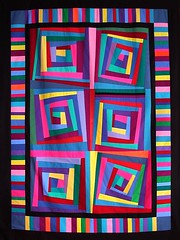
Another finish (and it took long enough!)


It took stinking long enough but I finally have my pieces of my team's donation basket for a silent auction to raise funds for a local hospice house. My team's theme was "spa," and I volunteered to make candle mats and a lavender sachet, using lavender harvested from my garden last summer.

I didn't want to mess with making a circle something-or-other, so I chose three blocks that had sort of round feels to them and made them 6 1/2" (after getting a pillar candle from my own meager candle collection to see about what size would work best). @ddrquilter suggested quilting it in circles--a great idea!--which gave me a chance to play with the circular sewing attachment for my Janome. The attachment mostly worked--I'll probably talk about that on a future podcast episode.

Then I got to the binding. The poor block in the center got bound three different times, using two different methods, none of which worked. Rip rip rip. And rip some more. And run out of the original binding fabric, which was the rest of that wonderful pink that appears in two of the blocks. Finally, after several hours of nonsense spread over two nights, I had a "doh" moment. Use a method I hadn't used in years. Once I did, and once I found another fat quarter that coordinated, bang. All three bindings done in about half an hour. Jiminy Crickets, but I can be my own worst enemy.

And here they are, all ready to go with the pillar candles I bought to go with them. My basket offering...done!

We'll be putting together all five baskets at tomorrow night's guild meeting. The other themes were "tailgating/picnic," "baby shower," "holiday," and "kitchen." Pictures will be on our guild's blog at http://canalcq.wordpress.com within a few days, probably. I can't wait to see what everyone else has come up with!

(Sorry, my plan had been to get a Total Color Tuesday post done tonight to appear tomorrow but I spent all night working on the donation blocks instead. Dang, but I'm glad those things are done! It's always the simple projects that trip you up, right?)

Sew-Day Tomorrow

It's like bunnies, the way guilds are multiplying in my life these days.

Y'all know how much I love my usual guild-that-is-not-a-guild. I've been with that one for about six years now. Actually started talking to people about four years ago. (That's the "i" word thing that we won't talk about at the moment.) Now they're my peeps. My main quilty squeezes. No one will ever replace them.

But a few months ago, I decided to go ahead and join a second guild. The second one is the big guild in the region--maybe something like 400 members? They've been around since the dawn of time, too--they're one of the oldest/longest running guilds in the country. However, they meet on a weekday. In the morning. Urgh. So really, I can pretty much never make meetings. But they do have good speakers and classes and such, so being a member means that if I can plan far enough in advance, I might be able to periodically take a vacation day and attend something. Meanwhile, I keep up through the newsletter and news groups. While I'm technically a member of that one, it's hard to feel like a member when I'll probably only be physically present maybe once or twice a year.

This week, a bit on a whim, I joined a third guild. This one doesn't have meetings, from what I've been told. They just do sew-days on a Friday and Saturday once a month. And, as it turns out, of the 30-ish people in that guild, about 10 of them are also in my Main Quilty Squeeze Guild. Always a bit easier for this i-word-person to join a group where I already know a third of the people. My thought process is that when I'm back to work in a few weeks, between my MQS Guild's sew days and this new one's sew days (never scheduled on the same weekend), I should be able to make one or the other every month. All the more opportunity to "go get my quilty on" on a regular basis.

New Guild has their sew days tomorrow and Saturday, so I'm getting my thoughts and supplies together about what I'll be bringing with me to do. Hence, this:

Remember the self-mitered receiving blanket from yesterday's post? I went back to the sale at Joann's this afternoon to pick up a bunch more fabrics and will be cutting the sets of 30" and 40" squares tomorrow. I'm planning on using this as a project to teach some of the women I've been volunteering with how to use a sewing machine. It's really perfect. All they have to learn to do is find the middle, pin, sew in a straight line,  mark a line, cut on that line, then sew a zig-zag stitch. Easy Peasy. And, what's more important, they end up with usable receiving blankets for all the many babies being born into their community!

I lost track. I think those three hangers of fabrics add up to about 15 receiving blankets or so. I had them all sorted out as to which ones were pairs when I was stacking the bolts in my cart, but then the woman doing the cutting kept flipping my piles back and forth, mixing the sets up. I decided I'd better take care of sorting them back out again as soon as I got home before I completely forgot what my original intentions were. There are a couple that I'm questioning, but ultimately I ended up with even sets so it's good enough for horseshoes.

I haven't decided yet what else I'll work on tomorrow. Here is my usual criteria for a sew-day (different from a retreat since I'm there for shorter periods of time):
  • No machine quilting. I only do that on my regular set-up at home.
  • Nothing that requires intense concentration. Who can concentrate with a cast of thousands?
  • Nothing that requires a lot of parts. Hate packing it all just for a few hours.
I still have some hexies to mark, so those will probably come with me, then I may just bring my scrap bins and work on cutting everything to usable sizes. That's the kind of tedious work that's nice to do while I can be entertained by everyone else!

Donation Quilt Wednesday--Receiving Blankets

I wanna make me a bunch of these! How cute and easy are they?! Thanks to Missouri Star Quilt Company for this idea--great for donating to hospitals, women's shelters, clothing cupboards, and so forth. (As always, check with the intended recipient organization first to make sure there are no special requirements.)


I thought this looked like so much fun I picked up some flannel on sale at Joann's ($2.79 a yard! and a coupon on top of that!) and made one myself. It works! (Not terribly keen on the decorative stitch I chose for the finishing touch--it worked well on the sample but I didn't like it in the end. Next time I'll just do a zig-zag, I think.)


And here's the fabric I've got to make a second, more boy-like one.


Notes:
1. Make sure you bring the measurements with you when you go to buy the fabric. Oops. Since I made these on a whim, I stopped at Joann's while running other errands and didn't have the ability to double-check the measurements. I had in my head 20" and 30". Nope. That would be 30" and 40". Fortunately, while I'd only intended to buy a yard of each of the four fabrics, one in each pairing I'd picked up was the last of the bolt so I got a few extra inches. Bingo. Saved by happenstance.

2. It's flannel. Yikes. Flannel is hard to work with in the best of circumstances. In this case, you're sewing something smaller to something bigger, which involved a lot of smoodging around to get things to line up under the presser foot, so that was kind of a pain. Ultimately, it didn't turn out to be that big a deal when all was said and done. The miters still worked well.

3. The video could have used a little more detail in the "sewing everything together" section. Since you sew from the center out on all the sides, that means one seam you sew with one side up, then you have to flip it over with the other side up to get it under the presser foot correctly. Which affects how you pin or mark things. It wasn't a huge deal but took me a couple of sides to figure out how to do best, and it was still a lot of flipping around. If I'd thought ahead, I could have done four seams on one side, then flipped and done the other four on the other side. I didn't think ahead. I suppose you could try just sewing straight down one side without going center out, but with flannel as stretchy as it is, I'd think you'd risk not having things line up in the end.

4. Ten minutes? I don't think so. The first one took me about an hour. It took me ten minutes just to get the cutting done because my cutting table isn't set up well to do a 40" square. However, I think the second one will take me significantly less time, and if I were to do a bunch of them, I could probably get it down to under half an hour. I still don't buy 10 minutes. Still n' all, half an hour isn't bad either! And this could be a good project for a group to do in assembly line fashion--some folks cutting, some folks pinning, others sewing, etc. You could knock out a bunch in a few hours.

So I've now got a receiving blanket ready to donate. I'm hoping to knock out the second one today, as well as make progress on my other projects.

Have you ever made these? Leave a comment!

Progress! One Finish, a WIP, and a Challenge (O My)

Yesterday was a banner day here in the "Quilting...for the Rest of Us" quilt studio. (Ooh, doesn't that sound all sorts of official?)

First, I started out with a little mini-project that I'd volunteered for last week. If you're following my Fabri-Sabbatical blog, you'll know I spend Wednesday afternoons with the Women's Learning Club, which is a group of recent arrivals to the U.S. from Burma. Last Wednesday, a couple of women from our church brought some fleece, hearts cut out of fabric, and embroidery threads to make baby blankets that will be donated. This is a project they've been doing with various groups for a few weeks, so we thought it would be fun to include our group as well, and in the process, teach a fast and inexpensive way to make extra blankets for your family if you should need them.

The women organizing the event decided it would take too long to do a blanket-stitch around the outer edge by hand, so they were taking them home to do by machine. I volunteered to take one as well, so I decided to knock that out first. It turned out OK, although I still prefer doing it by hand. It took about twenty minutes to sew, and then another twenty minutes to get all the fleece lint out of my machine.

One of our group had embroidered the heart onto this one, and she taught me how to do the chain stitch as she was doing it. My chain stitch doesn't look nearly as good as hers yet!

That project done, I moved on to my funky landscape quilt in progress.

This...

...became this.


Everything is just stuck down with glue stick at this stage, so I may still move some things around. I'm playing with perspective and balance and such. And I'm still working on getting the fern-y things to look more like ferns and less like Seussian birds. Quilting will help that a lot, though.

Haven't decided yet what's going in the center section. I'm going to live with it for a bit to see what comes to me.

Then I turned to my guild medallion challenge. The dang thing is due tonight, so I really wanted to get it done. And I did! (Only three more borders to go until the challenge is done. I'll find out tonight what the next border is supposed to be.)

Shazam!

Donation Quilt Wednesday--Quilts for Kids

You may well have heard about this organization already, and perhaps you've already helped out. If so, great! If not, well, you need to know about it: Quilts for Kids, founded in 2000, has distributed tens of thousands of quilts worldwide. Quilts for Kids transforms discontinued, unwanted and other fabrics into quilts that comfort children with life-threatening illnesses, as well as children of abuse.

You may have a chapter of Quilts for Kids near you--you can check the interactive map on their website to find out. If you work through a local chapter, the quilts stay in your community. If you don't have a chapter near you, just send your completed quilts into the national office and they'll get used where needed most.

You can create a quilt from your own stash--they give some guidelines and offer several free downloadable patterns if you need one. If you work through a local chapter, they may have donated fabrics you could use. If you would like, you can request a kit from the national office--all you have to add is your own batting. (Quilts created from these kits need to be returned to the national office.)

The website highlights that there is a real need for quilts appropriate for teenage boys. So if you think you might have something appropriate in your stash, go for it!

If you decide to do a quilt for Quilts for Kids, please pay close attention to the guidelines--the guidelines are primarily related to health issues so if you don't follow them, your quilt may not be able to be used.

For more information about Quilts for Kids, visit their website at www.quiltsforkids.org.

Donation Quilt Wednesday--and some Progress!

As I was doing some surfing-of-the-cyber-type recently, I ran across another great site full of free, downloadable patterns that make great donation quilts, the Q.U.I.L.T.S. group in Schenectady, NY. (QUILTS stands for Quilters United in Learning Together, Schenectady--love that acronym!) Check it out.

Remember to share pictures in the Quilting for the Rest of Us Flickr group for donation quilts!

On to the progress: I also finally got back to my sewing machine yesterday--woot.

We're doing a "roosting robin" in our guild this year--in other words, a round robin that you don't pass. (Someone in my guild used the term "roosting robin" for it--I don't know if that's the official name or was just her joke but I find it a good descriptor so I'll roll with it.) The way it works is that we each do our own projects rather than passing them along, but the leader tells us what we're adding to it each month. We started in January and I'm already behind. The first month (for January) we were to make a 12 1/2" unfinished center block, then the second month, for February, we were to have made 4 1/2" borders. I'm just working on my center block now. I decided to do a simplified Mariner's Compass for the center, made entirely from the Stonehenge line. I've been collecting Stonehenge for awhile waiting for just the right project, and I hope this is it. The concept I have in my mind is something that will look like inlaid tile.

I had to refresh my memory on paper-piecing since it's been a couple of years since my last pp project. But Carol Doak lives on my bookshelf (she's very comfortable in her little DVD home) so I invited her in for a visit for a refresher course and then dove in. I have 8 Unit As and 8 Unit Bs to do for the compass. Got through all the Unit As with only one little, easily flixable glitch (sometimes a little hard to tell right side from wrong side on some of those Stonehenge, until you've done it the wrong way once and it sticks out like a sore thumb). Finished Unit As are pictured.

Unit Bs started out well, but when I got to seam 2, I couldn't for the life of me figure out how to sew the piece on to get it to cover the space needed. I knew it really should work, I just couldn't figure out how to make it work. Turned everything every which way; no dice. My brain had just completely shut off.

I glanced at the clock. Oh. 9:00 p.m. Yep, that's why. I learned years ago I can't sew past 9:00. My brain completely shuts down, like clockwork. Even, like tonight, when I have no idea what time it is, there's some little internal trigger. Bam. Stupid Time.

So this morning, after caffeinating, I sat down again to look at the Unit Bs and decided, actually, I think it's OK--I may just have to press it a little crooked to get it to fit exactly right. The angle of the seam doesn't really match how the cut piece of fabric would fold across the space needed, if that makes sense without a diagram--so I'm sewing on the seam and but pressing a little off. Probably not paper-piecing-standards but works for me. Unit As and Unit Bs have the same pieces and the same angles--it's just that on Unit As you sew top to bottom and Unit Bs you're sewing bottom to top, and that makes a surprisingly big difference in the geometry.

I've only sewed one test Unit B so far and am about to try to sew a Unit A and Unit B together to see how it all comes out. Once I see that they really do fit together, I'll finish the rest of the Unit Bs. Should have enough time this morning before I need to head out for the day. I've got a lot going on today so I probably won't be able to put the the whole thing together until tomorrow.

Feels good to be back at the machine, even if I did have my Stupid Time glitch. Actually, that felt welcomingly familiar as well. Sandy's back.

Donation Quilt Wednesday--Other Sewing Projects

Just for a quick change of pace this week, as I was perusing sites with free patterns that work well for donation quilts (fast, easy, but attractive), I came across this list of other sewing projects that would provide some much needed donations as well. If you're looking for some alternatives, maybe you could get some friends together for a sewing day and put together some of these options:
http://www.sewing.org/html/charitysew.php

Some great ideas in that list!

(More on those sites with free patterns later!)

Donation Quilt Wednesday--Some Inspiration

Here's a nice example of a very "fortunate" donation quilt! Cute design, attractive, but still relatively easy to make.

Central Star  (#3617)

And here's another one:
Crazy Quilt Top - Final Border Added

And another:
Lopsided Log Cabin (5387)

These are all by AllThatPatchwork on Flickr. (If this link works, it should take you directly to her charity quilt set.) I had a hard time choosing which I was going to post! I got her permission to use her pics; when she responded she said, "my whole idea in posting them all is to encourage others to do more donation quilts." Here here. What she said.

I've gotten some good ideas from looking at her quilts for future donation quilts of my own. I'm also fascinated by all the many places that receive quilts--we get used to hearing the "big names," (Project Linus, Quilts of Valor, etc.), which are fantastic. But there are so many other places that a lot of you have named: nap mats for inner-city school kindergarten classrooms, birthing kits for Haiti, local shelters, places that have had natural disasters.... Seems everyone needs a quilt to show them a little love, doesn't it? So, what are you sitting around reading this blog for? Go forth and quilt!

Donation Quilt Wednesday--Two Books for Ideas

Over the weekend I had the chance to stop by my local library again to check out the quilting section; I was in the mood for a special treat, and I was not disappointed! I found a couple of books that are geared at donation or quick gift quilts--they're both great resources if you find yourself running out of ideas or getting tired of doing the same three stand-by designs all the time.

Debbie Mumm's I Care with Quilts: Sewing to Make a Difference, (2009, Debbie Mumm), is not only filled with patterns, but it has information about organizations to which you can donate, ideas for small gifts, and inspirational quotations. It really would make a very good resource. Her designs are classic Debbie Mumm--sort of a modern country. The book is nicely laid out and is pretty simply to look at. Although the designs are all fairly simple, some of them looked like they wouldn't be easily defined as "quick." Several you could probably knock out in a few hours; others seemed like they'd take more time. But still, I did enjoy looking through this book and got a few more ideas planted in my head for future donation quilt projects. 

24-Hour Quilts by Rita Weiss (2006, ), is a little bit more "classic donation quilt project"-friendly, I think, only because most of those projects really are pretty fast and simple. Weiss' premise is that you can make an attractive quilt in under 24 hours--and she's counting that as working time, not 24-hours-in-which-you-also-eat-and-sleep time. As she says, 24 hours doesn't need to be all in one stretch; it could be one hour for 24 days, eight hours for three days, or whatever. And I found it a nice feature that she actually lists the estimated time for each pattern. I don't recall that any of them were listed as 24-hour quilts: The average is probably around eight hours or so--some a little less, some a little more. I saw several designs I liked; found myself double-checking the library due date to see if I felt like I could pull out a couple of quilt tops before I had to return the book. I wasn't as keen on the organization of the book, though. For whatever reason, the publishers decided to put a gallery of all the quilts in the book right at the front, with all the actual patterns in the back. I found myself doing some flipping back and forth. I don't think that would be an issue if you were working on one of the designs because everything you need for the making is right in the pattern itself. But other than that, everything seemed very well laid out and clear--I don't think there would be any problem following the patterns, although, to quote Fats Waller (I think), "One never knows, do one?" I can't judge how well a pattern is written until I actually try to work with it, but it seemed to make sense, anyway.

Do you have favorite books for donation quilts or fast gifts? Let everyone know!


Donation Quilt Wednesday--Some Strip Tubing Tips

The technique I used for "Fortune," my donation quilt, is strip tubing, which I got from the book of the same name, Strip Tubing, by Daniela Stout and Georgette Dell'Orco, Cozy Quilt Designs. I've seen the technique on the web a lot and have heard of others using it. I do like having this book, though, because it gives you several potential projects using the same method. I'm not going to describe the process in detail as I don't want to infringe copyright anywhere--it simply involves sewing strips together into a tube and then cutting them to get blocks quickly. And it works!

I also bought the ruler just because it does make things go so much more quickly. The Strip Tube Ruler, also Cozy Quilt Designs, can be used not only for the projects in the book but just about any other time you want to quickly cut strip sets into half square triangles. The book gives you suggestions for variations, so really, the number of different projects you can do is multiplied well beyond the five in the book.

I do recommend the book, and/or the technique, and the ruler. I could have very easily gotten two baby quilts out of the blocks I got from the process. I chose to make one larger throw (64"x80"). They do also have directions for using 1 1/2" strips rather than 2 1/2" strips, if that's what you've got in your stash. I probably could have gotten the entire project done in a weekend if I'd not had anything else going on, so it's pretty fast. It's also fairly forgiving since you square up your blocks after you've done the cutting--but it still helps to have a consistent 1/4" seam!

I did discover a few things along the way, though, that I thought I'd share with you.

1. The strips I was using were scrap strips that I'd accumulated from a variety of places, cut by a variety of people, and some handled more than others. That means there was a fair amount of variation in the actual width of the strip. 2 1/2" was a loose definition.

That meant that...


2. When I got my sets of three strip sets sewn together, I measured all of them before I cut the white background strips (which were supposed to be the width of the strip set). My strip sets came out a hair narrower, so I cut my background strips a hair narrower. Taking the time to do that measuring and shifting my cutting accordingly helped tremendously when it came to sewing them into the tube.

However, you can see once in awhile it wasn't quite there. Some strips were really wide. So I used the accurately cut white strips as my seam guide. My 1/4" seam was from the edge of the white, knowing that hangover on the other side ultimately wouldn't matter.
3. It helps to mark the line on the ruler you need to use with tape or something. This is a good idea anytime you're cutting a lot at the same measurement. But for some reason I had particular difficulty making sure I was always on the right line with the triangle. Even with this tape on there, I almost messed up a couple of times. (Can you see it? That pink line is semi-transparent tape.)


4. And, oops, watch the ends.


Like with the width, not all of your strips are the same length, either, so the end of the strip set won't necessarily be neat. I thought I had the whole thing in when I cut the triangle, but didn't.


So from then on, I just lopped off the end of each strip set before starting to cut the triangles. Made it a little bit safer.

5. It took me awhile to get the hang of the angle that you're cutting. You have to cut up one side of the triangle and down the other without moving the ruler, which means you're cutting at an awkward angle at least 50% of the time. And you flip the ruler over--so one block is cut with the ruler point-up, the next one is cut point-down, which also shifts your cutting angle. I finally figured out that if I made the one cut to separate the triangle from the rest of the strip, I could then move the triangle onto my rotating cutting mat to trim up the other side. Made everything much more comfortable.


6. The book tells you, and it's true, that you may need to clip some threads at the point, depending on how your ruler falls compared to the seam. Not a big deal. I did have to be careful not to shred the tip of the triangle but it went quickly.


7. But it all works out in the end, because you square up each block to end up being the same size, no matter what shenanigans may have come before!

Because I was working with such a mishmash of strip sizes to start with, not all of my points exactly match on the finished product, but I decided not to sweat that. There weren't that many points to match anyway in my setting. And, as Frances says, the muggles never notice.


So, if you're looking for (1) a great way to use all those 2 1/2" strips you've got laying around or, (2) a fast project for a gift or donation quilt, this is a great way to go for either one. I'll definitely be doing more of these in the future.

Donation Quilt Progress--"Fortune"

And so....here's how it all turned out.

As you can see, I ended up choosing "none of the above."

I had originally been leaning towards option 6. But as I kept pondering, I finally decided I really wanted to offset the center diamond, so I dropped it over and down.

My 18-year-old daughter gave it her thumbs up of approval. And she played quilt hanger--I like having her home. My husband fails as a hanger.

The only other thing I'm going to do tonight on it is choose my backing. Tomorrow I'll put it together and hopefully get it quilted. I'm going to do straight-line in the diamonds--so it'll be stich-in-the-ditch through the strips with those lines extending through the white half blocks. It'll emphasize the diamonds while still being pretty fast to do.

By the way, if you were keeping track, majority rule would have been traditional Roman Stripe setting. And I love Roman Stripe quilts. And I'll probably do one at some point. I just wasn't feeling it this time. Loved reading everyone's opinions and rationale, though--thanks for playing along! I enjoyed it!

Second by the way, I've named this quilt "Fortune," since it's the first "fortunate donation quilt" made after my rant. Normally I don't think I'd name donation quilts--you name something, you develop an attachment to it. But this one seemed to need the honor.

Donation Quilt Progress--Opinions Welcome!

So, as you may recall after my rant of a couple of posts ago, I've been bound and determined to make a donation quilt that's aesthetically pleasing, doing my best to work exclusively from my stash. I even took it a step further and gave myself a little additional challenge. I've mentioned before my sizeable collection of 2 1/2" strips. I have several jelly rolls, but I also have a few jelly-rolls-worth of just scrap strips, collected through strip exchanges, as giveaways on shop hops, and those I've cut from my own scraps at the end of projects. This was the stash I dug into for this project. (I'll post separately later about the Strip Tubing book and method I used--there's a few tips I'll pass along for anyone else considering the same technique.)

And a further challenge: start with an unfortunate strip. I chose a strip from my stash that I really didn't like, and used that as my jumping off point to choose all the other strips.

You can see right in the center of this layout the teal strip with a small floral print. That was my starting point. I like teal, but this is a particularly murky one with a very odd little floral.

Working off the teal, I pulled blues and greens, and then used the fuschia of the floral to pull me to the opposite side of the color wheel; hence, the pinks/fuschias.

I took a b&w shot just to check my contrast. I wasn't worried about having a ton of contrast in the strips because they were going to be against a white background. (Which, by the way, I did end up having to go out and buy because I didn't have enough true whites in my stash.)

Editor's note: I should apologize for the photography. I was relying on my cell phone which takes decent pics in the great outdoors, not so great in the dimly lit indoors. Plus, I can't stand far enough away from my design wall to get the full design.

Blocks complete. Ignore the setting for now--we'll come back to that in a bit.


Here's the challenge strip in the center row of the strip sets on these four blocks. Not too bad!


The strip tubing pattern I used creates "roman stripe" blocks--each strip set creates between 4-6 blocks, depending on how long the strips are (again, posting on that later so don't sweat it now), with alternation between the first and third strip.
OK--now we're getting into the setting options. I'm going to give you all the pictures here, and you get to tell me your opinion! I think I know which way I'm leaning after looking at all the pics, but would be interested in hearing what you have to say.

N.B.: I'm not going to spend much time quilting this. Most likely, I'll do an all-over meander or something along those lines, as the idea is to still keep it fairly fast and easy as a donation quilt. That's an important point to keep in mind as we look at the setting options: some are the type that scream out for really nice quilting, others can carry an all-over design a lot more easily.

OPTION 1: Matched Up

I'm not sure that this one is really an option for me--but it's a kind of cool effect of the alternating strip sets when you put the four matching blocks together.

For me, this isn't really an option mostly because you'll see one lonely block at the bottom that wouldn't fit with this set...and...
...a whole pile of leftover blocks. Most of my strip sets made 5 blocks, one made 6. Option 1 only uses four blocks per strip set, leaving me with 9 or 10 blocks leftover.

Yes, that means I could get a second quilt out of this but I'm trying to expedite my time on this project at the moment. (Normally, potentially getting two quilts from one set of blocks would be a whoop-de-doo moment, so keep that in mind when planning your own donation quilts--this might be a method for you.)

So here are the real options I'm offering up to you.

OPTION 2: Traditional Roman Stripe set.

Very scrappy, nicely geometric, easy to see done with an overall meander quilt. No one fabric really sticks out this way.

(BTW, note about fabric: there are a couple of blues in these pictures that seem to jump off the page. They're not that stand-out-y in real life. Sorry about that. Lighting and bad cell phone picture issues.)


 And this setting--and all that follow--only leave me with three little orphan blocks, that I can easily use up somehow. Or hand them off to someone in my guild to figure out how to use. In any case, manageable.


OPTION 2: Horizontal Stripe

Funky!


OPTION 3: Vertical Stripe

Still funky!


OPTION 4: I call this one "Echo"

I really like it in theory, but the white space seems to really want feathers or something fancy like that. Not likely to happen. Could, however, do some fast vines with leaves or something. So, not out of the running yet.


OPTION 5: Radiant, Version 1

Nice!

(By the way, I realized after taking this picture that there's one block I'd forgotten to flip. Oops.)


OPTION 6: Radiant, Version 2

Also nice!


So, "what would a quilter do?" If you were making this quilt, which of these options might you lean towards?

I'm not likely to get much sewing time today so I thought that would give y'all some time to give me your thoughts. I've got a couple of front-runner options for myself but it'll be interesting to see if there's a majority of opinion anywhere!

BDSI Completed Projects...and A Rant

As anyone who participated with us on Twitter for our Boxing Day Sew-In (#BDSI) may recall, I was sick as a freaking dog that day. I came down with a tremendous cold the Sunday before Christmas (the 18th), and still have it today. Yikes. So I wasn't doing a whole lot of sewing on Sew-In day, but I sure as heck had fun with the conversations and reading everyone's comments on the BDSI blog. It was a hoot! I'll definitely be hosting either another Anti-Black Friday Sew-In or Boxing Day Sew-In again--had too much fun not to!

So, who cares that it actually took me three days to finish my BDSI projects? They're done!

I had several donation projects to work on. These were all pieced tops and/or orphan blocks that had been donated to our guild over the years for our guild to use for it's own donation projects. How long had they been in storage? Let me just say that one of the tops still had pins in it, and the pins were rusted to the fabric. I had to do some extrication. And some praying that my tetanus shot was still current.

Lockjaw aside, I got them done. First up: two pieced tops that were roughly baby quilt size. Like, newborn-baby-just-home-from-the-hospital size. Most babies won't be small enough to use this quilt for long. But that's OK, because by then, they'd be able to see, and who would want to see these?

But let me rant later.

In short, I'll simply say for now that rather than creating two ugly quilts, I decided to contain the damage and only make one with two ugly sides. Used some strips for binding and batting from my stash, so that all worked out nicely.

The other project was the poor little orphan block. Really, she was almost there. Almost cute. But she had some issues, which is how she ended up being a donated orphan block.

I suspect many of the issues really came from the fabric that was used. The white is an extremely loose weave and fairly coarse--it didn't want to play nice with the blue print (which was a much higher quality fabric).

I puzzled, and puzzled, 'till my puzzler was sore. Turn her into a baby quilt? Nope--I had absolutely nothing in my stash that would work with that particular blue. Turn her into a pillowcase? I put the white fabric to my cheek. Ick. Nope. Finally it dawned on me.


A drawstring bag! Lots of places look for drawstring bags--for example, hospice homes like to send personal belongings home for family members in something nicer than a plastic grocery bag.

She works nicely for that, although I have some concern about how durable the white fabric is. Probably not a bag for carrying sharp, pointy things. Or rocks.


I solved the non-coordinating fabric thing by going patriotic and using a red fat quarter with stars from my stash. Wouldn't be my first choice if I was in a quilt shop, but hey, it works.


So, now can I rant?

First disclaimer: I've seen a lot of very lovely donation quilts on blogs and in person. I'm not talking to anyone here, nor am I pointing any specific fingers at anyone other than myself. But I'm also aware of--and inadavertantly became involved with--another side to the donation quilt story. I hope I don't offend anyone with this, but the last several donation projects I've been involved with have really worked my very last nerve, and in the process, I came to some realizations about how they had even begun to affect my own attitudes. To whit:

When did we ever get the idea that we can use our ugliest fabric in the most haphazard way or our blocks that clearly didn't work at all and donate them? It's like donating shirts with tears and stains or electronics that don't work or furniture with broken legs and assuming, "Hey, I don't want this piece of junk in my house anymore but someone else will be grateful for it." Yeah, maybe (although I have my serious doubts), but we're talking quilts here. We talk about quilts symbolizing love and care...so what the heck?

Doesn't everyone deserve beauty in their lives? Especially some of these places we're making donations too--women's shelter's where mothers and children are struggling to put themselves back together; hospitals with families watching loved ones in pain; families who have been burned out of their homes. Why wouldn't I want to give someone in need just as pretty a quilt as I'd give my own child? Sure, maybe I won't do heirloom quality hand-quilting on it, but I sure as heck would want to choose fabrics that will bring pleasure or a bright spot to what may be an otherwise gloomy day. I sure as heck would want to show some care in my design and in my piecing. I would want the person to think I actually thought about them--even if in the abstract, a nameless person that I've never met but I can have some genuine human empathy for. Not just a way to offload ugly fabric. (And although I know one woman's ugly can sometimes be another woman's beauty, I've read enough tips on enough message boards that have quite literally said, "use that ugly fabric in a charity quilt!" to make me steam.)

I also came to the very discomfiting realization that my own attitude changed whenever I worked with those unattractive, often musty-smelling tops. I stopped caring about my own skills. I adopted a very "I don't care, just get 'er done" attitude. Fast and Finished was queen, not Done Right. Which, of course, led to me simply compounding the problem of ugly quilts with shoddy workmanship. And that's to my shame. I'm doing some penance over that one.

People don't necessarily need blankets...they can buy blankets pretty dang cheaply at big-box stores these days. Frankly, if my purpose is to provide a blanket, I'd rather write a check. The reason to make a donation quilt is to go that step beyond, provide someone in need with just a little bit more: the thought that someone else cared enough about them in their situation to sit down and make something by hand. But for pity's sake, please make it pretty.

I vow never to make an ugly quilt for donation again. I vow to never be attached to making ugly quilts for donations again. I will choose to make my own donation projects from my own beautiful fabrics with an attractive design, not some slapdash thing that "someone ought to be grateful for." I will choose to make something that shows someone I cared enough to take the time to think about it, even if it is a simpler pattern, even if it is a slightly faster style...it's still attractive, and thoughtful. And hopefully, will give them a touch of love and care at a time when they need it most.

If I wouldn't want it in my own house, I won't donate it to someone else.

Ok, rant done. Sorry--had to get that off my chest. Hope I didn't bug anyone. To purge myself of these negative feelings and bring some Beauty Mojo back to my sewing room, I plan on making a donation quilt from my own fabric before my vacation is done. I'll keep you posted.

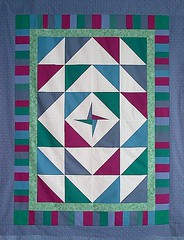
#BDSI Projects--at least to start

I woke up this morning (at 2:00 a.m., with visions of Boxing Day Sew-In dancing in my head) with the realization of the projects I really should tackle on BDSI. Since I'd like to honor the origins of Boxing Day, a day of charitable giving, by encouraging folks to consider doing a donation project at some point during the day, I realized I had the perfect projects sitting in a plastic back in my sewing room.

You may recall my previous adventure doing five donation quilts last year--unfortunately, they weren't the kind of projects that inspired me with the joy of giving. Rather, they were teeth-gnashing, hair-tearing-out kinds of projects. But I did celebrate when they were done (completed projects here) and I was thrilled to know they would be going for a good cause in our area. However, I became haunted by the project (check out this blog entry for the continuing story) and got another pieced top from the same fabrics several months later. So now, merely a year later (!), this has become BDSI Project #1. Fortunately, this one doesn't look as tricky as the other ones were, and having done a few of these now, I think I'll know how to tackle it most effectively.

All I have to do is find backing and batting (both from my stash). I'll probably just grid quilt it. It's an odd shape--it'll work for a very, very, very tall baby.

BDSI Project #2, if #1 doesn't do me in and doesn't take too long, will be a donation quilt challenge of sorts from my guild. We had a boatload of donated fabric, blocks, and scraps from somewhere or other--I'm not sure what the origin story is. But one of our guild's leadership team divided it all up into packs and encouraged us all to bring one home and turn it into a donation quilt or two.

This is what was in my bag. There are two pieced tops, but neither is really big enough even for a crib quilt, in my opinion. So I'll either put them together for one big one, or throw borders of some sort on each for two normal-sized quilts. The one on the left has the last row of blocks pinned on, but not sewn on. I almost killed myself on the pins when I pulled them out of the bag.

The little star block on the top is a lonely little solo block. Haven't decided what I'll do with that yet. Maybe a pillowcase?

It would be nice to get these all done before the new year, wouldn't it? Clean slate sort of thing?

If I manage to get all those done--or at least seriously moved along, I'll probably be working on UFOs or WIPs. I'll have a lot of sewing time next week, I think, since I have the week off, so I'm looking forward to serious forward progress!

So--remember to check back here anytime after midnight Eastern time (US) on Monday, December 26, for your chance to enter into a bunch of great give-aways and fun mini-challenges for our Boxing Day Sew-In!