Hand-Dyeds and A Finish

Remember these?

These were the fabrics created in my snow-dyeing experiments a couple of days ago.

Yesterday I had the day off and since dyeing is a fairly restful activity for a sick day (still coughing!), I decided to review Jane Dunnewold's

"The Art of Cloth Dyeing" class in Craftsy

that I'd purchased and watched some months ago. I'd bought the kit of supplies from Craftsy, figuring that it was simpler and just about as cost-effective to buy the kit Jane had put together with the basic supplies needed than it would be for me to chase all over the Internet finding and ordering them.

I felt a bit like a mad scientist in my basement, with rubber gloves and mask on, hunched over a table mixing chemicals. It was a hoot.

I started out well organized. Look how neat and clean everything is.

 And here are my fabrics, neatly wadded, scrunched, folded, banded, or bundled, waiting patiently....

Soon enough there were drips and puddles and bins of things in wonderful, hopeful color baths.

(By the way, those screw-on lids on Rubbermaid "Twist n' Loc" containers? They seal tight about half the time. Ask me how I know.)

And lookie what happened.

This one was straight turquoise.

This is roughly the same mix of turquoise and yellow that I did with the snow-dyeing above.

The colors are so much more brilliant!

I was shooting for teal on this one, using less yellow proportionately to the turquoise, but I ended up with this wonderful abstract art instead. Love it.

(Scrunched and rubber-banded little "buns" of fabric in a few places.)

This is a white tone-on-tone that I had in my stash and sacrificed to the Cause of Experimentation. In this picture, the side showing is the white tone-on-tone side. The white print acts as a resist for the most part--it's only dyed the lightest green but mostly stayed white. I wasn't too fond of this side.

(Accordion fold, rubber-banded in a couple of places.)

But the reverse? Here's the wrong side of the above fabric. Very, very nice.

It was a fairly dense print on the fabric to start. It would have been more interesting if there were less of the print to resist and more of the background to get dyed.

This was in a mix that was more turquoise than yellow. I was hoping for a teal, but instead I got this really funky mottled effect. Love!

(Scrunched up with rubberbands holding little mini-buns here and there.)

Yummy red. Straight-up red, not mixed with anything.

(Accordion fold with a couple of rubber bands.)

Another section of that white tone-on-tone. I was shooting for orange here. Almost got it. I have to play more with my color recipes.

Again, I wasn't as happy with this side as I was with...

...this side. Wowzer.

(This one was scrunched up tight and then I wrapped the ball with a couple of rubber bands to hold it as tightly closed as possible.)

More of the white tone-on-tone, this time dyed with straight-up yellow. (I think this one was "Sun Yellow.")

The mottling comes out better in this picture than in real life. It mostly just looks like yellow fabric.

And the wrong side of the fabric. Although in this case, I'd use this as the right side.

Hmm. Looks pretty intense here. It's not that bright--just a nice, springy, lemon yellow.

And my favorite result of the day? Here we go, drum roll please.....

BAM!

Now THAT'S what I'm talking about.

I mixed turquoise and red for purple, folded the fabric in a triangle and used a couple of rubber bands on two of the ends.

I

Love

This.

Unfortunately, I've run out of dyeable fabric--at least, what I'm willing to sacrifice from my stash for the time being, so I've got some PFD (prepared for dye) fabric on order now from

Dharma Trading Company

. You don't have to have PFD, by the way. I'm just testing various things to see what I like best. Some of the above fabric was Kona PFD fabric I'd picked up at Joann's awhile back. Some was white/off-white quilter's cotton I'd gotten in the scrap box from Fat Quarter Shop, and some was the aforementioned tone-on-tone. I washed the scraps and tone-in-tone with Synthrapol to prep it for dyeing. It all took the dye beautifully.

Oh, and that other thing...my second finish for 2013...

"Are You Getting Sleepy"

aka The Poppies Quilt

Detail of pantograph quilting by

Mt. Pleasant Quilting Company

It Is Finished... Easy Street Complete!

 
And so, it is complete.
The longarm quilter did a nice job with a pantograph flower. I asked her to do whatever she wanted, but to make it blend. She chose well!
I did a purple binding (also from my stash--yay). The backing was 108" I bought at the quilt shop when I dropped it off for quilting. The measurements worked out perfectly--I didn't have to cut or piece a dang thing for the back.      

Looking back through time from its humble beginnings as a stack of fabric...

No, I'm not a whole lot more thrilled with it now than I was before. However, my husband really likes it and it fits the bed in our son's bedroom (now mostly a guest room). And it's soft and cuddly now that it's been washed--nice and wrinkly like I like them. I'm not sure it'll ever grow on me, but that's okay. I don't feel the need to absolutely love everything I do. If I don't love it, or love the process, I at least have to have learned something, and that I did. So it's all good. 


A Near Finish: Easy Street Top Complete

Phew!


 (Not a great picture--the only place big enough for me to use as a design wall on this was my bedroom floor and the lighting in there isn't exactly made for photography.)

I'm planning on (weather permitting) dropping it off with a longarmer tomorrow. I'm not going with borders because I ended up with the same fabric running all along the outside edge of the quilt and I like the idea of it just ending there. May bind with that same fabric since I believe I still have enough of it, or I may pick up the red or purple from the quilt.

If you want my full review of my experience doing this, including my feelings about the end product, listen to the episode I just posted tonight. Suffice it to say that my feelings have NOTHING to do with Bonnie Hunter. She does a bang-up job with a mystery quilt, descriptions of steps, and so forth. And I love her designs. In terms of my end result, however...well...you'll just need to listen to the episode!

Catching Up...WIPs, BOMs, and Finishes, O My

Boy, howdy, has it been awhile since I've written a blog post! My apologies. It's not for want of quilting to show, it's for want of time to write the posts about the quilting I've been doing. It's time to play catch-up, and the fastest way to do that is with a little photo-essay...

The Progress Down Easy Street (not in strict complete weekly order)


I have everything pieced--just have to put the top together. I'll be talking about this in an upcoming episode.

My Guild Paper Pieced Block of the Month
We're using Carol Doak's 300 Paper Pieced Blocks book. The BOM leader is choosing the block each month. I'm using only scraps from my scrap bin as much as possible--so far, with only two months under my belt, so good. We'll see what happens when I get into months 10-12! I'm trying to keep all the colors at the same intensity and saturation level, with scrappy white backgrounds, so no matter what the blocks are I'm hoping they'll all hold together at the end. But I'm also being flexible--if I can't get them all into one project I won't sweat it.

January's block


  February's block already done (woot! I'm ahead!)


My little growing village. 
@verylazydaisy said they looked like gnome houses; 
so now I think of this as Gnome Village. 
We'll see what the next block brings!


An Impulse Project: Christmas Tablerunner

I bought some Christmas fabric on sale that I really had no right to be buying given that (1) it was a couple of days before Christmas and (2) I already had a respectable stash of Christmas fabric at home that hasn't been used. So, to waylay the guilt factor, I immediately made a table runner out of it that weekend and successfully used up all the Christmas fabric I'd bought plus some white from my stash. So while I still have the aforementioned respectable stash of Christmas fabric, at least I didn't add to it! (My apologies--I stuck a black border on the picture and belatedly realized it makes it look like there's a black border on the tablerunner itself. There's no black border on the tablerunner.)

I also poked away at a quilt for a family member but it got set aside until I can finish Easy Street. That one really isn't picture-worthy yet--mostly a bunch of cut fabric at this point.

We have family in from out of town for the rest of this week/weekend so no more sewing for a little while. Things should settle down next week so I can get back into a blogging routine again!

Finish! Disappearing 9-Patch

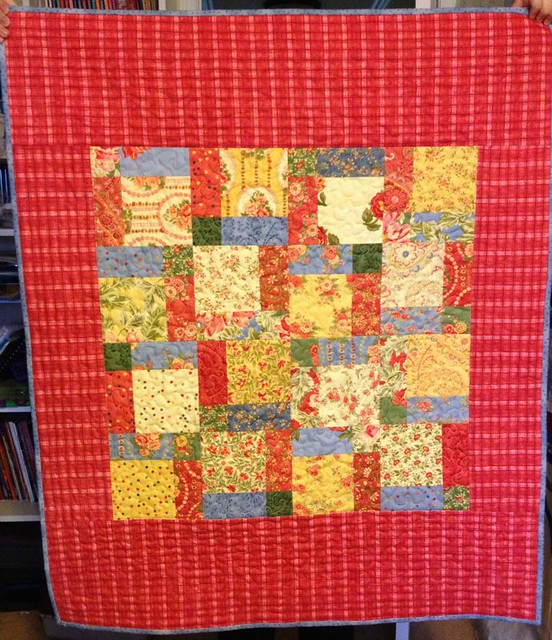
Disappearing 9-Patch WheelchairI completed the Disappearing 9-Patch I pieced during the Black Friday Sew-In. I've posted pics of this in progress so the finish isn't quite as exciting a reveal as usual, but there it is. They always look that much more interesting when they're completed!

For those of you jumping into the middle of the story, I'd been wanting to make a Disappearing 9-Patch for awhile so I decided a bit on a whim to grab a charm pack I'd had in my stash for a year or more--Moda's "Portugal" line--and just went to town without worrying about how big it would end up. The center came out to something like 26"x26". Since I wanted to make it for a person in a wheelchair, I looked up what other people had found to be a successful size, and the suggested size was a rectangle. Since I wanted this done quickly, I opted for the simplest solution, which was putting honkin' big borders top and bottom with more reasonably sized borders on the sides. I wasn't sure about it at first but it's grown on me. (I put all the measurements in my original post on this linked above. Frankly, I don't even really remember them now! Too many other quilty projects in between.)

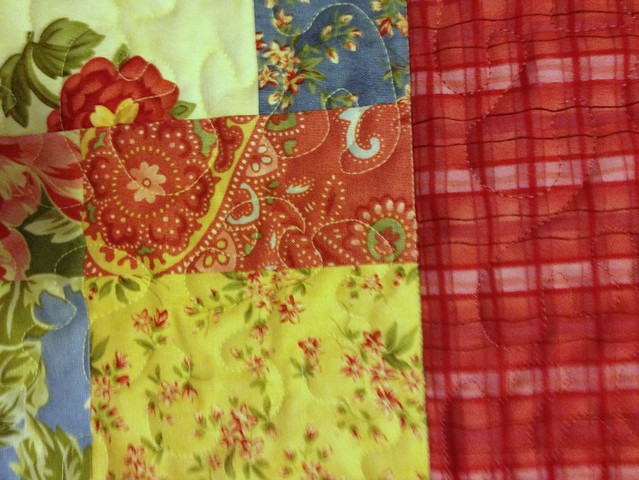
Dis9P detailEverything was out of my stash. I got to use not only the charm pack, but about a yard for borders, a couple of yards for a backing (yellow--not pieced), and gee, maybe a quarter yard of the blue for the binding. Probably less.

I did a simple meander with yellow thread in the center and a pretty dark red shinier thread in the borders, so it blends but still gives it a little spark with the shine. (Sorry the picture's blurry--the lighting was bad.)

It turned into quite the happy little quilt. Originally it was going to be a donation quilt but then I realized after I had the top pieced that I didn't have a gift yet for a family friend that I always do something for at Christmas, and since she's in a wheelchair, this was perfect. So it got repurposed for her, and I know she'll love it.

I'll be making more of these in the future as donation quilts, I know--although next time I'll use two charm packs so they'll take up more space!

I got Easy Street Week 3 done, technically, before Week 4 was posted, although I'm still trimming up some dog-ears. I've started the cutting on Week 4. It's going relatively quickly since I had a lot of 2" strips of the required fabrics left from previous weeks. I don't have much doubt I'll have them done by Friday, although we're decorating our tree tomorrow night so I won't get back to my machine until Tuesday. I didn't do the linky on Bonnie's blog last week; may not get to it this week. I'm still playing along, though! (I'll post pics of 3 and 4 together later this week.)

Postcards a-Plenty!

And so the great reveal! Although if you follow Sandi's blog, you've already seen the reveal since she got her post done last night and I'm the Sandy-Come-Lately in this pairing!

Here's the postcard I got from Sandi. Isn't that fussy-cut ornament just adorable? I love how it also includes the little loops on the top of each ornament. She did really nice decorative stitching on them as well with variegated thread. It's just adorable! It's got a place of honor on my mantle this year and will become a decoration that's put up every Christmas. Sandi and I have decided to make our postcard exchange an annual tradition!

Here's the one I sent Sandi.

Someone asked me to describe how I did this. I (oops) neglected to (dang) take photos during the process (shoot). I'll do my best to give a verbal description here. I had a ball doing it, although I made some parts a little complicated for myself. Live and learn. Also, I did this during a sew day with my guild so I was away from all my usual supplies. I'd grabbed some that I thought I might use before I left, but had to improvise a bit here and there.

I had the basic image in my head of a crazy-quilt-esque background and a close-up, off-center pointsettia. From there, however, it was design-as-you-go. I decided to take the log-cabin-style approach to the crazy quilt piece.

  • I had with me a lot of green scraps from my scrap bin plus a couple of holiday fat quarters. I cut a bunch of strips that ranged from about 1 to 2" wide. They were mostly longer than 4" but not entirely--you can see where some of the shorter ones were used in the lower right. 
  • I used a piece of muslin as a background, and cut it slightly larger than 4x6", giving myself a little wiggle room in case things shrunk up on me with all the seams I knew I was going to have.
  • After a false start with the sewing first piece (see below), I realized that I really needed to stabilize the muslin before proceeding. I've decided beginning an experimental project with some seam-ripping is a sign of good luck. My story, going with it.
  • I happened to have some of the Ricky Tims Stable-Stuff Poly with me, which is great but isn't fusible. I had a very lightweight fusible of some sort so I cut the stabilizer to the same size as the muslin, then fused the muslin to the stabilizer. So much for needing room for shrinkage now, since the stabilizer would take care of that. Still, I like me some wiggle room.
  • I started with a yellow-green scrap that I cut into a random pentagon shape and then used just a dab of glue to help hold it on the stabilizer. (See the yellow-green peeking out from behind the flower? That was the starter patch.) Then I took my first green strip, lined it up right sides together along one edge of the yellow-green pentagon, and stitched. I pressed it open and then took my next strip and sewed it to the next edge, and so forth, moving around the sides of the pentagon in succession. I only trimmed anything that was hanging way over--for the most part, you're sewing over any extra bits and since this was all going onto a stiff background and nothing I was going to be trying to hand-quilt through, I didn't have to worry about close trims.
  • Since it's a rectangle, you eventually can no longer go in even rounds and have to just start filling in space with strips. I just had to think through a little bit to make sure the strips would cover the entire space I needed to cover and not leave me with a random blank spot in an awkward location. This is where I did find it helpful to have much longer strips that I'd then trim back to fit better after I sewed.
  • Once the background was complete, my friend pulled up a picture of a pointsettia on her cell phone and I looked at it for some direction--that's when I realized it had several layers of petals, some lighter than others. I had a couple of red fat quarters with me but needed something lighter. Fortunately, my sew-buddies were generous with their scraps! (I traded some back with them too--great way to get new-to-you-fabric!) I just free-handed the cutting of the petals, then used a dab of glue baste to hold them down until I could do the machine blanket stitch around the edge of each petal. Originally I was going to do french knots in yellow for the stamen in the center, but I wasn't sure how much would actually show once I put the binding on (see below) so I bagged that idea.
  • I played with a variety of decorative stitches on my machine along most of the seams. Hadn't used most of those stitches before. Some worked better than others, but hopefully Sandi didn't look too closely. :-)
  • Once it was done, I fused it all to a piece of Peltex double-sided fusible, then cut my backing fabric and fused that on, and then trimmed it all to a true 4x6" size.
  • Because of all the pieces on the crazy-quilt front, and because I now had several layers fused together with the stabilizer still in there (didn't want to risk ripping it off when all those seams were involved--and it doesn't have to be removed) I had to put a binding on it. I didn't think a decorative stitch would really work in that instance, and it would've been a real pill if I'd tried it. So I put a narrow binding on completely by machine, with a certain measure of success. That's something else I need a little more practice on. 
Sandi and I had agreed ahead of time that we'd send each other pictures of what our postcards looked like when they arrived in our respective homes so we could test out whether the postal system would damage them. No damage at all! Now, if we were to have used embellishments of any kind, using an envelope would definitely be safer. But I'm pleased to report that our experiment worked beautifully, we've started a new, wonderful holiday tradition, and we both had a blast.

So, my friends, start making postcards! They're a hoot!

A Finish--Just Playin'


 A few weeks ago, I decided to play with a technique I'd been wanting to mess with for awhile. So I gathered up a bunch of snippets of embellishment threads, yarns, and cords.

This...


Became this... 


 (This a little more close up...)

And soon became this after I soaked off the water soluble stabilizer.

And then it sat for awhile.

Last night I dug into my fat quarter stash and turned it into this:


Which is dimensional, by the way. My current modus operandi.
 Each layer was done by itself, quilted, and then attached the layer beneath or above. 

 (Can you see I free-handed some feathers to frame the thread? First time for that too!)

Ahem. Currently no idea what I'll now do with this. It doesn't have an obvious way to hang it (no binding to sew a sleeve into), so I need to do some more thinkin'. And playin'. But even if it never hangs anywhere, it served it's purpose. I experimented, tried a few techniques at once that I've been wanting to try, and I had a ball playing. What have you experimented with lately? Fabric-wise, that is.

#BFSI In Review

Friday was, yes, our Black Friday Sew-In! Woot! And a great time was had by all. The giveaway on my blog was great fun--loved reading everyone's responses! Congratulations to Brenda J (The Quilt Show subscription) and  Fiber of All Sorts (The Fat Quarter Shop certificate), the lucky winners of my blog giveaway!

Thanks to all the other bloggers who hosted their own giveaways and linked up here. It made the party even bigger!

And even more--I did four mini-giveaway challenges via Twitter through the day. Posted those winners via Twitter. Again, I loved reading everyone's responses to my questions!

What else did I get done on Black Friday, besides hang out on Twitter? (By the way, for me "BFSI lasted through Sunday morning--other than some Christmas decorating and going to a movie with the fam, I basically hung out in my sewing room most of the weekend--so this is a tally of everything done from Friday morning until this writing.)


I took an April Cornell charm pack (Portugal) I've owned for several years...
 ....made some 9-patch blocks out of it....

...and then turned it into this Disappearing 9-Patch.

The astoundingly oversized borders are because I'm making this a wheelchair quilt to donate to a local nursing facility and the one charm pack only makes a 26"x26" square center. Wheelchair quilts should be in the neighborhood of 36"x45" so I added 5" borders (finished) to either side and 9" borders (finished) to the top and bottom. Normally not a design choice I'd make but I think it works okay. I didn't have another charm pack that coordinated and I also didn't want to cut just a few squares from yardage in my stash, so I went with the honking-big-border technique. And hey, I got to use another yard out of my stash for the borders, 2 1/2 yards for backing and another part of a yard for binding. Big stash-busting happening this past weekend!

Disappearing 9-patches are fun. I'm already digging into the rest of my charm pack collection to see what ones I might work with next--they make very fast donation quilts! This only took about 90 minutes total to get to this stage. Since I'm just going to meander-quilt it, it won't take any time at all to finish completely.

Then, rather on a whim, I pulled another set of fabric off my shelf that's been there for a few years. I fell in love with a vendor's booth the last time I was in Houston in 2008. She did all her own hand-dyed fabrics with various surface treatments--super cool stuff. I bought a roughly one yard piece of fabric and then several small pieces that each had leaves stamped onto them. No idea what I was going to do with them, which is why they sat.

Finally today I just bit the bullet, did some arranging, lightly fused them into place as a basting method, pulled some yarn apart to make it a little thinner, then did some stitching and embellishing. I also loved the frayed edge of the background fabric so I frayed all the pieces to give it all a very organic, rough-hewn look.

It's not really a quilt since there's no batting, backing, or quilting. Let's call it a tapestry.


Leaf details 1


 Leaf details 2


I can't put a hanging sleeve on it because stitching would show through front so I need to find a hanging device with hooks that fits the mood of the piece.


And then I finished something I'd been playing with for a bit.

Karen Lee Carter teaches a dimensional flower technique that I've been wanting to try. Since this was a test piece I used some scrap fabric for it, so my fussy-cut flower (center) has a part of another flower overlapping the leaf. That particular fabric doesn't have any whole flowers untouched so it doesn't work well for fussy-cutting. Again, test piece, didn't worry too much. I did some satin-stitching for the first time--need to practice more on that. Then I also used it to test another technique I saw in Quilting Arts Magazine: cut a hole in the center of something and sew across it to create a web effect. Very cool!


Detail of dimensional flower


Detail of webby hole in the middle.

Love both techniques!

I also put together a few new "quilt sandwiches" to practice my FMQ on, and the rest of the time I spent poking away at Easy Street Week 1. I'll put pictures in the Flickr and Threadbias groups tomorrow (Monday) and be linking up to Bonnie's blog then. 

I had a very productive long weekend. What about you?

A Finish! 9-Patch Pizzazz

No, sweetheart. I'm not trying to take a picture of you. 

There it is, as best I can do with no portable quilt hangers (aka people) in the house when I was taking the picture. A handy armchair had to do. Hopefully I'll get a better picture for my files later. Here it is, the 9-Patch Pizzazz finished and washed. It's been lightly quilted with a ribbon design vertically down the seams between each row which you can't really see in this picture, but they pick up on the ribbons that appear in the focus fabric. The quilt has been now renamed "Faith, Hope, and Love." If you missed previous posts, that's an adaptation of the Scripture verse that appears in some of the blocks.

Tomorrow night, back to Poppies, a.k.a. "You're Getting Sleepy". I might be able to get that top completed, including borders, in one evening--I don't have a lot left to do. Then I can start working on the Stack the Deck quilt while I'm debating how to quilt Poppies. I'm kinda sorta wishing I had a longarm machine in my basement. Shhh. I didn't say that.

Another finish (and it took long enough!)


It took stinking long enough but I finally have my pieces of my team's donation basket for a silent auction to raise funds for a local hospice house. My team's theme was "spa," and I volunteered to make candle mats and a lavender sachet, using lavender harvested from my garden last summer.

I didn't want to mess with making a circle something-or-other, so I chose three blocks that had sort of round feels to them and made them 6 1/2" (after getting a pillar candle from my own meager candle collection to see about what size would work best). @ddrquilter suggested quilting it in circles--a great idea!--which gave me a chance to play with the circular sewing attachment for my Janome. The attachment mostly worked--I'll probably talk about that on a future podcast episode.

Then I got to the binding. The poor block in the center got bound three different times, using two different methods, none of which worked. Rip rip rip. And rip some more. And run out of the original binding fabric, which was the rest of that wonderful pink that appears in two of the blocks. Finally, after several hours of nonsense spread over two nights, I had a "doh" moment. Use a method I hadn't used in years. Once I did, and once I found another fat quarter that coordinated, bang. All three bindings done in about half an hour. Jiminy Crickets, but I can be my own worst enemy.

And here they are, all ready to go with the pillar candles I bought to go with them. My basket offering...done!

We'll be putting together all five baskets at tomorrow night's guild meeting. The other themes were "tailgating/picnic," "baby shower," "holiday," and "kitchen." Pictures will be on our guild's blog at http://canalcq.wordpress.com within a few days, probably. I can't wait to see what everyone else has come up with!

(Sorry, my plan had been to get a Total Color Tuesday post done tonight to appear tomorrow but I spent all night working on the donation blocks instead. Dang, but I'm glad those things are done! It's always the simple projects that trip you up, right?)

Finally--a Finish!

I finally finished my project from the Craftsy class "Stitch and Slash," taught by Carol Ann Waugh. Woot! Had a grand ol' time with this; it's a very fun and pretty easy technique. I'll be podcasting this week about the class with my special guest, AJ of The Quilting Pot, as we talk about our experiences taking this class. I'll post more detail, including "in process" pictures, tomorrow when I've got a little more time. Just had to celebrate having my first finish in awhile!

(Front)

(Back)

(And yes, currently unnamed. Any suggestions?)

Randomness and a Finish

1. My friend Lori from guild took my left-over baby receiving blanket flannel scraps and turned them into adorable stuffed bunnies. Bunny is now a spring decoration in my home. He makes me smile.

2. I need a pedicure. Not at all related to #1.

3. It's officially summer by my clock. I got in the pool for the first time today. Hence noticing #2.


 4. Stonyfield Organic Low-Fat Vanilla Yogurt, frozen pineapple chunks, frozen mango chunks, a fresh banana, and a splash of orange juice make for a wonderful, vacation-y-feeling breakfast smoothie. A little beach time without the beach. Or the time. But we'll take what we can get. Puts me in the mood for #3 and, by extension, #2. Maybe I'll bring #1 with me to cuddle too.

5. I finally finished "Joy"! It started out just playing with shapes, but that word kept coming to me and became the guiding principle.


5a. It's the joy that I've witnessed in the lives of so many women. Women who have been through Some Stuff. And yet, joy abounds.


5b. I learned how to let go.

5c. I discovered the fun of just cutting shapes and seeing what happens.

5d. I learned to be okay with the fact that a fern suddenly looked a whole lot more like a big speckled bird. Conversation piece.

5e. I listened when my quilt told me it needed another fern peeking out from the side, behind the border. "Okay. Whatever you say. You're the boss."

5f. I took my time, redoing a figure several times over until I got one that was more or less the shape I was going for. I found fascination in noticing the slight changes in line that could create a whole different sense of movement.

5g. I had fun using some great fat quarters I've had kicking around for awhile and never quite knew how to use.

5h. Some pieces are just too dang small. Even for fusible, raw-edge applique. I'll cuff myself upside the head next time I start doing little bitty feet or arms. (Note the woman bending over in the back of the top picture. Her appendages gave me fits.)

5h. I learned when to say "enough is enough," let a project call itself done, and get ready to move onto the next in the series.

So Stinkin' Cute


Receiving blanket #2
Originally uploaded by sandyquiltz
I finished the second receiving blanket tonight. I was taking my time, listening to an episode of Crafty Garden Mom podcast, which seemed very appropriate since she's got a couple of little bitties in her house. I was just puttering along in no rush, so it was sort of a very zen process.

These are just about the cutest darn receiving blankets I ever did see. If you need a baby gift, I strongly recommend you check it out!

Another finish and some homework


 I finished the first of two receiving blankets tonight. These are going to be for a friend of mine who is expecting her first baby, a little girl, this July. I'm also going to be making her a quilt but just couldn't resist making a couple of these really cute receiving blankets using the same Missouri Star Quilt Company technique I used for all the donation quilts I helped new sewers make back in March.

I'll finish the second one tomorrow or Wednesday--it's all cut and ready to go.

Tomorrow night is our quilt design study group. Since we had to shuffle our schedule around a bit in April to accommodate travel schedules, we ended up with a six-week stretch between meetings. I suggested we do homework, which is supposed to be a regular part of our experience but we've been skipping a lot. (We do a lot more in-session, however, so it's sort of a toss-up.) I figured with six weeks, it wouldn't be a problem. Of course, I left it to tonight to do. Yes, I can spell procrastination.

We had just done a segment on color and Vicki, who led the session, had prepped all the materials for us to each make our own fabric color wheel and it contains little spinny cards to put in the center with a variety of color schemes on them. Our homework was supposed to be to choose a color scheme we wouldn't normally use and do something with it.

So, tonight, I pulled out the color wheel and threw all the little center spinny cards face down on my table and shuffled them up. Drawing one at random, I then put it in the center of the color wheel and, eyes closed, spun it around a few times then landed it somewhere. Opening my eyes, this is what I found:
(The writing says, "4 points on a square.")

Yep, that's definitely a color scheme I wouldn't normally use. Yellow, blue-green, purple, red-orange. My first thought was, "ick."

I burrowed through my scraps for awhile, still thinking at that point that I might just do a little fused something-or-other, so I didn't want to commit whole pieces of fabric. I found the blue-green and purple pretty easily--those are colors I do drift towards on occasion. Red-orange was a little trickier mostly because it's hard to find something truly red-orange and not red or orange. I finally landed on one. But yellow? Wow. That was a toughy. I've discovered I don't actually have a lot of yellow in my stash. I had a few random yellow scraps but they were all a lot more shaded (and I use that word in its official artistic sense) than I wanted to go with the other colors. Finally, I dug into my fat quarters and there it was. The perfect yellow. 

And, in fact, a lovely combination altogether. Bright, admittedly, but just imagine it with a some white thrown in there to calm it down. I'm picturing festive appliqued flowers on a white background with the yellow as a border. Or cute little mini-stars pieced into that yellow as a background in a mini-quilt.
But, to be honest, that's an image that will never get made into reality. I've got too many other more pushy designs in my head demanding my attention. It was a fun project, though, finding those colors. And now I do have some new color combination possibilities in my head. Try it yourself sometime!

Finally--A Finish!

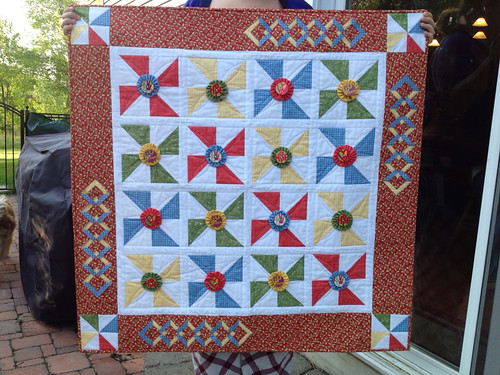
This wallhanging has been almost a year in the making--and it was supposed to be a fast, simple project. I wanted something for my dining room wall that would say "summer!" and would rotate with the flag wallhanging I have that goes up Memorial Day and Fourth of July, but that I didn't necessarily want hanging up the entire summer. So I thought, "I know! Primary colors! Pinwheels!"

The basic pinwheel part was done pretty quickly. Then I pondered borders. "I know! I'll use the Double Diamond Ruler by Kim Templin!" (See episode 41 for my interview with Kim.) I thought it would look like a cute garden fence around my pinwheels, thereby turning the pinwheels into flowers. My summer wallhanging was beginning to take on a theme.

Unfortunately, I didn't have quite enough of the fabrics I needed to use for the double diamonds to do a full border of them, so I did half borders and framed the center with them. I actually like the way that looks better, anyway.

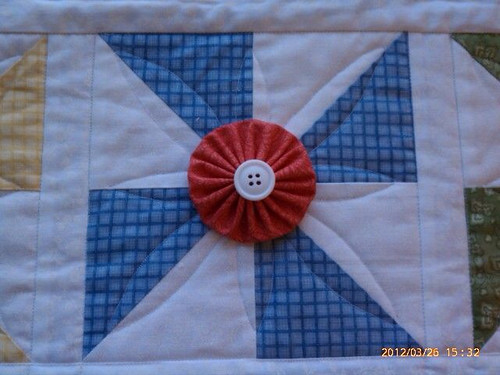
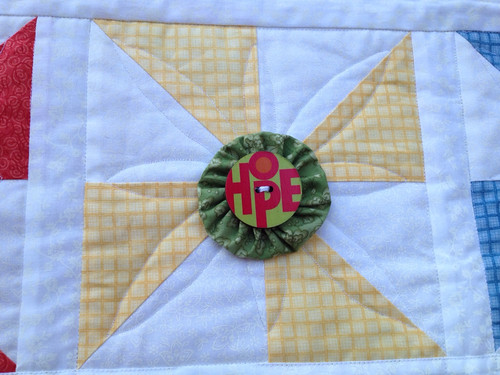
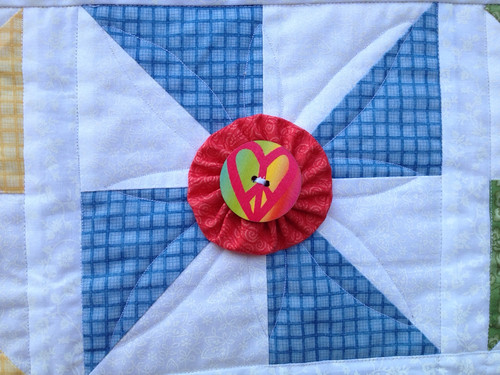
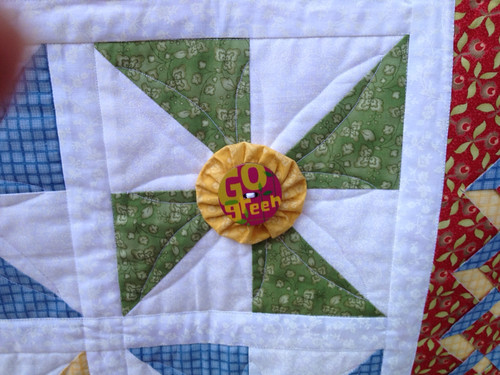
And, of course, I couldn't leave it at that. With the more complex border, the pinwheels now looked just a little bit plain. And they had morphed into flowers--so how could I make them more flower-esque? "I know!" I thought, yet again. "I'll do yo-yos!" This required finding fabric in my stash that coordinated but didn't stick out like a sore thumb...which was a task unto itself. But I persevered...and I think I only ended up having to buy the yellow because that's not something that typically exists in my stash much.

Yo-yos made (using the Clover yo-yo tool, which makes it very easy), I realized I'd need something in the center. Wait for it.... "I know!" I decided to use buttons. The first buttons I bought were white, because I thought I'd like the clean, fresh look of white buttons unifying the different colors of the pinwheels and yo-yos. The only buttons I could find at Joanns with 16 that matched were on the small side, but I thought I could make it work.

I sat down one night and started sewing those dang yo-yos and buttons onto the pinwheels by hand. It took me almost half an hour to get one done--it ended up all cock-eyed and didn't have the clean affect I wanted, plus I had 16 of those stinking things in total to finish. At a half hour a pop I wasn't sure it was worth it. I threw it to the side in frustration.

You guessed it. By now I was sorry I'd ever started the stupid project.

"I know!".... and I pulled out my sewing machine manual to check a niggling memory I had that I could sew buttons on by machine. Sure 'nuff, there it was. I sat back down with my wallhanging and little white buttons and started on the first one, high hopes and dreams of having it done by the end of the afternoon.

Urgh. And more urgh. The buttons were too small for me to really easily hold them in place while I was sewing, and they were just high enough that my presser foot couldn't quite mash them down far enough for the needle to do its work. I finally got one sewn on, but when I pulled it out and looked it...all cock-eyed and nasty again. Threw is to the side in frustration again.

A couple of weeks later, I decided to go to Joanns and see if I could find bigger buttons. Standing in front of the collection of white buttons, I kept counting and recounting different designs in mounting frustration again--there weren't 16 of any one design. And none of them were interesting enough to warrant getting different designs.

I was just about to bag the whole yo-yo button thing as I turned to walk away when my eyes lighted on a set of buttons that were very different than anything I'd pictured in my head. Interesting. The more I thought about it, the more it tickled me. Suddenly I went from "simple, fresh summer wallhanging" to "funky hippy fun wallhanging."

The new buttons worked swimmingly. I wasn't able to get the four different designs I wanted so I held up for a bit while I tried to order one of the designs online--and ended up losing money when the secure site I'd purchased from suddenly disappeared with no trace and...no buttons. But it was only $11 so I'm not sweating it. Just yet another delay in getting this supposedly simple project done. I ended up back at Joanns buying the other set of four buttons that I hadn't liked as well the first time but can live with, because done is better than perfect.

So, all that being said, introducing "Sandy's Hippy Peace Garden."