So this one had been in my wish list for a few days, and I had no intention of purchasing it until I'd knocked a few other quilting classes out of my queue. And then I realized I had a UFO I really needed to finish before the end of November. And then I realized it was quite possible that this class would have the perfect solution to my "How to quilt this thing" dilemma. And then it went on sale. So I bit.
Here is my review of Dot-to-Dot Quilting with Angela Walters.
I'll start by saying Angela Walters is an excellent teacher and very easy to watch. Her classes are much like her books (which I have reviewed before)--step-by-step, clear instructions, with good diagrams as well as her demonstrations.

Using Golden Threads quilting paper to test out my design plan.
Here's one caveat: If you've never machine quilted before, you should consult other resources or classes first. This is a class about quilt designs: She doesn't talk about making your quilt sandwich, basting, or stabilizing the quilt. She assumes you are already at least that far in your experience. Indeed, I was wondering for several lessons whether she did any stabilizing (stitch-in-the-ditch) at all and finally found reference to it in the discussion threads on the side. As I watched the next lesson, I could finally see some evidence of stabilizing stitching.
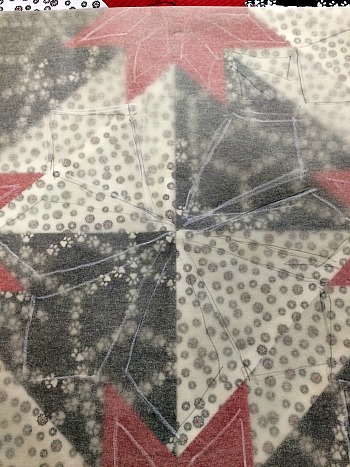
Closer view of my quilt design sketch, marking what points I'd be using as my "dots". I then free-handed the actual quilting.
That being said, once you know how to prep your quilt for quilting and are ready to start doing some designs, this would be a good starting point. These designs are very simple, but have lots of possibilities for making them more complex. They're good no-mark designs, but if you're more comfortable marking, there are some very fast and easy ways to do that. On the other hand, most of the designs she shows in this class involve straight lines, which can be remarkably difficult to do with a free motion foot. (Although you can use a walking foot if you want, that requires a lot of twisting and turning of the quilt so it's far simpler to become competent at doing straight lines free-motion.)
I was able to immediately put the class techniques to use on a wallhanging/baby quilt I'm trying to finish for my great-niece's first birthday at the end of the month. I made it a long time ago and it's languished from inattention but then, I always work better to a deadline. I'd been waffling on how to quilt it but found the dot-to-dot technique the perfect solution.

Quilted--you can see the chalk lines and stitching on the black but the thread blends on the white and red.
The pictures embedded in this post show my testing process as I tried to figure out what design would work well on this top--I sketched it out on Golden Threads quilting paper first (the most sheer paper I had in my cabinet), but I didn't use the paper when I did my quilting. I just wanted to see how my design thoughts would help those black and white background squares feel like a single block. For the first few blocks, I did sketch out in chalk on the black fabric where my lines should be and based on that, was able to then keep track through the whole block of where I was headed. By the end of it, I no longer had to sketch anything out; I'd gotten into a rhythm of knowing where to aim next. (The last picture is quilted--you can see the chalk lines on that block, but you can't really see the thread in the white or red.)
My need to continue practicing free-motioning straight lines aside, this was a great way to figure out a nice quilting design quickly, and execute it almost as quickly. I'm glad I bought this class!
The Basics
- 9 lessons, ranging from 3 minutes (the intro lesson) to 10 1/2 minutes. Although the lessons are quite short, she gives good information in a very concise manner. I still felt like I'd gotten my money's worth from this class.
- The lessons include quilting starbursts, starburst variations, diamonds, diamond variations, lattices, lattice variations, and borders. The final lesson is a gallery that shows all of the designs used in a variety of ways.
- The class materials include the pattern for a quilt if you'd like to use that to do the class project; it then includes diagrams of all the designs she shows in class, and three examples of how the designs could be used in the class project quilt.
Again, I do recommend Dot-to-Dot Quilting with Angela Walters. It really helped me in figuring out possible quilt designs more easily. And now I've got a UFO nearly complete!
(Using Craftsy links in this post help support this podcast and blog. Thank you!)