Craftsy Class Review: The New Chicken Dinner with Ian Knauer

Time to kick in with the Craftsy class reviews again! This one will make you hungry (unless you're a vegetarian like my daughter: sorry!). If you're a carnivore and are looking for better ways to cook chicken, you really need to check out The New Chicken Dinner with Ian Knauer. I finished this class a few months ago but it's one that I definitely keep going back to the well on. In fact, I just did the rotisserie-style roast chicken again last week (pictured below) and am likely to do it again in the next few days. It's probably become my favorite way to do a roast chicken now. 

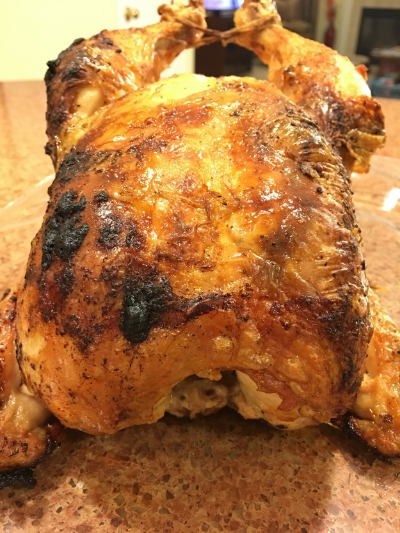
For the most part, Knauer addresses fairly common techniques for chicken but he teaches different approaches that just have wonderful results. The rotisserie-style chicken (lesson 2) is really the best dang roast chicken I've ever had, and I've made a lot of roast chicken a lot of different ways! It's incredibly moist with a wonderful crispy skin.... Huh. I may make it for myself for dinner tonight even though no one else will be home. It's pretty easy to do and you can change up the flavors of his recipe really easily.

But let me move on. There's more to the class than an incredible roast chicken. (Although it's worth it just for that!)


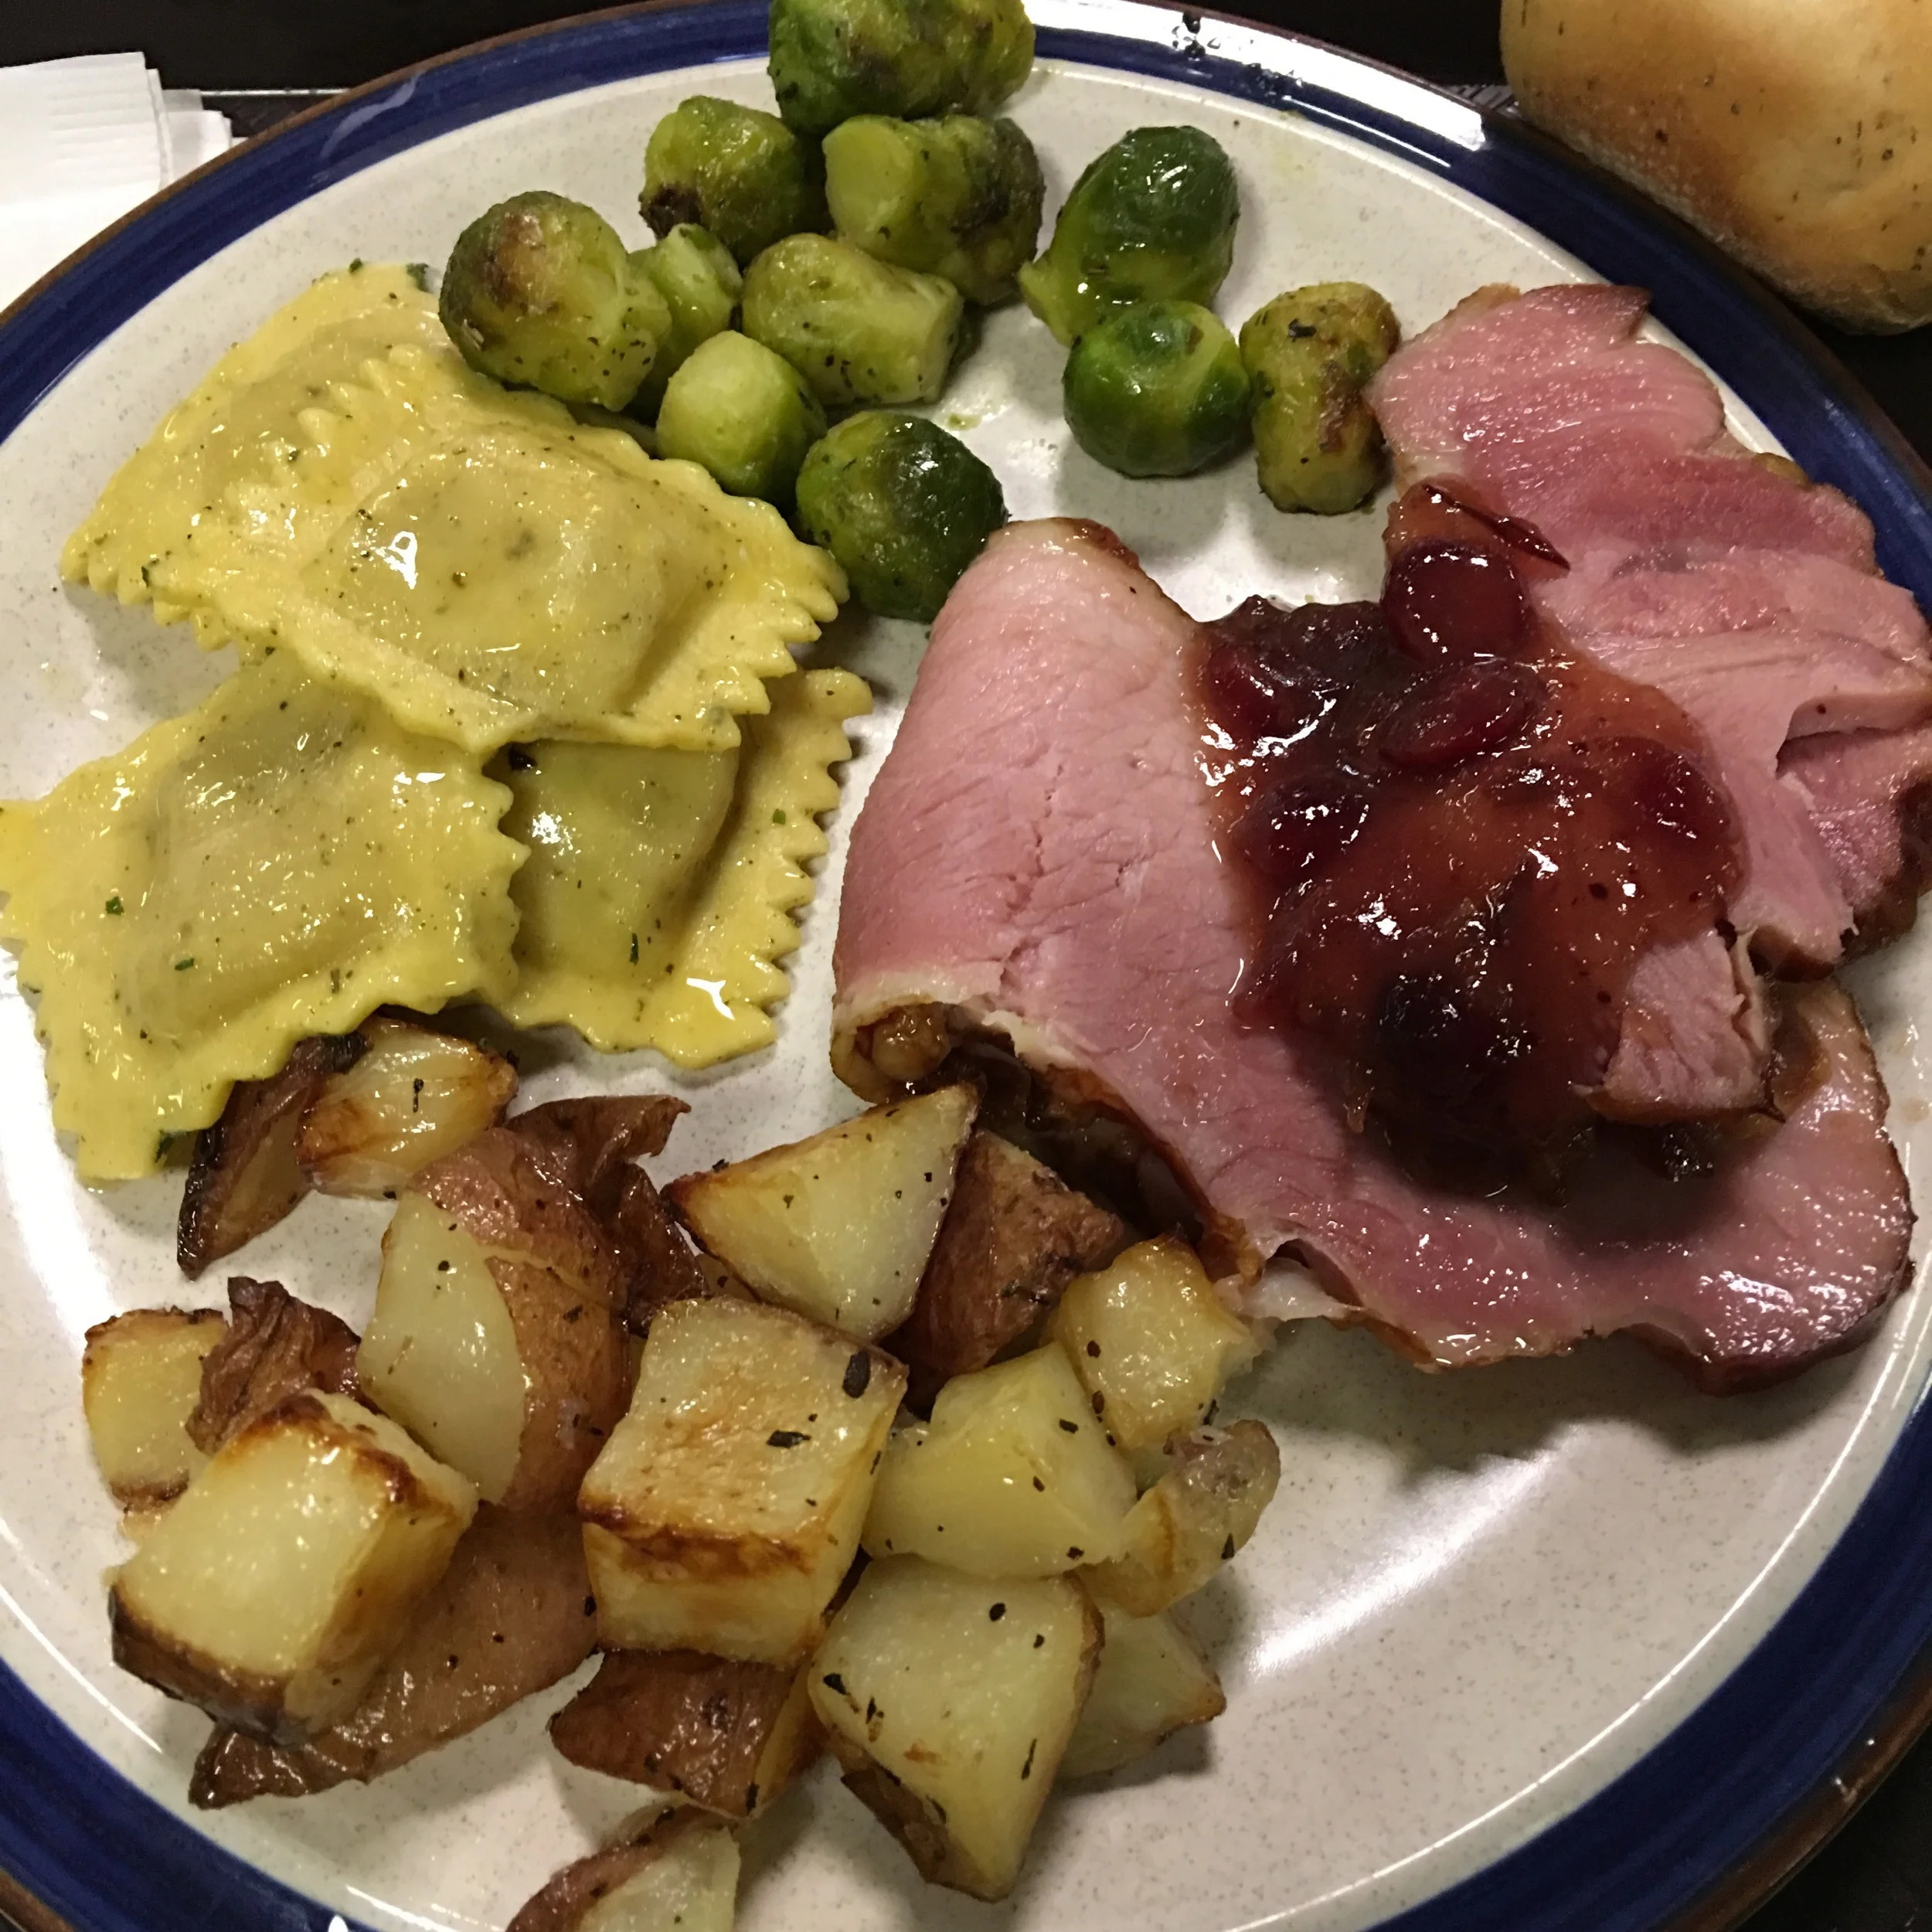
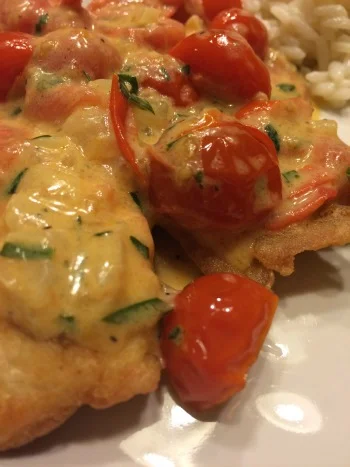
Well, wait--let me just do one more picture to make you really get hungry: here's the rotisserie-style chicken cut up and covered with a pan sauce from the class recipe. Wowzer. 

I know I made another recipe from this class but I don't know that I took a picture of it. I remember thinking it was also really good. There are a handful of other recipes and techniques I also want to try. If I could only get that roast chicken out of my head. 

Knauer is an enjoyable teacher to watch--very straightforward, offering lots of great information about substitutions or variations on the techniques in each lesson. There are eight recipes in the class materials but, again, with variations there are dozens more possibilities. The ingredients are all quite normal ingredients, easy to find, and the flavor profiles run from fairly traditional American to Italian to Asian. However, again, the techniques are key: Although he uses an Asian recipe to teach poaching, for example, you can do any flavors you want. 

I highly recommend this class--it'll elevate your every-day chicken to make it feel new!

The Basics

  • 8 lessons, ranging from 9 minutes to about 20 minutes
  • Lesson 1 gives good information for what to look for in the supermarket and how to store chicken safely.
  • Lesson 2 is that really wonderful (have I already said that?) rotisserie-style roast chicken. It also includes information on compound butters and a pan sauce, as well as tips for trussing and carving.
  • Lesson 3 is deep-frying. He almost made me want to try it. (I avoid deep-frying for health reasons as well as to avoid a messy clean up!)
  • Lesson 4 is searing both bone-in and boneless chicken (this is the one I did but didn't photography--it was great!)
  • Lesson 5 is a salt-baking technique that I definitely am going to try at some point; it also includes how to salt-bake vegetables as well.
  • Lesson 6 is spatchcocking (or butterflying the whole chicken and grilling with bricks)
  • Lesson 7 is braising, using a recipe that creates a ragu for pasta
  • Lesson 7 is poaching and torching, with information about cooking rice.
    • Many of the lessons also include carving and plating suggestions.
  • The materials include eight recipes, as mentioned above.

The New Chicken Dinner with Ian Knauer is probably one of my top three favorite cooking classes from Craftsy now. (Artisan Bread Making with Peter Reinhart and Homemade Italian Pasta with Giuliano Hazan are two others, although ask me on different days and I'd probably name different ones!) In any case, I definitely, wholeheartedly, recommend this class!

(Transparency: Using Craftsy links in this post helps support my podcast and blog. Thank you!)

Why you may have not been able to access my podcast lately...

One of my listeners had to reset all her podcast feeds and asked me if there was a problem with mine because she suddenly couldn't access it. I looked into it and, sure 'nuff, I had apparently missed some emails in all my travels and my account had expired. Oops. I've now re-upped and all my episodes are now available again. Sorry about that! I am in the process of uploading a new episode this afternoon...

Not quite OT: Longyi from Myanmar (Burma)

It's not quilt-related; it's arguably embroidery-related; it's definitely fabric-related. I thought y'all might enjoy seeing the collection of longyi that I've amassed over the last 18 years, including two trips to Burma (Myanmar) and one to Thailand. Some of these I bought, many were gifts. At some point, I may need to cull the herd a bit and either gift some along to others or have other types of clothes made out of them because, as I said to my husband, I now own more longyi than I've ever owned skirts of any kind at any time in my life!

Longyi (pronounced "loan-gi" or, sometimes, "loan-gee" as in "Gee, I have a lot of longyi!") is the traditional sheet of cloth worn by men and women in Burma. It's a long sheet of fabric that's wrapped and folded around the waist--the wrap and fold method differs for men and women. Sometimes it's sewn into a cylinder that you step into, then wrap and knot. I've posted a couple of YouTube videos at the end of this post that demonstrate the method.

Tailors in Myanmar generally have a couple of ways they'll turn the longyi into something a timid Westerner like myself, who doesn't trust herself to wrap it in such a way it'll actually stay up at all, is more likely to wear. You can have them made into skirts with zippers, of course, but it's easier to have something done with slide clips or just cut to the chase, have straps put on, and wear it as a wrap-around skirt, my favorite option as it's far more one-size-fits-all. Most of mine have been done as wrap-arounds, though some still have clips. I'm about to take those to a tailor to have them changed to wrap-arounds and altered slightly in other ways.

Here's my collection. The photos don't really do them justice as several of them are beautiful cross-wovens. (Cross-wovens show different colors depending on how they hit the light.) I've included captions that show the ethnic group the design represents and other info here and there. This is an auto-rotation photo gallery, though it does have forward and back controls on either side of the images. If you're reading this through a blog-reader, the gallery may not appear. You might have to go to my website to view it. 

And believe it or not, I don't think that's all of them. I know I've got a Karen top and skirt hanging in different closet, and several Karen tops scattered through a couple of closets. Maybe some day I'll get those posted as well. But for now, this will suffice!

Back...and not-so-much "better than ever"

It's been two months and sixteen days since my last post. Ahem.

I've returned to the Land of the Living Quilter. Or, rather, perhaps I shouldn't be quite so optimistic yet. I've returned to the Land of the Want-to-Be-Living-Quilter and the rest remains to be seen. The key points here are:

  • I'm officially done with school for the semester. My next class isn't until August, although I still have plenty of school-related work to keep me busy. (You should see the stack of books I want to get through before August, ahem.) Still, no weekly assignments or papers to be turned in for awhile, so things can get more relaxed and predictable.
  • I'm done with most of my travel until our summer events in July. I have a mid-length vacation planned with my husband in May (a few extra days around Memorial Day weekend), and a speaking engagement in June, but that one is within an easy drive and won't take a whole weekend. And although I still have some evening conference calls, it's not nearly the volume we had earlier in the year. So I feel like I'll be able to have a life outside of work and school for awhile!

But it wasn't all "work and no play makes Jane a dull girl." Although I haven't had the time or energy since my retreat in February to do much in the way of quilting (none) or embroidery (two evenings, about 20 mins each, as I recall), I did succumb to "quilting/embroidery preparation," so to speak.

2016-04-14 16.49.57.jpg

As I was driving home from a set of meetings in Exton, PA, I saw a quilt shop in a plaza on my right. There may have been a squealing of tires. Welcome to The Quilt Block, Inc. (Their Facebook page is a little more active until they finish getting their website put together.). This was a wonderful store! I was the only customer there at the time so I had a nice long chat with one of the owners, Cynthia (with thanks to a reader who was able to identify her for me so I could update this post accordingly). She mentioned, by the way, that since she'd opened in 2006, 10 other quilt shops in the area had closed. I was surprised to hear that since there's a very fine national quilt show in the area--I would think that would equal a solid fan base locally. I guess not in this case, although it may also be that property values are so high in the areas surrounding Philadelphia that the overhead shuts them down before they can even really get started. In any case, if you live in the area or are vacationing around Philadelphia/Valley Forge, make sure you check out The Quilt Block and keep them in business!

Here's the goods. I'm not buying fabric very often at this stage except to finish projects, but if there's embroidery threads available, well...

And yes, you're seeing right, that's an Annie Unrein pattern. I love her stuff, even if I do whine every step of the way in making it. To be clear, her patterns and instructions are actually extremely well done. We just all know how I feel about this kind of sewing. But I keep going back to the well.

The green box is a bit of over-packaging for embroidery needles. The owner spoke highly of Tulip brand and I'd never tried them, so this is an assortment collection.

The two buttons were irresistible. The one with the red circle and slash has the word "mending" behind it. The other one says, "No you couldn't make that." At least, they gave me a giggle at the end of a long day. 

And yes, that picture was taken on a hotel room bed. I've seen a lot of those lately.

Cynthia, one of the owners

Cynthia, one of the owners

What's not shown here is that...and I really can't believe I did this...I signed up for the store's embroidery/quilt block of the month. Apparently I was having a really weak moment. I posted about this on my Facebook page so I won't say more here.

Except to say that I know I'll have completely forgotten about this by the time I get the first block in the mail in a couple of weeks. Will it be like Christmas, or will it be like "What the heck did I just do to myself?" Only the Shadow knows...

 
2016-04-18 22.54.27.jpg

One of the brief times I was home between travel, I saw on Mary Corbet's blog an announcement that my favorite Etsy shop for hand-dyed embroidery threads, ColourComplements, was having a sale. So I bit. Lovely. Lorraine does a beautiful job. 


And, in celebration of being done with school, I suddenly paid attention to my quilty email again and saw that Craftsy was having a sale. Mind you, while I do still own several Craftsy classes I haven't gotten to yet, I didn't have any left in the areas that I felt the need for new ideas. (Rationalization is a good thing.)

On the quilting front, most of what I need to do to finish up UFOs is machine quilting, so I decided to pick up a couple of classes that I'd been looking at. I now own Jaquie Gering's Creative Quilting with Your Walking Foot. It's been on my wish list for a l-o-n-g time and I've heard Frances of Off-Kilter Quilt and others speak highly of it. I also picked up a newer class, Quilting with Rulers on a Home Machine with Amy Johnson. Color me intrigued. I don't own any longarm rulers but if she convinces me it's the thing, I'd be happy to pick some up. 

And now you're going to laugh. And laugh. And laugh. Remember that Annie Unrein pattern I referenced above, and what I said about whining my way through projects like that? Well, she has a new class on Craftsy. Again, did I say I've had a few weak moments? This one, though, makes a certain amount of logical sense. Her new class is The Ultimate Travel Bag. We can all agree I do a lot of traveling, right? And I'm always on the lookout for that perfect carry-on, weekender, totebag...whatever. I haven't found it yet, but I live in hope. However, I need to finish the second bag from the Annie Unrein class I started last year before tackling this one. Still, there's no reason I can't start digging through my stash to see what fabrics I can use, right?

What I Want to Do Now

I'm going to talk more about this in my next podcast episode--and yes, there will be a next podcast episode soon!--so for the purposes of this blog I'm just going to get a few things down in writing for my own clarity.

In the realm of personal health

Being back in school has not been good for my health, sadly. So I've got a few goals now that I've got several weeks on end where the word "routine" can actually come back into my vocabulary.

  • Start paying close attention to what and when I'm eating
  • Get back into an exercise routine.
    • Includes, but not exclusively, canal walks with the Doofus as he's put on a couple of pounds this winter himself.


In the realm of life organization

  • Clean my office/sewing room. Things have gotten a bit stacked and muddled these last couple of months.
  • Clean my daughter's room--she left behind a bit of a heap when she moved, and I need access to her bookshelves for my academic overflow, as it were. So she's coming over this afternoon and we're doing a Clean Sweep. (Tanesha of CraftyGardenMom was recently talking about that show and I was also a HUGE fan and, like her, am very disappointed that it's not on Netflix or Amazon Prime!)
  • Get my dogs to the groomer. Yikes.
  • Finally finish several blog posts (Craftsy class reviews) that I started over the last couple of months but never actually got posted. (Is this "life organization" or is this "quilting/sewing? Hmmm.)

In the realm of embroidery

  • I just want to start doing it again, regardless of which project it is. Technically speaking, I have a few projects in the works but they're all just me playing around--no deadlines involved. So my crazy quilt blocks tend to take priority, but I also have my crewel embroidery project and one purchased embroidery pattern I'm poking away at when I'm in the mood.

In the realm of quilting/sewing

This is where I have the most specific goals, although I'm not pressuring myself on them.

That's it! My daughter just showed up and she's making me vegetarian avocado/tomato burritos (her own concoction, no recipe) for lunch. And then...the Clean Sweep is on.

(Transparency: Using Craftsy links in this post help support my podcast and blog. Thank you!)

And so I went on retreat... (I guess this is #SBSI)

I made an impulsive almost-last-minute decision to attend a quilt retreat this weekend sponsored by a sorta-kinda-LQS. I went on her first retreat two years ago--horribly sick, had to go home at night to sleep in my own bed, didn't get a lot done. Couldn't go last year as I'd only recently gotten home from my international jaunt. I'd put my name in for this year but waffled for months over whether I'd be able to go. Finally decided I really needed some friend-time and quilty-time so about 10 days before the retreat I contacted the LQS owner and was able to send in my deposit. I'm so glad I did.

image.jpg

My home away from home... It was a small enough retreat that several of us got rooms to ourselves. That's my "Quilt I Saved from Almost Certain Destruction" on the bed (episode 17 and this blog post). The armchair was convenient for getting some class reading done here and there as well.

 
image.jpg

Our weather. 

Unexpected, but pretty. (Drive 10 minutes in any direction and no snow. For some reason, our retreat center was right in a blizzard pocket.)


image.jpg

The way we ate. All freaking weekend. I don't even want to know how much I gained/ 

 
image.jpg

Oh...and did I mention the desserts? Yikes.


My friend surprised me with a little gift on the table space she'd set aside for me (I arrived a few hours after most others). Adorbs! 


The retreat started Thursday morning but I didn't go down until after work Thursday, which meant I got there right about dinner time. Thursday evening, therefore, after getting my stuff all set up, I decided to just go for a little embroidery Zen. I got one more patch on my crazy quilt block done. 

I wasn't keen on the way the feather turned out (my markings kept disappearing on me, urgh), so I used the Rule of Distraction. Put enough beady-bling on there and you don't notice anything else!

 
image.jpg

By Friday morning, I was ready to rock n' roll. This was a guild BOM from 2008. Got all the blocks finally pieced a couple of years ago. I'd put fabrics for the sashing, inner border and outer border in the bin with the blocks so at least I knew more or less what I'd intended to do back then. Now the top is done--woo!  

This is just for me so I'll probably just do an all-over FMQ on my DM. So we'll see how long it takes me to get it REALLY done.

 
image.jpg

Saturday's job was my second UFO of the weekend. This is a jelly roll quilt from Jelly Roll Sampler Quilts by Pam and Nicky Lintott (a gift from listener Carolyn of the U.K.--thanks!). Started it around 2012-ish. Finished the blocks in maybe 2014. Took it to an LQS Super Bowl Sale this weekend and amazingly found sashing and border fabrics pretty quick despite the crowds. That burgundy stripe between the two borders is a flange--first one I've done, and I love it. Just the right amount of accent for the burgundy in the blocks. I'll probably use that same fabric for the binding. Haven't decided if I'll do it myself, or maybe rent time on a long-arm to do it myself that way, or send it out. I'm giving myself another week or so to think about that. It's going to someone else so there's a little more at stake than with that other one.

 
image.jpg

As a small, fast project for a break between the two UFOs, I fused this kit. It's most likely from an Edyta Sitar BOM quilt* but I bought just this one block at an LQS so I don't actually know for sure: The block kits were in an unmarked basket; there were only three months' worth there; and no picture or information available about the completed quilt. I thought this one would make a great background for some fun embroidery and beadwork. All the pieces were pre-cut and pre-fused, so it was basically just putting together a puzzle. I mostly followed the picture on the package but I moved the bird from sitting on one of the leaves at the top to sitting on the basket--I thought that made him far more prominent and we all know how I feel about pudgy birds.  

*Later edit: I did some googling and yes, it's Edyta Sitar, Seasonal Silhouettes.

I also traced another embroidery design on some linen using a big picture window and the last remaining light of the afternoon, but didn't take a picture of it. Not terribly exciting anyway. 

Finally, I had some time left Saturday night and Sunday morning, so I made another little zipper pouch. This one is the Ditty Bag pattern from www.byannie.com. (The pattern has three sizes; I made the medium-sized one.) Wasn't too hard to do, other than the usual annoying fiddly bit sewing around that curve on either side. Zippers are going pretty easy for me these days. Yay. It's got some nice structure but if I use the pattern again, I won't bother with the binding on the inside--it was a pill and doesn't really add much. Finishing the seam with a zig-zag would be good enough. 

Oh, and I got a decent amount of class reading done. So there's that too.

All in all, a good time. And now, for the rest of #SBSI, now that my week's assignments are done, I'm going to hang out in front of the TV with my man and four-leggeds and do some more embroidery.

(By the way--I realize I didn't draw the name for the Quilty Resolution challenge yet--I'll take care of that manana!)

Vacation Days 4-6 Accomplishments

If you're looking for the 2016 Quilty Resolutions Challenge and Giveaway, click here!

What with another holiday thrown in there, I didn't have time to post a daily update. Sorry!

What else I've gotten done:

  • More reading (although not nearly enough at this point, but taking a break is important too so I'm not beating myself up about it)
  • One pre-class assignment that we're supposed to have done before we arrive on campus late next week
  • Smelling wonderful downstairs as I'm typing this: A slow cooker meal for dinner tonight from the Craftsy class I'm working on (hopefully posting a review in another couple of days)
  • These containers are now mounted. I bought them last May. Ahem.

Two pics: What they look like "at ease," and what they look like in action.

I got them from the Container Store. Adorable office supplies--gotta love it.

(The plaque above them reads: "Ask not what your mother can do for you.... But ask only what you can do for your mother." That's hung behind my desk since the kids were in middle school. I don't think the message quite sank in....)

  • And, of course, some more embroidery. Woo! 
  • And probably most significantly: The Jacob's Ladder is done! Woo! Major happy dance! It's now at a LQS awaiting longarming. I've tweeted another pic but won't post it here on Facebook for another few weeks. Of course, I'll still have binding to do when it comes back home to roost, but I don't mind doing binding so much.

I also had an unexpected shop hop today. I called BFF/BQF Kate to see if she wanted to meet up with me at the LQS where I was dropping off JL and she said yes. Actually, she squealed with delight. I understood that to mean yes. We had lunch afterwards and then decided we were really obligated to visit a second quilt shop that was right in the same area. I always start out saying, "I don't really need anything." Ahem. 

Both shops had some Christmas sales, which was enticing. What jumped into my bag to come home with me (how can you resist those puppy dog eyes?):

  • Deb Tucker's Rapid Fire Lemoyne Star (not on sale, unfortunately). I loved using her petite Hunter Star ruler that I'd won in a giveaway by AJ of The Quilting Pot a couple of years ago, and have been looking at this Lemoyne Star ruler ever since. Having just completed a big scrap project (the JL) that I mostly enjoyed from the perspective of having used up a lot of stash on it, I thought it might be fun to start making some Lemoyne Star blocks from stash fabric as well. Good retreat project, anyway, if I ever get back on a retreat! (Tentative plans for one in February--stay tuned.)
  • I got a few patterns--more zipper pouches (they are great for travel!), plus some Christmas-related embroidery patterns that were pretty cute (and on huge sale). 
  • The button thread is for Daisy's armchair buddy tutorial. I hadn't been looking for any but it was only a buck, so I figured it was worth making life easier on myself when I got to that step in her process.
  • And whee! A 120" tape measure! I'd heard rumor this rare beast existed. After spending a couple of days crawling around on the floor shuffling my 60" tape measure from side to side to measure the JL for borders and final measurements, I was thrilled to see something that would actually cut the mustard for those occasional times I do make big quilts.
  • In the upper right is a nifty little block kit that looked like it was part of a block of the month but they were being sold separately. There were only three or four months available, and I only liked this one block of those that were displayed, so I just got the one. It's got die-cut applique pieces and the background fabric. I took one look at it and thought, "Oooh, I could embellish the heck out of that with embroidery and beads!" I've definitely drunk that Koolaid. It's a fall design--a basket with leaves and such. I'd best start it now to have hopes of finishing it time for decorating in September.
  • Then, of course, some pretty Weeks Dye Works embroidery threads because they're candy. And some funky colored zippers to use for pouches because those colors are harder to find, and I think I've got a collection of fat quarters they'd work beautifully with. If they don't coordinate as well as I thought they would, as I joked with BFF/BQF Kate, I guess I'll just have to buy fabric to match the zippers. As you do sometimes.

Not that I needed any of this stuff. But I guess I was so relieved and, darn it, proud of myself for successfully completing that dang JL it felt like a reward. 

Tonight is an embroidery night. Tomorrow, my last day of vacation, we're hosting my side of the family's Christmas celebration so I won't get much of anything done, I suspect, although I may be able to knock out a little more embroidery while waiting for things to come out of the oven and such. I also doubt I'll get a report post up tomorrow night, although maybe Monday. We'll see.

As usual, though, as I get to the end of a vacation, I look back and think, "Sheesh! Where did all that time go? I still have post-it notes left uncompleted!" Still, it feels good to have gotten as much done as I did, and I did take some time out to relax and hang out with the fam. So it's all good.

2016 Quilty Resolution Challenge and Giveaway

Here it is! Listen to episode 193 In Which We Talk Quilty Resolutions and Fidget Quilts to hear about this year's...

2016 Quilty Resolution Challenge!

Remember, I always have very specific themes and/or questions I ask--it's not just your laundry list of quilty stuff you want to get done! You may also want to listen to episode 194 In Which We Recap 2015 and Look Ahead to 2016 Quilty Resolutions for a look back at my 2015 resolutions (and you listeners!) and I talk about my 2016 resolutions based on my challenge theme--you may get some ideas.

Once you know the theme, the form is below: fill it out to enter the challenge.

  • You may only complete this form once to enter, so be sure you fill out all three items. (The word of the year is optional.) Any incomplete forms will be disqualified.
  • Make sure you include your name and accurate, complete email address where indicated in the form. If I don't have your information, I wouldn't be able to tell you if you won!

(Life has gotten away from me and I've not had time to post what you'll win. But those of you who have entered my giveaways before know that it's always been good! So trust me... it'll be good!)

Complete your entry by midnight, Eastern time, on January 31st. I'll draw the winner on February 1st.

If the form does not appear below, just click here instead.


Craftsy Class Update: December 2015

Craftsy Logo

I've skipped a few updates but thought it would still be worth me doing an end-of-year assessment with where I stand on Craftsy classes. They're not as high priority for me now that I've got other classwork I need to attend to first, so reviews and updates won't be as frequent in 2016 as they were in the first half of 2015. Still n' all, I love doing Craftsy classes and will continue to work away at them as I'm able. 

By the way, I've now added links to all of my reviews in the final list of completed classes at the bottom. There are a handful that I completed prior to starting to write official reviews so there are no reviews for those classes available--that's noted where appropriate.

New Completions

(+4)

As a note here: I've removed Jinny Beyer's 2015 BOM from the "in progress" list because I don't have a category entitled "Bagged For Now." It's still in the "To Be Completed" list but it's no longer on my current radar.

Classes added since last update

(+6, but remember, it's been a few months since my last update!)

Classes To Be Completed

Current count: (18, +6 from last report) 

Completed Classes

Current count: 65 (+3)

(Disclosure: As a Craftsy affiliate, using Craftsy links on this post helps support my podcast and blog. Thank you!)

Vacation Day 3 Accomplishments

  • Read about a third of assigned reading from this book for January class
  • Went through class syllabus with a fine-toothed comb; realized I had to order four more books based on class assignments and final paper description. 
  • Dropped another bundle on Amazon.
  • Made mental note to clean off bookshelves before end of vacation to have enough room to get through this next semester.
  • Sighed a big sigh. Moved on.
 
  • Got myself set up in Weight Watchers again as they've changed their system so I needed to do a new "assessment," plus downloaded their new FitBreak app to try to help myself get in more stretching and exercise during the day. My jury's out on the FitBreak app--some nice features, others that seem like a silly thing to have missed including. Still--anything I can do to help myself be healthier moving forward is worth trying. I've gotten really stiff from all this time at a computer and reading.
  • Looked up group class schedule at Y to see if I could work yoga back into my schedule when I'm back from my January class. 
  • Looked up "how to modify yoga poses for vertigo." (Yoga classes haven't always ended well for me in the past. Oi.)
  • Finally got center of the JL quilt pieced. No pics here as it'll end up on Facebook (will likely post it on Twitter, though). Heading to another LQS in a little bit to see if I have better luck finding border fabrics. 
  • Suggested to DH that he come with me on my LQS jaunt as the shop is about 10 mins away from a restaurant we enjoy but don't got to often since it's a 40 minute drive, so I've also got a dinner date tonight--woo! 

Tomorrow is a return to holiday merry-making as my son and a friend are coming for a New Year's Eve game-a-thon. We have a little cleaning to do, though not much, plus I need to go grocery shopping. Fortunately, he asked if I could make the Southwest Chicken Chili, so making dinner will be a snap! That means I should have time for some sort of sewing fun: I'll either do embroidery or, if I have more time than I think, I might tackle Daisy's armchair buddy tutorial. So, stay tuned!

Vacation Day 1 & Day 2 Accomplishments

I never really think of vacations as starting until Monday because hey, I would've had the weekend off anyway. And even though my vacation started last Wednesday, Christmas prep, Christmas, and Christmas Recovery took up several of those days. So yesterday was, in my brain, the REAL start of vacation--the first day I'd have been working but am not, and the first day I don't have other things I need to be prepping for. Woot! 

In the past, I've occasionally documented what I've gotten done each day of vacation as it actually helps me to feel good about occasionally sitting down and just wasting time with iPad games. However, the reality about this particular week of vacation--especially this year--is that it's just as renewing for me to clear the decks of cleaning or organizational things I've been wanting to get done and set myself up as best as possible for the start of another busy stretch of work and school. So although I'm not running around killing myself to get all sorts of things done (I am relaxing here and there), I am tracking those tasks that would really feel good to accomplish and tackling one or two a day. 

So--to start, I did my usual Post-It Note task list. Those of you who have been readers/listeners for awhile know that this is my favorite way to keep track of what I need to do in my sewing room. Sometimes I re-order them based on priority, but at the moment, they're just slapped up there and I periodically check them to see which one I'm (1) in the mood to do or (2) can knock out quickly while waiting to do something else.

I'd already gotten three done before taking this pic so this is a shorter post-it list than I started with, plus I did a few things that never even made it to a post-it. 

Monday was a bang-up day:

  • I got this read for class. (You can read my review on GoodReads--not one of my faves but makes some good points.)
 
  • I got my sewing room/office vacuumed, desperately needed after the Fidget Quilt Fabric Fall-out last week and the fact that this one (and his less-sheddy furry compatriot) hang out in my office. You can see he's already managed to spread some of his chew-toy detritus on the carpet again.
 
  • I finally got this hung up. This was a finish from probably two or three years ago--no, I didn't do the stamping/hand-dyeing; I bought them from a vendor. My contribution was design, execution, and hand-stitching. The stopper was finding an appropriate stick for the hanging. Of course I get the bee in my bonnet to take care of it this afternoon when it's about 30 degrees and sleet/snow outside, rather than last week when it was in the 60s. Go figure.
  • I got all the #BDSI winnings in the mail (thanks for sending me your addresses fast, winners!) plus winnings from a previous giveaway that you winners have been oh-so-patient about me getting out!


And I also drove across town to go to the bead store as I needed a different size bead in a color I already have, plus two other colors; and also planned to stop at the LQS in the same plaza to get border fabrics for the Jacob's Ladder. Sadly, the bead store was closed and I couldn't find anything that spoke to me at the LQS, so that was to no avail. I did, however, find two of the three beads I needed at a nearby Michaels, and meet my daughter at the mall on that side of town so we could exchange shoes I'd gotten for her and her brother and guessed wrong on sizes in both counts (hazards of having adult kids!). And then my husband met us and we went out to dinner, then all three drove home in our separate cars during a winter storm advisory. 40 mph all the way home. So glad to get home!

Tuesday--Less Stellar:

Today I've spent most of my day on classwork, but I did also have a hair appointment in there. After writing this post, I'm sitting down at my sewing machine, finally, to work some on that Jacob's Ladder. It's just so not my favorite kind of sewing...hard to get myself motivated other than to remind myself, "I'll be so glad to get this done!" However, I have started the new season of Serial so I'm looking forward to listening to more of that. Off I go...

Craftsy Class Review: Bead Embroidery--Beyond the Basics with Myra Wood

Online Machine Embroidery Class

Fair warning: Adding beads to your embroidery is pretty addicting. I'm still working on embroidering my first crazy quilt block because after adding a little bit of beady-bling to the first section I embroidered, I'm suddenly off and running with those beads. Every section now has beads added, and I'm finding myself planning my embroidery designs based on where I'll be able to add the beads. Who knew? (Knitters and crocheters, check out the very end of this post for including beads in those crafts--you too can join in my addiction!)

My sudden increase in using beads meant that I was looking for as many ideas as I could get, so I quickly dove into Bead Embroidery: Beyond the Basics with Myra Wood.

Bead Embroidery: Beyond the Basics is a sequel class to Myra Wood's original Bead Embroidery class which I reviewed a few weeks ago. If you've never used beads before, you could certainly start with this Beyond the Basics class, but I'd recommend starting with her other class first as this one only has a short segment about the basic stitches. In fact, within a few minutes of watching the first lesson, I realized this class would be a "watch only" class for me. Beyond the Basics focuses on pure beadwork, rather than beads added to embroidery projects (as in her first class). This class is about how to do those beautiful, wonderful, over-the-top bead encrusted accessories such as amulets, cuffs, buttons, and boxes (etc.). Those are something I enjoy looking at and can appreciate, but it's not at all on my radar to do at this point. 

My quickly-growing bead stash

My quickly-growing bead stash

However, even if this style of beadwork isn't something I'm doing right now, I don't feel that watching the class was a waste of time. First of all, who knows? Someday I may decide I need a big ol' bead encrusted amulet necklace that's just the right finishing touch on a special outfit. Not something I see happening anytime soon, though. However, mostly, I did pick up some good information about color planning and design that's been useful as I've been doing the mostly-embroidery-with-beads-thrown-in work on my crazy quilt block. Besides, after watching this class, I could see myself adding beaded fringe to the finished crazy quilt since it'll likely be a wall-hanging and, if I do, lesson 7 will come in very handy.

So, dear readers, it's really up to you to decide what your goals are for learning bead embroidery. Do you mostly want to add beads as accents to your embroidery? If so, Bead Embroidery would be the class for you. If, however, in your viewpoint The Bead is the Thing, then you'll want to ratchet up to Bead Embroidery: Beyond the Basics for sure. 

In either case, Myra Wood is an excellent teacher. She takes you step-by-step through each stitch or technique and discusses how to fix it if things go awry. The information about products to use is very helpful, especially when it comes to making cuffs or things you need to be able to bend; she also gives extremely helpful tips about covering edges and gaps that may appear.

The invasion of the beads

The invasion of the beads

This is definitely a technique class rather than a project class. Although she makes several suggestions of projects (a bracelet/cuff, amulets, beaded boxes, fringe on lampshades and such) and gives some verbal direction as to how to do them, there aren't a lot of step-by-steps for them. The only class project that's covered in the downloadable class materials is the bracelet/cuff, and even that is definitely sketchy in the materials. It doesn't really give a pattern or dimensions, just a suggested design. If you choose to do any of the projects she talks about in the class you'll be listening to her verbal directions and figuring a lot of it out on your own.

As always, I highly recommend reading the discussion threads in the class itself. You'll pick up a lot of good information from her responses to other students' questions. Plus, there's some nice eye candy as people post pics of their works in progress. Also, do check out the student project section for the class (which you can do without buying the class)--great inspiration!

The Basics

  • Seven classes, from 18 to 22 minutes each.

  • The first lesson talks about materials and a little about overall design; lessons three and four cover additional design considerations such as focal points and dimension. 

  • Lesson two is about the four basic stitches used in this type of bead work.

  • Lesson 5 gives basic instructions about how to finish off projects such as a beaded cuff and buttons, as well as how to attend to the edges of the beadwork for any project.

  • Lesson 6 is how to do beaded embellishments and appliques, which a very helpful tip about using store bought applique patches as your foundation for the beadwork.

  • Lesson 7 is fringe and beaded accents.

I enjoyed Bead Embroidery: Beyond the Basics with Myra Wood even if I won't be doing this level of beadwork anytime soon. As I said above, there were a lot of good tips and design information in this class that have been useful to me as I've been doing my more embroidery-based beadwork. Certainly, if you're into doing some serious beadwork, I'd highly recommend this class!

P.S. For you knitters out there, did you know you could also play with beads? Check out Laura Nelkin's Knitting with Beads or Betsy Hershberg's Brilliant Knit Beads! Also, if you crochet, there's Amazing Crochet Textures with Drew Emborsky that includes beadwork.

(Disclosure: As a Craftsy affiliate, clicking on Craftsy links in this post help support my podcast and blog. Thank you!)


#BDSI wrap-up and looking ahead to #NYSI

Hey, everyone--thanks so much for joining in the Boxing Day Sew-In (#BDSI)! Lots of people got lots of stuff done and those who weren't able to actually be at their sewing machines had fun checking out everyone else's pictures. Thanks to those of you who played along with my giveaway! I drew the four winners randomly and the names are posted on the Rafflecopter widget on the original page, plus I've already emailed those four winners. So--if you see your name and aren't sure if that's you, check your email. If you don't have an email from me, it's probably not you. Sorry!

As for my #BDSI, I spent quite a bit of my day doing embroidery (with beads--woo!) as I was too fried to trust myself at a machine with sharp pointy things going a mile a minute. As it was, I jabbed myself a couple of times with my embroidery needle but for the most part, the day was blood-free. I count any blood-free day as a good day. 

My #BDSI is continuing as I'm on vacation this week. Today (Monday) I did some more class reading (finished book 2 for my January class--woo!) and then did a much-needed cleaning of my sewing room/home office. Now everything is all ready for me to get back to work on my sewing--which is my after-lunch plan. However, as the question has been posed on Twitter...at what point does #BDSI become #NYSI (aka New Year's Sew-In)? 

I won't be doing a giveaway on #NYSI and I'm not even positive how much I'll be at my sewing machine as the day hasn't become clear to me yet. But I'm pretty sure I'll at least get some embroidery time in. Meanwhile, I know lots of other folks are already gearing up for #NYSI so if you're on Facebook or Twitter/Instagram, be sure to post pics of your progress or check out what other people are doing!

Two Christmas Finishes

image.jpg

(The #BDSI giveaway is still live until midnight Eastern time tonight, Sunday! Just go back one blog post to enter.)

I can finally post the pics of the pudgy bird garland; I gave my MIL hers a couple of days before Christmas although I snuck it into the house and hung it across her tree while she was occupied with other things, so she didn't see it until a few hours later. She knew it came from me, though, so I got a phone call immediately upon its discovery.

If I were to make this again, I'd do two things differently: 

1. Cut both sides of each bird at the same time rather than separately. No matter how accurately you try to cut, that darn felted wool always scootches so I had to do a lot of trimming once I put the birds together to get them to match. 

2. Rather than inserting the ribbon between the bird halves, I'd just put them all on one side of the ribbon. That way I could've stitched the birds together and, again, kept them evenly matched.  

image.jpg

Here's the second one I ended up making and keeping--if you don't know the backstory, I talked about it a couple of podcast episodes ago.

It does look pretty cute hanging on the mantle. Especially when it's largely covered up by other stuff. I don't like this one as well as the other because I attached it to the ribbon differently and the end result wasn't stellar. Oh well, lesson learned. And that's why my MIL got the other one.  (Note the quilted postcards that are now a permanent part of my Christmas decorations--thanks to a couple of postcard swaps hosted by Sandi of Quilt Cabana Corner podcast.) But no, I didn't make any of those stockings. Someday...

image.jpg


Here's the first of the two framed embroidery projects I did for my daughter to hang in the kitchen of her apartment. The patterns are from Kelly Fletcher Design, or KFNeedlework Design on Etsy--great shop! 

I changed up the colors from her original design because my daughter likes blue,though the colors in the original design were quite nice. 

 
image.jpg

And here's the matching project. Kelly Fletcher actually has several designs revolving around tea that are all quite wonderful. It took me awhile to decide which I wanted to do.

I also bought another of her designs to do just for me when my schedule allows; she has a couple of others that I'm looking at for future projects. I really enjoy her work--great stuff! 

Now I'm only working on one quilty project for someone else--everything else is just for me and for fun! Woo!

Welcome to #BDSI: Boxing Day Sew-In (and Giveaway)

Woot! It's Boxing Day! 

Okay, well, for those of us in the U.S. that probably doesn't mean a whole lot. But it sounds a lot more interesting than "the day after Christmas." There are a variety of explanations for the beginning of the holiday but generally it was the day that tradespeople (and servants) got extra tips or gifts for having provided good service through the year. It sounds to me, from our friends in those countries that do actually observe Boxing Day, that it's become something akin to our U.S. Black Friday and is mostly known for crowds at malls. 

Hey, I'm willing to stay home to avoid the crowded malls in Canada, just like I stay home to avoid the crowded malls in the U.S. on Black Friday. Another great excuse for a Sew-In!

The Giveaway

To celebrate Boxing Day, I'm giving away four sets of fat quarters--one set to each of four lucky winners!

Ooh--black, white, and red! Great combination for a bag or zipper pouch!


Got a Scrabble lover in your life? This set would make a great totebag or mug rug (with room for cookies).


This sophisticated stripey set could make a slick cosmetics bag or professional-looking technology sleeve.


This beautiful leaf print and coordinates would make a lovely table runner--get a head start on your fall seasonal projects!


Or use them any way you want! I'll be choosing which one I'm sending to each winner--so it's a bit pot-luck. But all of them have tons of possibilities!

To enter my #BDSI giveaway, just leave a comment on this blog post about what your current quilty (or sewing, or embroidery) projects are. You'll have a couple of other ways you can enter too--the more ways you enter, the more you increase your chance of winning! (Remember if you leave a comment on this blog you need to still let Rafflecopter know you've done so.)

Enter here!

This giveaway starts at one minute past midnight (EST) December 26 and ends at one minute to midnight on Sunday, December 27. I'll be doing my drawing on Monday, December 28.

(The fabrics are quilt-shop quality and unwashed. My home is smoke-free although I do have 2 dogs.)

Looking forward to getting your responses. Hail, #BDSI--Quilt On!

Get Ready for #BDSI

I've got my Boxing Day Sew-In (BDSI) blog post ready and scheduled to go live at just past midnight (Eastern time) on December 26th. You'll want to check it out--there's a giveaway involved!

The giveaway is open until midnight December 27th (Sunday). I'll be doing the drawing sometime on Monday the 28th send posting notifications in this blog and by email. So stay tuned!

Want to play along with #BDSI? Just join in the conversation on Twitter/Instagram with the hashtag #BDSI, or post on the Quilting...for the Rest of Us Facebook page or the #Twilters Facebook page. (You need to be invited to join the Twilters page as it's private. Send a FB message to any of us podcasters/Twilters, let us know who you are and that you want to get into the Twilters group, and we should be able to make it happen.)

See you Saturday!

A fast finish: Fidget Quilt

I will talk about this on my podcast this week, so if you want all the background and more detailed information about (1) how this project came about and (2) why I went the direction I did with it, give the episode a listen (whenever I manage to get it posted). Meanwhile, in a nutshell, my father-in-law has a rare form of Alzheimers. Like many people suffering with dementia, he has a habit of constantly fidgeting with things in his hands--napkins, blankets, handkerchiefs.... So, as quilters tend to do, when they see a need, they figure out a way to turn it into a quilt. "Touch quilts" or "Fidget quilts" for those suffering with dementia are a thing.  

image.jpg

I did some research on fidget quilts but ultimately I decided to keep mine really simple. He isn't looking for things to do, so much--in other words, buttons, velcro, ribbons, and the like usually included on fidget quilts. He just crumples and smooths, picks and pokes. So I went for physical texture through using very touchy-feely fabrics and good visual texture and contrast in color. (Gallery of fabrics below.) He's a life-long Buffalo Bills fan, so that was my thematic jumping off point. 

It finished to about 36x36", give or take. It's as close to square as something with such a huge variety of fabric types was going to get without me making myself crazy. Also, I was trying to get it done quickly enough that I could get it to my father-in-law in the hospital so he'd have something more interesting than just the hospital blankets to mess with. I didn't mentally commit myself to giving it to him, though, until it came out of the wash as with so many different types of fabrics involved it could've turned into a hot mess. Different shrinking rates, possible color bleeds--the opportunities for it going horribly awry abounded. Fortunately, it's workable. Not my finest work from an accuracy perspective but it didn't need to be--just fun and functional. 

One of the nurses was walking by his hospital room when I gave it to my father-in-law, and she immediately popped in to see it, saying, "Oh, I just love these quilts!' So that was a nice unexpected affirmation. My mother-in-law called me yesterday to let me know that my father-in-law has been using the quilt exactly as I'd hoped and won't stop messing with it. He's also the one who keeps reminding her to take it home with her when she leaves the hospital each night so it won't get taken. I'm really glad it's meeting its purpose and has brought some joy although, as quilters understand, just the process of making it was therapy for me.

Next on the agenda: Getting out the vacuum. That red furry fabric made my sewing room look like a teddy bear crime scene. 

Crazy Quilt Slow Stitch-a-Long: Second Crazy Quilt Block

image.jpg

I'm actually not being as slow on my stitch-a-long at the moment as I'd thought I'd be. I figured I'd get several blocks done now before I start school again--that way I can just work on embroidery in the pockets of time I get once I'm back in class.

So, to whit: I've now got my second crazy quilt block pieced. It sat for awhile because there were some gaps that I had to fix and I had a couple of other projects I needed to knock out first. When I got a random few minutes earlier this week, though, I was able to fix those gaps and call the block done. Well, almost done. I still need to stay-stitch the outside edges so it doesn't drive me nuts while I'm embroidering

I don't like this one nearly as well as my first block. Partly, I tried to get more adventurous in the fabrics and I'm not 100% behind my own choices, but that can probably be fixed with some clever embroidery. The other part was simply my struggles with filling those gaps that appeared. I've decided I'm not a fan of this particular method.

For those of you playing along at home, this is the second block style in Allie Aller's Crazy Quilt class on Craftsy: curved piecing using templates. The curved piecing wasn't a problem at all, but some of the fabric pieces just weren't big enough to fully cover the places they were supposed to cover, somehow. Again, the nice thing about crazy quilts is you can just throw some more fabric on--it's just a little harder to work that out with the curves than it was on my first block that was all straight lines. I tried to keep paying attention to balancing color and design as I was adding extra fabrics to cover gaps, but I still think it would've looked better had I not had to add three extra spots of fabric. Oh well--again, in the grand scheme of things, when I put several blocks altogether, this probably won't be an issue at all.

Her next block style doesn't include templates. Yay! I'm looking forward to digging into that one, but I'm giving myself a few days before kicking it into gear. 

Don't forget to check out the progress of other folks who have joined the Stitch-a-long. You can join the Flickr group even if you're just a lurker!

Craftsy Class Review: Bead Embroidery with Myra Wood

I'm digging this one out of memory a bit because I actually finished this class several months ago. However, it goes to show the value of Craftsy classes that I was able to review material in it again this past week when I was doing some beadwork on my crazy quilt block!

For those of you doing our crazy quilt slow stitch-a-long, you will definitely want to pay attention to this review. For the rest of you--it's still really good stuff, even if you're not playing in our sandbox right now!

Bead Embroidery with Myra Wood is an excellent class for learning how to add some bling to your projects. I'm not interested (at least, at this stage) in doing a bead-encrusted-something-or-other, but I do like a little subtle shine here and there on the right projects. I'd bought and watched Bead Embroidery last summer when I was plowing through every hand embroidery class Craftsy had going at the time, even though I didn't really know at that moment what I might throw beads onto. But when I was doing my first bit of embroidery on my first crazy quilt block last week, I realized that a touch of beadwork was exactly what was called for. 

"I know how to do that!" I exclaimed in my head. Or it might have been out loud. I'll never tell.

It's really hard to get a decent picture of bling but trust me, there's a little sparkle going on here!

It's really hard to get a decent picture of bling but trust me, there's a little sparkle going on here!

I'm now going back and referencing the class more fully again--I could easily recall the basics that I used in this particular instance, but I have plans for more complex beadwork coming up and have been reviewing Wood's tips and techniques. I also bought more sequins. Because everyone needs more sequins in their lives, apparently. (Although I've now learned that sequins are a lot like working with glitter--they end up everywhere. The Doofus was looking quite festive as he slept on the floor next to the table where I was working.)

I got so much out of this class that when her sequel class went on sale, Bead Embroidery: Beyond the Basics, I bought that too, though I've not started watching it yet. I want to be able to work my way through more of the techniques in the first class before I get ahead of myself!

Anyway, back to the first one...

There is a project for this class that was tempting, but I decided to stick to using the techniques on my own projects. I will say that it's definitely worth taking a cruise through the photo gallery of class projects because there is some beautiful work represented! I found Myra Wood's presentation style very comfortable--straightforward but not stilted. This class is the one that convinced me to buy a new style of embroidery hoop that I love. Although I use other hoops and (gasp) even go hoopless at times, the combo hoop is definitely good for beading.

The class materials, while predominantly geared at the class project, do include useful information about supplies in general. In terms of the class project, the materials include the design to trace as well as a stitch guide if you want to follow the design exactly--it's all very clear to follow.

So...I'm off and running! Just watch my future crazy quilt posts to see the benefits of this class!

The Basics

  • 8 lessons, ranging from 13 to 25 minutes, although the vast majority of them are over 20 minutes long.
  • The first lesson is some introductory material and information about needles, hoops, threads, and beads.
  • Lessons two through six are a wide variety of stitches and designs. The classes are organized as categories, but each class has several types of stitches and/or variations on the basic stitch. If you're doing the class project, she'll show where each stitch shows up in the project. (Even if you do the project, there's a high level of variability in the project design so you can still very much make it yours.)
  • Lesson 7 covers ways to add that perfect finishing touch to your bead design--assessing gaps and adding just a little extra something. It also includes a gallery of inspiration.
  • Lesson 8 gives the final information about putting together the class project. If you're not doing the project, you'll still want to watch this lesson as she addresses some issues common to most embroidery/bead projects such as pressing out hoop marks in the fabric and such.

I can't wait to dig my needle into more beadwork, so to speak. I highly recommend Bead Embroidery with Myra Wood. Keep an eye out--although it'll be awhile--for my review of her sequel class as well!

(Transparency statement: As a Craftsy and Amazon affiliate, using the Craftsy and Amazon links in this post help support my podcast and blog. Thank you!)


Craftsy Class Review: Building Better Bags--Interfacing and Structure with Sara Lawson

I admit: I can get obsessive sometimes.

Yes, I'm so determined to get more comfortable with bag-making that I bought Building Better Bags: Interfacing and Structure with Sara Lawson (of Sew Sweetness).

Nope, still really don't like making bags. Probably never will--it's just not my bag (ar ar ar). For some reason, though, I'm feeling a bit stubborn about making myself get better at it. As I think I've mentioned in previous reviews, one of the big issues when it comes to following patterns and tutorials for bag-making is that I didn't come to sewing from garment-making, I came to it from quilting. I had to learn how to stitch in a straight line and keep an accurate 1/4" seam and that was about it.

So, one of my weaknesses when it came to sewing bags has been a lack of knowledge about interfacings. One doesn't run into interfacings much in the quilting world. I'm figuring it's lucky I had even absorbed the definition of the word from my Mom's years of garment-sewing when we were kids and before we rebelled against wearing homemade clothes--a rebellion, however, that had a happy ending as it's what propelled her into the world of quilting. But I digress.

When I saw Building Better Bags: Interfacing and Structure with Sara Lawson pop up on sale, I decided that although it would probably be a bit like watching paint dry, it was information I should probably have. Plus, I do really like Sara Lawson's bag designs--I'd like to get comfortable enough in my skills that I could tackle some of her more interesting patterns and not end up wanting to throw things or swearing a blue streak through the entire process.

My goals are small, really. Less throwing and swearing. That would be good.

I have to say--the class did have really good information. I do feel like I have a much better understanding now of the variety of interfacings and stabilizers that are available and what each one of them brings to the table. I feel like I could more easily approach some bag patterns and perhaps substitute different innards if I want a different result. So that's all really good--and I'm glad I have the class for reference in later bag-making endeavors. I would have liked Sara Lawson's presentation style to be a little more relaxed in the class, but she did give the information very clearly and in a very easy-to-understand manner. 

I immediately felt the benefit of the class, by the way, when I started watching again the Crazy Quilt class with Allie Aller and she referred to the interfacing/stabilizers she used. I knew what she was talking about now!

This is purely an informational/reference class: There are no class projects, although she shows tons of examples from her really wonderful bag designs. (Hence, no pictures to share with this post.) The class materials include an excellent reference chart for stabilizers and interfacings that I'm going to hang on my wall to check whenever a pattern calls for a particular brand that I can't find, or just says the type and I have no idea what they mean. 

If you're an old-hand at this kind of thing, you could probably bypass it. But if, like me, you have only passing reference to the fact that there even is such a beast called "Interfacing," you will find this class tremendously helpful. If also, like me, you're a relative newbie on the bag-making scene--take advantage of this class earlier in your journey down this path than I was able to. This information would probably have lessened my frustration level somewhat in my prior bag-making endeavors. 

The Basics

  • 8 classes, ranging from 10 minutes to 23 minutes, although most are about 12-15 minutes.
  • Lesson one is simply a brief introduction of Sara Lawson and Sew Sweetness designs.
  • Lesson 2 gives the foundational information about what interfacing is, how to choose and purchase the best one for the job, and how to test it before committing your project to it.
  • Lessons 3 through 5 cover the different weights and types of stabilizers in categories, and she gives very helpful tips for how to use each with the most success (tips for sewing, fusing, and so forth).
  • Lesson 6 is entitled "Structured Reinforcements" and covers the other types of materials you can use as a stabilizer, how to do a false bottom, and reinforced handles.
  • Lesson 7 is about creating and attaching bias binding for seams and how to make and install piping.
  • Lesson 8 offers great finishing touches appropriate for any bag design, and how to care for your bags long-term.

So, while not the most exciting class I've ever taken, in terms of the information Building Better Bags: Interfacing and Structure with Sara Lawson presents it's a solid addition to my repertoire. I do recommend it if you've had the same questions swimming in your head as I have!

(Transparency statement: As a Craftsy affiliate, using Craftsy links in this post help support my podcast and blog. Thanks so much!)