Closet Matters (Update on Style Project)

I won't only be talking about clothes and closets from here on out...no worries! (I've actually been doing some embroidery lately!)

Just thought I'd do an update on a couple of other changes that my whole "trying to get a fashion sense" has generated. 'Cause if I was finding certain stoppers in my closet, my guess is some of you may be finding the same.

It really is a snowball thing. Once you start examining one thing, you realize you have to take care of this other thing, and oh yeah, this other thing. When assessing why I wasn't wearing/using certain items in my closet, I came to the conclusion that in many cases it had nothing to do with the item itself--it had to do with how easy it was for me to access or use it.

As I was sorting through everything, I realized that my closet storage methods for several categories just wasn't working for me. When it's hard to see things, or when stuff falls on your head when you pull something off a shelf, you're far less likely to actually use what's there. My so-called "purse shelf" was ridiculous. I'd kept stuffing my ethnic bags, special-use-bags, and seasonal bags onto one shelf until it was virtually impossible to access any of it. Pull one, you'd get five on your head. Once I'd sorted and culled to get down to what I wanted to use, I decided I needed a different storage solution. Do some googling. Head to Amazon. Buy the purse hanger.

I don't have too many purses so one hanger should be fine. I had to knot my cross-body bag handles a bit so they wouldn't drag on the floor, but overall this new hanger is working swimmingly. I still have a clear plastic, lidded tote on the shelf with my less-used specialty bags, but now I don't have to worry about putting my eye out when I decide I want to change purses.

And scarves. Yikes. First off--true confessions--I have like 40 of the things. That's after the cull. And I could easily buy more. I've got a thing for scarves and wraps and pashminas and such. They're so dang pretty. So scarf-storage is a big deal in my closet. I thought I'd found the perfect solution a few years ago when I bought a few similar to this wooden one.

Well let me tell you, boy, these things have driven me nuts. First of all, thicker/bigger wraps barely fit through the holes. Secondly, when I pull one through, I often get caught up with the opposite end of a second trying to sneak through the same hole and then getting all twisted up. Thirdly, sometimes threads can snag on the wood. Fourthly (?), you can't fold the scarf to make it shorter and still fit it through the whole, so all of my scarves were dragging all over the floor. My late cat used to use my scarves as a cat bed. It got so I was less frequently trying to use scarves because they were such a pain to get on and off the hangers.

Enter google, enter Amazon, enter a new scarf hanger

I think I'm loving it. I only bought one to start to see how it would go, and the test went well: I just ordered the second one. 

First, each hanger holds more scarves than the former ones did so I can get away with two hangers rather than the four I used to have. Second, I can more easily slide them on and off; thirdly, nothing snags; fourthly, I can fold longer scarves in half so nothing's dragging on the floor anymore. These two hangers mean my 40 scarves take up half the space they used to in my closet, too. Bonus!

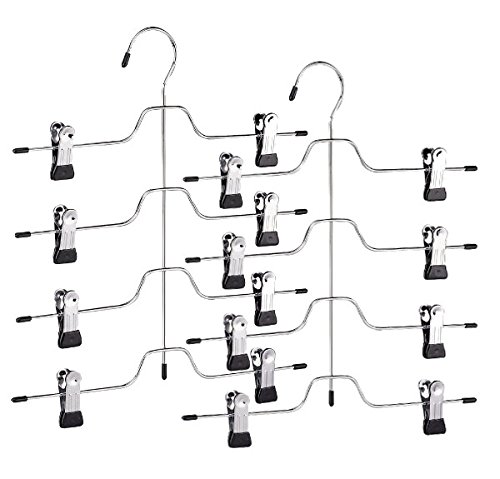
The other big issue I needed to deal with was pants. I've been using skirt hangers for my pants for most of my adult life. I started it back when we first got married and I had a closet the size of a change purse. I had tiered hangers for everything! I don't think I quite knew at the time that there were tiered hangers for pants that didn't involve clips and then I stopped thinking about it. I've always folded my pants in half at the knees and clipped them on. Well yes, you guessed it, whenever I pulled my dress pants out of the closet I'd have to iron them to get those stupid little clip creases out. It got so I avoided wearing certain pairs of pants that weren't as wrinkle resistant just because I didn't want to go to the bother of ironing them every time.

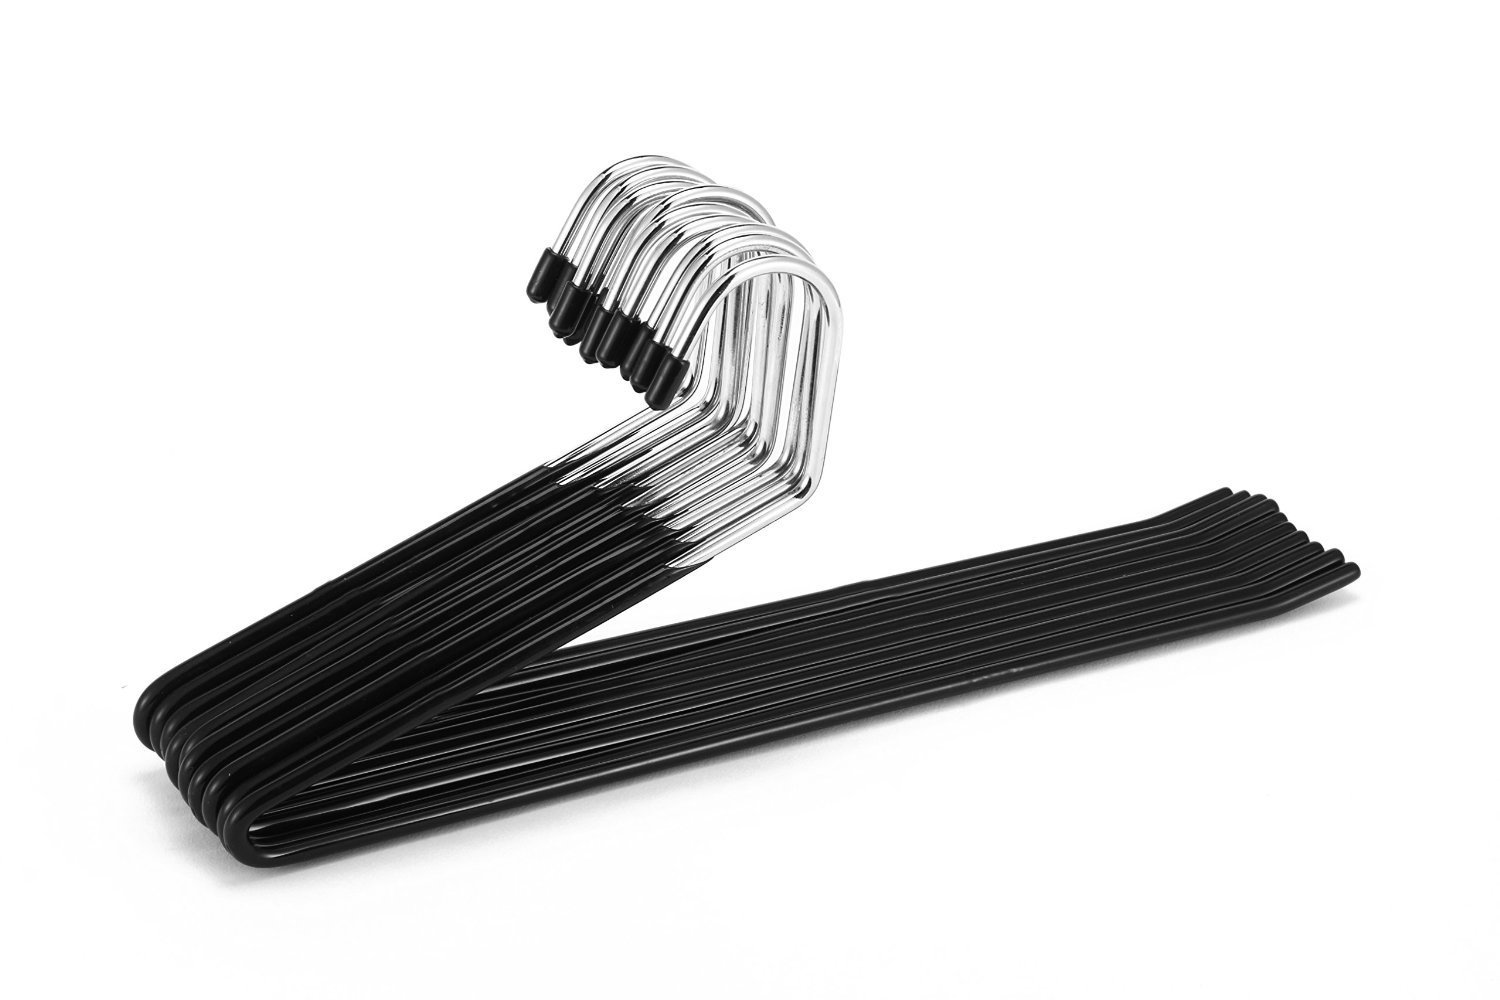
So, in order to actually wear the pants I have in my closet, I found a different pants hanger solution.

These are working beautifully. Yes, my pants take up more space in my closet now but I've got a bigger closet these days and it's not a problem. You know what else? I've actually hung my jeans up now too! I used to scoff at the idea of hanging jeans. Jeans weren't hanger-worthy. But once again I got tired of trying to pull one pair of jeans out of the middle of the folded stack on my shelf and having everything else come a-tumblin' down. Now I can easily see which pair of jeans I want and just get those in my hands without having a wrestling match with the rest of them. 

Finally, I also like to hang my sweaters up so I can see what I've got more easily. You guessed it--bumps on the arms. Those bumps are fairly easy to get rid of just by dampening them down but once again, having to take that extra step often meant I wouldn't bother wearing the sweater (or I'd be walking around looking like I had growths on my shoulders). 

I did a lot of research on this one, though, because I've never owned a padded hanger. The ones I bought (in the picture) are canvas covered, not the frou-frou-satin kind, because I didn't want stuff sliding all over the place. The canvas holds the sweaters in place really well.

Yep, I've spent some bucks on hangers in the last couple of weeks. But I look at that as an investment in having a closet that makes it a whole lot easier to use what's in it.

So, as you look at your own closet--what do you see? Is it easy to use? Can you see and access everything? Are there clothes you don't wear often just because you have to fight to get to them? Because you may end up with a concussion trying to get things out of a stack or a stuff shelf? What are your stoppers? Maybe it's as simple as using a different hanger!

(By the way, nothing here is sponsored by anyone and I don't get any benefit from using the links. Just hoping I can help y'all out!)

OT: Trying to get a fashion sense...

Since I've gotten squat done in terms of quilting or embroidery for the last few weeks, I've had squat to talk about. I finally decided that maybe some of you (ahem--all we women "of a certain age") may appreciate some of the things I have been spending time on recently. This one's kind of long, but I'm letting you into a whole thought process and then making some recommendations...

You see, every so often I decide I should grow up and get a clue. 

Getting advice from the #twilters about pants length (the verdict was, they're a keeper). Crocs Lina Flat--how do I love them? Let me count the ways...

Getting advice from the #twilters about pants length (the verdict was, they're a keeper). Crocs Lina Flat--how do I love them? Let me count the ways...

I've been thinking that dressing at 50 feels different from dressing at 40. Each decade has brought its own styling challenges (and, to complicate matters, its own range of sizes I'm wearing at the time). I still remember so clearly the year I turned 40, walking through a department store and having no idea whatsoever what department I was supposed to be shopping in. I quite literally stopped dead in the middle of an intersection and looked around me in bewilderment. I had to leave and come back again in a few months after I'd gotten over myself. 

Now 50 is the new 30, thanks to the aging Baby Boomers shifting demographic assumptions once again. I don't actually like thinking about clothes, but I have decided I've reached a point in my life and my career where I need to start thinking about these things. I need to figure out how to dress in a way that's ME while still dressing professionally in a way others will accept. (No, it's not right that people judge us by externals. But it's reality.) I need to pay attention to...well, shoes. I am so NOT a shoe person. But I really have to be. Mostly, I have to stop making shoe mistakes. I admire other women's shoes but rarely figure out how to have the right ones for my own outfits. And purses. I've always subscribed to the "one bag for everything" theory but rarely does that actually work.

My biggest issue is that I buy nice pieces, but I don't do well when it comes to putting things together into outfits. Stacey of What Not to Wear was often speaking directly to me. So I'm taking steps towards building a wardrobe that works better. That way I don't have to think about clothes again--I can theoretically just reach into my closet, grab a couple of things, and be on my way. Really, I'm taking what I've learned about creating a really good fabric stash for quilting and applying it to my closet. It only took me 15 years of quilting to realize I could do that. Go figure.

So, first step: I've been subscribing to style blogs, selectively. I've found a few that I've enjoyed for various reasons. I may not like all (or even most) of a particular blogger's outfits but maybe I enjoy her relatable writing style. Or another I may like because of her choice of accessories. Or another because she's a larger person and I appreciate that fashion isn't dependent on the size of one's waist. There's actually only one of these bloggers who 90% of the time wears outfits I could see myself wearing, and I get ideas from seeing the way she puts things together. But I'm not going to tell you which is which--you can guess for yourself. And sorry, my younger followers, all of these blogs are at least for post-40, most are post-50. Younger folks have a lot more blogs to choose from!

notdeadyetstyle.com 

Gorgeousingrey.com 

50isnotold.com 

fashionfairydust.com 

styleatacertainage.com 

wardrobeoxygen.com (this one is geared at all ages but is realistic fashion, not Fashion Week fashion)

awellstyledlife.com 

flattering50.com (she hasn't posted in awhile but still good info on past posts)

over50feeling40 

fiftynotfrumpy --although she no longer blogs here because she turned 60, so she's working on a new website named susanafter60.com. As of this writing, that one isn't available yet so I'm still going through the posts on her fiftynotfrumpy site. However, note--she's still active on Polyvore (below) as fiftynotfrumpy.

Many of these bloggers have Pinterest boards as well.


Second step: I've also started playing around with the website and app Polyvore. It's both an inspiration-curating and shopping app with a social networking twist to boot. I haven't shopped from it as it tends towards the pricey options, but it's good for getting ideas and then going to look for something similar somewhere else. You can follow folks on Polyvore so there are a couple of "over 50s" I've added to my feed: http://stylish-at-50ish.polyvore.com/ and http://fiftynotfrumpy.polyvore.com/ (see her blog above). Polyvore also has home dec stuff and "beauty" (products) as well.


Third step: I'm taking a good, hard look at my wardrobe and assessing it the way I did my stash a few years ago. The major helper in this is another app named Stylebook. I'm switching out my spring/summer clothes for my fall/winter clothes this week (despite it being 85 degrees out there--I live in hope!). As I'm doing so, I'm taking the time to photograph items to enter into my Stylebook "closet" so I can start figuring out how things actually go together into outfits. This process forces me to pick up every single piece of clothing and decide--do I actually wear this, or do I just like it in theory? And if I do wear it, do I like the way it makes me feel when I wear it, or am I tugging, pulling, and constantly feeling uncomfortable?  In other words, do I like this item of clothing well enough to go through the bother of taking a picture of it and entering it in Stylebook? 

There are two bags of clothes that didn't make the cut waiting to be dropped off at Goodwill. I'm working on getting the rest photographed. I also went through all the bad-idea-shoes and the purses and handbags that had gotten stashed on a shelf over the years to decide what deserves to see the light of day versus what can be donated. I several "ethnic" bags from various social entrepreneur/women's empowerment sites that I've never figured out how to use and I'd really like to, so they're now photographed. And I've already ordered a couple of new bags to fill in some situational-gaps. See? I'm already learning! (And no, I'm not waiting until I get the time to make myself more purses--I need something now, not five years from now. That day will come....)

outfit.jpg

I've already started messing around with the really fun part of the app where, once you have pictures of your wardrobe, you can start putting it together into outfits. Since I only have pants and a couple of tshirts and three or four bags entered yet, I can't get super-creative with the outfits at this point. (But see? That's one of those women's empowerment bags in that pic--I love it with that tshirt and I'd never thought of that before!) But you know what? I'm wearing an outfit to a family shindig tonight that has had the components in my closet for some time but I never thought to put them together before taking pics for the app. Don't I just feel all that and a bag of chips?

However--what I'm mostly looking forward to here is how helpful it'll be when I have to pack for vacation or work trips. It has a section where you create your packing list from your "closet" entries. I'll be able to plan my outfits for each day I'm gone all within the app and then create my packing list from there. SO helpful! My work trip this past summer had so many different types of events that I had to keep track of a couple of outfits for every day. Obviously, as I try to pack light, I'm using a lot of items multiple times, which creates more possibilities for confusion. Having a picture of every outfit will be so useful!

Plus, now I will be able to see what I have too many of in my closet (the herd of white camisoles needs to be culled), what I have just enough of (no need to shop for jeans or black work pants for awhile), and what I really need to get to make these individual pieces work together better. I have several nice blazers and sweaters that I haven't worn for a long time because I don't have anything that works layered underneath them. Now I can make a list and shop with smarts. 

So--this is what's been occupying my time as I've been taking breaks from studying and laying in bed for a couple of days with vertigo. I know--very shallow kind of stuff. But it's a nice break from the Deep Thoughts I'm engaged in most days. And I always love a new app to play with. I hope some small piece of this, at least, has been useful to you.

I'm going on a quilt retreat this weekend (woot!)--no worries about what I'm wearing there as it'll be yoga pants and tshirts all the way--and although I'll have to spend time on school work I should also have something involving fabric and thread to report on next week. So stay tuned...

Lake at the site of our quilt retreat...it's gorgeous!

Lake at the site of our quilt retreat...it's gorgeous!

Finally--Jacob's Ladder Revealed

It's finished AND delivered to my brother-in-law and sister-in-law--a wedding gift that's not quite a year late. (There's still a month to go before their one-year anniversary--woot! I made it in the window of "yes, it's okay to give a wedding gift up to one year after the actual wedding.")

This started out, way back last February (2015, that is), as an EQ7 design. Jacob's Ladder and "Road to California" are pretty much the same block, if you're looking for it in EQ.

I knew I wanted to use up as much stash fabric as possible, and I did blue and cream/beige because I thought it was a nice color scheme for something that involves male and female recipients.

Besides, I've always liked that color combination. So there's that.

It took over a year not because it was a hard quilt to make but because there were large chunks of time in there I didn't get to it at all. I took a good run at it right before the wedding, then I took another good run at it right before Christmas...and then I took another run at it after Christmas and got the top pieced so I could drop it off at my LQS for long-arm quilting before I hit a long spate of travel...

And finally, several months after picking it up from the LQS, I finally got it to the couple last night. So I can finally, completely and totally, call it done.

Whole quilt. Can you see the slight "woven" feel to the design? I love Jacob's Ladder because it's a seriously versatile block!

Whole quilt. Can you see the slight "woven" feel to the design? I love Jacob's Ladder because it's a seriously versatile block!

Block detail--to show you the quilting design, not my piecing--although this block's not too bad, considering. 

Block detail--to show you the quilting design, not my piecing--although this block's not too bad, considering. 

Border quilting detail. Plus, I am so pleased with that border fabric--it was the perfect find!

Border quilting detail. Plus, I am so pleased with that border fabric--it was the perfect find!

Corner--you can see the inner and outer border quilting designs here.

Corner--you can see the inner and outer border quilting designs here.

She used a variation of the interior block quilting design in the parts of the block that end up looking more like sashing. Very effective.

She used a variation of the interior block quilting design in the parts of the block that end up looking more like sashing. Very effective.


And to continue my "dogs with quilts" series...

Why are you keeping us out here, Mom?

Why are you keeping us out here, Mom?

Because THAT'S what happens when I don't!

Because THAT'S what happens when I don't!

Some embroidery, then a general health and well-being report

After all, we need to be healthy enough to quilt, right? (Not much time for the quilting at the moment, but doing well on the being healthy!)

First--a  couple of quick embroidery-related updates.

In cleaning my sewing area today (it had gotten stacked during my travels), I took my new lightbox out of its packaging and realized the one I bought is bigger than the one I'd borrowed from BFF/BQF Kate. Apparently she had the 8x12" or whatever it was; I have the 11x17". You don't think about how big that is until you see it laying on your cutting table. I'm going to have to figure out a safe place to store this thing and I'm also thinking "padded lightbox holder" might be something I have to add to my "things to make when I find time" list. Still, it's nice to have the bigger one as I can envision myself doing some larger embroidery projects.

I did also get a little embroidery done last night, and hope to get more done today. I'm very much behind on this embroidery BOM (I got August's block in the mail yesterday and I'm still working on May's!) but I'm not worried. They go fast so if I can just get myself back in the habit of regular embroidery in the evenings, I should be able to catch up before the end.


Okay, now for health and wellness. My goals this week were:

1. Get my calendar organized around current assignments. Done as much as possible. Still waiting on that syllabus.

2. Set myself up a good habit of consistent journal-writing around my thesis topic. Pretty good--I've done some journaling most days. Still need to work out a better study schedule.

3. Prep my groceries to make it easier to eat healthy this week. That really is helpful. I've been eating a lot more fruit and vegetables because they're so much easier to grab-n-go. 

4. Get back into the habits of my gratitude journal and habit journal. I finally started getting back into this midweek. I also started playing around with a vision board app to keep my goals in front of me. I'm not sure how helpful it'll be or how much I'll use it long term but it's provided some entertainment for now, anyway.

5. Get back into habits of moving. 

I've begun using WW's FitBreak app (see below for more about Weight Watchers), although my personal jury is still out on it. It gives you short little one-minute exercises you can do throughout the day, ranging from stretches to office-chair-calisthenics to weight-lifting (using household objects). For the most part, I like the way it's done. However, it has no notification system to reach out and grab me saying, "Hey--time for a FitBreak!" That seems a big miss. I've tried to link it to other reminders but still, I have a goal for a certain number of FitBreaks during the day and I keep missing it because, frankly, I forget about it for hours at a time. (By the way, you don't need to be a member of WW to use the app and it's available on several platforms.)

Meanwhile, I've also been in the pool doing aqua aerobics and aqua yoga again. Ahhh. Plus I've been getting back into my "moving 5 minutes every hour"--I'm probably at about 60% with that but 60% is better-n-nuttin! Unfortunately, taking time for the FitBreaks and pool exercise means my steps are lower, so I'm dropping down the FitBit friends leaderboard. Don't have time for everything!

6. Make a decision about re-joining Weight Watchers and going to meetings. 

I have, indeed, rejoined Weight Watchers. That means I'm back to tracking and planning meals. Now that I've had the new points system explained to me, I'm feeling friendlier towards it than I did when I first ran into it last winter. It does make logical sense--and that's all I require of a system: It needs to appeal to my logic. 

7. Get some personal and household appointment-type-reminders into LifeTopix. Much better at this. I finally dealt with some houseplant issues (!) and got the dogs set up with the groomer--both things I've been wanting to do for weeks but until I got it written down in LifeTopix it didn't happen.

I've also been working on paying attention to time in the evening and getting off electronics around 9p so I can get to bed between 10 and 10:30 so I can be up and perky earlier in the morning than is my habit. I'm back to reading magazines or doing embroidery in the evenings. Much more renewing than hours of mindless iPad games...

Goals for next week:

  • Continue to build up the "favorite meals" and "recipes" database in my WW app so it's as easily as possible to track and plan.
  • Get more regular with walking/FitBreaks through the day.
  • Be more consistent on bedtimes.
  • Do embroidery most evenings.

By the way--it's birthday week. I'll be turning 51 on the 26th. My daughter and MIL cooked up a girls-night-out party for me on Wednesday and we're doing one of those painting-and-wine things. Should be a hoot. Next weekend my husband and I are heading to Buffalo for the weekend as a small getaway and a chance to see my son for a bit. That's my favorite kind of birthday--just hanging out with family and friends. Yay!

Needle recommendation

You may recall that I've recently discovered Tulip embroidery needles from Japan. They really are my favorite needles now. It's hard to describe, but you really can feel the difference in how they slide through the fabric. Love love love them.

I was reminded of them when I was following links and found the YouTube video below. I've only seen these needles in one LQS but got some at a vendor at the AQS Syracuse show and you can buy them online. 

I'm not commissioned by Tulip to do this--I just love these needles and wanted to recommend them to my hand-quilter and embroidery buddies. (I may not be doing much needlework myself lately but I can live vicariously through enabling the rest of you!)

OT: The rest of my life and goals for the week

(Apropos of nothing, but it made me giggle.)

(Apropos of nothing, but it made me giggle.)

And so, now that I'm back into the swing of juggling work and school and such, I was thinking about the fact that I'd rarely have quilty or embroidery stuff to write about and whether I should just put the blog and podcast on hiatus for awhile until I can be interesting again. 

But I'd miss y'all.

So here's what I think I'll do instead. Since we ALL have lots of stuff to juggle, even if our deets are different, and since we probably therefore all have issues around stress and anxiety and keeping ourselves healthy in the midst of chaos, maybe it'll be just as important for me to hold myself accountable to all of you--and hopefully inspire you to do the same--around staying balanced. That means I'm going to set myself a goal of blogging on every weekend about my mental and physical health goals for the week ahead--and if I can sneak some fabric and funky threads in there as well, all the better.

I'm home for a few weeks running. Yay. So my goals for this week are:

1. Get my calendar organized around current assignments. I can only do so much of this as we've gotten our fall reading list but not our fall syllabus so I can't get too organized for that until I know what's due when. I do have follow ups due from my August intensive, though, so I can at least wrangle all that into submission. LifeTopix is my favorite tool for this. 

2. Set myself up a good habit of consistent journal-writing around my thesis topic. I'm in a "synthesis mode" at the moment, in which I've done a lot of the reading I need to do but I need to allow my brain space to play with it all, making connections, and such. So although I still have plenty of reading ahead of me, I think it's just as important--if not more so, at this point--to slow down the reading for a bit and start the brewing.

3. Prep my groceries to make it easier to eat healthy this week. Okay, so I'm cheating on listing this as I already got it done this afternoon. If I don't slice-n-dice all those fresh fruits and veggies, they tend to sit in my fridge untouched until I have to toss them out. Everything is now ready for immediate use. I'll report in next weekend on how well I did actually eating it all.

4. Get back into the habits of my gratitude journal and habit journal. I was doing really well on these until I had my work and school trips so close together. Back at it. They do help me stay focused...and stay focused on the positive. 

5. Get back into habits of moving. I had a "gimme" week last week with all the walking involved in getting back and forth between housing and class in Boston. This week I'm back to having to make an effort. But it's an effort well worth it. Planning some aqua yoga this afternoon to work the rest of the kinks out left over from my long drive home Friday, and back to real exercise tomorrow.

6. Make a decision about re-joining Weight Watchers and going to meetings. MyFitnessPal ain't hacking it for me--nothing wrong with the app, but everything to do with weekly accountability of showing up at a meeting in person. I know I'm happier in general when I feel like I'm taking steps towards making myself healthier, so rather than thinking of the negatives around the whole issue of weight loss I'm working on framing it more positively in my head. And rather than my habitual all-or-nothing approach, I'm reminding myself to take it one day at a time.

7. Get some personal and household appointment-type-reminders into LifeTopix. I've slacked on setting up my reminders for things like "make groomer appointment for dogs" and "renew prescriptions" and such. I'm much happier and more relaxed when I'm not trying to remember things. (David Allen's Getting Things Done is a great resource for helping you learn more about how your brain works when it comes to unfinished tasks!)

That seems like a long list but it's all quite doable as most of those things are integrally related to one another anyway. 

What do you need to take care of so that you can feel a little less stress this week?

P.S. Never fear--I do still intend to talk about quilty and embroidery-y stuff when it comes up, which I still plan on having happen on a regular basis. Meanwhile, all this other stuff clears my schedule and head for actually having the fiber stuff happen. So it's all connected!

A brief quilty adventure: AQS Syracuse

So I haven't been blogging/podcasting because there wasn't a whole lot quilty goin' on up in these parts. I was out of town for work and because I was on my feet pretty much all day every day and doing a whole lotta extraverting during that entire 10 days, I was a slug for a day and a half when I got home. Then I had errands to run. Then I had schoolwork to catch up on. So really, the only crafty stuff that's been done since the beginning of July was a girls-day-out at the AQS show in Syracuse yesterday (Saturday).

My BFF/BQFs Katie and Lori and I were joined by one of Katie's guild friends, Niki, for a really entertaining road trip to Syracuse. I was still pretty beat from my trip but the nice thing about four people in the car is that I didn't have to do much to hold up my end of the conversation. I could just enjoy. And enjoy I did! Good friends, good times.

The show had some very nice quilts but I didn't do much in the way of picture-taking. I wanted to just relax and see pretty things. I did, however, treat myself to a few stops at the vendors.

And lookie what finally came home with me...

Woot! I got me a lightbox! This is the one I've been dreaming of since Katie bought it at last year's AQS Syracuse show. She'd loaned it to me earlier this summer and I fell in love with it even more. I'd done my research and knew how much I'd get it for online (and even in a recent Massdrop offer), so when the vendor at the show quoted me a price, I knew it was a great deal--around $50 cheaper than I'd seen it online--and no shipping!

No more taping patterns and fabric to windows for me!

I made sure I bought that first--glad they were willing to hang onto it in the vendor's booth until the end of the day--so that I'd keep my other expenditures limited. Therefore, other than the lightbox, I only picked up the following:

Another bag pattern. I need another bag pattern like a hole in the head but I sometimes can't stop myself. This one is a great design with a zipper top underneath the flap, a couple of zippered pockets (one outside, one inside), and a few pockets inside that are quite big enough to hold my behemoth iPhone 6 Plus. I ogled another bag pattern for awhile at a different booth but this one grabbed me more.

I asked the pattern designer (running her own booth) to rate the difficulty scale on a 1-10 spectrum. She said it was a 6. We'll see if I've made it to a 6 skill level yet.


And then some luscious hand-dyed ribbons from my favorite Akonye Kena vendor. Not only is it "fair trade" (hand-dyed from South Africa, proceeds shared with the artisans), but he's a trip--gets me laughing every time. I dropped a big bundle in his booth last year but was far more restrained this year, due to the lightbox and the fact that I still have a lot left from what I bought from him last year. 

By the way, there's a calendar on their website of what shows they'll be vending at in the future. Check it out to see if he'll be near you and keep an eye out for him. He wears a kilt. And he's a trip, as I said. I don't think you can miss him.


And because embroidery thread is like potato chips (can't get just one), I fell for this gorgeous variegated Valdani silk floss in one vendor's booth...


...and this collection of Sue Spargo's Razzle in another. Plus a couple of spools of more neutral colors that always come in handy. It was a good price on that collection--$10 for the five of them. Had to hold myself back from buying several more collections. "Lightbox," I kept reminding myself.


I picked up these little dainties at the Tsukiniko inks booth--not even letting myself look at the inks as I've got some in the basement I haven't touched in way too long. But these are fun to imagine painted/dyed and used in my crazy quilt blocks.


And finally, we all know how I feel about pudgy birds. And I'm a big fan of cardinals, too. How could this guy NOT come home with me?

I'm not a huge fan of this kind of project but it would be nice to have him around as a winter decoration...sitting next to my other pudgy birds on my bookshelves.

So--not a huge haul in quantity but I'm so glad to finally have that lightbox. Woot!

I'd originally thought I might get some sewing time in today but ended up spending the whole day working on electronic stuff--getting my laptop, mobile devices, and PC all set up for getting back into school, and setting up one of the components of my dissertation software better (and actually reading the user manual!).  I'd never taken the time to do some stuff I really should've done months ago so now my laptop is much more functional, I should be able to more easily move between devices for certain things, and I hope I can more fully utilize all the cool stuff my software is supposed to allow me to do. Still working my way through some of that, but I feel better about my technological situation now.

So--no podcast again for awhile. I leave town next Sunday for my summer intensive class and I'll either be home Saturday or Sunday--not sure yet. I'm also not sure what my assignment schedule or fall class schedule will be yet to know what life will be like after I get back. We've gotten remarkably little information yet other than reading lists (and only a partial one for fall at that). So that means when they do drop the info for us we'll be hitting the ground running--no wind-up time allowed. I'm sorry to be breaking the Podcaster Contract but I also don't want to post scattered, boring episodes that have little to do with quilting or embroidery since that's not figuring greatly in my life these days. So I'm hoping you'll forgive me for another break in posting for awhile!

Weekend Goals and Craftsy Sale

Once again, I have the pleasure of a largely unscheduled weekend in front of me. I'm treasuring these because they are about to end. Next weekend I'm home, but I leave the following Monday for my summer board meetings and national conferences (work). I get home the 27th, have a week at home, then head to Boston for my August classes. And we all know what happens after that--back to assignments, papers, reading, work travel, and no more free weekends for awhile. 

So my goal is to get the Annie Unrein Ultimate Travel Bag done this weekend--or at least enough done that I can do the finishing touches in the evenings next week. I'd really like to be able to take this with me on my work trip.

I've got the class for this one so fingers crossed.

Join me? Craftsy is having a 50% off sale on some of their top classes this weekend! 


And yes, I'm still plugging away at that binding. Still feel like I have miles to go. We're running out of episodes of Stargate: Atlantis...


(Using Craftsy links in this post helps support my podcast and blog. Thank you!)

Post-4SI Weekend Accomplishments

On the spur of the moment, we U.S. #Twilters declared this past weekend #4SI--in other words, the 4th of July Sew In. Most people were out and about with friends and family for the weekend so there wasn't a ton of activity online, but it was still, as always, fun to keep up with one another. 

So here's what I got done with some mammoth (for me) sewing sessions on Saturday and Sunday:

Catch-All Caddy--done! I'll post a separate blog entry about this one. It was a thing. Although it wasn't as much a thing as the Everything in Its Place Bag or the Cosmetics Bag. But still. A thing.


Designs stabilized and traced for Postcard Cuties Halloween embroidery BOM for months one and two--done! Just in time, too, as we got the email today that month three is on its way. (Yeah, I know, you can't see much in the pictures, but really--they're all done!)


Design traced for Nouveau Witch--partly done. I've got the linen background cut, pressed (which took some doing--it is linen, after all), and stabilized. I haven't gotten the tracing done yet. See above. By the time I got all that done my neck needed a break from looking down so I put off tracing the witch for another day. No pics yet since it's just, well, a piece of linen. 

And gravy: I did get the second snowman embroidered. Just need to get him fitted with his hat, sewn together, and stuffed. I'll post a pic of him when he's totally done. Not that he looks much different from the other guy.

Binding on Jacob's Ladder--not done yet. By the time I got done working on that caddy every day my shoulders, neck, and hands were whining at me so I didn't push it. I'm working on it this week, though. Although I got the BOM embroidery designs traced I'm not letting myself start embroidering them until I get that binding finished, dang it.

Basically--woo for me--I got everything done I wanted to get done! 

I don't have much going on this coming weekend, either, so I am already starting to think through what I might focus on accomplishing. I think I'm hearing Annie Unrein call my name again...

(Craftsy links help support my podcast and blog--thank you!)

Pre-Long-Weekend Progress and Plans

Ooh. I love alliteration.

I do find it helpful to state boldly--sometimes rashly and foolishly--all those things I seriously think I could actually get done over a weekend. And then at the end of the weekend, I generaly look back and say with some sheepishness, "Well, at least I got this one little thing done. That's something."

Here in the U.S. it's the 4th of July weekend. For many of us, that means we have Monday off. I also had slightly-early-dismissal today (Friday). Even though it was only about 90 minutes early, it still feels like a nice way to get a head-start on the weekend.

We'd originally planned to have people over Monday but as it turns out, we're going to be meeting my son for breakfast and then maybe going to Genesee Country Museum for their festivities (including a swearing in ceremony of new citizens--always a highlight). Since we're not actually having people over and I don't have to prep for a party, that means woo! Sewing time the rest of the weekend!

2016-06-26 19.27.47.jpg

First: I plan on finishing the Catch-All Caddy.

It's been in this state since last weekend. That does actually represent good progress made last weekend, but obviously it wouldn't catch or caddy much in its current state.


Also: I plan on getting the binding done on the Jacob's Ladder. 

Miles. I have miles to go. But our family is in the midst of a Stargate Atlantis binge so I've been to working on this all week while watching the Atlantis crew fight off the Wraith. Here's to hoping we watch enough TV the rest of the weekend that I've got it done by Monday!


Finally: I'd really like to get started on putting together the first blocks of my embroidery BOM. 

I want to finish the little Christmas snowman guy I'm working on before starting the embroidery on this one, and I will get back to him once I get the binding done. (He's a "handwork in front of the TV" project.) But I need sewing room time to get the blocks for the BOM together and prepped for embroidery so I'd like to do that this weekend when I have more hours in the day available to me. 

By the way, I've also started thinking through my other new Halloween embroidery project. So that's a possible other endeavor this weekend, depending on time. 

Thanks to Trisha who turned me onto Urban Threads (see the Quilting for the Rest of Us Facebook page for that conversation), I bought a really wonderful Art Nouveau Witch design. Love Art Nouveau. This Halloween design is seriously classy and SO right up my alley. I've pulled out my tracing paper and colored pencils and am starting to think through thread choices. I printed a picture of an Alfonse Mucha painting to use for color inspiration. (Mucha's a fave.) I might toss into the weekend schedule a trip to an LQS that I recall having some great Art Nouveau/Art Deco/William Morris fabrics to see if I can find some borders I could use on her and blend that with color inspiration from the Mucha painting. I did find some pretty nifty possible border fabric from Fat Quarter Shop but really don't need/want an entire half a yard of it, so I want to see what I can get at an LQS first. Unfortunately, said LQS is about 45 minutes away so it would take a big chunk of sewing time out of Saturday, so we'll see what I feel like when I get up tomorrow morning.

So, let's see what happens this weekend, shall we?

Post-weekend progress and errata

I got a lot done this weekend, but I also realized I had two designers confused when I wrote a blog post and spoke on my podcast episode (posted yesterday).

The Christmas ornament embroidery I'm working on is Lynette Anderson Designs. She's from Australia.

The Postcard Cuties for Halloween Block of the Month I'm doing is Bunny Hill Designs. She's not from Australia. She's from the U.S. 

I've fixed the BOM blog post to note the error. I can't fix the podcast episode in which I think I said both projects were Lynette Anderson. Apparently I had too relaxing a weekend and my brain just stopped working altogether. Sorry about that!

Meanwhile, I did make progress!

1. I got the label affixed and the binding put on the front of the Jacob's Ladder quilt. I then got about 36" of the binding hand-stitched to the back while watching Stargate Atlantis (our current summer viewing fun). I haven't done the math to figure out how many inches I have left to go on that hand-stitching. Too depressing. I'm just enjoying the zen.

By the way, tried a new method for keeping the binding organized while sewing it on--I've seen this as a tip in a few places, and it really works! 

If you've got two thread spindles on your machine, roll up the binding and put it on one of them. I was concerned it would get tangled with the thread but it never did--I just kept a bit of an eye on it to make sure. 


2. I made progress on the Catch-all Caddy.

Trust me--that's a lot of progress. 


3. I got the first of the two Christmas ornaments completely done. The second is now on hold until I get that binding done.

He's kinda cute. His button hat is a little off in this picture (you shouldn't see the end of the stitching on the one side) but I just twitch it with my finger and it goes back into place. 

A point of slight interest on the stuffing: I bought myself a meditation cushion a few weeks ago as none of the cushions in my house were the right height/firmness. That puppy was rock hard when I got it, so I kept pulling out more and more stuffing until it got to a comfortable firmness I could handle for meditation sessions. The stuffing is 100% cotton fiber--beautifully smooth and soft, actually. I kept all the stuffing I was pulling out in a bag and stashed it in my sewing room. Came in handy for this! I've still got plenty left--can stuff more little fun things like this, of course, but some may also eventually make it down to my dye studio. I think it would be fun to play with. Way to re-purpose!

So--all of this progress, plus time poolside, a Saturday afternoon nap, and lunch with a friend, adds up to a really wonderful weekend. Ready for the week ahead!

Pre-weekend progress

image.jpg

By working in fits and starts this week (where does that phrase come from, anyway?), I've gotten all the cutting done for the Catch-All Caddy. The blue fabric is very old (inherited from Mom, no idea how long it had been on her shelves) and has been washed several times so even though I used Mary Ellen's Best Press with abandon, it's still a little squidgy. Fortunately it's my accent fabric and mostly used as trim so I don't think think the squidginess* will be a problem.  

Nothing much on the calendar this weekend right now except taking the Doofus to the vet on Saturday to figure out why he's lost fur in a patch on his shoulders (fortunately, he doesn't seem bothered by it), so I plan on spending plenty of time in my sewing room.  

Goals:  

  • Get binding and label on Jacob's Ladder quilt
  • Get Catch-All Caddy at least partway done
  • Finish embroidering the two little Christmas projects I started last weekend.  

I'm keeping my goals reasonable. I have a lot more in my head that I'd LOVE to get done but I always over-expect and under-deliver, so here's for trying to keep my feet firmly grounded in reality... 

*auto-correct did not like this word. "Squid news" was it's replacement of choice. I'm not up on the latest squid news, are you?

Pretty Mail (AKA: Like I Really Have Time for This)

BOM bag.jpg

Yesterday I got the first couple of installments of the embroidery Block of the Month (BOM) that I signed up for at The Quilt Block, Inc., when I was in Exton, PA, in April. Woot!

I ended up getting month 1 and 2 at the same time due to some delays around getting my payment info to them, etc., which is part of the fun-tricky part of doing a LQS BOM from a distance. Still, we worked it out, and it's all good. It was a kick getting a box filled with goodies!


The BOM is "Postcard Cuties for Halloween," from Bunny Hill Designs. My package included all sorts of great stuff to get me rolling!

Even candy corn for a mid-project sugar fix!


There's a jelly roll of fabrics to work with--Moda's Spooky Delights by Bunny Hill Designs.

As you can see if you use the link for the whole project above, ultimately this finishes to a 38" x 36" finished wallhanging. To date, I've never made a Halloween quilted decor item of any kind, although I do have a few patterns I've collected over the years. As I told my daughter yesterday when she was admiring my pretty mail with me, this isn't my usual style. But even if I don't love it when it's done, it would only be hanging up for, at most, a couple of weeks a year. (More likely, the way I usually forget to decorate until the last moment, a couple of days a year.) 

I do the cutting for each block as I work on them, and it looks like I can choose which fabric I want to use each time, so that'll be fun too. The only thing I'm a little worried about is whether I'd end up with two fabrics sitting next to each other in the finished wallhanging (which would bug me no end) so I may end up, for simplicity's sake, just following her picture. That's not normally like me, either, but much of the time I'll be working on this I'll be deeply enmeshed in work travel and schoolwork again and won't want to unduly stress myself out for what's supposed to be a fun project.

I know my limits.


The package also included some Tulip embroidery needles. This is a Japanese brand made in Hiroshima. According to the packaging, they're made in such a way as to make them slide more easily through the fabric. I bought some Tulip needles when I was at the shop but I made the mistake of opening the package and dumping them into my usual magnetic needle case with all the rest, so I have no idea now which is which to compare. I'll keep these needles separate with this project to make it easier for me to get a feel for them.


And then there's the embroidery thread--everything I'll need for the project. This is Cosmo embroidery floss, another product from Japan. I noticed that it's also sold on the Bunny Hill Designs website so she must be a fan of this floss; hence, it's use in her project. 

I'm not familiar with Cosmo, but since it's from Japan, and since Bunny Hill Designs is Australian, I'm thinking maybe Cosmo is more common in Australia...? Any of my Australian/New Zealander buddies want to comment on that? I'm looking forward to using it to compare it with DMC and the other threads I'm used to working with. 

EDITOR'S NOTE: Error here--sorry. I had Bunny Hill Designs and Lynette Anderson Designs mixed up in my head. Bunny Hill is not in Australia, Lynnette Anderson is. So Australian/New Zealanders would have no more reason to be familiar with Cosmo thread than I do!


And just to be extra nice, they included a water soluble marking pen. I already use this type and really like it, so I'm glad to have another!


Month 1 will be fun--I get to start out embroidering bats. Woot! I need to make five bat blocks altogether, but it's a really simple design so I don't think it'll take too long. I will have to practice my satin stitch a little more--I've not gotten that one really smooth yet and it's used for the bats' eyes. The bats are scattered throughout the finished wallhanging on that orange dot fabric included with the package. The official first block includes a cat and spider (on the off-white background). It's got a little more going on, especially in the satin stitch department. If I'm not good at that satin stitch now, I will be by the time this puppy is finished!


Month 2 is another cat block with some lettering. That one is simple enough that again, it should go pretty quickly. (I know, I know: "Famous last words.")

Month 3 comes in July, but I do have a few other projects I really ought to get done before starting on this so I may end up with Month 3 arriving before I've managed to get both 1 and 2 done. I'm determined not to fall too far behind, though!

I'm thinking I may have found the ultimate use for the Annie Unrein toiletries bag--I feel like it would be the perfect project bag for this BOM. It would easily hold all the supplies, so it's just a matter of what size hoop I'll need for the blocks. I'll keep you posted...

Just a little embroidery fun

My guild had a sew day today and although I didn't feel like I could be gone an entire day, I put together a quick embroidery project I've wanted to get at for awhile and stopped by for about an hour or so. It was long enough to get my social fix with my quilty peeps and it was good motivation to finally get these little puppies underway.

I have two identical little kits that I picked up at one of my LQS a few months back. It's from Lynette Anderson's Sweet Christmas Ornaments patterns. There are 12 designs in all and you can choose to make a wallhanging out of them or use them individually as ornaments. I think I bought these right after Christmas and they only had a few of this one design displayed. It's possible they'd started out with the whole set but sold out of most of them before Christmas. I didn't mind picking up two of the same: I thought they'd make nice last-minute gifts and/or I'll keep one/give one, or something. Undecided. The kit came with the design, fabric strips and squares to trim to size, and a wooden hat button. I'm using my own floss. 

I got both of them sewn together and traced before heading to the sew day, then I got partway through the embroidery on one of them while I was there. It's been so long since I've touched my embroidery that I had to re-start my stem stitch three times because I totally blanked on how to get myself going. Once I worked that out, though, it was a relaxing hour just hanging out with my friends and doing some simple stitching. 


Another finish! A New Travel Accessory

Probably not a surprise, given how much I travel, I've been hankering after some updated travel accessories of late. I've been using a jewelry roll that I bought from Etsy a few years back and I really liked it at first. But over the years my necklaces have shifted to bigger, clunkier, heavier things that refused to stay neatly corralled when it was rolled and were always trying to make a break for it out the ends. I began a search for a jewelry roll pattern with pockets that would keep everything more together and was so pleased to find such a thing in a jewelry roll pattern by ModKid/Patty Young Designs on Craftsy. Perfect!

The inside has one lined zipper pocket, four pockets on one panel (two tall, two shorter), and two tall pockets on the third panel. The button straps at the top are mostly for rings but I don't wear any other than my wedding/engagement rings and those puppies never come off. (Not even sure they could at this point; been wearing them nigh on 30 years). However, it's nice to be able to just slip the necklaces on without having to unhook them, and then button everything back down again.

(Photo gallery below will automatically forward, or use forward/back buttons on the sides. If viewing this in a feed reader or by email, the gallery may not appear; you may need to view it on my blog.)

 True confessions: I broke two needles doing the last topstitching as I hit some really thick seams (should've had a denim needle on hand, I guess), but other than that, and the fact that I had re-learn how to use my buttonhole feature on my machine, and I also had to learn how to do a different type of zipper pocket on this one...it all went pretty dang well!

Plus, I got to use up some cute fabric that hadn't found a purpose yet. Looking forward to this jewelry roll becoming a travel companion for the next several years

Finally! A finish that's been a long time a-comin'...

Remember oh-so-long ago when I started Annie Unrein's Travel Organizers class on Craftsy? Remember that I did actually finish the Everything in It's Place bag and post my class review back in the yesteryear? Remember how I mentioned in that review that it would probably "take me six months" to get the second bag done?

Ahem.

At least it's not a full year. Not quite. I'm about three weeks shy of a full calendar--which is, in this case, very similar to being a few cards short of a full deck.

Ah well, it's done. There was a bit of cussing, a couple of broken needles, some major surgery and a mulligan on a whole section of it, then finally just bagging any idea of something I'd be happy with other people seeing when I then messed up exactly the same part the second time and just moving on so I could get 'er done.

This puppy ain't making it to show n' tell at guild. It's definitely a note in the category of "I learned a lot, and mostly I learned I'm never making this stinkin' cosmetics bag pattern again." This is not an Annie-Unrein-Pattern problem. This is all in my execution. And this was a particularly challenging project for someone with my fairly newbie status when it comes to sewing accessories like this.

It actually mostly went swimmingly until the very end. I was extremely optimistic, indeed. And then the whole project went pear-shaped, to make the whole experience sound far too gentle and sweet, in the last couple of steps. The binding is my Waterloo, as it turns out. And Annie sure is fond of her binding--inside and out. I had similar problems with the EIIP bag binding, but this one took those problems and magnified them to the nth degree.

The first little snafu was with the webbing that goes in the handle. I'd had an early piece completely shred on me so I'd had to cut a second piece, which then meant the remainder was a bit too short for the piece it was to be used in. So I had to "franken-webbing" the unshredded part of the discarded webbing back to the longer piece. I tried zig-zagging it together. 

It felt strong enough, but as I was pulling it through the fabric casing the ends shredded again and the whole thing fell apart--which subsequently required about 10 minutes of fishing to get the short end back out of the middle of the fabric tube.

Fortunately, I happened to be on a Google Hangout sew-in hosted by the Stitch crew and got some good advice for options. The one that worked (I believe maybe originally from Nancy Zeiman?) was to wrap a piece of scrap fabric around it and then stitch the fabric to the webbing. Beautiful. Although, by the way, I learned that webbing--made from nylon which wasn't really on my radar--hardens into a tough plastic mess when you accidentally hit it with an iron. (Fortunately, I was able to clean up the iron.)

And then everything was fine for a few more steps (representing a few more hours). And then I got to the binding. Oh well. It's done.

Here's the outside, all hooked up. 

The fabric is a batik that had been given to me as a thank-you gift when I did a speaking engagement in ...where? Can you guess? Yep, Kansas, the Sunflower State. I've held onto it for a few years to try to find the right project for it. I thought it would be fitting to have a travel bag for work made from a gift received through work. And it still is--even if no one ever actually sees this thing. I won't be sending them pictures. 


And here's the inside in all its four-pocket glory.

Strangely, that pouch pocket on the bottom didn't really give me any problem at all. Nor did the vinyl pockets, since I've now got my handy-dandy Teflon foot (or, in the Janome world, the Ultra-Glide). Yep, if you're going to work with vinyl, that is well worth the purchase. My Ultra-Glide foot just skated right over that vinyl with no problem whatsoever. If only I'd just bitten the bullet and bought it when I was working on the EIIP bag. Life would've been much easier!

However, getting the binding on around that same darn pouch pocket was a real... ahem. This is a family blog. There will be none of that language here, young lady.

Now, the real question is--will I really use this when I travel? The jury is out on that. I'm going away with my husband on vacation next week and we're driving so, in that instance, yes, I'll take it for a spin. Luggage space isn't really an issue. 

However, for air travel? Probably not so much. Pam of Hip to Be a Square made this bag awhile back and told me she had problems traveling with it because the hook on the top is too small to hang on the clothing hooks on the back of hotel bathroom doors, which is what you're supposed to do with a toiletries/cosmetics bag like this. So that's kind of a pain.

Of bigger concern is the overall size. Here's a comparison photo with my usual L.L. Bean (well-worn) toiletries bag.

Compared to a bag that I already sometimes have difficulty finding room for in my suitcase, the Annie Unrein bag is a bit of a behemoth. I like to travel really light. In fact, when I'm only gone a couple of days I don't even bother with the L.L. Bean bag--I just use a zippered pouch or two and use as many hotel-provided toiletries as possible.

So the jury's out on how useful this new cosmetics bag will be. I strongly suspect I'll find some other use for it--like as another embroidery project bag or something like that. As long as it's something that doesn't have to appear in public, I'm good.

But it's done. And sometimes, done is even better than not-particularly-good, let alone perfect.

Craftsy Class Review: Creative Quilting with Your Walking Foot with Jacquie Gering

I'm back to the machine quilting classes again. I know, you've seen me take a lot of them. But I do always get some new ideas and a few tips and tricks to help make it a little easier!

Creative Quilting with Your Walking Foot with Jacquie Gering would make an excellent class for a beginner in machine quilting, with the caveat that she doesn't spend a whole lot of time on some of the basics. She does address machine features that are helpful, and she does talk about basting. I've been machine quilting for too long now to be able to judge how easy it would be to learn how to machine quilt from scratch with this class, but I think it would be possible. 

The designs themselves are quite straightforward, as you would expect with a walking foot. I was personally able to watch most of the classes on faster speeds as I was watching for things I didn't already know. I did pick up a few tips for being more successful at some of the walking foot quilting I have already done. It was useful, though, for getting some new ideas.

Since I'm working on the cosmetics bag for the Annie Unrein class, and I needed to quilt some of the components that go into the bag, I took the opportunity to nail two Craftsy classes with a single project.

I've used painter's tape in the past to mark lines so doing it here a la Jacquie Gering wasn't new for me. What was new was doing a second strip as a "registration" line. You use the first line (in this case, the one in the middle) to run the side of your walking foot along to keep your line straight--the registration line is handy as you begin to echo your first line to one side or the other; now you have a second line to eyeball too. That was a useful little tip.

For the first Annie Unrein bag I made (the Everything in Its Place bag), I quilted the units with a meander stitch. That worked really well for the bag but in hindsight I probably should've done a much tighter meander as I ran into problems occasionally along the edges as I was piecing--in some cases there were gaps between meanders on the edge and the fabric was pulling away from the batting a little as I pieced two units together. It wasn't a huge issue--just required some attention. But having had that experience, this time I decided that one of Jacquie Gering's suggestion of using the curvy decorative stitch on my machine might be just the ticket.

I like the way it looks. I hated how stinkin' long it took to do. Two quilted pieces, neither all that big, took me about 2 1/2 hours all in. Not only do you have to go slower when doing decorative stitches on a walking foot (as Gering says repeatedly in the class), I was using a 28 weight thread and if I got going too fast, it shredded. I finally turned the speed on my machine down to keep me from getting bored and hitting the pedal to the floor. I can't even begin to imagine using a stitch like that on a whole quilt. She must have far greater patience than I do.

Gering offers good ideas on choosing designs for various types of quilts and even though, again, because I've been doing this awhile I was already familiar with most of the designs, I did pick up some ideas for future quilts. Also, she's a very good, thorough teacher.

 This definitely a good class for anyone new to machine quilting to give a try. It's also good for experienced machine quilters if you've never thought of your walking foot for anything other than stitching in the ditch. Gering has a second Craftsy class on the same topic, Next Steps with Your Walking Foot, if you really get into it. I don't own that one so I can't speak to it, but I imagine it would be equally good.

The Basics

  • 8 lessons, ranging from 18 to 40 minutes (most are around 25 minutes). 
  • Lesson 1 discusses helpful features to have on your sewing machine for machine quilting, as well as a brief overview of how to prepare your quilt sandwich
  • Lesson 2 goes into the walking foot itself in detail. She also addresses straight line (matchstick), crosshatch and grid quilting.
  • Lesson 3  through 6 are different families of design: using decorative stitches, radiating designs, curves, spirals, echoes.
  • Lesson 7 is about quilting text--a slightly different technique than I've seen before and one I'd like to try
  • Lesson 8 is quilting strategies--supporting large quilts, etc., as well as the all-important "ripping out stitches." She does also include some discussion here about choosing quilting designs.

Creative Quilting with Your Walking Foot with Jacquie Gering--worth your while!

(Transparency: Using Craftsy links in this post helps support my podcast and blog. Thank you!) 


Craftsy Class Review: Slow-Cooker Savvy with Michele Scicolone

For awhile there, the only Craftsy classes I had time to do were the cooking ones. After all, a girl's gotta eat even in the midst of writing papers! That being said, this is another class I finished awhile back while snow was still on the ground.

Let me clarify, since we had snow on the ground well into April. I finished Slow-Cooker Savvy: Make Your Best Meals with Michele Scicolone in early February. Just the [normal] season for slow-cookers. Nothing like smelling your dinner cooking all day long when the snow is falling outside your window. (Although by mid-April even the smell of dinner couldn't make me feel any better about that snow. But I digress.)

This was a good class, and I tried several of the recipes out of it. I do have to give you fair warning, though: These are not your typical "dump it in, turn up the dial, walk away" recipes. Some of them take a fair amount of work either before the slow-cooker does its job or after. The Beef and Beer Stew, for example, took me about half an hour to get everything ready just to go in the slow-cooker. (That also didn't turn out to be my favorite recipe, but you may enjoy it.)

IMG_0001.JPG

I made her White Beans with Sage recipe, although I didn't have any sage so I did thyme and rosemary instead. I used them as a side dish with some other ingredients here and there over a period of days. I intend to use the techniques again with a variety of other beans as I like the idea of having beans on hand to use in other ways.


The Peking Chicken recipe was quite good. My husband even liked it, which is saying something since he approaches any slow-cooked meal with suspicion, plus I used the chicken thighs the recipe called for and he is not a fan of dark meat. This recipe is definitely a keeper. (That being said, I may do chicken breasts next time to cut him some slack.)


For me, the Beef and Beer Stew recipe, maybe not so much of a keeper. I've got other stew recipes I like better. Still, there are several other recipes in this class that I'm looking forward to trying, now that I have time to cook again. (Even the "dump and cook" recipes take too long when I'm on the road more than I'm home!) For example, there's a pulled pork recipe that's intriguing--I want to try it out to see if it beats my others. Hmmm. Maybe this weekend--more time for sewing if the slow-cooker is working for me!

Michele Scicolone is a polished instructor and has written twenty cookbooks--if you dig this class, you can pick up some of her cookbooks and have all sorts of slow-cooked recipes in your repertoire.

The first lesson talks about the varieties of slow-cookers on the market, and gives pros and cons to several of them. I already own three slow-cookers of varying sizes and after watching this lesson, I've started thinking about getting a fourth for some of the very handy features I don't have on any of the others. She also shares some cautions about using older slow-cookers, such as ones you might find at a garage sale. Michele goes through safety concerns and caring for your slow-cooker, as well as how to calibrate the temperature settings.

The rest of the classes walk through different types of meats, side dishes, and "fast slow-cooking" (frittata and creme caramel). In each, she not only talks about the one recipe used to show the technique but also shares substitutions and basic information about considerations you need to keep in mind for cooking that particular type of food using this method.

I don't tend to use my slow-cooker as much in the summer, for some reason, but I think this class may make me adjust my usual habits. After all, there are some great summer salads using beans, and a frittata would be a nice brunch dish. Something to consider, anyway!

The Basics

  • 7 lessons ranging from 16 to 30 minutes
  • Lesson 1 is an introduction and includes lots of fantastic information about slow-cookers
  • Lesson 2 is cooking a whole chicken (which includes good information about how volume affects cooking)
  • Lessons 3-5 are various types of meet: chicken pieces, beef, lamb, and pork
  • Lesson 6 is side dishes--mashed potatoes, beans, and polenta
  • Lesson 7 is "fast slow-cooking," including an egg dish (frittata) and a creme caramel. 
  • The class materials include a brief list of some of the slow-cookers she talks about in the class, as well as 12 recipes. 

I did find Slow-Cooker Savvy: Make Your Best Meals with Michele Scicolone very helpful. Recommended!

(Transparency: Using Craftsy links in this post help support my podcast and blog. Thank you!)

Craftsy Class Review: The New Chicken Dinner with Ian Knauer

Time to kick in with the Craftsy class reviews again! This one will make you hungry (unless you're a vegetarian like my daughter: sorry!). If you're a carnivore and are looking for better ways to cook chicken, you really need to check out The New Chicken Dinner with Ian Knauer. I finished this class a few months ago but it's one that I definitely keep going back to the well on. In fact, I just did the rotisserie-style roast chicken again last week (pictured below) and am likely to do it again in the next few days. It's probably become my favorite way to do a roast chicken now. 

For the most part, Knauer addresses fairly common techniques for chicken but he teaches different approaches that just have wonderful results. The rotisserie-style chicken (lesson 2) is really the best dang roast chicken I've ever had, and I've made a lot of roast chicken a lot of different ways! It's incredibly moist with a wonderful crispy skin.... Huh. I may make it for myself for dinner tonight even though no one else will be home. It's pretty easy to do and you can change up the flavors of his recipe really easily.

But let me move on. There's more to the class than an incredible roast chicken. (Although it's worth it just for that!)


Well, wait--let me just do one more picture to make you really get hungry: here's the rotisserie-style chicken cut up and covered with a pan sauce from the class recipe. Wowzer. 

I know I made another recipe from this class but I don't know that I took a picture of it. I remember thinking it was also really good. There are a handful of other recipes and techniques I also want to try. If I could only get that roast chicken out of my head. 

Knauer is an enjoyable teacher to watch--very straightforward, offering lots of great information about substitutions or variations on the techniques in each lesson. There are eight recipes in the class materials but, again, with variations there are dozens more possibilities. The ingredients are all quite normal ingredients, easy to find, and the flavor profiles run from fairly traditional American to Italian to Asian. However, again, the techniques are key: Although he uses an Asian recipe to teach poaching, for example, you can do any flavors you want. 

I highly recommend this class--it'll elevate your every-day chicken to make it feel new!

The Basics

  • 8 lessons, ranging from 9 minutes to about 20 minutes
  • Lesson 1 gives good information for what to look for in the supermarket and how to store chicken safely.
  • Lesson 2 is that really wonderful (have I already said that?) rotisserie-style roast chicken. It also includes information on compound butters and a pan sauce, as well as tips for trussing and carving.
  • Lesson 3 is deep-frying. He almost made me want to try it. (I avoid deep-frying for health reasons as well as to avoid a messy clean up!)
  • Lesson 4 is searing both bone-in and boneless chicken (this is the one I did but didn't photography--it was great!)
  • Lesson 5 is a salt-baking technique that I definitely am going to try at some point; it also includes how to salt-bake vegetables as well.
  • Lesson 6 is spatchcocking (or butterflying the whole chicken and grilling with bricks)
  • Lesson 7 is braising, using a recipe that creates a ragu for pasta
  • Lesson 7 is poaching and torching, with information about cooking rice.
    • Many of the lessons also include carving and plating suggestions.
  • The materials include eight recipes, as mentioned above.

The New Chicken Dinner with Ian Knauer is probably one of my top three favorite cooking classes from Craftsy now. (Artisan Bread Making with Peter Reinhart and Homemade Italian Pasta with Giuliano Hazan are two others, although ask me on different days and I'd probably name different ones!) In any case, I definitely, wholeheartedly, recommend this class!

(Transparency: Using Craftsy links in this post helps support my podcast and blog. Thank you!)