

Let me just start by saying, I had a ball with this!
The Craftsy class at hand is Thread Art with Lola Jenkins. My project ended up varying greatly from what she did in the class--so what you see here is inspired by, but not an exact replica of, the techniques she teaches in the class.
I'm hoping you'll see what fun I had with this and want to hightail it right over to Craftsy to sign up for her class!

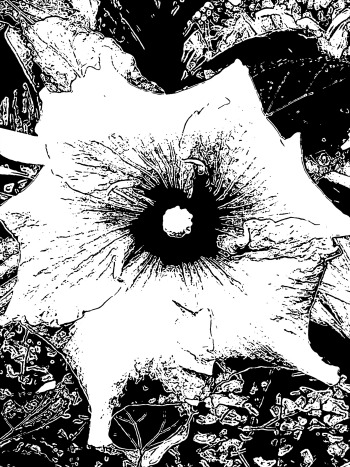
Hawaiian flower, my own photo taken in 2010
The foundation of the class project is using a copyright-free image to base your artwork upon. She gives a lot of ideas about where to get your copyright-free images, and provides one in the class materials (The Girl with the Pearl Earring); it was one I do really like and debated doing myself. But I generally don't want to do what I know a bunch of other people are doing, and it wasn't a portrait I had ever wanted hanging in my house. I went back to one of my own photos (taken in Hawaii in 2010)--one I've always intended to translate into fiber in some way or another.
Photoshopped outline of flower
I'm not particularly good at drawing realistic things freehand, so I used PhotoShop to get an outlined version--more or less. There was at least enough outline for me to follow and trace the main parts.
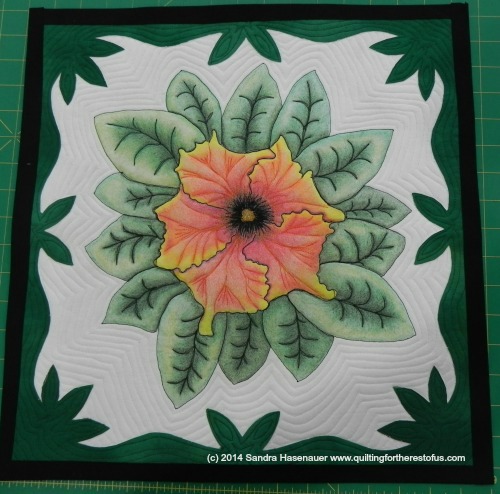
I stuck to the outline of the flower and each petal, plus the center stamen. I knew I'd be doing later quilting to give it more dimension.
I chose to do it on a white background so that the oranges and yellows of the flower would really show up well. I used one of my PFD fabrics as I had nothing else white in my stash that didn't have any print to it.
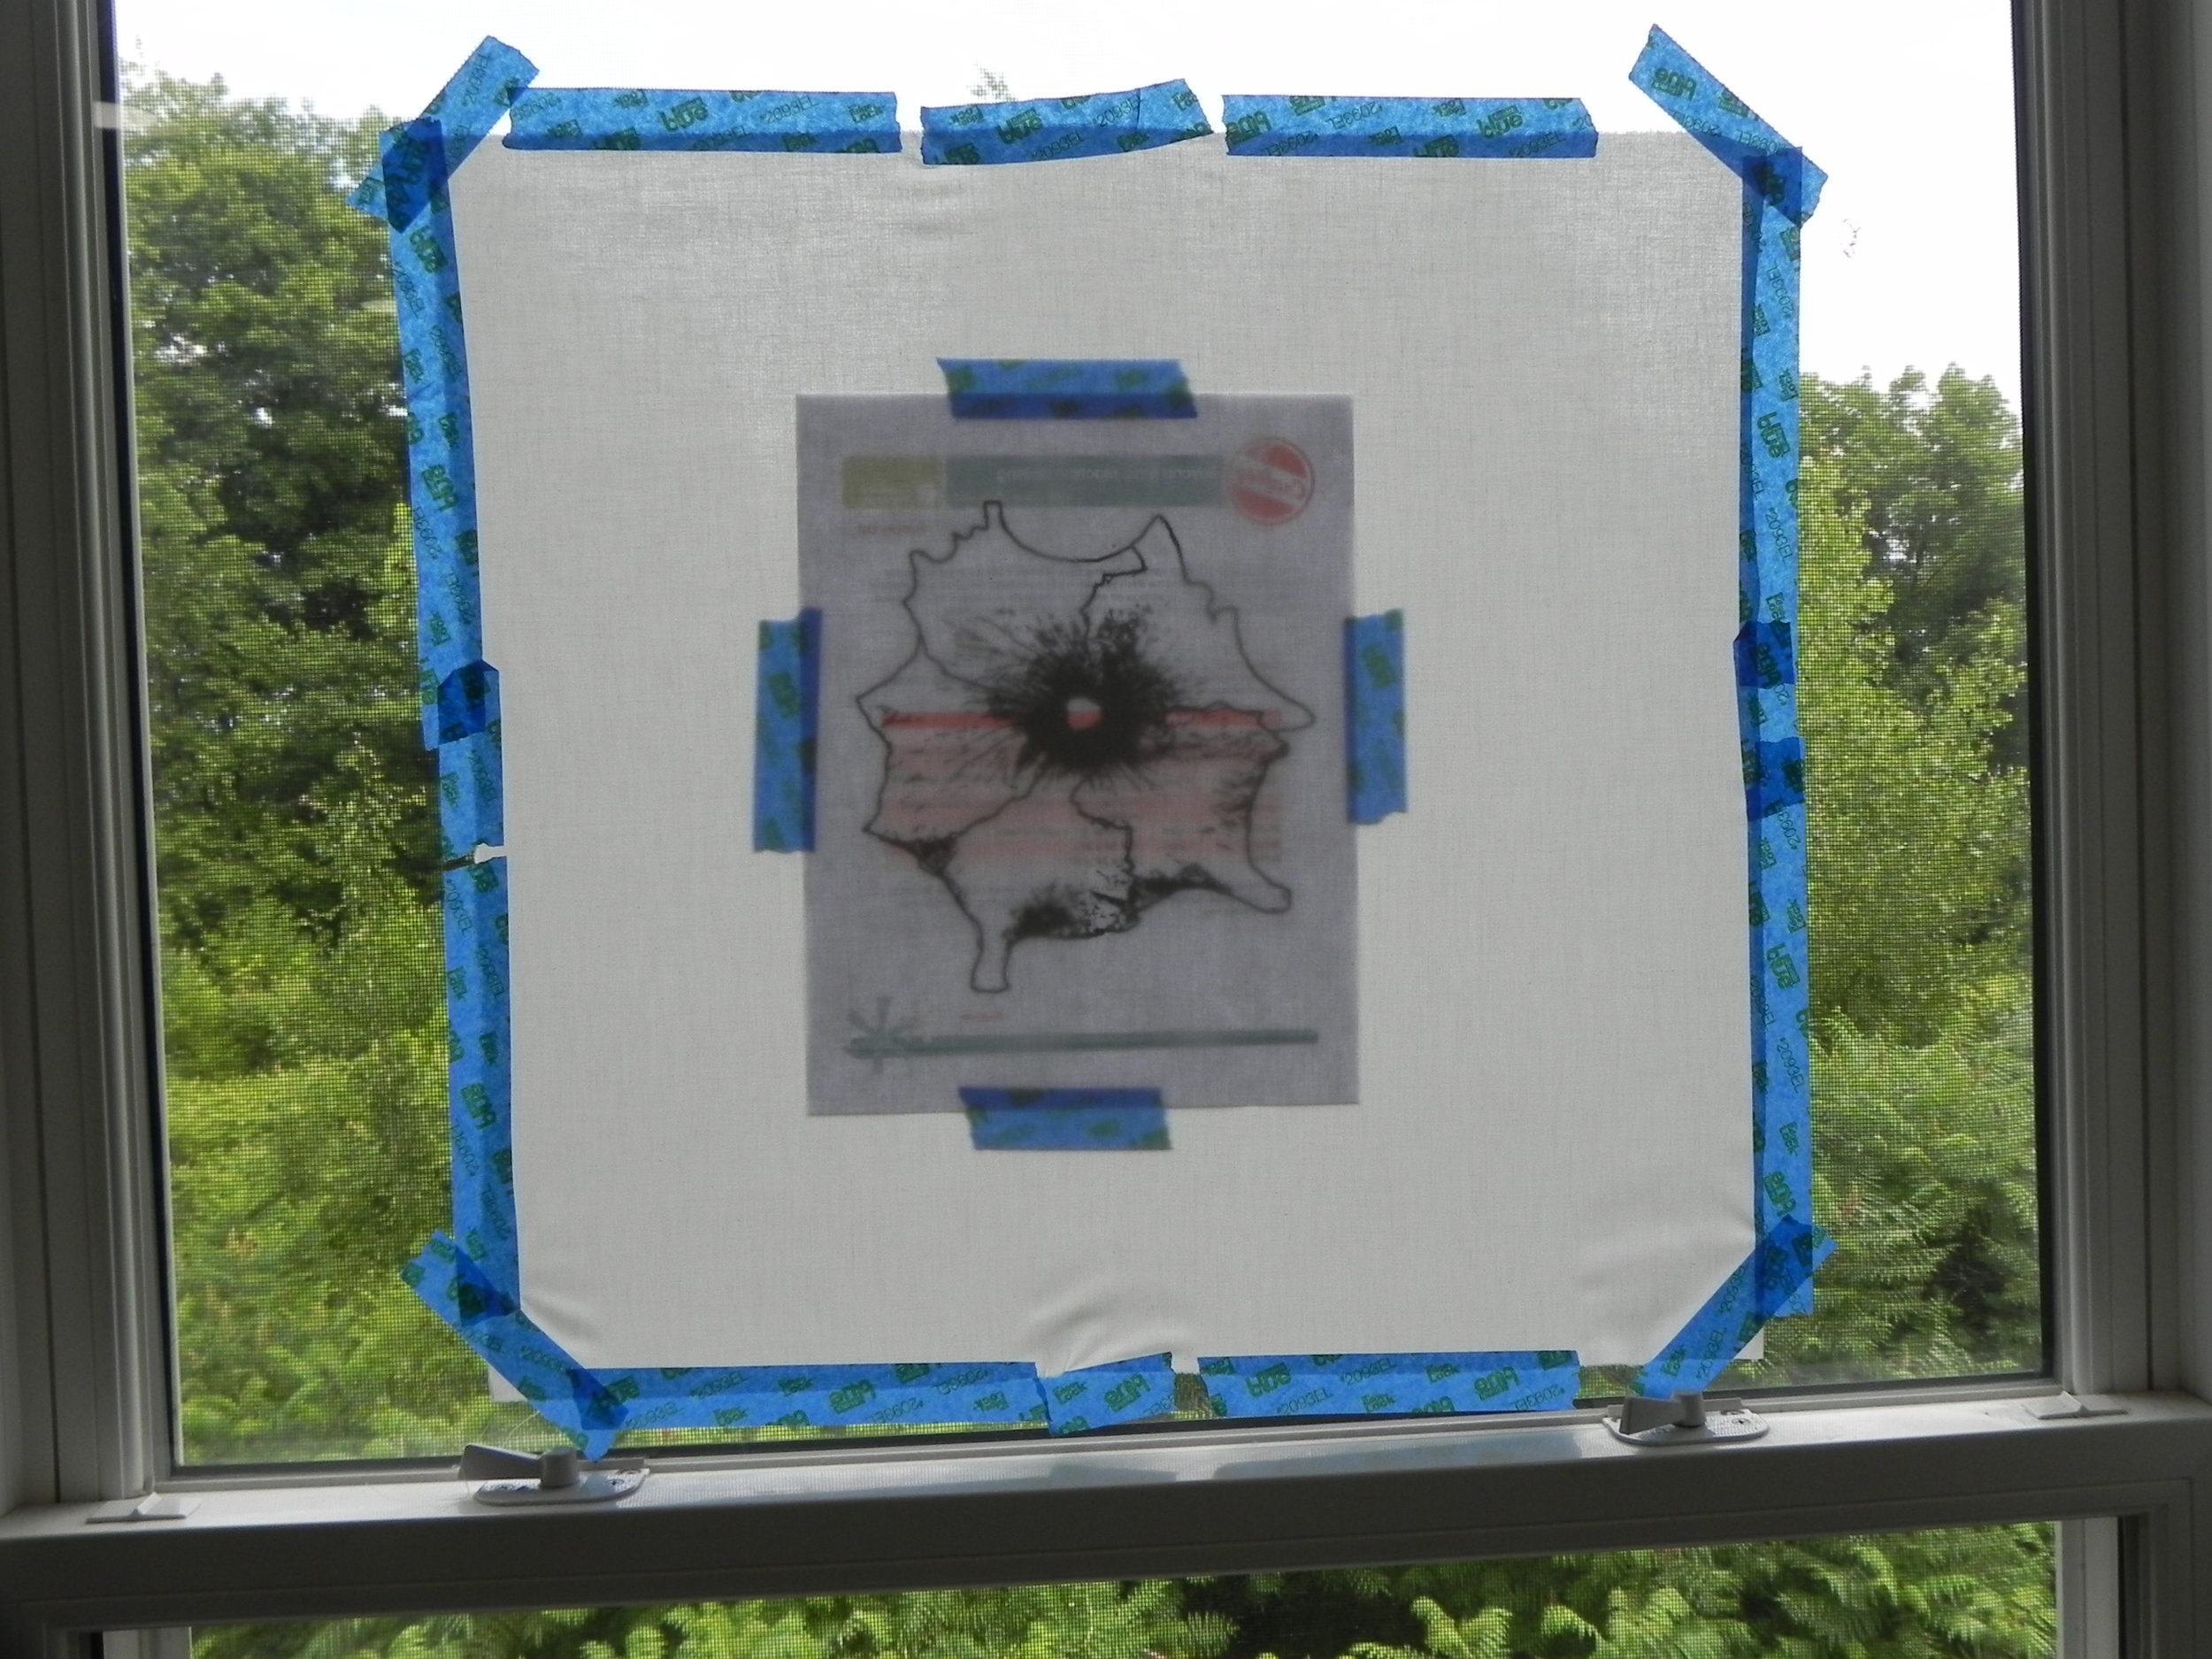
Windowpane light box
Then I used my trusty built-in lightbox (!) to do the tracing. Someday I'll have neighbors in that currently-empty-lot and and they'll wonder why the crazy lady next door keeps taping things in the window. I should come up with messages to write on the back of the images I'm tracing. "Call the Mothership." "The Bear Flies at Midnight." "Send brownies." Messing with the neighbors' minds: always a good time.
Lola Jenkins makes several suggestions in the class (for which you're going to need to buy the class to find out!) about other things to do to your design, but none of them were speaking to me for this particular image. I finally landed on what I think was probably my most brilliant idea of the whole process. I pulled out my Hawaiian quilt block book, chose a block design that had a great outside edge to it, and used only that part of the block to create a frame for the project from one of my hand-dyes. Love it. May have to do that more often! I also free-hand drew leaves around the outside of the flower to help balance the entire thing. I drew the leaf I'm most comfortable free-handing. @Nonnie_p pointed out that it looked suspiciously philodendron-esque. Hey, when you find what works, stick with it.
I knew I'd be able to shade the leaves fairly well--I've done that before. The flower was a bit intimidating, though, with all the ruffley bits. I kept going back over and over again with slightly different colors or adding in a line here or there, and I'm fairly pleased with the way it turned out.

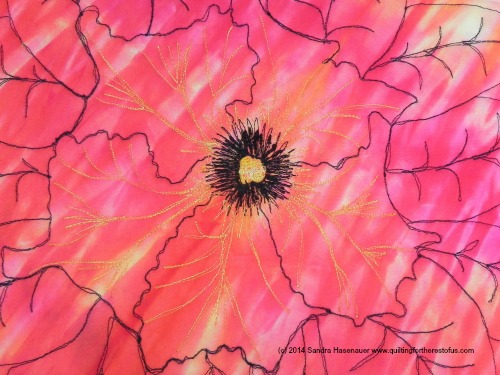
Dimension in the petals
I debated for awhile what color thread to use in the petals to make the dimension even more obvious. Black would be too heavy. But invisible thread may not be interesting enough. I had finally settled on red thread until I actually sat down to do the stitching...the red wasn't jazzing me as I pooled it on the petals to test it out. Then I realized--wait! I had all those Superior "Try Me" special variegated threads I'd been picking up lately. Bingo! One in orange, yellow, and red variegation. FTW.
I had a lot more fun stitching the petals than I thought I would--I was a bit nervous about this part, as I knew it could go from helpful-dimension to way-wrong-angles in the blink of an eye. But, again, I was pretty happy with the way it turned out. And that thread really is pretty. I also did some thread painting in the black center, and you can nearly see a corner of the stamen. I'd used a yellow thread to do circles in the stamen area, but the circles are so dinky and I could see what I was doing so poorly that it ended up being more of a scribbly-fill. But it worked, so I moved on.
I stuck to the theme of Hawaiian quilting and echo-quilted both the flower and the border, and I went with a simple fused binding with one of my black hand-dyes--nothing fancy.
And so, my finished class project!
And the back looks pretty spiffy too! (Used another of my hand-dyes)
And so, for my review of the class itself:
1. I had a ball doing this. It was a fun combination of quilting with my old fave hobby, coloring. (Coloring in geometric design coloring books was my main form of stress relief in college, in my pre-quilting days.)
2. I learned a new technique that can be applied in many ways in future art quilts.
3. I got more comfortable with free-form thread sketching, contouring, and so forth.
4. I realized I'm actually not too bad at shading and drawing. Still no Van Gogh, but hey, good enough for horseshoes!
5. Lola Jenkins is a very artistic person and I enjoyed hearing her tips and suggestions for tools, techniques, and different ways to achieve results. Please note that the description of my approach above is inspired by her class but doesn't follow it exactly. You really should check out her class to see how she does things. I have a few take-away ideas that I can easily see myself putting into practice in other projects even if I didn't use them here.
The Basics:
- 11 lessons, ranging from about 6 minutes to 35 minutes
- She addresses choosing materials, supplies and resources, how to set up your sewing machine, etc, and then has one full lesson on finding copyright-free art with some very helpful ideas.
- The next lessons are about turning a photo or image into something you can trace on fabric, adding other elements to the design, transferring the designs onto fabric, creating your quilt sandwich, stitching it out, coloring (over two lessons, with specific tips about eyes, lips, and shading), and final steps to set the color. The last lesson is a gallery of her own work which gives plenty of inspiration!
I really enjoyed this class. Two thumbs up!
One more time, that's Thread Art with Lola Jenkins. Get out your colored pencils and get ready to have fun!
(Transparency statement: Clicking on Craftsy links in this post helps support this blog and podcast. Thanks!)