
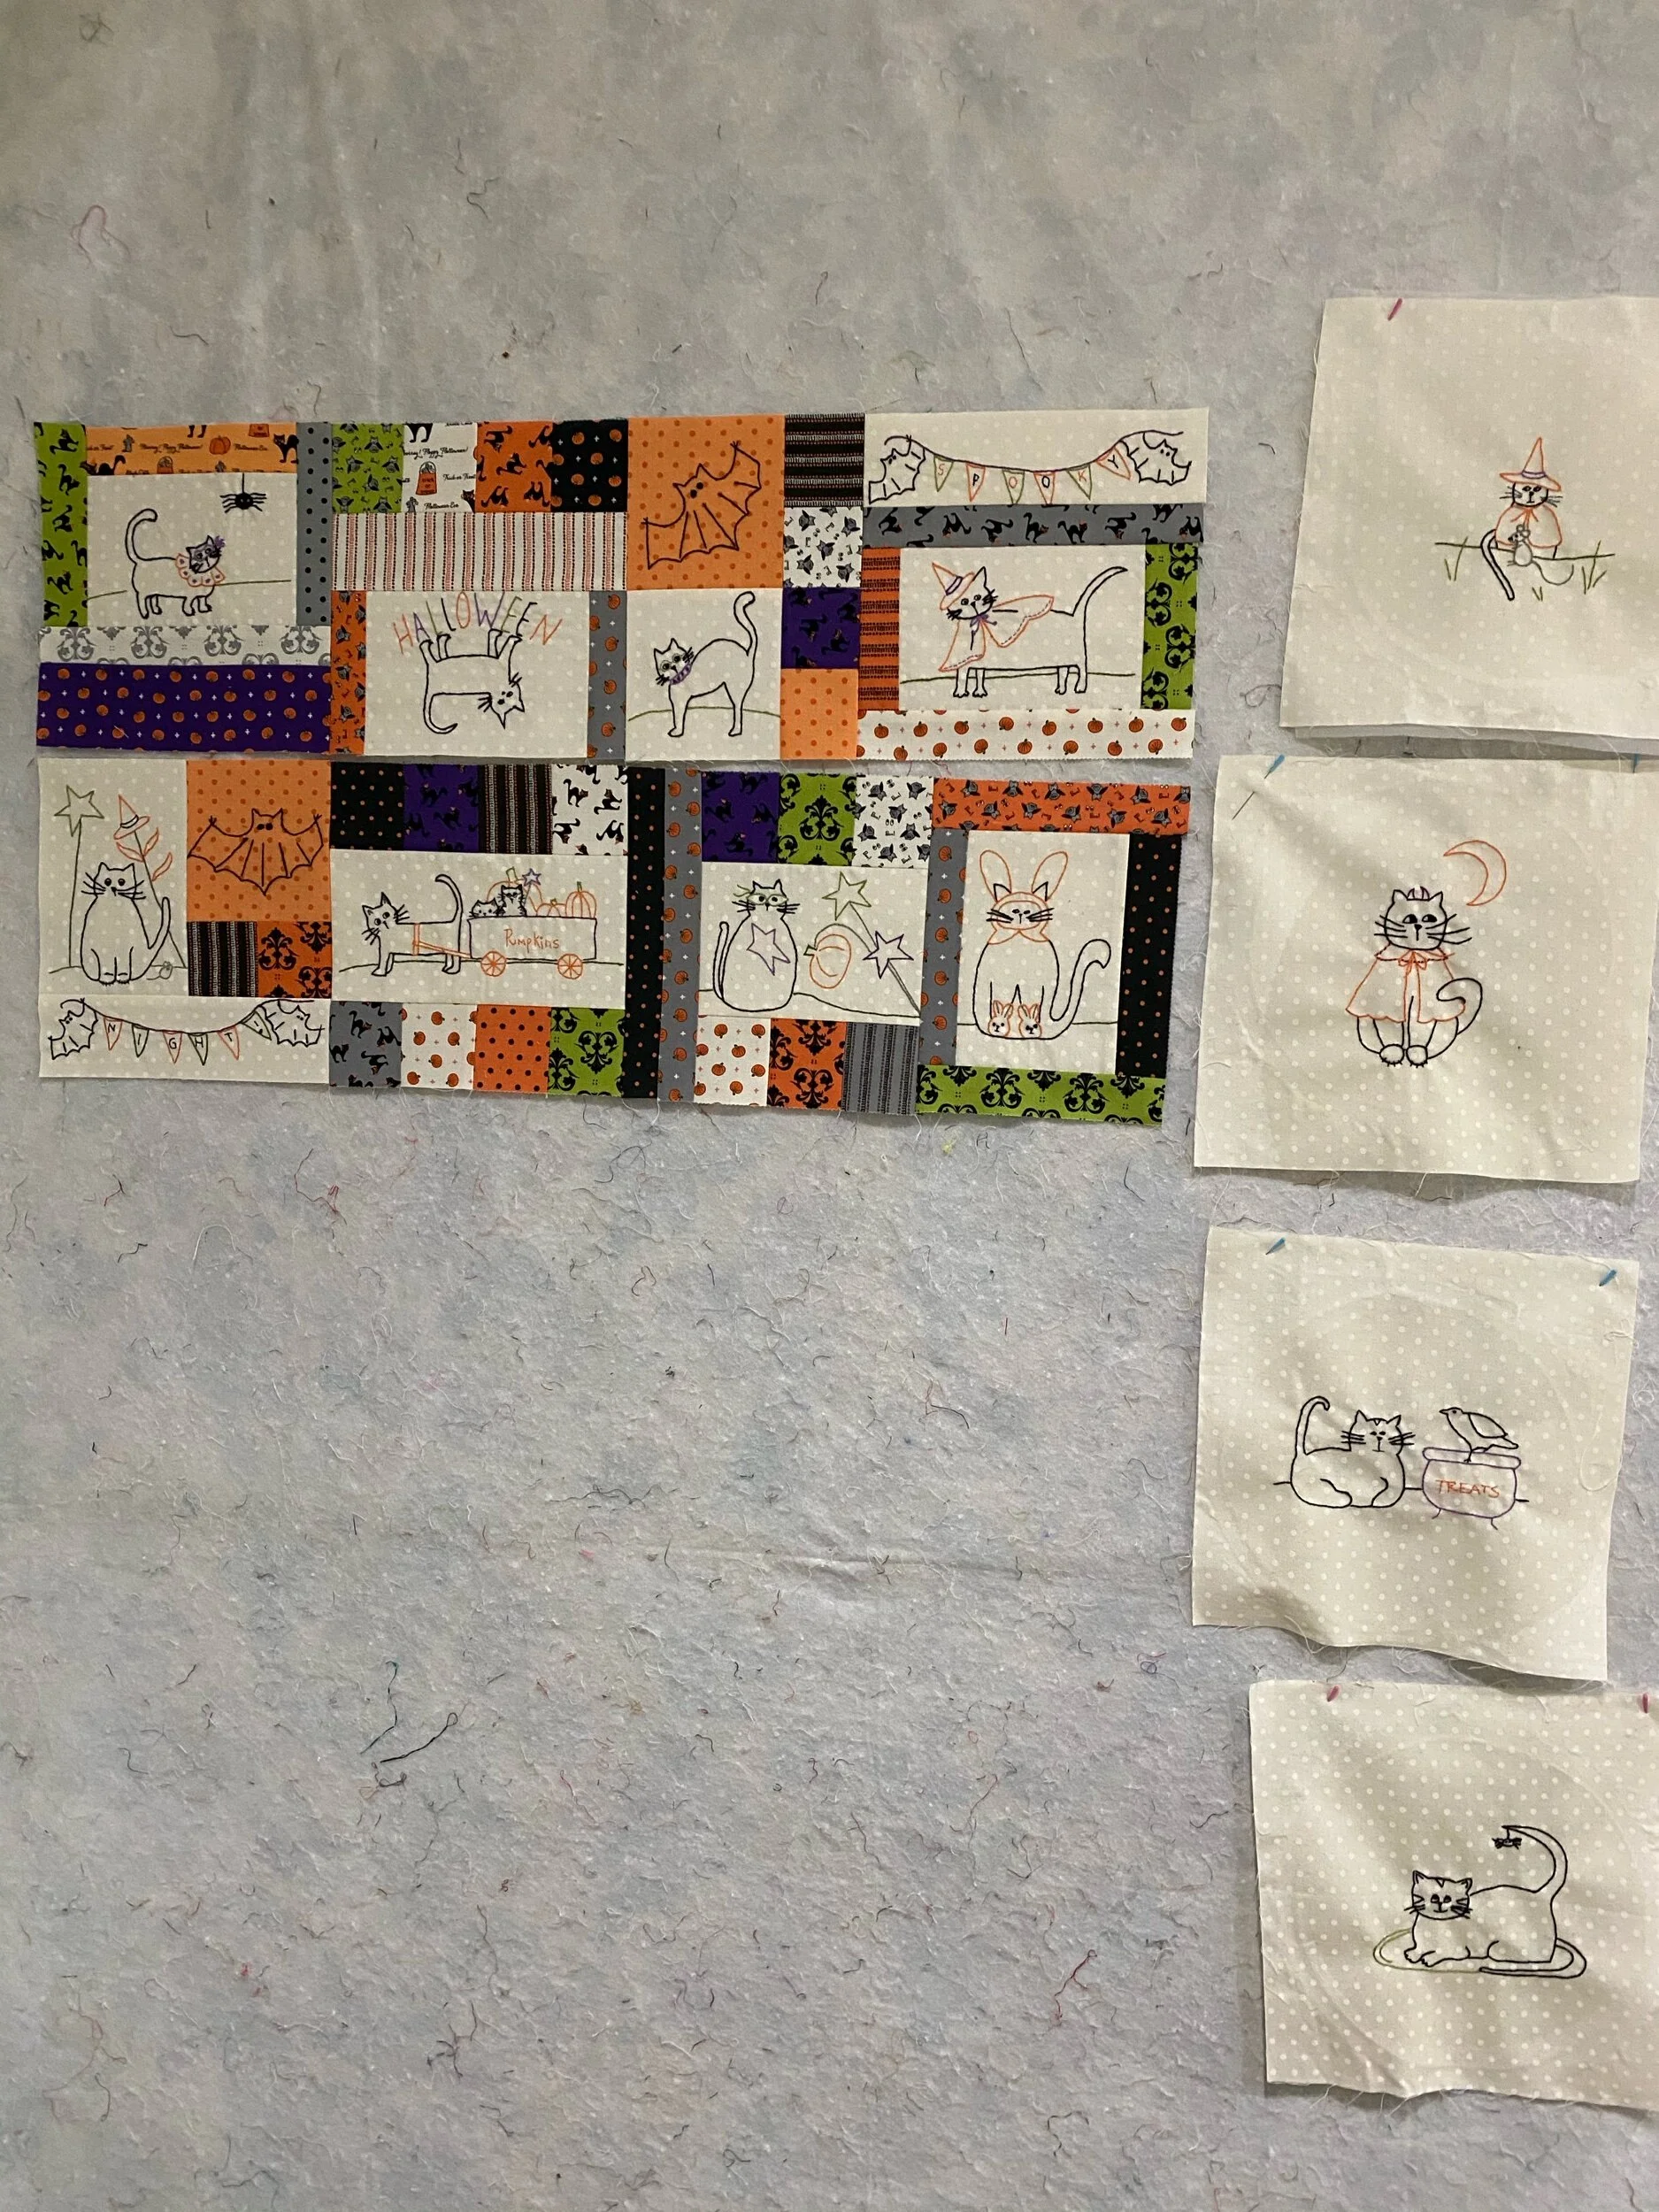
Row two done. Waiting for the embroidery blocks on row three to dry after spritzing with water to get the blue marking pen out before putting that one together tomorrow. If we still have power. They’re predicting high winds for us tomorrow afternoon and we have a poor track record of losing our electricity when that happens. Maybe end up doing embroidery by candlelight, frontier-style.
Friday Sabbath
It’s been awhile. I’m being pretty forgiving of myself these days. Long weeks of Zoom meetings day and night has me good for little else than housekeeping and reading by the weekend. I haven’t been doing much in my sewing room or anything.
However, I have lots of unused vacation days, (thanks, lockdown), so I’m taking every Friday in November and December off. Instead of just thinking of them as a “day off,” or a “vacation day,” I’m very intentionally calling them Sabbath days. This simply makes me much more intentional about thinking through what would be renewing and restoring rather than just what I can do with free time. It comes out to a lot of the same activities, it’s just a little different mindset going into them.
One piece of my plan was to go for a long walk with the Aug-dog. I wanted to take him to a place up on the shores of Lake Ontario that’s a nature preserve and I recalled some really nice paths through it from a family hike we’d taken a number of years ago.
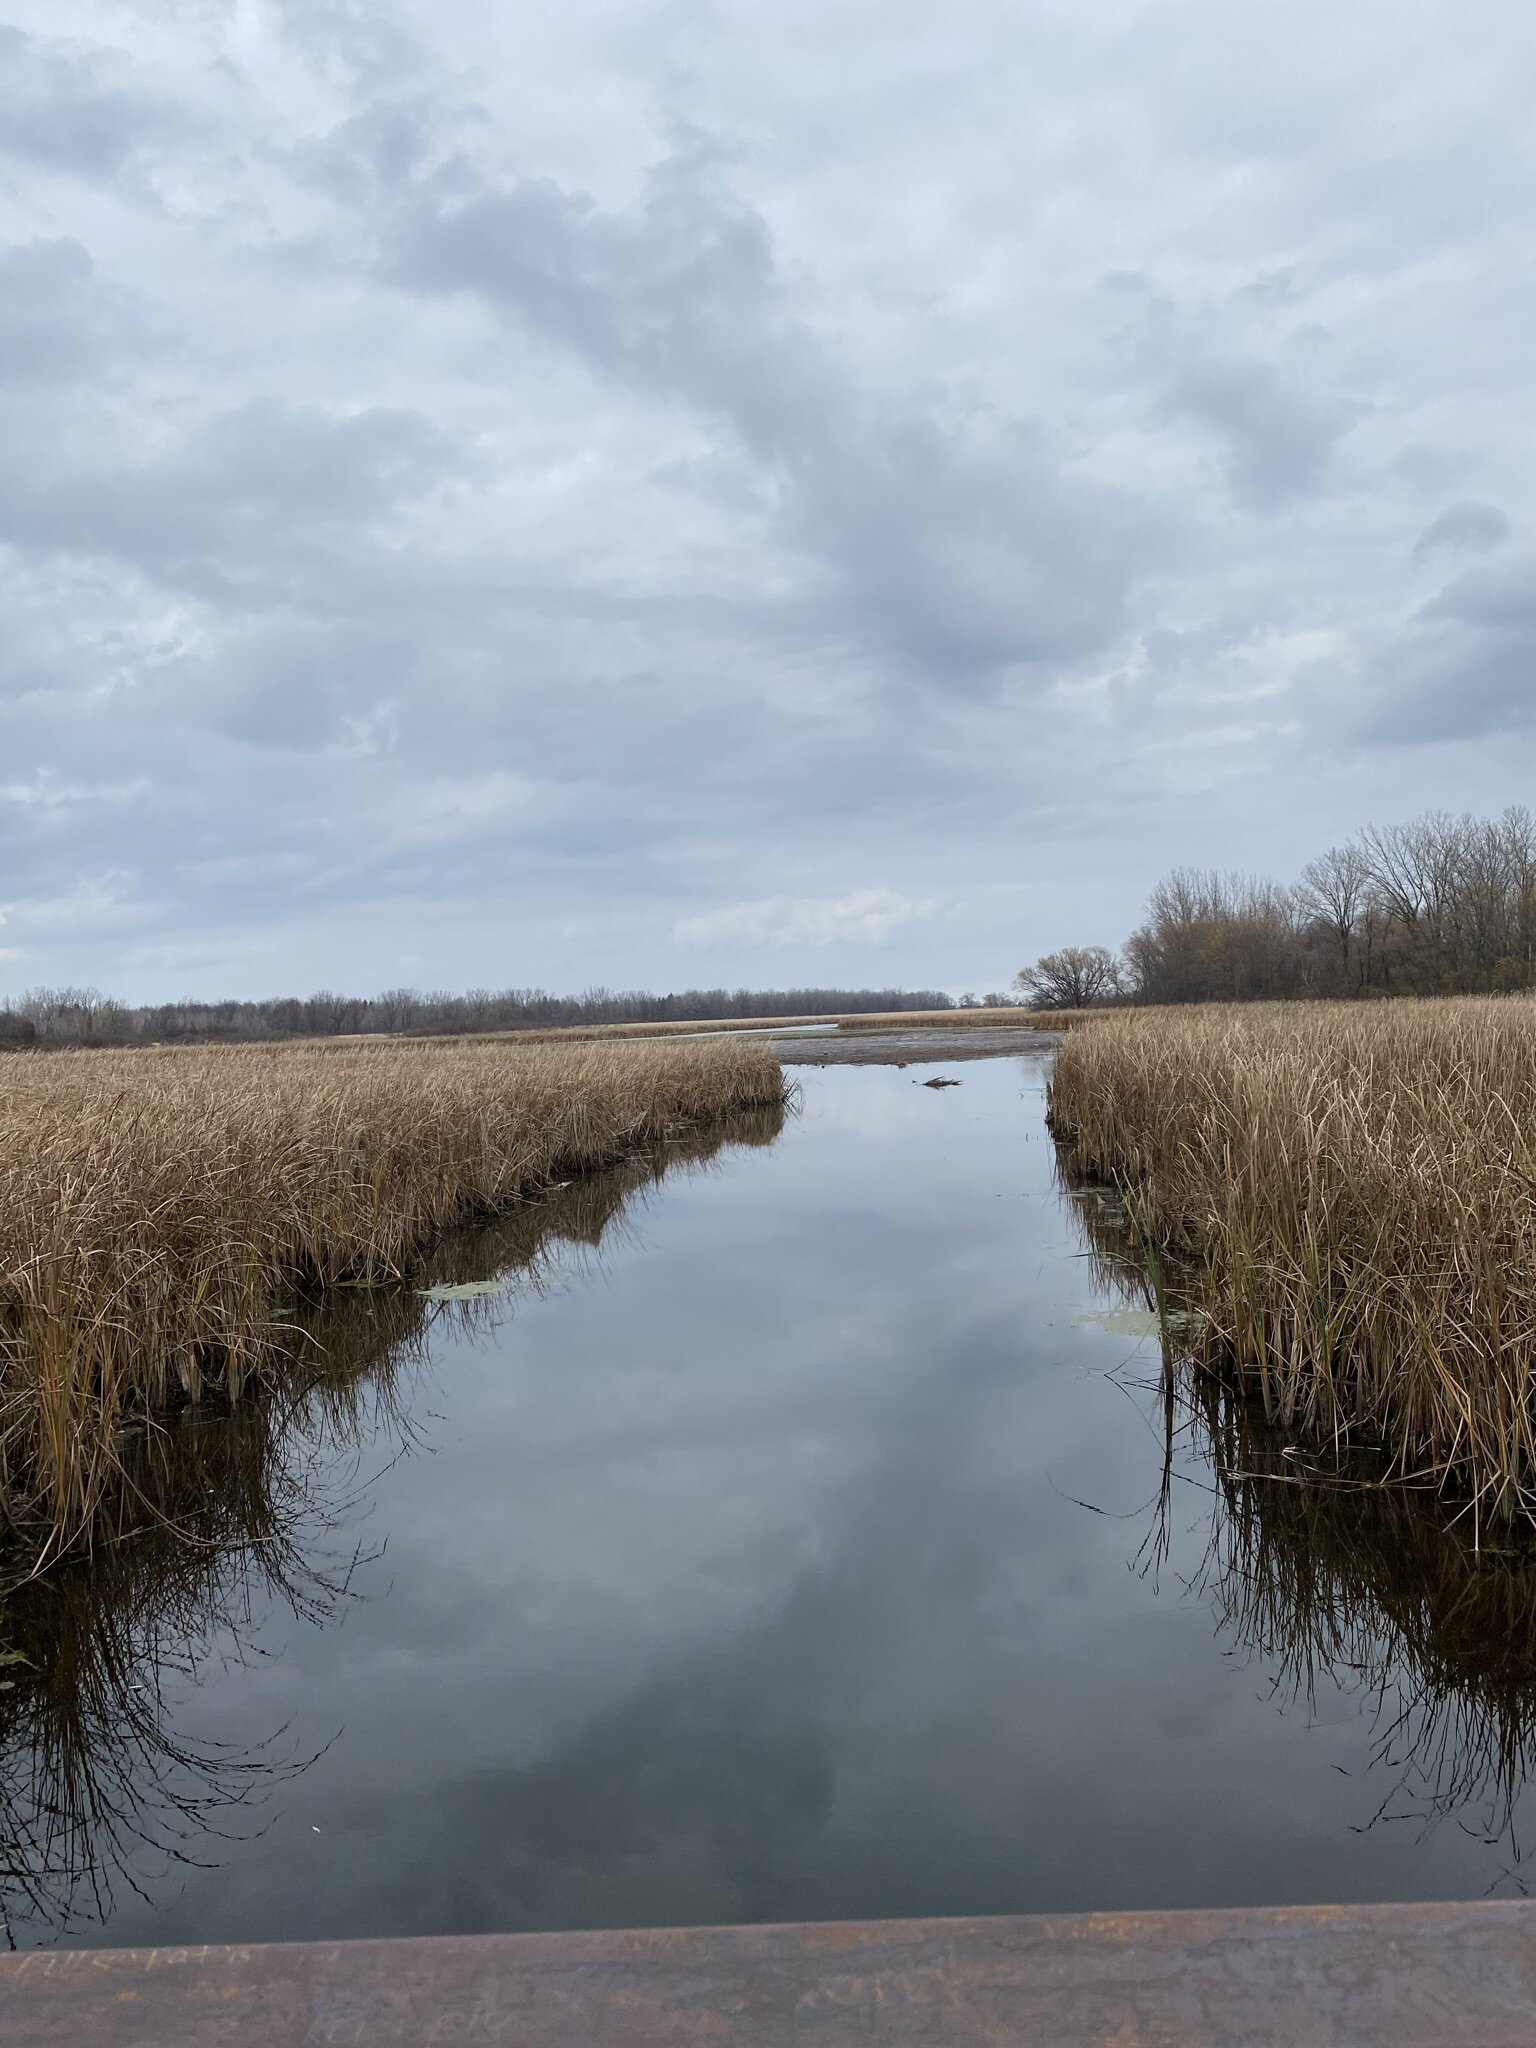
Unfortunately, it’s not really obvious which trail is which and they don’t all lead off a common trailhead—not even close. They’re spaced over about a 6-7 mile area. Ultimately, Auggie and I ended up driving around for a good 45 minutes total between finding trailheads, realizing it wasn’t the one I wanted, finding another one that looked good and heading off only to find out that it was a very short, loopy trail through brush and trees with only the slightest glimpse of the lake far off over a lot of reeds. Not particularly interesting. And I’m trying to stay ahead of the rain that I can see gathering on the horizon so I don’t feel like I’ve got a whole lot of time to mess around.
I finally took Auggie back to one that was a more populated and well-kept trail that would at least take us through some wetlands. 15 minutes into the walk, I see a hunter in full gear walking towards me. Ummm… “Are there a lot of hunters back in here?” I asked him as he got close enough. “Well,” he said, flipping his shotgun into his arm and scratching his head, “I think I’m probably one of the last ones.” I look down at Auggie, with coloring remarkably like a deer, and my own jacket which, although fairly bright, is still green. Yeah, no. Not a chance I’m willing to take. Hadn’t ever given a thought to needing reflective gear since we were only going to be in public parks. We turned about face and hoofed it back to the parking lot.
I grew up in the country. I know about hunting season. We wouldn’t let the dogs out to run at certain times of year because of the risk. But hunters in a well-traveled park with walkers and dogs? Huh. I looked it up online when I got home. I don’t think it’s legal to be hunting there, but there sure were a few folks doing it openly and a bunch of walkers who didn’t seem surprised so they must know something I don’t know. Still, I won’t be going back there any time soon.
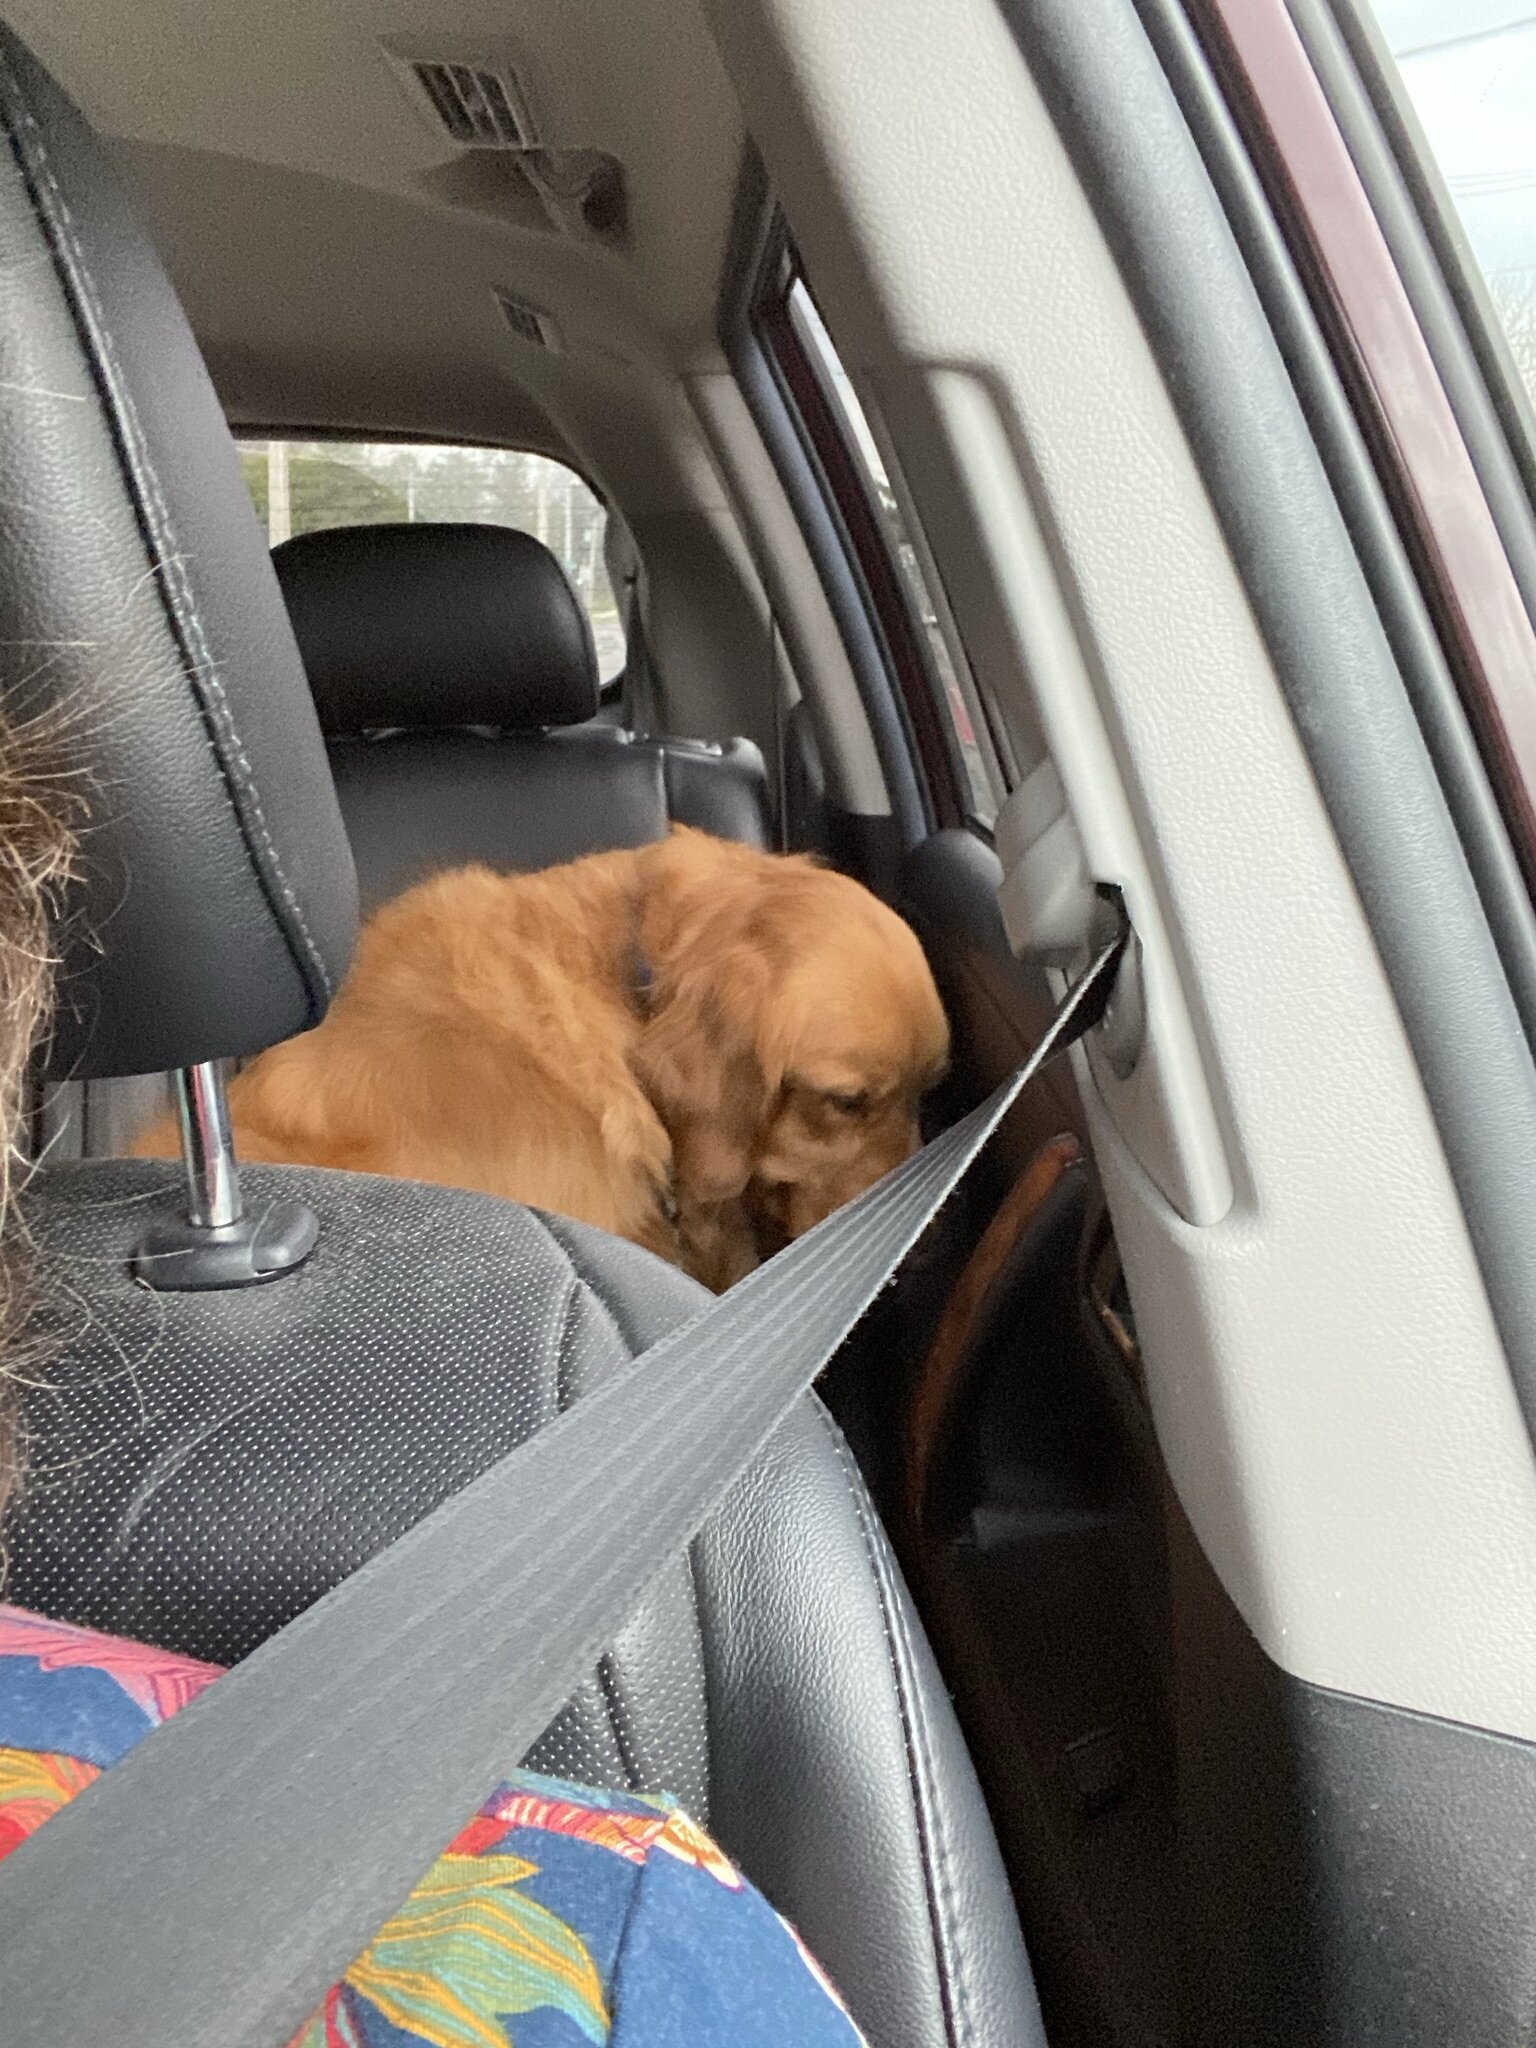
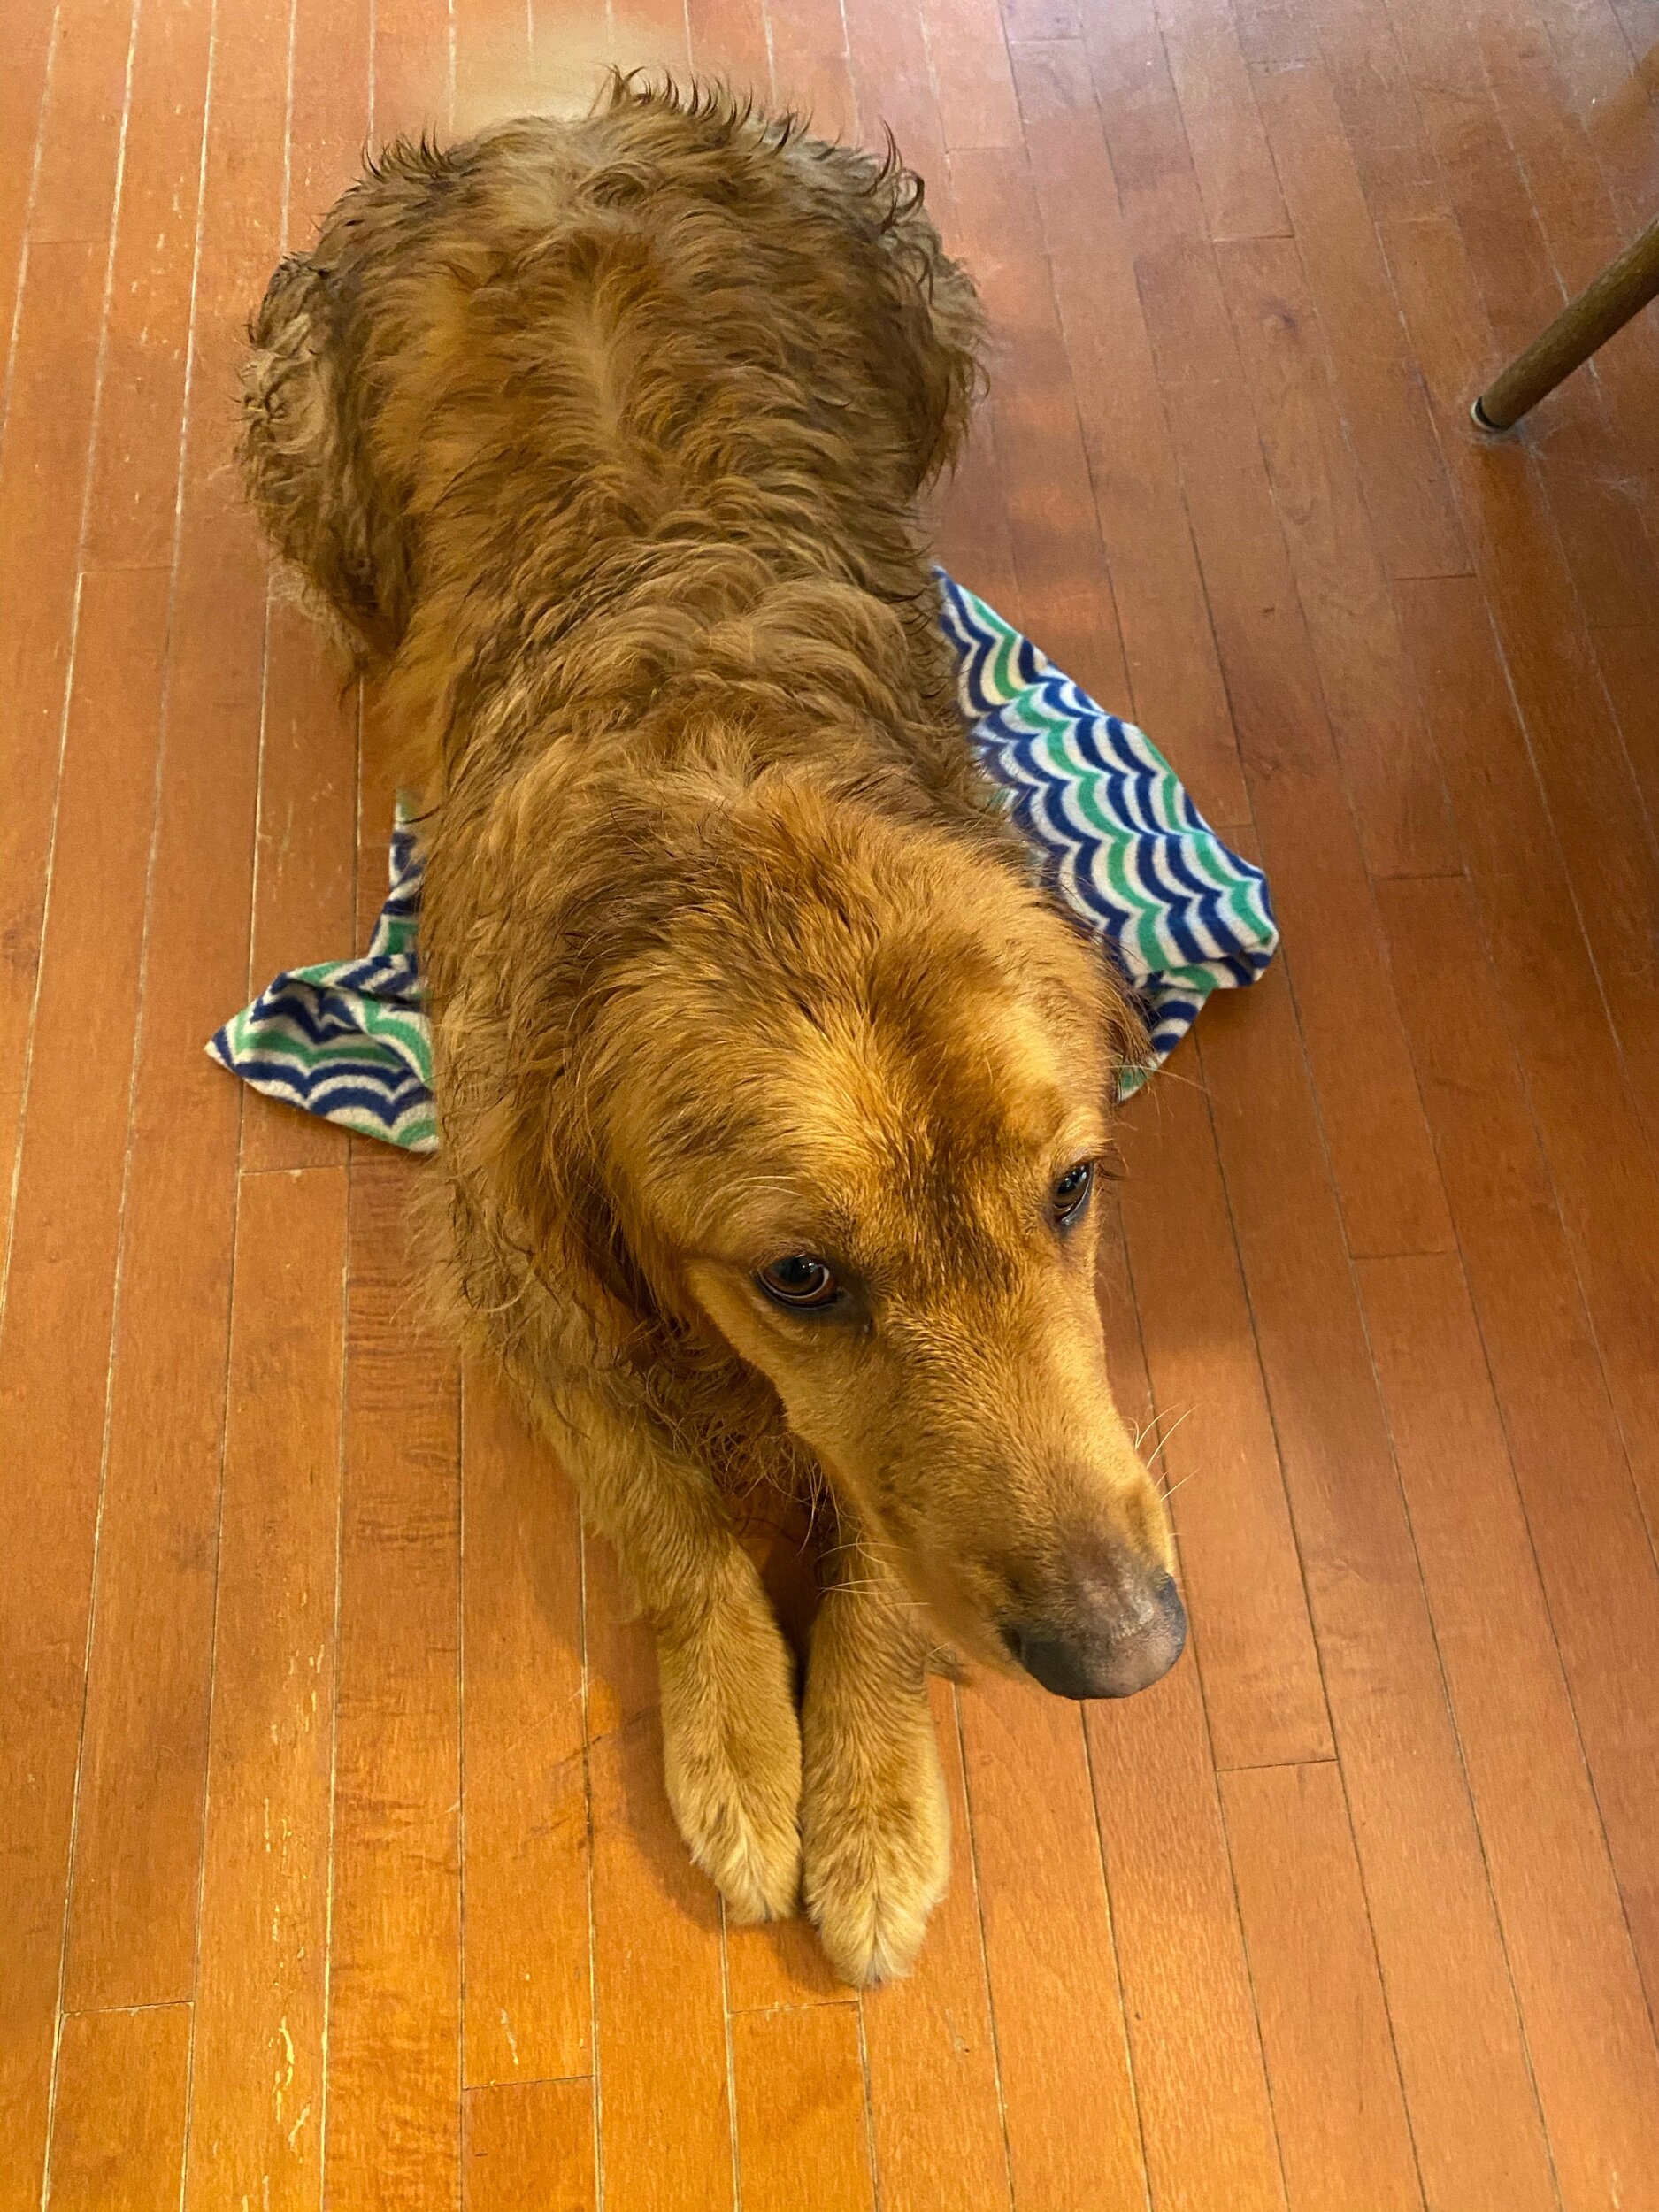
Fortunately, it was enough of a day for Auggie that he’s now conked out on his bed. Between the walking and all the great new smells (although he was none too keen on the bridge we had to walk over), he’s a sleepy boy now.
Mission accomplished.
(BTW, he rarely lays down in the backseat. He likes to sit up and lean his head against the door. Weird dog.)

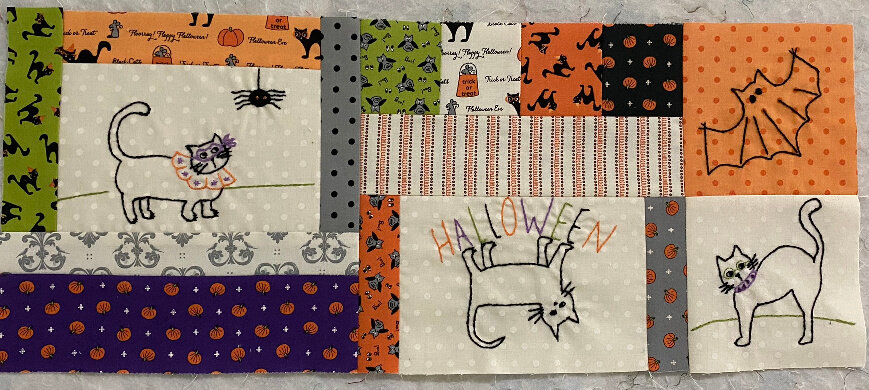
I had originally planned to spend most of the afternoon in my sewing room but by the time we got back from our adventures all over the shores of Lake Ontario, it was later than I’d intended. I only ended up with a little over an hour. It was long enough to clean off the cutting table (ahem), remind myself where I was in the Halloween project that no, didn’t get done in time for Halloween again, and get one more block done, which completes the top row. I lost a couple of points on the “spooky” banner in the upper right, but overall I’m pleased with the way it’s turning out so far.
Meanwhile, I’m trying to remember what I intended to do with these. {{head scratches}}.

In other news, my daughter has just been quarantined. She lives about 3 hours north of us so this Mama Bear is worrying and not able to do anything about it. Someone in her office tested positive a few days ago so they quarantined a few people right off the bat, and a few others subsequently tested positive, but my daughter and her office-mate didn’t get sent home until yesterday afternoon. Then her office-mate tested positive this morning. My daughter went right in today and had herself tested as well, and so far so good. Still, she’s definitely quarantined through Thanksgiving which is deeply disappointing, and I hate thinking of her alone in her apartment that day. If she stays healthy, her quarantine lifts the day after Thanksgiving so she’ll probably come home that weekend and we’ll do something late with her. But we’re taking it day by day. While I’m praying she stays COVID-free, it’s hard to imagine that she’ll be able to be with everyone else in her office down.
Yikes.
Here’s a question for you…
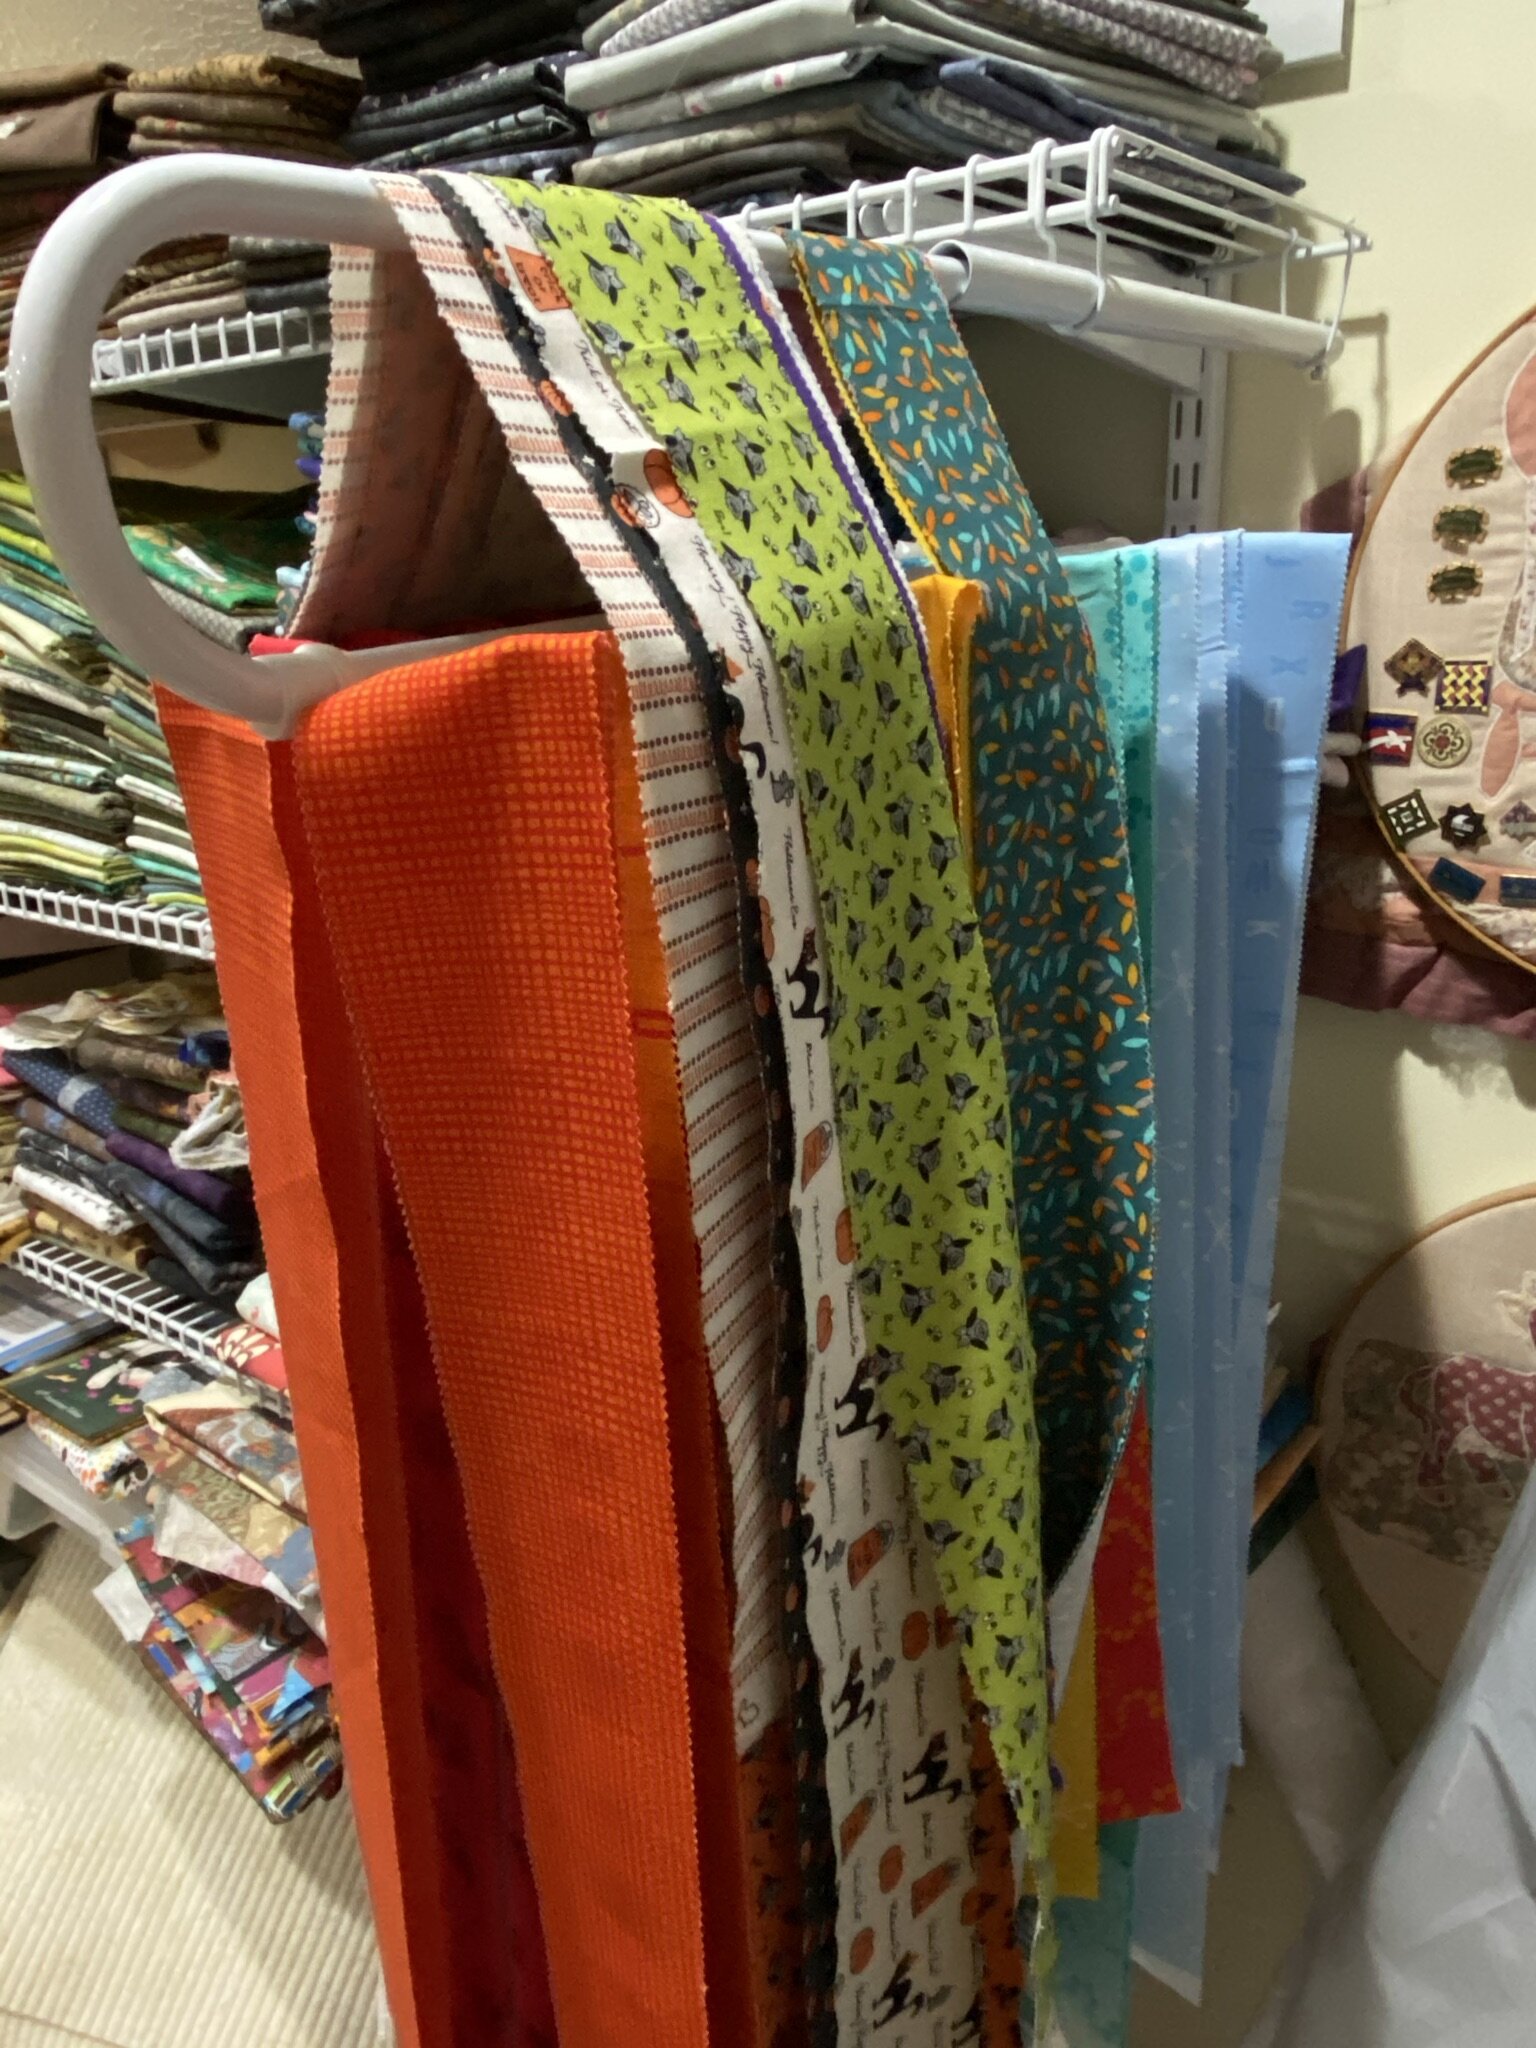
I just can’t imagine this actually working for me. What do you think? Does this seem to be a workable fabric storage solution to you? Do any of you do this?
Lookie what's coming together!
Can you believe it? This quilt has now officially been four years in the making. I got the first delivery in June of 2016. As I suspected when I started it back then, although I definitely hoped for better, it wasn’t going to get done by that first October.
After spending a significant amount of time today cleaning out my bedroom closet, relegating clothes I’m unlikely to need in this pandemic situation to the unused closet in my daughter’s room (I’m not doing much in person in the next several months so dress clothes are tops only), moving summer-colored clothes out and moving my cold-weather clothes in (although we’ll still have warm weather, I do a lot of layering so my fall wardrobe will do double-duty), and generally re-organizing and cleaning things up…I rewarded myself with some time in my sewing room.
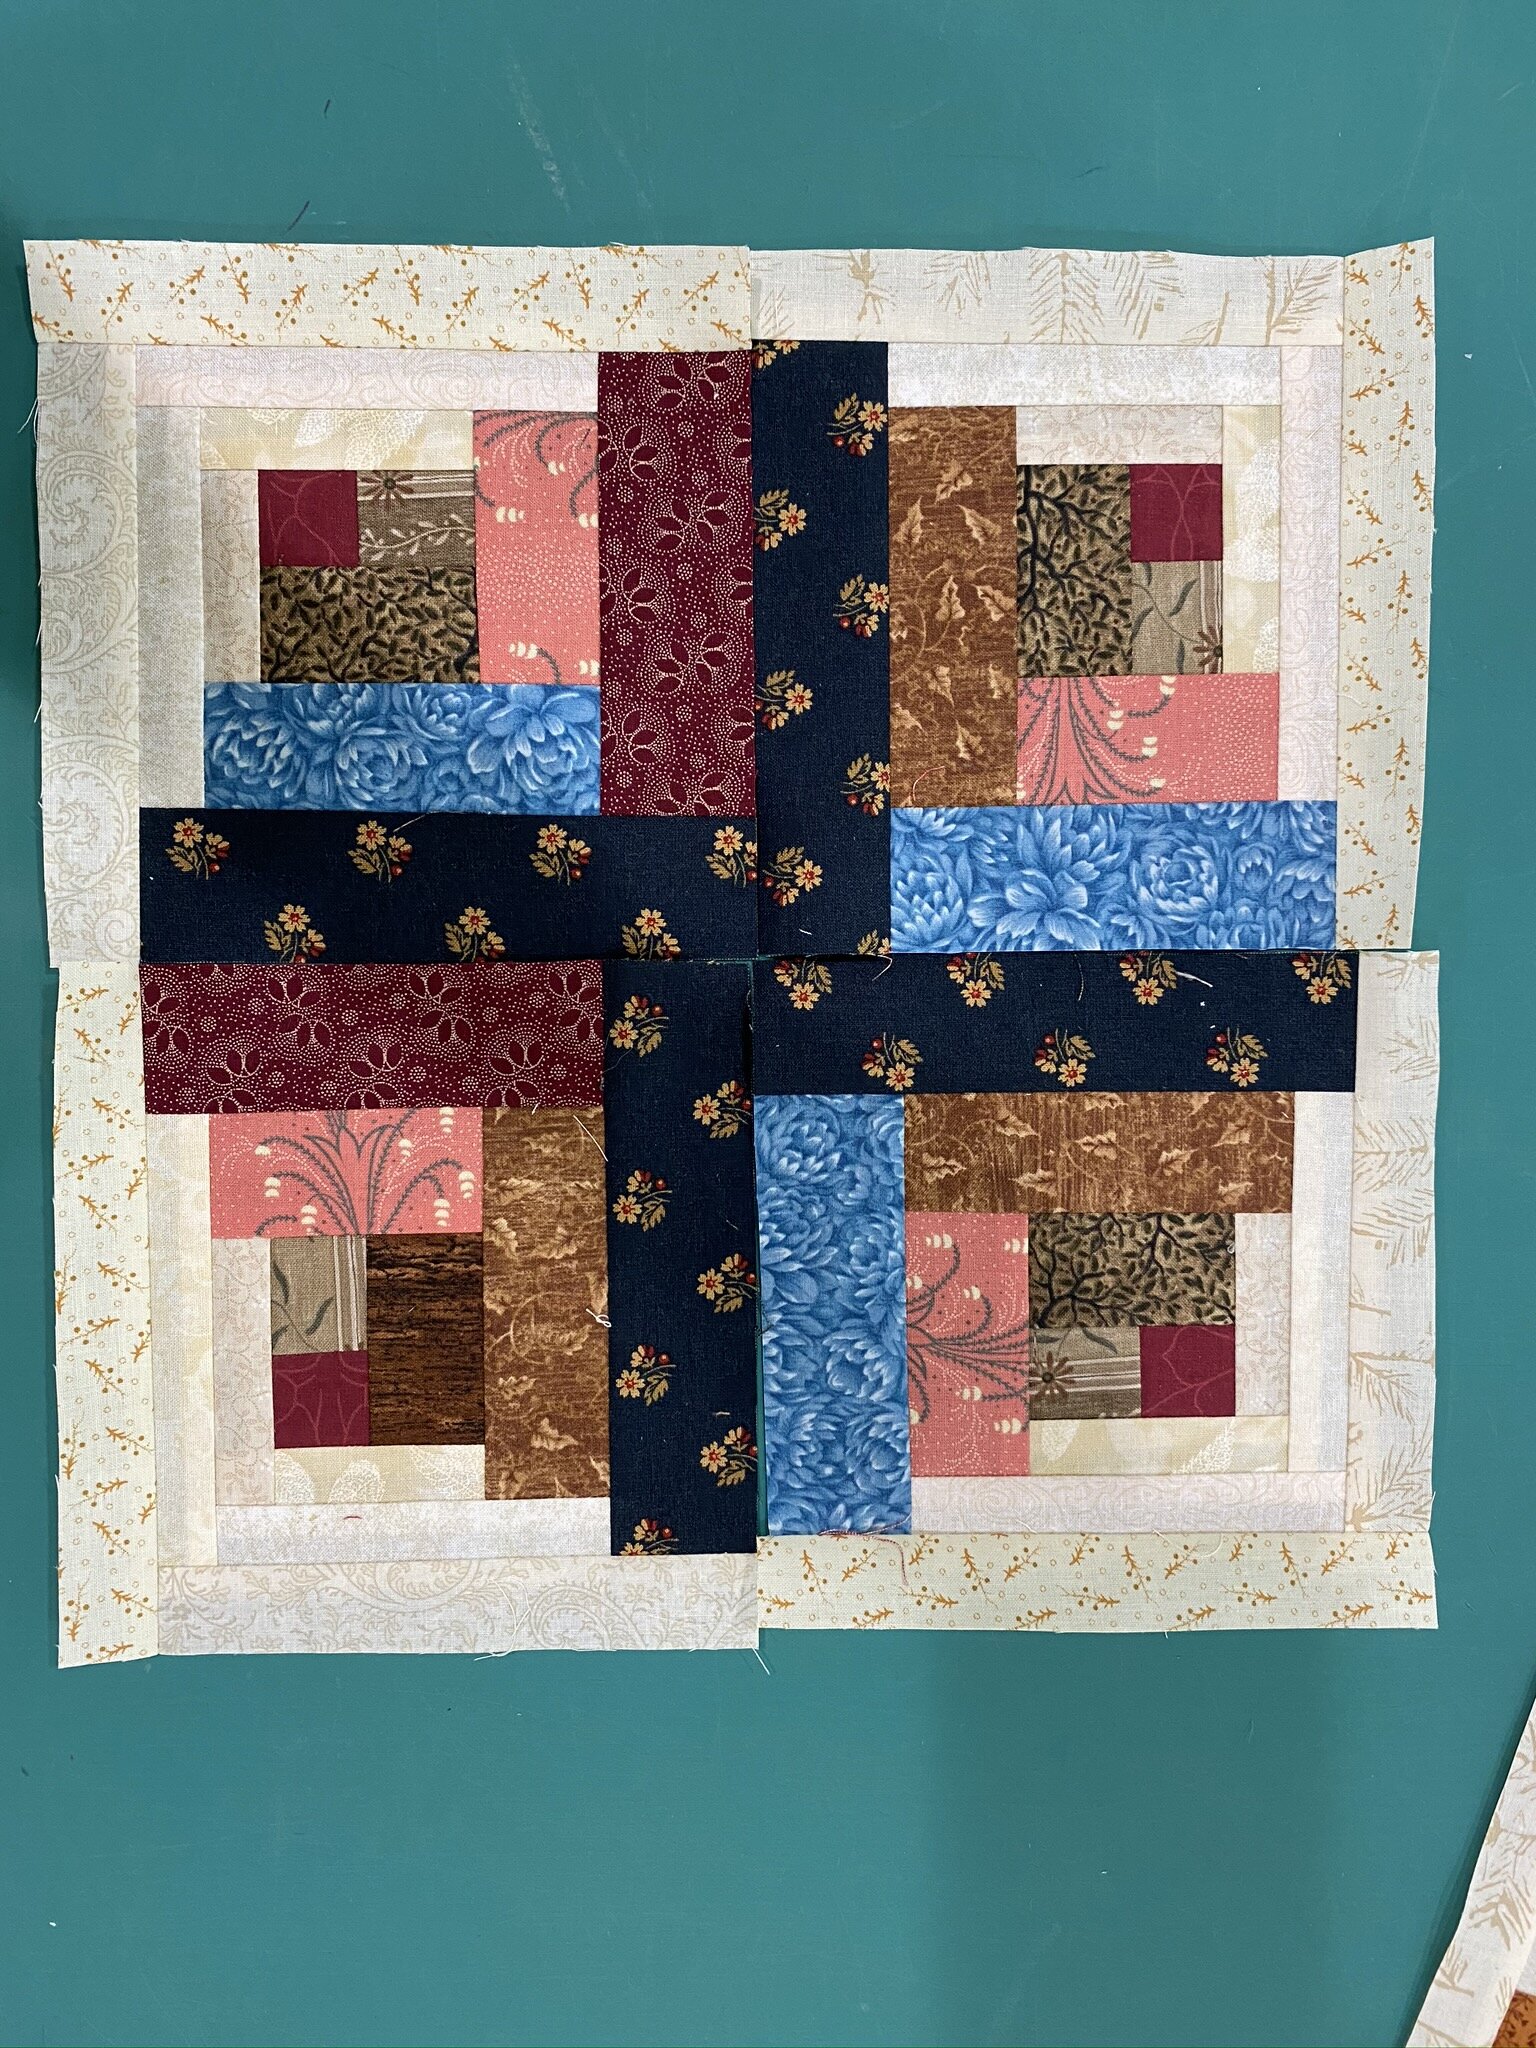
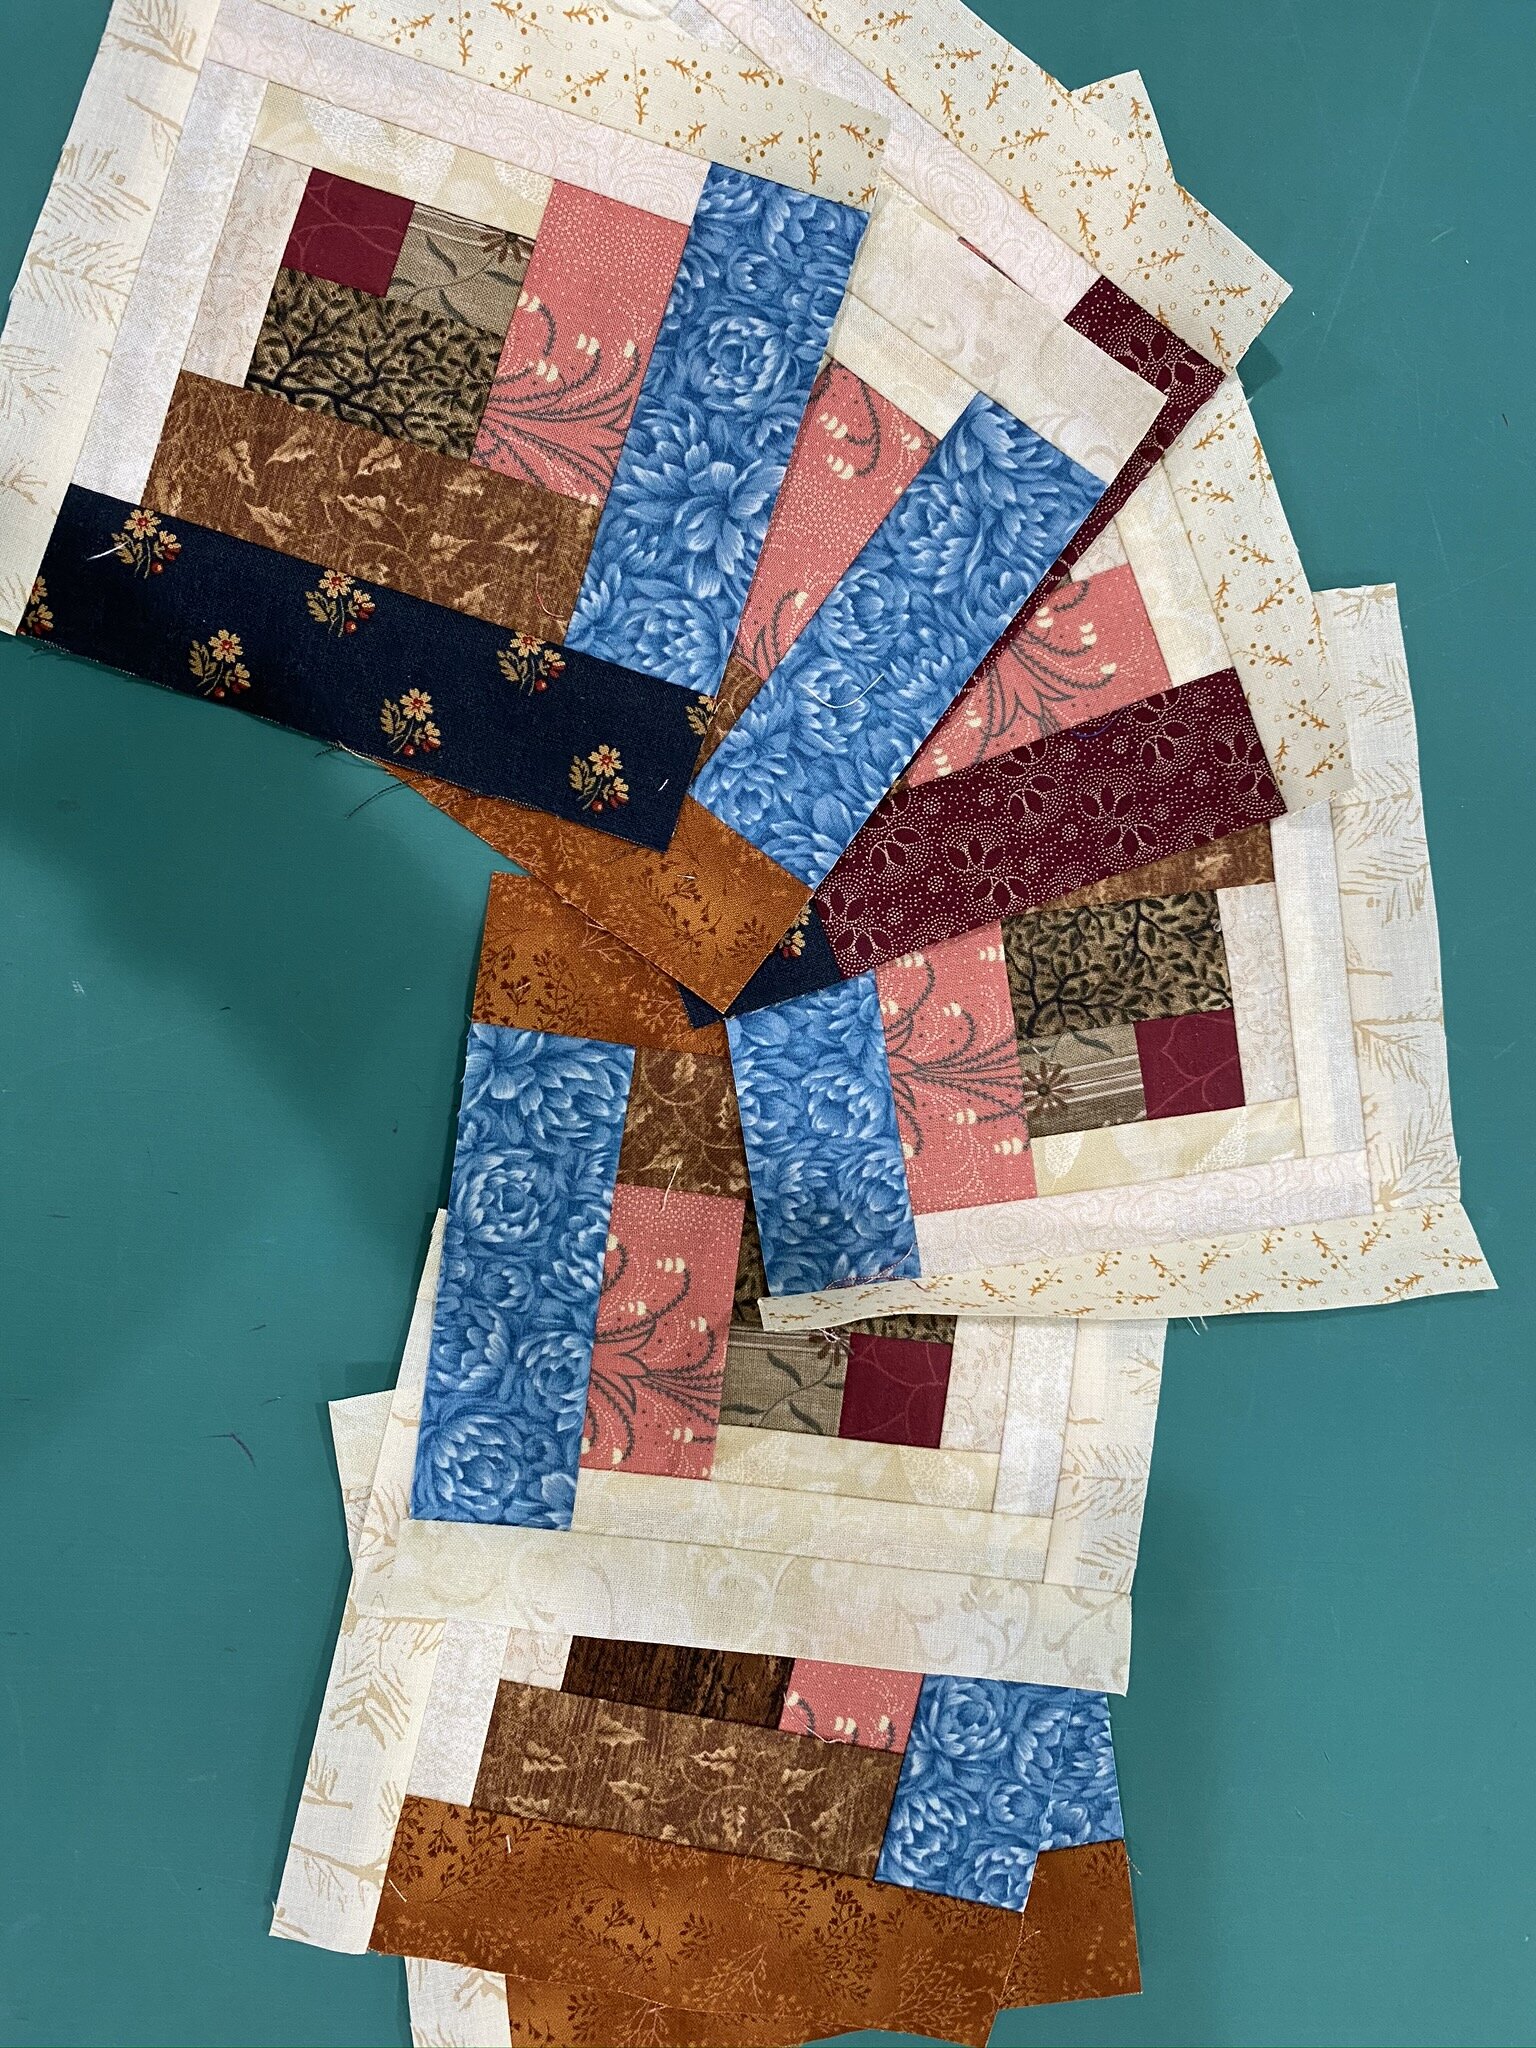
It actually took me almost an hour to sort this BOTM out, put all the parts in order, and read through the piecing directions to make sure I understood everything. Then I tackled the first couple of blocks.
It’s very easy piecing, as you can tell. The tricky thing is that I’m cutting the pieces for each block individually and, as we always say, “random is hard.” It’s going to just keep getting harder, too, as I get into lower rows and am trying to make sure I don’t have the same fabric in any of the connecting pieces. So it’s pokey, but not difficult.
It is, however, fun to finally see how it all comes together.
I clearly got lazy partway through the embroidery. The first few blocks I’d carefully pressed and gotten the marks out as soon as I finished them and before putting them away in the project bin. Not so much everything after about block four. When I got done with what I wanted to sew today, I took out the next few blocks and hit them with a spray bottle of water to get rid of the water soluble pen. It may be too late for some of the darker marks at corners, but I have hopes. The water will also help with remaining embroidery hoop creases. Fortunately, I’m cutting them all down small enough that I’ll likely be cutting out all of the hoop marks.
So stay tuned…

And by the way, since one of y’all talked me into it, I did buy a couple of Angela Walters’ Creative Grids Machine Quilting Tools. I looked on her blog and she very helpfully listed which she used the most, so I only bought two of her go-to’s, “Slim” and “Elvira.”
I’m still uncertain I’m going to be able to manage these. I’ll keep you posted once I get to the point of experimenting with them.
Tomorrow is supposed to be mostly rain, so I’m predicting some more sewing time in my future!
Therapy Sewing
It’s been a rough few days. Not personally, but from a community basis. We’ve been in the national news. I’m involved with an alliance working on issues regarding how we ended up in the national news. It’s heartbreaking.
I’m glad my daughter had come home for the weekend so we were able to hang out some. We didn’t do anything special, but it was nice to have her here. After spending several hours in Zoom meetings over the weekend due to the issues going on, I decided not to worry too much about being productive otherwise. I got the newest Louise Penny Gamache novel, All the Devils Are Here. I hadn’t loved the last book but this one is better again. I’m blasting through it. It’s nice escapism.
Despite not being worried about productivity, though, I reminded myself how therapeutic I find my sewing machine to be. I also reminded myself that I had a couple of projects I could work on that required no actual thinking—they were very repetitive.

So, of the two, I decided to finish up the top of the impulse jelly roll project I’d started years ago.
I think I’d mentioned in a previous post that I’d decided to use up the leftover strips from the jelly roll for the border. I cut them into 4 1/2” wide rectangles, stacked them so that I could just chain stitch in a somewhat random way, and went to town. You’ll see I didn’t bother doing math to make sure I’d end up with exactly the right length of evenly-spaced strips. I just sewed strips together, sewed them onto the borders, and then lopped off the ends to make it square.
I know to some of you this would be like a toothache. Every time you looked at it, you’d wince. I’ve chosen not to stress it. Typically I’m a bit compulsive in that way as well, but I’m reminding myself this was an impulse project and just meant to be fun. I’m looking through stencils and designs I could mark into the centers of those snowball blocks—feather wreaths or other some such—to give me the chance to practice my FMQ more.
So stay tuned. It might be awhile before I get back to this project, though. Now that it’s a completed top I want to get it off my design wall so I can work on the layout of the Halloween embroidery quilt.
I have a quick notion review. Don’t blame me for spending your money.

In a past Sew Sampler box, we got samples of a new pin on the market, called (unoriginally) “Magic Pins.”
The samples were three sizes, but these pins are available in a wide variety of thicknesses and lengths.
Oh, how fast I fell in love.
My past favorite pins were very long and very fine, with a glass ball head. I loved those things. And you can tell. They had become a collection of warped, burr-covered, blunted pins that weren’t quite as useful as they had once been. I’ve tried other pins and gotten other samples, but none really took. Until these.

So this is what my magnetic pin holder is full of now.
Oh, how I love thee, let me count the ways…
These are shorter than I usually use but when I was pinning the borders this afternoon I found that I actually liked the shorter pins. Go figure.
They’re smooth as butter. (Maybe just because they’re new, but hey.)
I absolutely love that pin head. It’s a silicone grip. So easy to pull out as I’m feeding things under my presser foot. They’re supposedly heat resistant but I haven’t tested that yet. I simply found them so much easier to pull off my pin holder, stick in the fabric, pull back out of the fabric, and toss back onto the pin holder.
I’m so happy.
Check them out. (The link goes to Fat Quarter Shop—I don’t get anything out of you using it; the pins are available elsewhere as well. This is just a nice selection of them.) At some point I’ll likely pick up some of the other sizes, but for now these will do me for the majority of my pin usage needs.
More of "not a whole lot going on" and a question about scraps
It’s another weekend after a very long week, so motivation is at low ebb. I had to put in a couple of hours of work this morning (Saturday) for some things I didn’t get done during the week because next week…yay!…my husband and I are going on vacation. We leave tomorrow for a week. We’re staying in-state due to the virus and all sorts of travel restrictions/mandated quarantines and such, but it’ll be good to have a change of scene.
In terms of creative work, I did take about an hour last night to work on my newest embroidery project.
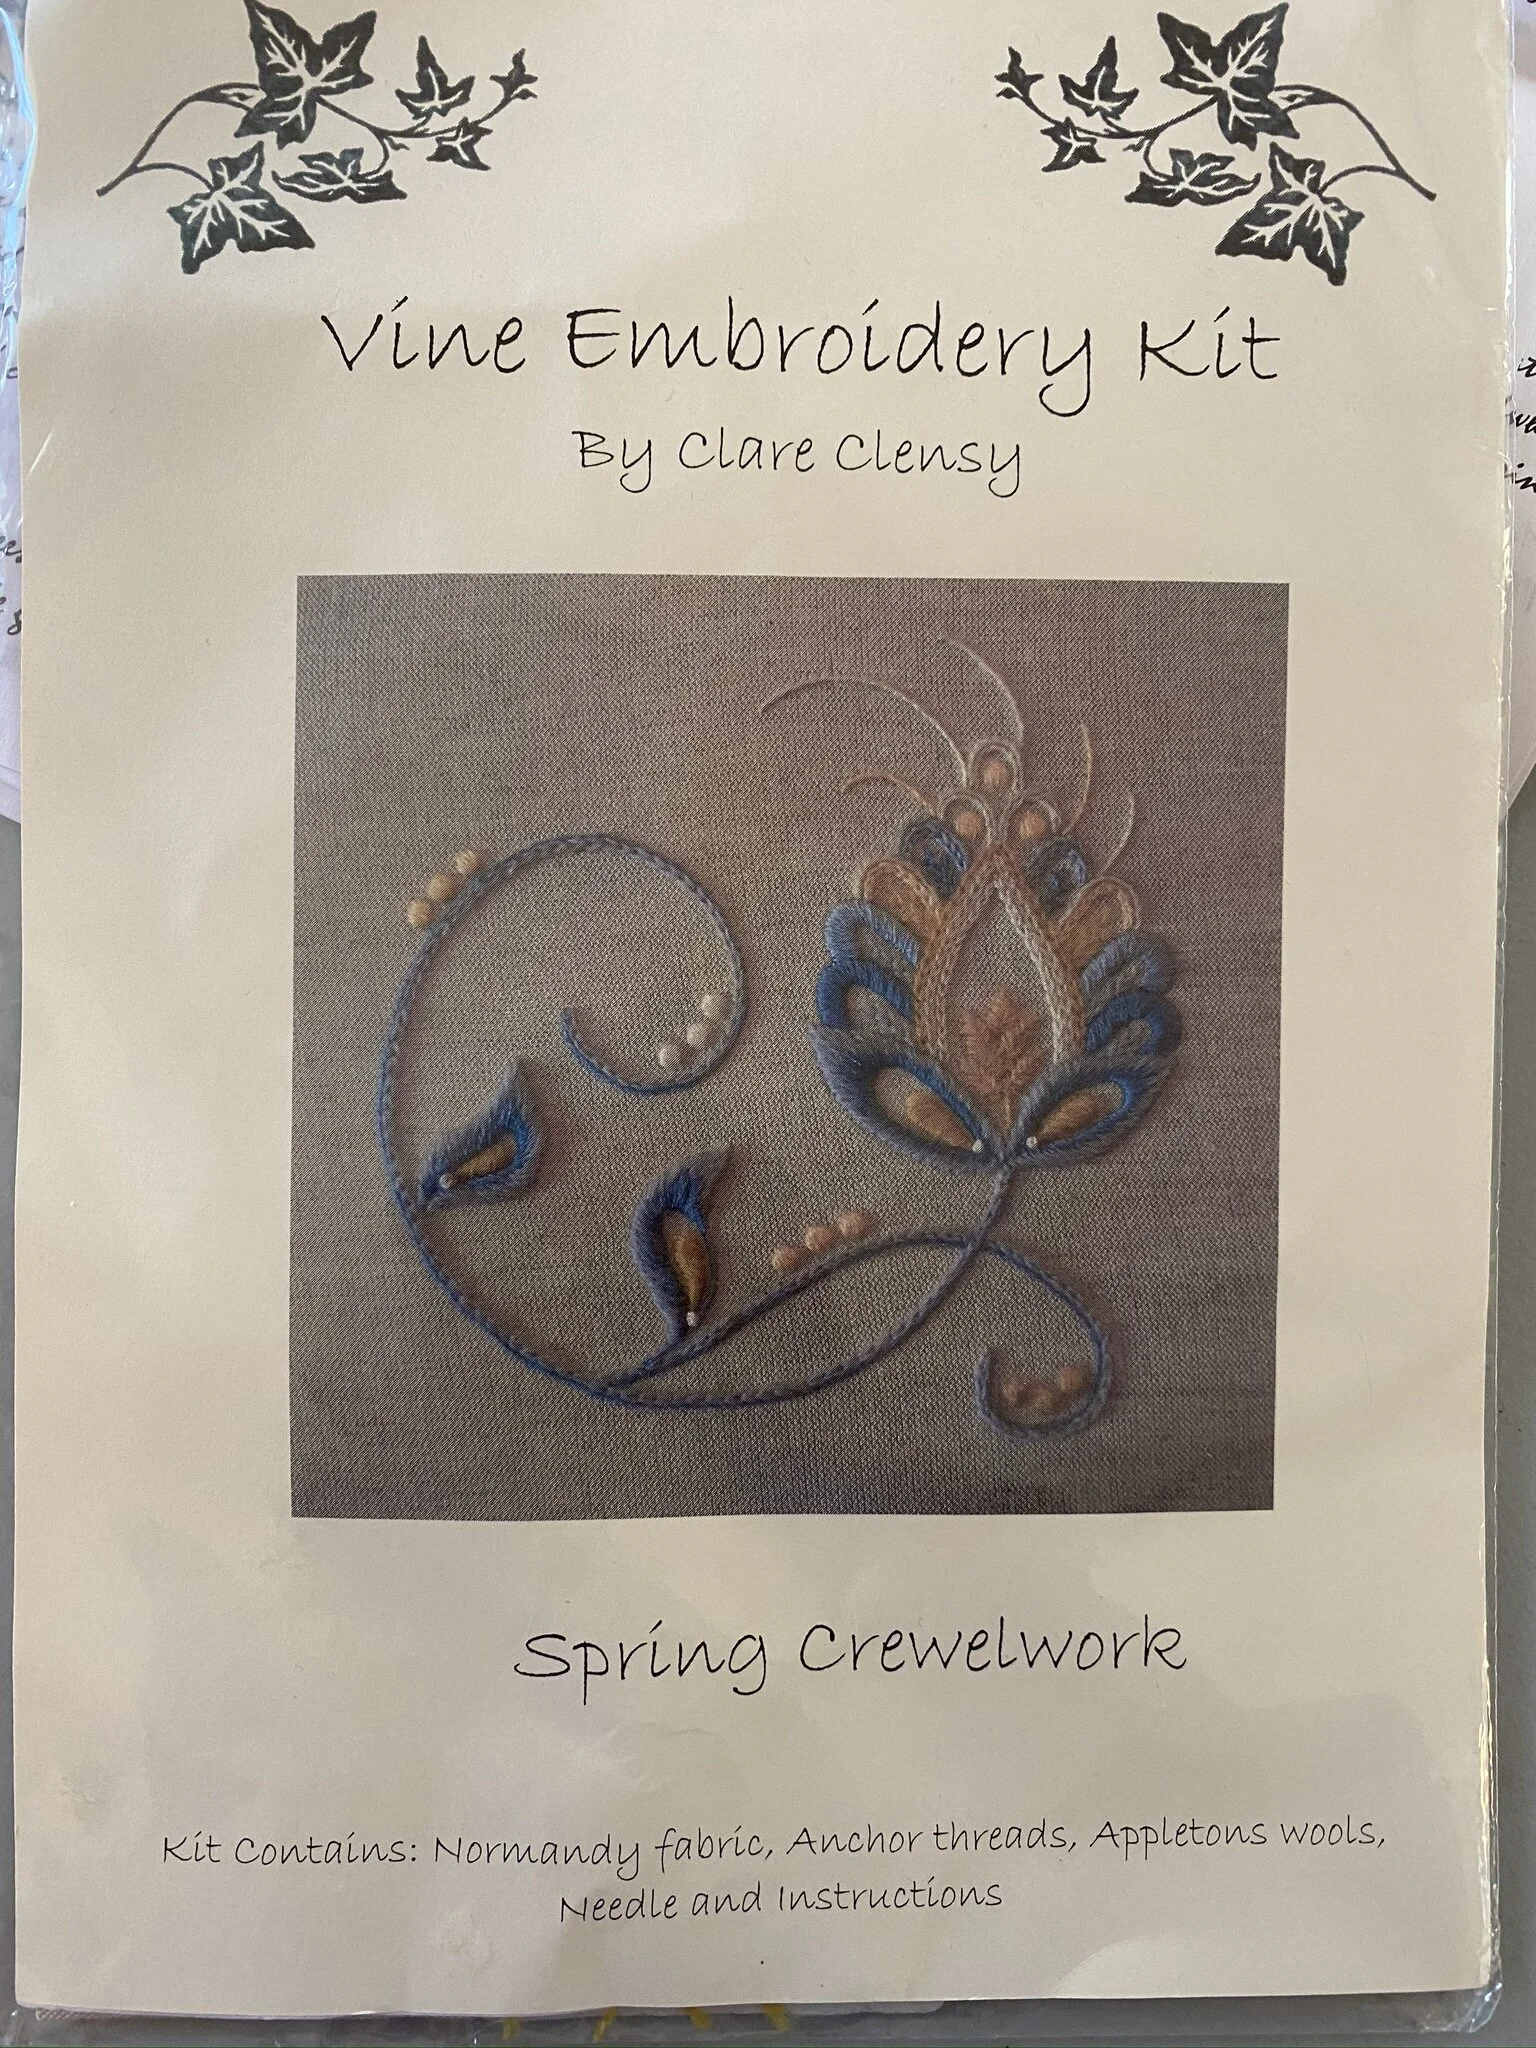
I decided I wanted something just a bit more challenging, and I’ve been wanting to do some crewel work again. I love Jacobean-flavor designs, so I bought this kit. It’s a small project so it’s just enough to be interesting without being overwhelming. The “challenge” piece is to help me perfect my stitching, really. there aren’t any new stitches for me in this. Just a more complex combination of them.
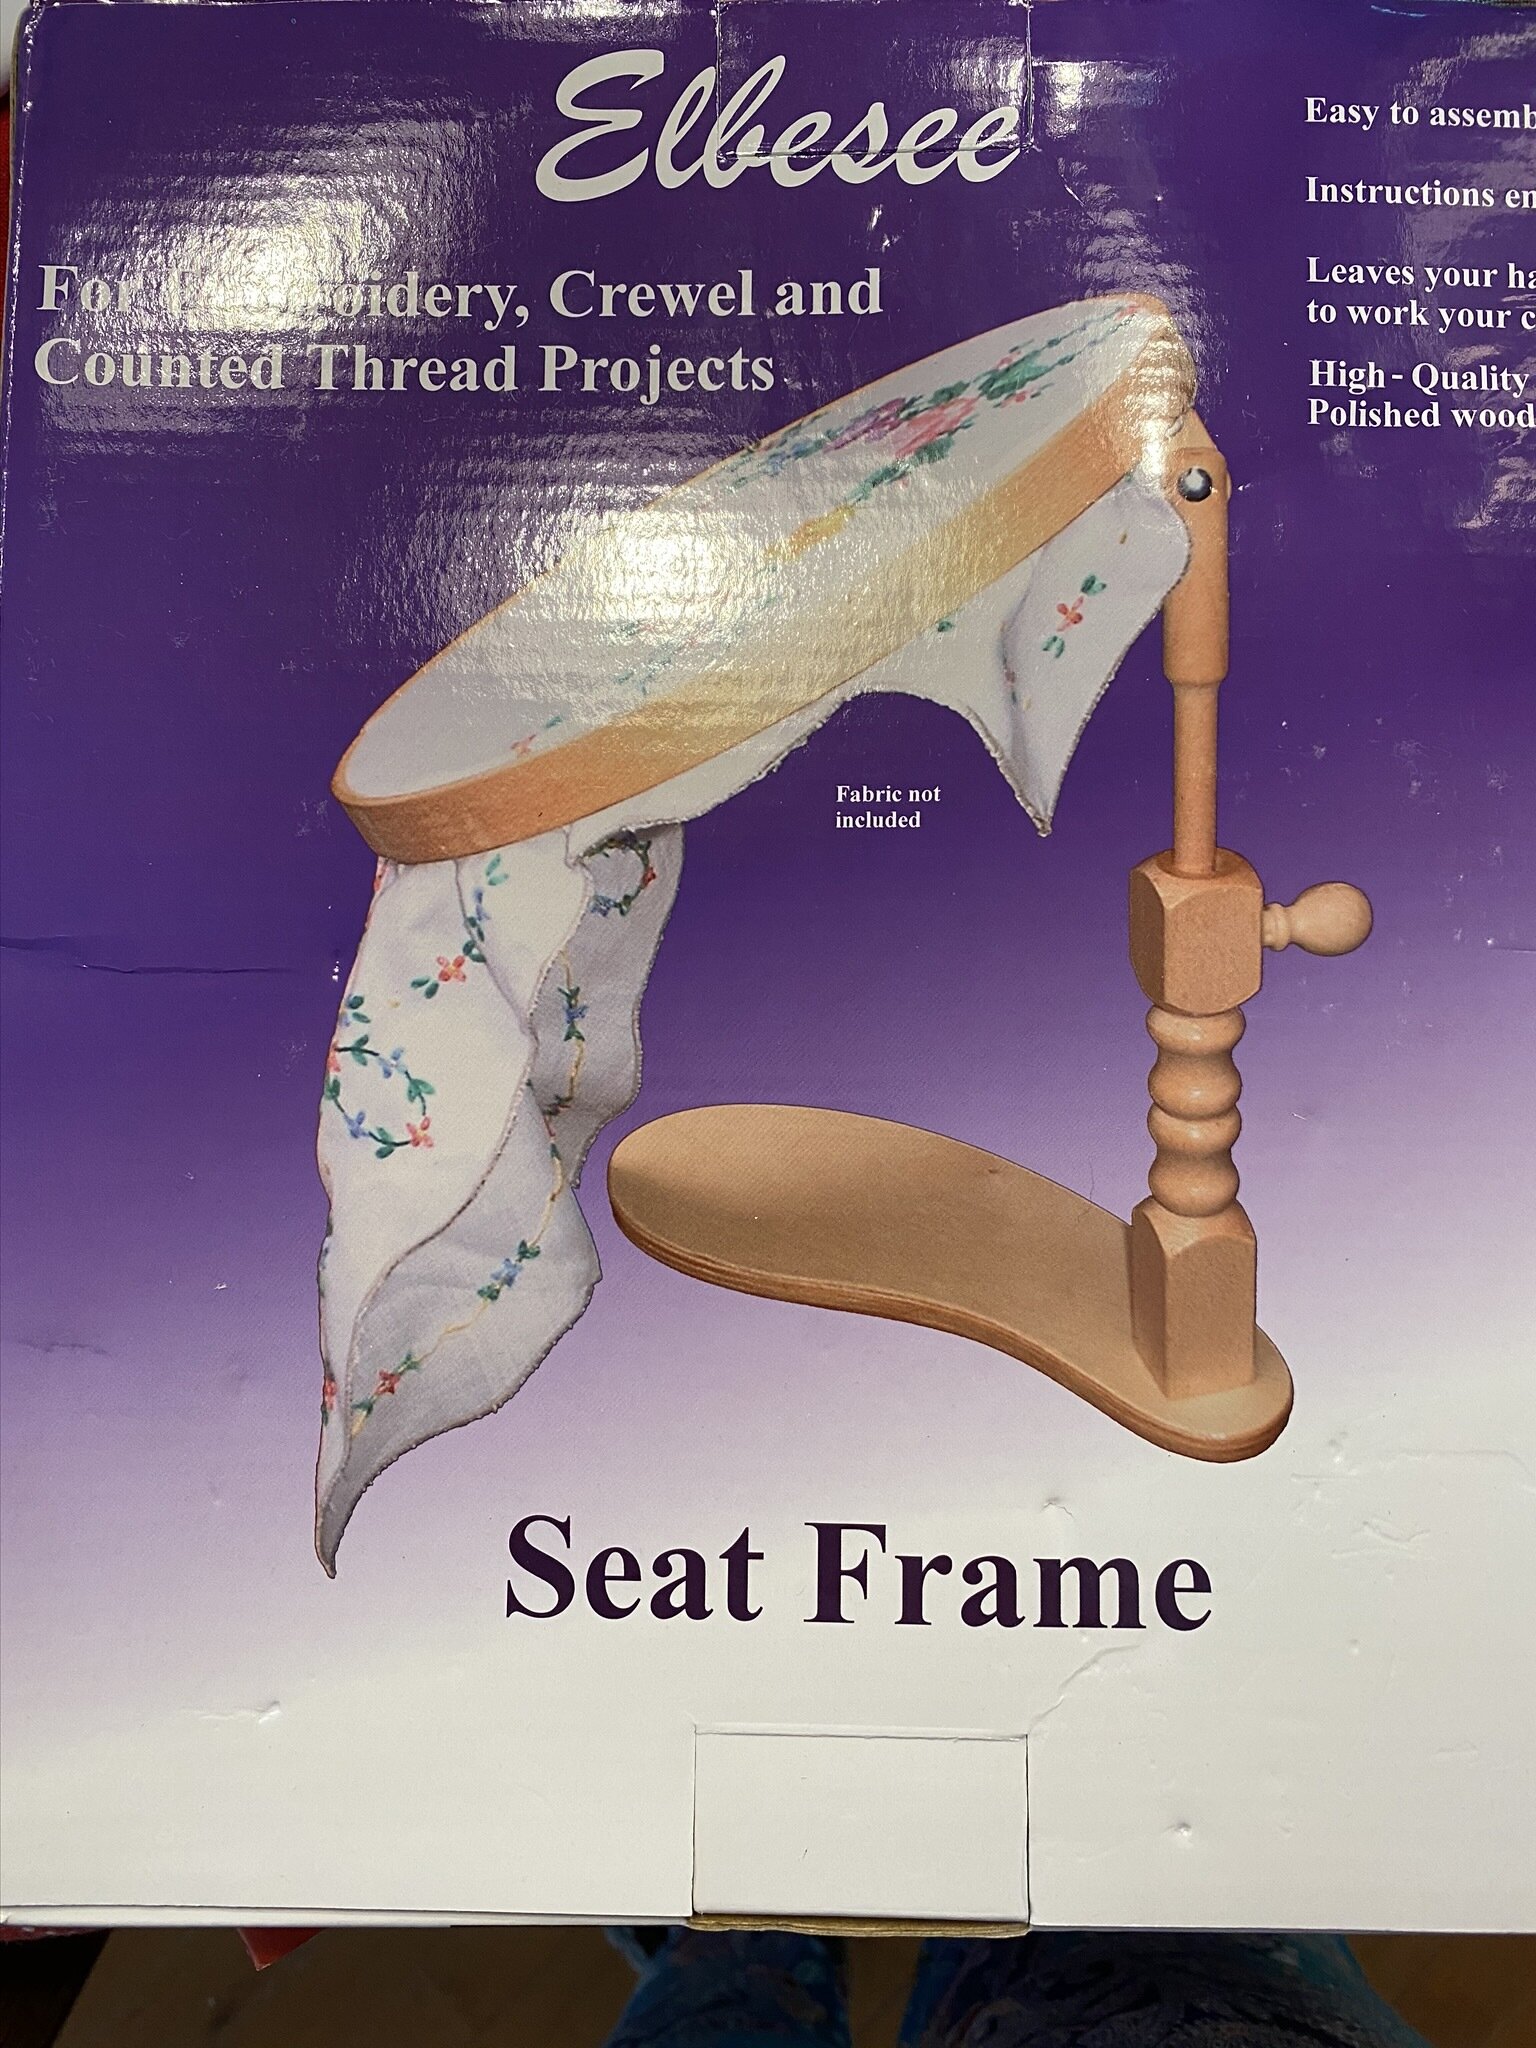
Also, after trying to do good French knots on my last project which was in a hand-held frame, I decided I really needed to figure out a way to have both hands available. So after reading some recommendations and such, I ordered this from Amazon.
It has three different hoops you can use with it, plus I ordered the clamp accessory you can get to use other frames. It’s nice and sturdy with several adjustable points.
The trick is knowing how to position the darn thing.
I used it for the first time last night and kept getting myself into all sorts of awkward positions as I was working my way around the design. Like I was playing Twister or something.
It wasn’t until I’d finally decided I was too tired to do anymore last night and was putting things away that I realized an entirely different way I could’ve positioned myself with it and probably would’ve had far greater success. Oh well, that’ll wait until after vacation.

I’d actually taken my first stitch in it last weekend, but with just that one stitch I managed to get myself a pretty serious tangle in the back. I was WAY too tired last weekend to have even been pretending, so I set it aside, tangle and all.
So… all that’s to explain why I only got this much actually embroidered last night.
Watch me burning up the track.
It took several minutes to get that tangle taken care of, several minutes of futzing with the new frame to figure out how I was going to sit, and then away I went. Watch my dust. (It was very slow going.)
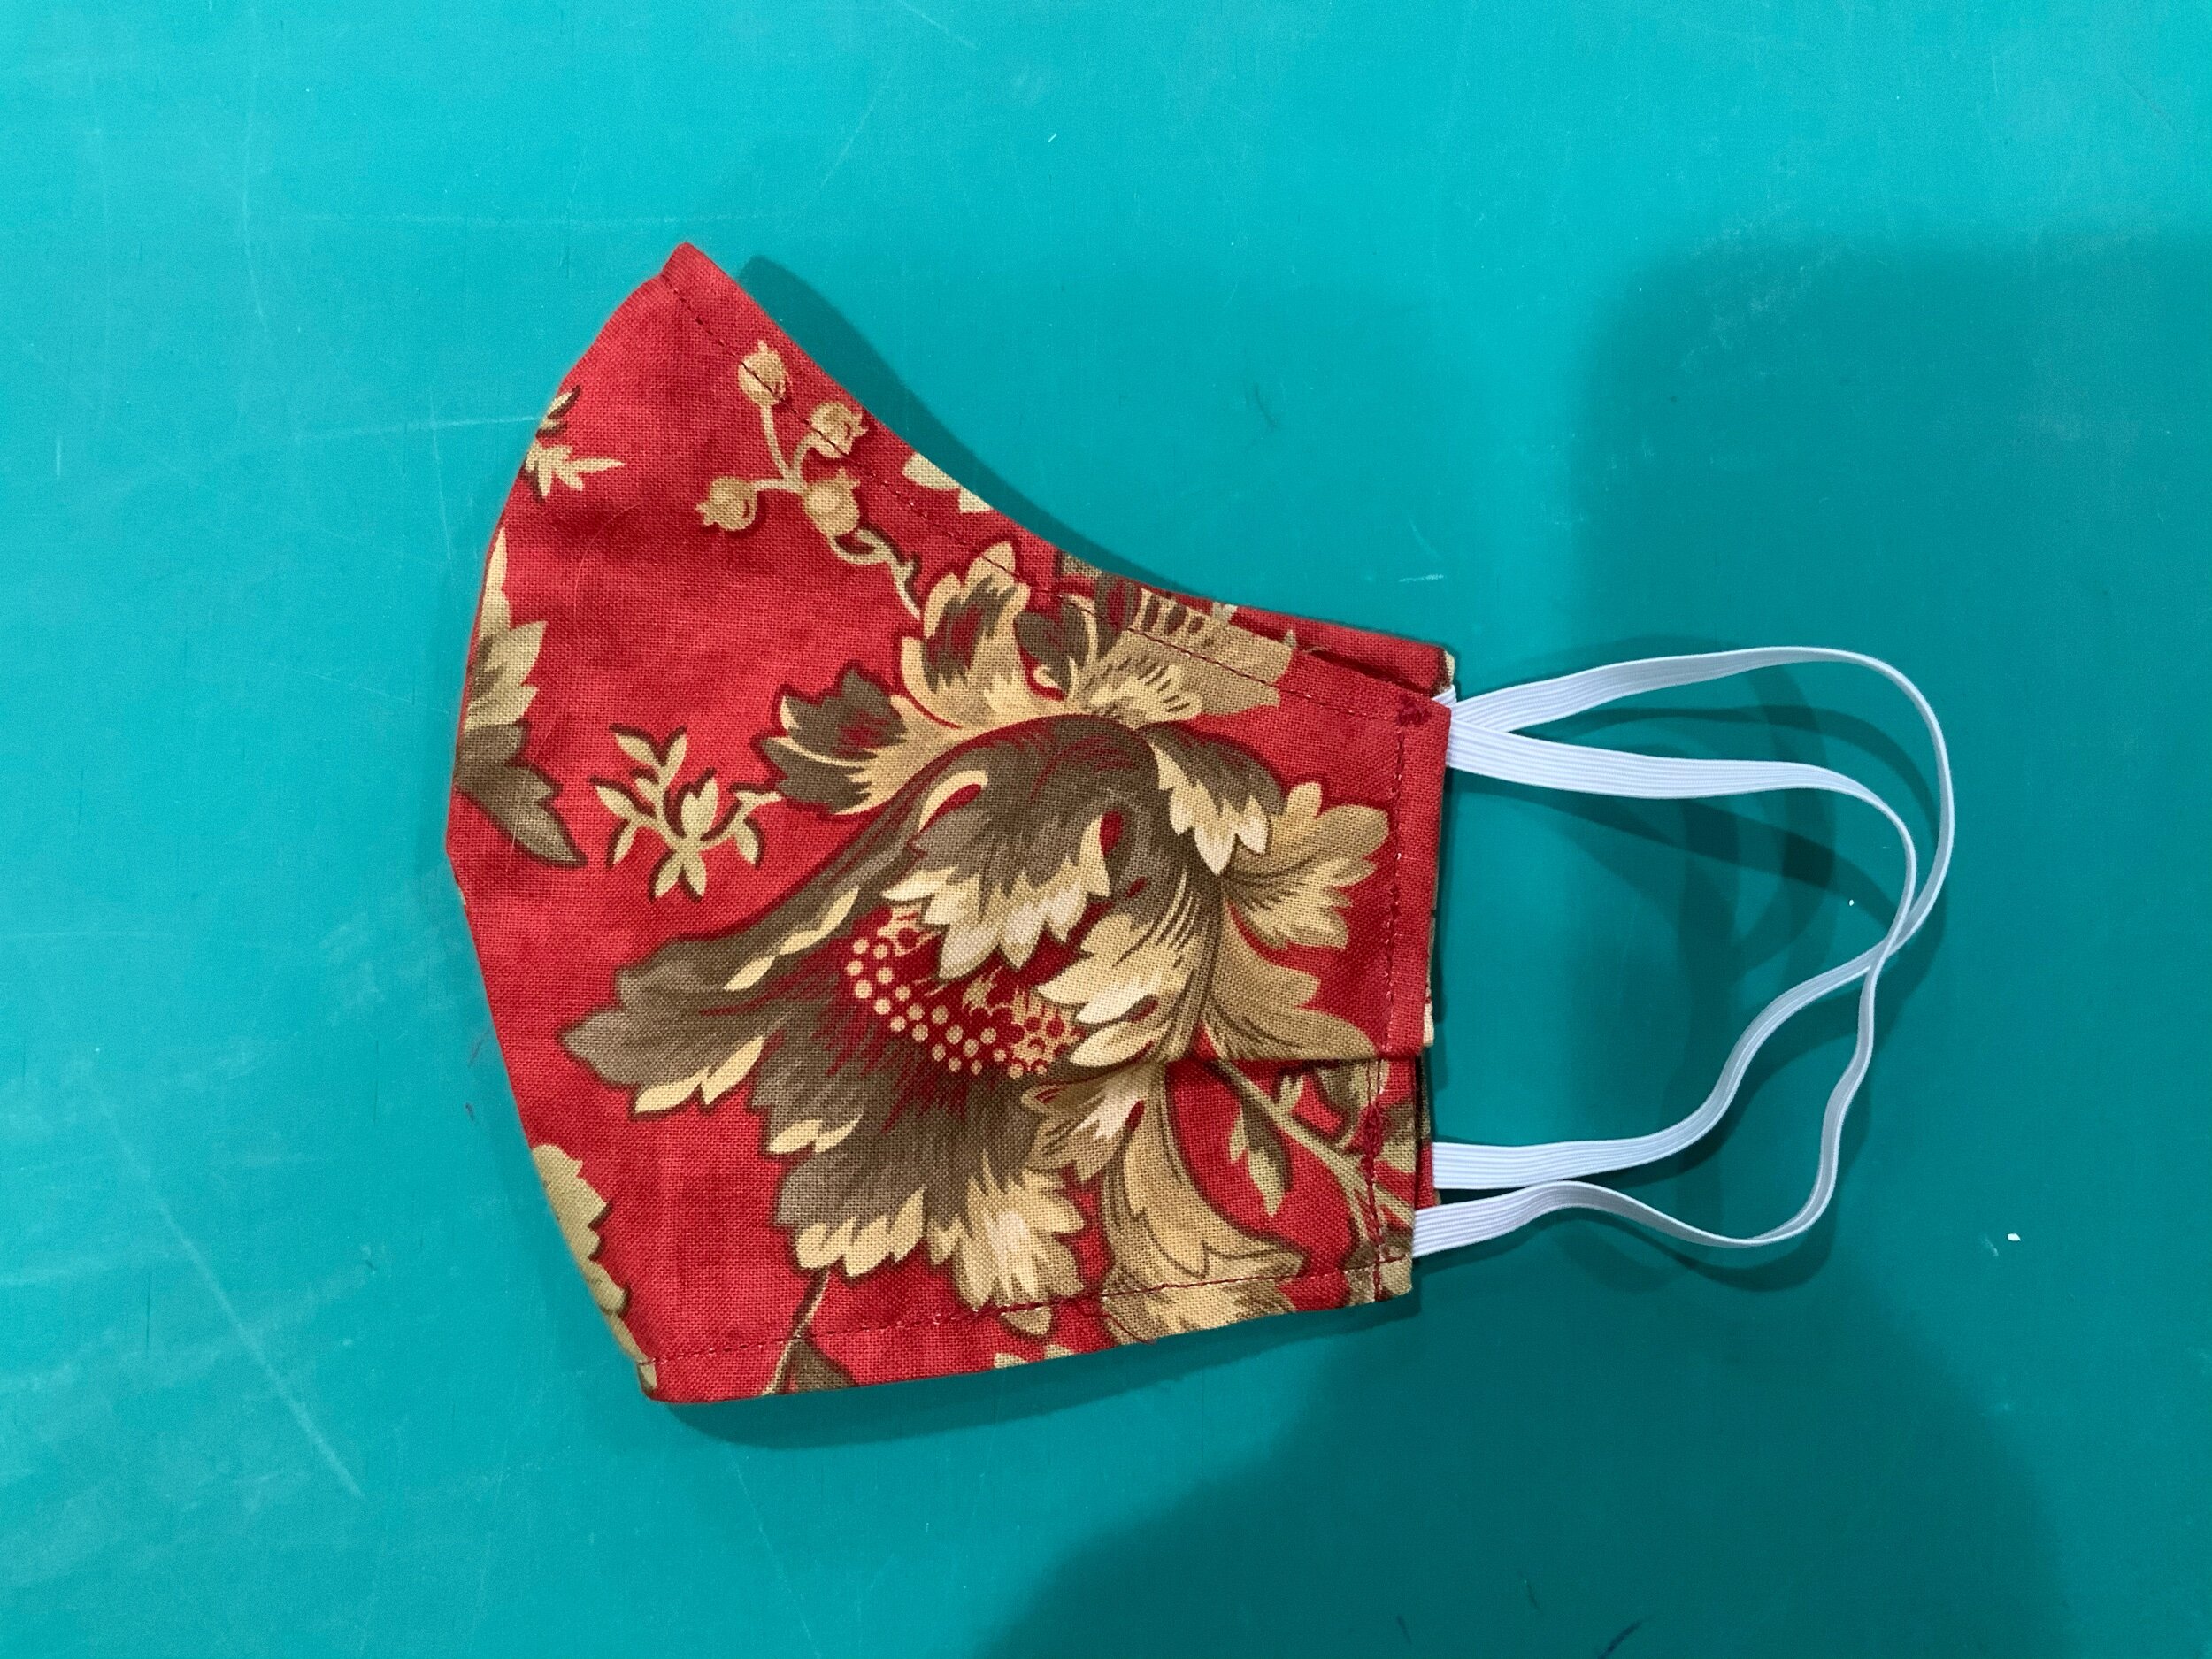
I’d planned on making myself some more masks today as I’m not sure I actually have enough cloth ones to get me through a week away. However, I discovered I am well and truly out of elastic and don’t like any of the other methods. So I’ll have to use the disposable paper ones once I’m out of my cloth ones. I already have elastic on order so, by the time I get home next week, I can make myself a few more. I just thought I remembered having a couple of mask’s worth left. Nada.
Instead, I decided maybe I’d cut some more scraps into usable sizes. Well, motivation left me on that one too, so here I am writing a blog post instead. But I have been doing some blog-surfing to decide what scrap sizes I want to cut routinely. I’ve been doing 2 1/2” strips for a long time—whenever I cut fabric for a quilt, if I had less than a half-yard left, I’d slice it into 10”, 5”, or 2 1/2” strips/squares. Now I have a whole lot of “real” scraps from making masks—fat quarters with big holes in them. I’ve been doing 2 1/2” squares, and a few tumblers with my tumbler die when the piece is a little bigger. But I really want to get myself into a system.
In my growing AccuQuilt collection, I have a 5” die, a 2 1/2” square die, and a 2 1/2” strip die. Those are easy sizes to cut, and I do still remember how to use a ruler, LOL.
ScrapTherapy uses 2”, 3 1/2”, and 5”.
Bonnie Hunter does strips in 1 1/2”, 2”, 2 1/2”, 3”, and 3 1/2”, then cuts those down when she needs squares or rectangles. (She seems to vary from these sizes but those are her standards.)
In my current scrap stash, I have 2 1/2” strips, some 2 1/2” squares, 5” squares, 10” squares, and some small number of 1 1/2” strips.
If you’re someone who routinely cuts scraps into usable sizes, what sizes have you found most helpful to have in a stash? I don’t want to get overly complicated, but I would like to get in habits so I need to be more systematic.
Help?
Not a whole lot going on…
The last couple of weeks have been a lot of evening conference calls and webinars so I haven’t gotten much else done. However, after wearing paper disposable masks and one of my husband’s fabric ones I’d made him all weekend because the few I’ve made myself are in the wash, I decided it was time to make myself more masks. Frankly, I also wanted to spend some time to make myself real masks that I wouldn’t mind wearing for several hours. All of my masks were basically tests on variations on patterns so none of them fit me quite right or were particularly comfortable to wear.
So, yes, I took about an hour this afternoon carefully paying attention to the instructions from the AccuQuilt website (as that’s the die I’m using), trying it on, and then making some adjustments to make it fit better. I had to take tucks in the elastic as it was a little too long, and then I took a couple of tucks in the side. The top is still a little big, which would be fixed if I were able to put a nose wire in there. I haven’t been able to make that work right yet, in the few I tried doing it in.
The downloadable instructions aren’t the same as their video tutorial (different seam allowances and so forth), so there is a lot of trial and error in using the cut pieces from the die. I’m not overly thrilled with AccuQuilt in that regard.
My husband and I have a vacation coming up so I need to make myself a few masks that I could be comfortable in for hours at a time. Guess I know what I’ll be working on this week….
Weekend Check-in

I didn’t realize that I hadn’t posted once I finished the Halloween embroidery. Yes, this project is now finally on to the next step—piecing! I really need to get on to that. Halloween is right around the corner.
If I recall, most of the fabric is in 2 1/2” strips—it’s all in the project bin but I haven’t taken it out and looked at anything other than the embroidery for awhile. I should probably target that project for next weekend. It would be nice to have the Halloween project actually done in time for Halloween…five years later….

I’ve been more in the mood for embroidery lately than for quilting. I think that’s because I haven’t been sleeping well lately so I’ve been pretty fried after work every day. As long as I’m doing embroidery, I don’t feel quite as guilty binge-watching guilty-pleasure-TV. “Look, I know I’m on the third episode in a row of Dateline: Secrets Uncovered, but look at how much stitching I’ve done!”
The night I finished the Halloween embroidery, I immediately started searching for new embroidery designs in some of my favorite places. You may recall my new little niece? She’s four months old now and I’ve still not gotten to cuddle her. Blame my auntie-withdrawals but I ended up buying several designs I want to work up for her nursery as Christmas gifts. They’re all from BumpkinHill Designs. They’re stinkin’ adorbs. Before I started in on those, though, I wanted to do more of a practice piece that would be just for me.
The design is another BumpkinHill one. We all know how I feel about pudgy birds. And tea. Plus I’d get to use all sorts of pretty colors (no more limited color palette for years on end!) and a slightly wider variety of stitches. I’m using some embroidery fabric and some lightweight stabilizer I had in my stash. I’ve lost the AC plug for my lightbox (no idea) so I had to use the old window-and-painter’s-tape trick for the transfer. My lines probably aren’t as true to the pattern as they should be.
It’s a fun design to work. However, I’m not keen on how my fabric and stabilizer are behaving. It’s a little too lightweight to hold up to the stitching. The design calls for three strands, which I’ve used in a lot of places, but I switched to two strands for a few elements because the fabric just wasn’t behaving. And the French knots? Puh-lease. They’re either pulling through the back or I overcompensate by making them too big. I’ve ripped out multiple FKs and finally decided to wait until I have everything else done, then tackle them again (perhaps after a glass of wine). I’ve done FKs before with success—but these are killing me. I’m definitely checking out other fabric and stabilizer options for when I do my niece’s project for realsies.
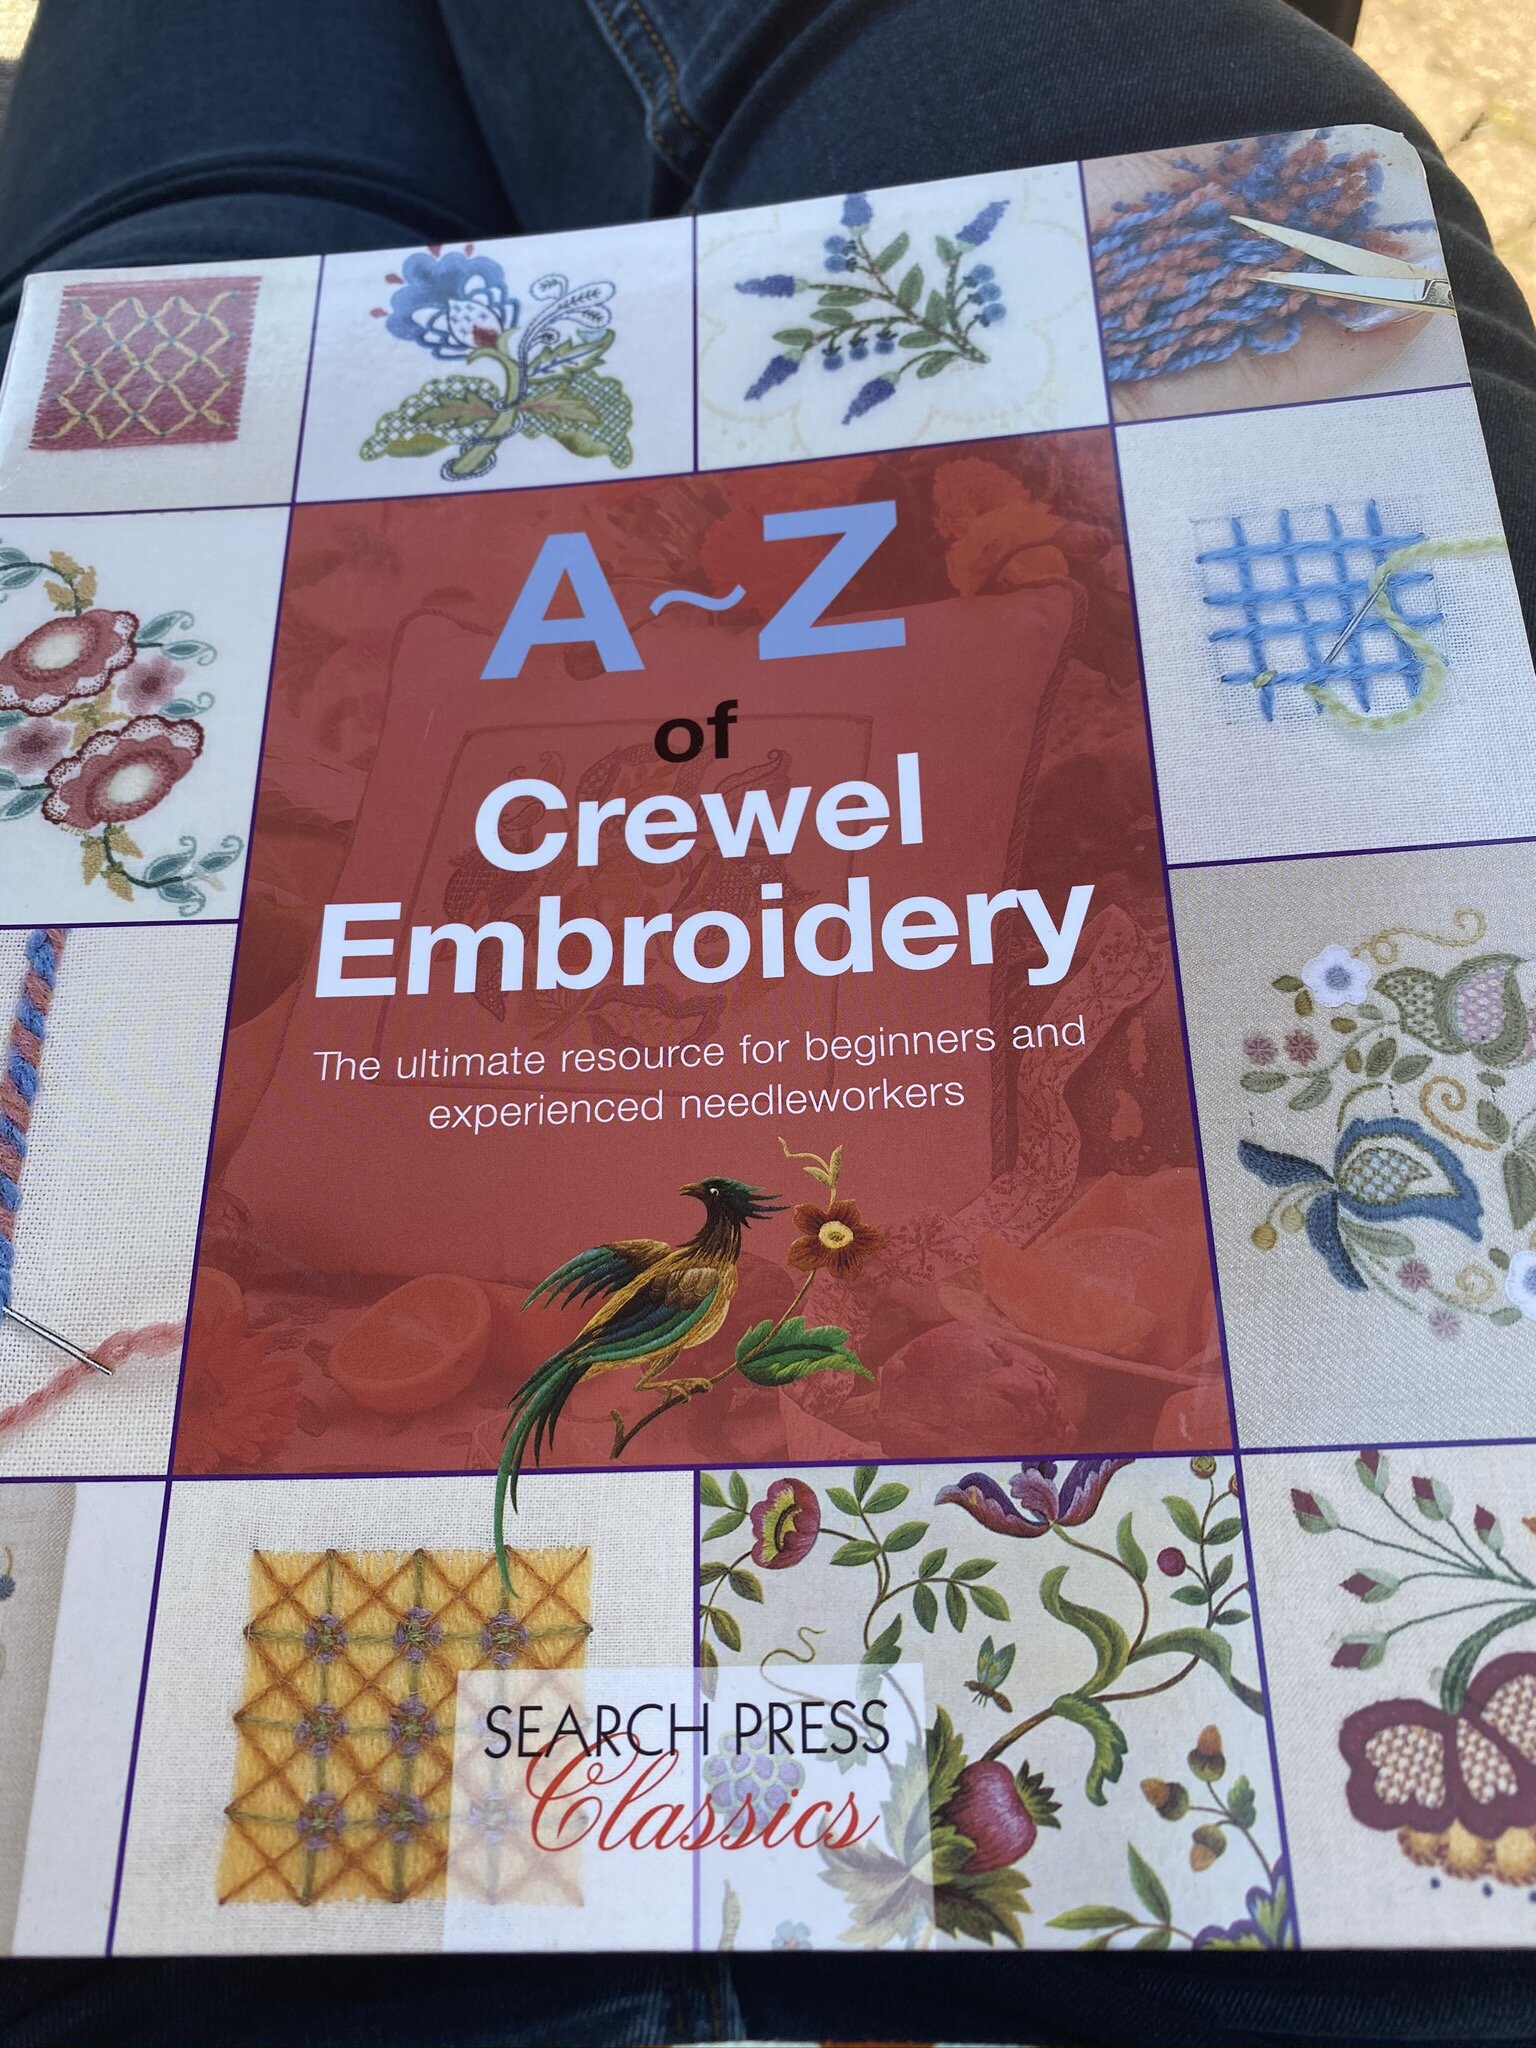
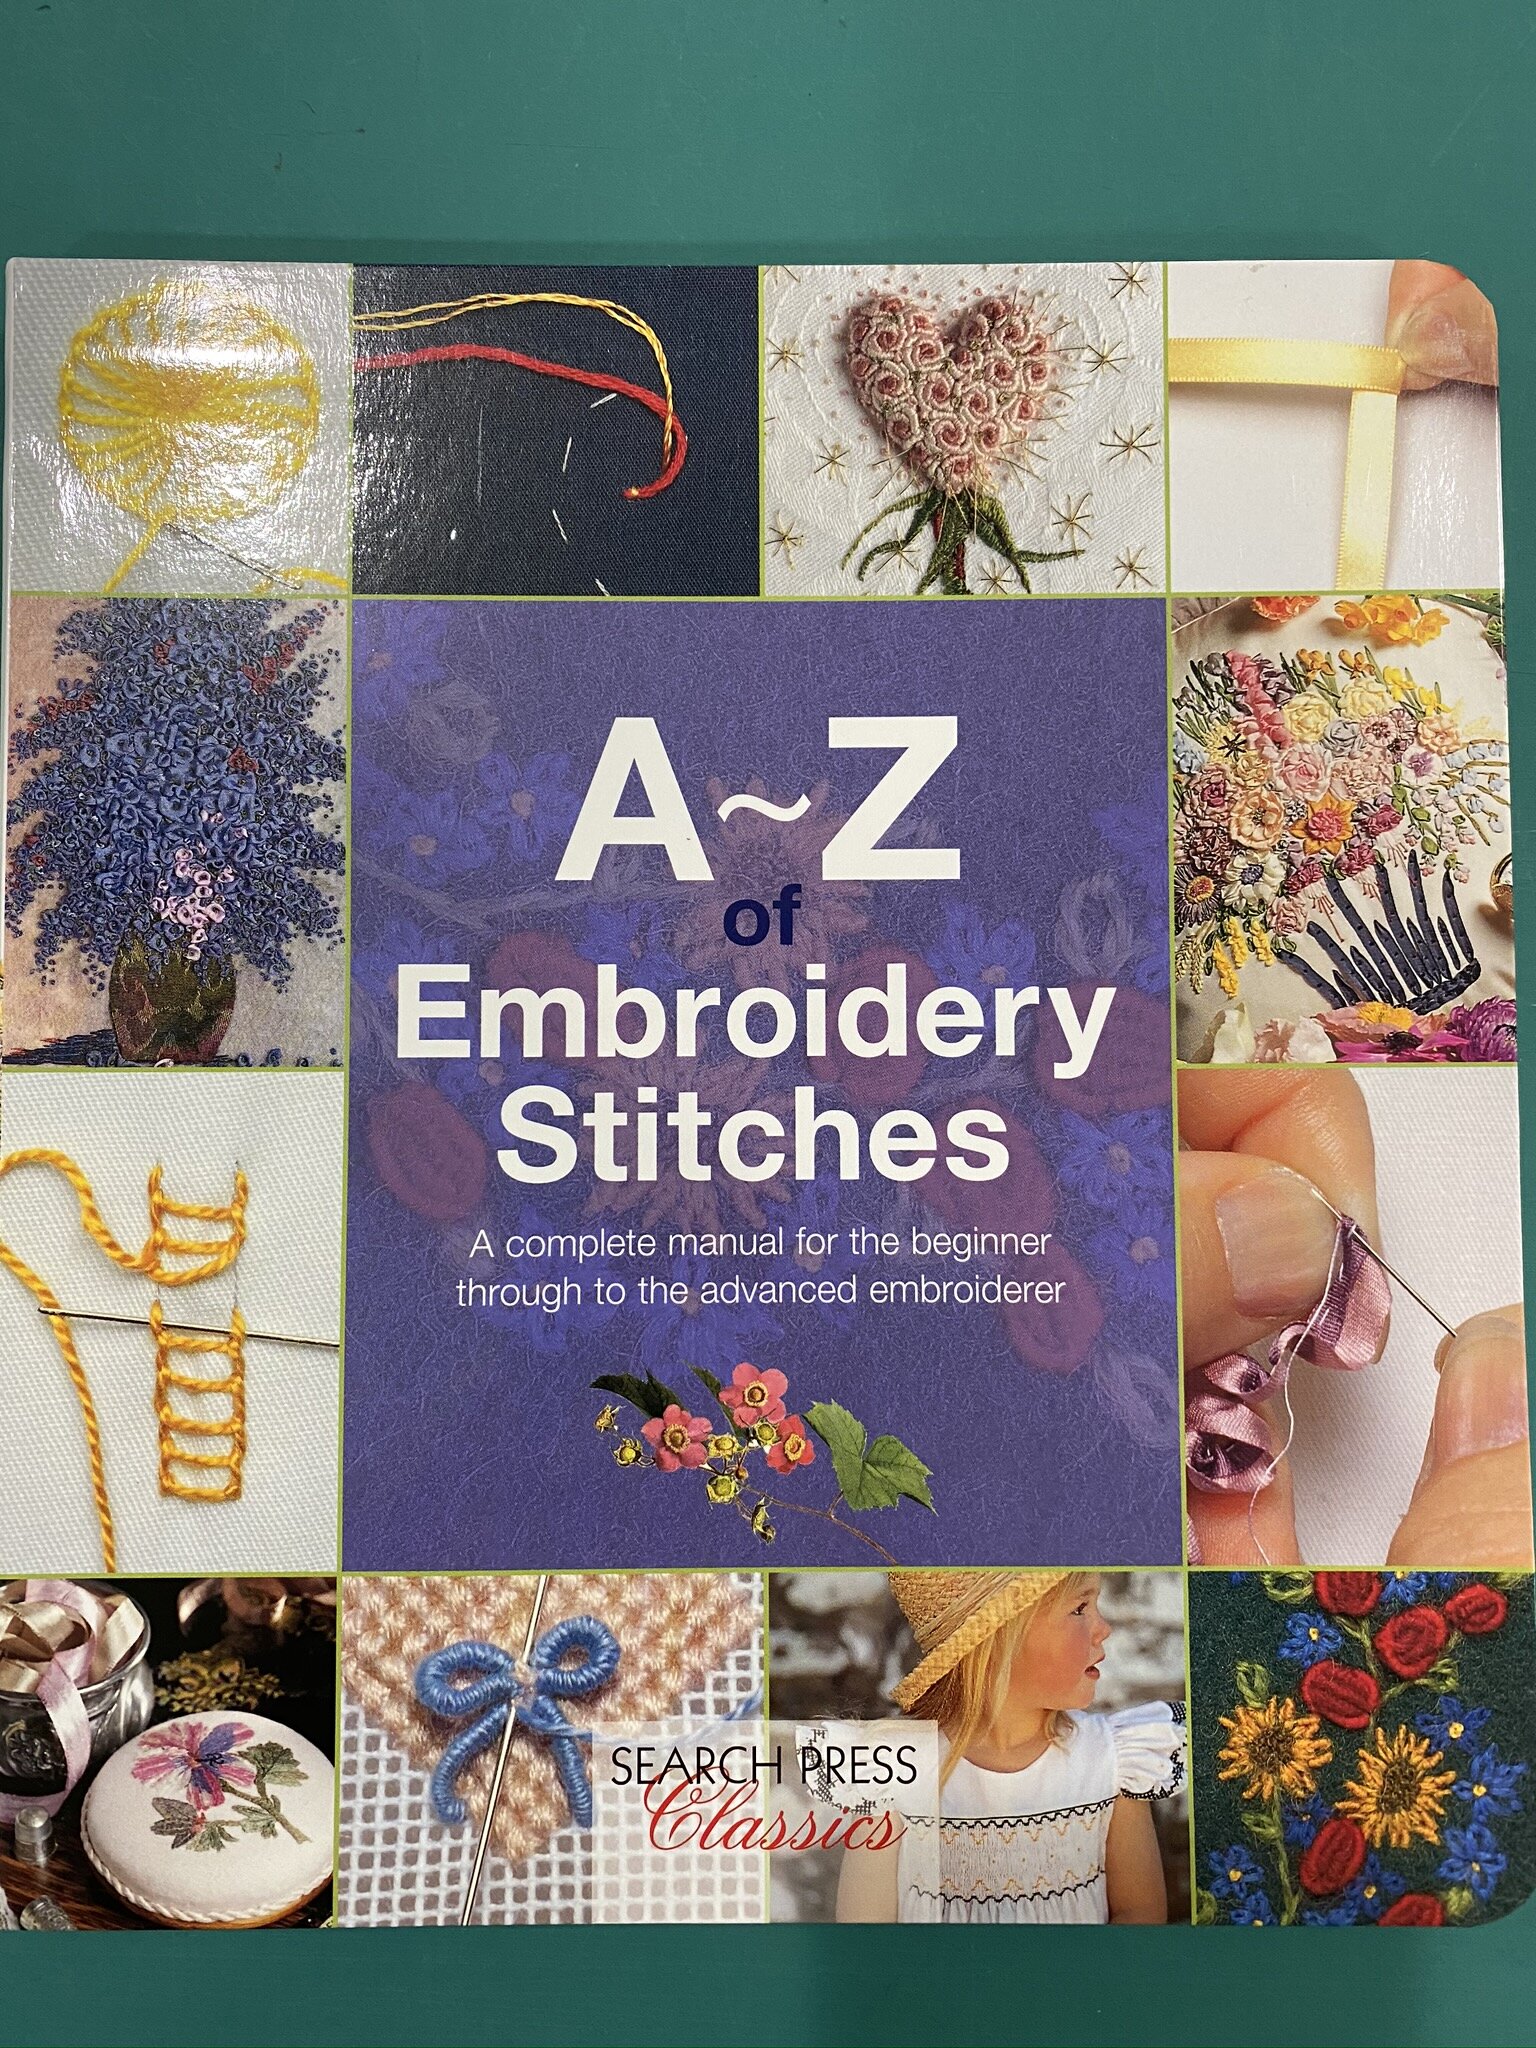

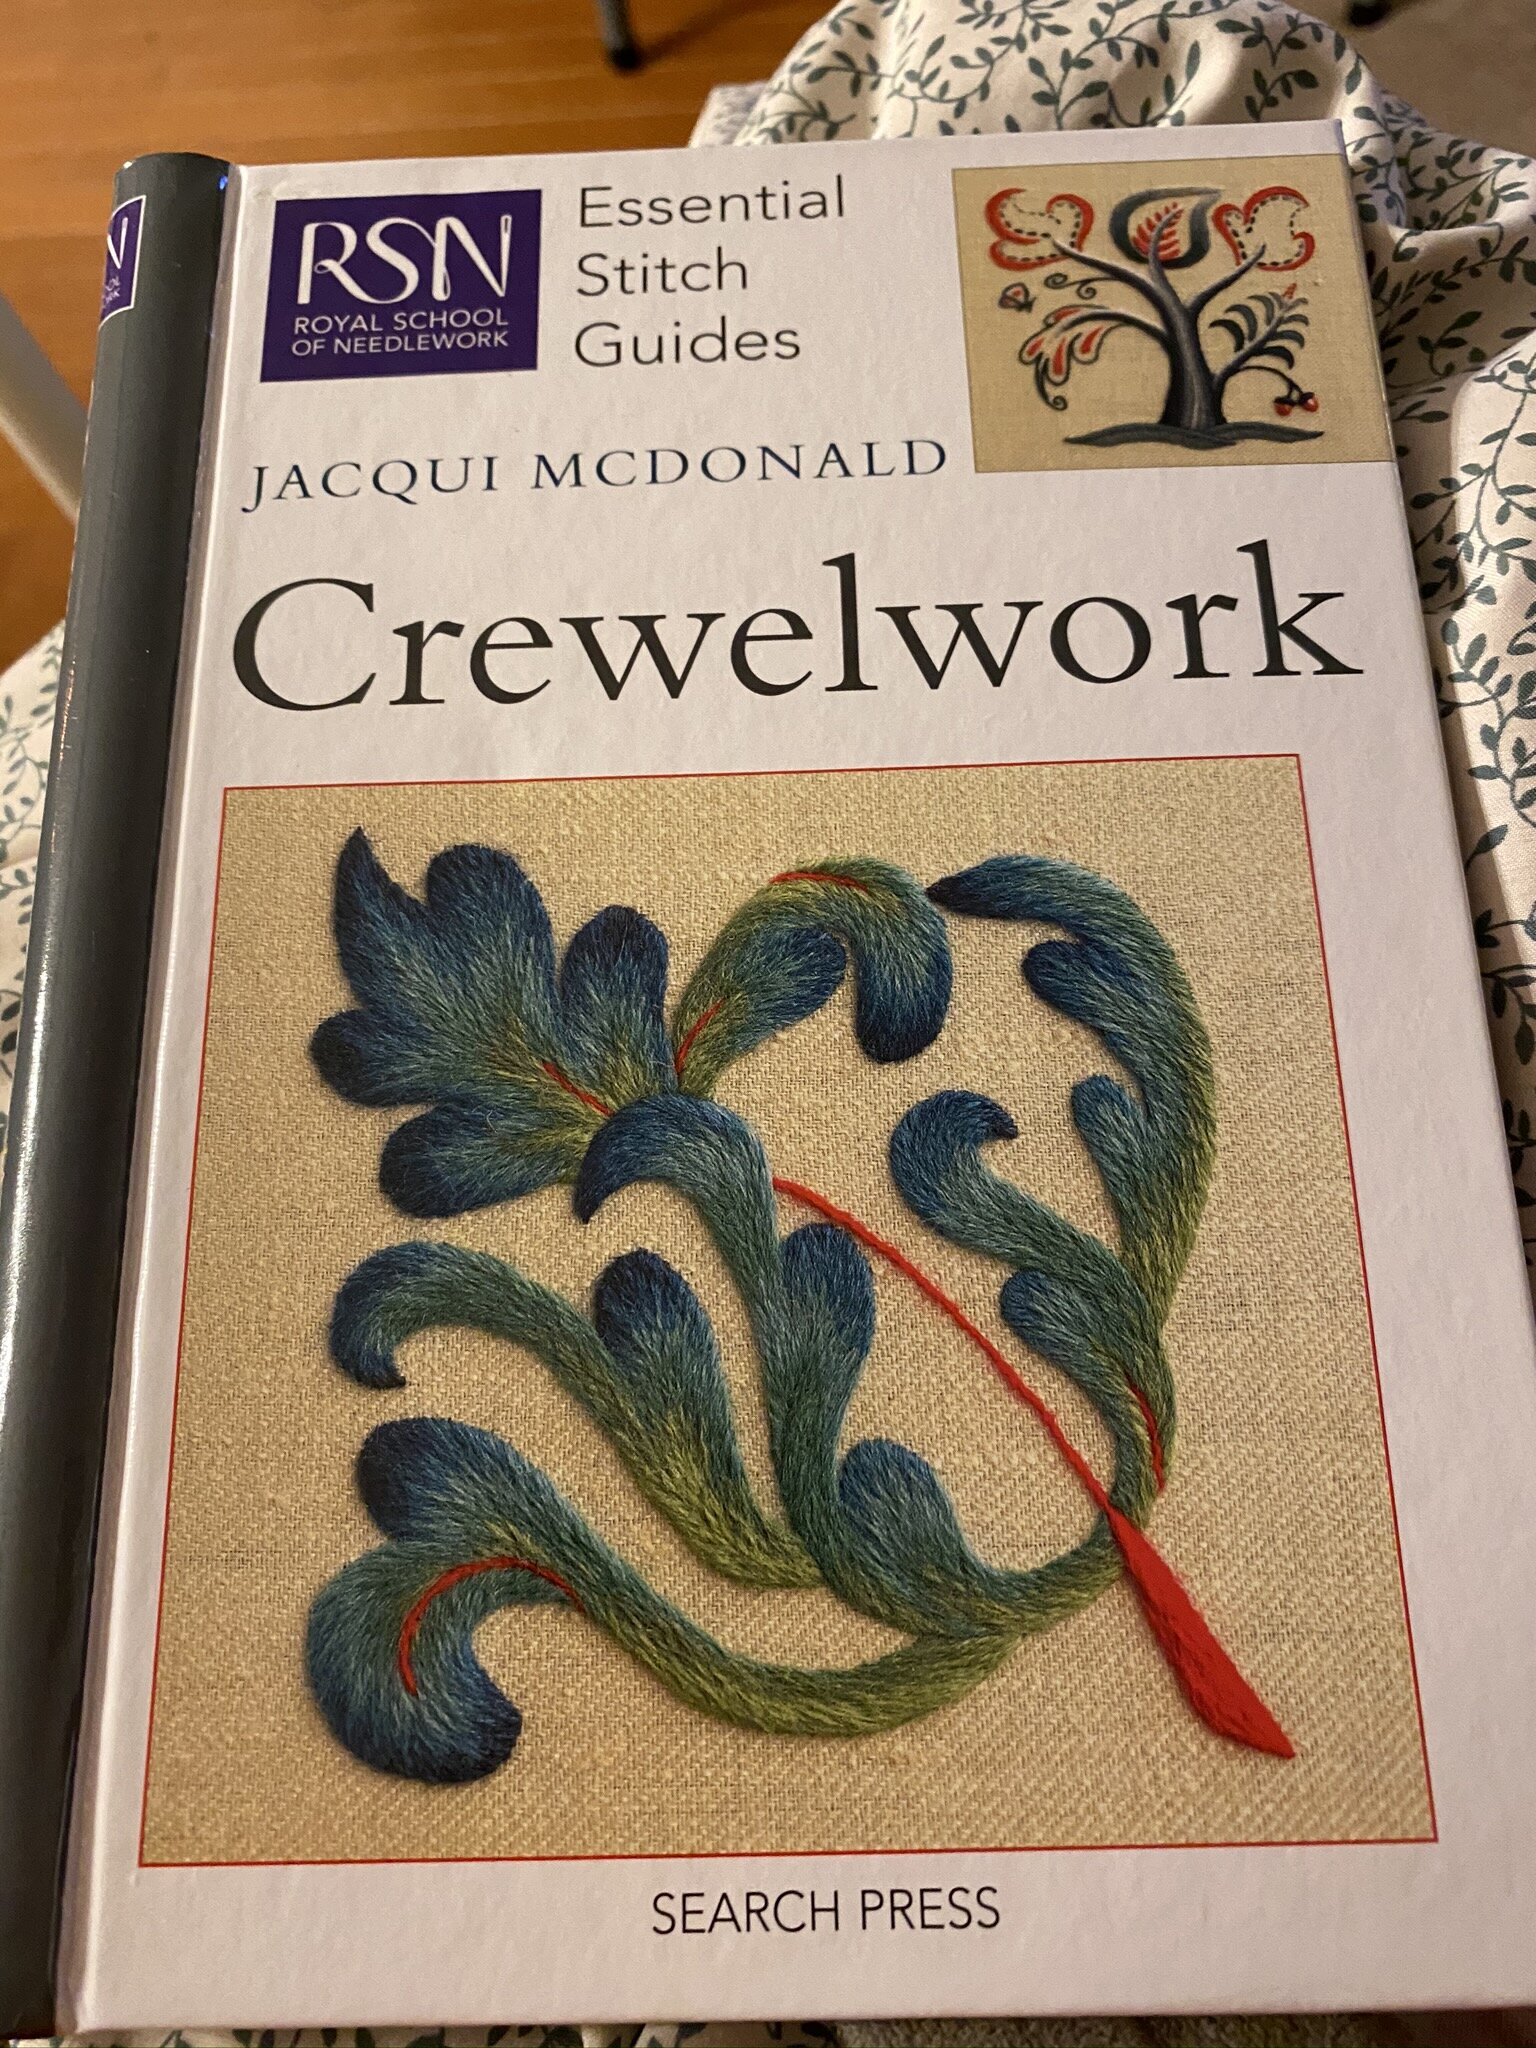
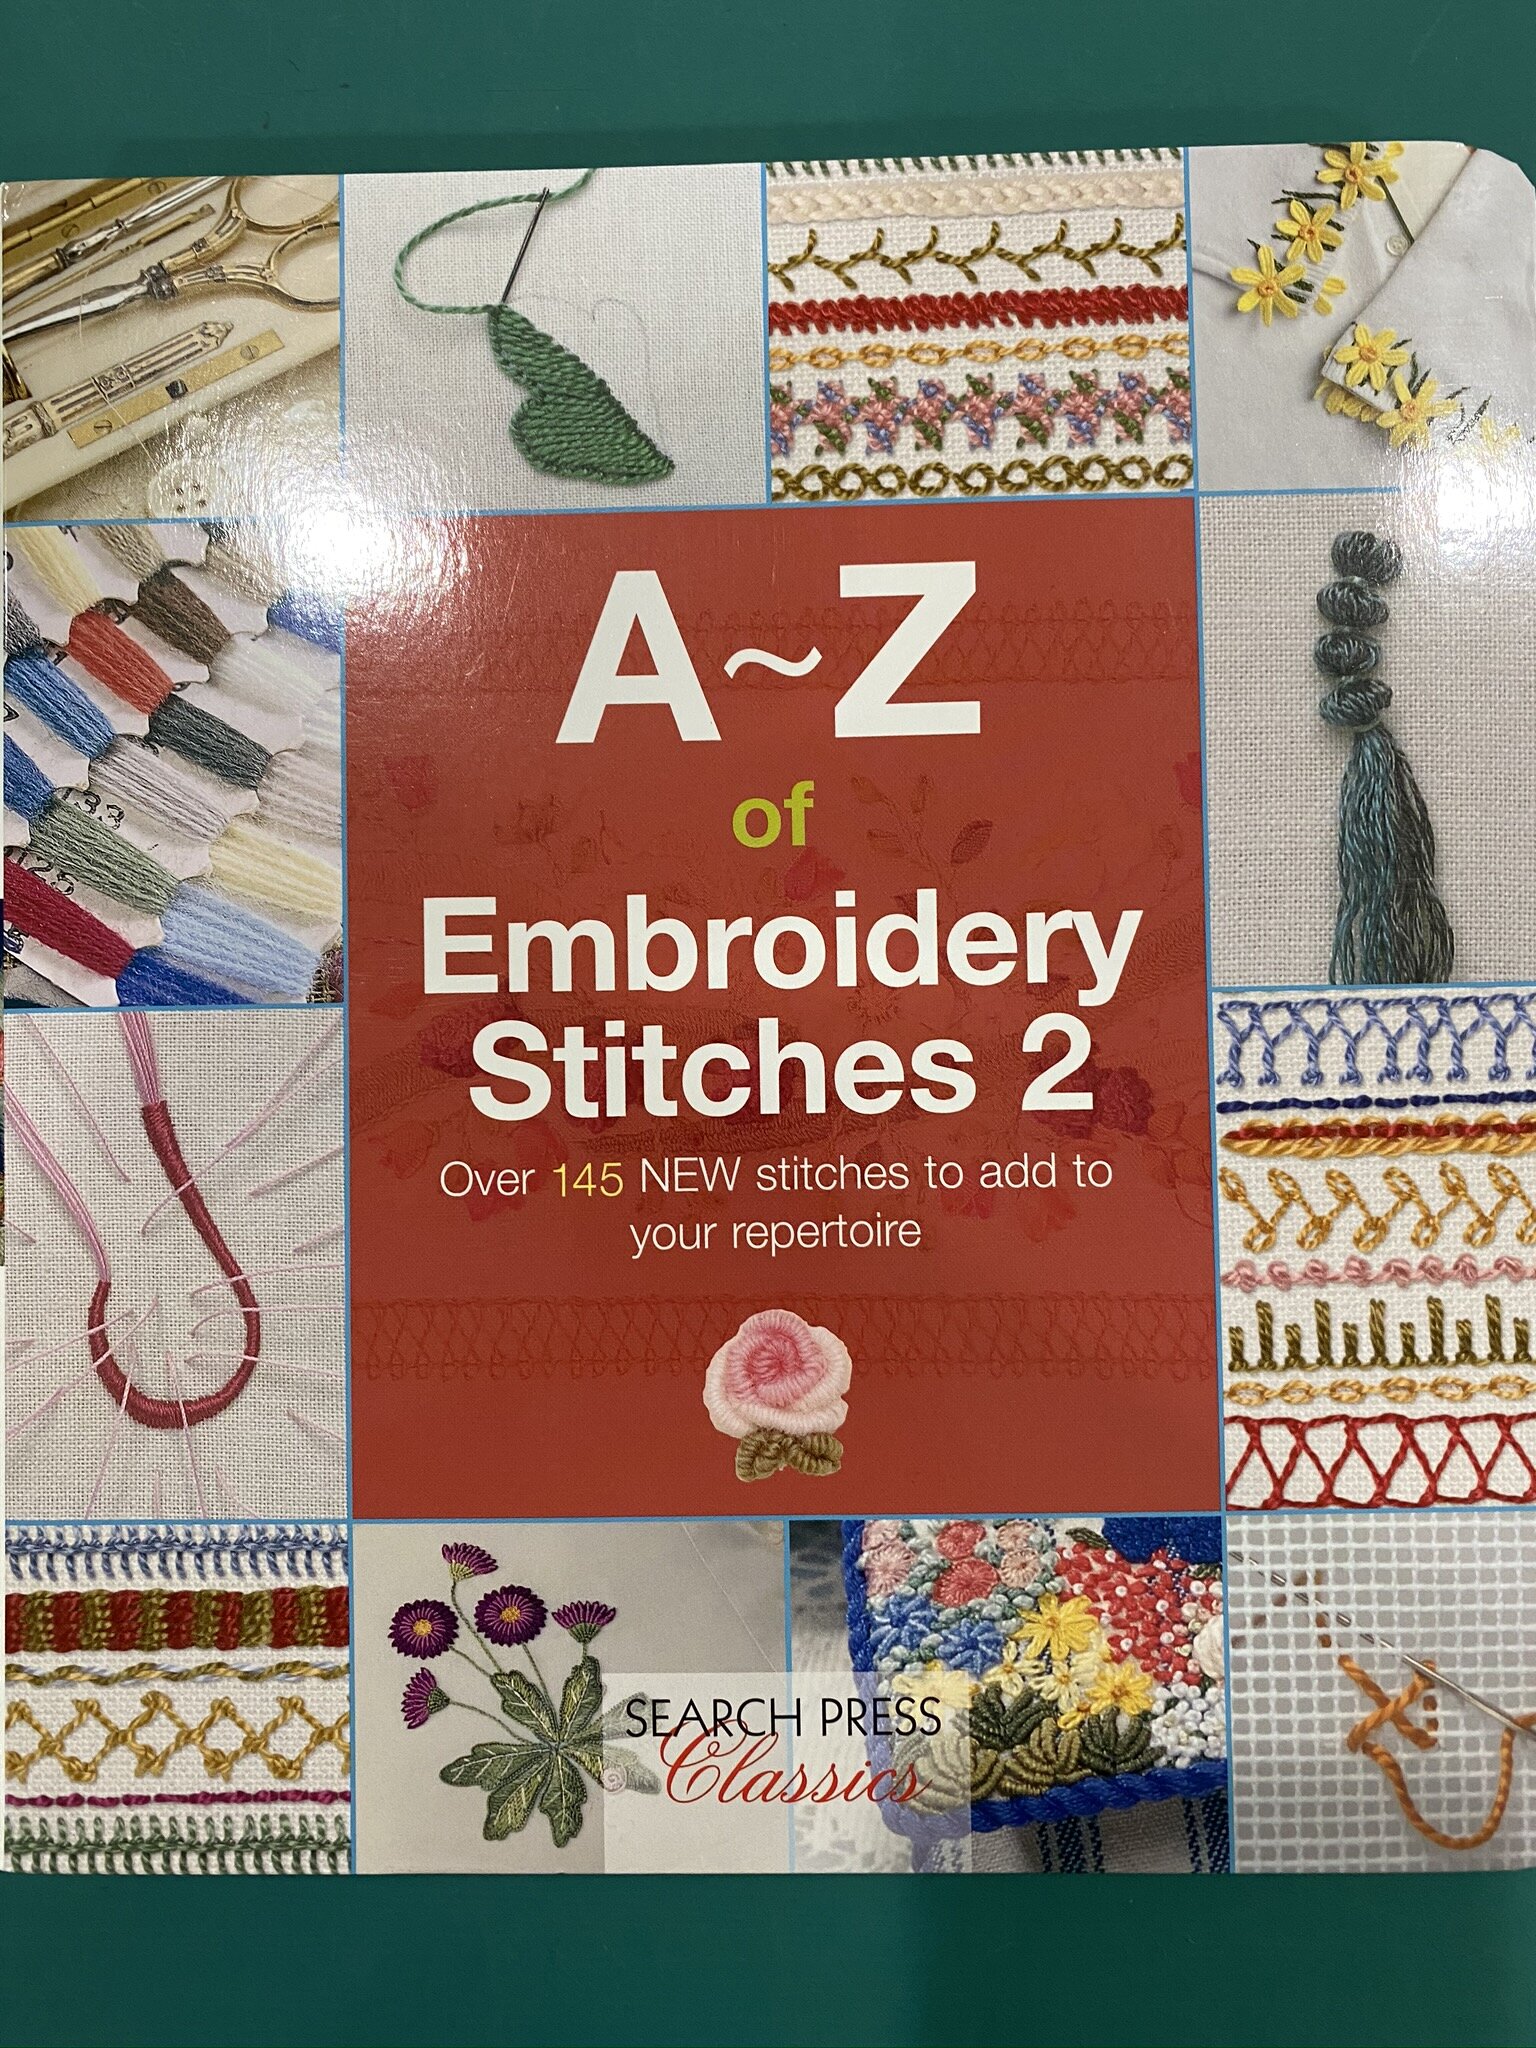
As an example of how focused I am on embroidery these days, I’ve made a few new book purchases.
I love the A-Z books—they have excellent diagrams. I already owned another of their embroidery books—on motifs. Tatiana Popova is a talented designer of crewel embroidery designs in a style I adore; I’m working my way up to doing something of hers, or one of the ones I’ve been drooling over on Mary Corbett’s blog.

And just because I’m a gadget girl, here’s a review for you. As I dove back into my embroidery for the first time in years, I also began to hanker after a neater-looking floss holder. I use Artbins and have a shelf that contains all my supplies, but the DMC floss (and floss like it) container just had skeins tossed in it, organized by color, but I had to dig through everything to see what I had. I prefer my floss to be on bobbins when I’m using it—much less likely to end up in a tangled mess. So I ordered a bag of bobbins from Amazon and ended up choosing one that came with a doo-hickey for winding bobbins.
Once I managed to get it hooked on to the side of my Artbin divider securely, it actually worked like a charm. I take the paper off the floss skein and put the resulting “loop” over my right arm so I can quickly unwind it with a few flourishes of my arm (very graceful and dancer-esque, I assure you); then I use my left hand to hold the tension while my right hand then starts winding the little doo-hickey. It would go very quickly except I don’t have a fine-point permanent marker so I have to use my label-maker to label the DMC color number on the bobbin, which takes extra time as I have to cut the tape down to size. (You can see a labeled bobbin in the lower right.)
I really wasn’t in the mood for any of the sewing projects I have in my head that I need to work on, so I ended up standing and winding bobbins for about a half hour. There was something strangely satisfying about it.
Maybe this week I’ll sleep better and be more in the mood for quilting. Not sure what’s blocking me, but it’s definitely not felt like my jam the last couple of weeks.
Belated Weekend Report and Big Plans….
Well, maybe not such big plans. More “fun to be had in the future” plans. But we’ll get there.

First, my weekend report. I’d set some goals—here’s how I did.
Finish cutting mask kits for friend: Done. I now have a total of 50 “kits” spread between small, medium, and large, in a bag waiting for either mail or personal “drop and run to be socially distanced” deliver. Phew.
Finish the unit in month 2 missing the piece: Done.
Make myself another couple of masks. Done—I now have two more. I think I now have 5 masks, although one of them was a “reject” so it’s not as comfortable to wear—it’s only when I don’t have any of the others available. Still, that should be fine for the amount I’m out these days.
In addition, I got six masks done for my son. I’d been delinquent.
And now I’m done making masks for awhile. I really hate making them—I hate wasting good sewing time on something like that. I know, I know…keeping my family safe and all that, and keeping strangers safe through the donation ones. But frankly, masks are prevalent now and at a price where, by the time I’ve counted the cost of fabric, thread, and my own time, it’s a tough sell for me to take the time out of my precious sewing time to make them rather than just placing an order. I still have the AccuQuilt dies for them. I’ve debated selling them off at this point, but I think I’ll hang onto them for a bit to see if my energy comes back to make more, or my friend needs more kits.
I never got to making the tote bag. That’s still on my wish list.

So…plans for the future.
I finished this embroidery block last night.
I have one more to go. I’m SO FREAKING EXCITED to be done with this embroidery project! I started it in 2016 (yes, I checked my blog for the first post about it). It kept getting ignored for months on end, then I’d pull it out determined to finish it and get a block or two done and then it would get ignored again.
It’s almost exclusively stem stitch with a little bit of satin stitch and a very occasional back stitch. Yes, that made it easy, but it also made it extremely tedious. And worse, 90% of it was using black thread. I also decided by these last couple of blocks I really don’t like the thread they sent. Some kits had DMC and others had Cosmos. Mine had Cosmos. I’m never using Cosmos again. It just feels cheap and I didn’t like the way it behaved. It got far more shaggy from use than DMC does but when I used thread conditioner it got hard as a rock and didn’t lay nicely. I know it’s almost sacrilege but I may be tossing the leftover threads from this project when I’m done.
Here’s the celebration point, though: I have one block left. Only one! Unfortunately, it is a more complex block, relatively speaking. In other words, there’s a lot of lines to be stem-stitched. I plan on poking away at it diligently this week, maybe even while on some Zoom calls, to just get the dang thing done. Then I have a wall hanging to assemble from it.
So I celebrated my almost-done-with-boring-embroidery this morning by going onto Etsy and placing a fairly sizable order for new embroidery patterns that are so much more interesting and will require more than just a stem stitch or, even if they’re simply stitched, have a lot more color variety. I have several Christmas gifts in mind.
I’ve been watching The Victorian House of Arts and Crafts on Amazon Prime. It’s a four episode series where six artisans move into a Welsh mansion and live and work as if they’re in Victorian times, creating their own “takes” on Arts and Crafts movement pieces using Victorian techniques. It was really interesting and I’m sorry there were only four episodes. In any case, the woman whose particular focus was embroidery just really got me re-inspired and reminded me that I really do enjoy doing it, and I’m ready to challenge myself a bit. I love Jacobean designs so I’ll be spending some time on Mary Corbet’s website looking at her tutorials and patterns and perhaps jumping in, although that’s really long-term, fairly intense work. What I keep reminding myself, though, is that embroidery travels so much better than the type of quilting I do, so when the day comes that my job returns to normal (however we define that) and I’m back on the road again, embroidery is something I could continue to do.
So that’s where I am in this current moment of time. Big plans for progress on things this coming weekend!
Weekend Sewing Plans
I made a list of things to get done this weekend in my planner. It’s now Saturday lunchtime and I’ve completed three of them: I have hard boiled eggs done (via Instapot) and in my fridge for fast snacks during the week; I’ve cleaned the kitchen (my adult son living at home is teaching himself to cook—has yet to teach himself to wash pots and pans and now he’s working all weekend and I can’t do anything unless I clean up after him—this will be a discussion point on Monday); and I’ve given the dogs baths outside on the patio with a hose. Well, I gave Auggie a bath. Spencer (aka Princess Doggie, aka Old Girl) barely let me wet her down before she started freaking out, and I made sure to use on her the warm water that comes out when you first start running the hose. She’s old. I let her get away with things now. Auggie, not so much, despite him looking at me the whole time with an expression of “But you let HER get out of it, Mom!”
I treated myself with a quick dip in the pool because it was extraordinarily steamy and I wanted a treat. But I got out as soon as I heard thunder.
And then it started pouring buckets outside.
So now I’m inside surrounded by Wet Dog Smell.
It seems like a good day to spend upstairs in my sewing room.
My fabric-related plans for the weekend are:
Finish cutting the mask kits I’m making for my friend (I have something like 13 left to go to get her to her original goal)
Finish the units in month 2 (I think it was) that was missing the piece from the Cotton Cuts Mystery Quilt; I got the replacement piece in yesterday’s mail
Make myself another couple of masks as I’m out-and-about now and could use some.
Those were the only specific plans I have. I may have just added a new, fun/fast project to the list, though. I was toodling around on the web looking at quilty things and found this fast project from Better Homes and Gardens: Six Pocket Tote Bag. I’ve done variations on this before but when I was doing my sewing room clean-up a few weeks ago I found lots of batting scraps that would be the perfect size to use up on a project like this. So stay tuned to see if it actually happens!
Staycation Day 8: Loose Ends
Friday was what I actually consider my “vacation” because today (Saturday) my husband and I drive north to spend the 4th with my daughter, sleeping on her pull-out sofa bed. It’s somewhat comfortable. For a pull-out. We’ll be doing some 4th kinds of things like eating a picnic lunch in a park and roasting hotdogs over a campfire on the beach of Lake Ontario. There aren’t any fireworks shows scheduled due to the C-virus but I’m sure lots of people will be setting them off over the lake, so we’ll have something to watch.
Back to my Staycation activities: I had decided to do whatever I felt like doing when I stepped into my sewing room on Friday. No plans, no “I have to get thus and so done,” just pure “do what feels good.” I’d originally thought I’d probably knock out another couple of Cosmos blocks but as I reached for that project box on my cutting table, I realized I’d hit my block-making limit for the week. As I looked around at the other projects in bits and pieces around the room, I just wasn’t feeling any of them.
I realized, in that moment, that what I was feeling was a bout of organization coming on. I needed to clear the decks, so to speak.
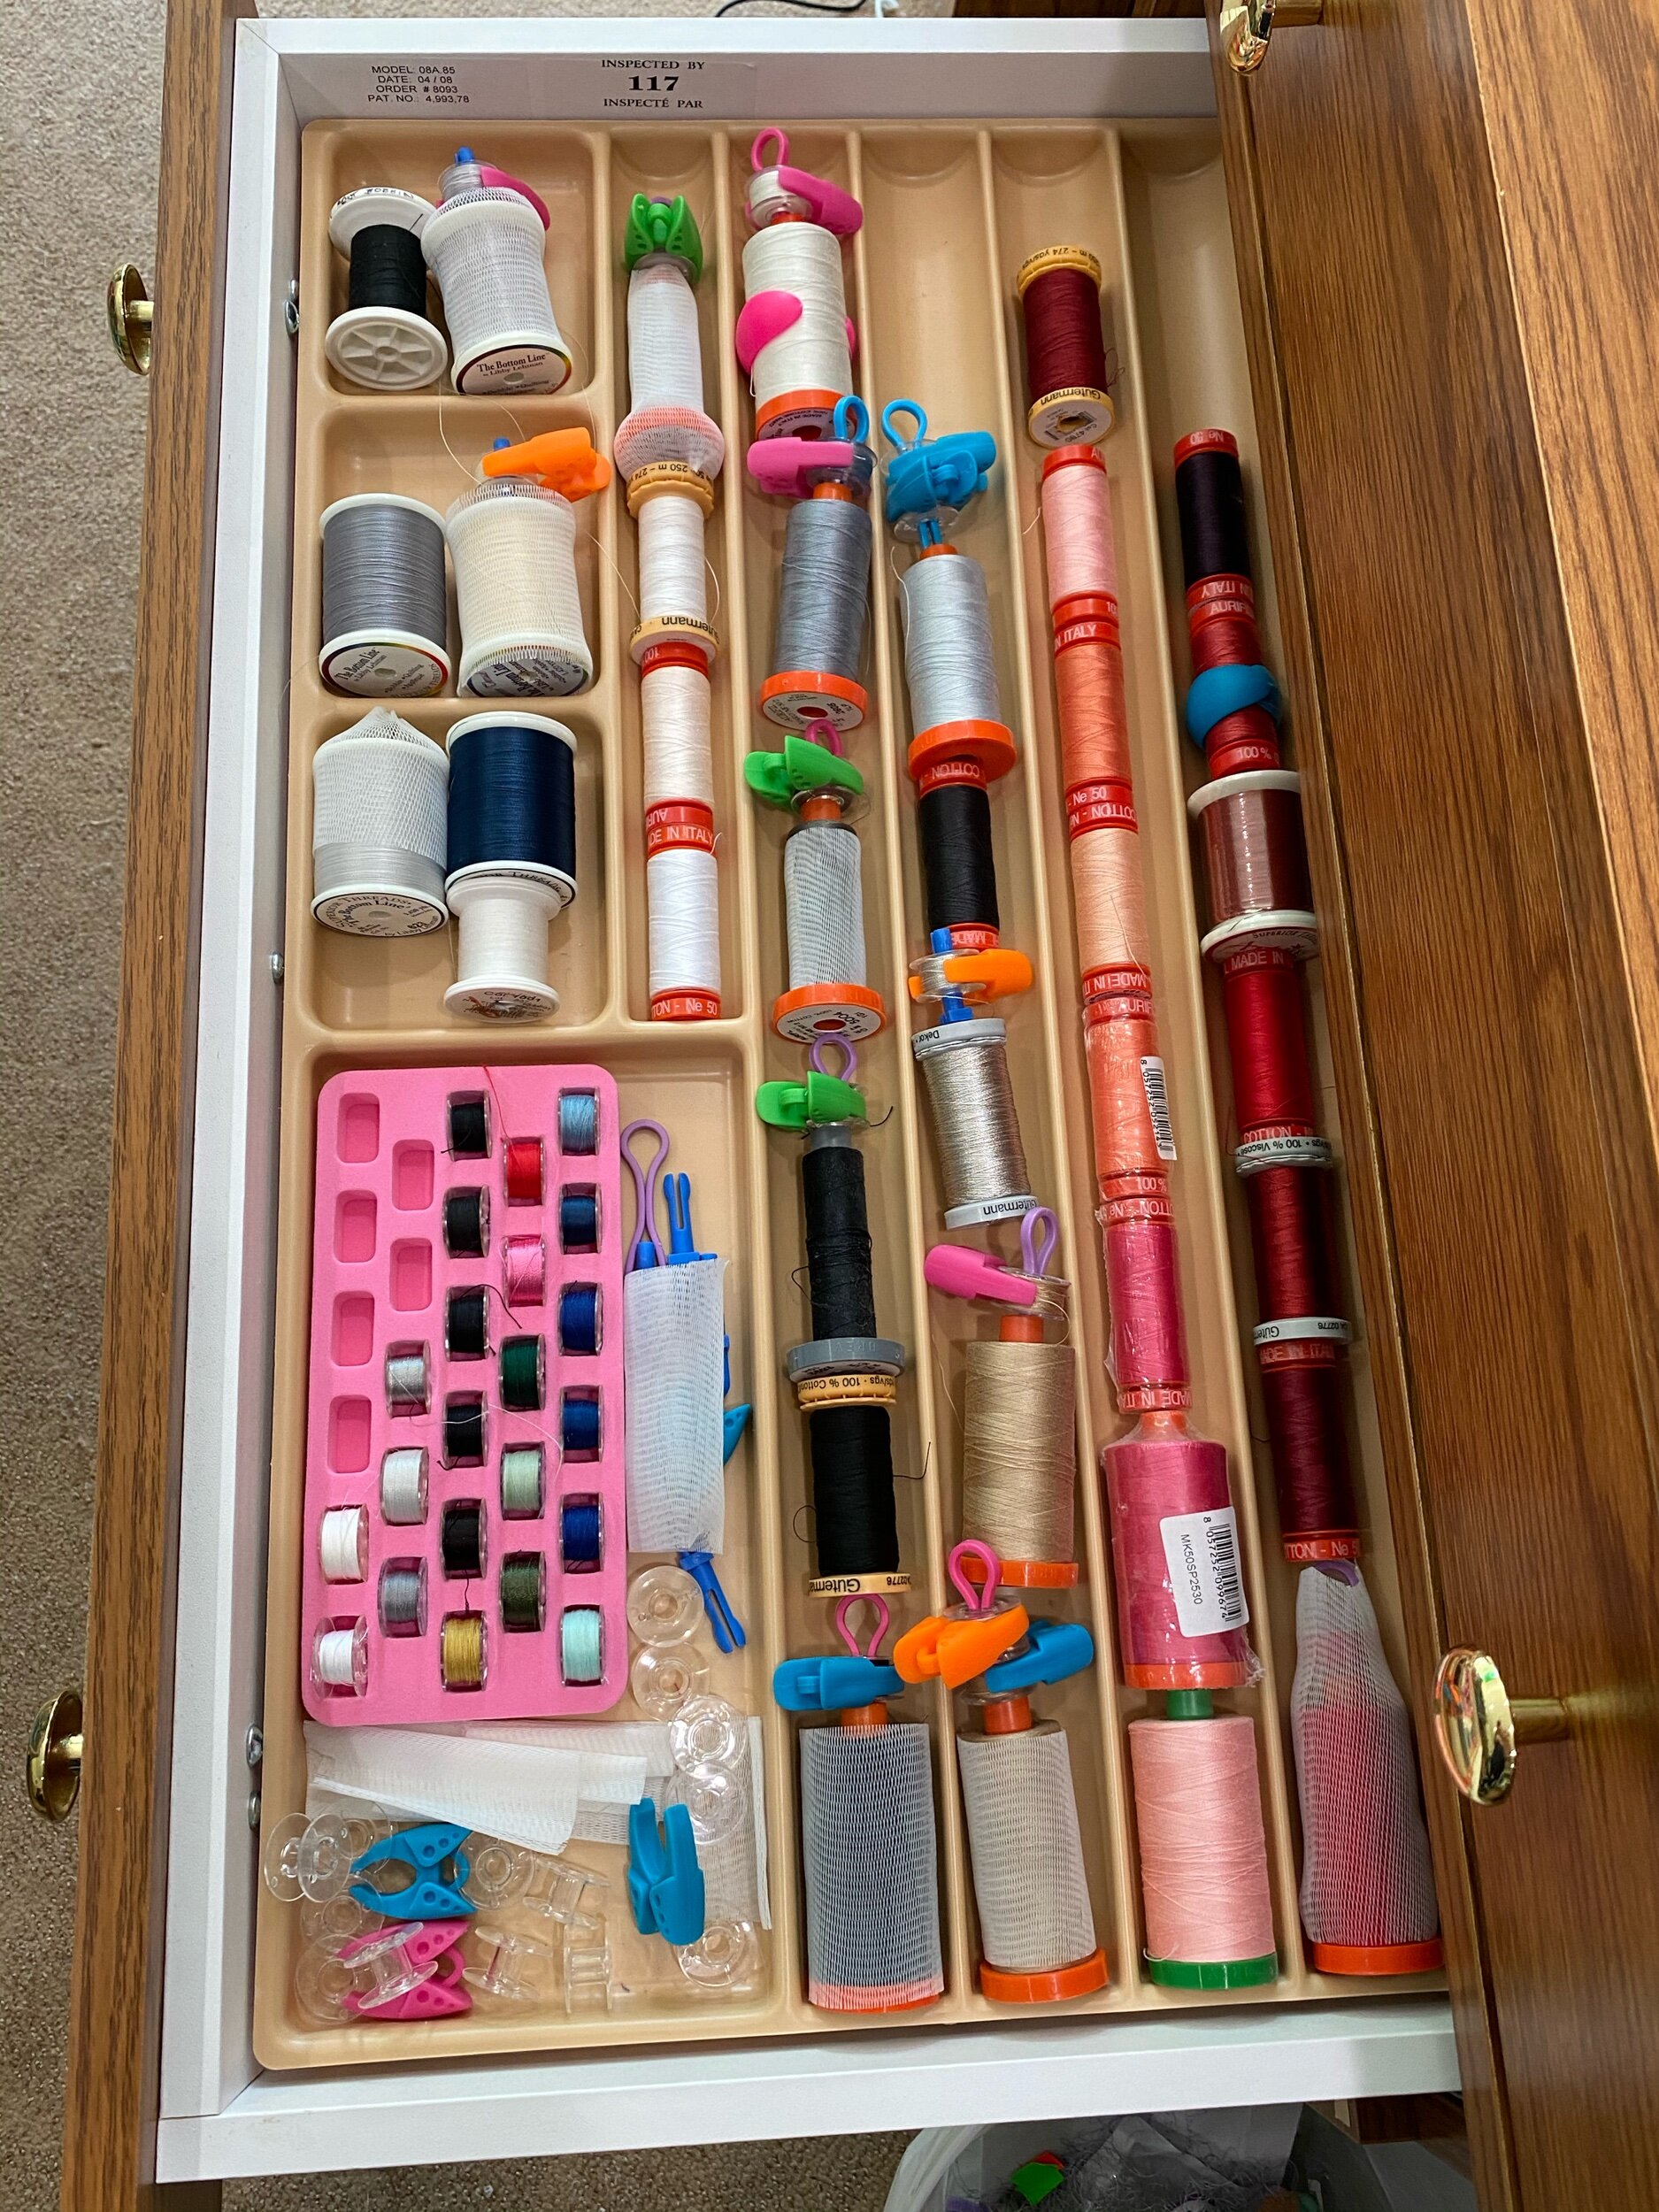
I had gotten tired of my overflowing thread drawer in my sewing cabinet earlier in the week and hit up a Joann’s sale online. My Artbin Thread Storage case had arrived on Thursday.
I didn’t think to take a “before” picture—I was too anxious to get at it. However, to describe…
I have a thread drawer in my cabinet with grooves to hold spools. It had spools stacked on top of each other, and my round silicone bobbin keeper didn’t actually fit well between the drawer dividers so I often had to shove things around to get the drawer to close. I realized I didn’t often go into the drawer to find thread because it was too annoying.
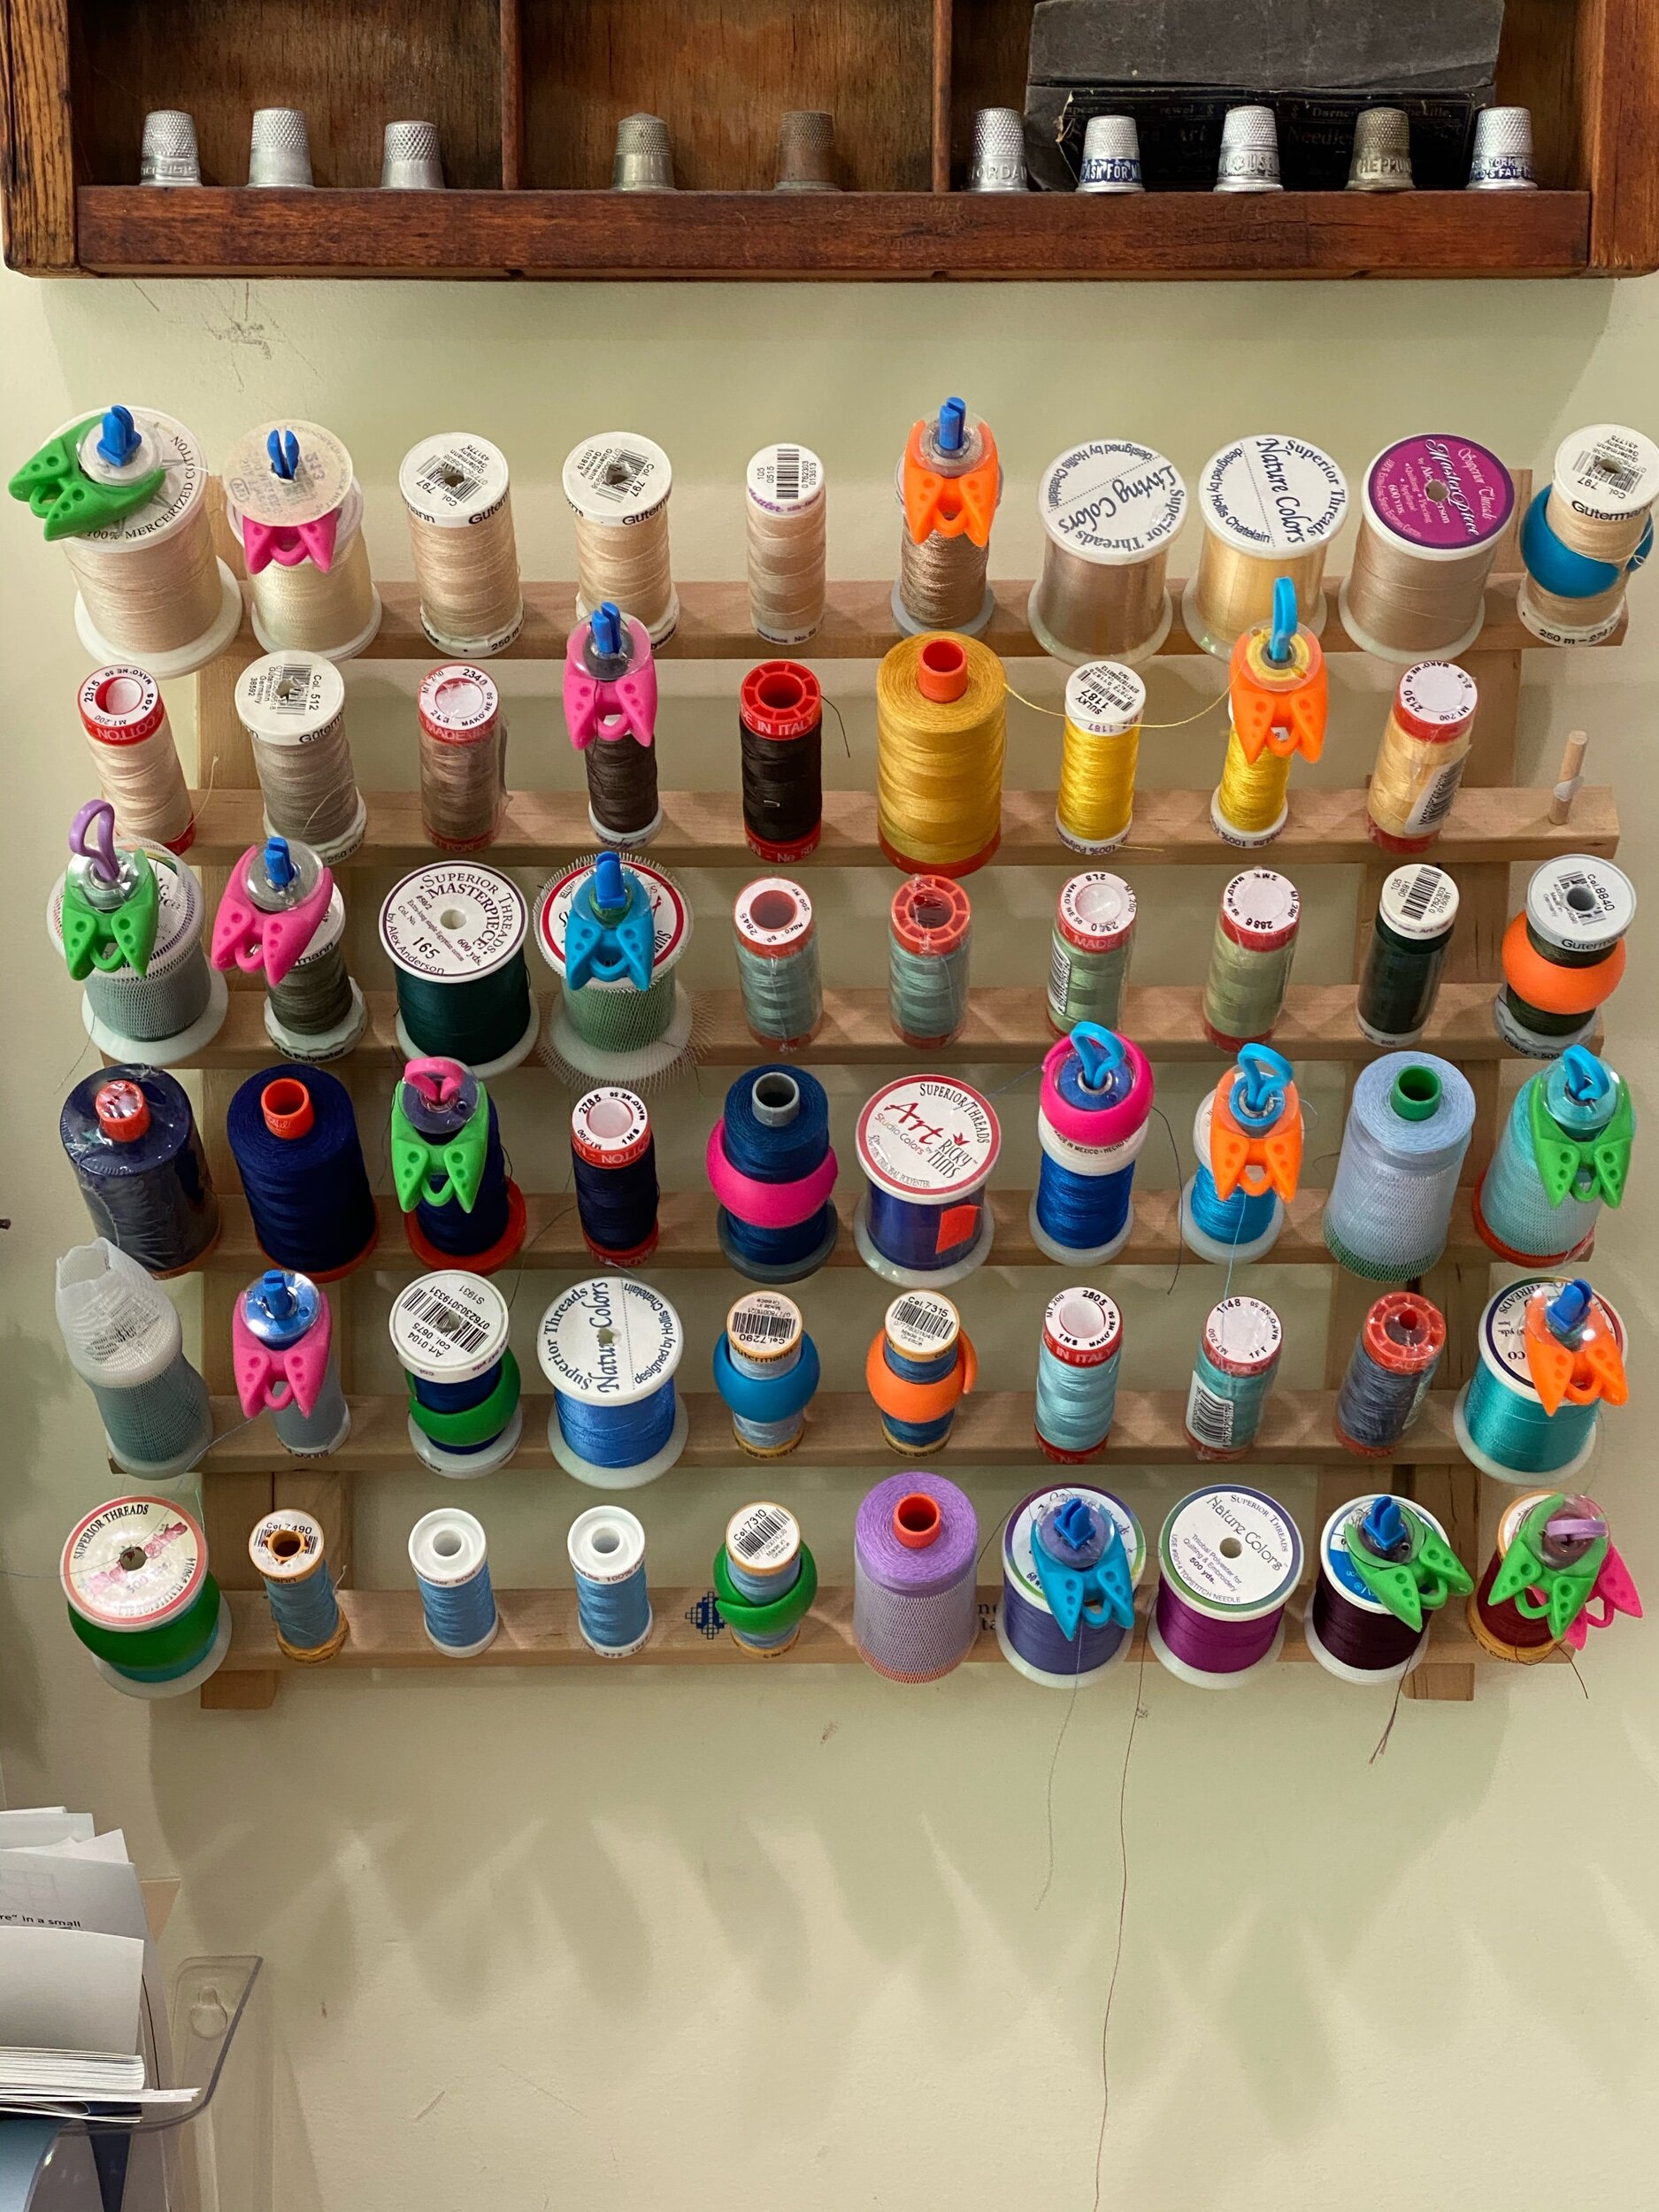
My spool rack on the wall is impossible to overload, but my color organizational system had broken down somewhere along the way. Plus, for whatever reason, I’d always thought it a good idea to keep my go-to neutral Aurafil piecing threads on the top rack. Every time I had to find a thread for piecing, I’d have to stand up and slide around the side of my cabinet to reach the rack.
I did that for about 10 years.
Enough, I thought. Time to get more efficient about thread.
It took me about 45 minutes but now I have a much more workable system.
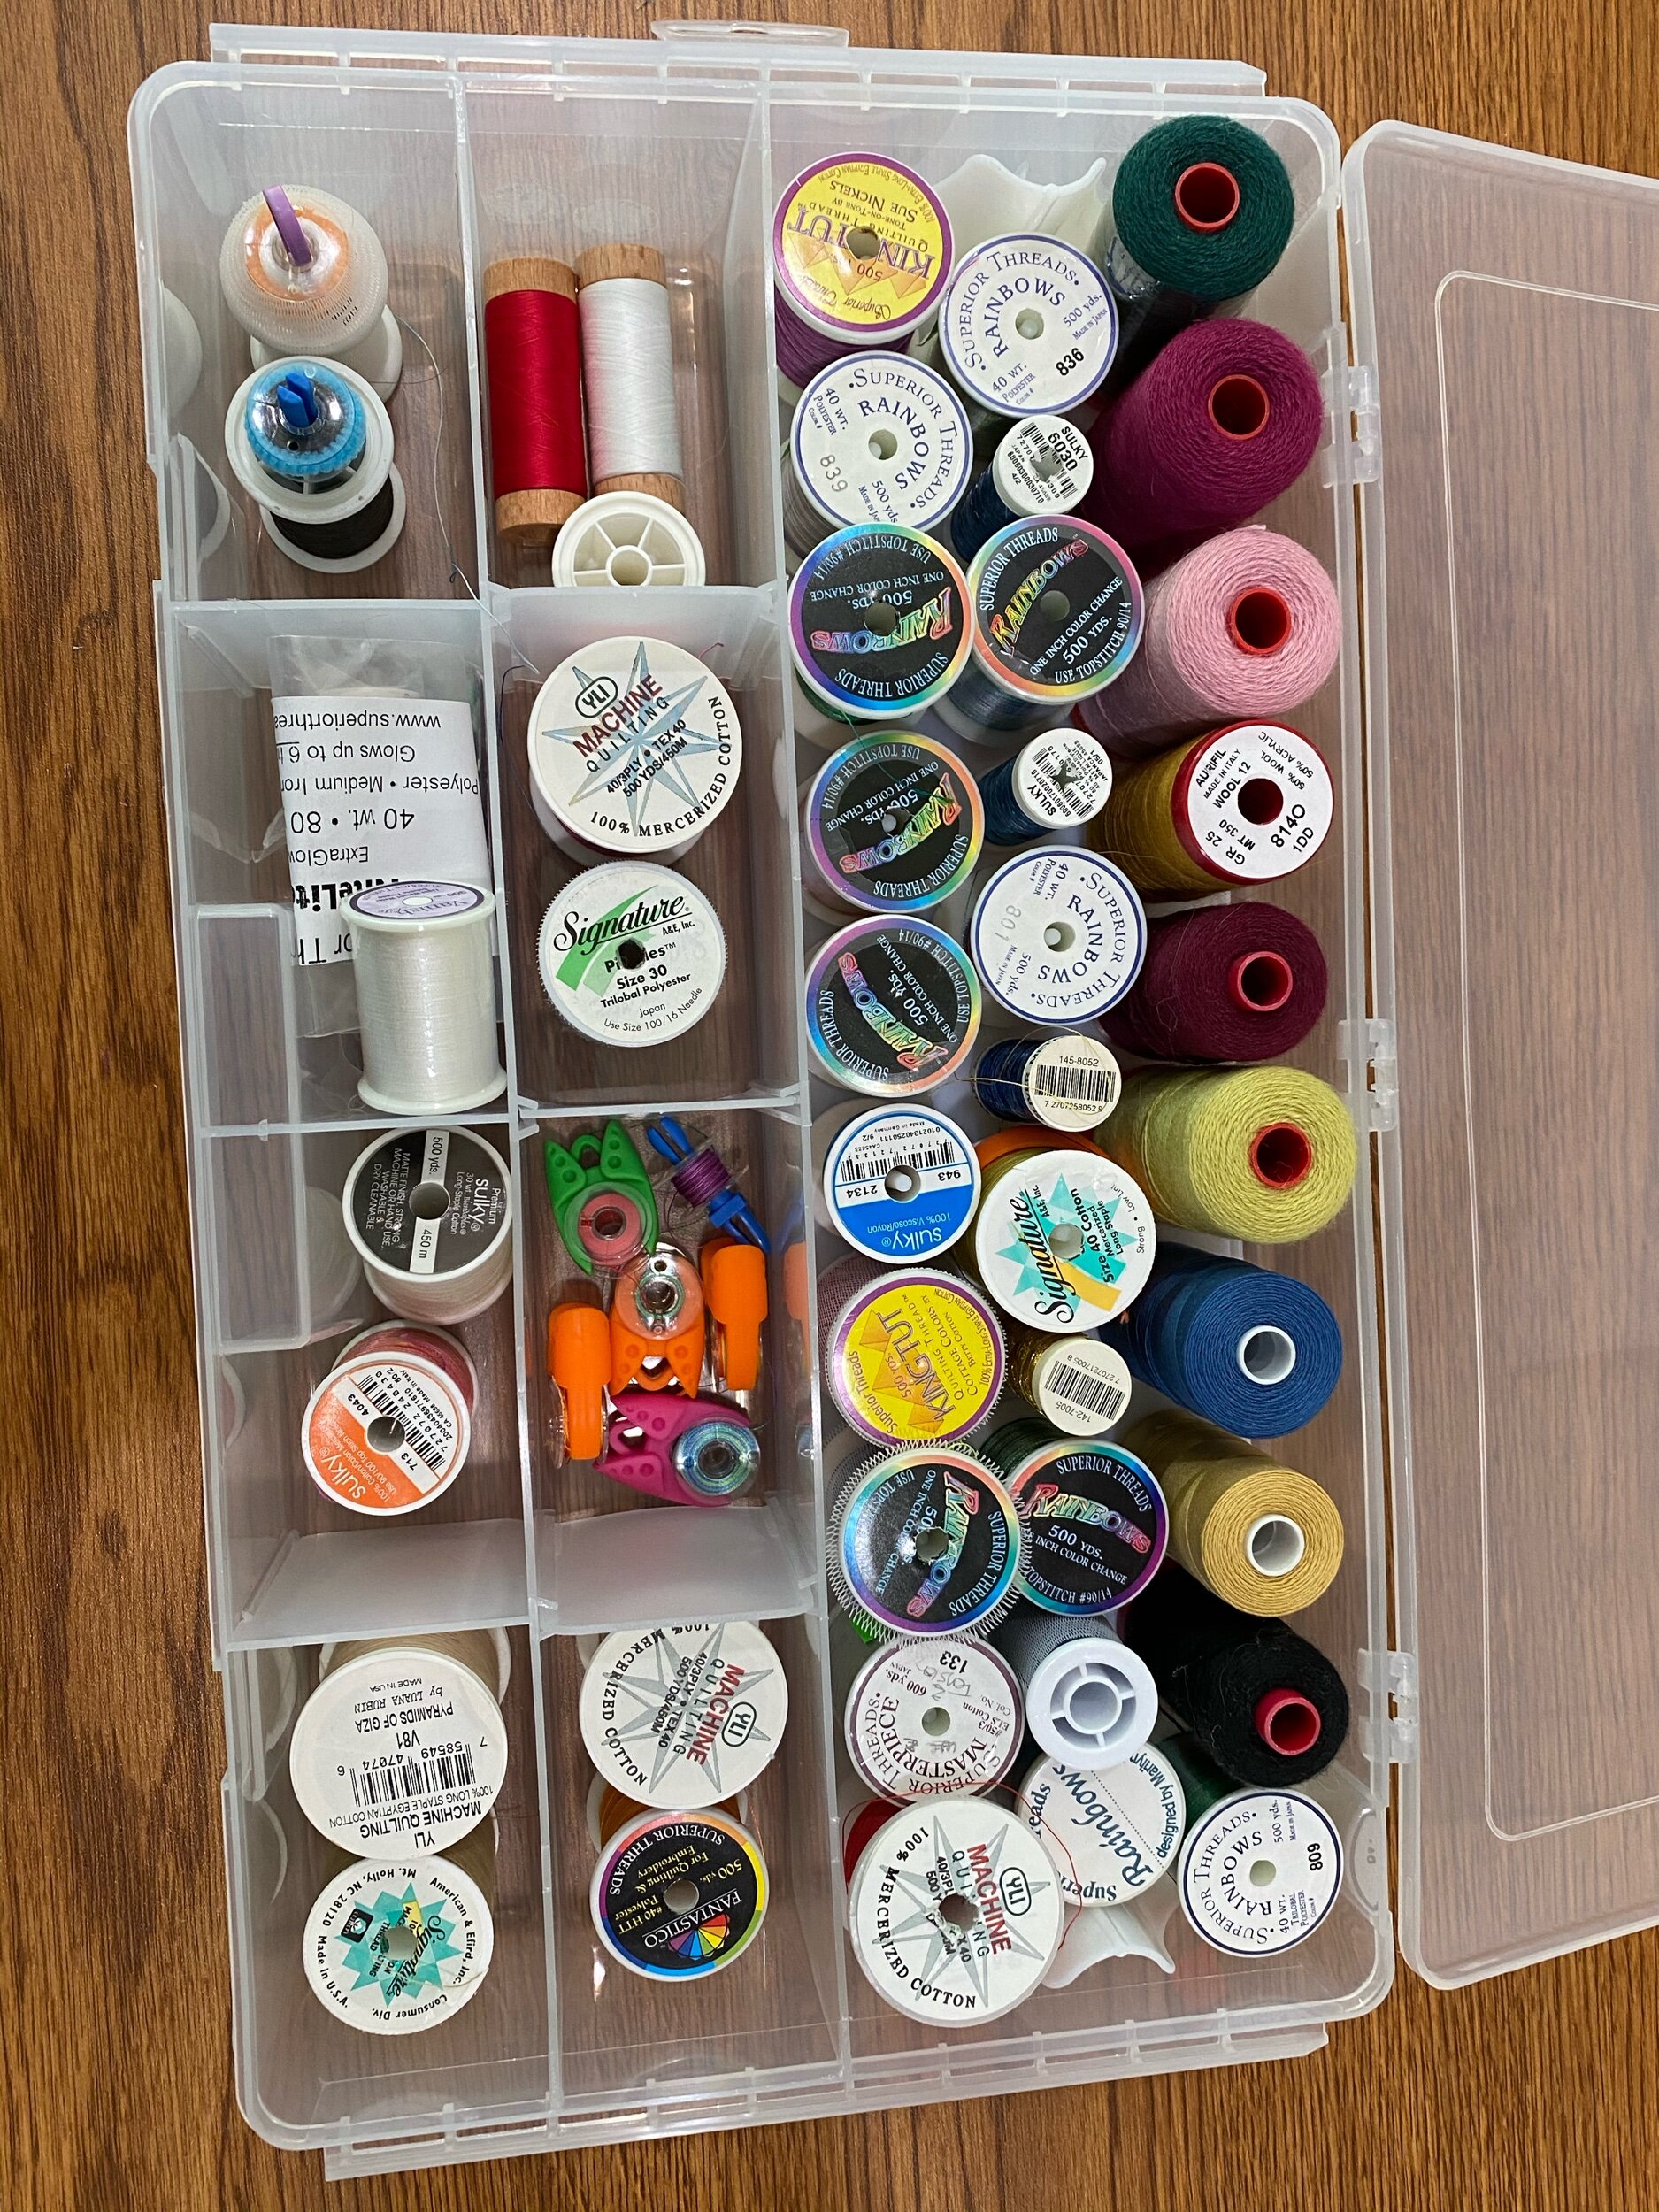
All of my variegated, metallic, invisible, wool, heavier-weight, and other specialty threads are now in the Artbin case and on a shelf. These are threads that only get used once in awhile (and you can see several that have never been used at all). The only thing that bothers me about this thread storage system s the number of spools I’ll have to pull out and look at to figure out what they are. There’s no avoiding that, though. The number of times I’d be inconvenienced by having to do that will be minimal compared to how much easier it is to use the rest of my thread now.
I’ve moved my go-to piecing threads to the drawer in my cabinet, within easy reach. I also uncovered several spools of bobbin thread I’d forgotten I had as they’d gotten buried in the detritus. Those are now separated out (far left dividers). And now I plan on actually using them.
I was then able to organize the thread rack on the wall by color. Who knew I had so many dang blue threads? The reds and pinks had to get relegated to the remaining space in my drawer.
I’d gotten a bobbin holder in a Sew Sampler box a few months ago that I realized would be perfect for this space. I took the foam bobbin holder out of the plastic container and am using that part in my drawer. It fits much better and actually holds more bobbins.
True confessions: I did end up throwing out two or three spools of thread. They were cheaper brands that I don’t like. Clearly I’d bought them for some special project that needed an exact color but didn’t end up needing them. Or something. By now, I’d spent the money on them so many years ago it no longer mattered. As organizer Peter Walsh used to say on the TV show “Clean Sweep” (which I really miss!), “Real estate is costly. What real estate are you giving this object in your space? In your mind?” Am I likely to ever use it? Nope. In the trash it went.
By the way, most of those smaller spools of Aurifil were from when I’d briefly subscribed to a monthly thread club. It was fun to get the colors but I quickly realized I’d be drowning in thread. You can see I haven’t used most of them yet. However, now that I’m back to sewing regularly, I plan on seeing what spools I can empty!

My next job was the cutting table. The side towards the wall is where I tend to stack, and stacked it had gotten. So projects that needed a project bin were given a project bin. Items of projects that had been waiting for me to finish them for several years were finally stored somewhere else. Fabrics that I’d planned on scanning into EQ8 were finally scanned, folded, and put on my fabric shelf.
I packaged up and mailed the two BOTM puzzle quilts and backings to my longarming friend, plus a book that had been set aside to mail to a work colleague—they’re now on their way. I returned some library books that had finally come due after the library reopened. Loose ends. Tied.
Ah. Space. Physical and mental cleaning house.
It feels good to be able to breathe again.
”Clearing the decks” has always been an important part of my process once I finish a project. That time taken to put things away and clean up has helped move that project out of my mind and gotten me ready for whatever I want to work on next.
I have no idea what I want to work on next, at the moment. But at least now I have some mental space to figure it out.
So now we’re off for a day and a half—we’re planning on being home again by lunchtime tomorrow. I’m not sure if I’ll be in my sewing room tomorrow as I need to make sure I’ve got everything in place to hit the ground running when I go back to work on Monday. It’s been a great Staycation although I feel like it flew by. Sum total: two completed UFOs, two UFOs now on to the next stage, three embroidery blocks done, three classes taken, three blocks from Cosmos done, three novels read, one batch of strawberry ice cream made (did I mention I bought myself an ice cream maker this summer?), one afternoon with a friend, two afternoons hanging out poolside in my backyard, and an overnight visit to my daughter. Not bad.
Sew Sampler Box--June 2020
This is the first time I’ve gotten my Sew Sampler Box after they’d already done the “reveal” in their blog, so I already knew what was in it. I’m fine with that—I don’t really do this for the surprise of it all. I mostly do it because I keep getting good rulers!


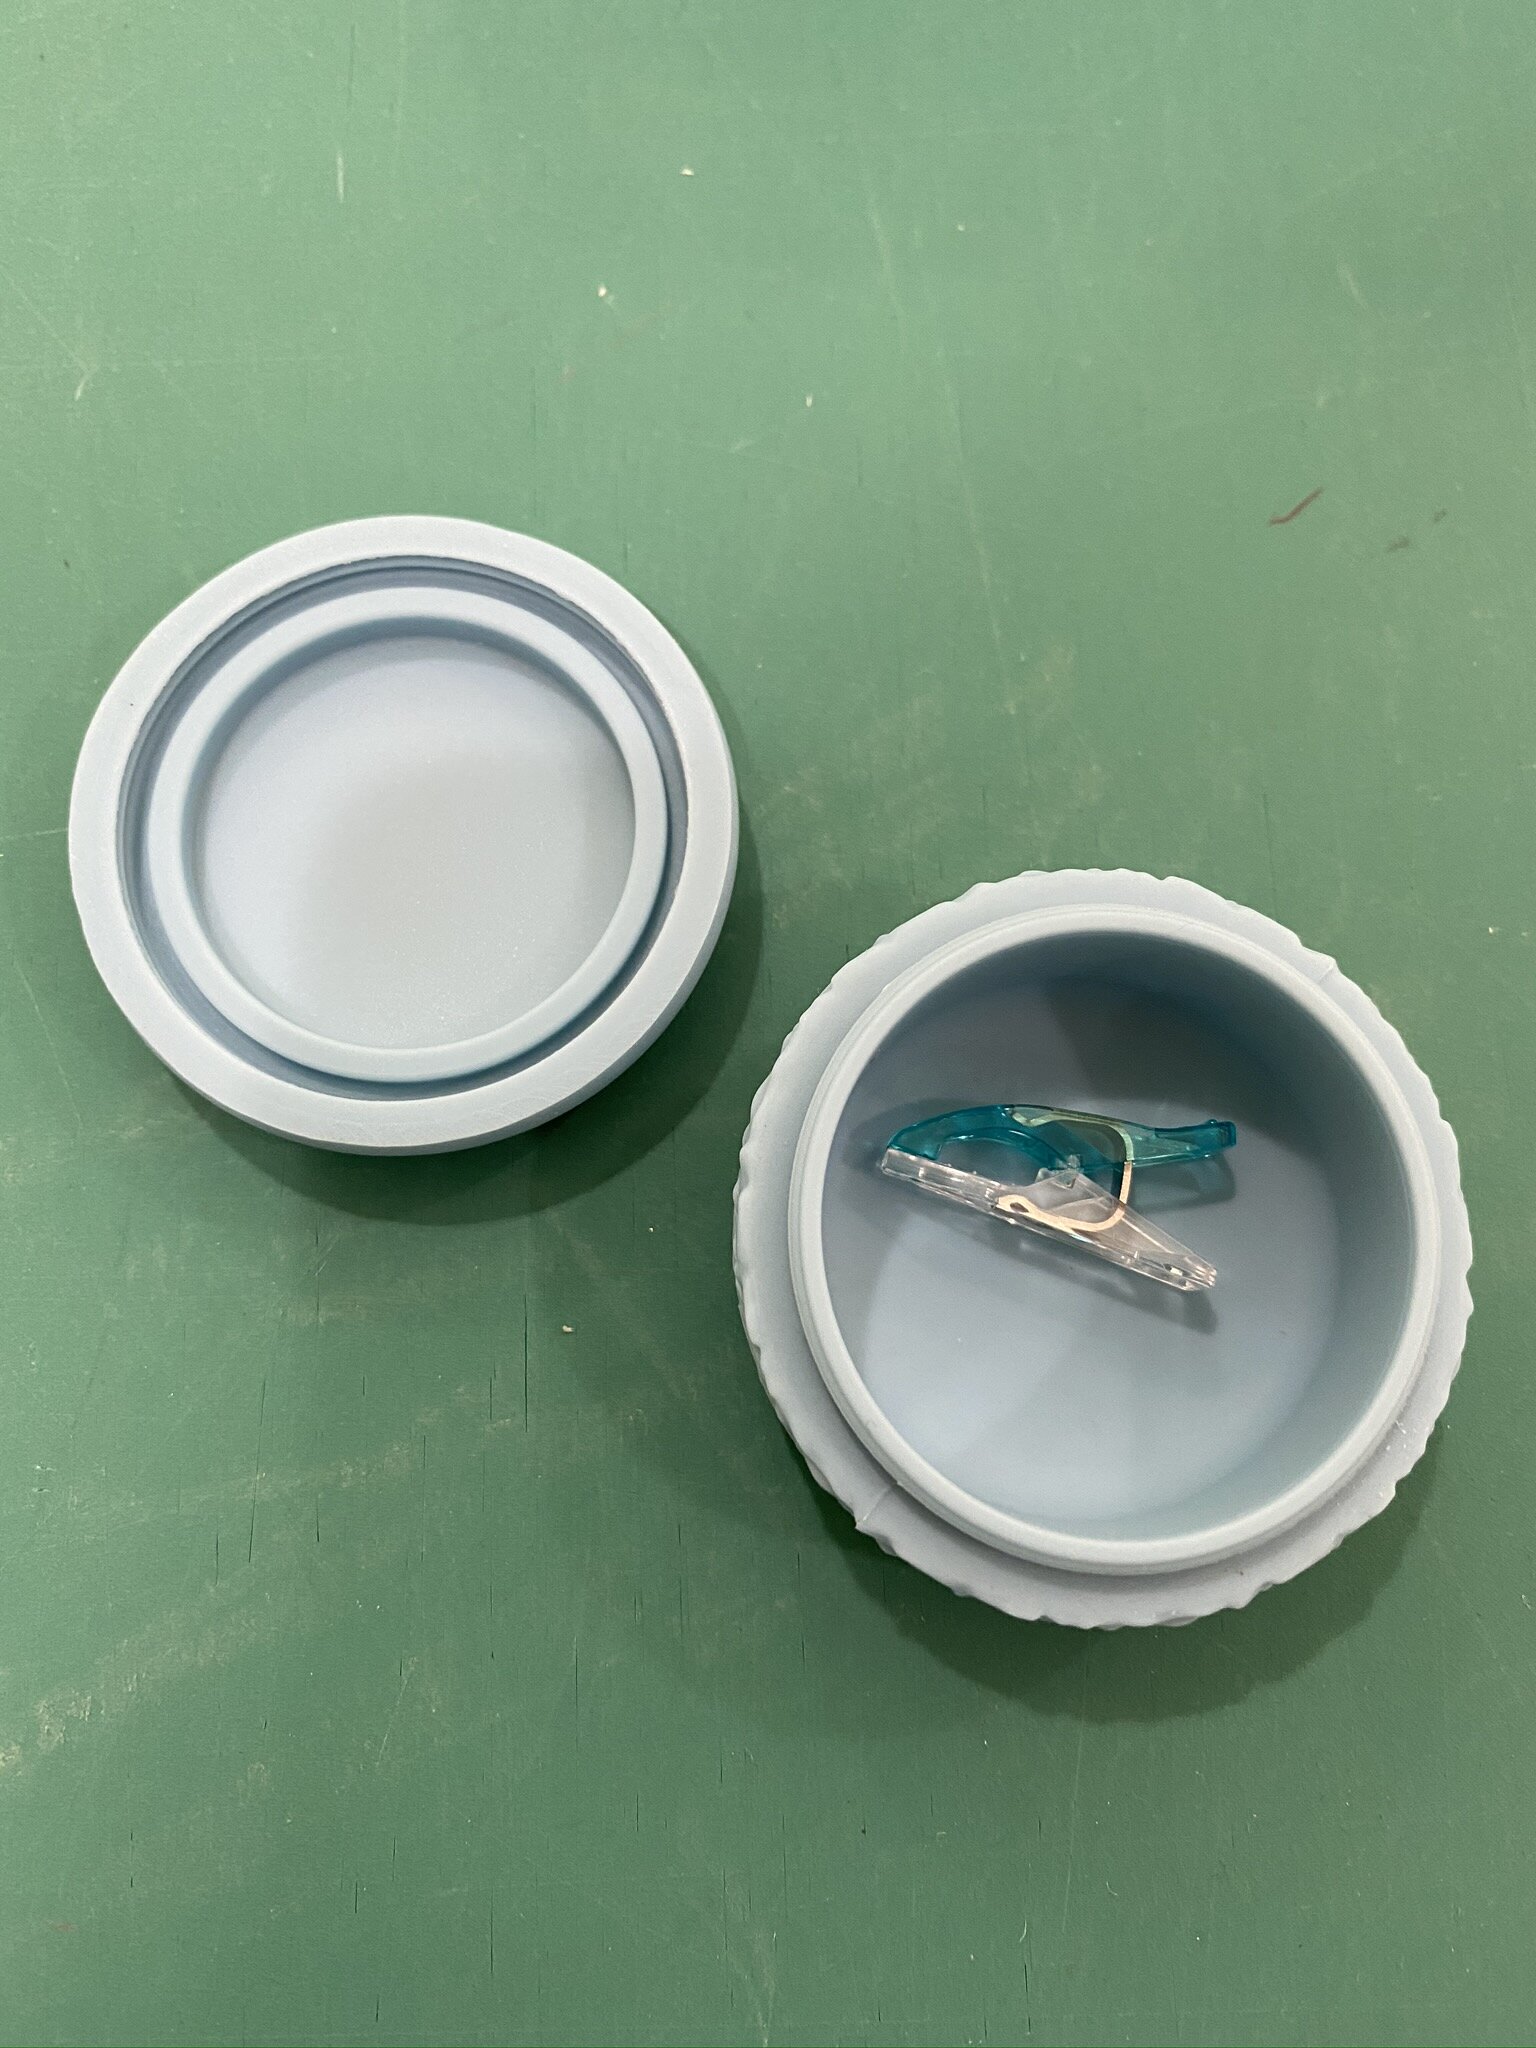
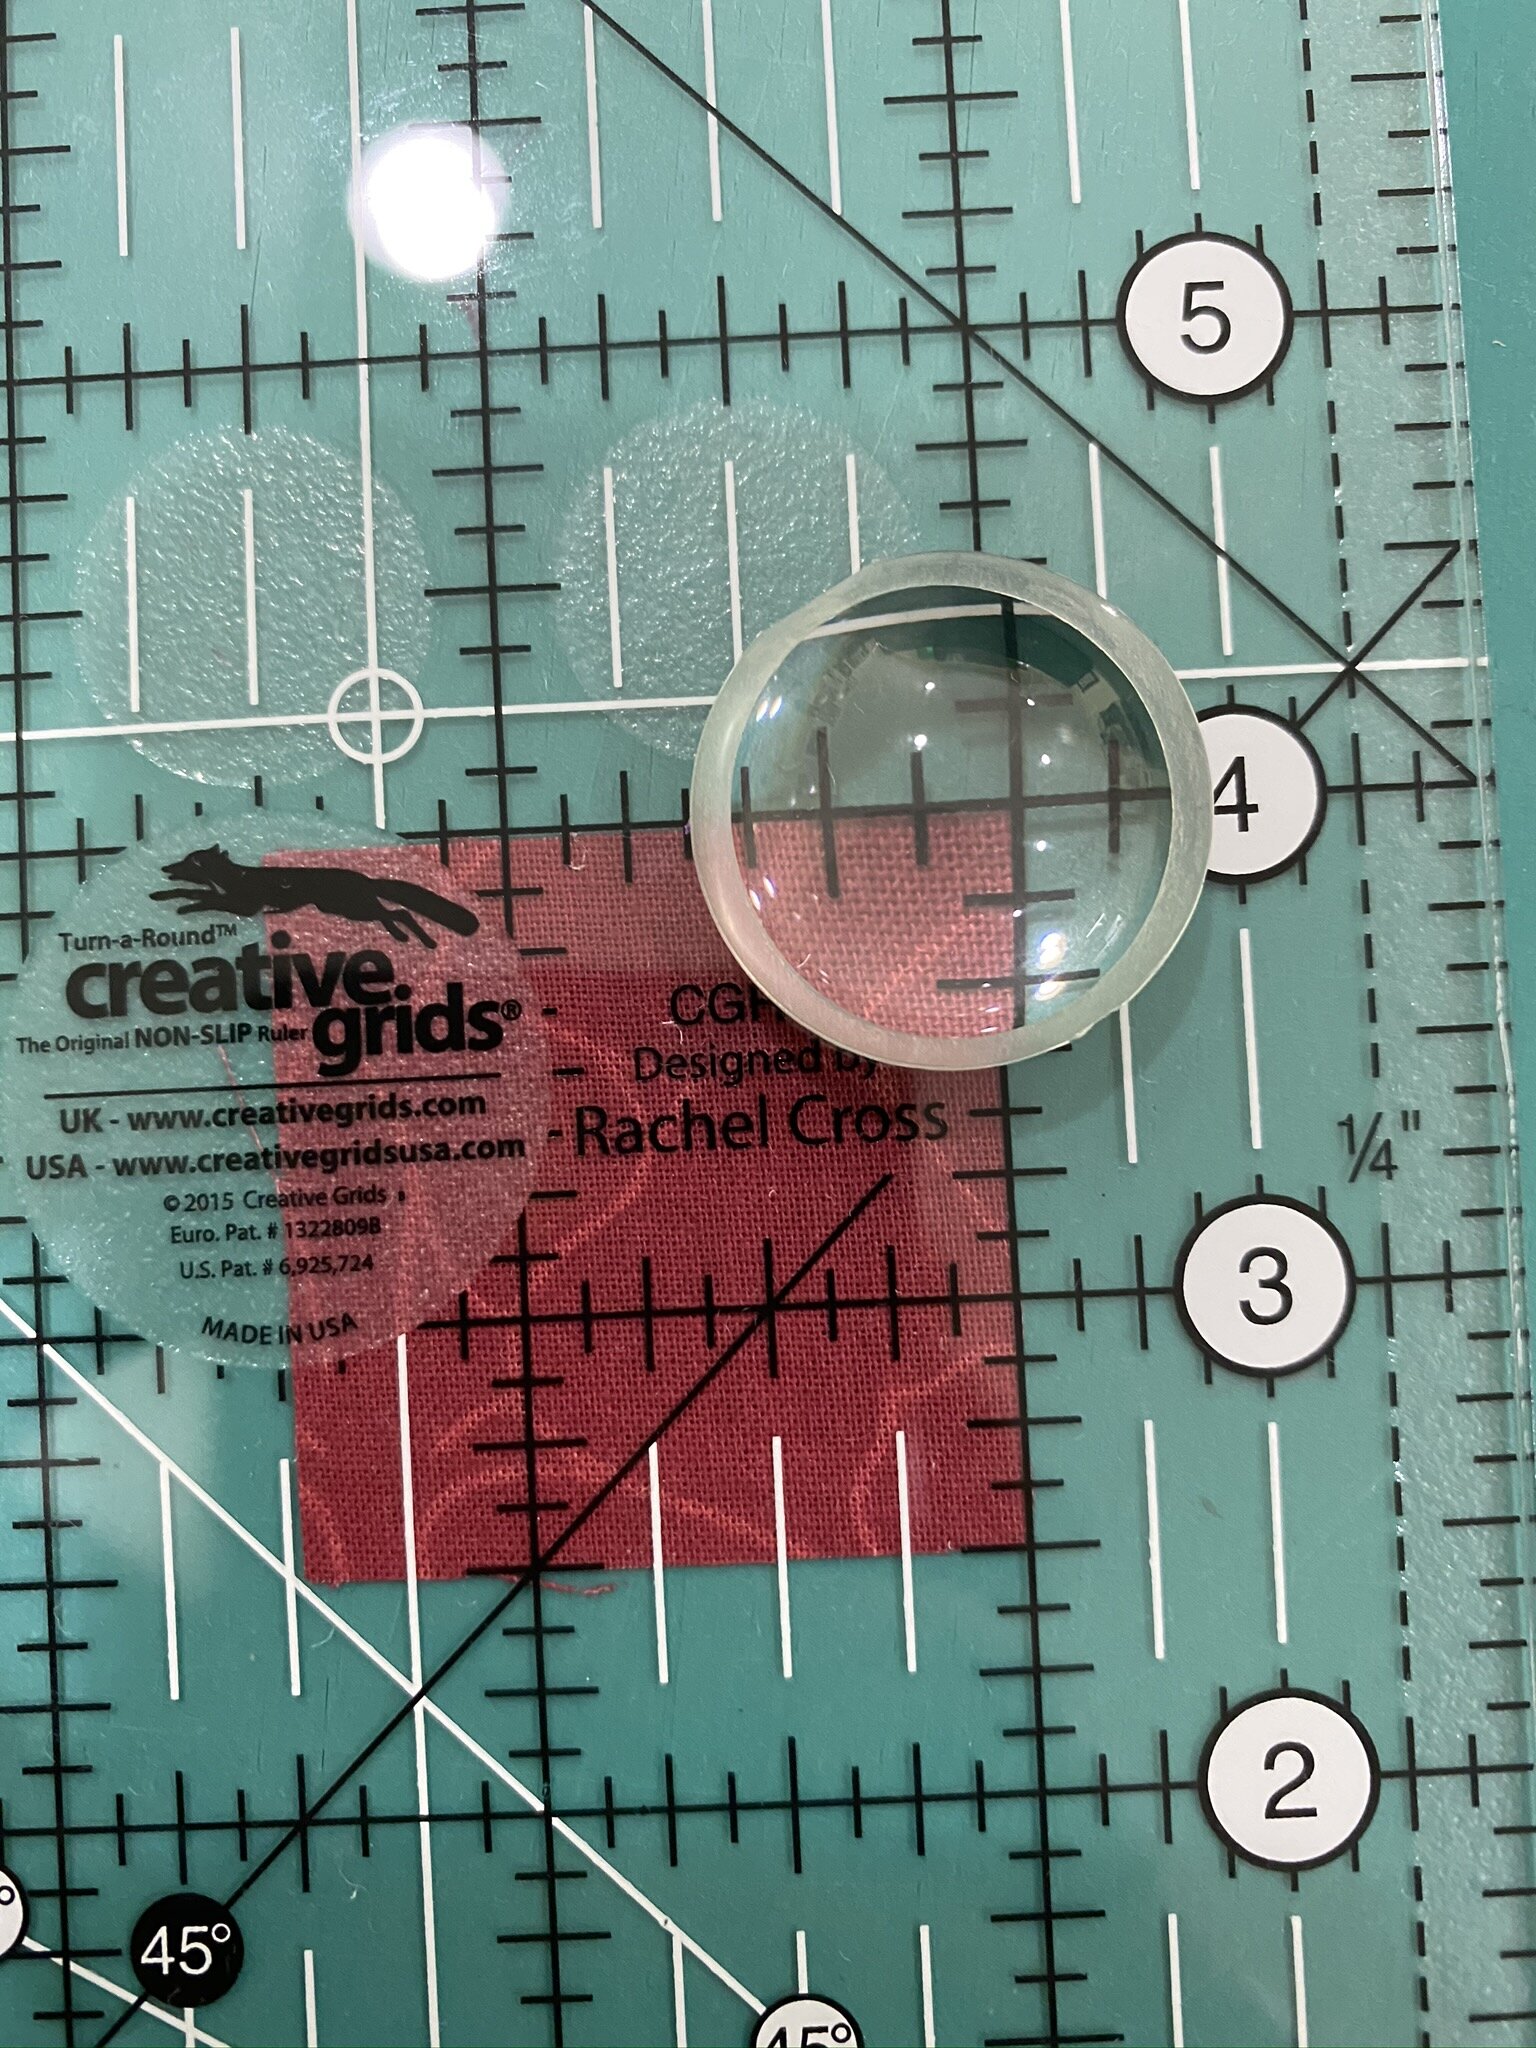
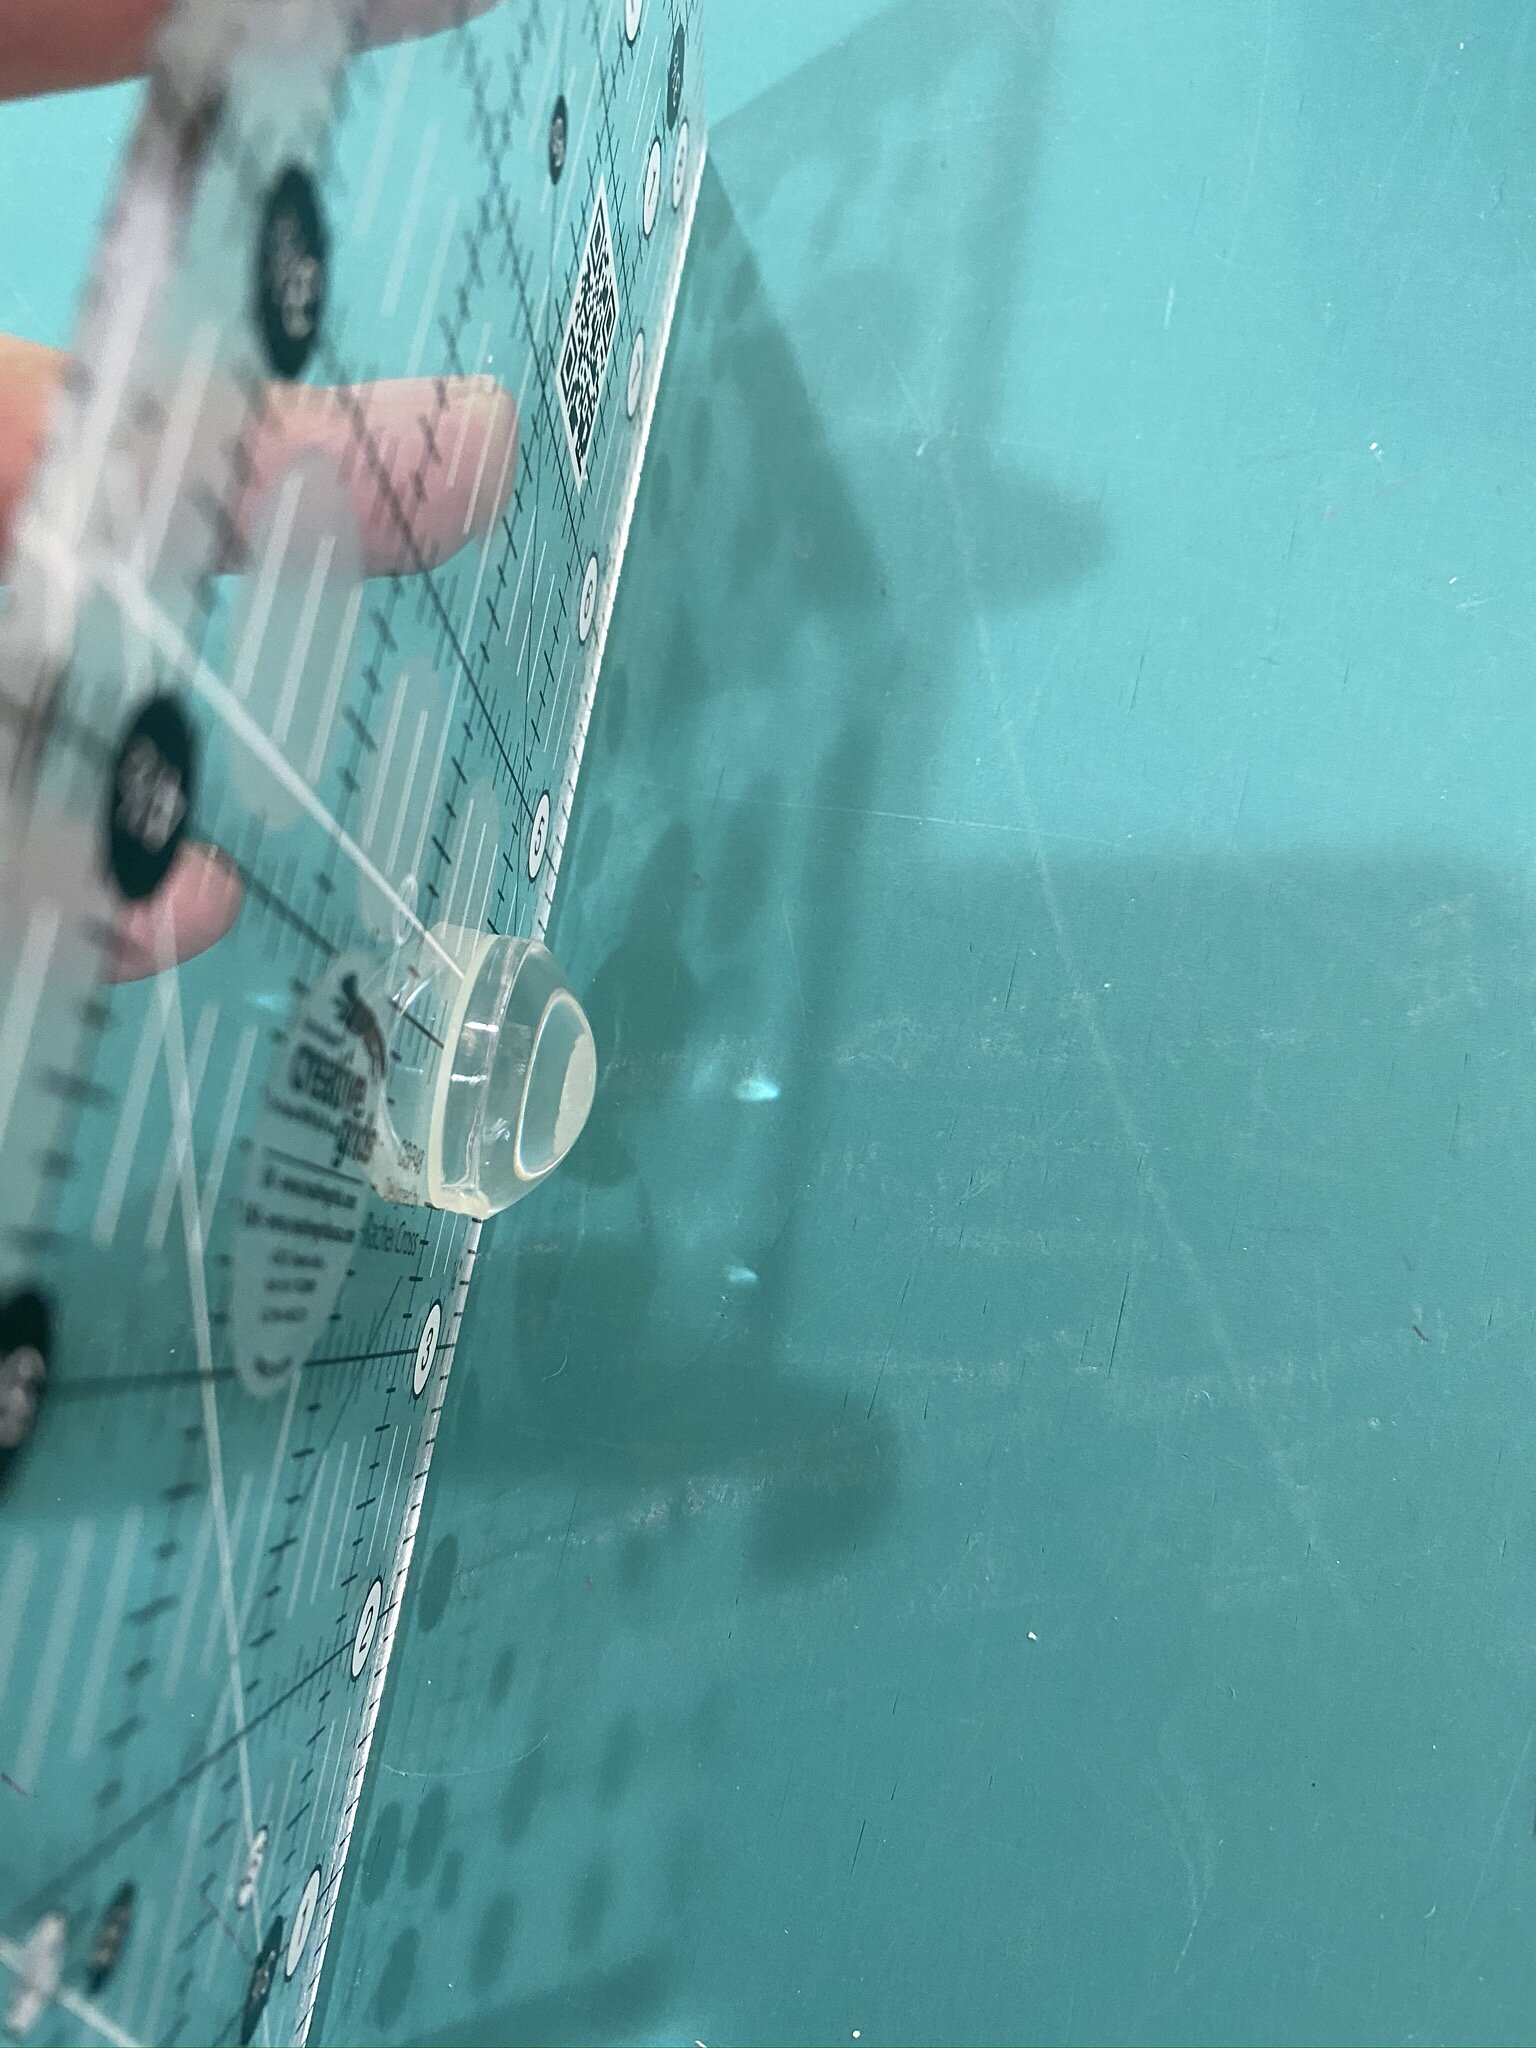
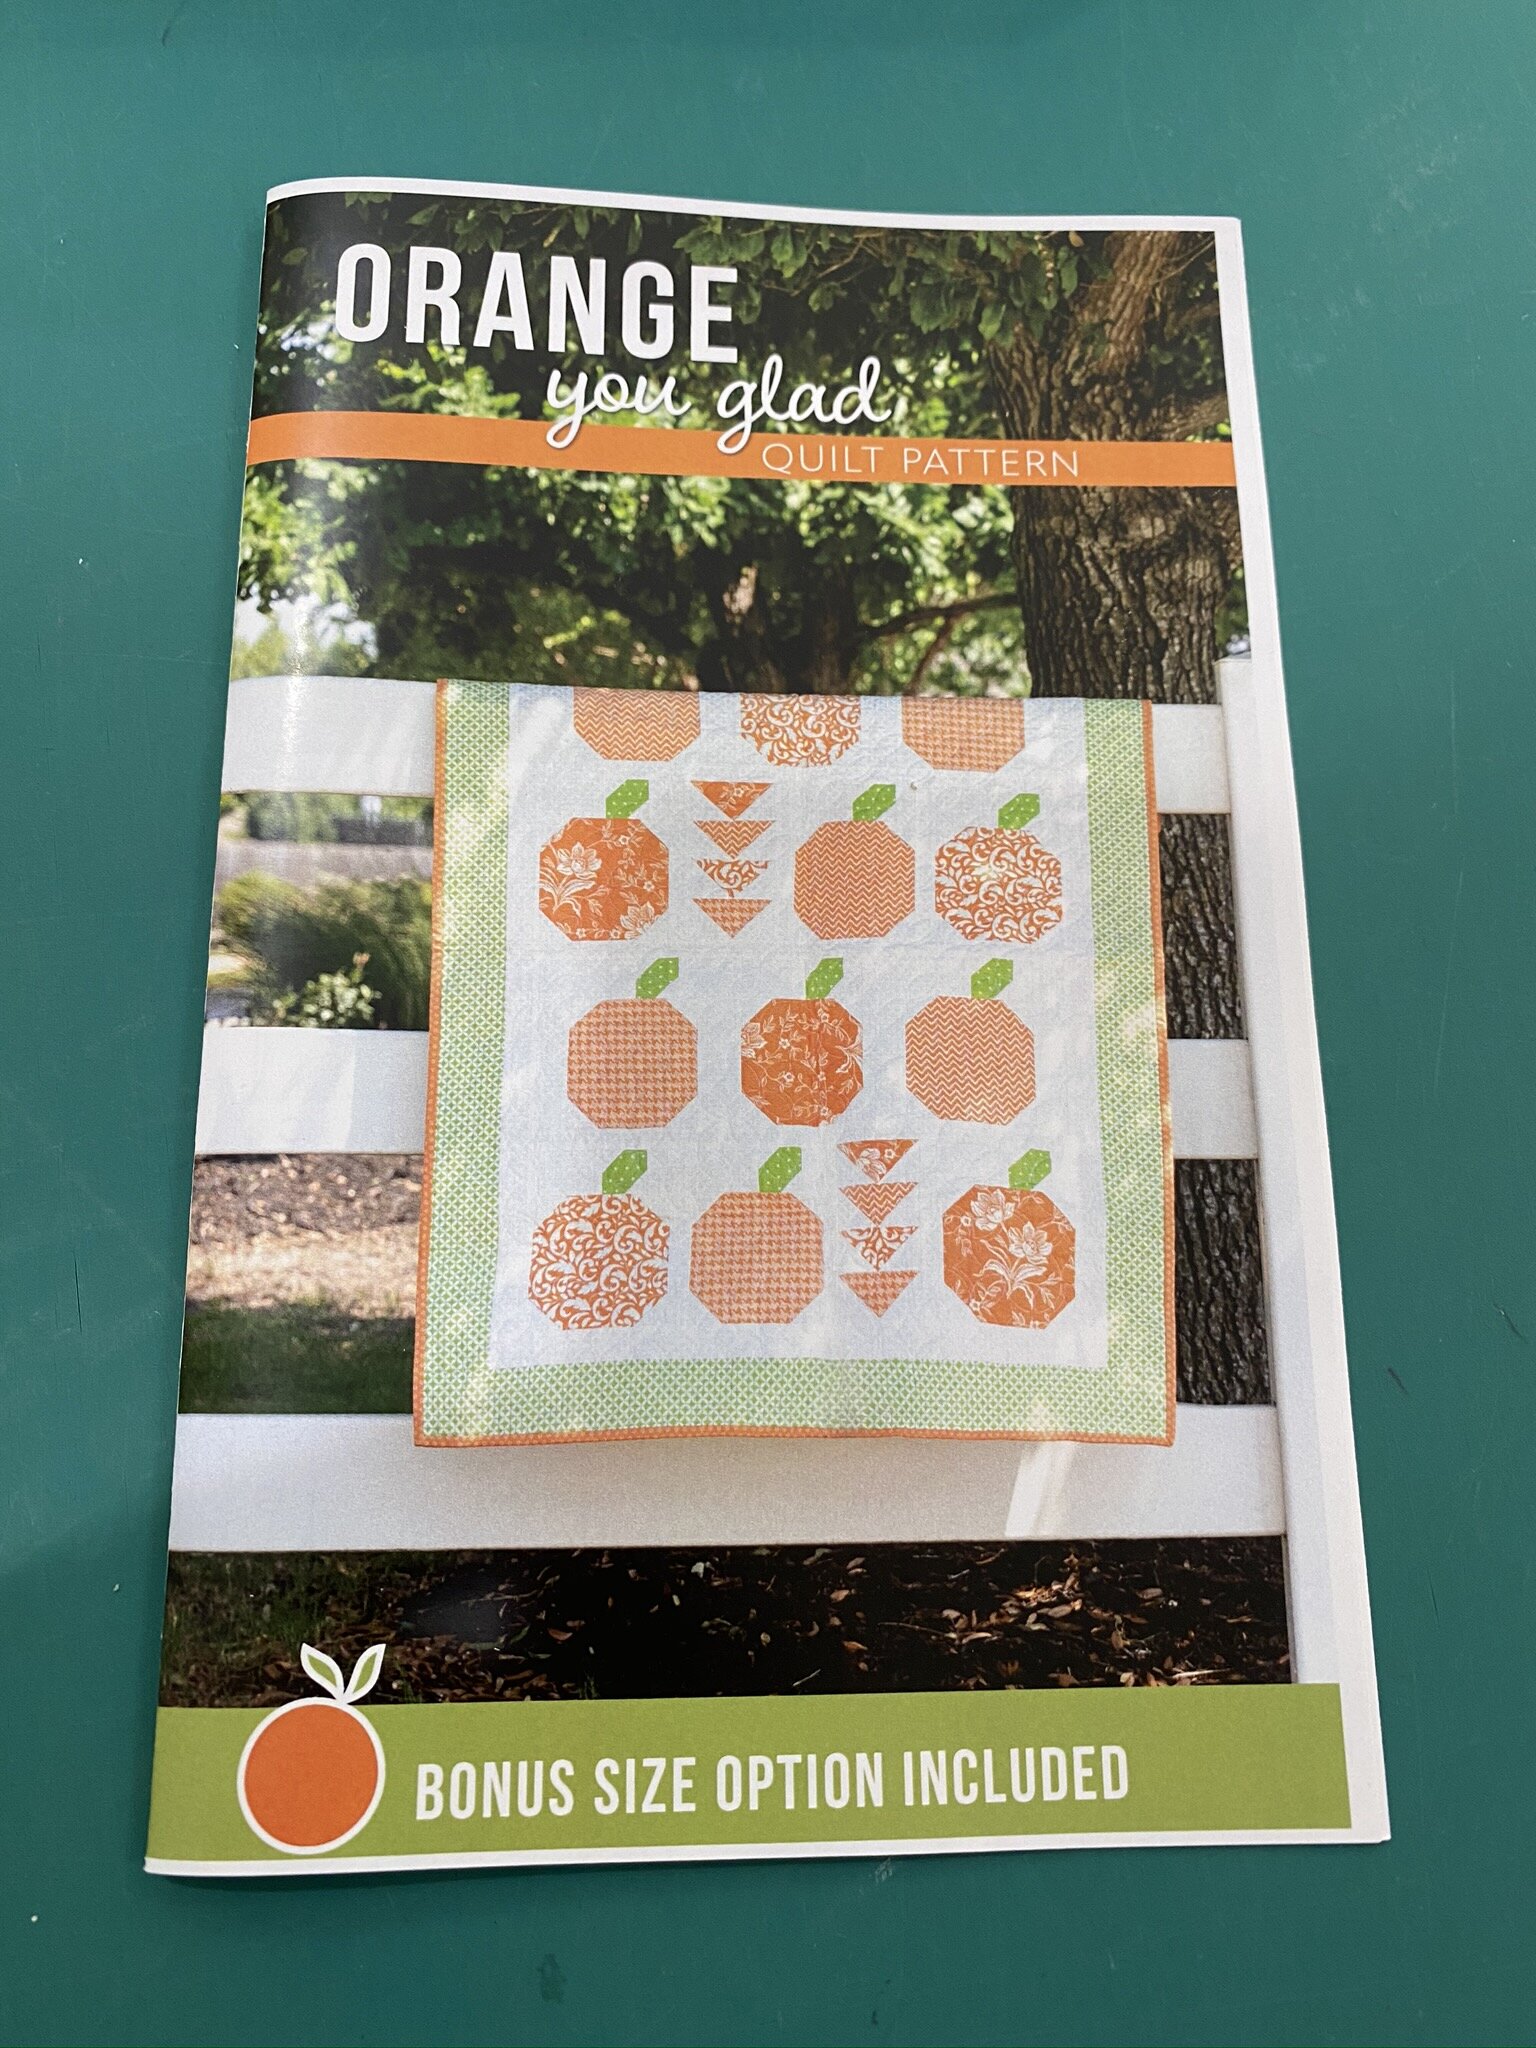
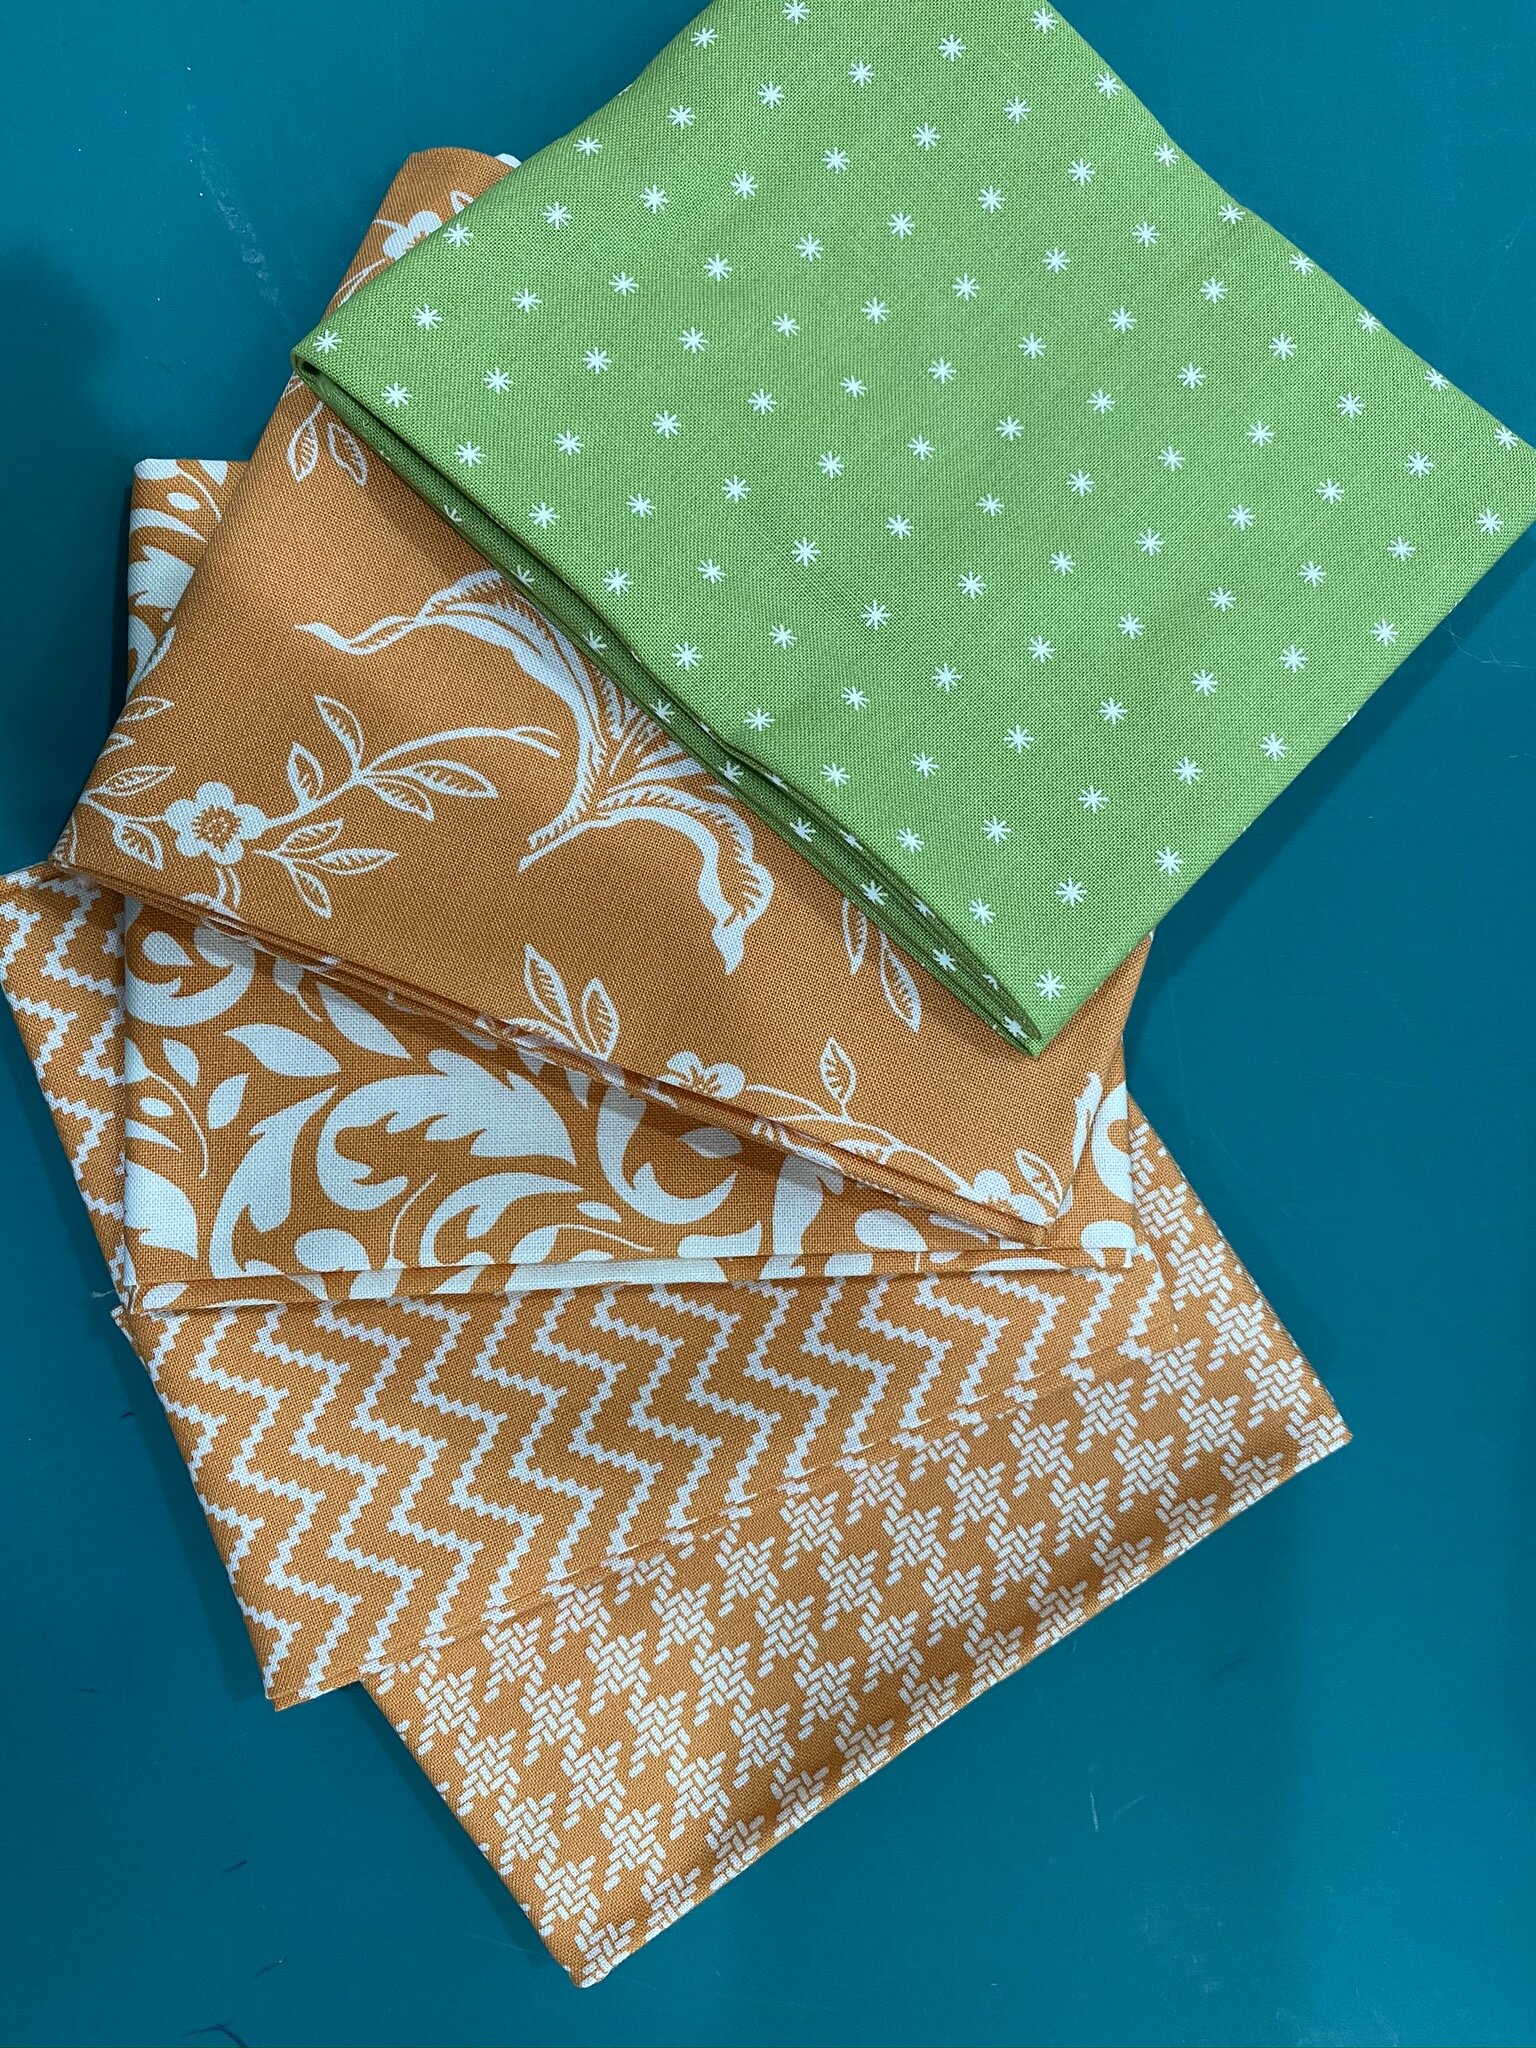
Photo 1: This month’s theme was around oranges. The themes are always pretty loosely defined…
Photo 2: The tschotscke this time was one Fiskars 45mm rotary cutter blade, one “macaroon” notion storage thingie, and a little magnifying bubble meant for rulers. I have an Olfa and I’ve never tried a Fiskar’s blade on it so we’ll see if that works; if it does, new blades are worth gold so that would be nice.
Photo 3: This photo is of one of the smallest Clover clips in the macaroon storage container. I could keep maybe 6 of those things in there. I have no idea why I would find such a tiny little storage container useful. Did any of you other subscribers to the box see this and get excited, saying “Finally! A storage container for my….”? If so, tell me what you’ll be putting in there.
Photo 4 and 5: The magnifying bubble (“Spot on Dot”) is supposed to help you with fussy cuts and magnifying ruler lines. I tested it and sure, it magnifies it a little bit, but not drastically. It is fun that it sticks to your ruler without falling off until you take it off. I got about two minutes’ entertainment value out of that. The macaroon and the bubble will both live in my sewing room for awhile. In my next cleaning binge, if I haven’t used them by then, they’ll go in some white elephant giveaway.
Photo 6: The pattern to go with this month’s fabrics. I always keep these but there’s only a few I think I’d actually make. Again, see the above comments about the next cleaning binge.
Photo 7: This month’s fabrics. My phone camera did weird things to the orange and turned them all brown. They’re actually all a sort of dusty orange and the green is a bit more of a yellow-orange than in the photo. When I saw that it was going to feature orange fabrics I was excited because I don’t have that much orange, but this isn’t as bright an orange as I’d hoped. These are fat quarters so I’ve added them to my fat quarter stash. They’ll definitely get used at some point…if only to make more masks, sigh.
So, I’d give this month’s box about a 3 out of 5. I’ve had some that were definite 5s. I’ve never had a 1—there’s always something I like in them.
Staycation Days 6 and 7: Embroidery and Puzzle Mystery Quilts
Day 6, Wednesday, ended up being mostly a lounge day in front of the TV, doing embroidery.

I spent the morning in my sewing room working on the first couple of months of clues for the 2019 Cotton Cuts Puzzle Mystery Quilt, Cosmos.
Which makes me realize I have a big “oops” in previous blog posts. My bad. The one I just finished is NOT Cosmos, but “Pastures New” from Spring 2018. I did it in the Portofino colorway. That’s what happens when you work on three at once—you totally forget which one is which. (The one I did in 30s fabrics is, indeed, “Stratford,” and I’d done the colorway Juliet. This one I’m working on now is actually “Cosmos” and I’m doing it in the Reiki colorway, which is all batiks.)
Clue 1 went just dandy.
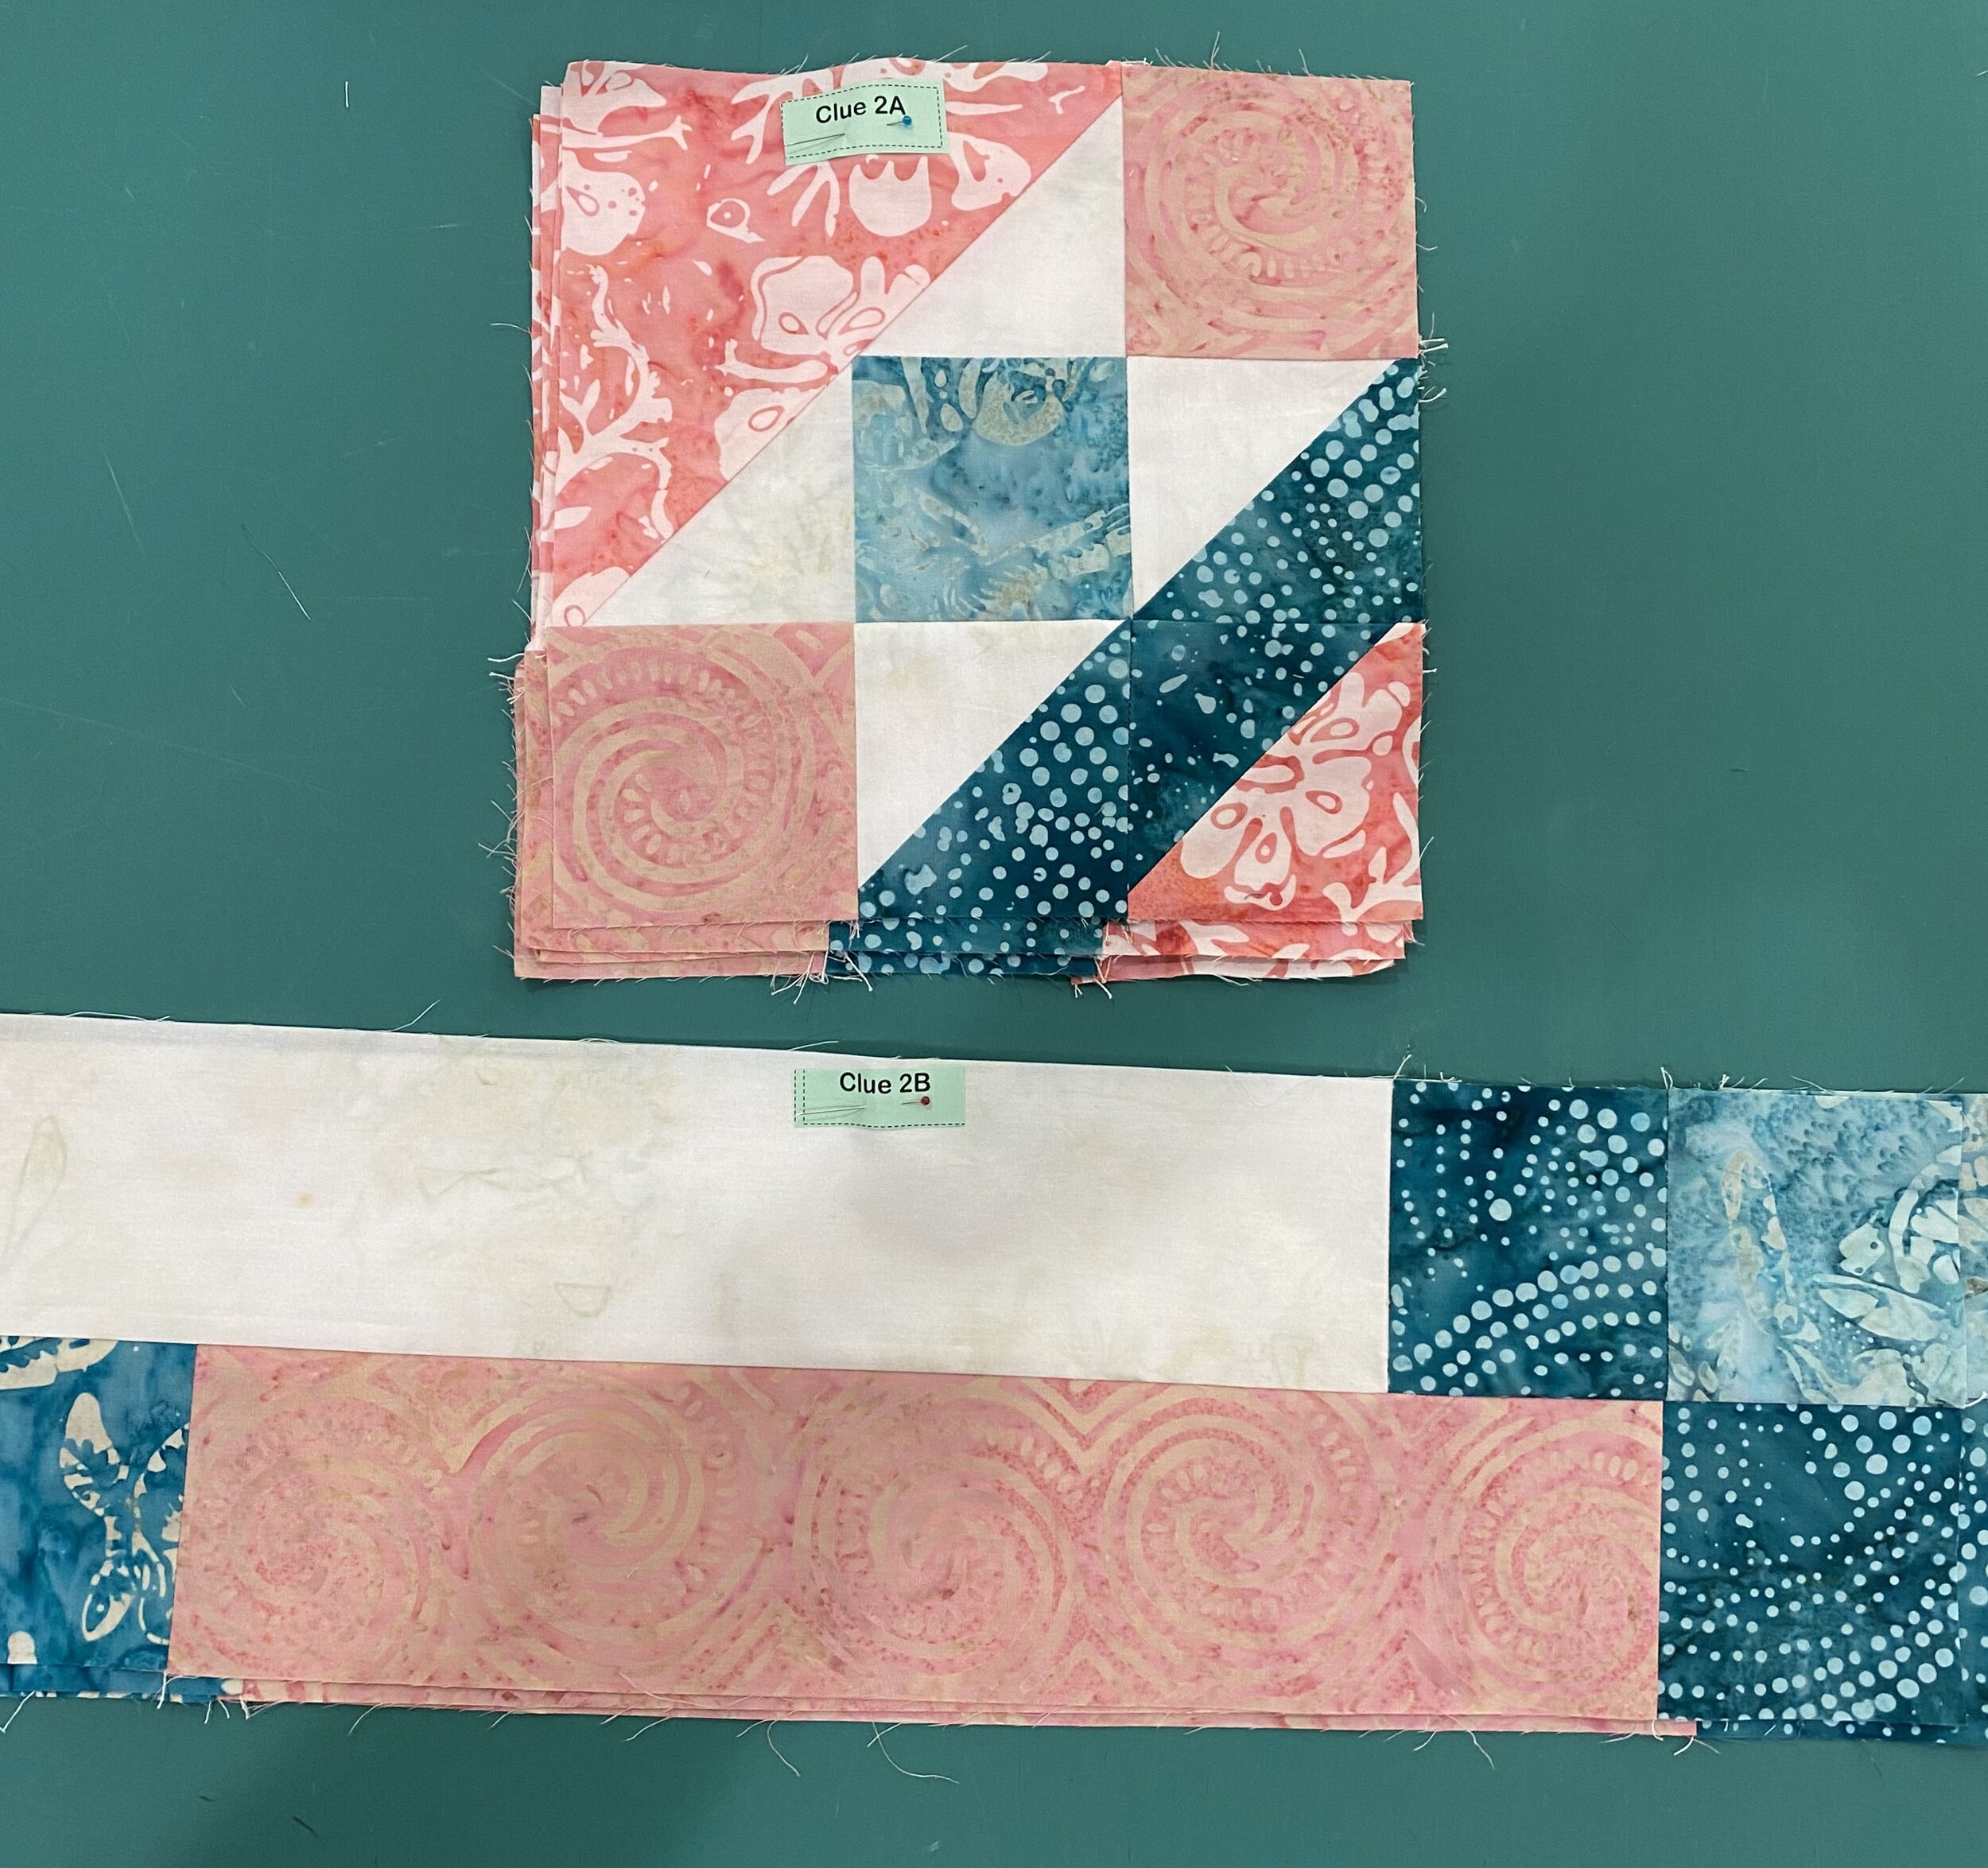
Clue 2, however, was a little more problematic as I realized when I got to the last few steps that I was somehow missing one square of fabric. One. Square. I looked all over my sewing room to see if it had just flown the coop but it is not to be found. I had to send a message to Cotton Cuts and they’re sending me a replacement square.
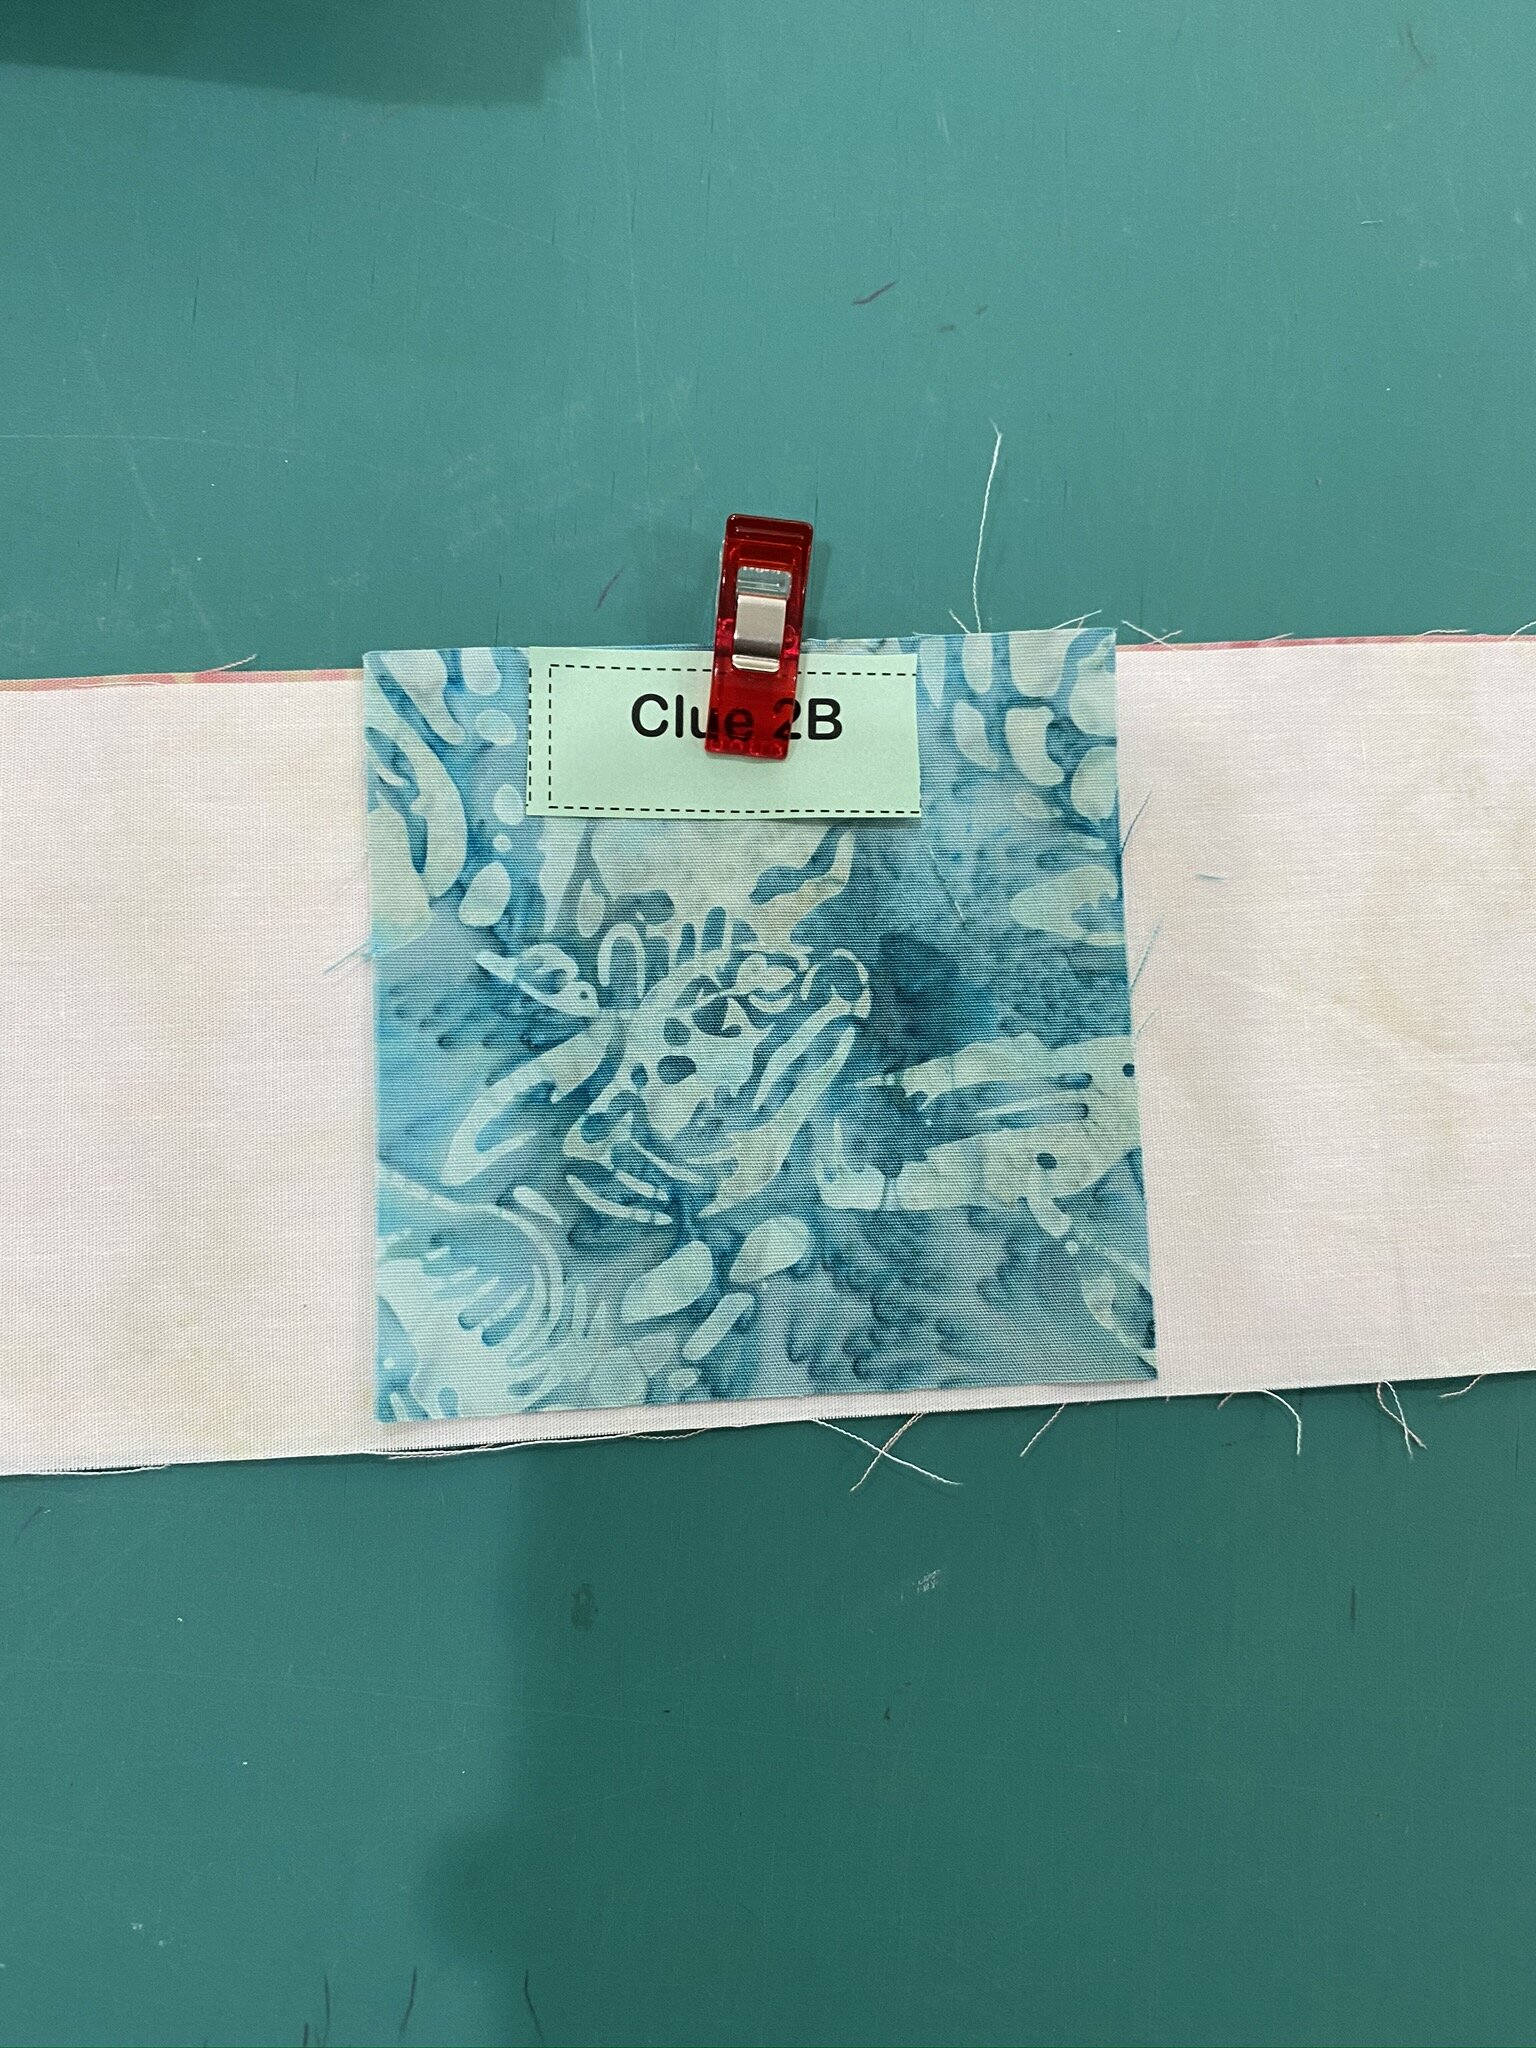
So the first picture is what I was able to complete of Clue 2 (Clue 2A and three out of four Clue 2B), and the second is the one last Clue 2B that’s awaiting the one, sad, lonely square.
I have to say, for all that I have had difficulty with mistakes in these puzzle mystery quilts, I can’t fault the customer service. Kimberly always gets back to me so fast and fixes the problem immediately.


After that, I sort of lost steam—plus, my sewing room/home office is the room above the garage; our garage is insulated but not climate controlled so my sewing room/office is always hotter or colder than the rest of the house, depending on the season. By mid-afternoon, even the fan going full-blast doesn’t help. I’ve been doing mornings in the sewing room and afternoons downstairs where the AC lives.
So, Wednesday afternoon I spent several hours watching “Marcella” on Netflix and embroidering.
One block finished, another block better than halfway done. And then my fingertips wore out.
I only have 2 1/2 blocks left to embroider and then I can start piecing everything together! Woo!
Today I got back to Cosmos again. Only this time I did two things:

I got out my 3M clips and hung the swatch card on the wall next to my cutting table so it would be easier to reference while I’m working on these blocks. Doh. Why didn’t I do that before with all of these? So much easier than constantly trying to figure out which pile of fabric pieces it ended up under.
I actually counted out all the pieces included in the month’s clue to make sure it matched what they said I should have before starting to sew. Go figure.

So, month 3 is now done.
Wish I could say it went swimmingly.
It floundered.
There was a mistake in the instructions that resulted in me having to do some seam ripping in order to put pieces together in a different combination for a later step.
At least this time I had the right number of fabric pieces, so I was ultimately able to finish the month.
I do have to say, though, that while I was taking a break from sewing (and sitting directly in front of the fan to cool down a bit), I was scrolling through quilty things on my computer and thinking about my Accuquilt dies and scrap quilts and such, and came to the realization that signing up for another one of these puzzle mystery quilts would impede my ability to do some stashbusting with my Accuquilt this fall. I can make myself my own dang kits, as it were. Mistakes aside, I do enjoy the puzzle mystery quilts because it’s fun to see how they ultimately come together, but for now, I have cancelled the subscription I’d done a few weeks ago to their fall mystery quilt. I’m anxious to work on some of my own designs again.
I finally did my pool yoga yesterday—first time of the season. Boy did that feel good. It’s supposed to get up into the 90s today so I suspect I’ll be in the pool again this afternoon. It’s a vacation-y thing to do, after all. If I do more sewing or embroidery, I’ll do another post later.
Staycation Day 5: Have I mentioned how much I hate doing backings?
With a purple passion.

So, on the happy side of things, I finally got Cosmos done. This was one of my Cotton Cuts Puzzle Mystery Quilts—I think from maybe 2018? It’s an older one. I did the smaller size on this so it’s finished something like 48x60” or something along those lines. You have the option of adding borders but I didn’t choose to.
Learn from me: The difficulty with doing a BOTM over several years is you may not remember exactly what you did in terms of the 1/4” seam. Was I using a scant one when I started? A full one? Was I using this foot or the other foot? In other words, the end result didn’t come out exactly square. I’m not sweating it. It’s close enough for horseshoes and I’m not doing this for a show or anything. But I should remind myself to put a post-it in the project box with my exact foot and needle settings for consistency.
That being said, done is done. And done is good.
I then worked on the backings for both of the Puzzle Mystery Quilts (see Stratford here).
The backing on Cosmos went just fine. I still hated working with it. It’s something about wrestling with large swaths of fabric that gets to me. Even a pieced backing is irritating because eventually it still becomes a large swath of fabric—it just takes longer to get to that point. Which is equally irritating. When I get to the backing, I just want it over with as quickly as possible.
Then I got to the backing for Stratford, which is a larger quilt than Cosmos so it required a little different logic around how to cut and sew things back together to get them large enough in the right proportions. Somehow, I managed to cut it wrong. It would’ve been just barely big enough for the quilt itself, but not leave any to spare for attaching to the longarm machine correctly and to allow for the slack that the quilting process needs. I ended up having to sew the scraps from the original cuts together and sew them onto the end of the backing, so there’s a seam in an awkward place. It’s possible the seam may end up right along the outer edge of the border and might be able to get trimmed off in the end, but we’ll see. It was irritation on irritation, but again, “Done is Done and Done is Good.”
That was it for Day 5, except some reading and more binge-watching of History Channel’s Alone. (I’m hooked.)
Staycation Day 5: Two finishes!
As I mentioned in my previous post, I took Sunday off the computer. I mostly vegged—and then went to see a friend where we sat 6’ apart on her front porch and drank wine slushees I’d made in my ice cream maker—very tasty.
Monday, however, I had three goals: Take Auggie for a walk on the canal, go in for my first hair appointment since early February, and finish the two jelly roll quilts that have been languishing in my sewing room for far too long. Done and dusted on all three of them (particularly happy about the hair appointment).
So, you may remember these from previous posts. I did two quick jelly roll race quilts on year at Christmas just to use up a couple of my many jelly rolls. A few months later I got them to a longarm quilter. A few weeks later, I picked them up. And then they sat waiting for me to get their binding on them. And waiting. And waiting.
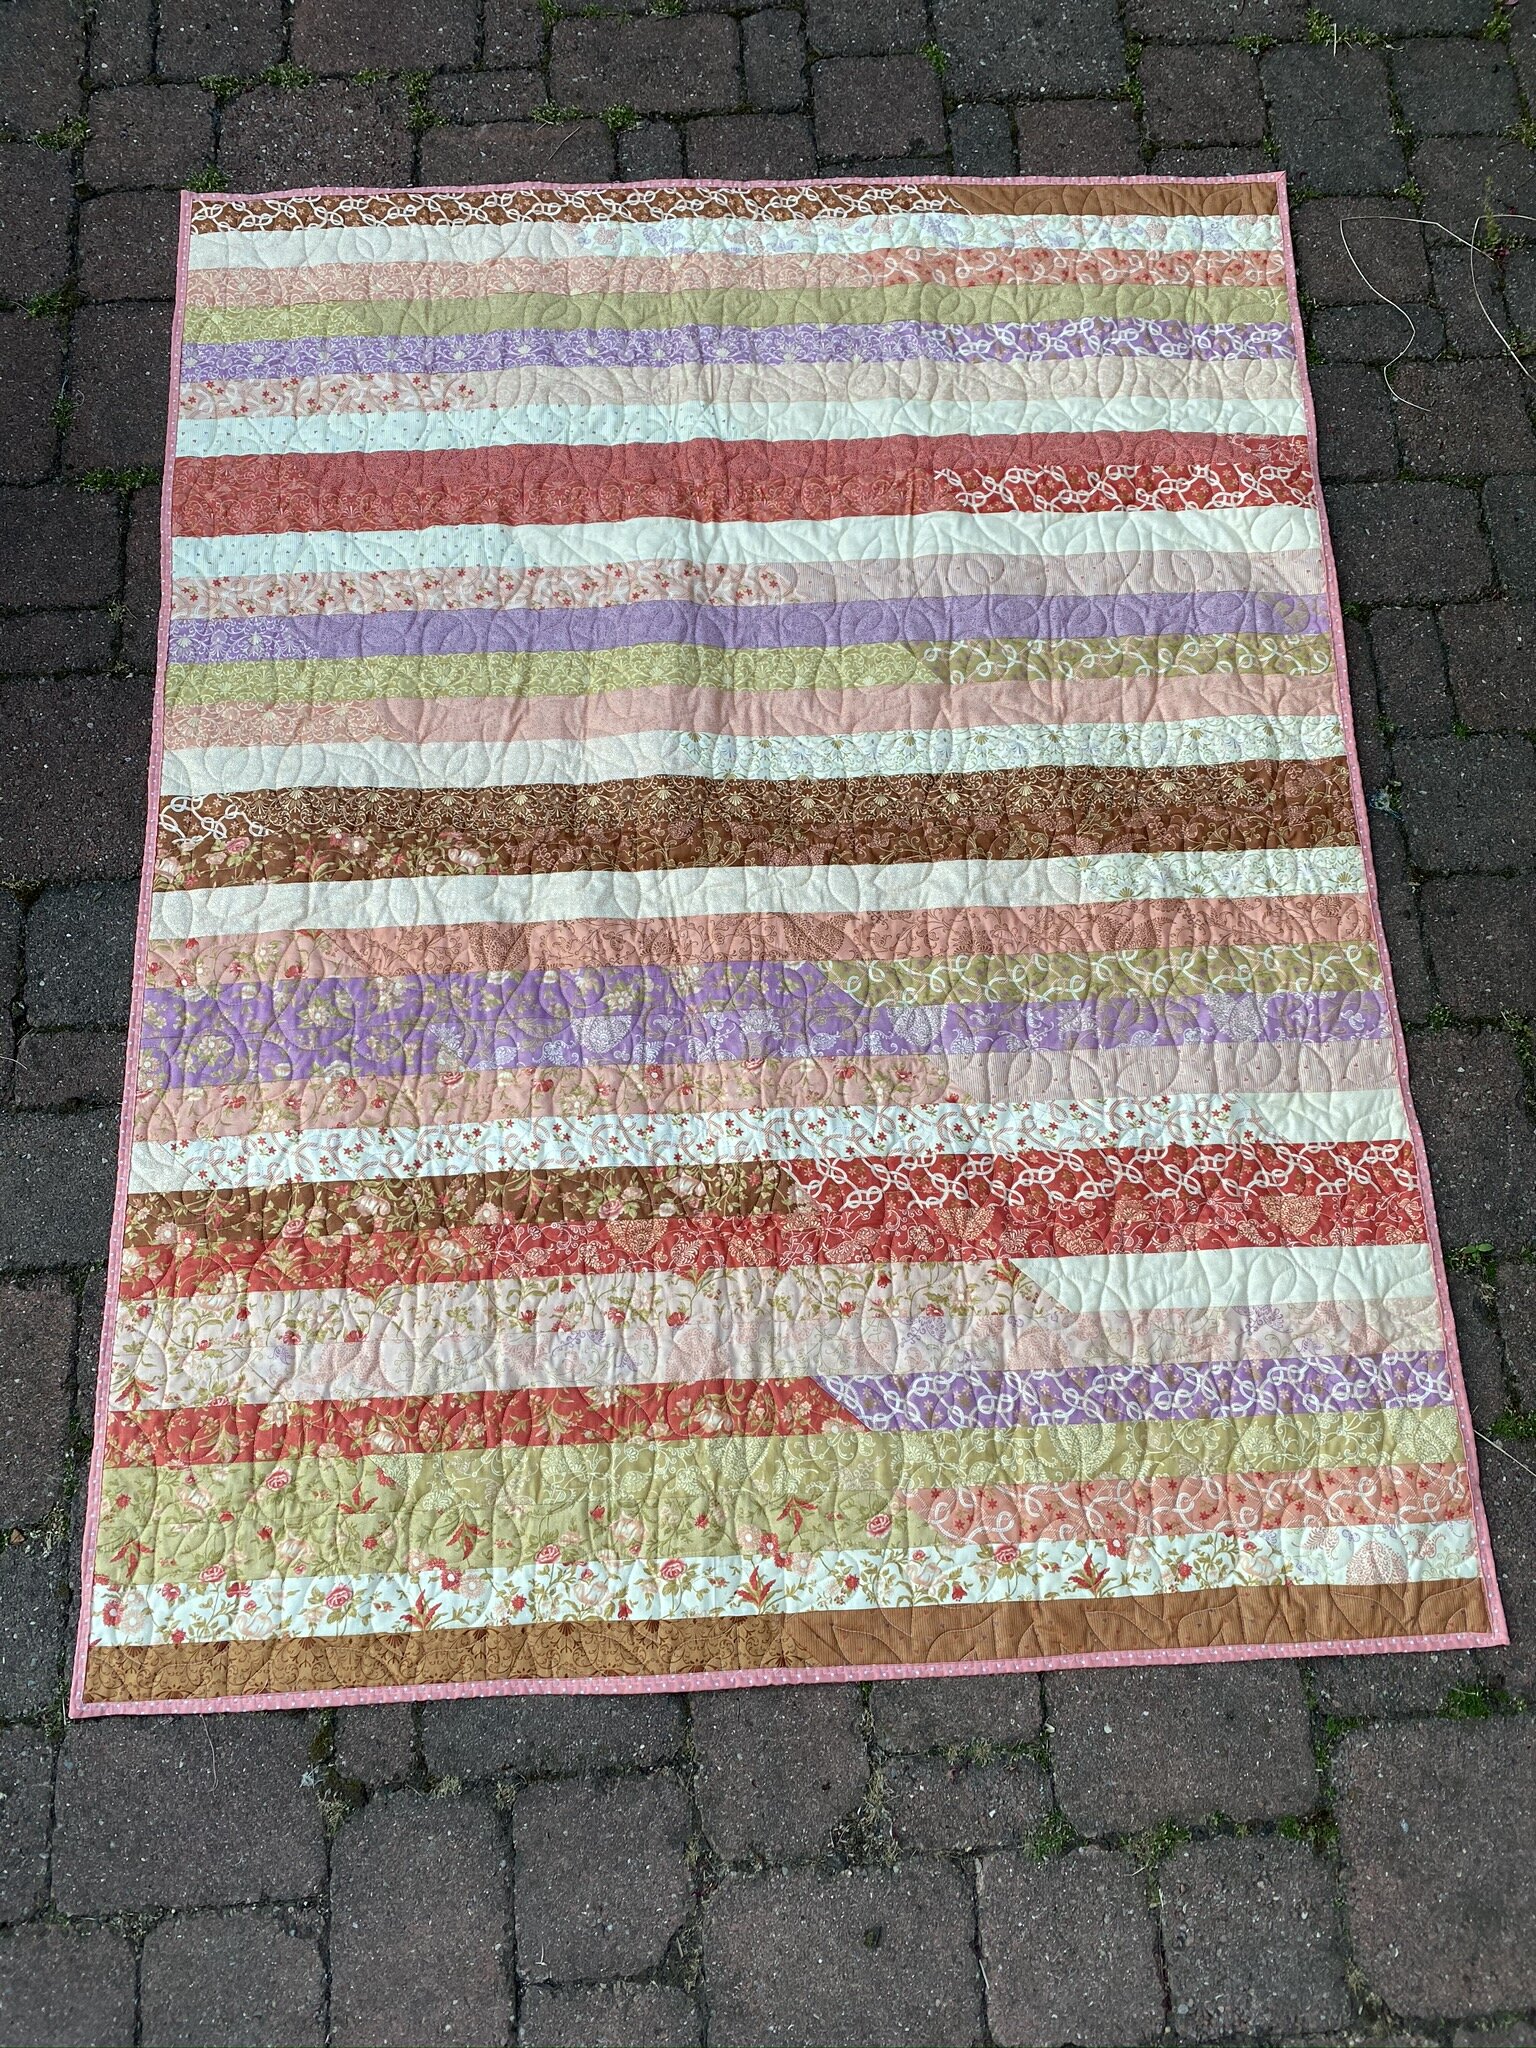
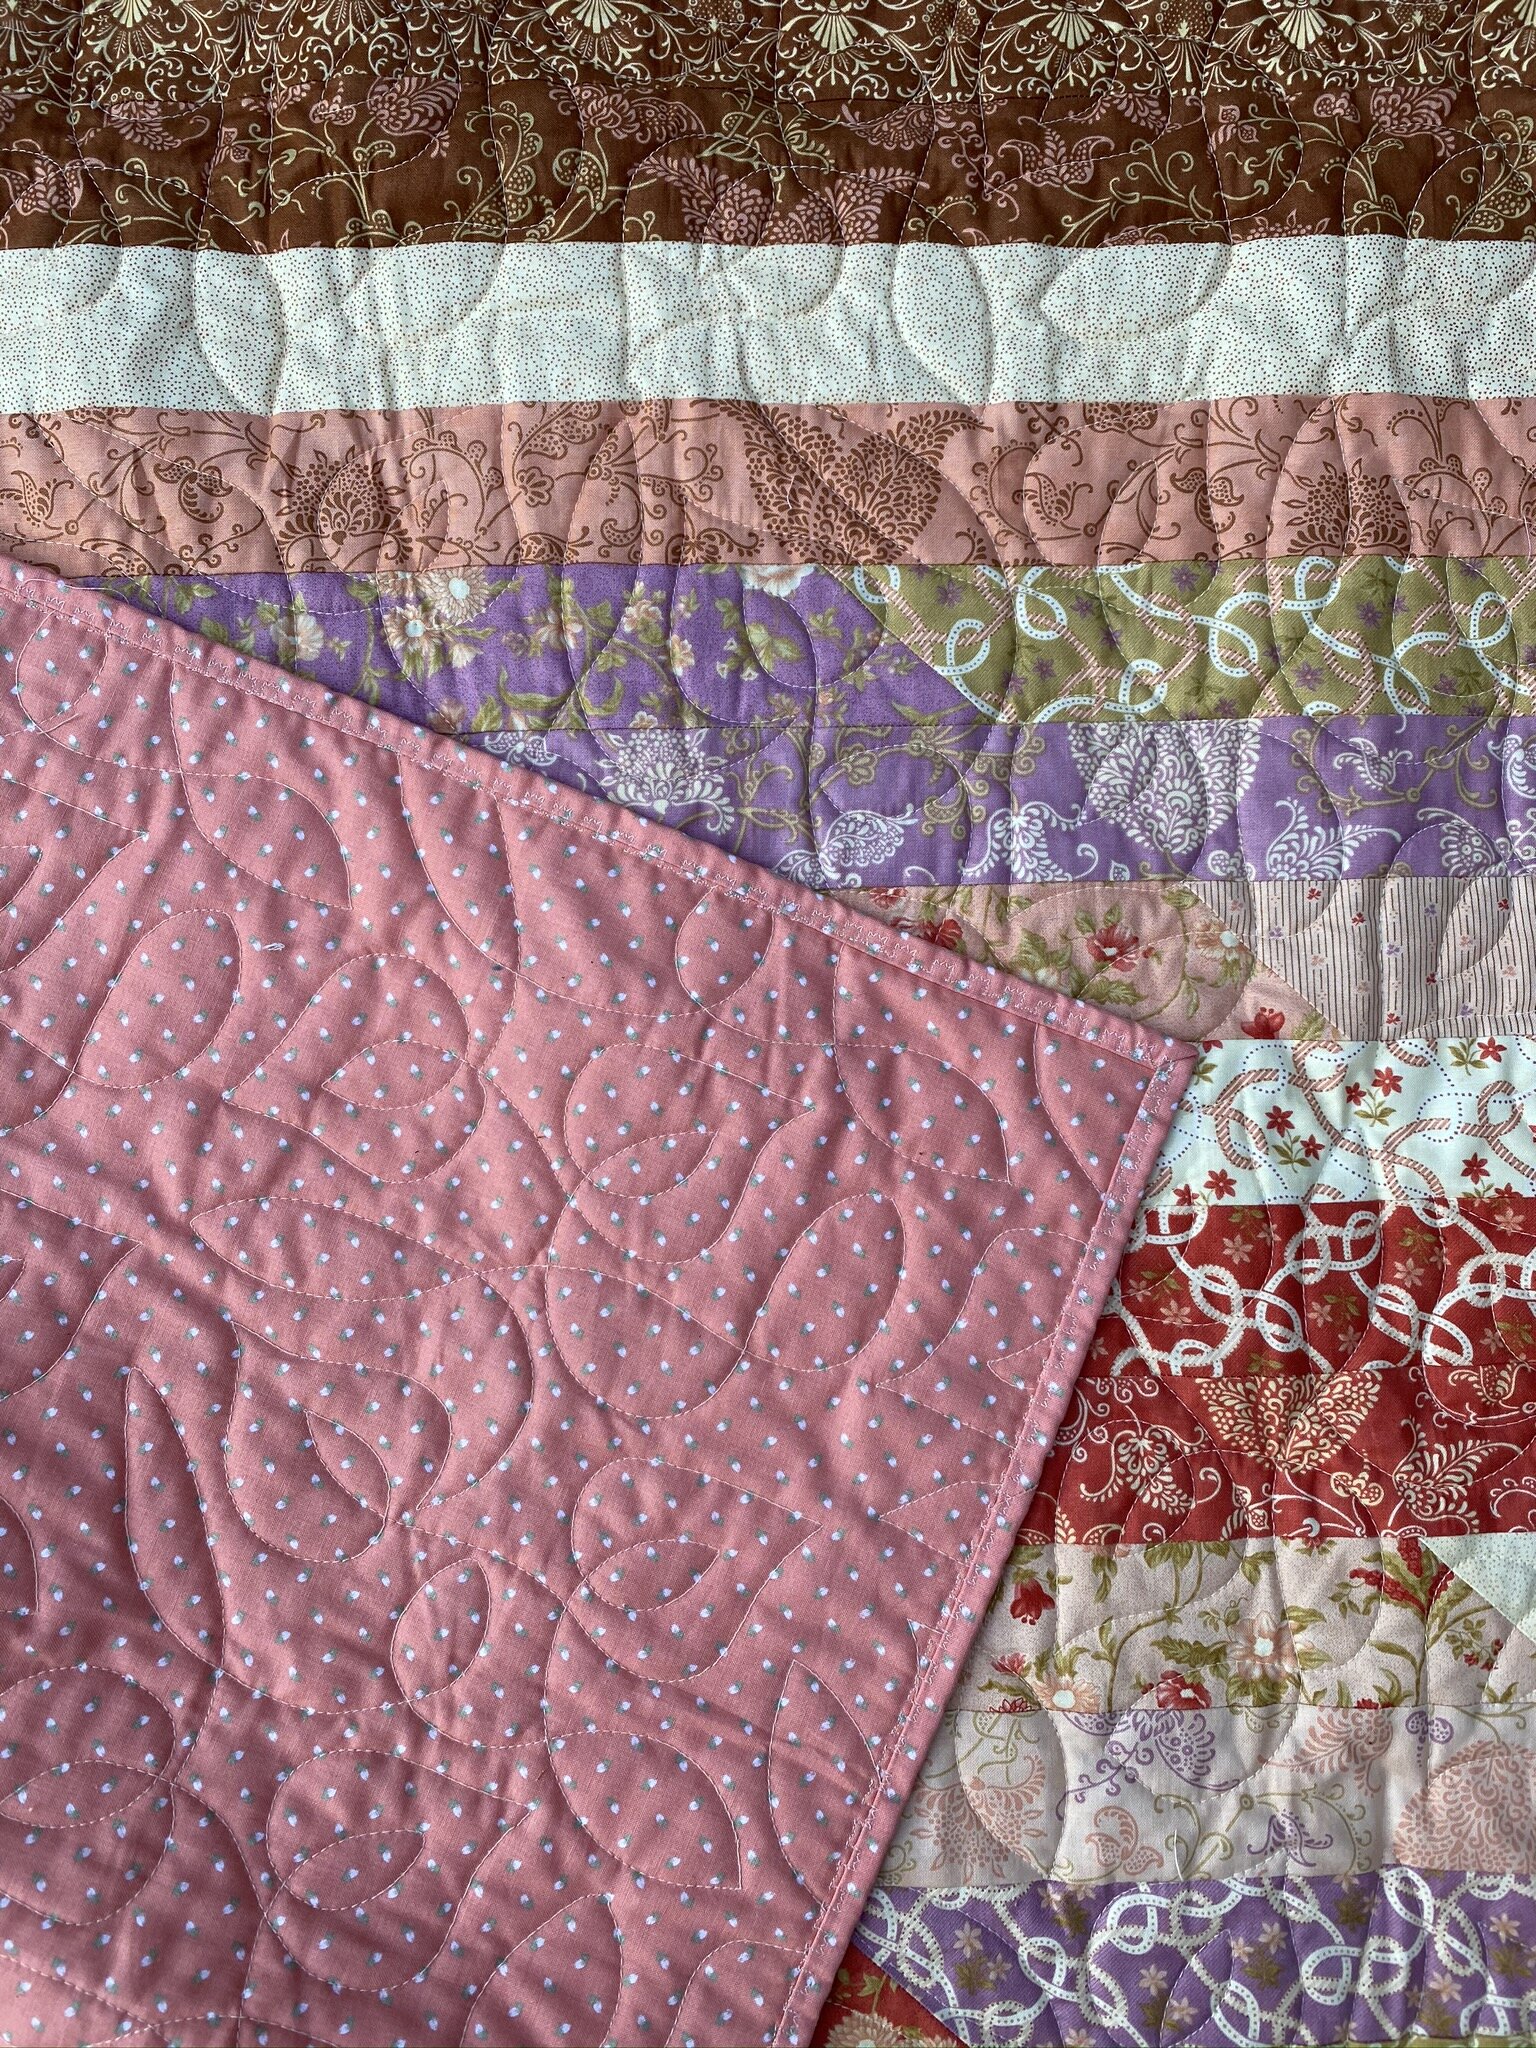
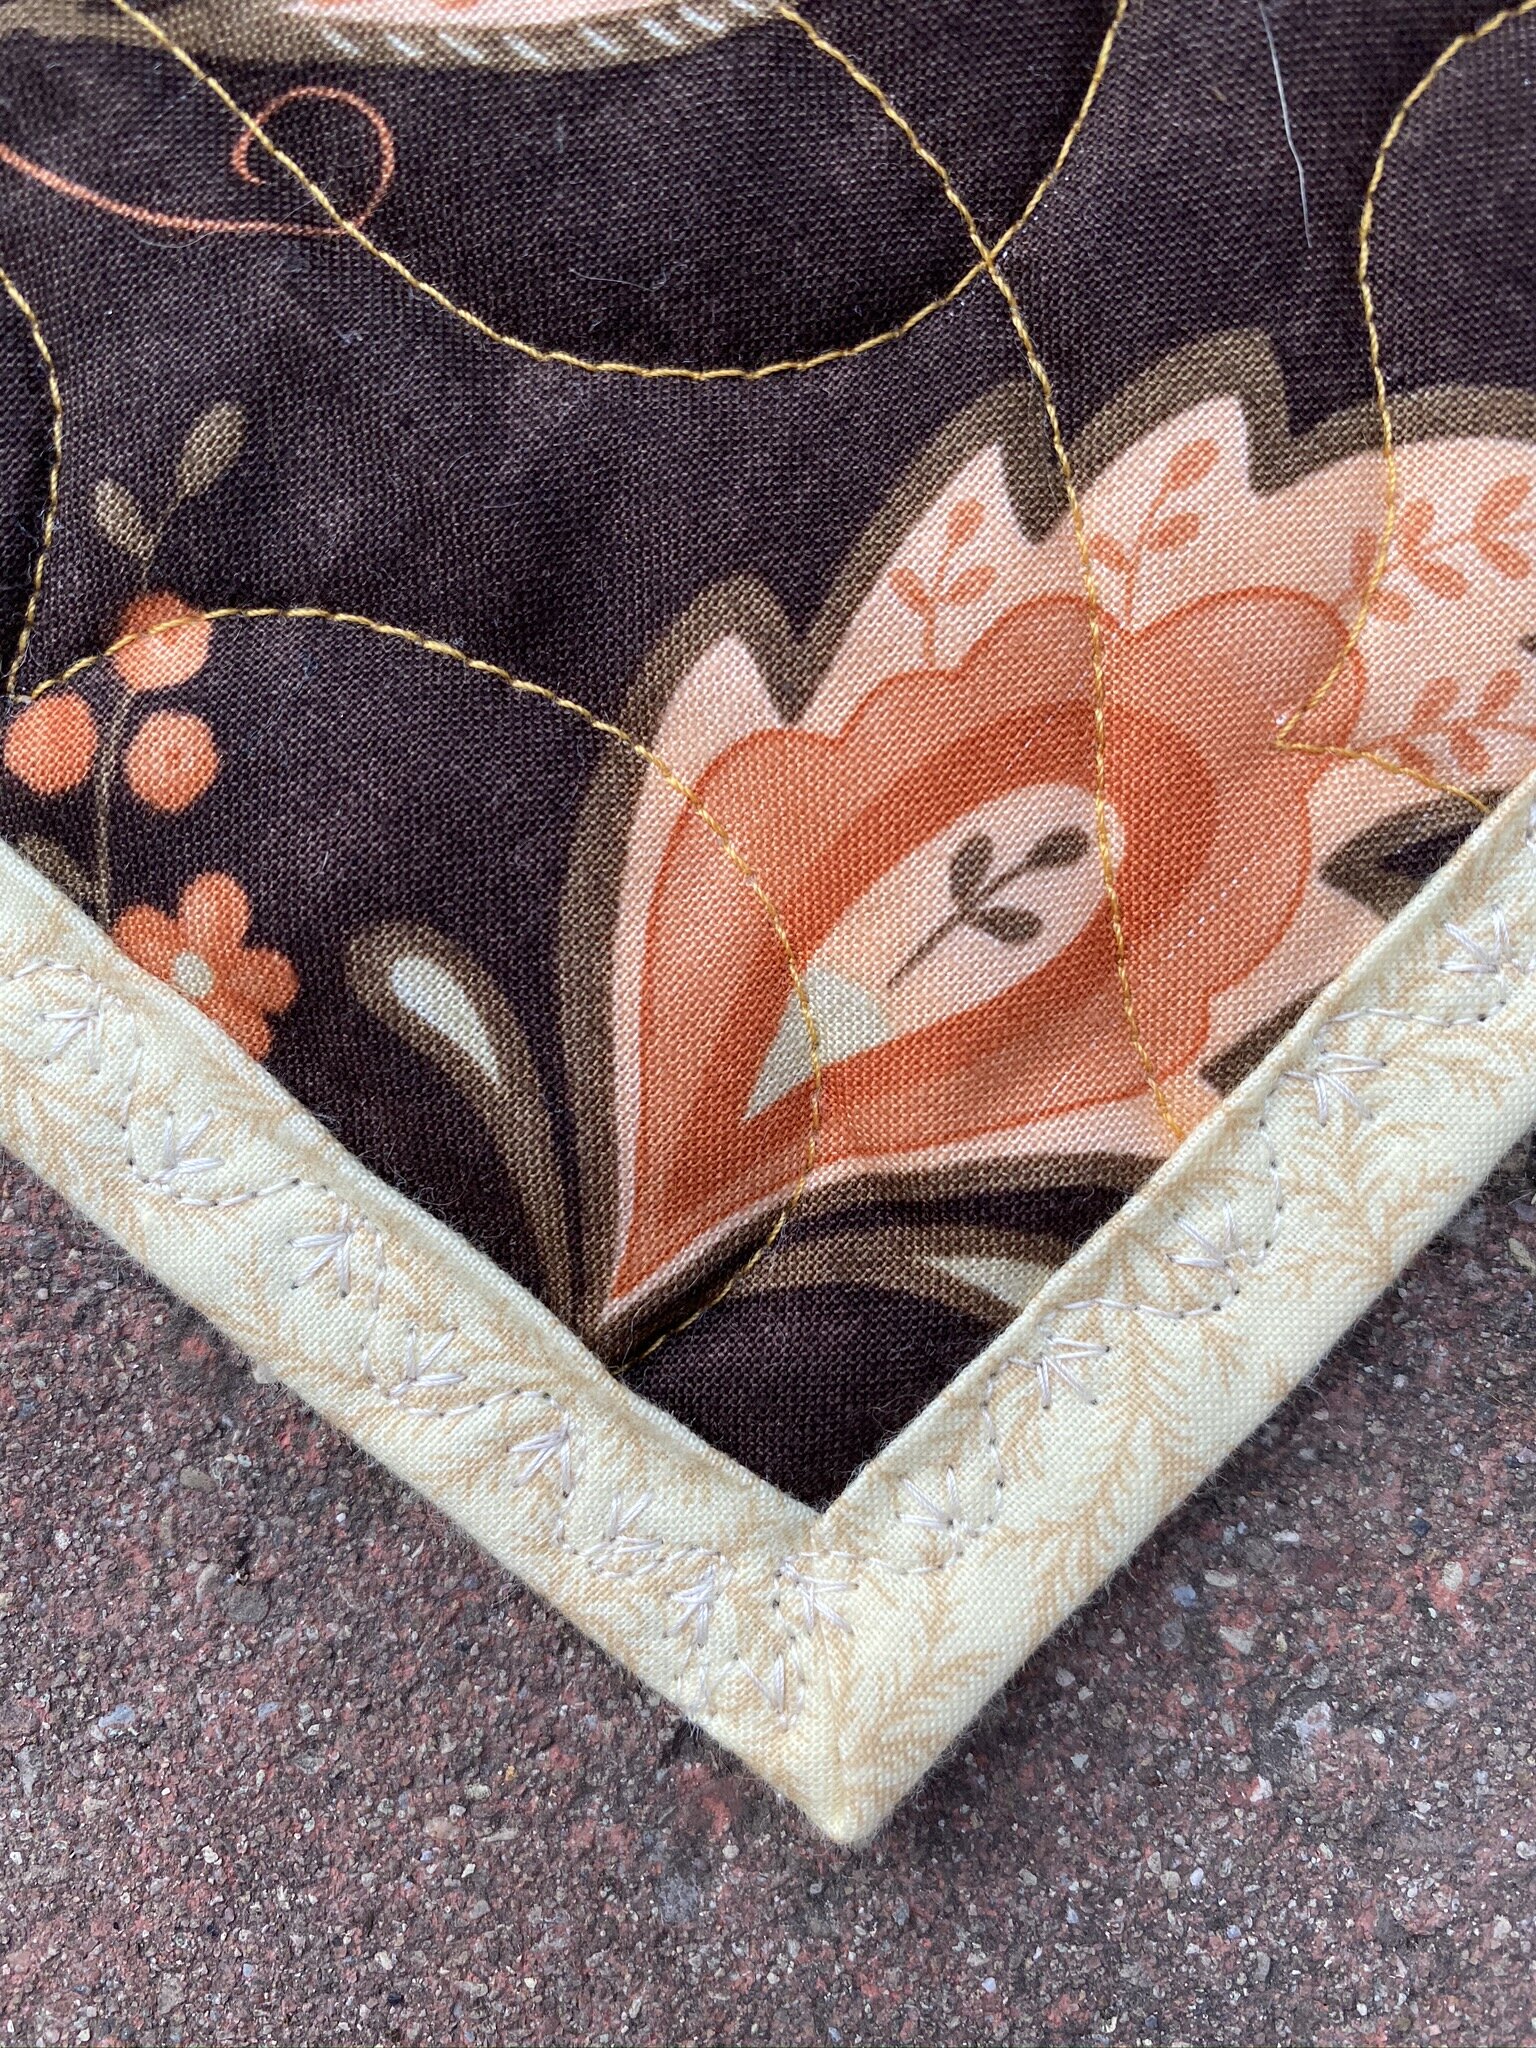
Finally, today, I did both bindings entirely by machine. The rose quilt, I was able to use the leftover backing fabric the longarmer had cut off and sent back to me for the binding. Loved having my 2 1/2” strip die cut as they were both length of fabric, so I was easily able to fold them up and slice them into appropriate binding strips.
I didn’t add a border to this one partly because I couldn’t find a good option from my stash and partly because I didn’t really feel like it needed it. Although, candidly, it was mostly because I didn’t have a good option in my stash and didn’t feel like taking the time to shop for something.
The longarmer did a nice all-over floral/leafy design that blends in but once I wash it will make it a nice antiquey-crinkly quilt.
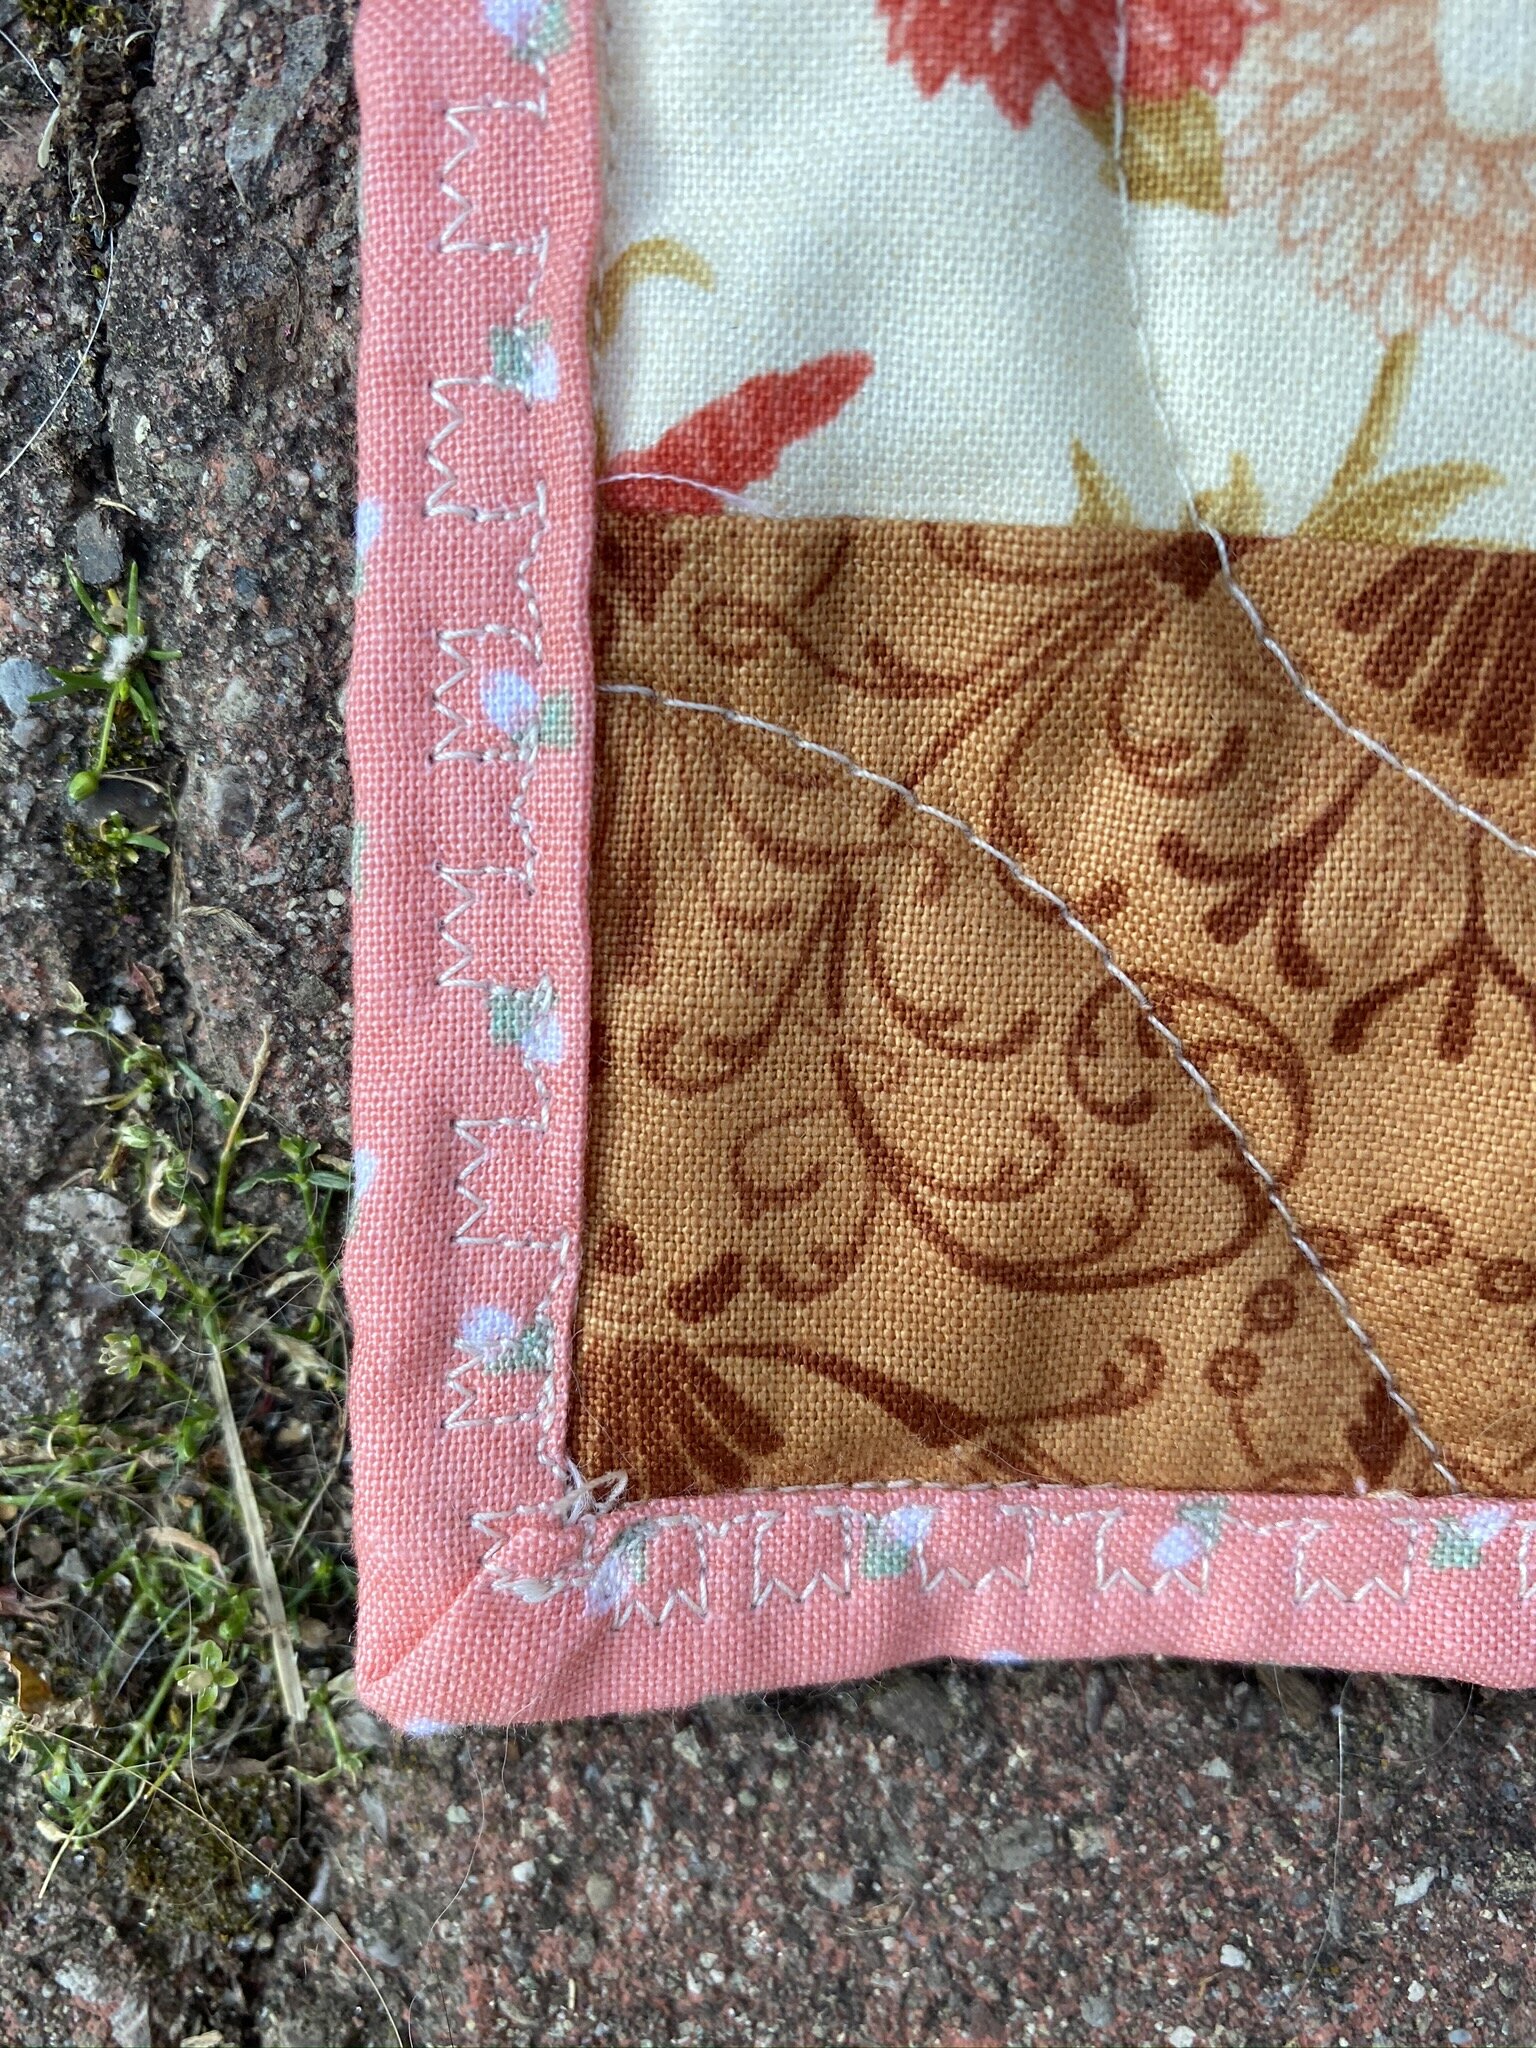
The third photo shows my corners. My corners worked well on both of these quilts because I used a very scant 1/4” seam sewing the bindings on the back so I had plenty of fabric to work with on the front to miter things. I did end up trimming the corners, which I don’t always like to do because having the corner intact helps make a cleaner miter, but sometimes it’s just a little too big.
The decorative stitch I used is supposed to be a row of tulips. Somehow my machine wasn’t closing the bottom of the flower so they look more like bear claws. Oh well.
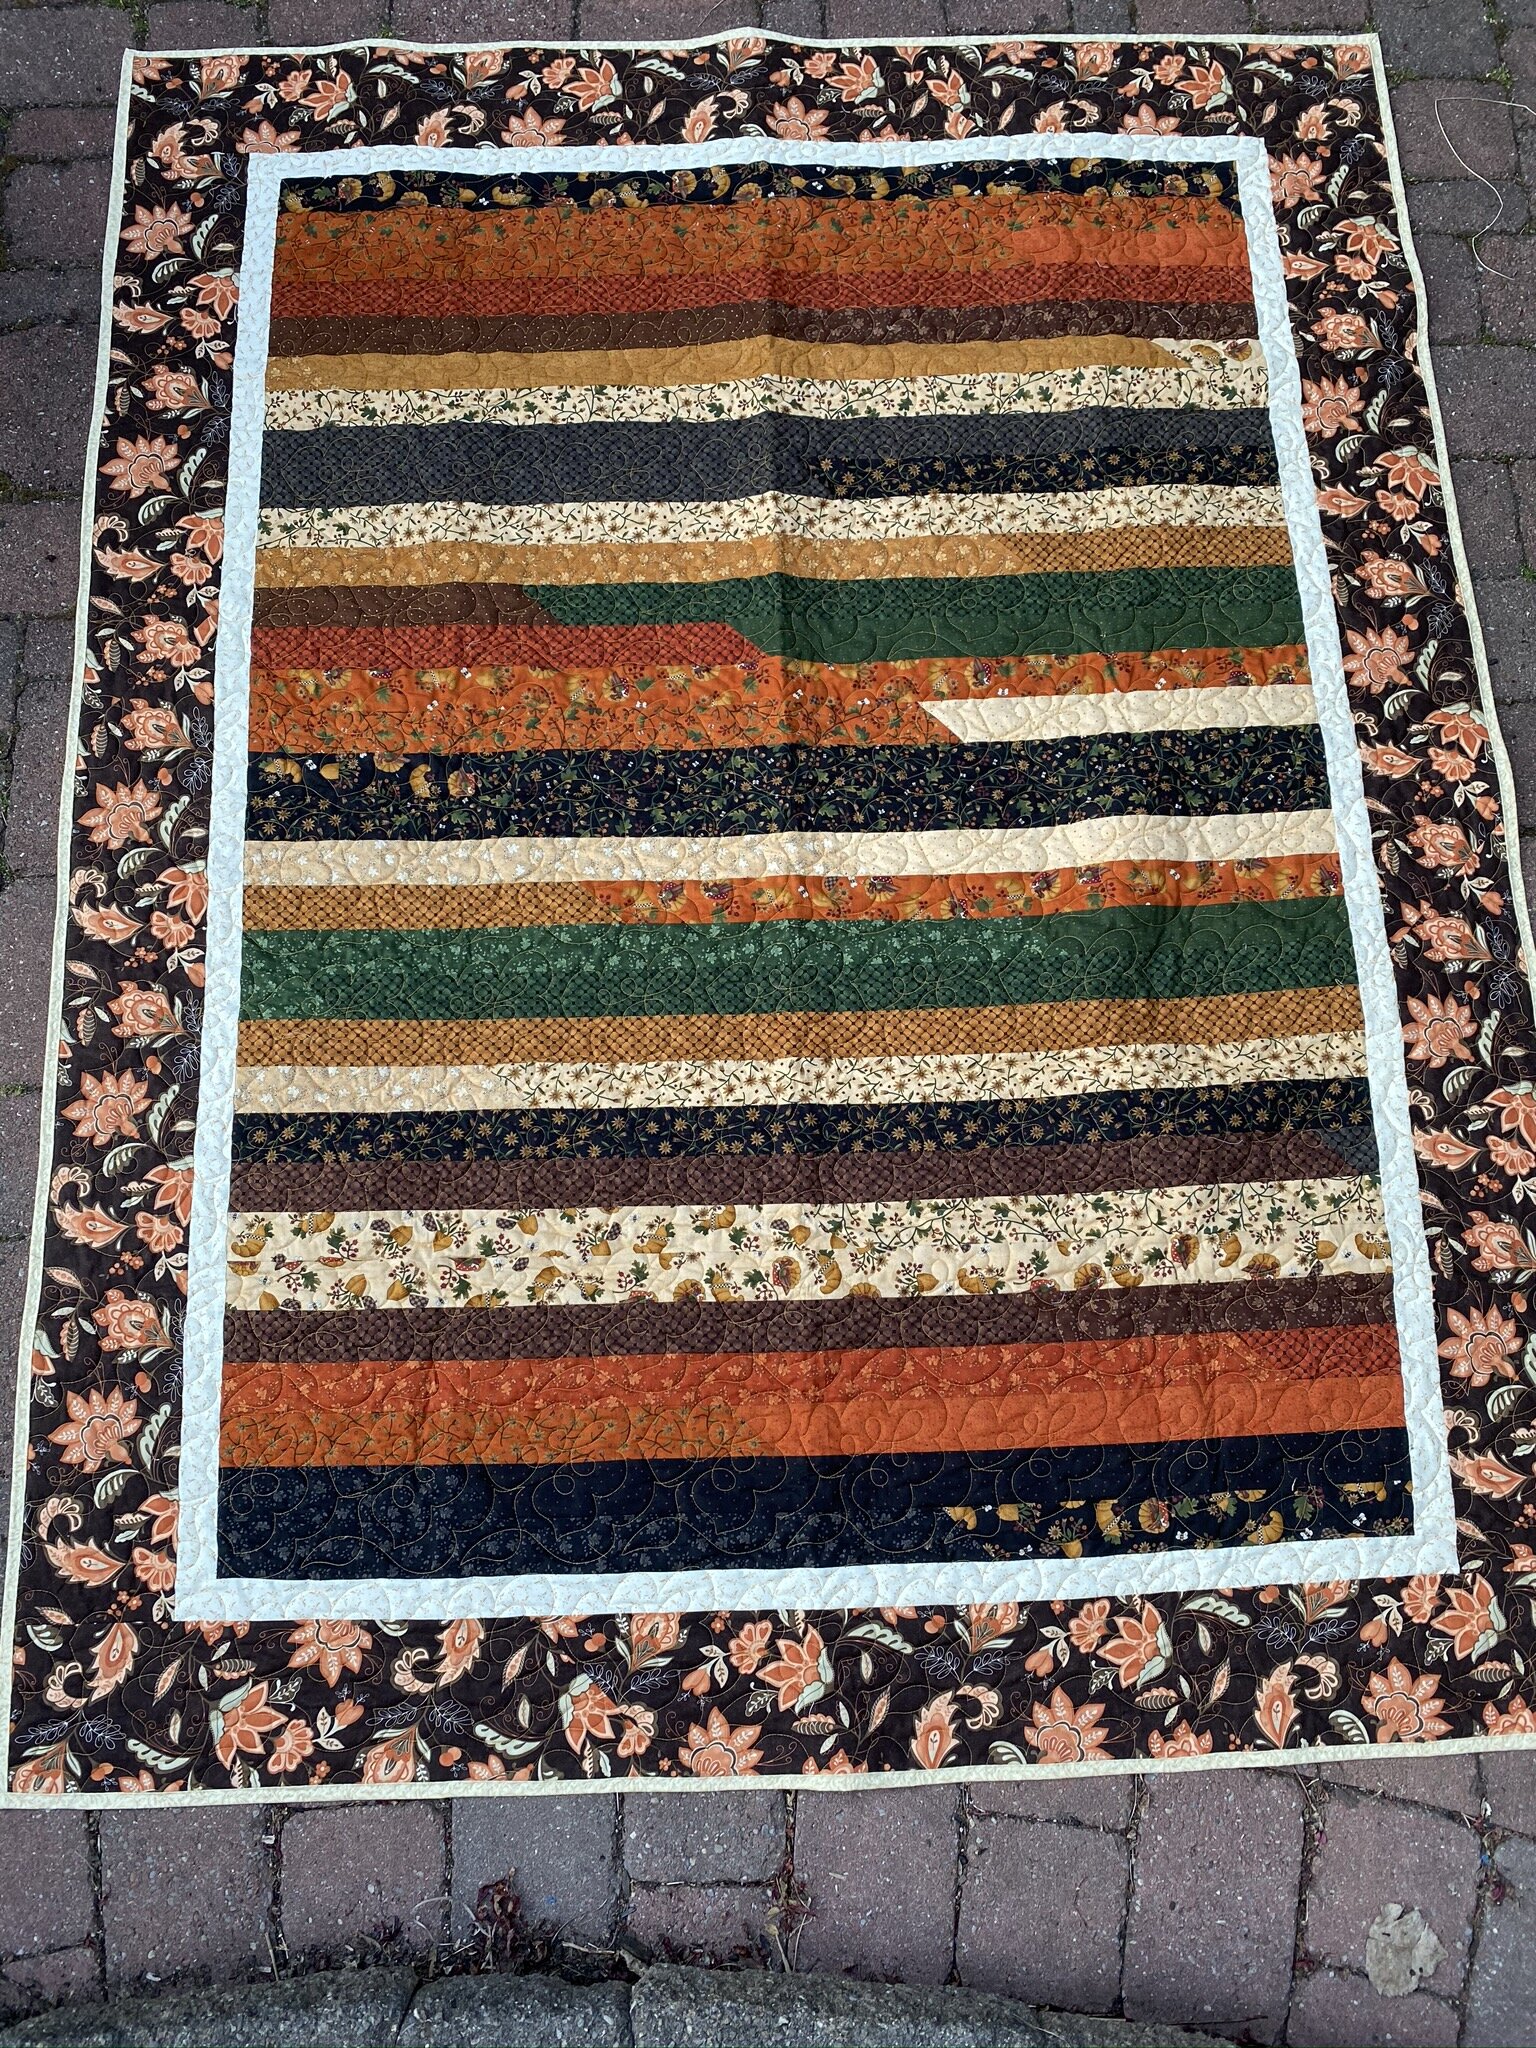
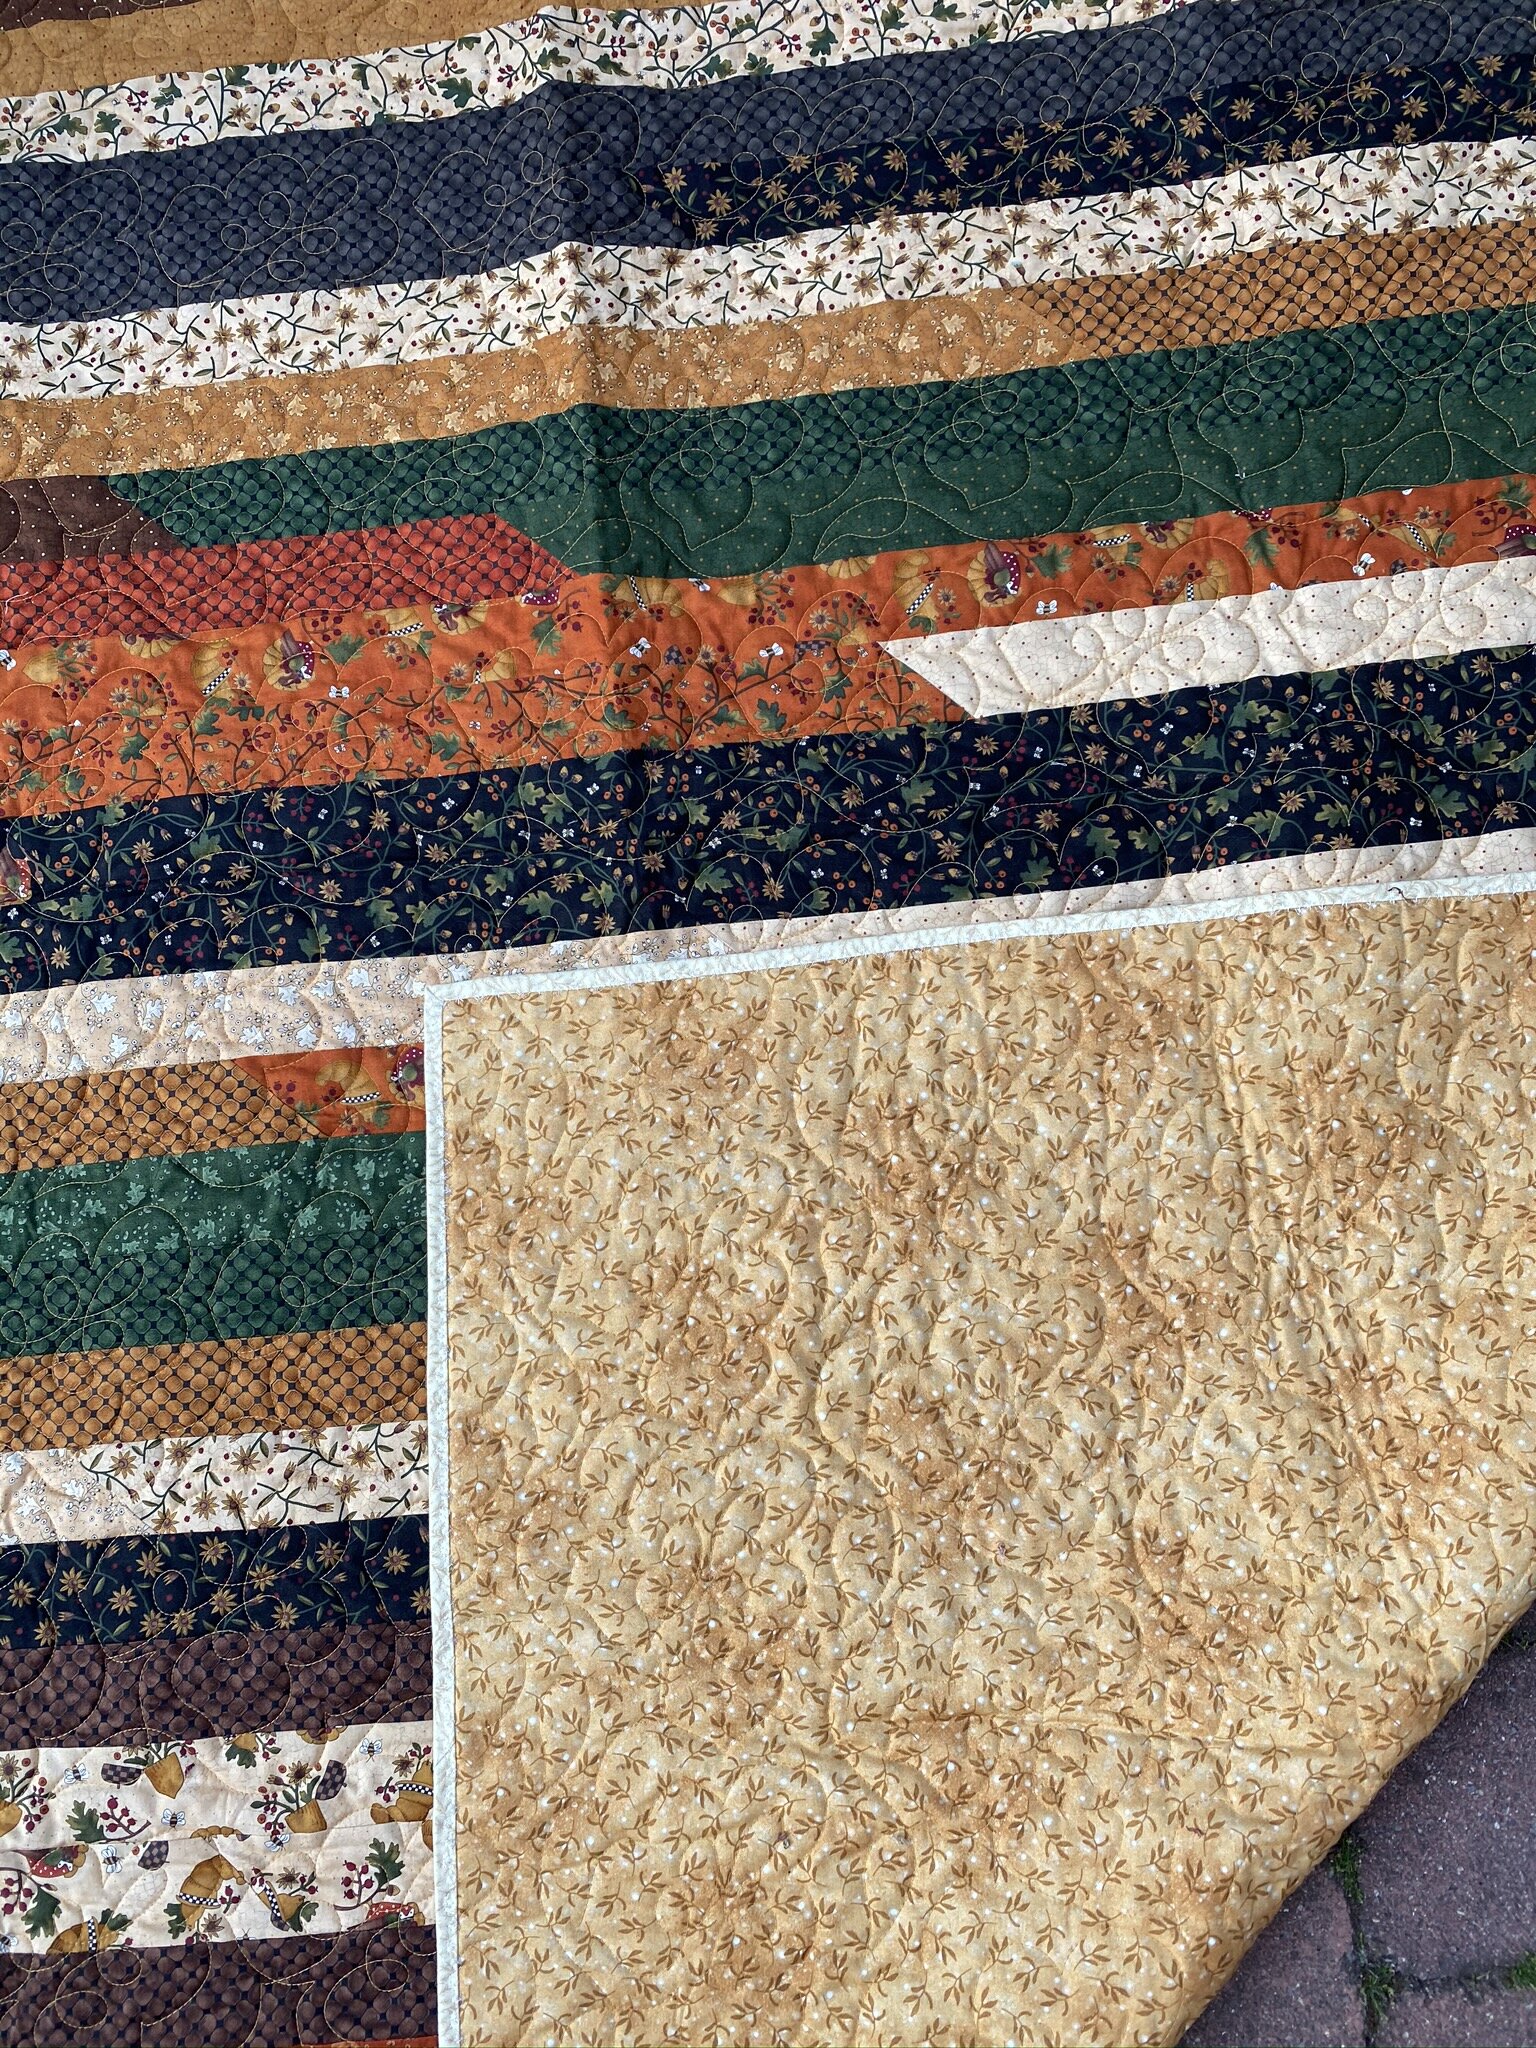
For the autumn quilt, I had to find fabric in my stash that worked for a binding. I auditioned a few and had nothing that was exactly right, but found a “close enough.” I tried some darker ones but they just made the quilt feel sad. I decided to mirror the light of the inner border and that worked much better, although I didn’t have enough left of the same light I had used in the inner border.
Have you ever had one of those fabrics that you just keep using and using and still seem to have so stinkin’ much of it left? The fabric I finally ended up using is one I’ve been using bits and pieces of for a long time. I believe it’s one I inherited from my mother. It definitely feels like it’s been prewashed and I’m not normally a prewasher (I prefer to leave the stiffness in while I’m cutting and wash later). I did, however, prewash everything I took from my mother’s stash as hers was in her basement and she hadn’t been able to use it in awhile before she passed, so much of it was a bit musty. A little baking soda and vinegar in the washing machine and it was back to normal.
In any case, every time I use this fabric I think, “Great! I can finally use it up!” But every time I still have a lot left. Well, no, This time I have about a third of a yard, I think. I’ll tossed it on my scrap pile, though, and will cut it into usable shapes using my AccuQuilt. (That’s another project for a Staycation Day later in the week.)
This decorative stitch is little bird tracks alternating sides of a meander. It worked perfectly for this.
While I was doing these bindings, I was listening to the audio version of the original book, The Wonderful Wizard of Oz, with Anne Hathaway reading. She does a fantastic job—love it and highly recommend it! It made all that time babysitting my machine while it worked away at the decorative stitches pass relatively quickly.
Boy, it feels good to get these two quilts finally done and out of the bag on my sewing room floor where they’d gotten stacked. It’s nice to see that space clean again, too.
On to my next UFO…
Belated: Staycation Day 3 and Online QuiltFest Class 3
I took Sunday completely off computers so I didn’t post about my third Quiltfest online class on Saturday: Machine Applique Fundamentals with Gina Perkes.
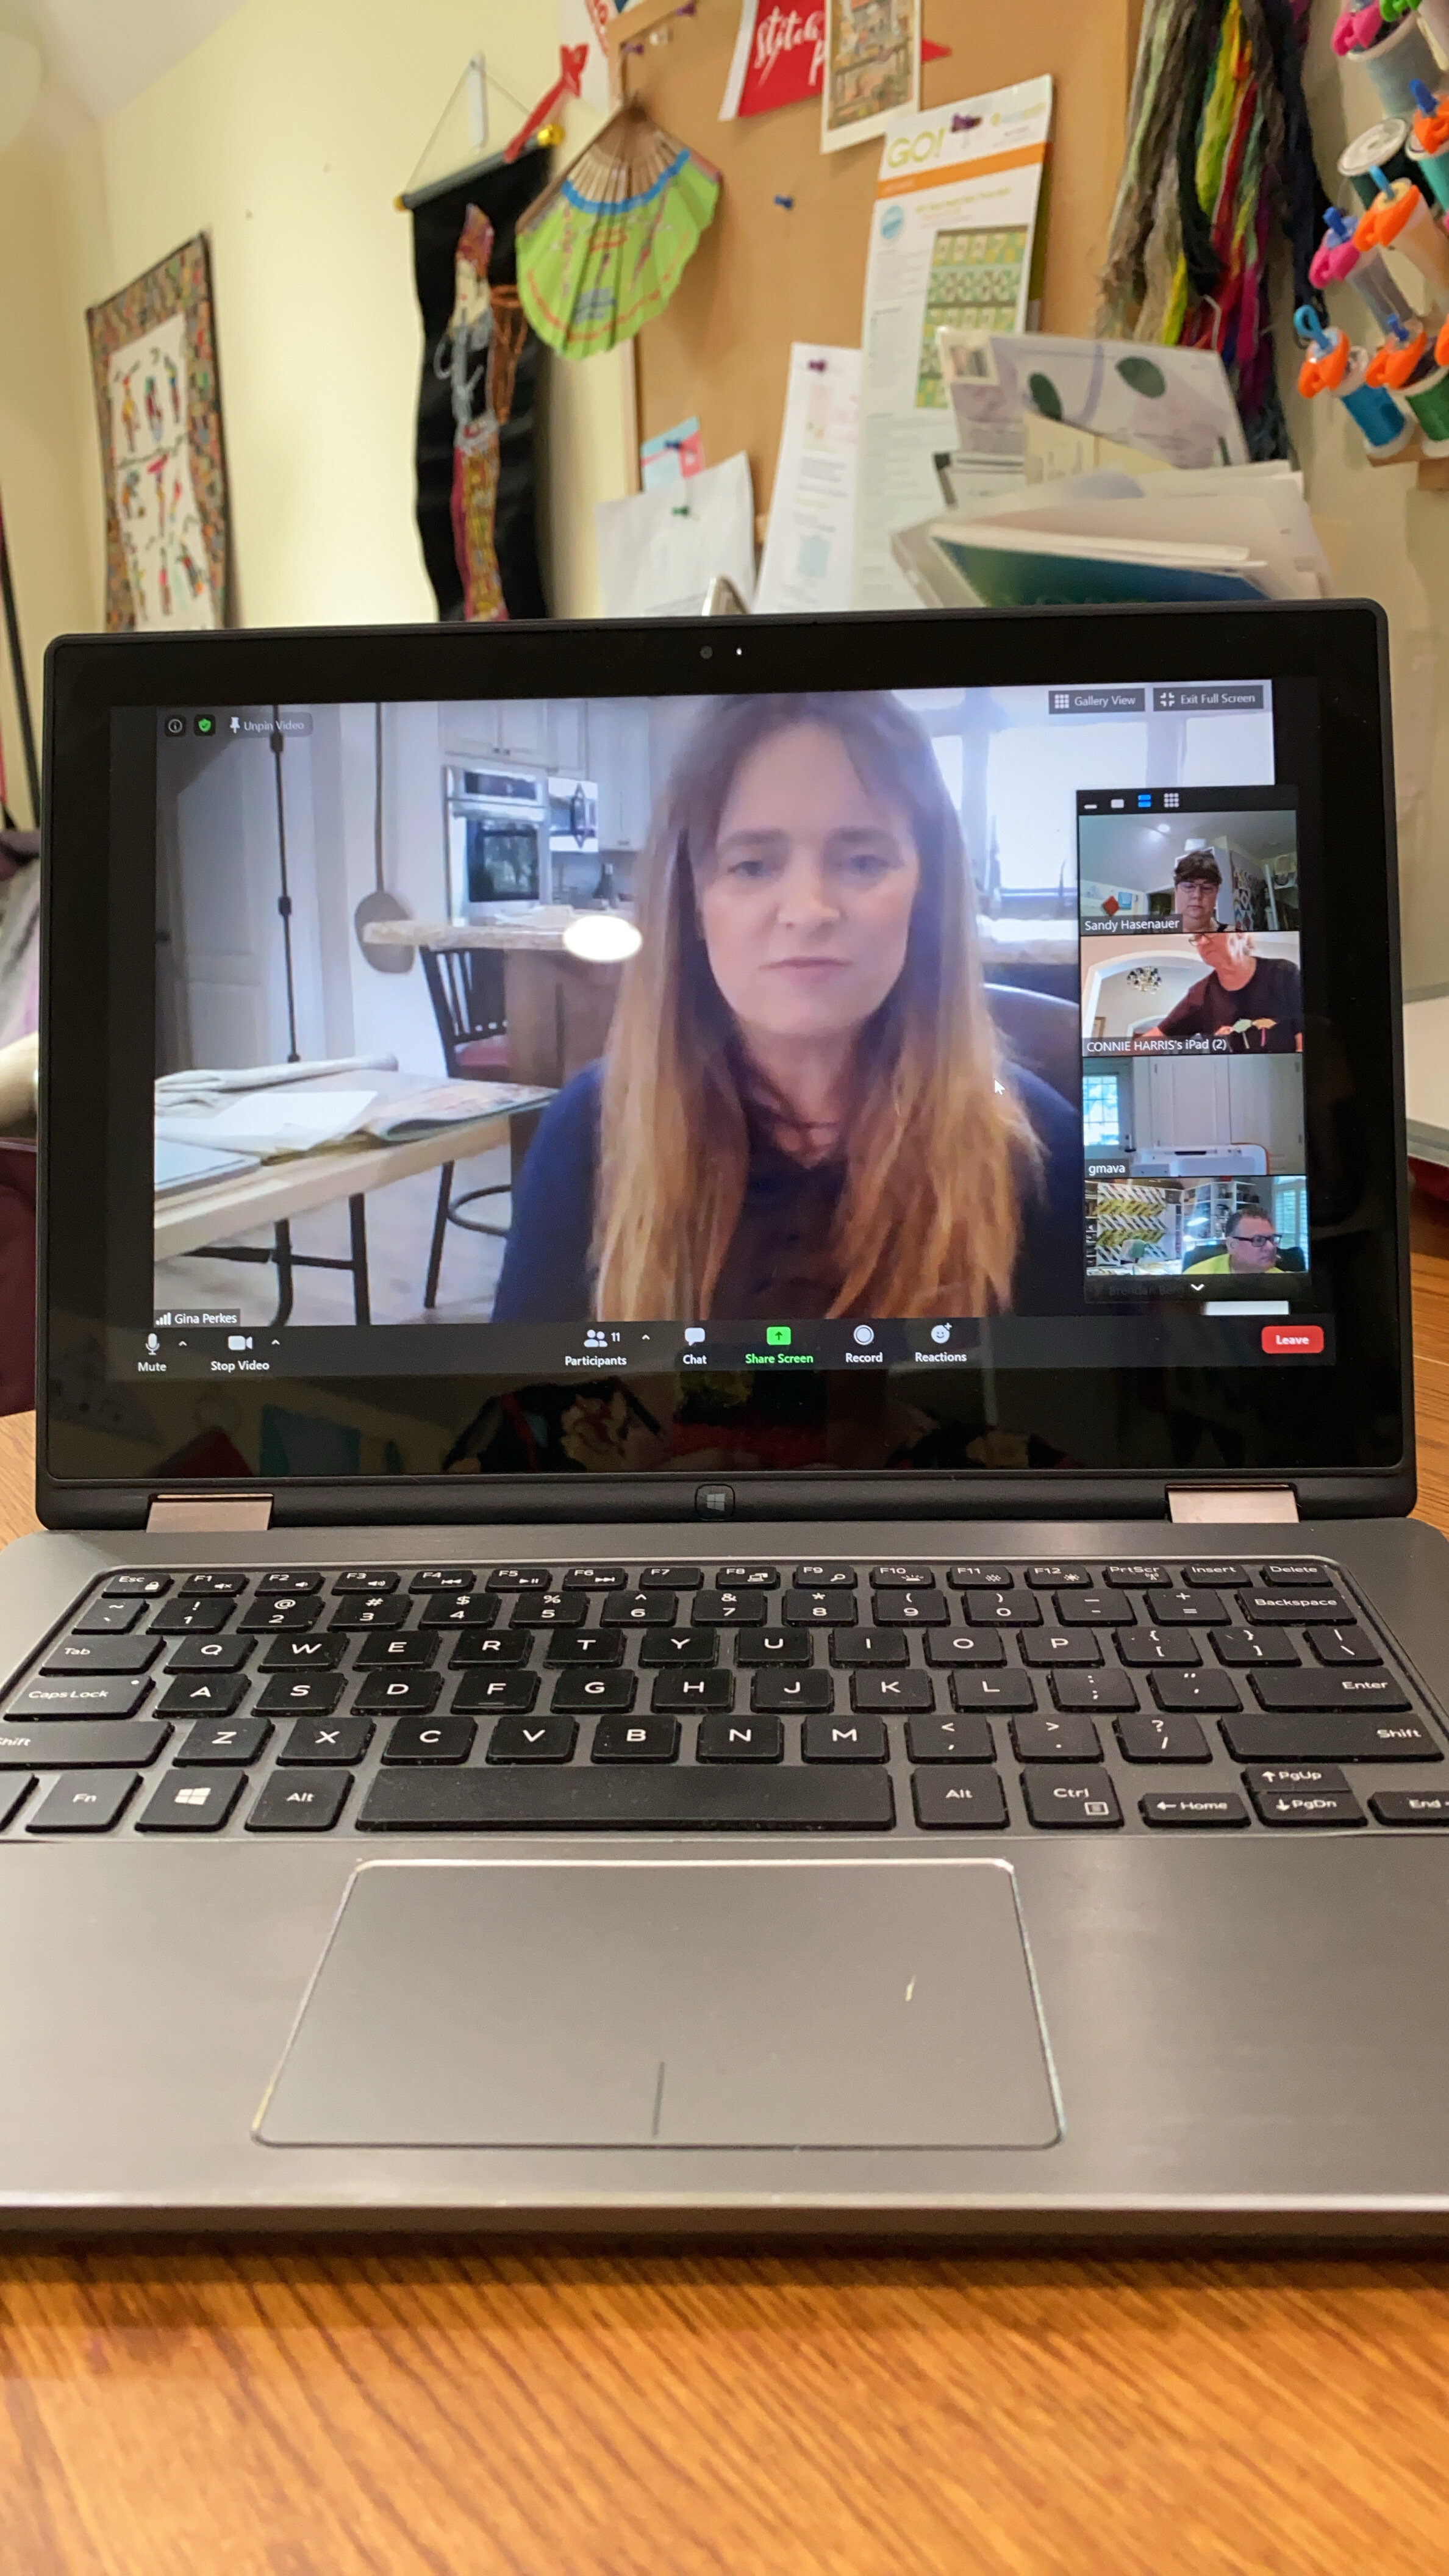
This class gets an A. Gina was fun, did a great job explaining the various techniques, had close-ups of her doing the techniques and explaining what she was doing during them, and then time for us all to do our thing with brief moments of show n’ tell (with questions) between each technique.
I’ve actually done a fair amount of machine applique in my past but, as I keep saying, quilting is NOT like riding a bike. It is possible to forget things when it’s been a few years. And I can’t believe it’s been a few years! Really? A few years since I did this? Wow.
The class included a kit with laser-cut applique pieces already cut out with their fusible applied so we could focus entirely on the stitching. It also included the stencil for laying your registration marks on the background piece. I’m glad to have that, although I have a vague memory I may already have one kicking around somewhere. Not a big deal since most of what we were paying for was the fabric in the kit. It includes all the fabric we need for piecing the final project. True confessions, though: I don’t actually like the final project. Not my colorway jam. I do like the two fabrics included for borders and backing so I’ll probably cannibalize the kit and get rid of the rest. (The blocks in my kit look just like the photos, but it’s a different fabric as sashing.)
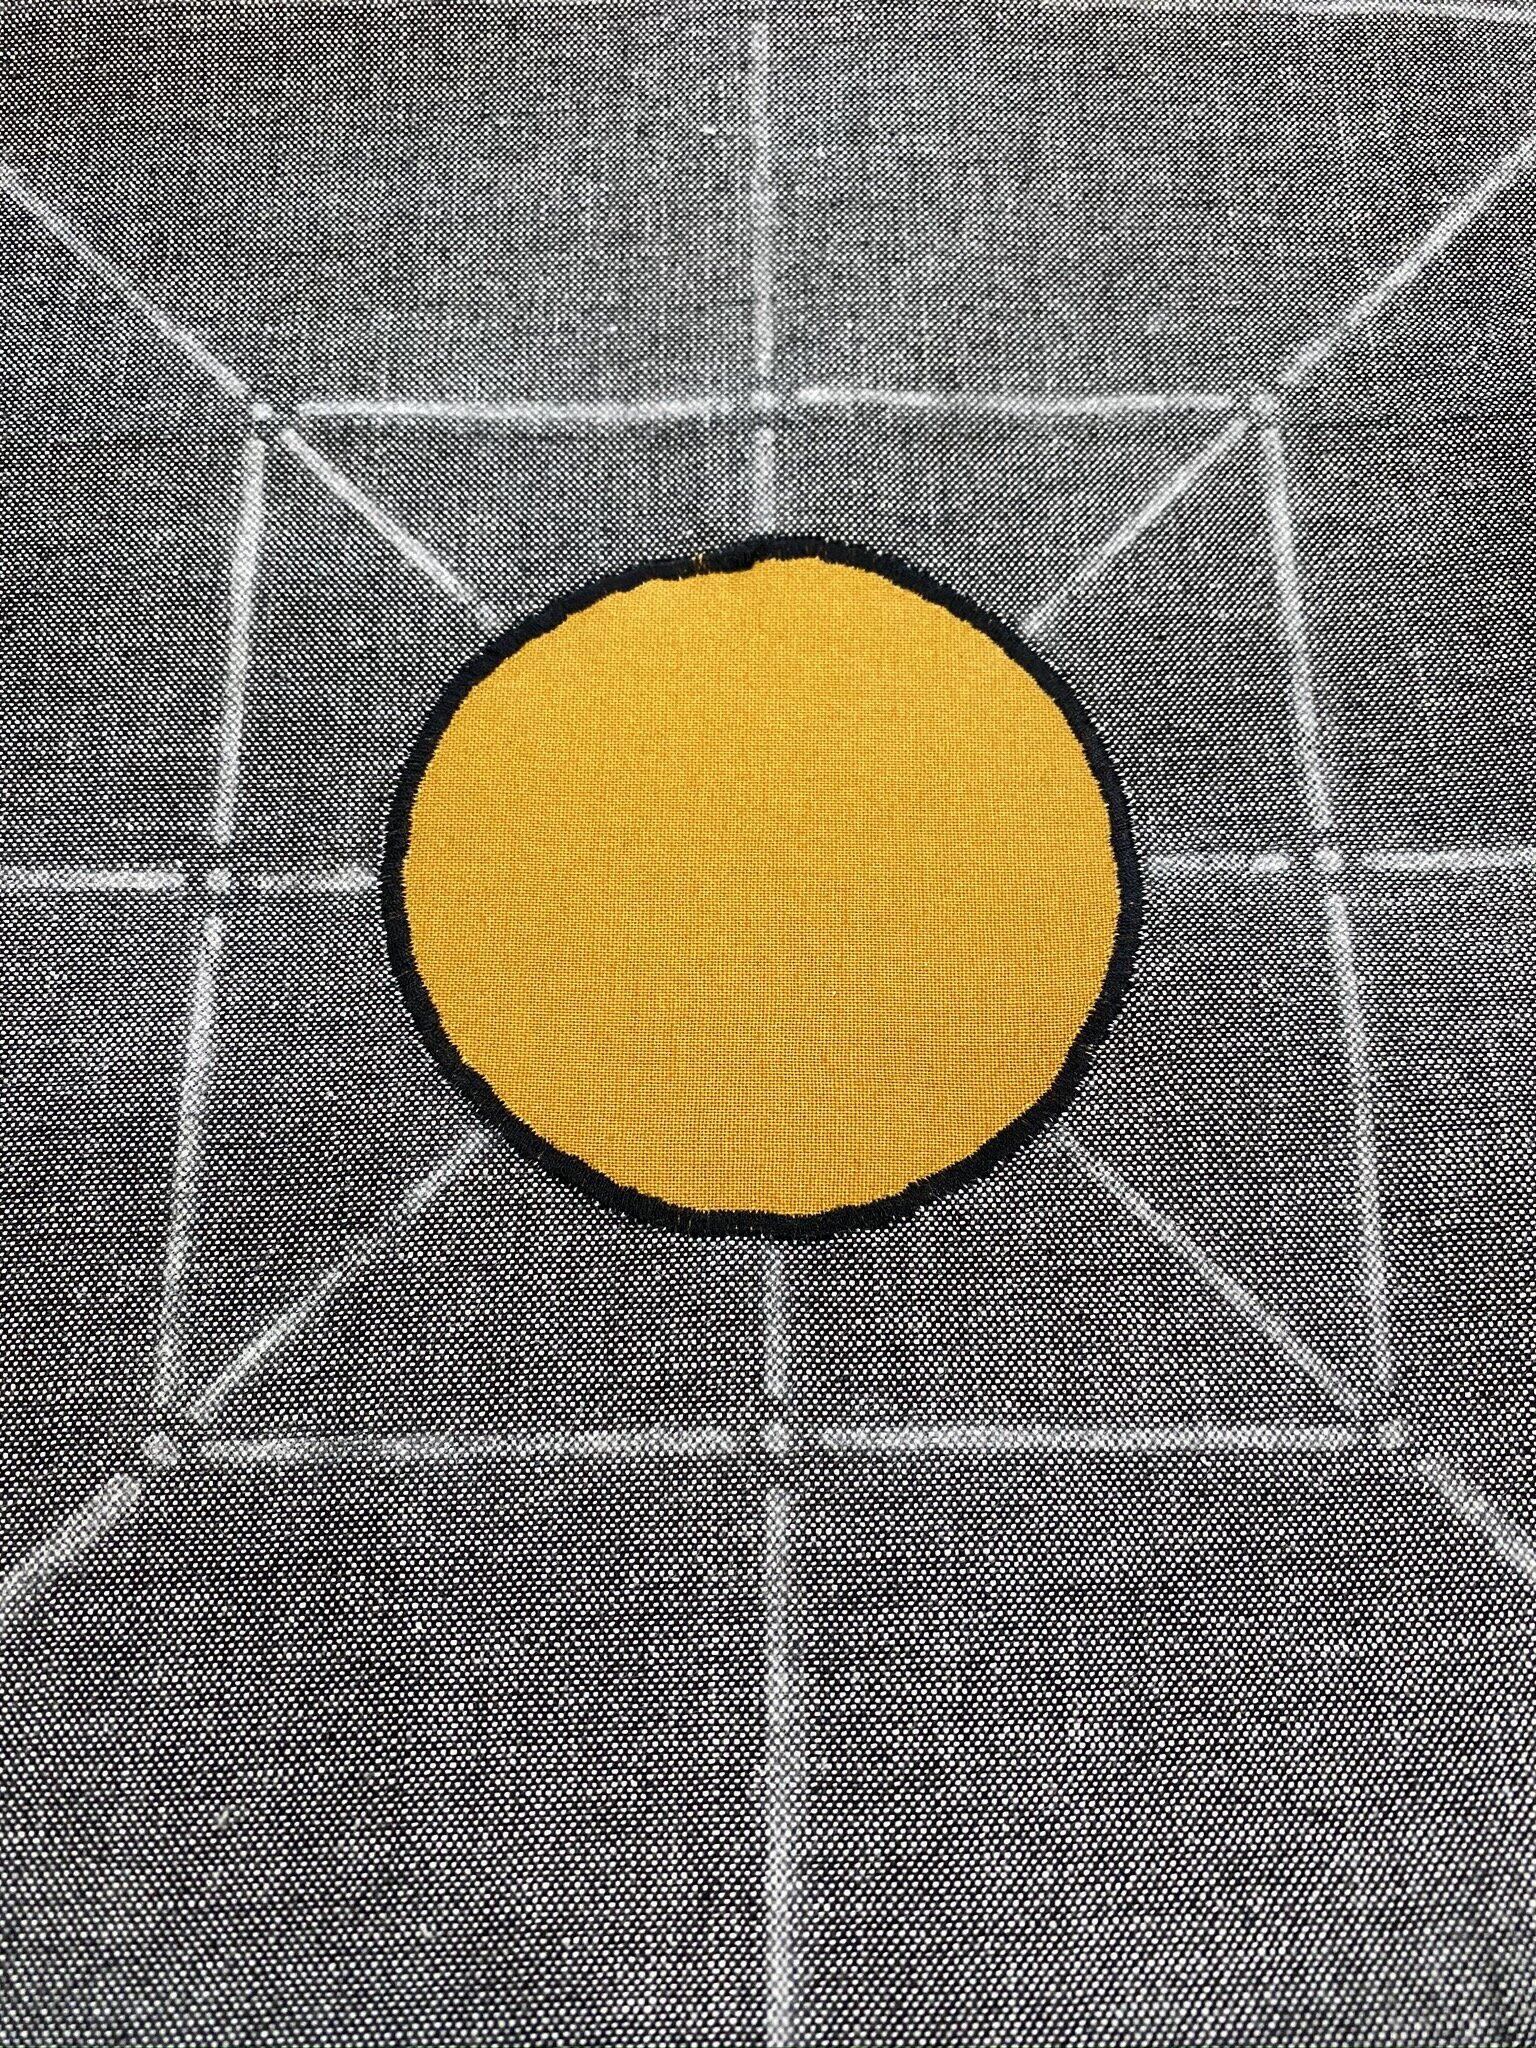
We did the satin stitch around the circle first. Mine wasn’t too shabby. I need to work to get it more even but I’m not sure I’d ever done a satin stitch in machine applique so I’m considering this a first try.
Also, I intentionally used black thread so I could see the results for learning purposes. If I were doing this for realsies, I’d likely default to matching thread so it wouldn’t be as noticeable. On the other hand, I do like the black outline. I really just need to practice.

Next was the applique stitch, and she showed us how to taper down at points. I’d not done that before and really liked learning that. I didn’t do too badly navigating the corners at the outside edges but, again, need practice.

Here’s the completed learning block. Again, pretty sure I’m not going to worry about doing the whole project. I mentioned creating another UFO for myself on Instagram and @ssinden commented that “We need a different designation for this as it is a finished learning piece. FLO? Finished Learning Object?” I’ll go with that!
Pretty happy with what I did, given that it’s been years since I’ve done some of it and hadn’t ever done other parts.
So—three classes done and dusted! Felt good to be back in quilt class mode again!
Staycation Day 2 and Online QuiltFest Class 2
Today’s was a much better class! I’d give it maybe an A-, but that’s only because there were long periods of silence while we were all doing our sewing. I joked in the chat room that our teacher should be telling us stories to keep us entertained but she didn’t see it. If we’d been in a classroom, you’d have heard some chatter and such, but it is what it is.
This was Curvy Log Cabin with Augusta Cole. Students had the option of using their regular rulers or using the Creative Grids Curvy Log Cabin Trim Tool. As I think I mentioned in a previous blog post, I have a thing for log cabin quilts and that includes curvy ones. My Mom made me a couple of different standard log cabins and then a curvy one as a college graduation/wedding gift, so some of it’s straight nostalgia. However, it’s mostly because I love a block that can create a completely different look depending on which way you twist it. (My other fave block is a Jacob’s Ladder for the same reason.)
I’d gotten a 4” Curvy Log Cabin ruler in a Sew Sampler box a few months ago and was quite excited about it, but wasn’t quilting at that point so didn’t ever play with it. I then decided to make a curvy log cabin quilt as a wedding quilt and designed it around an 8” block, so I went ahead and bought the 8” version of the ruler—I have a lot of trust in Creative Grids. This class used a 6” ruler. I dithered for awhile and then decided, “why not?” So I now own this same ruler in three sizes. I’m okay with that.

From a technological standpoint, today’s class went much, much better. Augusta knew how to use this platform to its advantage. She also had a couple of helpers present with her for managing, which was great. She began with a simple visual demonstration of the stages of the block.
However, as she had two groups of students—one with the curvy trim ruler, and one using standard rulers, she then used Zoom break-out rooms to separate the two groups. For each group, she had separate pre-recorded videos to show us within the appropriate break-out room.
Go, Augusta. Way to really leverage the utility of the platform!
The only thing I found myself wondering was whether the folks in the standard-ruler classroom got as much attention as we did, or if they were largely off in their own little world. There were only two of them, whereas there were 8 or so of us in the other room. We seemed to be seeing her most of the class, so I might have a different impression had I been in the other group.

We did one round of strips at a time, with a short video for each round and then sewing and trimming time with Q/A if we needed. It took me awhile to get the first round right. I had several reject blocks that I tossed aside and started with a new block as I wanted to get one block completely right before she got to the next section. It’s just one of those things that you need to logic out, and if you start off the wrong way you never get it straight. That, and the fact that twice I put the fabric wrong-way up while sewing. That was just distraction. I’ll be doing some seam-ripping and salvaging all those rejects but I didn’t take the time to do it during class. I had plenty of fabric to work with and just kept moving on.
BTW, at one point, I did sew a piece of fabric wrong-side showing, but as it was a light, and a very thin strip, you can’t even tell. That one stayed as-is. I’ll probably never even be able to find it once this whole thing is done.
I’m going full-on scrappy, to use up as many of my 2 1/2” strips as possible. The beautiful thing about the trim tool is I didn’t have to precut anything other than the initial center square. It all gets trimmed as you go.
(Photos at left—the 10 blocks I got done during class; four of them together so you can see the curvy effect. I wouldn’t try to put four matching logs like that together in the middle—that would take a whole lot more planning than I’m putting into this. They’ll be far more random.)
Note to self: Never, ever again fold fabric twice (WOF) to get the whole thing into my Creative Grids Stripology XL ruler. Everyone says you can do it. Every time I do it, I end up with wonky squares. I was trimming up my center squares today as I went but I’m still not happy. The rest of these are going to get cut with my traditional ruler. Does anyone know what I’m talking about? Any tips? (I own the 2 1/2” Accuquilt Strip Die but I don’t want to buy other strip dies quite yet. Trying to give the die purchasing a rest.)
I loved using the curvy log cabin ruler so much, and love how easy it made it to have a square block, that I ended up going online after class and buying the Creative Grids Log Cabin rulers—the 8” ruler and then the 6”/12” (both in one ruler). I can see making a lot of Log Cabins and Courthouse Steps in the rest of my quilt-making career, and even if I do end up buying the Accuquilt strip dies in the future, this ruler still keeps everything from getting whacked mid-block.
Time to close out this Staycation Day with some time on my patio with a novel: The Ballad of Songbirds and Snakes by Suzanne Collins. Thoroughly enjoying it!
Staycation Day 1 & Online QuiltFest Class 1
Today is my first day of my “staycation”—today, tomorrow, and all next week. I did have to put in a couple of hours work today and I’ll likely have to put in maybe an hour tomorrow with things I just couldn’t get finished up and am waiting on other people in order to get them squared away, but it is what it is.
I way overslept this morning as I had a slew of Zoom calls yesterday and a webinar in the evening, and was just fried. It’s okay to sleep in on a vacation day but I felt like I lost the whole morning as it took me awhile to get myself actually feeling awake. So the morning was mostly reading blogs, news, social media, and such.
By the way, Have you heard of the app Serial Reader? You choose the book you want to read and it gives it to you in daily 15-minute-reading increments. It’s got a bunch of the classics. I’m reading The Narrative of Sojourner Truth. I really like doing it in these short snippets because her writing style is, obviously, an older one and not always easy to get through. I think if I sat down and started it as a book, I’d get partway through and feel overwhelmed. But knowing I just have a few pages to get through makes it easy. It’s a really good book!

Getting ready for class
The main focus of my first day of vacation, however, was my first class of the Online Quilt Festival. I took “Not So Boring Stippling” with Julia Quiltoff, a three-hour class to help inspire us with all sorts of ways to do more interesting stippling designs.
The instructions were to log in at 11:30a (the class started at noon) so that she could check to make sure everyone’s audio and video were working. Since I’m a Zoom Maven, I was able to just say “yep” and “yep” and then I turned my video and audio off and proceeded to straighten up my sewing area while other folks were doing the usual, “Can you hear me? Can you hear me? What mute button?” or being really chatty (which I still wasn’t feeling awake enough to do).
Here’s a quibble for me, though: The teacher never took the time to walk people through the basics of using Zoom—mute yourself, use the chat room, pin the video. Turns out, partway through the class, the third time she froze and had to log out and back in again, this was the first time she’d used Zoom herself. She had used other platforms so clearly assumed it would be close enough. I wish she’d taken a little time to familiarize herself a bit more. I ended up being the Zoom Tipmaster for the class in the chat box. Don’t get me wrong—I certainly understand participants who may not have been comfortable with it (although please, people, look it up before you try to log in for the first time!). But for the teacher to not take the time to walk people through the basics? It just wasted a lot of time later in the class. And it felt WAY too much like a regular work day for me again rather than a fun vacation-day-quilt-class. But I got over myself.
(Really fun side note: Guess who was another student? Pokey Bolton! I private messaged her that I had her books and was happy she was in the class, which she appreciated. Julia Quiltoff clearly had no clue who she was so I wanted to let Pokey know that she was recognized!)

Julia demonstrating tips for better pearls
Julia started out by saying she was cramming a 10-hour class into our 3 hours so we should get ready for an intense class. It actually wasn’t that bad, although by Hour 2 I was having problems staying engaged. She went through five “tricks” for creating more complex designs at top speed, drawing everything out in a notebook. I was also drawing things out in my sketchpad along with her, but by Trick 4 it was pretty easy to figure out what the variation would be. I’m guessing in her 10-hour version, you do a lot of actual machine practice with each section so it breaks it up more.
Somewhere in Hour 2 she asked one of the participants to demonstrate a problem the participant had asked about. Said participant then took a good 5 minutes to get herself set up with her phone camera aimed at her sewing machine needle (including having to call someone in from another room to hold the phone), then sewed for a few minutes, and then the two of them talked it through. That’s exactly what classes are for, of course, but in a normal class, she’d have been standing with that student at a sewing machine while the rest of us were working away on whatever we were working away on. It was just really annoying to have to sit there and wait while everything got set up and such. I know. I sound like a crankbucket. I just spend WAY WAY WAY too much time on Zoom to have patience anymore.
So I turned on my sewing machine, grabbed some quilt sandwiches I made several years ago for practice (and then quickly stopped quilting at all, so I’ve still got quite a stash!), and with my video and audio still muted, just took the next half hour or so to practice myself.
Yikes.

It’s really not just like riding a bike. I was never a fantastic FMQer but I’d at least reached “Confident Beginner” stage, if not dabbling my toes into intermediate. I actually had gotten some decent feathers going on occasion. Today? Not so much.
One thing I did remind myself of, though. I had learned, back when I was doing this FMQ thing more regularly, that my drawing skills had nothing to do with my FMQ skills. I can’t draw worth a lick. But when I take a hen-scratch design from my sketchbook and did it as FMQ, I often had far better results.
Not today, of course. But there’s still a whole lotta rust on this girl from lack of use. I’ll get there again.
So, I think I’d give the class—in this online format—an overall grade of a B-. I got good ideas, but I could’ve gotten them in a shorter amount of time with a book and without the frustration of technological issues. That being said, I did like Julia Quiltoff quite a bit—she’s got great personality and clearly knows her stuff. I’d take an in-person class with her anytime. Some classes just translate better to an online format than others. She is sending us memory sticks with her full 10 hour class on them so that will help me feel like I got my money’s worth.
Now it’s time to do as much cutting as I can get done for tomorrow’s class on the curved log cabin. I’m really looking forward to that one—it’ll be good to have a project with progress to measure during the class!
Weekend Check-in Number One: Mostly Prep-work
I got my new Accuquilt Mask dies this week so I was anxious to make up some masks to see how well they worked.

Learn from me: Do NOT use the instructions that come packaged with the die. Lots of important steps left out.
I ended up with this mess—exposed seams, fabrics every which-way, some sort of something going on with the elastic as it didn’t explain that well at all and I finally ended up shoving the ends of the elastic in and nailing them down the way I had been doing in the other masks but this one had all sorts of seams coming together and it was a heck of a lump…. ahem. I kept looking at the instructions thinking I must have misread something but I’d followed those dang instructions exactly. Poor quality control.
Had I watched the Accuquilt video first, or used the downloadable directions from the website, I’d have been at least somewhat better off as they both had correct instructions for the cutting and sewing. Mostly.
The downloadable instructions tell you to use a different seam allowance than the video I was watching (which was from a quilt shop) because the Accuquilt tutorial video also leaves out a key step: how to attach the ties or elastic.
C’mon, Accuquilt. Get your act together.
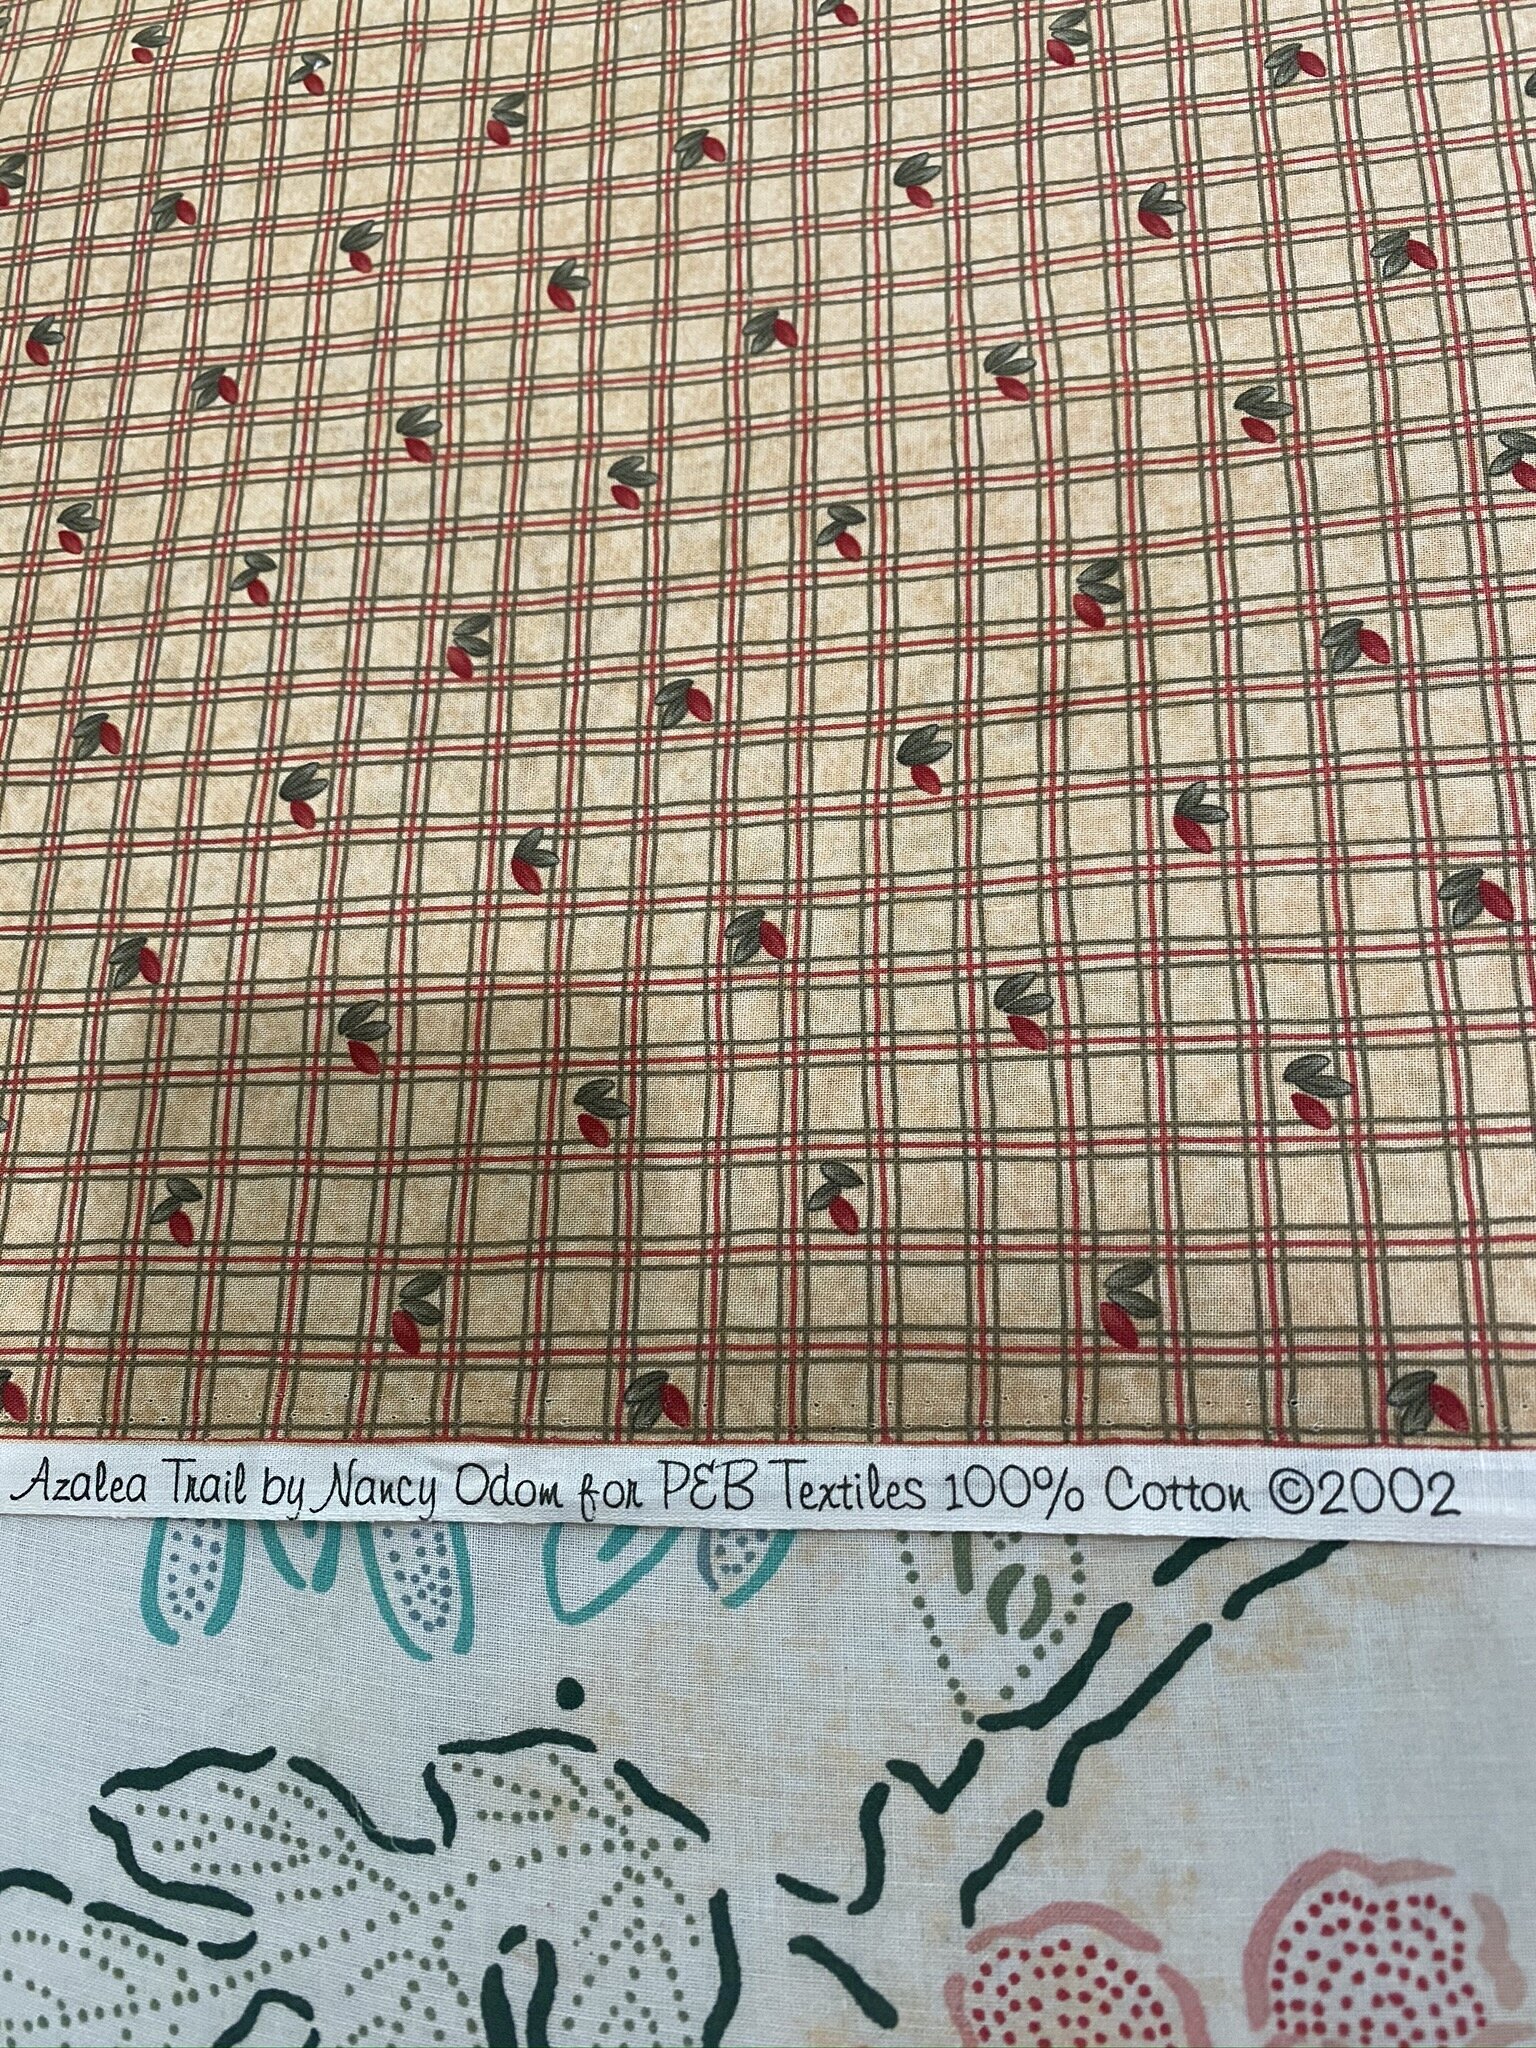
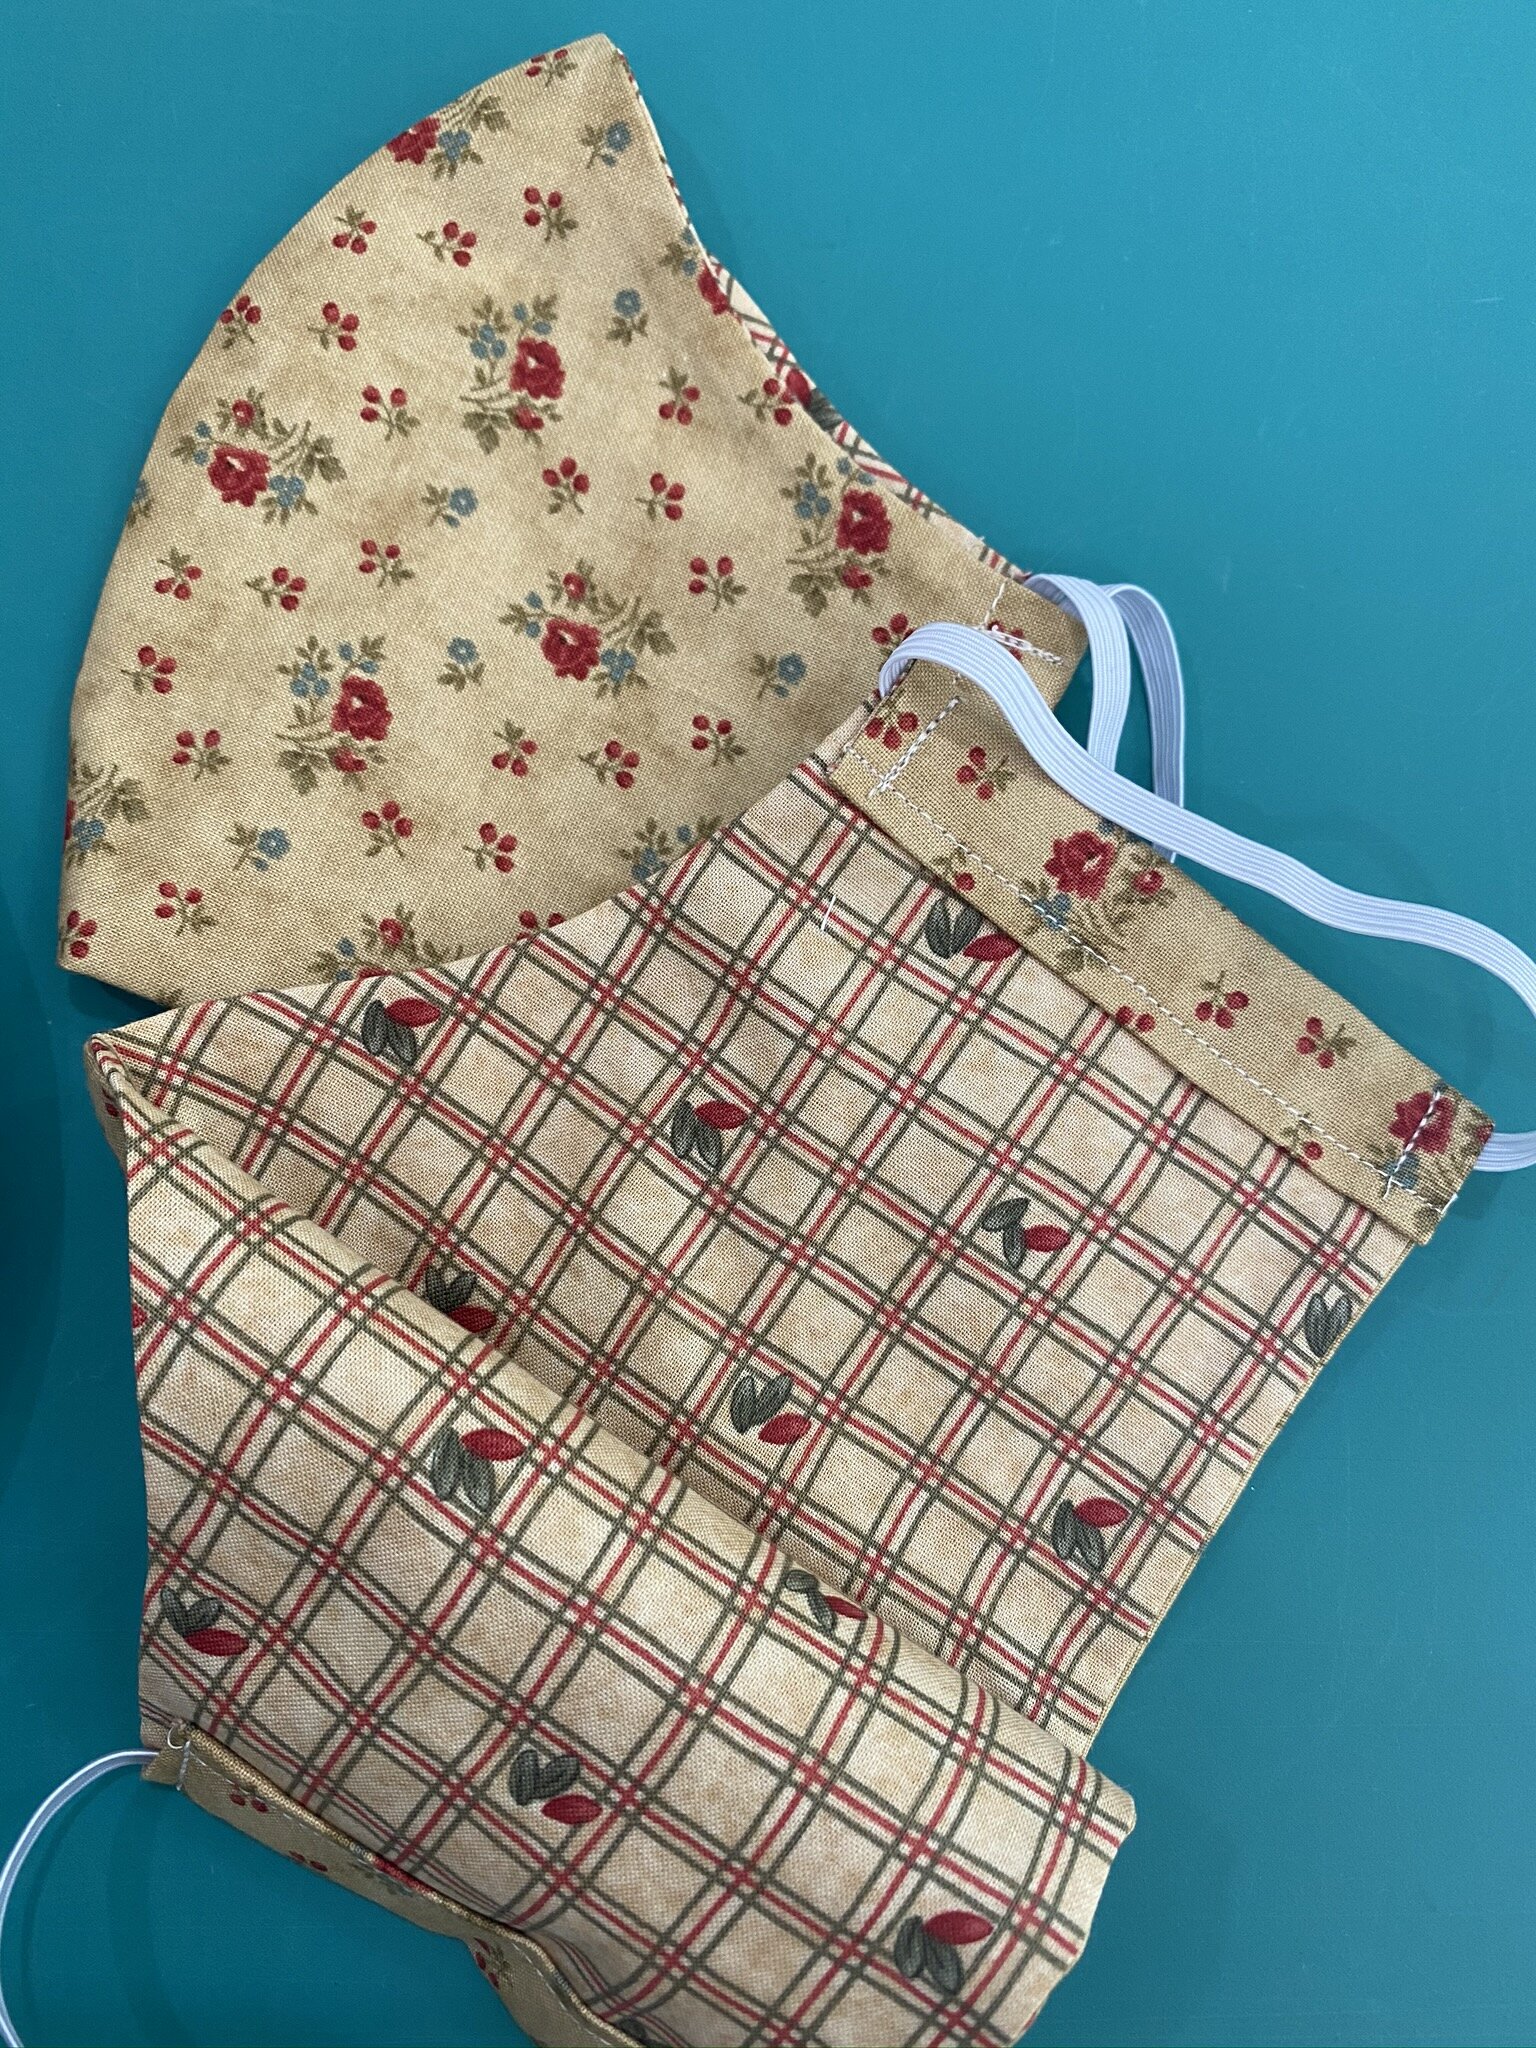
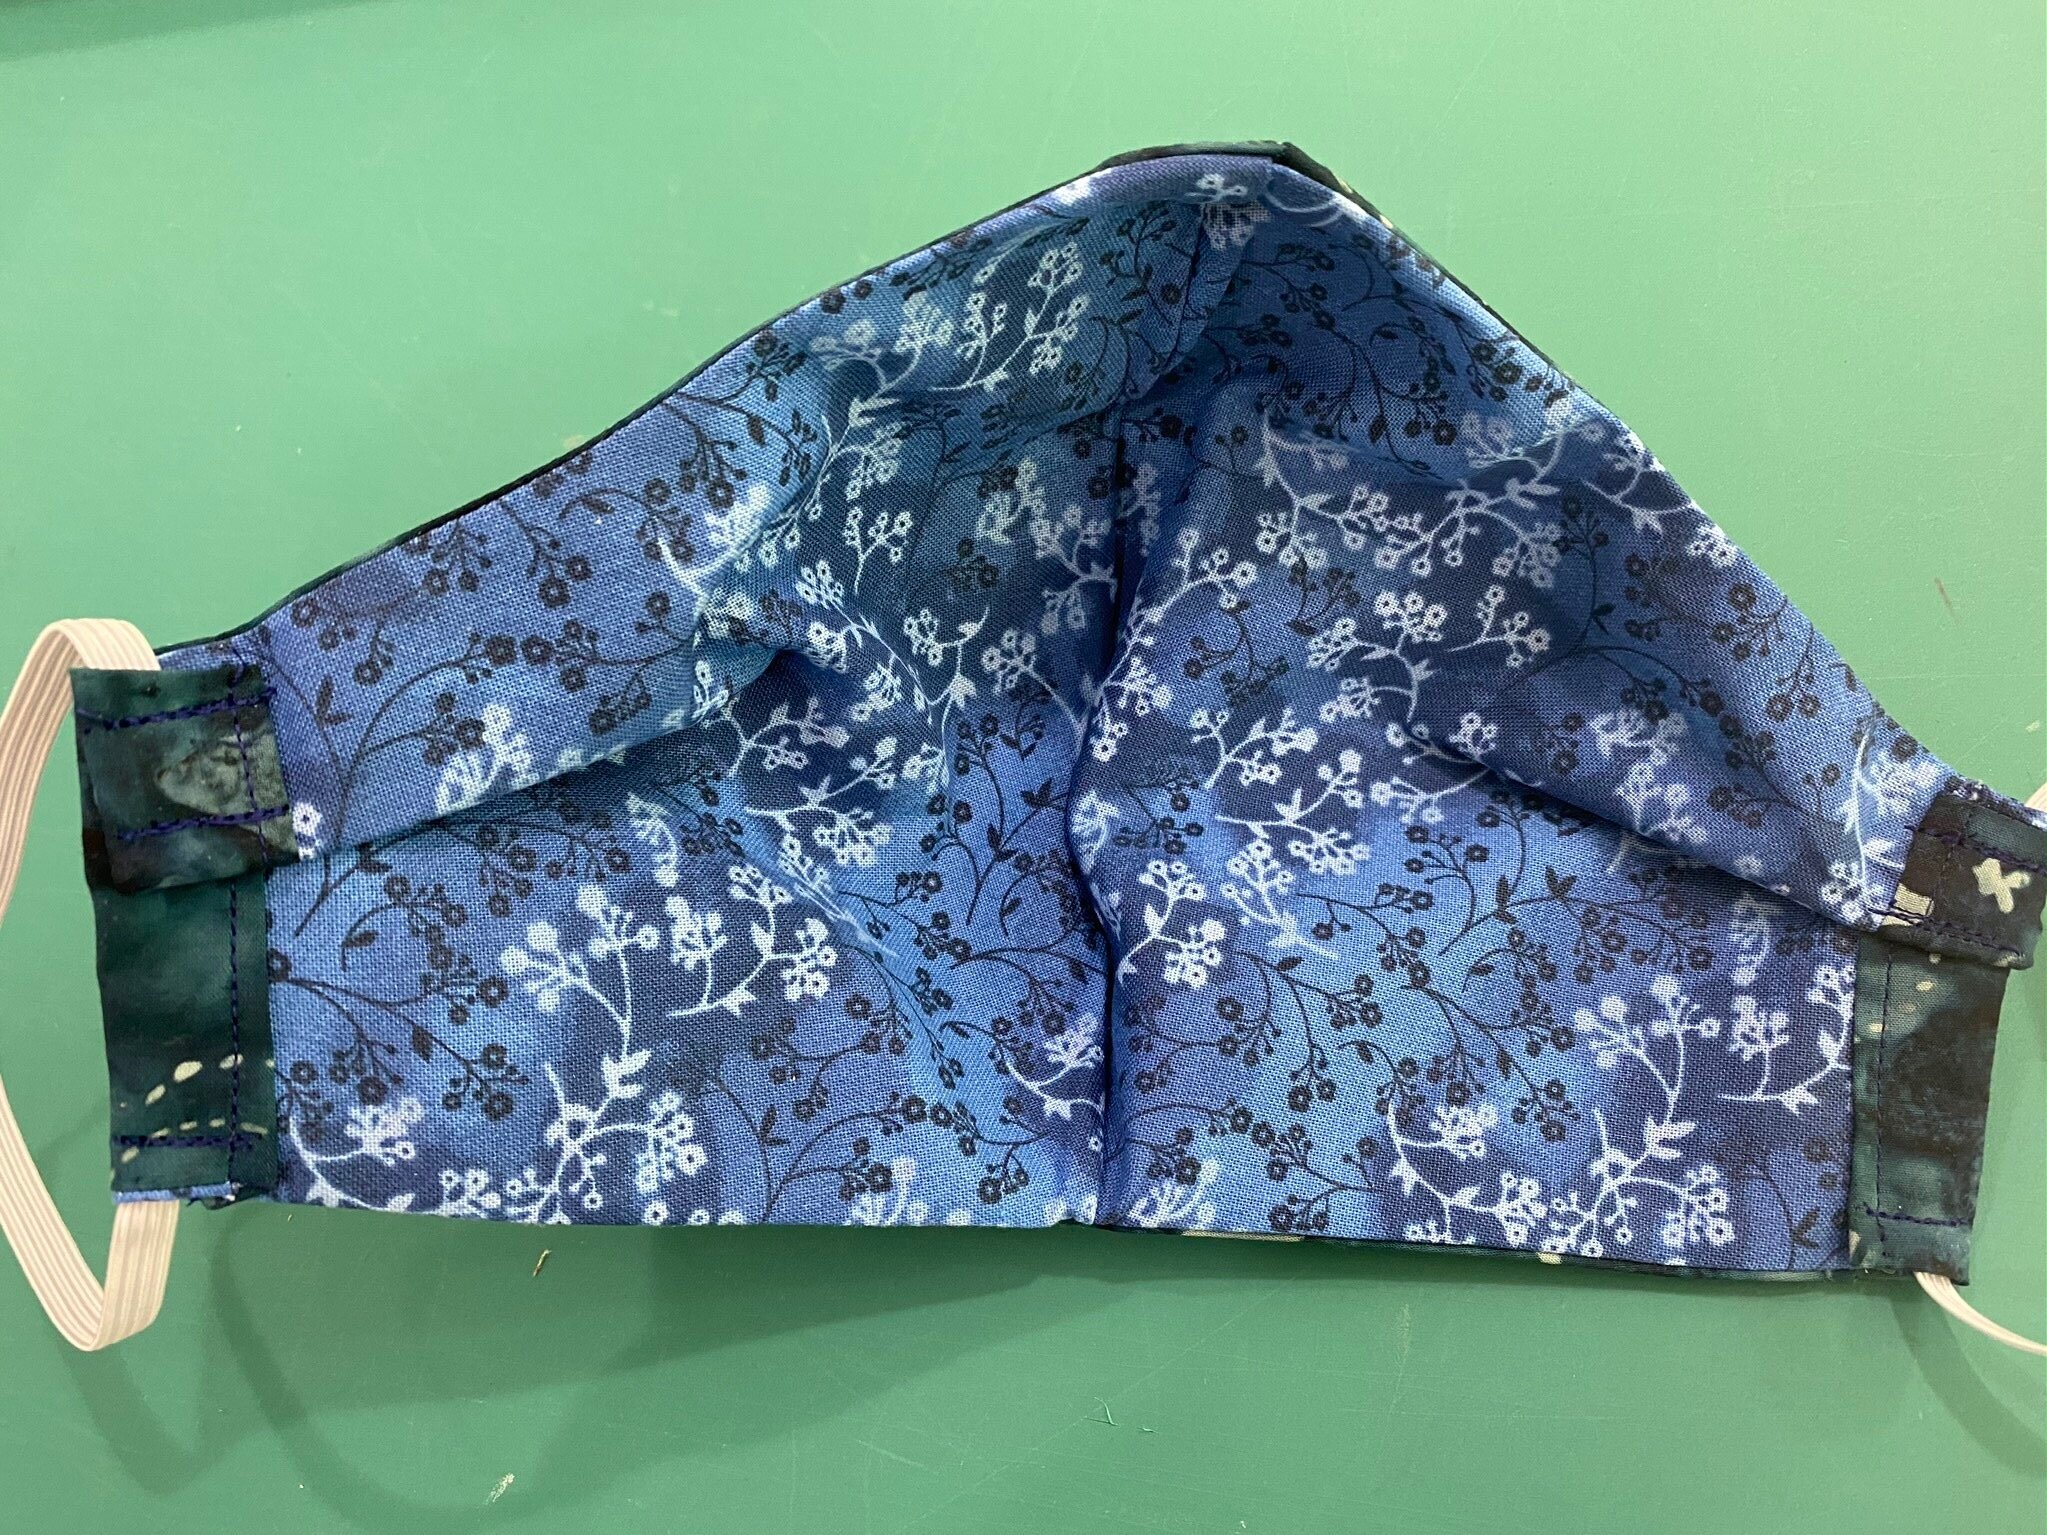
Anyway, between the downloaded directions, the quilt shop’s video, and what I’d already figured out how to do by making other mask patterns, I finally got some made. The first photo shows you just how old some of these fat quarters are that I’m using up to make masks—2002? Yikes. My Thimbleberries Era. They make very pretty masks, even if they’re not really my jam anymore. The blue mask is one I made for my husband. The outer fabric is a batik he brought me back from a work trip he took to Alaska—the lining is another really old fat quarter I was glad to use (and it’s cotton, which is far more comfortable against the face than batik is). He didn’t like the way his bulged out at the sides so I took in a quick tuck on either side. It’s not pretty but it’s wearable. I don’t mind mine bulging out—I don’t have to wear mine for as long at a time as he does.
Then I got to work making “kits” to give to a friend of mine who is making masks to sell as a fundraiser for an orphanage in her home country of Myanmar.
She’s going to use elastic so I’m not worrying about cutting the ties. This is the perfect partnership as I don’t mind doing the cutting and donating lots of fabric to the cause, and she doesn’t mind doing the sewing.
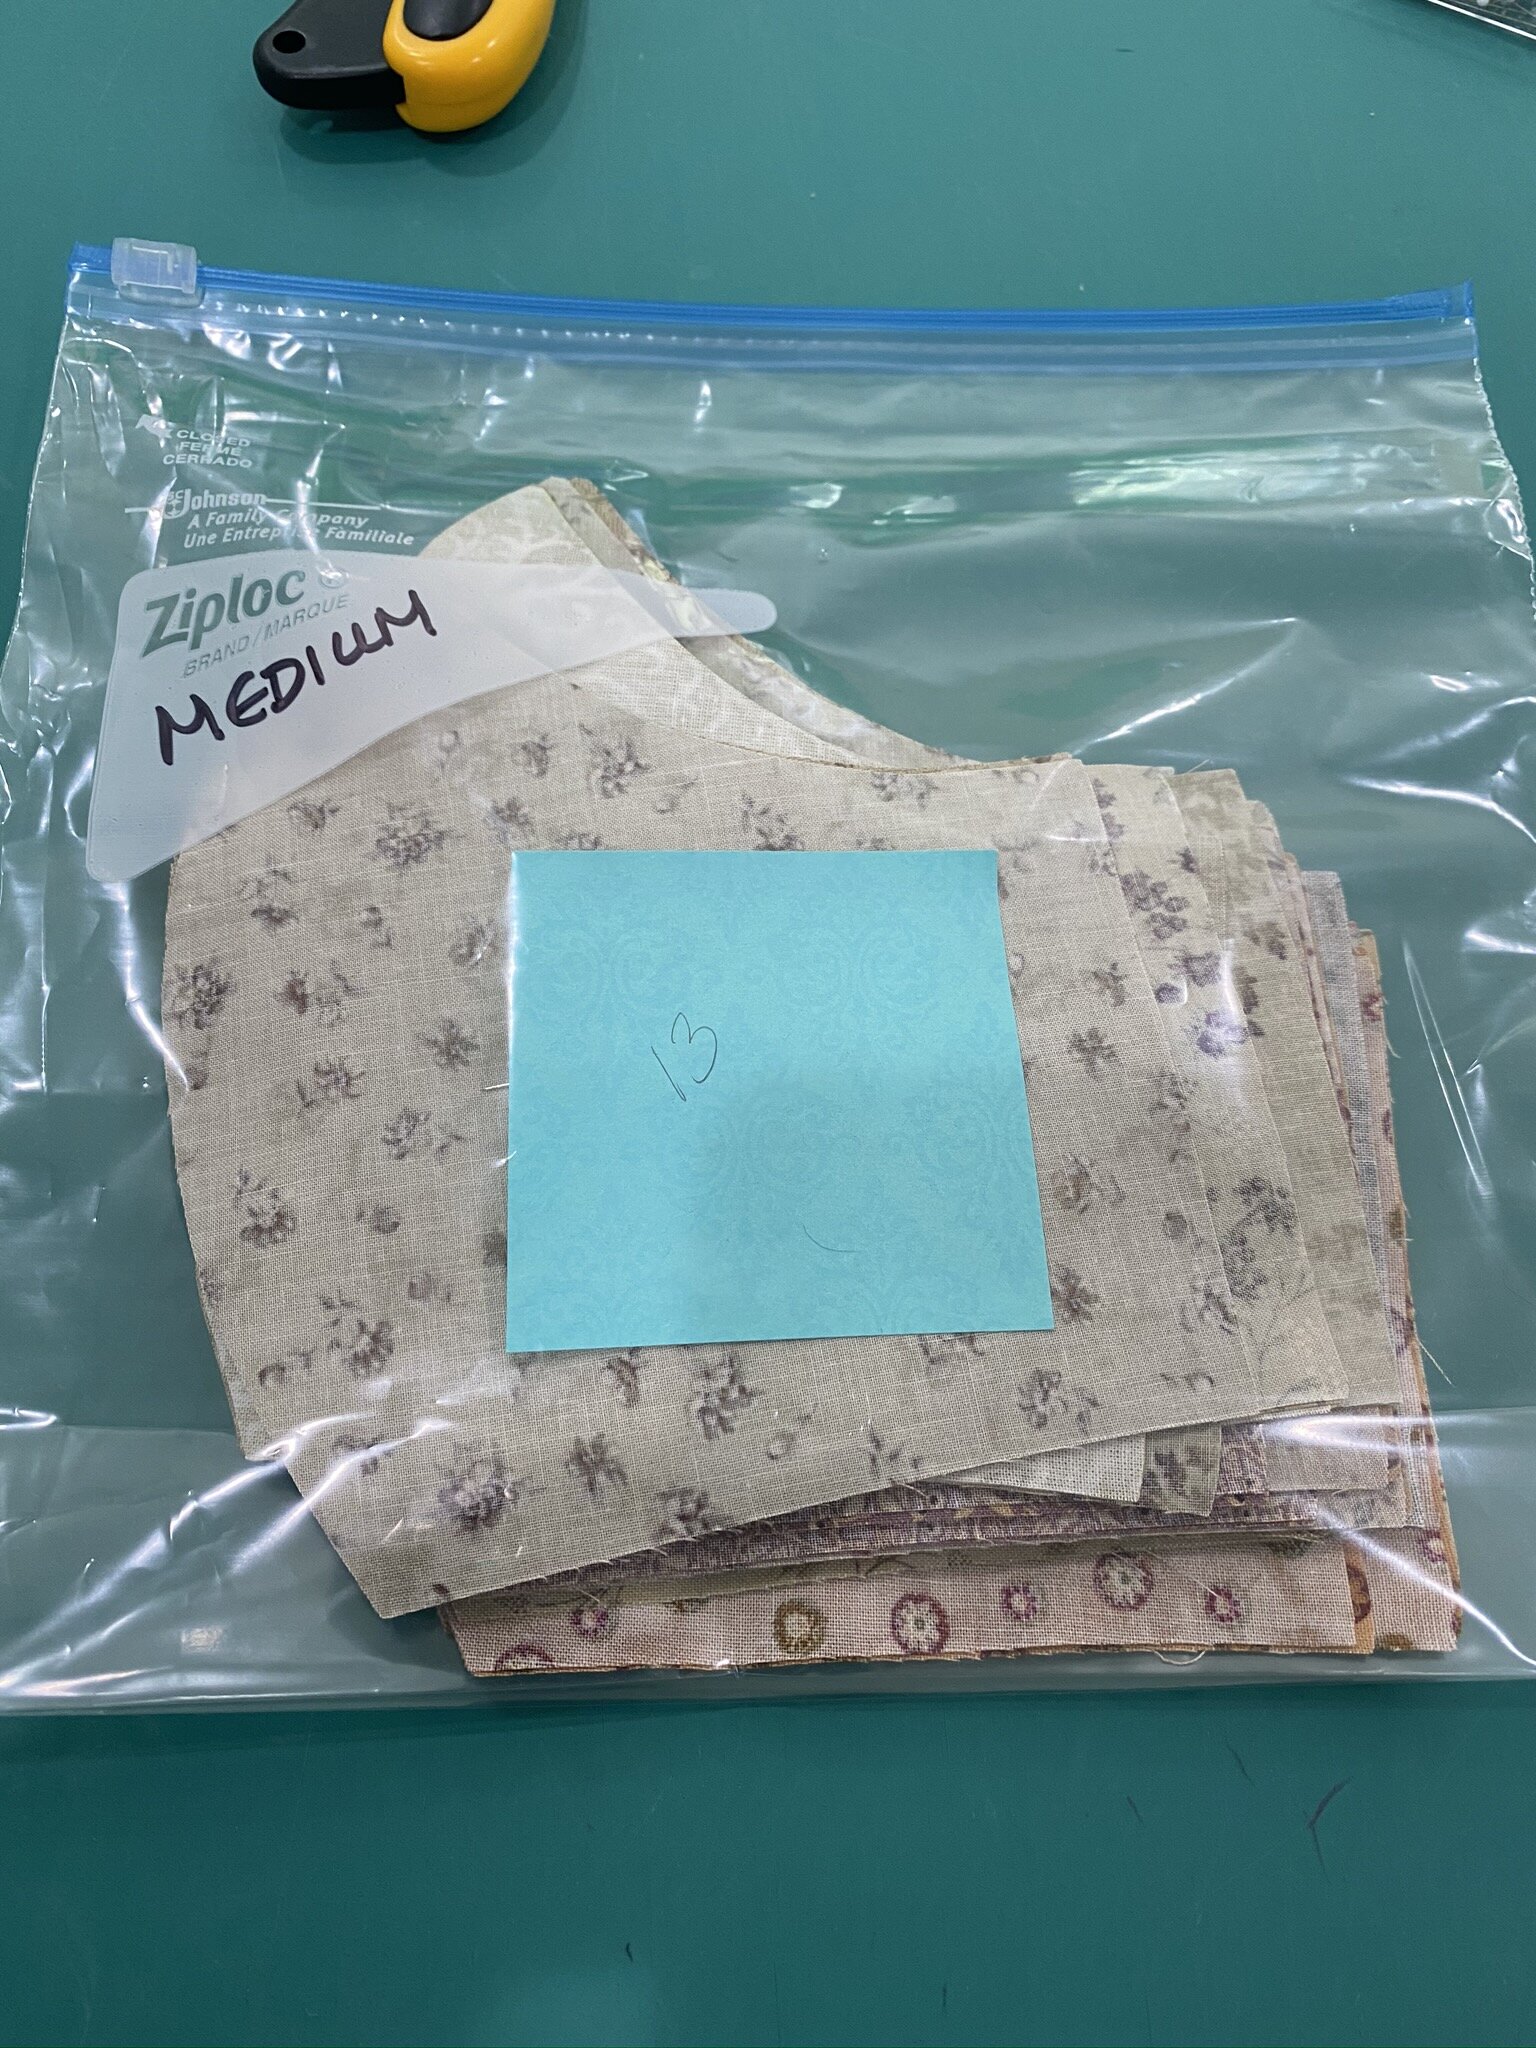
I have 13 medium-sized sets cut right now—that represents lots of fat quarters. For the medium and large dies, I get two out of each fat quarter—haven’t done any small ones yet but I’m thinking I may be able to squeeze three. Sadly, I haven’t even made much of a dent in my fat quarter stash yet, but at least it’s no longer overflowing its drawer.
And I’ve got lots of decent-sized scraps left over that I’ll be able to cut down into usable sizes for other scrap projects.

Finally, I mentioned in the Twilters! Facebook group that I’ve registered for the Mancuso Online Quilt Festival this coming week. I’m taking Thursday and Friday and all next week as vacation, and I plan on sewing my head off!
I’m taking a class on the curved log cabin on Friday (I think—not sure which class is which day). It uses 2 1/2 yards of lights and 2 1/2 yards of darks, so I’m pulling entirely from my strip stash. 80 strips total, and I still have a ton left. However, it feels good seeing all of these finally getting used!
I’ve got a pretty wide variety in my darks but I’m hoping that helps it have a little sparkle. The yard of burgundy is the center squares, and can I tell you how glad I’ll be to use that one? It’s one I inherited from my Mom’s stash, and she passed away in 2009, and it looked like it had been on her shelf for quite awhile before I took it. That one is just crying for a home. It’s just an odd enough color that I’ve never found a project I could use it in—so this one is perfect. Cut into pretty small squares, the oddness of the color won’t stand out.
I’m trying to channel my Inner Charlotte with the randomness of the darks. I was mostly sticking to “colonial” and/or “country” tones (again, from my Thimbleberries Years and a whole lot of strip exchanges at my guild), but have a few ringers in there. I think it’ll be okay.
Now I have to start chopping all of these down into the appropriate sizes for the blocks. That’ll be tedious. Saving that for tomorrow.
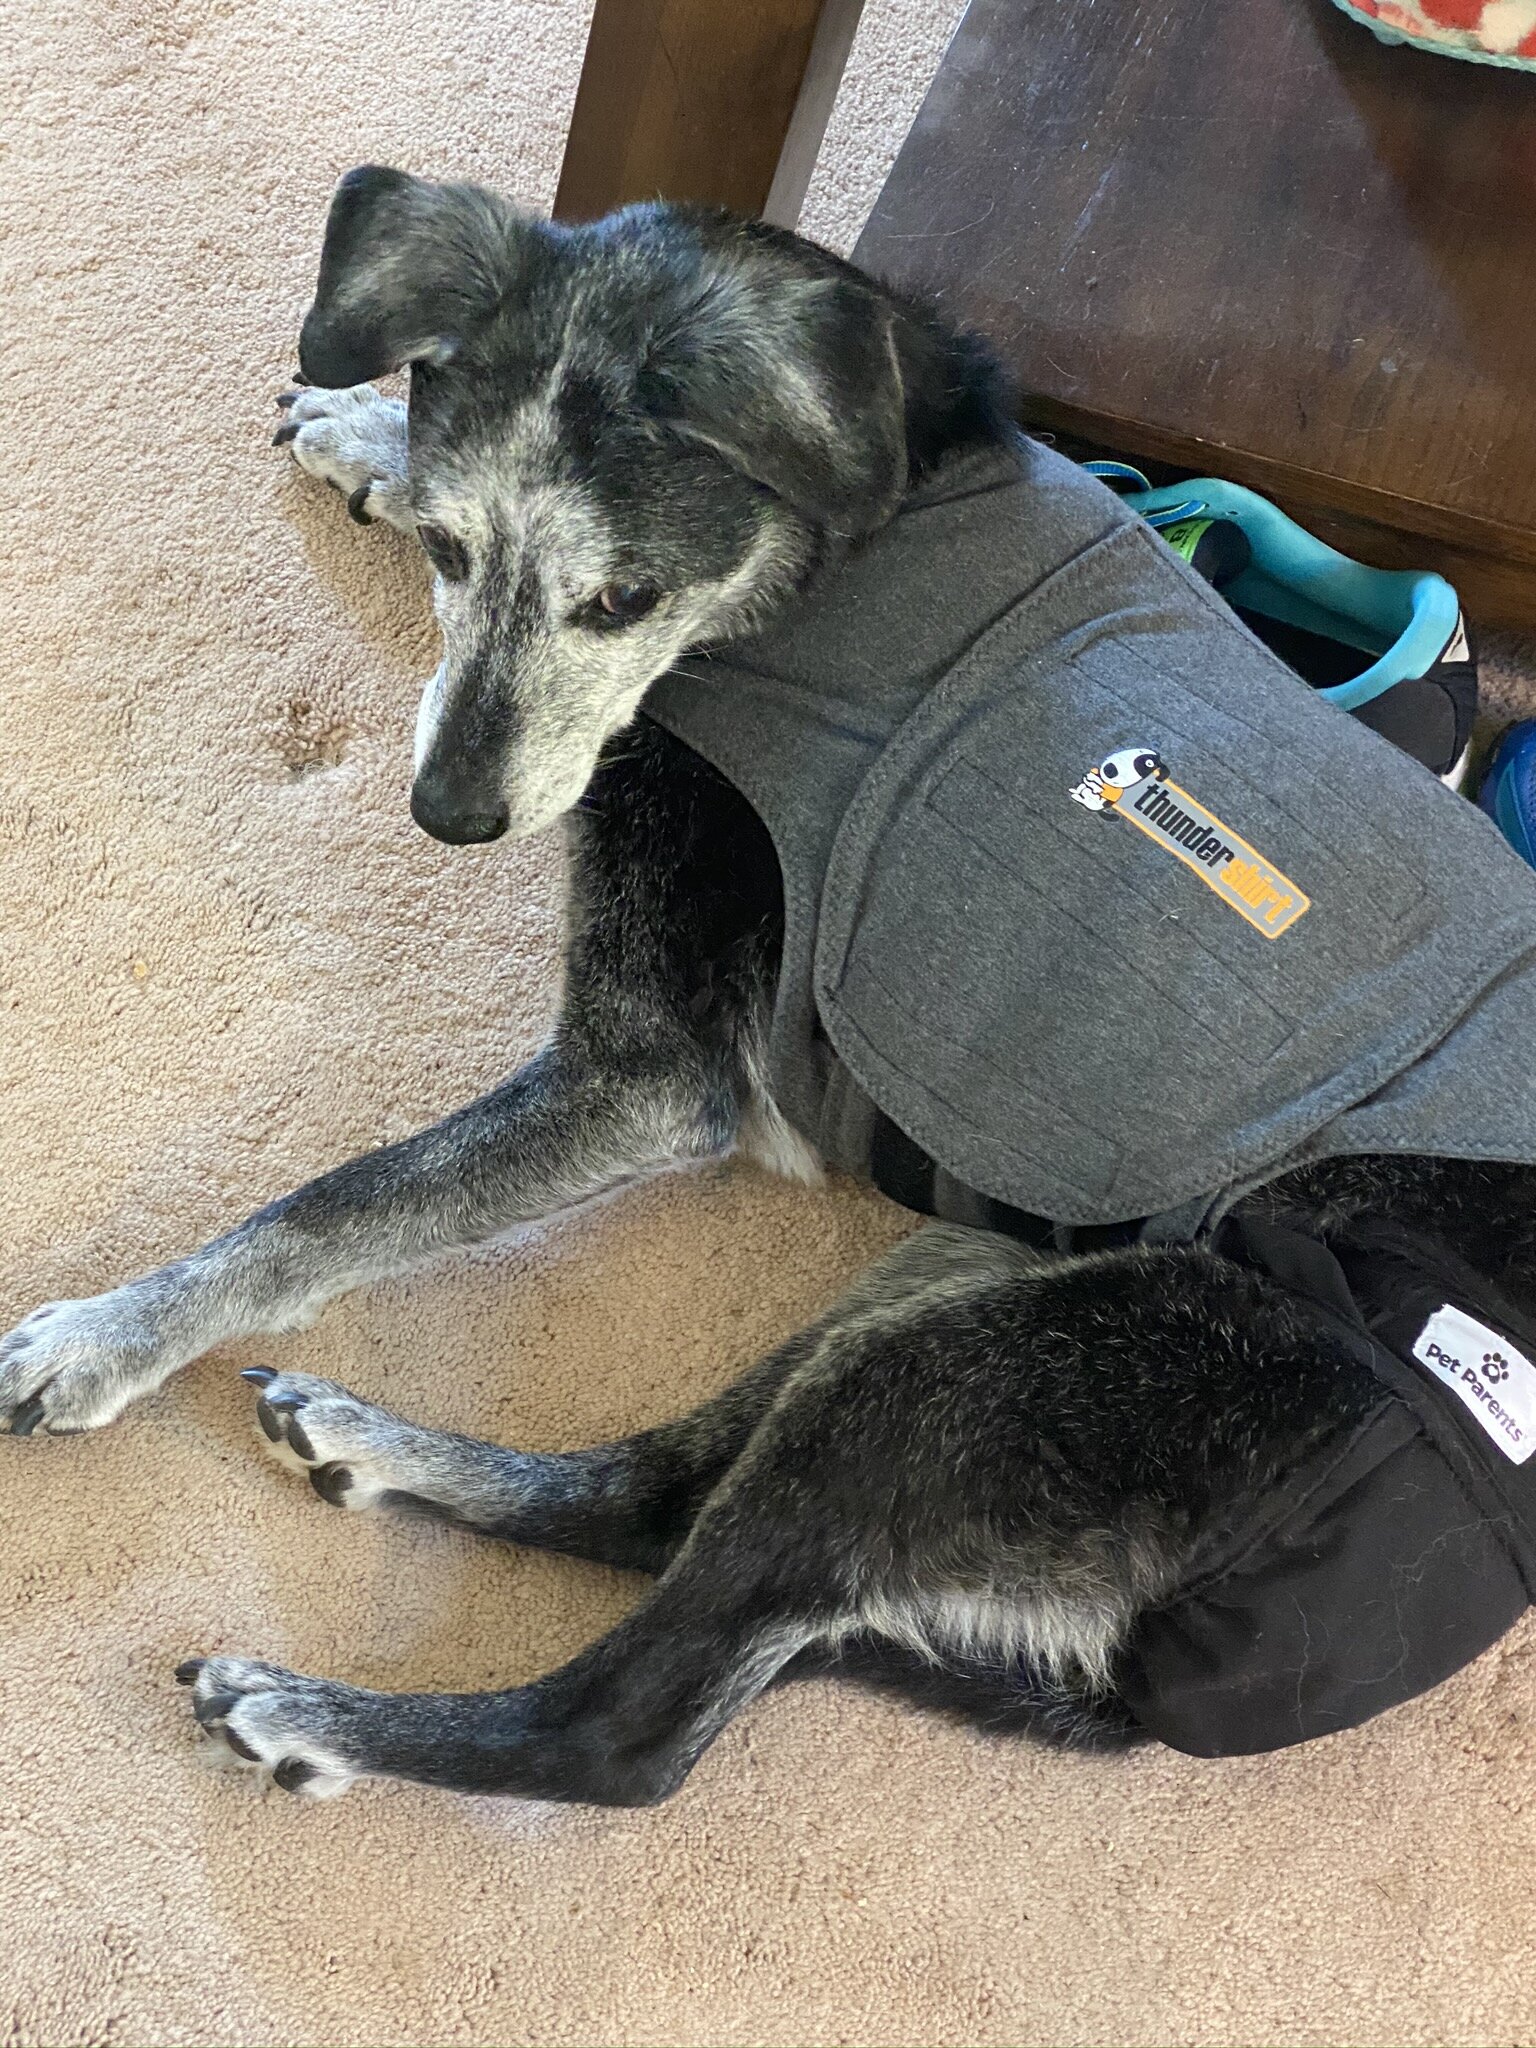
Last news of the day: Doggos got into the groomer today for the first time since February. Sadly, this turned out to be the last time Princess Doggie goes. She’s going to be 16 in September and is showing her age in rapidly increasing stages. She’s deaf, almost blind, has joint issues, and this past week has started losing her balance pretty frequently. She only let the groomer give her a bath but only one toe got its toenails trimmed before she freaked out. I’ll have to see if I can get her to let me do the rest of them. Otherwise, it was clearly just too stressful for her at this point. Aug-dog, though, was in his glory, having people pay so much undivided attention to him. As the groomer said, “He has so much [pregnant pause] personality!” I’ll bet.
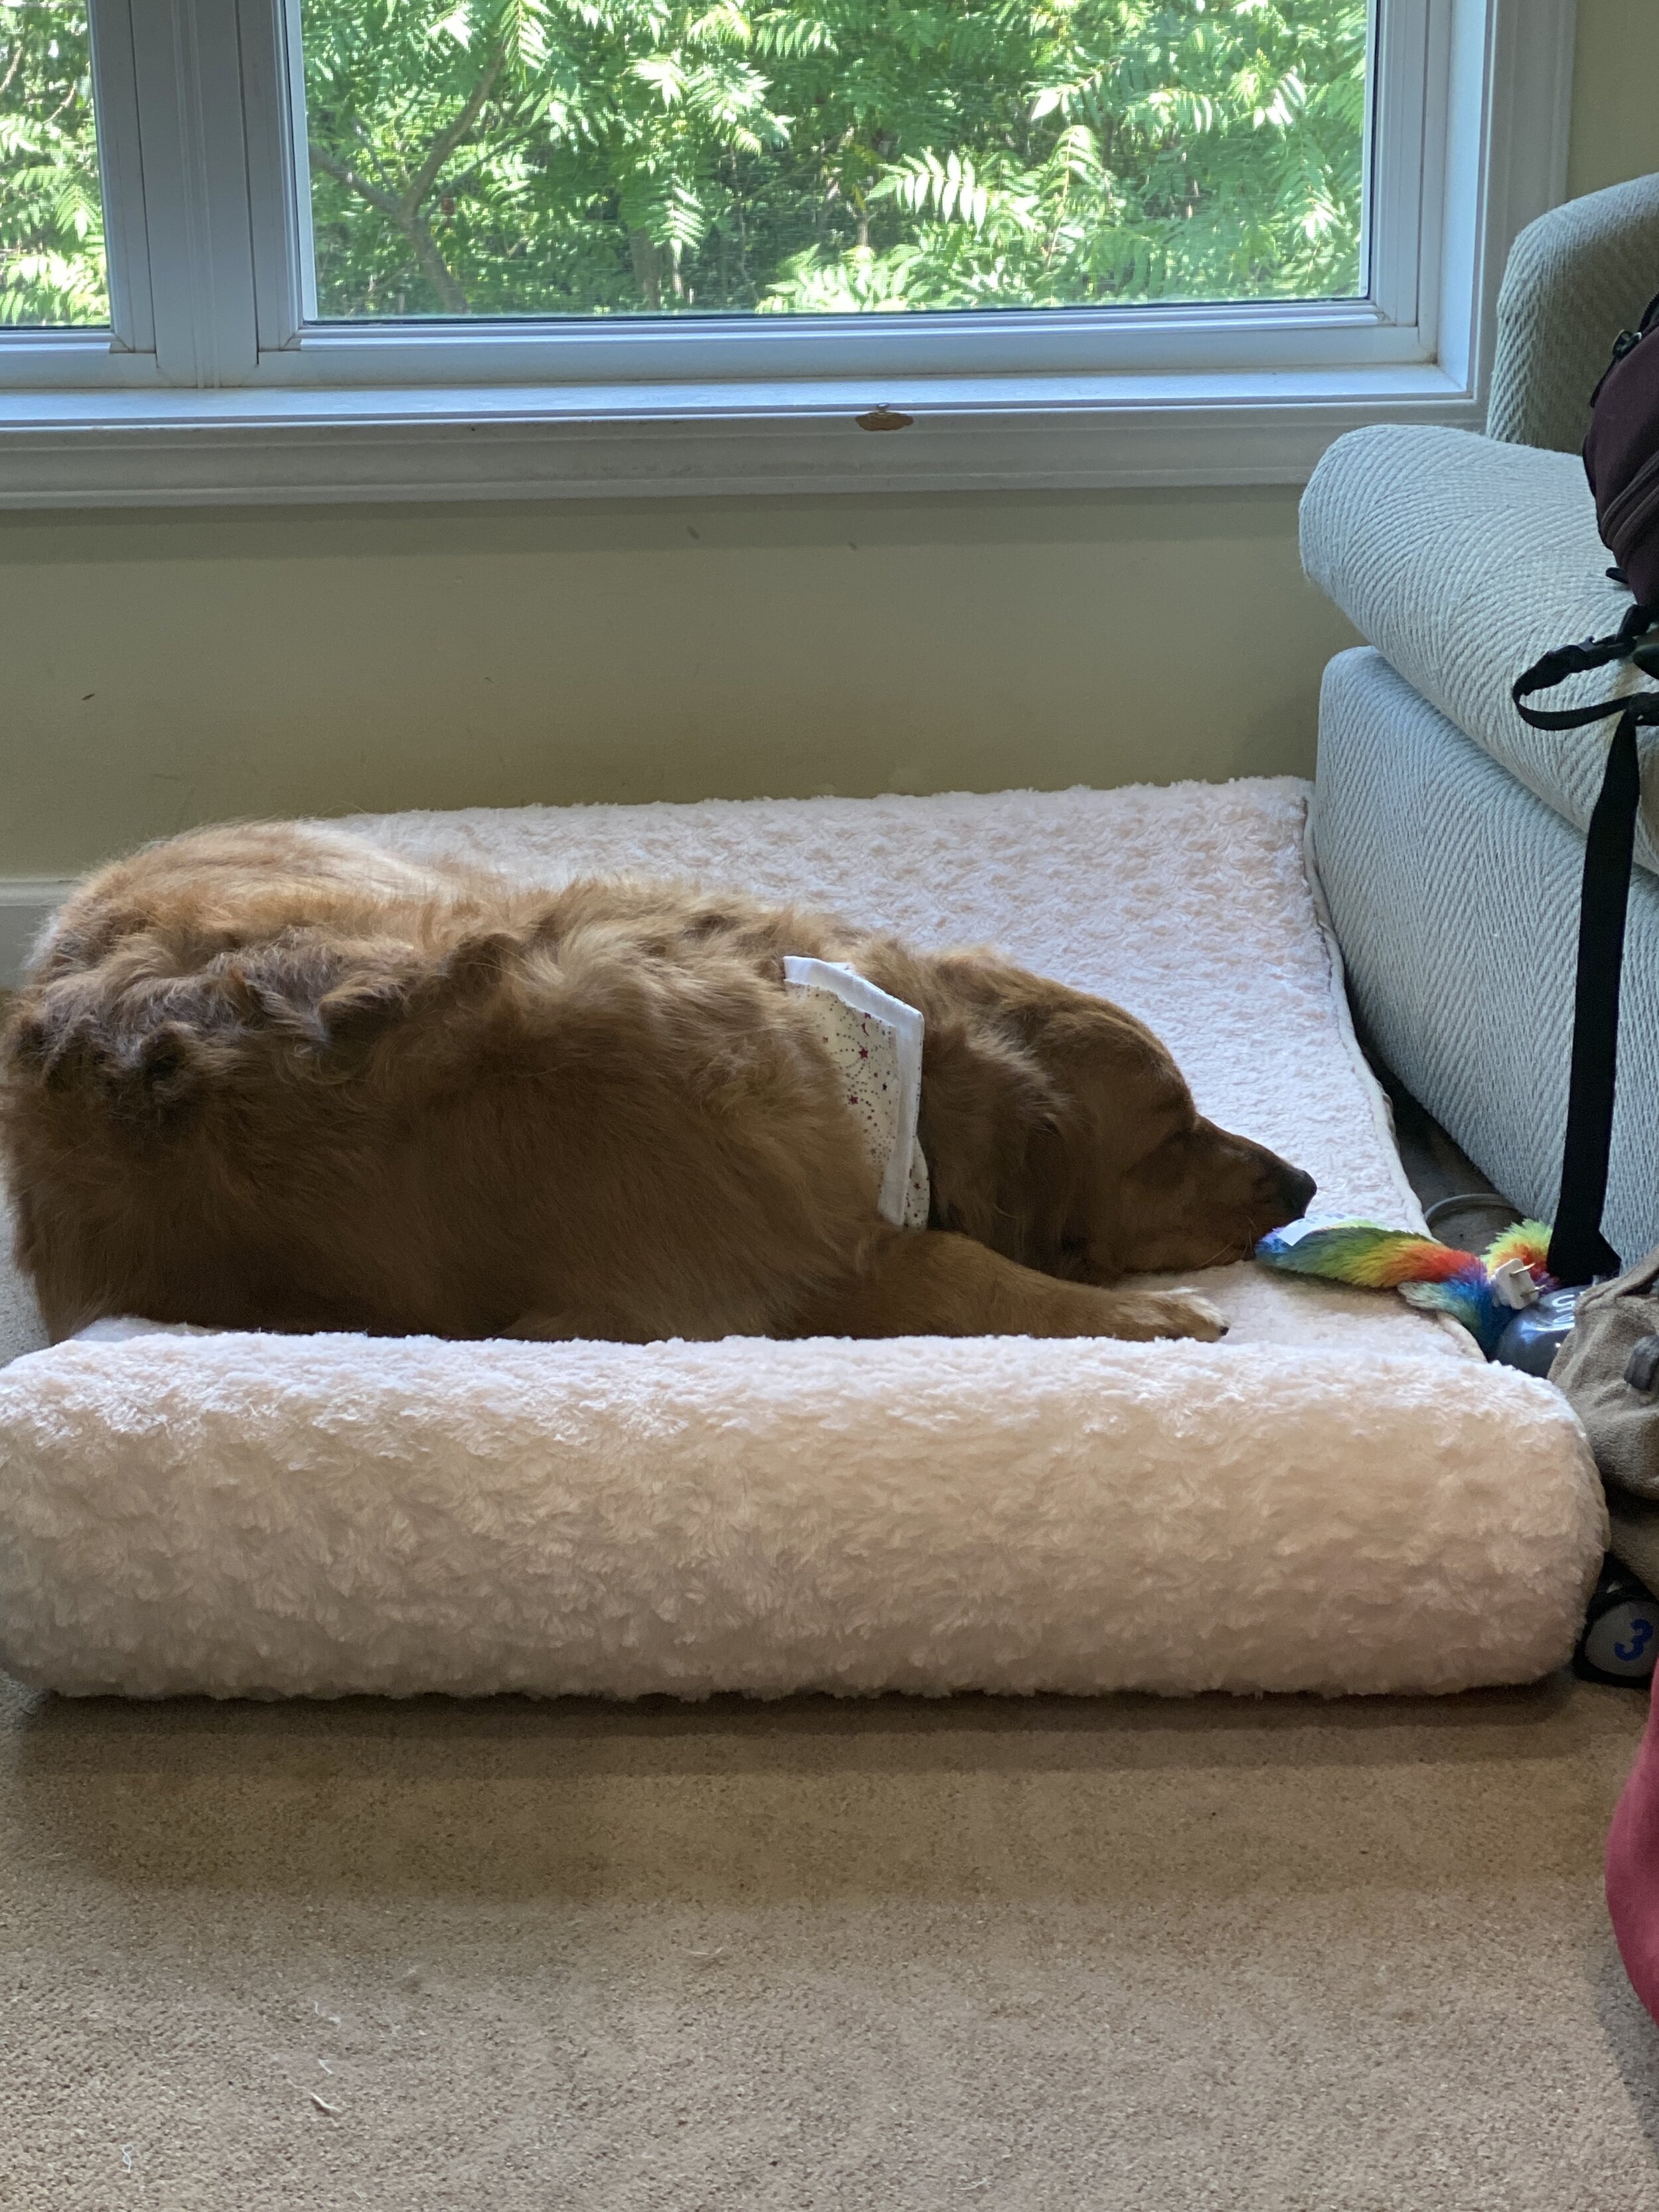
Spencer was in such a fuss when she got home I put her thundershirt on her to help her calm down.
Auggie came with me up to my sewing room and crashed on his bed.
Hygiene is tiring.
(And btw, they got groomed before I did. I still haven’t brought myself to make a hair appointment yet!)
Done and Delivered!

First done? Got some embroidery done.
To refresh your memory, this project was first mentioned here.
Yep, it’s been awhile. I’ve actually gotten a fair number of blocks done on this but periodically stalled here and there. In fact, this particular embroidered block was sitting in the hoop for umm…maybe two years? Hard to remember when I started this one. It’ll need a heck of a steam to get it to lay flat again.

Continuing the embroidery theme, I got a good start on another block this morning.
It really is more relaxing to sit and do embroidery in the evening while I am watching TV than it is to play stupid iPad games. I actually took one game (Runefall) off my iPad because I was spending way too much time on it.
Here’s to one more summer thinking, “Maybe I’ll have this done before Halloween THIS year???”

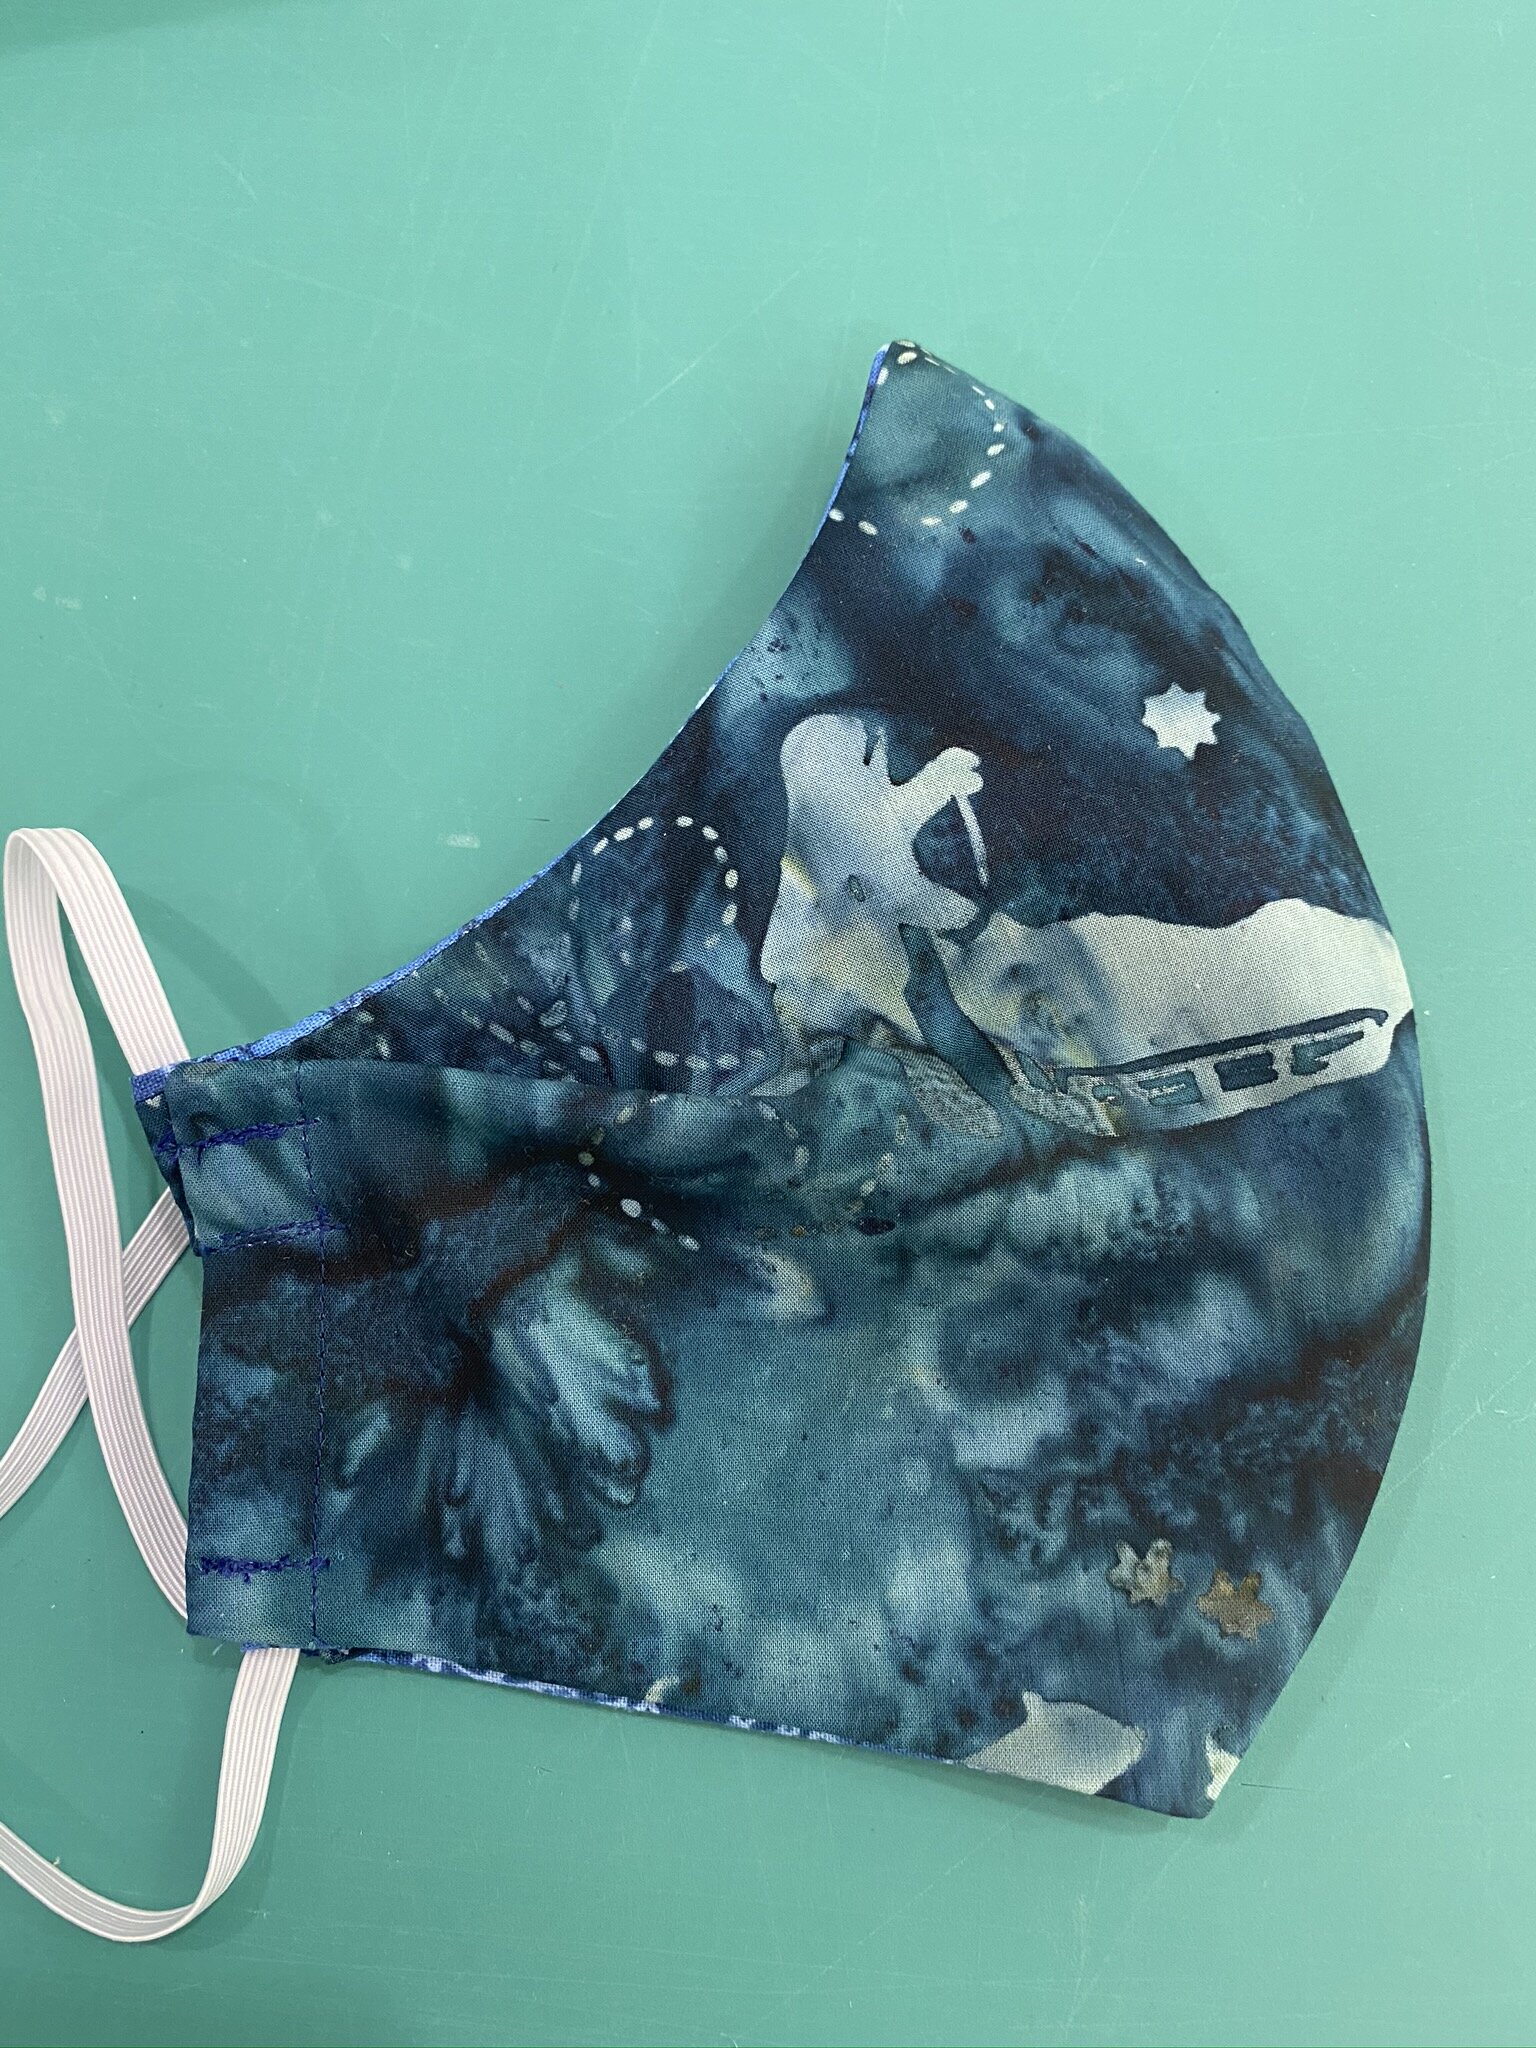
Then I knew I wanted to get the baby quilts officially delivered to my niece, but to do that, I really needed to finally make myself a face mask. First one for me! After wearing one I’d made my husband yesterday (the pleat style) when I went grocery shopping, I was really struggling with it because the pleats always seemed to be right up against my nostrils no matter which way I flipped it, making it particularly hard to breath. So today I decided to try the other style that’s more of a cup. (Honestly, sorry to any guys reading this, don’t a whole lot of masks look like they cut a bra in half?)
Anyway, this went together really easily, except for the fact that I had to make a template. Got to drag some old template plastic out of a drawer, and I used my little finger-tip rotary cutter for the first time in awhile for the curved edge.
I made three out of this set of fat quarters; two medium sized and then one large just to see whether that larger size would fit the guys in the house. Yes, it does, but the floral fabric means it’ll be mine, despite being large. They’re both comfortable with their masculinity, but, well, they weren’t fans.
After the template plastic, tracing, and having to carefully cut that curve…yep, I ended up ordering myself the AccuQuilt dies for face masks. My reasoning is twofold: 1) we’re going to need masks for a long time to come so I may as well be ready to knock them out faster; 2) I don’t have time to sew masks for donation but I can create die-cut fabric “kits” to give to the new arrival families I used to work with. Many of them sew and have sewing machines, but may not be able to afford much in the way of fabric. So I’ll cut up my stash and give it to them as kits, and they can sew them for their families. Win-win.

Mask ready to go, i decided to use up a significant portion of the fabric left from Baby Quilt #1 to make a pillowcase that would serve as a gift bag.
This picture was taken once the quilts were already in the pillowcase so it looks a bit odd, but you can see the combo of leftover fabrics.
And then I got to deliver the fun! Still couldn’t get in any baby cuddles, but this time I was able to be 6’ away rather than the only other time I’ve seen her, which was from about 20’ away in her driveway. She woke up briefly and did actually look at me. What a thrill.
I try not to think about how this all is going to affect the ability of our extended family to really bond with her—from her perspective. Not being an immediate part of her circle until she’s probably done with most of her first year? Anyway, at least I know she’ll be wrapped up in my quilt, if I can’t be giving her raspberries and playing with her toes.

One last thought. Doesn’t this feel like insults we used to hurl at each other in middle school? Surely there must be a better way to say this in LED.