
...And so, I've decided I'm done. I didn't finish off the details of the class project, but I've done about 80% of it at this stage and have tried out every stitch design she demonstrates. Since I've got a multitude of other machine quilting classes in my queue, I decided it was time to move on.
I really liked this class quite a bit. This is the second machine quilting class I've completed on Craftsy. (Click here for my review of the Wendy Butler Berns Machine Quilting class.) WBB's class is a little more free-wheeling, "whimsical," which is a great way to get yourself started. Beyond Basic does get a little more complex, but I'd rate it, as they say, Confident Beginner. Or Rank Beginner if you're just a little adventuresome. I think she assumes you've already done some machine quilting and doesn't spend a whole lot of time talking about setting yourself up for quilting, although she does some--and talks about threads. Although she also does get into more complex designs than I recall in WBB's class, Petersen works you up to them by starting at an easier level and getting progressively more complex.

Through the course of the first several lessons, Petersen demonstrates a few ways of creating quilt designs, including no-mark methods. She starts by teaching you how to create a stencil by sewing (without thread) through the quilt design on paper. I've done this technique a few times before so I did well at this step. The difficulty I had was keeping my stitch length long enough that I wasn't just slicing the paper on the lines. Just have to keep my hands moving faster!
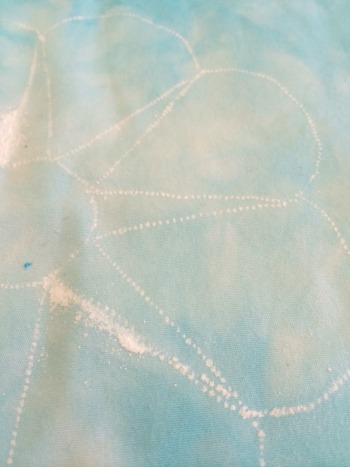
After you perforate the paper with the needle, you then rub some pounce powder or chalk dust through the holes of the paper to mark your quilt. She gives a different technique for how to apply the pounce powder so I was able to try that out. Because I'd over-perforated some areas, I got a few globs of powder that obscured the line a bit. Plus, I was using white powder on a very light blue background, so I did have problems seeing where I was going. I do have blue powder but was a little concerned about how easily it would come off. Not sure why I was concerned with that small detail when I knew for darn-tootin' this wasn't going to be a show quilt anyway. Apparently sometimes I do sweat the small stuff. Go figure.

And so, my first flower looks a bit like a 3rd grader drew it. Actually, lots of 3rd graders would've done better. That being said, I think I started with the hardest one.

They got better as I went along...
One of the main things I learned in this class is that the first lines you quilt are not always the most important. Although none of these flowers are even close to being what I'd want to have showing up on a quilt for public use, those first wavery lines tended to fade into the background as I added more layers to the quilting later.

And then we move onto feathers and feather variations. The variations include whether you're marking them first and, if so, how you're marking them (she demonstrates a couple of different methods), as well as different shapes and sizes of plumes, and also adding some funky extra touches here and there. She also has you go through straight feathers and curved feathers, and later you go back and embellish the feathers with different kinds of veins. I did okay on the feathers after the first few plumes; at least, I got more confident about just diving in. Still need lots of practice. This picture is one of my better ones.
I'm right-handed, but I was far better at the plumes on the left side. Does that make sense or is it bass-ackwards?

And then there's the dragonfly. He's cute. Apparently mine got into a bar-room brawl at some point and broke his tail and it never healed correctly. That's my story and I'm sticking to it.
(That's a different feather in the background. I had been dissatisfied with my first take on the plumes on this one so, knowing that sometimes the best thing to do when something is off is to just keep doing it over and over until it looks intentional, I went back over all the plumes a couple more times. It actually worked! Definitely improved.)
She also has you embellish all the flowers and leaves with various designs as well. I'd never given a whole lot of thought about the order in which you quilt your designs--I always just work center out. She has a different approach that makes a whole lot of sense. But you'll need to take her class to find out. I'm not giving away the farm, here.

And then there were the cornerstones and borders. I'd bagged adding cornerstones when I was putting together my project so I just drew them in and pretended they were there for quilting purposes--which worked just fine. Let's just say that I stink at pumpkin seeds. Yep, definitely lots more practice needed there. I also discovered the downside to using variegated thread on pumpkin seeds: You completely lose the design. Which was fine in my case since I'd lost the design several times along the way anyway. (Working backwards that small? Yikes!) My borders were a hot mess but her design options here aren't really my style, so nothing I'd likely use anytime soon. So I did it as-is in one border using one of her design options, then just used the rest of the borders to practice more feather plumes, echo stitching, and the like.
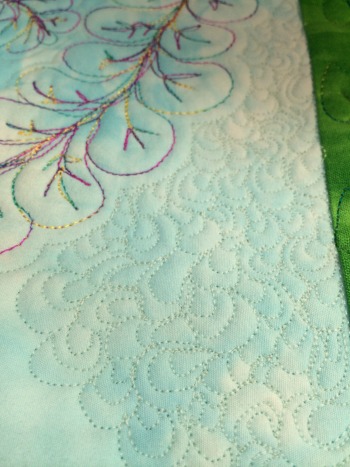
I did decently well on the echo quilting and practiced some of the background filler as well, but used a thread that blends. So it looks good, but who knows? You can't actually really see it that well--bonus!
To completely finish this, I'd have had to spend a lot more time on the borders and filler background--and I've just got too many other projects I need to get cranking on! Therefore, I decided I'd learned what I needed to learn and it was time to move on.
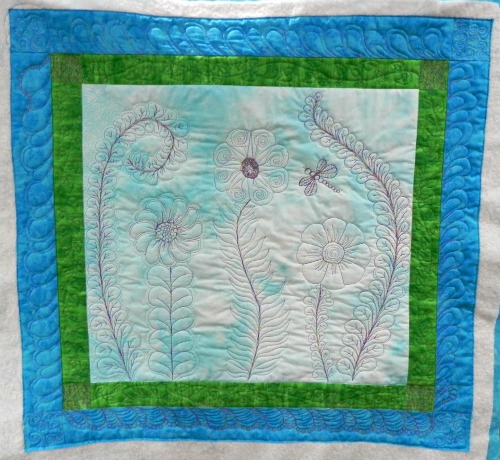
Therefore, now you've seen all the bits and pieces, here's the as-finished-as-it'll-ever-be class project.
In summary: Even though I didn't finish the project, I did get a whole lot more comfortable with machine quilting during this class. I got some good ideas for how to fill things in, and picked up a few new tricks along the way.
Ann Petersen is a very good teacher. She's calm, doesn't have any annoying mannerisms or habits; she's not a laugh-a-minute but feels like someone you could sit and have coffee with. I enjoyed her presence. I would definitely recommend this class if you're just starting out or looking for a few more designs to practice.
The basics:
- 13 lessons, ranging from about 13 minutes to close to an hour in length. (You really get your money's worth in this one--lots of content!)
- Lessons include supplies, basting and marking, starting to stitch, three lessons on feathers of various types, embellishing your designs (with stitching, not with beading or anything), the dragonfly, border treatments, quilted "lace" design, echoing and background stitches, and the final lesson is on blocking your quilt and dealing with ruffly edges.
- You don't need to do the class project, of course, but it is kind of a fun one; although, as I said earlier, to finish it will take time. I have another project I'm working on for which some of these designs and techniques directly translate so I'm definitely getting the bang for my buck!
Again, that's Ann Petersen's Beyond Basic Machine Quilting, definitely recommended! And now, on to my next class!
(Usual transparency statement: Clicking on Craftsy links in this blog post help to support this blog and podcast. Thanks!)