(If you're looking for the 2015 Quilty Resolution Challenge, click here.)

True Confessions: I started "working" on this class a long, long time ago. At that stage, working on it meant watching the lessons and not much more. But when it came up in my queue again, I decided this time around I really needed to make some decisions about how I was going to approach Leah Day's Free Motion Quilting a Sampler class.
I'd already decided I didn't want to make the sampler, nor did I want to purchase the pre-printed sampler panel available through Spoonflower for this class. Kudos to Leah, though, for making that an option! I did consider it, as it would've been an easy way for me to really practice all her designs in the way she guides them during the class. So I give her two thumbs up for having made that available. Woo! Options!
Ultimately, I decided I'd just watch through all the lessons again, choose a few designs I particularly liked to practice, and then put one or more into action on a current project. The main thing I can definitely say for this class: There is a boatload of quilting designs here!
For those of you who are already familiar withLeah Day, this won't come as a surprise: This is probably the most content-rich class I've taken from Craftsy to date. You'll see in The Basics (below) the sheer volume based on number and length of lessons. In fact, that's part of why it took me so long to get through the class--it felt a little overwhelming when I was over my head in life this past fall. Some lessons took me two or three tries to get through, and that was just watching the lessons, not even doing the project! After I got back from my trip and had some time over the holidays, though, I was finally able to finish watching all the lessons and do some practicing on quilt sandwiches. I still haven't used a design in a project, but that's just because I'm dithering between two or three of the designs from the class for the project I'm working on. When I finally beat this cold that's laid me out this week, I'll make myself decide on a design and just knock it out.

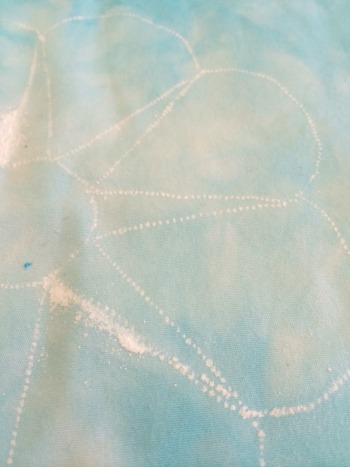
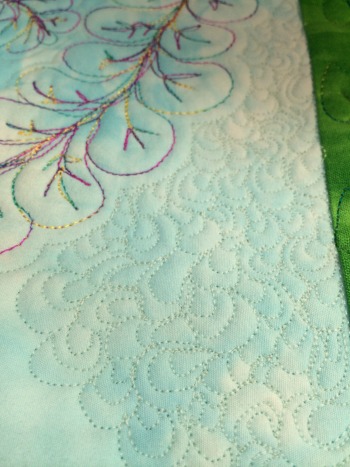
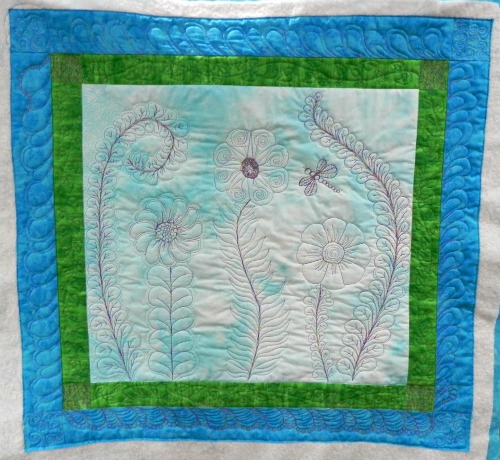
Practicing designs from Leah's class (one feather is from previous practice--the rest are based on her class)
This class is excellent for beginners who have never done any machine quilting before. She starts from the very beginning (as the song goes), and talks about prepping your quilt for quilting--starching, pressing, backing, batting, basting...41 minutes' worth of how to get your quilt ready.
If you've been quilting for awhile, it's still definitely worth watching this lesson. Her method for basting (especially for securing the quilt to the surface while you're basting it) is very different from other methods I've seen. You might pick up some good ideas for your own setting.
Then she spends over half an hour in the next lesson talking about supplies, FMQ feet, how to modify a foot if you need to, machine settings, and the basics of the quilting process itself.
The next 8 lessons are all different types of designs, from stitching in the ditch, to all-over designs and fillers, to motifs. Tons and tons and tons of designs. And tons. Each lesson has several designs within it. Did I say it? Tons. And the class materials include drawings of each design with little arrows to help you remember the best way to execute the design (and leaving yourself an escape route).
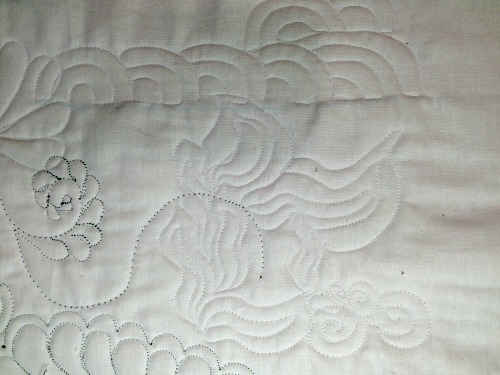
More practice on the back of a previously-used quilt sandwich--green thread showing is from the other side of old practice. All designs in white are new from Leah's class.
The last two lessons are borders and binding, with the addition of how to do a sampler as a "quilt as you go" quilt, quilting one block at a time and then attaching them together at the end.
She has a unique element in this class: In one of the early lessons, she brings in Sadie, who has never free motion quilted before. While Sadie is doing some stitching, Leah is talking about how hard we all are on ourselves. She then examines Sadie's results and talks about how normal they are, first of all, but then gives her some tips about how to improve. If I'd seen this back when I was first starting to FMQ, I'd have found it very empowering. It took me a long time to realize that I was actually doing not-half-bad.
This is a really, really full class. You definitely get your money's worth here, no matter what price you end up paying for it. Leah Day as a teacher is very easy to watch--she's very good at explaining what she's doing, she includes information about what to do when things go wrong, and she doesn't have any particular mannerisms that start wearing on you after watching her for several hours on end. Which is good, because this class is several hours! I still enjoy Leah just as much after finishing this class as I did when I was watching her 365 project on YouTube (the designs are now available in a book).
The Basics
- 13 lessons, ranging from 10 minutes (the introduction) to 92 minutes--yes, that's right, one lesson is an hour and a half long. Most fall in the 45 minute-ish range.
- Lesson 1 is the introduction to Leah Day and the Craftsy platform. Lesson 2 is all about basting (see above). Lesson 3 is Basics and Supplies--I picked up some good tips here. Lesson 4 talks about stitching in the ditch--which she's an advocate of doing before you do anything else. She does address in later lessons how you may be able to sometimes incorporate the ditching at the same time as you're doing other designs, but for the most part, she does it first, and then does whatever else she's going to do.
- Lessons 5-11 are all the different designs and, again, a ton of them. There are plenty of options here.
- Lesson 12 is finishing (borders)--including another design thrown in here for kicks n' giggles, plus trimming and squaring up.
- Lesson 13 is binding, using a quilt-as-you-go method or traditional. However, she mostly addresses the quilt-as-you-go method here.
I give Leah Day's Free Motion Quilting a Sampler two thumbs up although, as I said at the beginning, there were times it felt overwhelming. I'd almost have preferred two shorter classes from her. To a degree, it felt like she wanted to cram everything she could into the one class she thought she'd ever do on Craftsy. But, either way, I was able to practice several designs I'd not practiced before, and I've got some good ideas for projects I need to finish. So, yay!
(As usual: Using Craftsy links in this post helps support this podcast and blog. Thank you so much!)