My Show n' Tell at Guild this week

As you’ll hear in my most recent (9-7-24) podcast episode, I finally made it back to my guild meeting for the first time in years. And you know what guild means…. Show n’ Tell!

Here’s my jelly roll sampler made from the pattern in Jelly Roll Sampler Quilts by Pam and Nicky Lintott. I started it sometime in the early 2010s, I think. Rented time on a longarm and quilted it sometime between 2021-2022, and just got the binding on it a few weeks ago. Still hand-stitching the back down. Unfortunately, I pieced the blocks so long ago I no longer remember what the name of the jelly roll was. Sorry!

See my last blog post for the story on this one.

Neither of these quilts is in a color scheme I currently love, but they represent whole swaths of periods of my quilting journey. So there’s that. Glad to have some finishes on the books!

Decluttering Goals

If you’ve listed to Episode 207, you’ll know that I’m participating in the 21-Day Decluttering Challenge run by Karen Brown of Just Get It Done Quilts. (Today, day 3, is magazine day—I’ve already gotten rid of most of mine but have a few I’ll go through this afternoon after work; then we’re supposed to spend 30 minutes on a UFO. I have a couple of tablerunners that need sandwiching and machine quilting; that might make a nice break from the Storm at Sea Saga.)

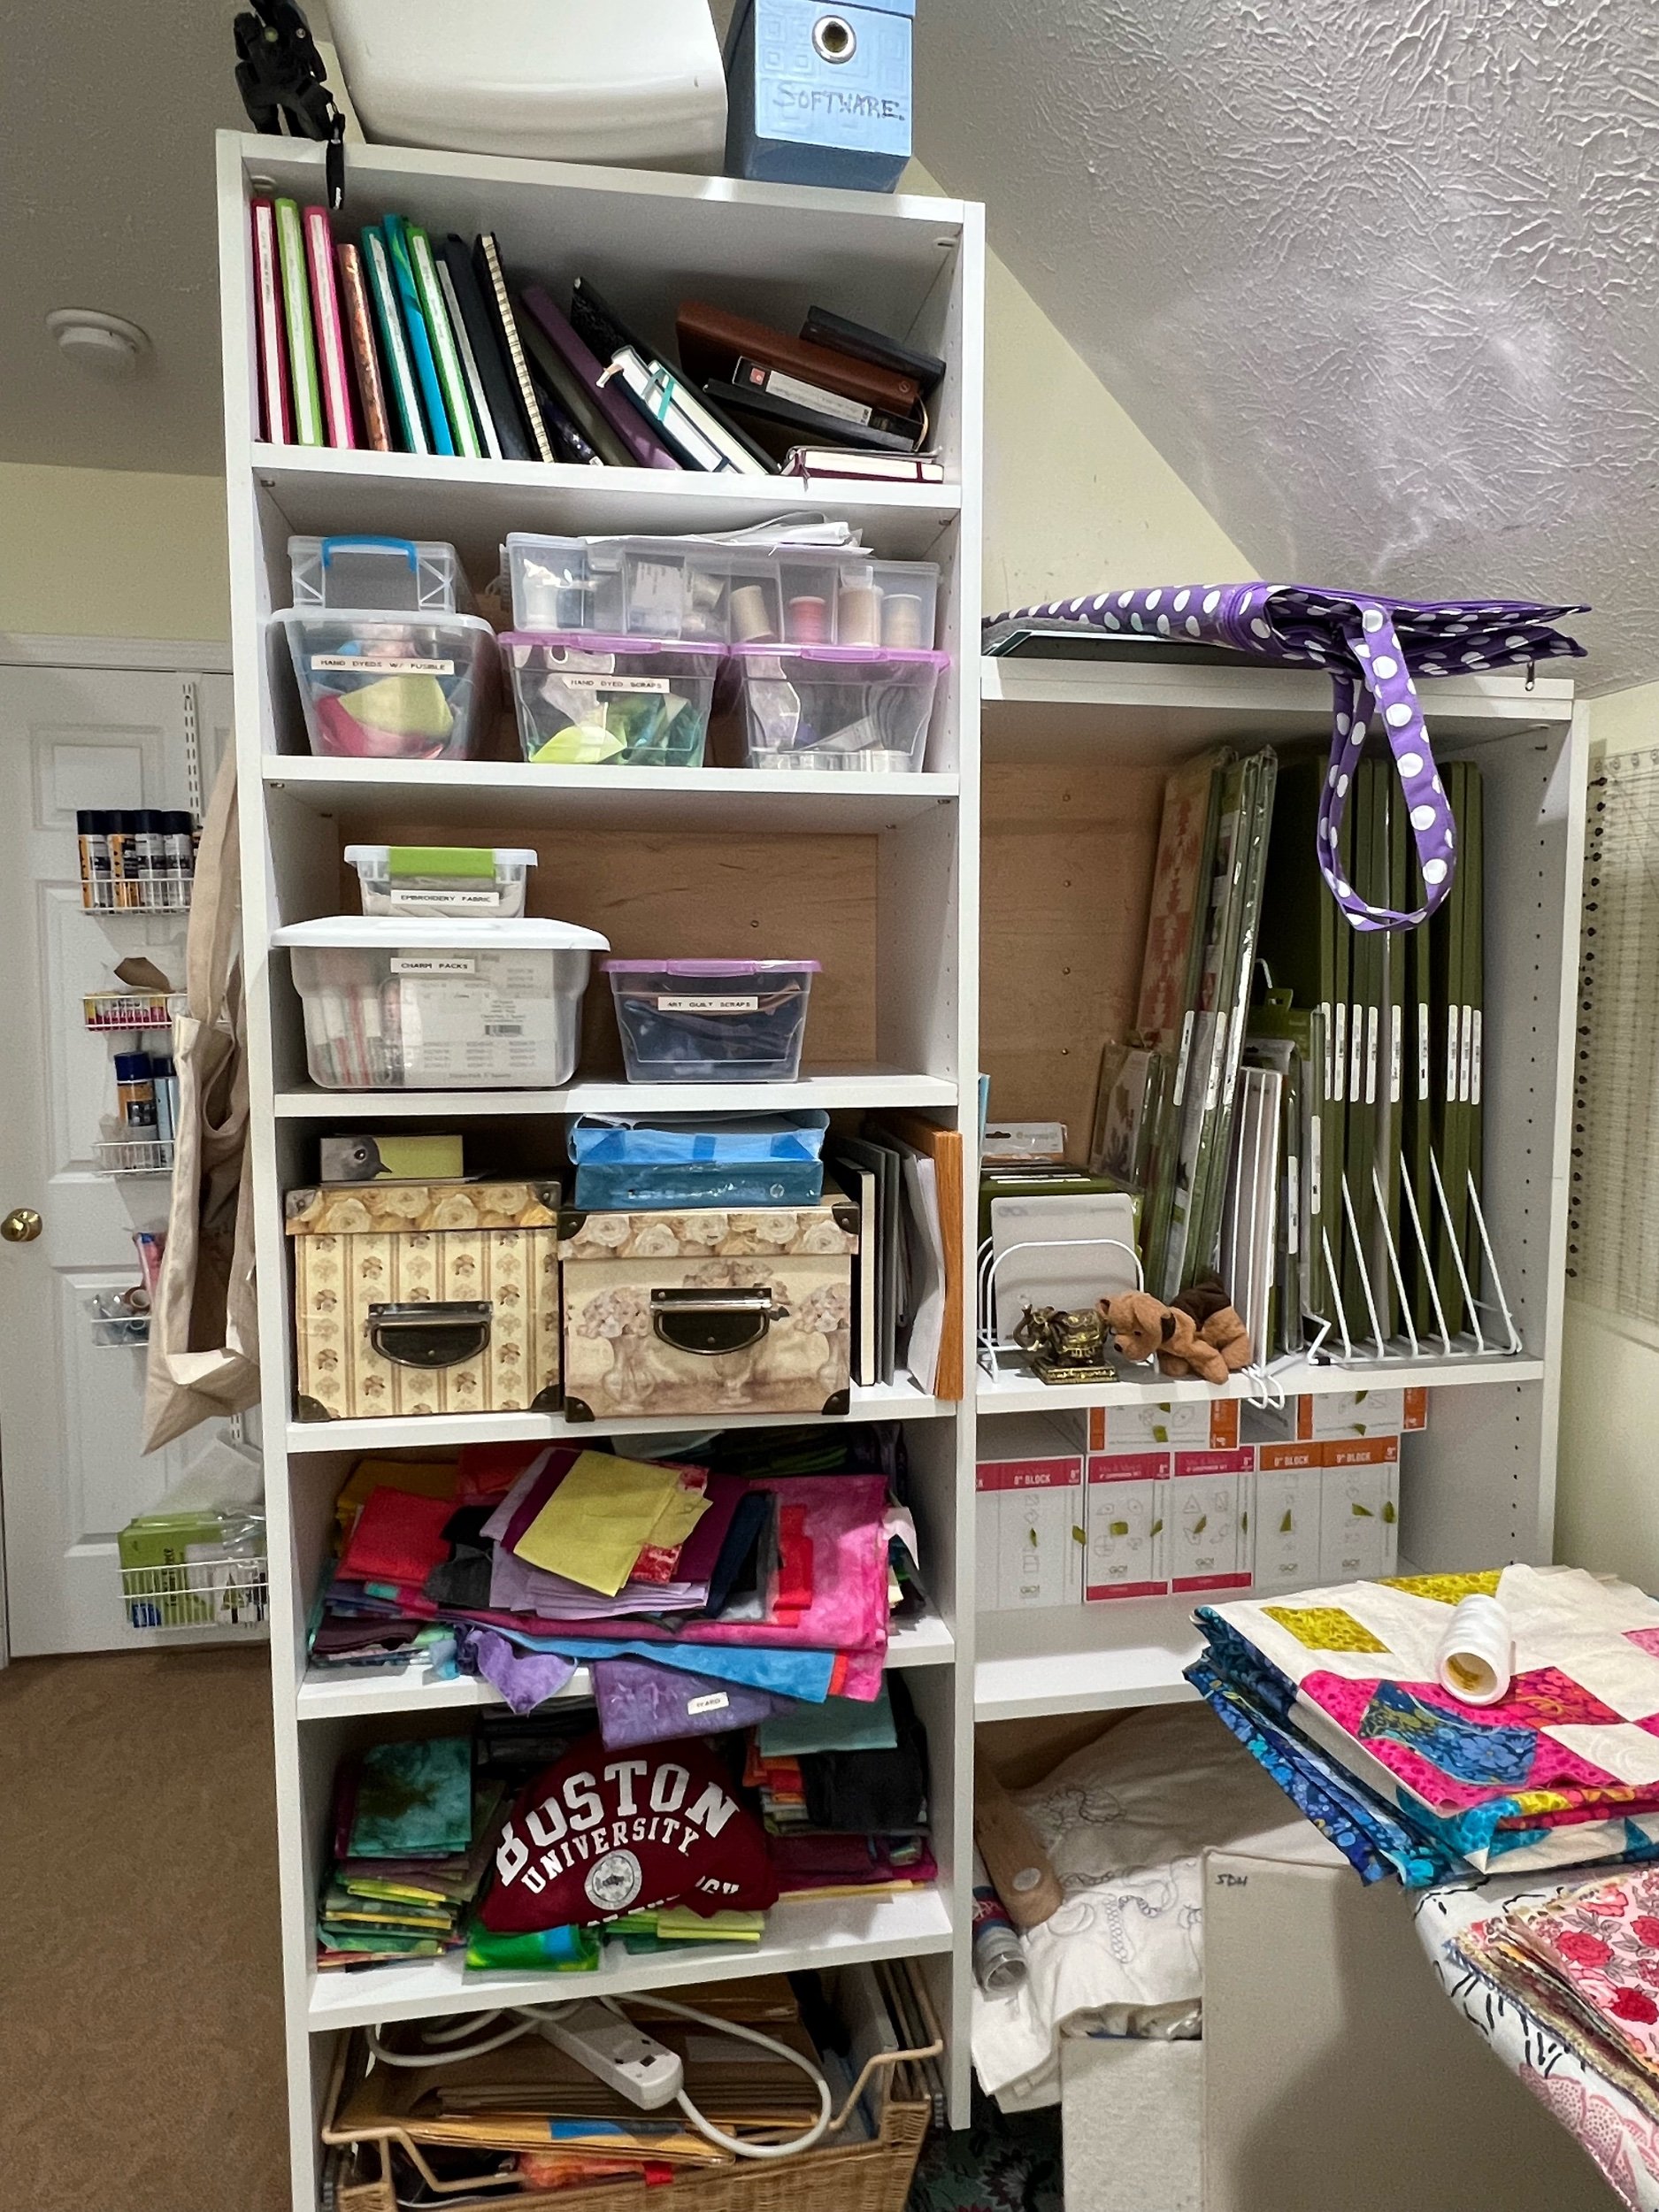
I thought I should clarify for myself what my end-goal for this decluttering challenge is as, if you visited my sewing room today, you wouldn’t think it was overly cluttered. It’s FULL, mind you, wall to wall storage units, but organized. I did have one pile of stuff in a corner that got taken care of on day 1, and a few things that had fallen off the wall that I took care of on day 2. But once I get the day’s assignment done I’m using the remaining 30 minutes to move forward on other organizational goals as well. (Waiting with apprehension for Karen gets to the book day and the tools/notions day, LOL. Stuff is in drawers that hasn’t surfaced in years.) So, in my usual mode of using y’all to keep me accountable, here are my goals for this project.

As I said in Episode 207, one big issue for me is moving my office stuff back to my external (region) office and reclaiming the space for personal use at home. Some of that will take a long time as it involves breaking down my current L-shaped desk and finding one with a much smaller footprint that will still suit the task. Meanwhile, I’m going to pare down office supplies, cord storage, work-related books, and so forth.

The quilting-related big issue for me is that, now that I’m doing scrap quilts with regularity, my scrap storage system is woefully insufficient. It’s organized, but in a way that makes it hard to use.

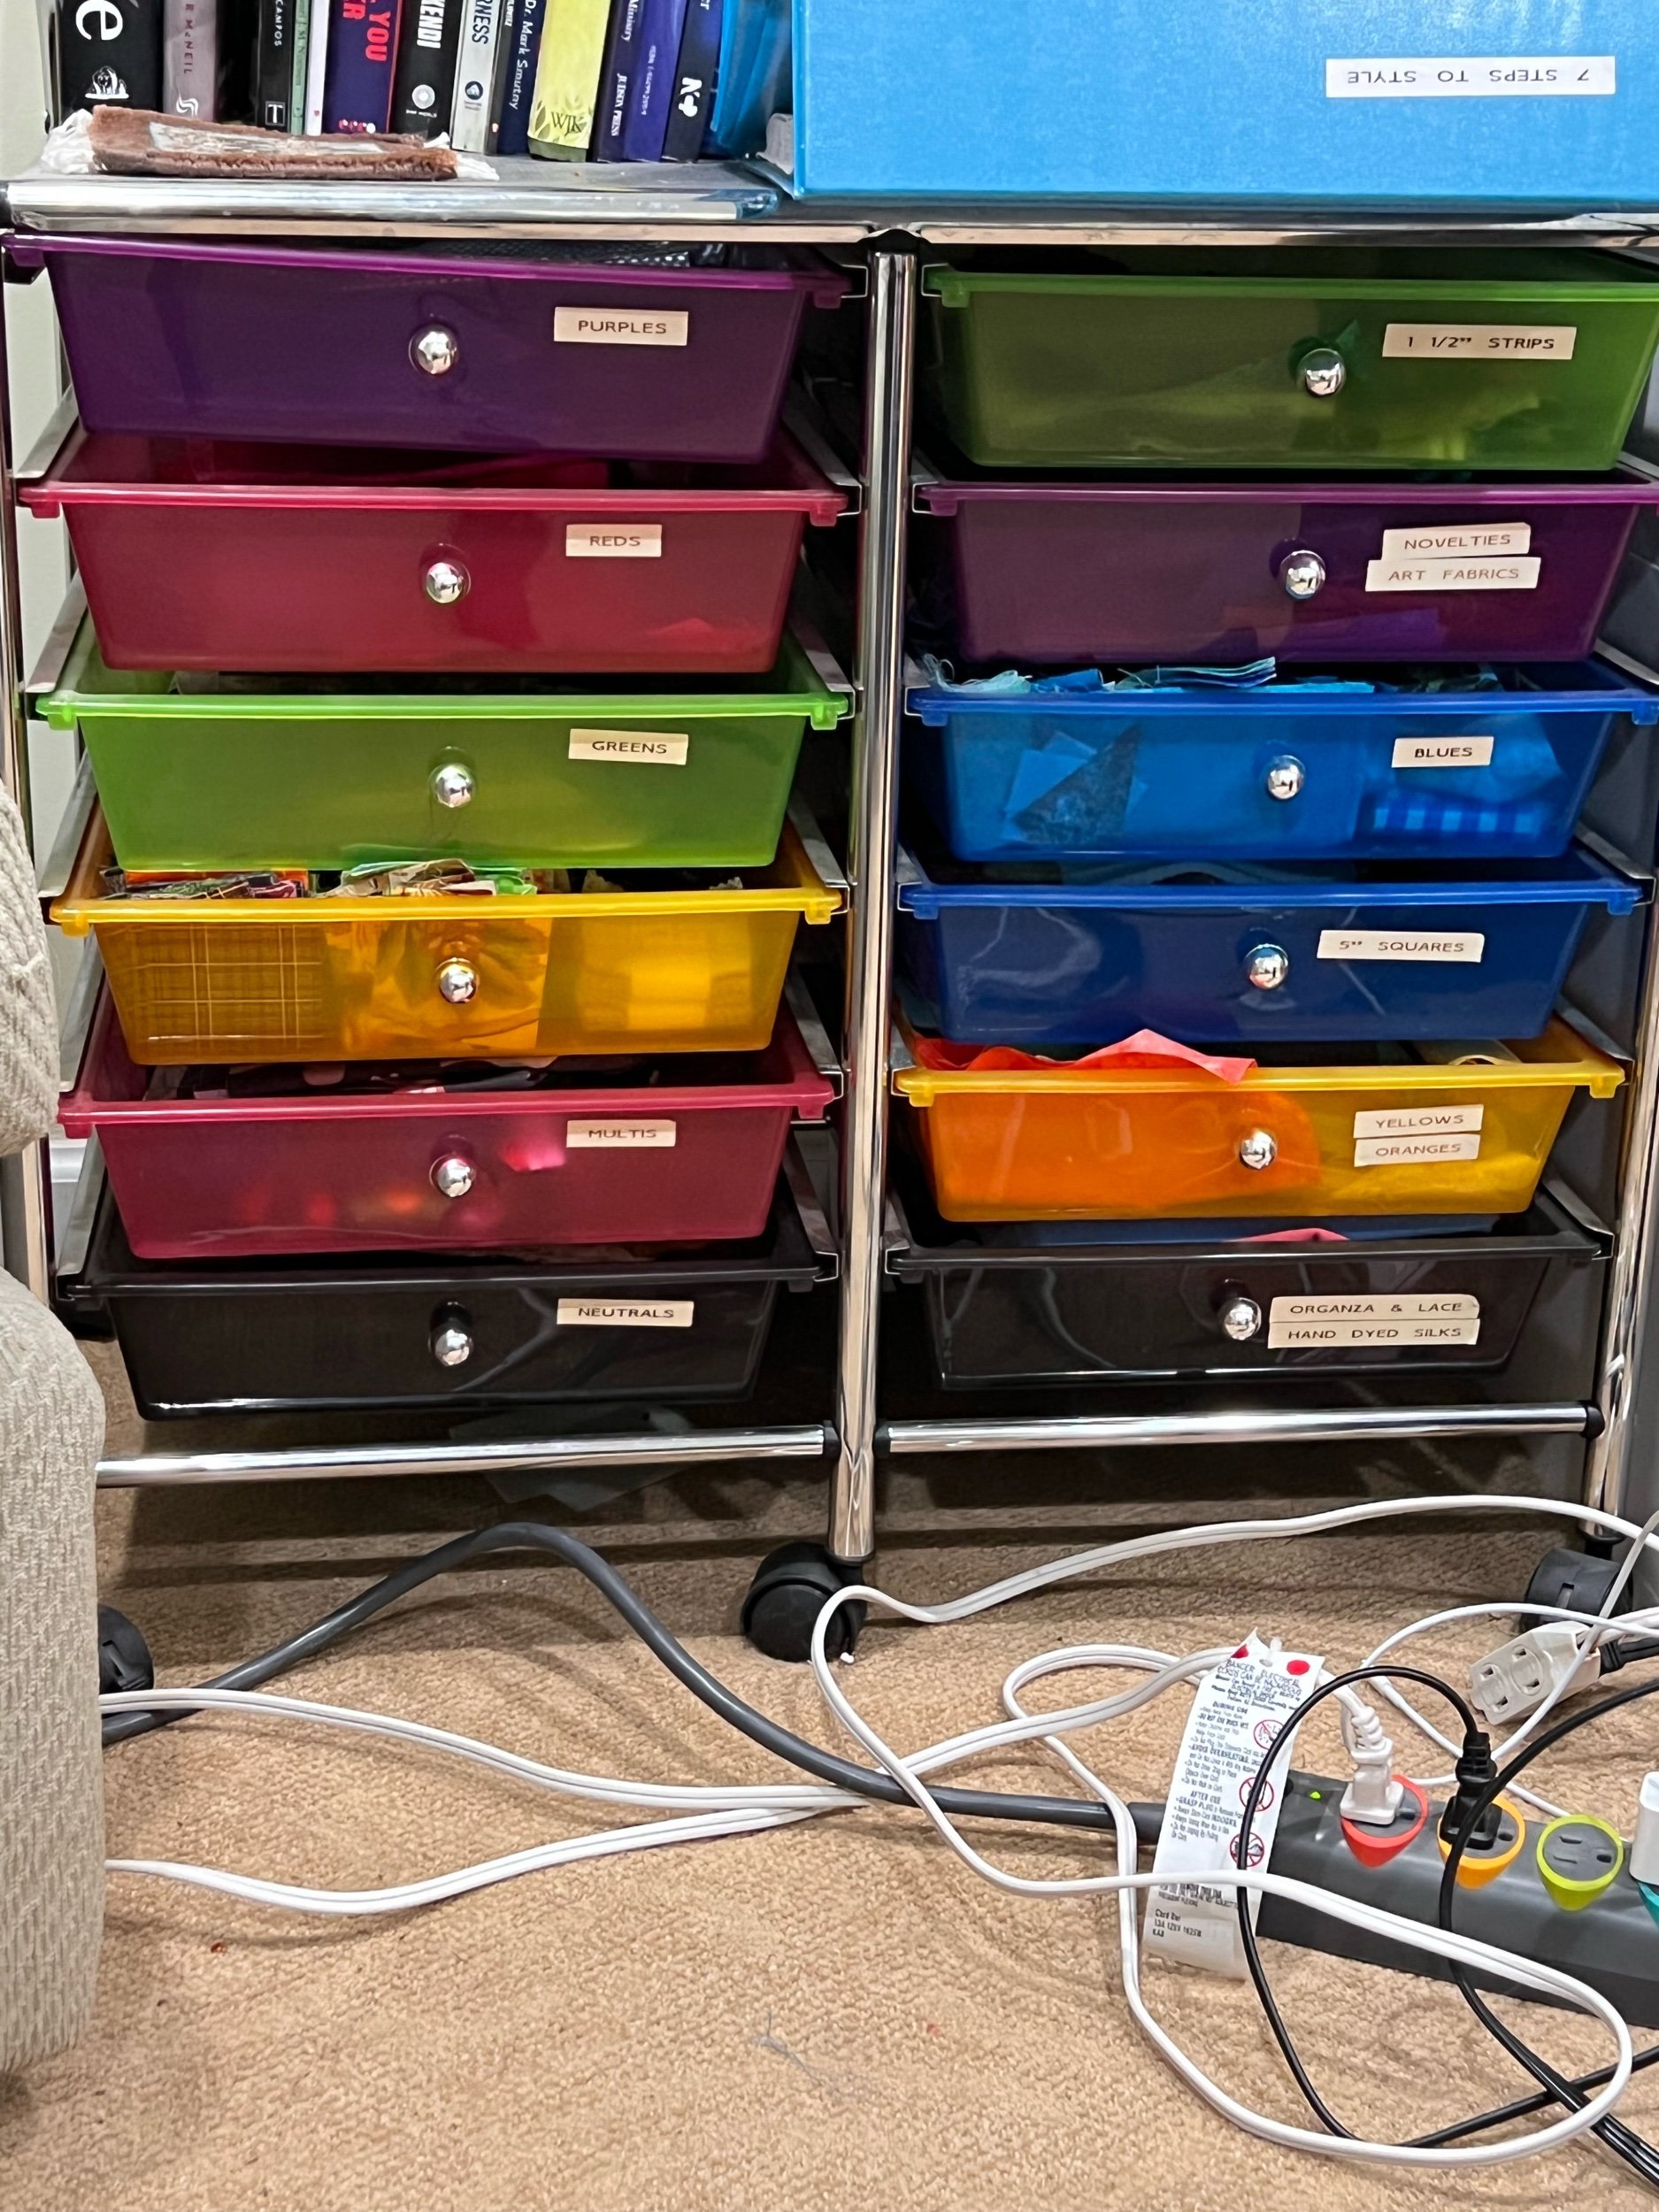
  1. In the gallery below you’ll see a photo of my current scrap storage solution—a nice set of shelves on wheels in which I’ve got my scraps mostly sorted by color (uncut) and then by cut size when I trim them down. Seemed like a great idea at the time. But it drives me nuts every time I go to use it. The drawers just really aren’t big enough, and I think I’d rather sort everything by size and get all the random pieces cut down to usable sizes to begin with. (Yay, Accuquilt!) That means in the long run I’ll need fewer but larger containers. So that drawer unit? It’s got to go. As an “oh yeah, and…” item, I have another variation on this drawer unit that I use to hold all sorts of embellishment laces, specialty yarns, and such when I was art quilting. I have to go through it to see if I’ll actually use any of it. If not, I may vote that unit off the island as well. I’m a little more hesitant on that one at the moment and it’s not really in the way, so it’s not high priority.

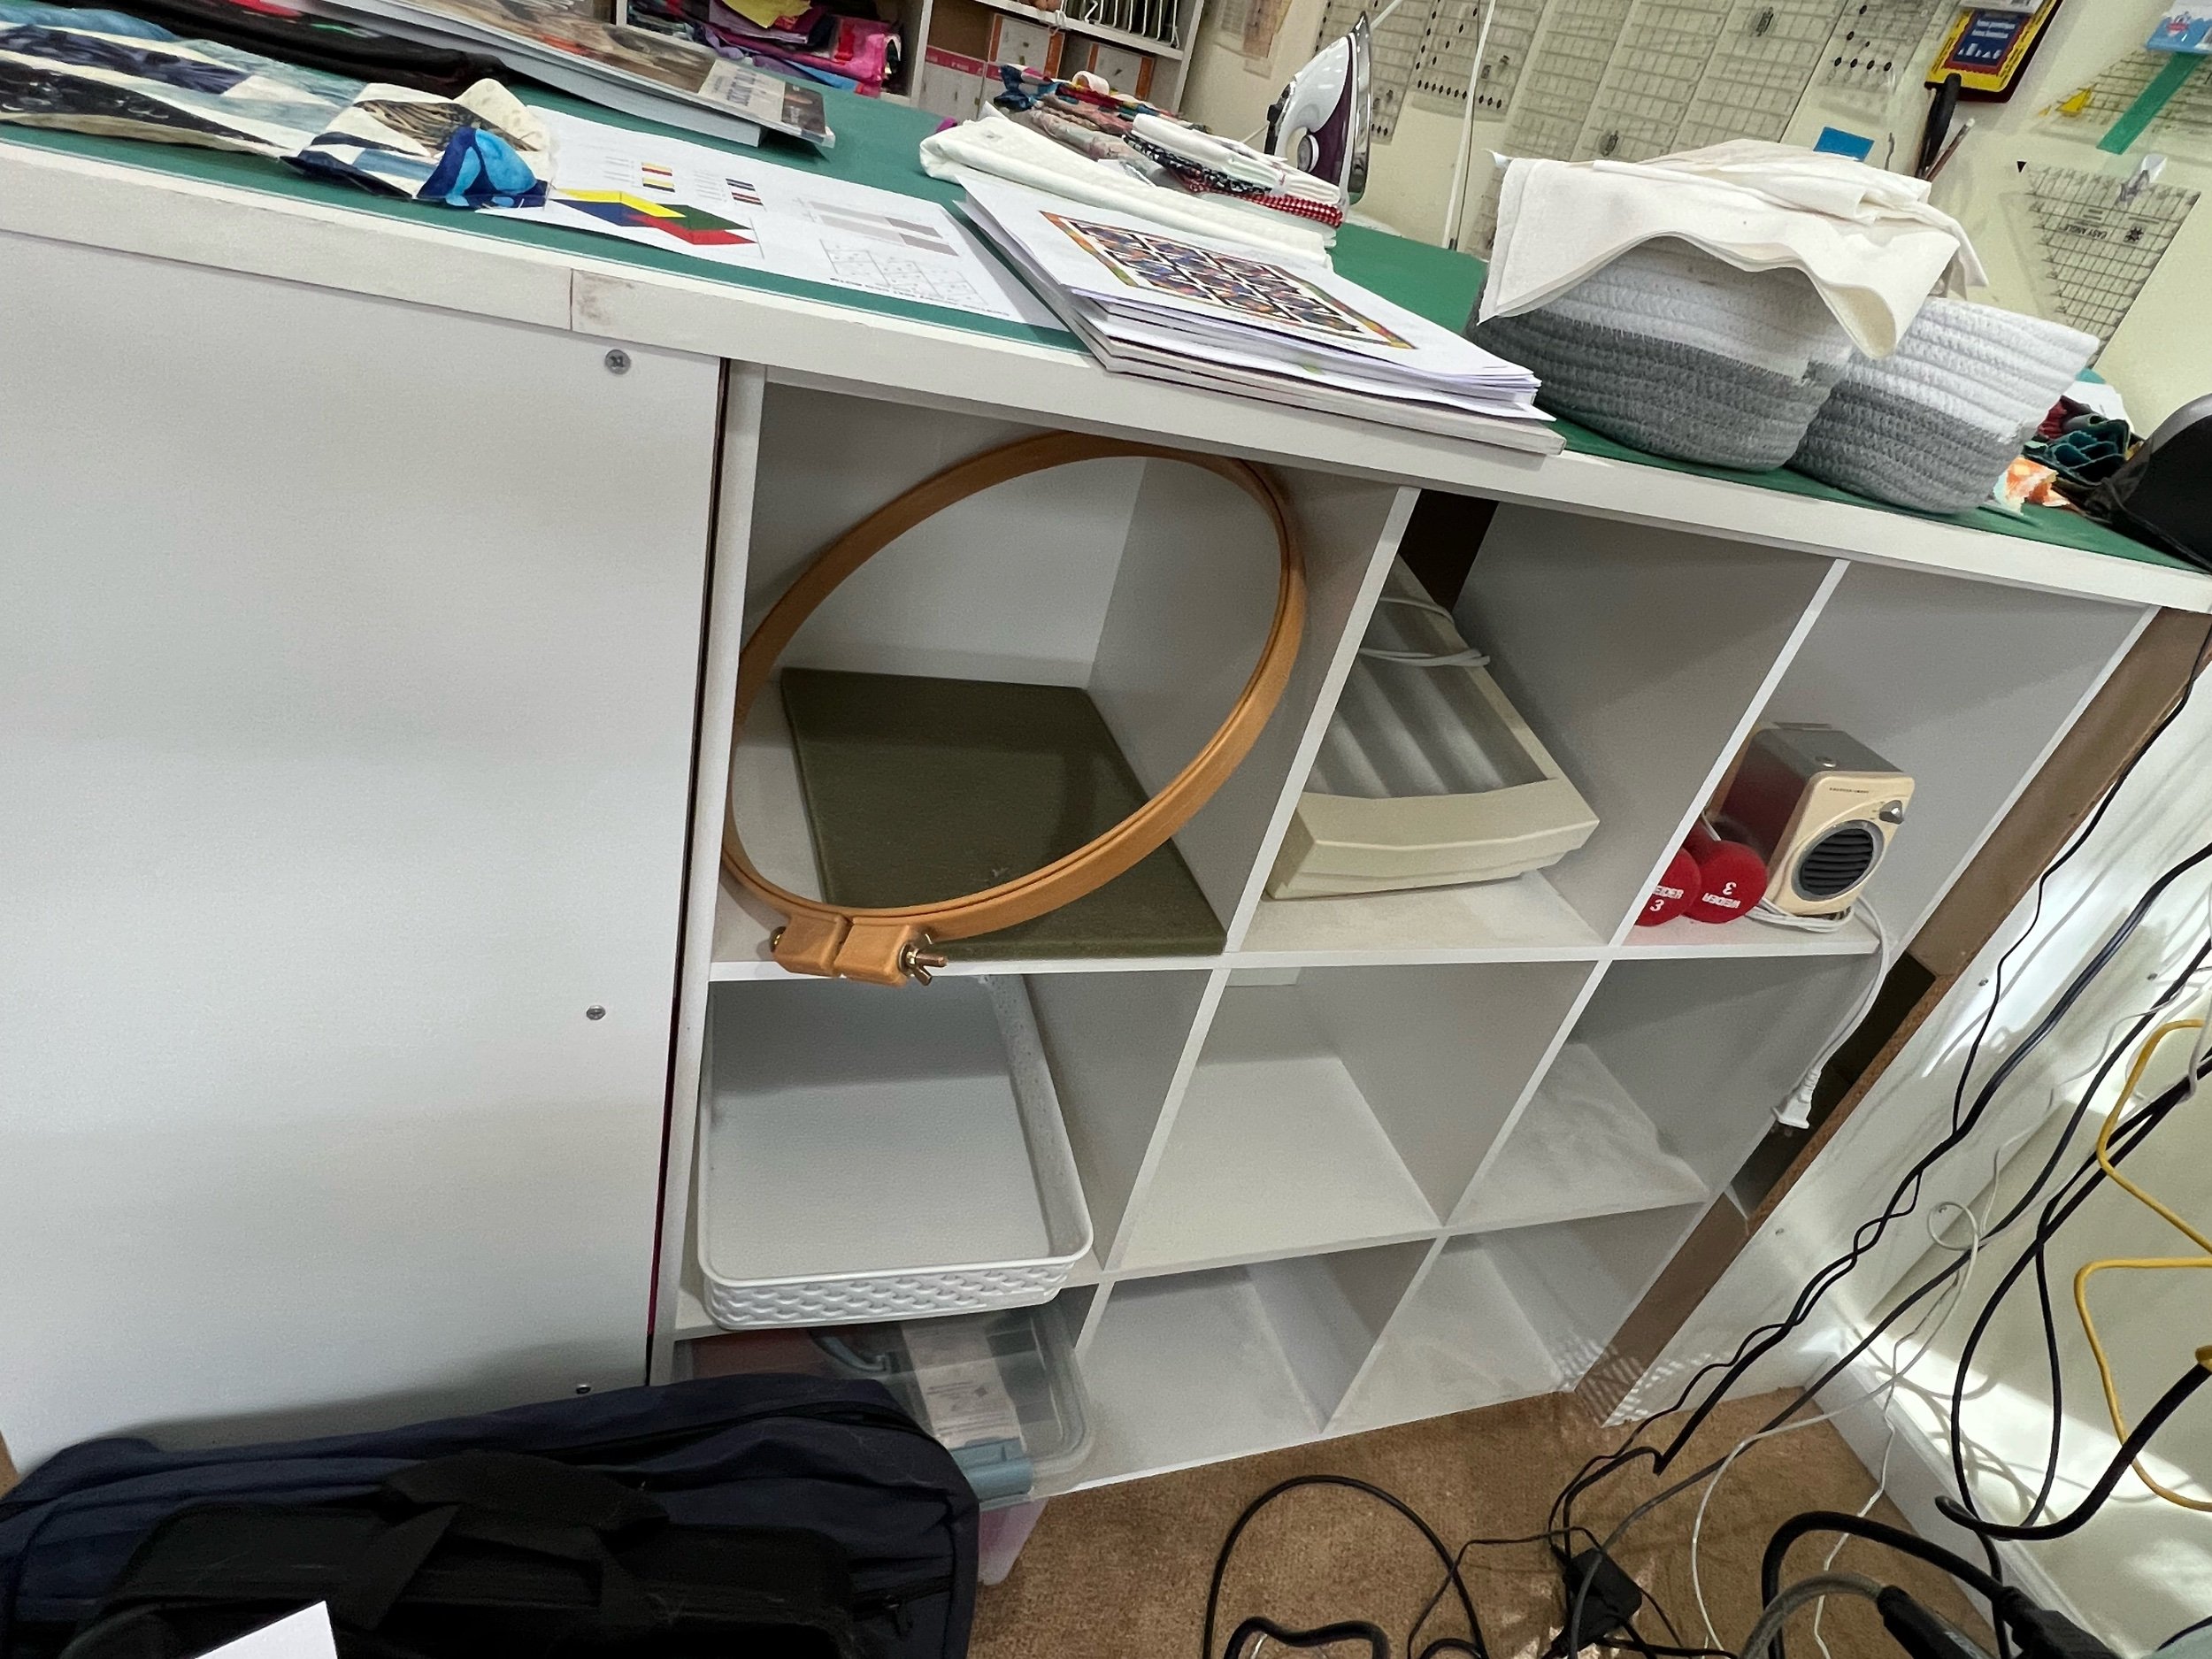
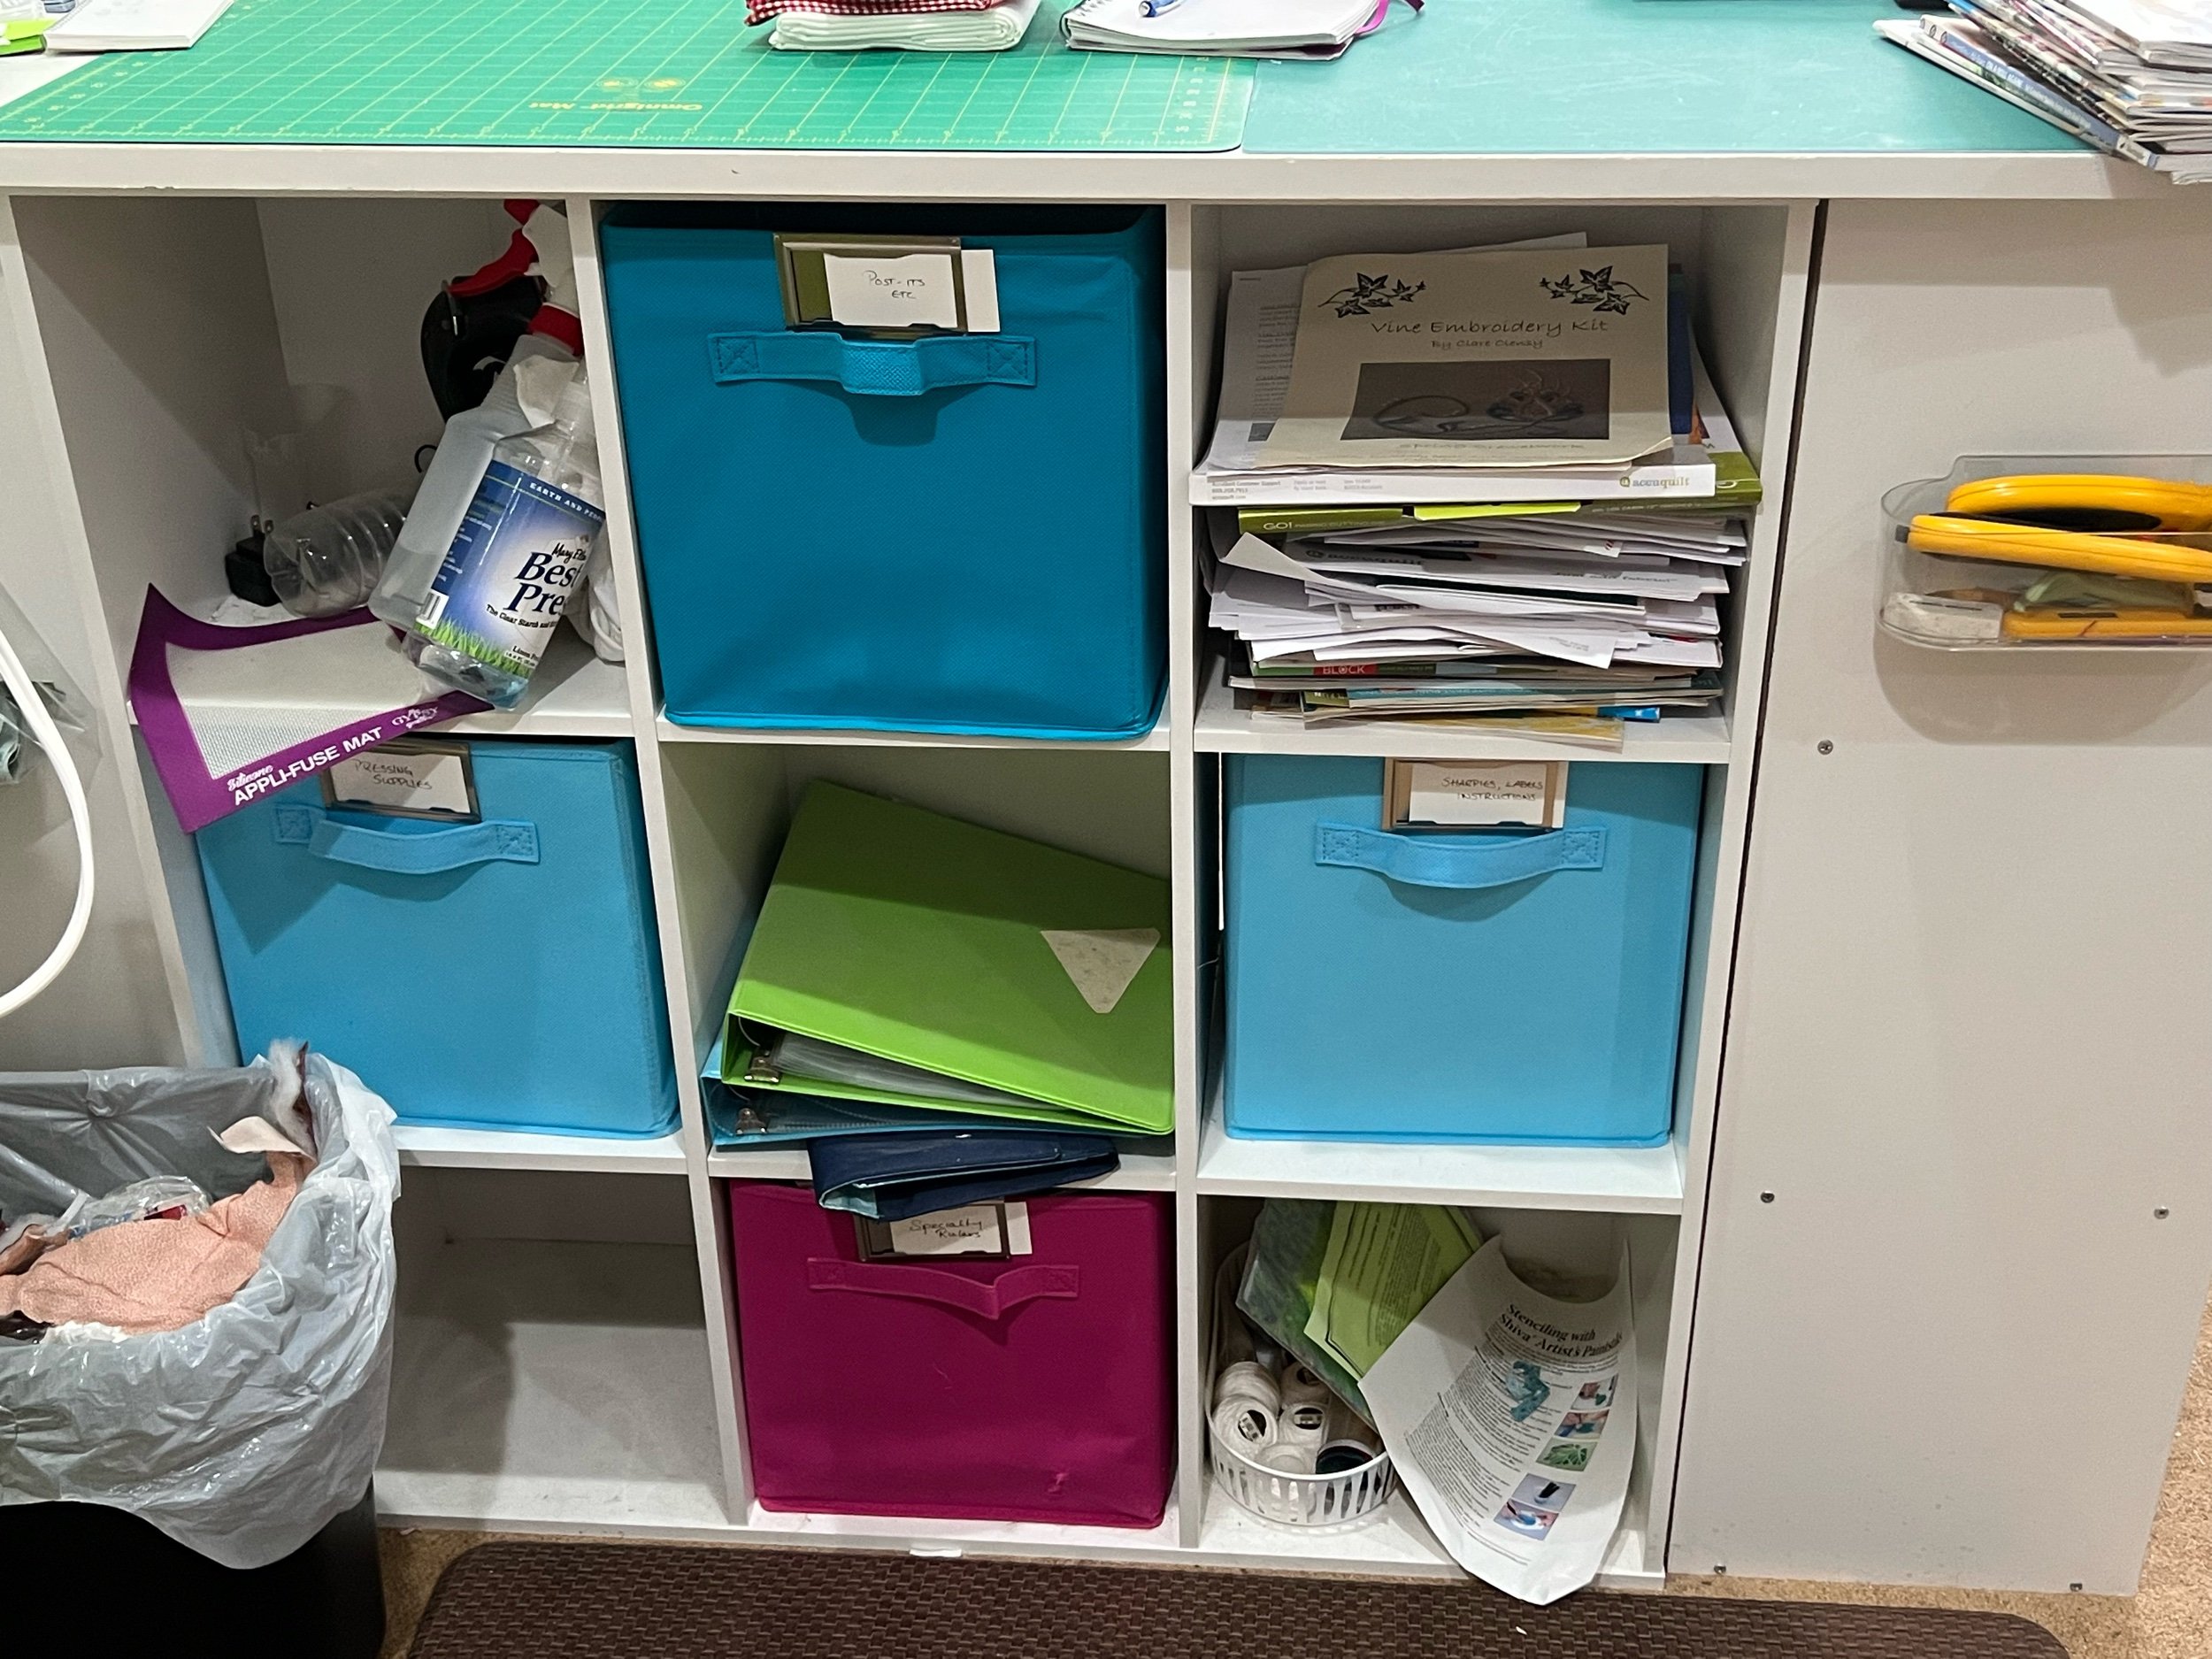
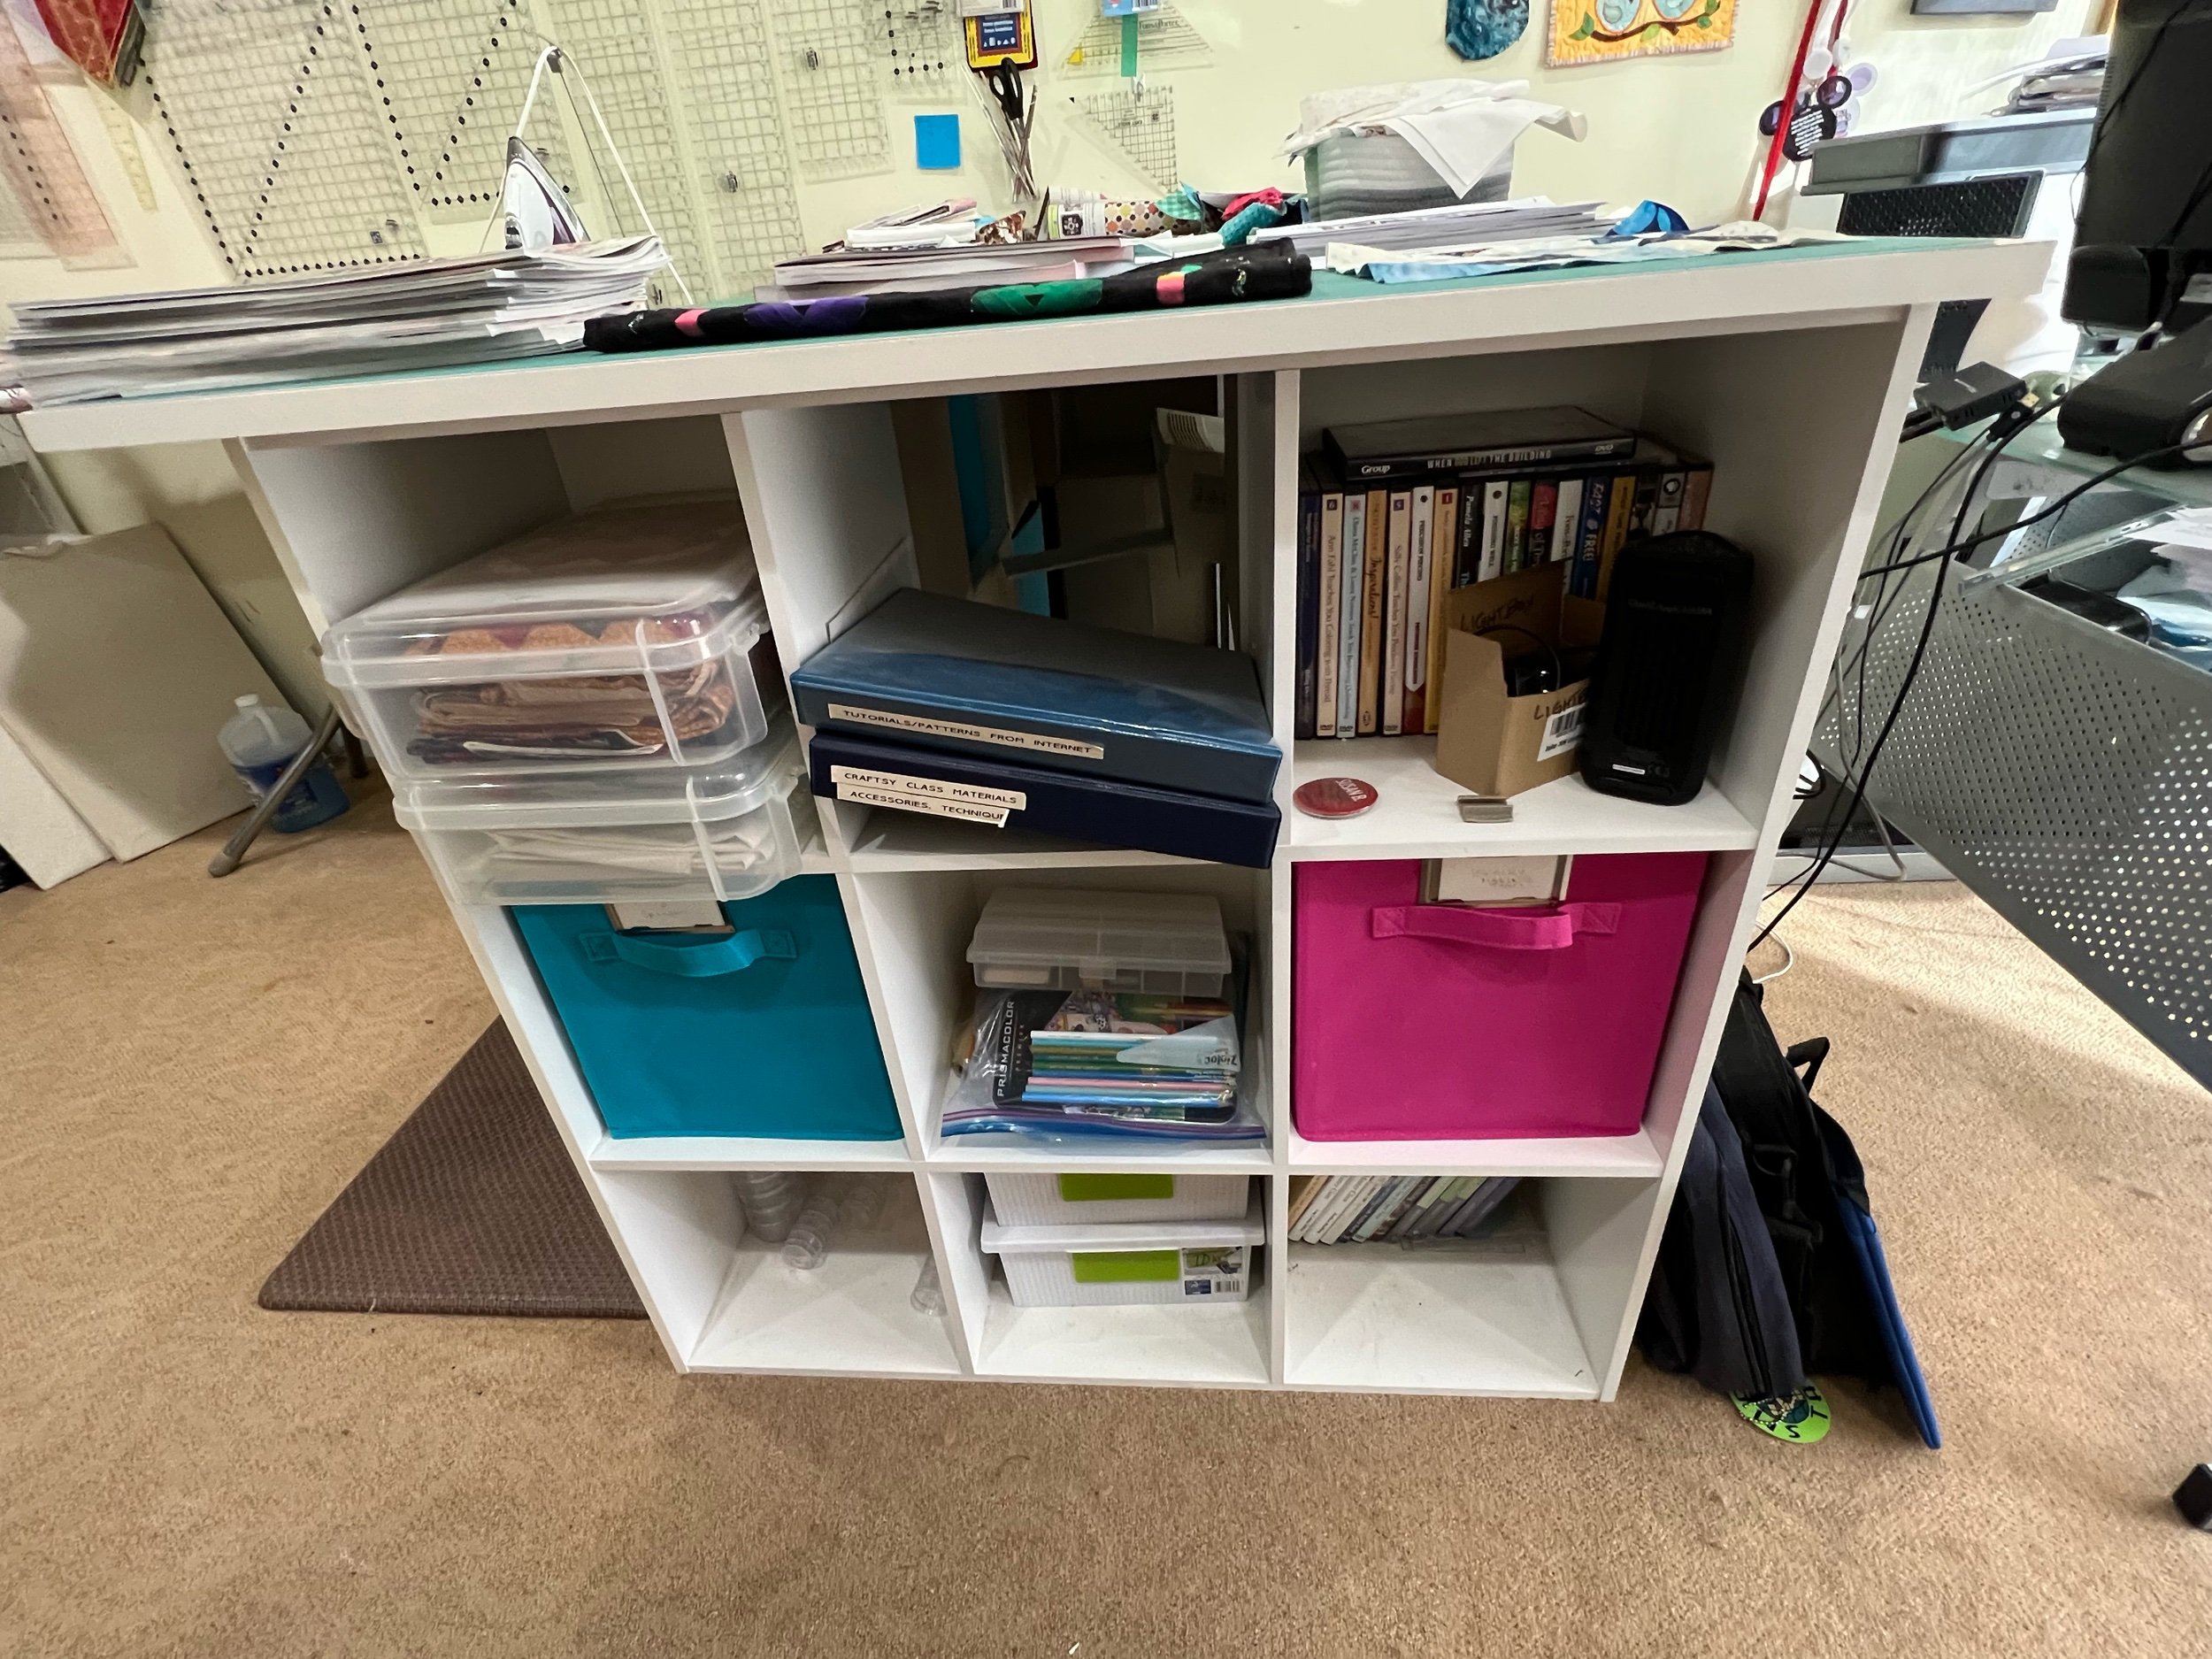
  2. Meanwhile you’ll see that the storage cubbies on my cutting table are being woefully under-utilized. My plan is to get those cleaned out and then either use the cubbies for project bins of ongoing projects and UFOs, or for bins of scraps. Also, the pull out fabric containers that came with the storage shelves are cute but useless. I’m visual—I need to see what’s inside a bin. Otherwise they become what these are—random dumps of stuff that I don’t know where else to store and, well, out of sight out of mind. Several of them are pretty much empty but as I like categories, once I throw a couple of things that seem to go together into a bin I don’t want to put anything else in there. Hence, I’d far rather have clear plastic bins that I can label but will also show me at a glance what’s in it.

  3. Also, when the office stuff is purged, I’ll have more room on the one set of shelves that’s still half-office and half-quilting. I may use that for my scrap storage instead. It all depends on how much space I can get cleared off.

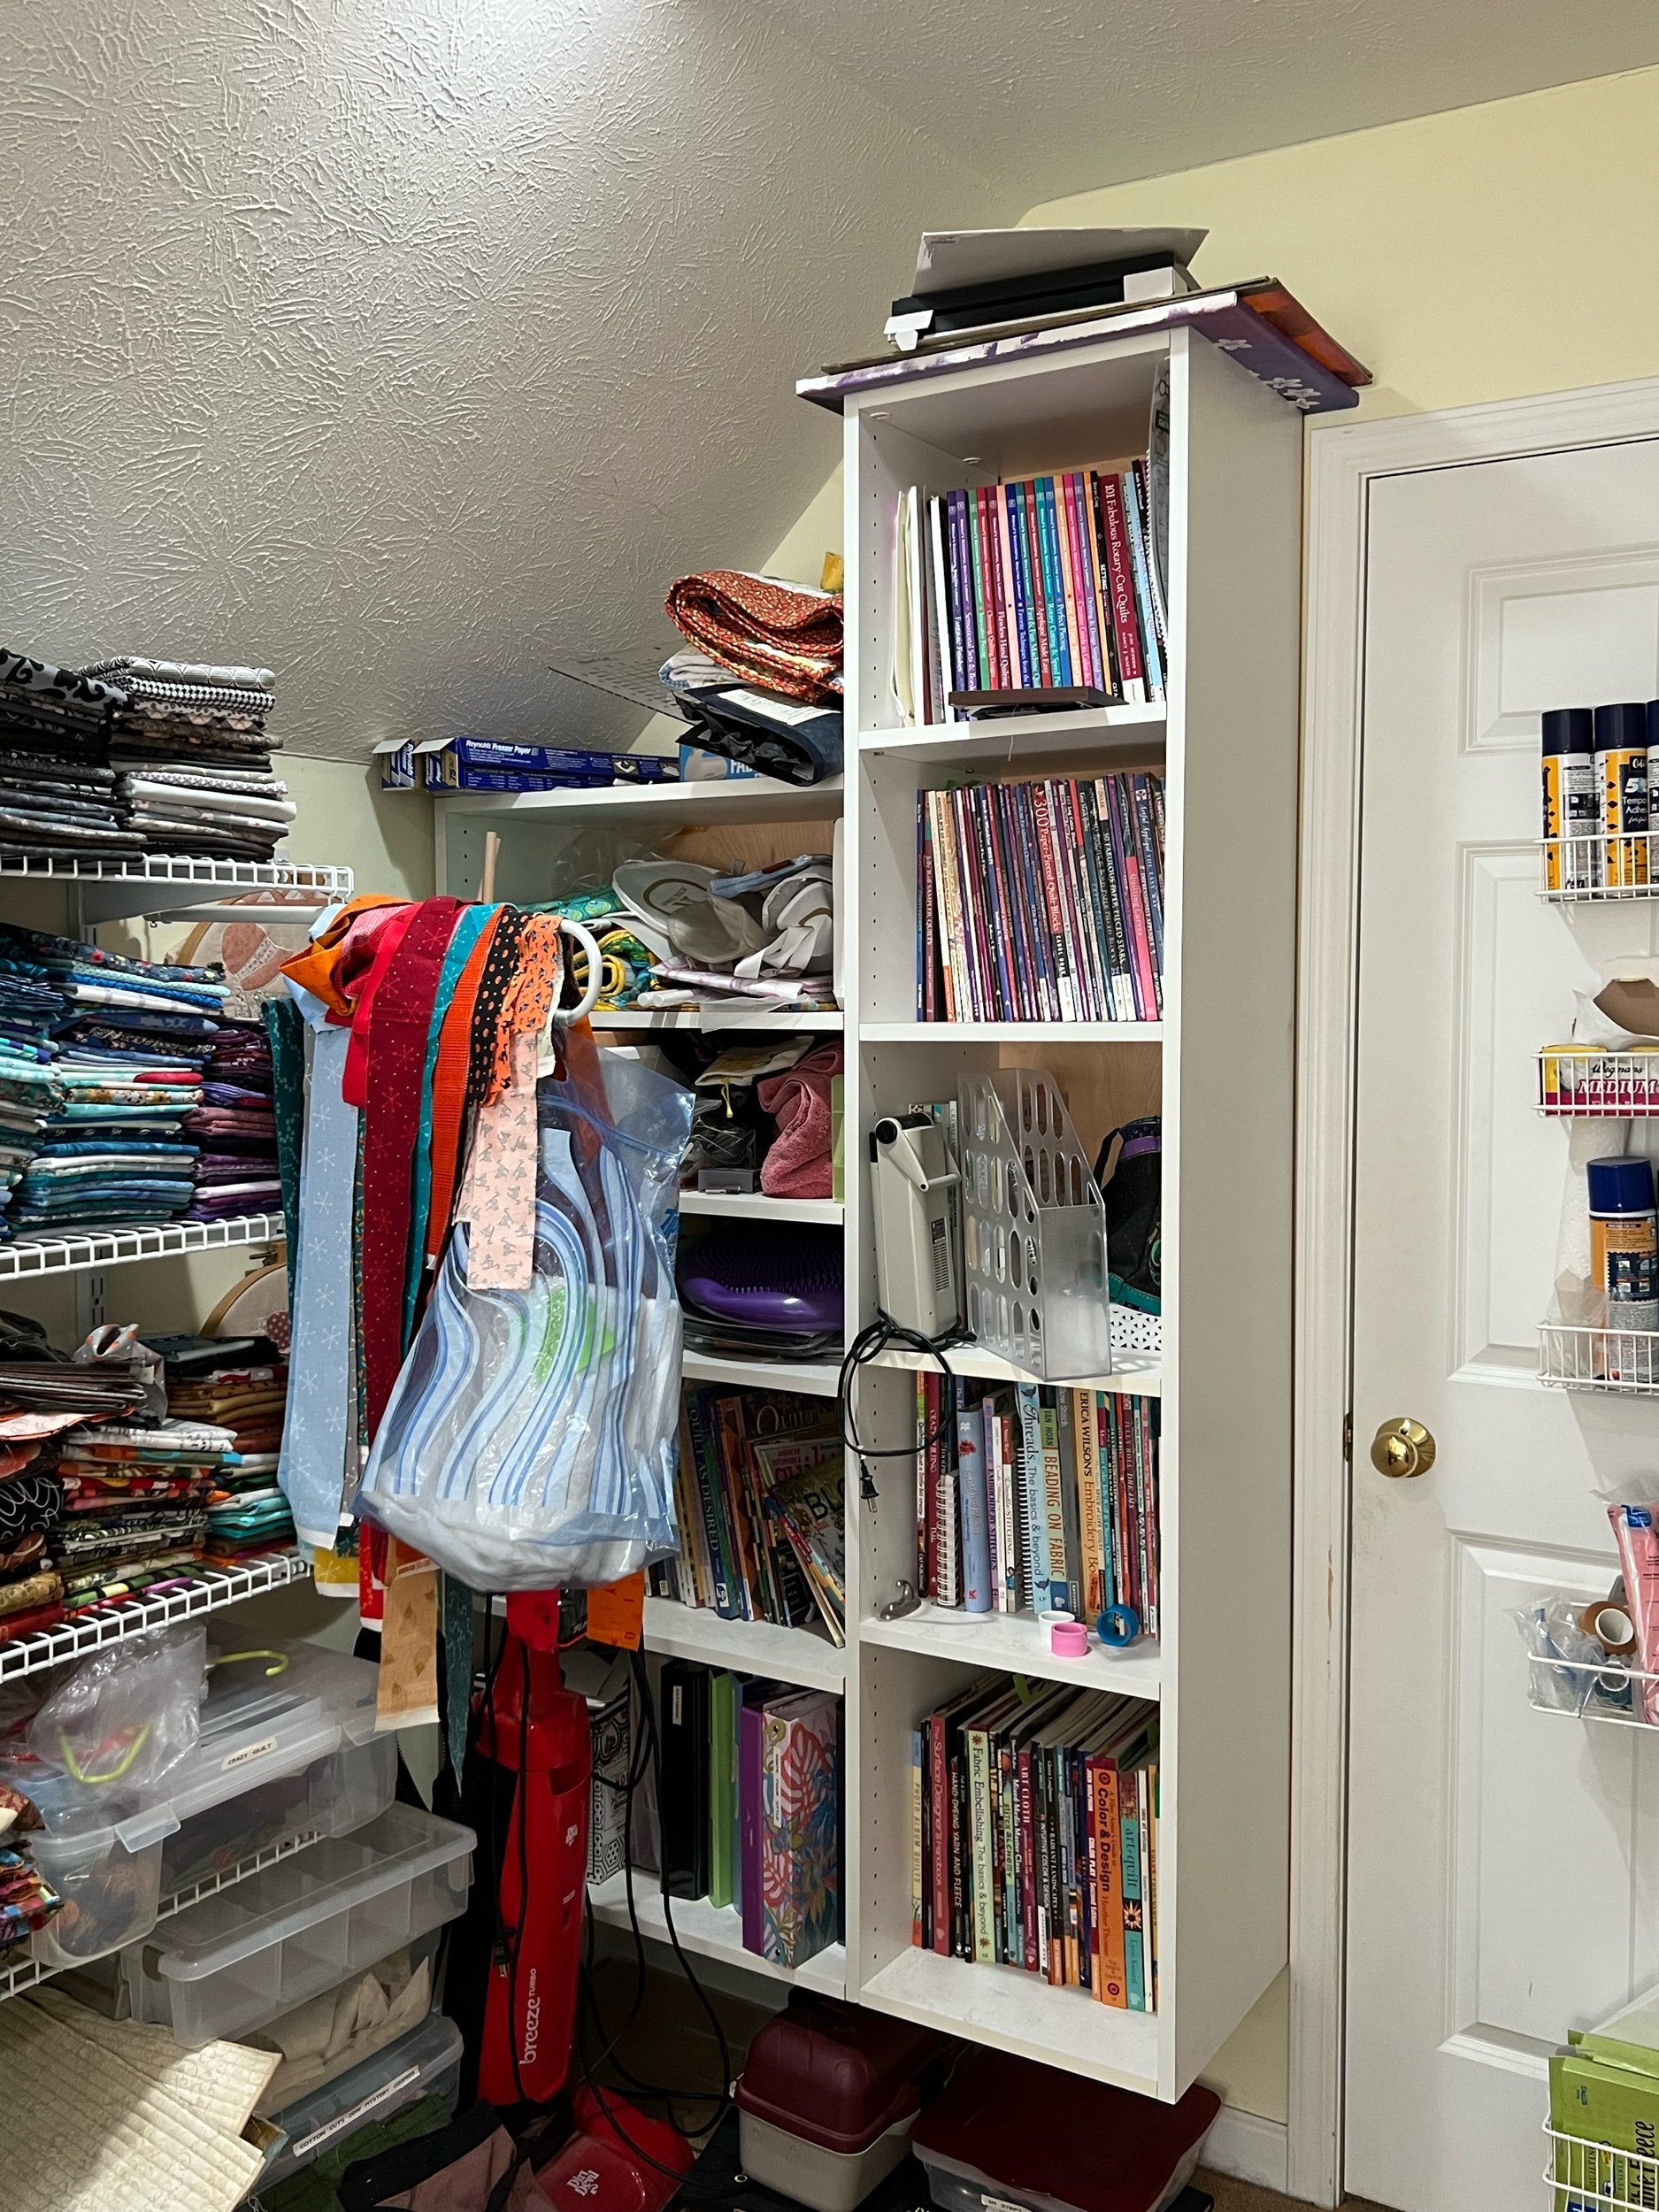
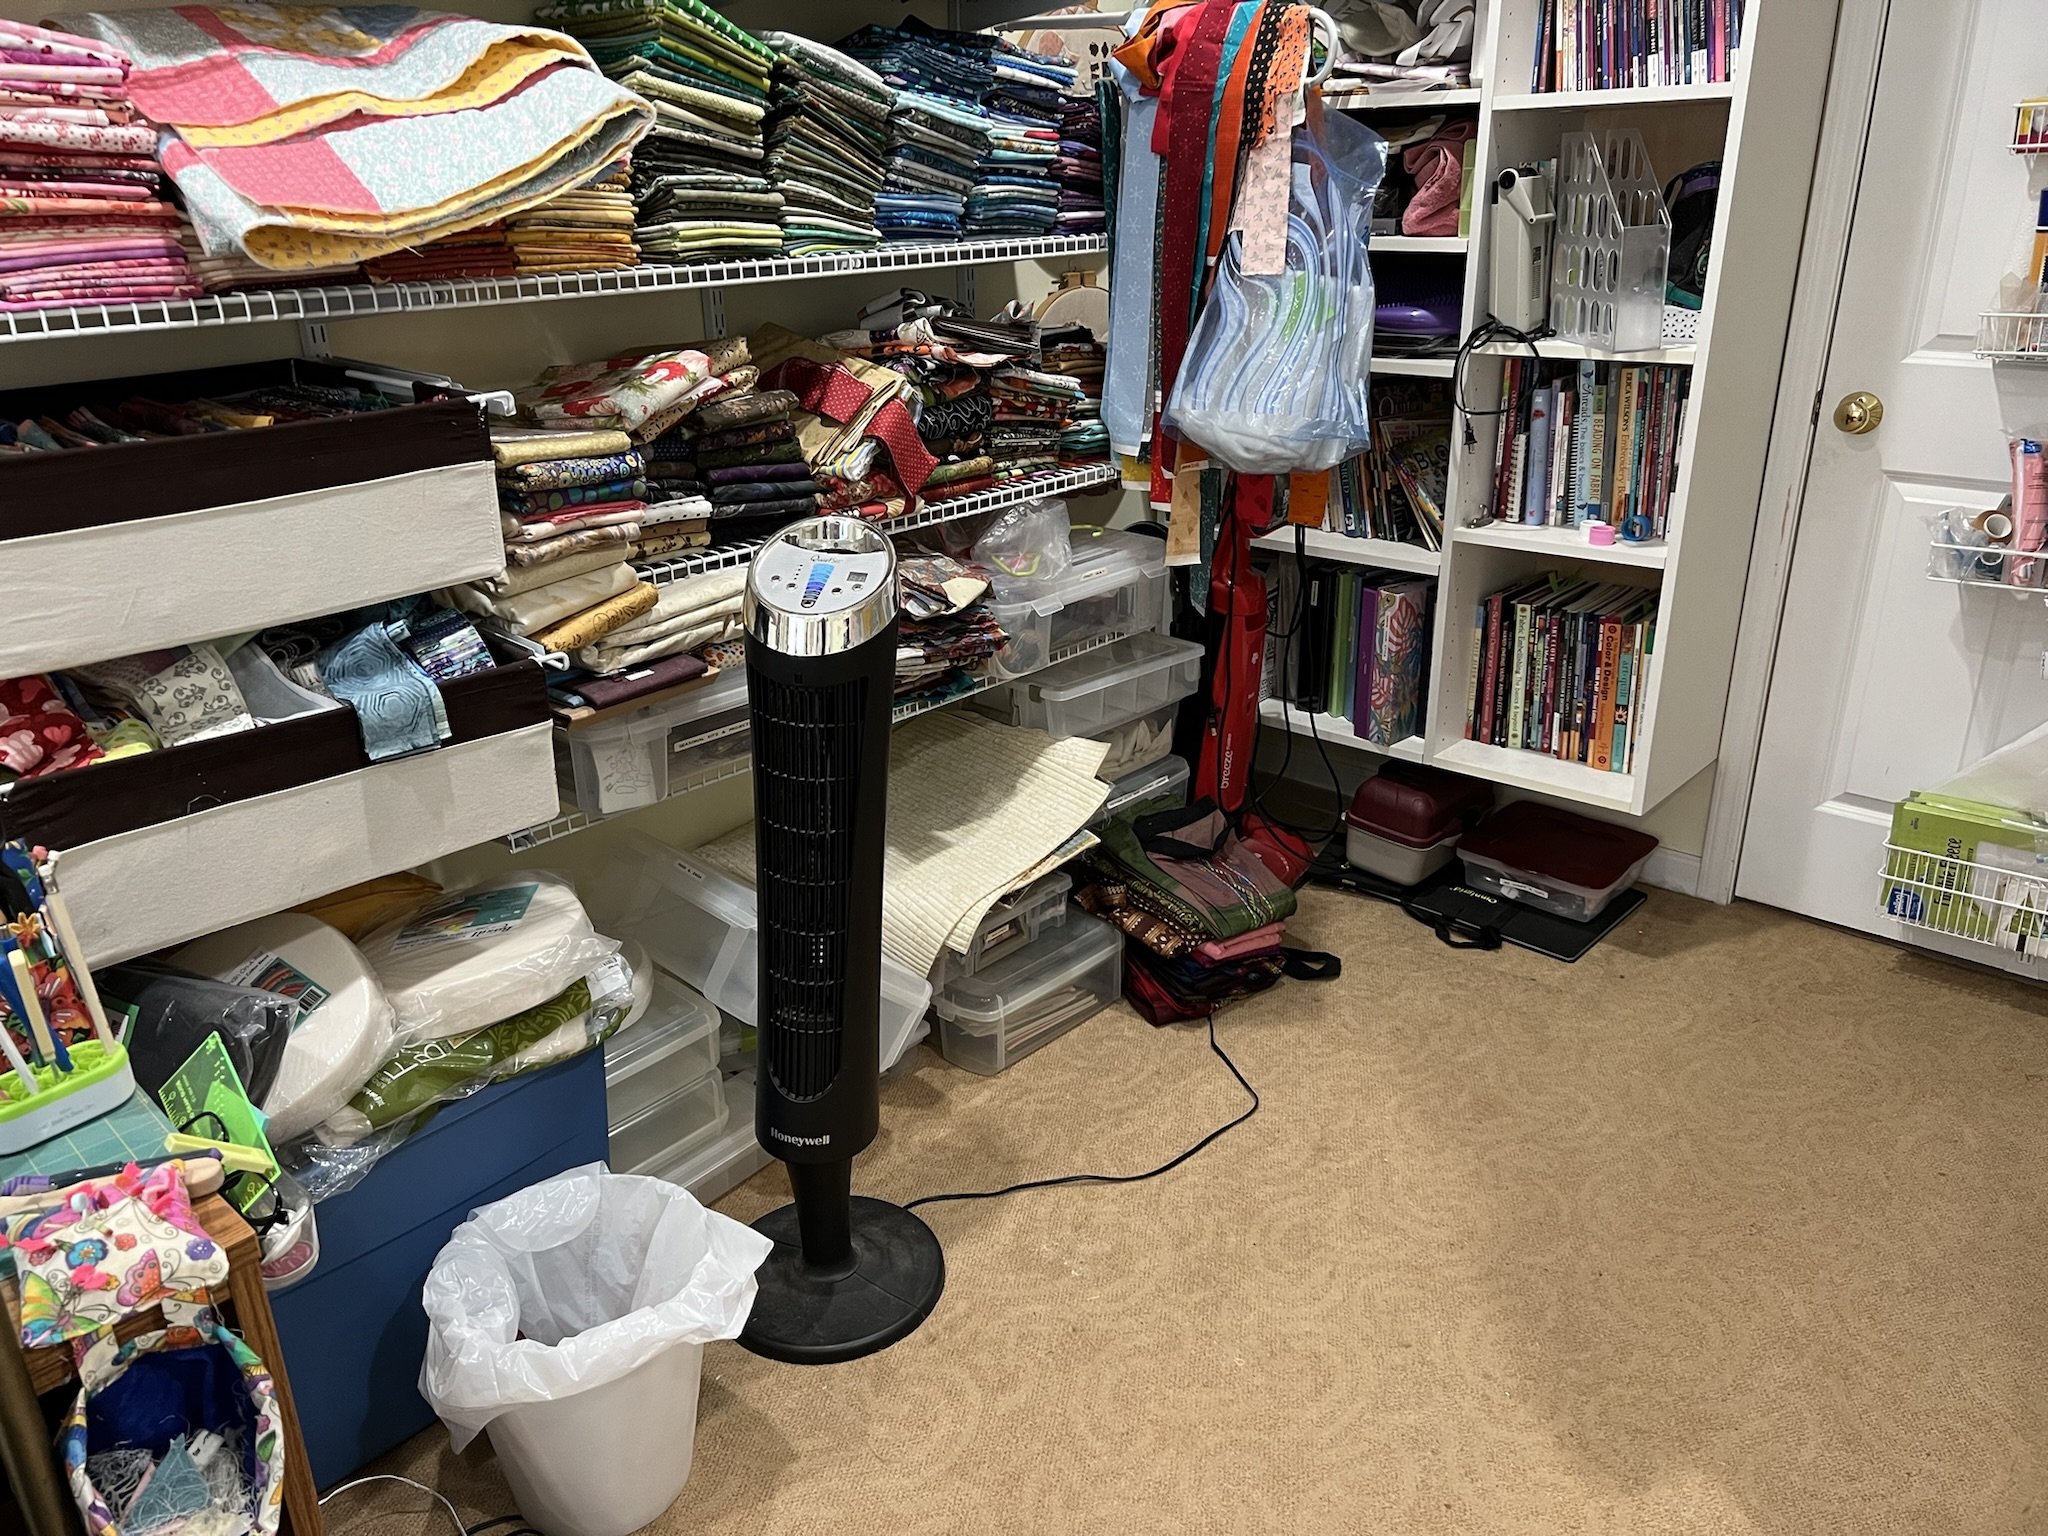
  4. The other two photos are my shelves of quilt books that needs another culling of the herd, and then my fabric stash which just needs to be cleaned up once I get some of the project bins and other space-hogs off the shelves. I’ve got two bags hanging from my strip hanger (tie rack) at the moment that will be leaving in the next couple so that corner will look much better than it does in the pic.

  5. As another goal that I actually think will happen naturally once all this gets worked out, I have several quilt-tool-travel-bags that I inherited from my Mom that I hate to get rid of. I know what those things cost and they’re still in good condition. The problem is that they sat piled in her basement for years when she stopped being able to travel to classes and retreats, so they need a really good cleaning. I just haven’t ever taken the time to do that, so they’ve now spent 10 years stashed on the floor under one of my shelves. I want to get them cleaned up and then placed somewhere that will make them easy to grab when I’m packing for a retreat.

And yes, you’re seeing tangles of cords in a couple of places. That’s another thing that will magically get better once I get some of this other stuff taken care of. Baby steps.

So them’s my goals. Here’s to being able to get some stuff done!

Use the link in the top paragraph to join up with Karen’s decluttering challenge yourself! Leave comments here about your own clutter-magnet spaces or your scrap organizational system.

Weekend Check-in Number One: Mostly Prep-work

I got my new Accuquilt Mask dies this week so I was anxious to make up some masks to see how well they worked.

82B24FE7-A7A9-4607-9B5F-6EAC34BB08FC.jpg

Learn from me: Do NOT use the instructions that come packaged with the die. Lots of important steps left out.

I ended up with this mess—exposed seams, fabrics every which-way, some sort of something going on with the elastic as it didn’t explain that well at all and I finally ended up shoving the ends of the elastic in and nailing them down the way I had been doing in the other masks but this one had all sorts of seams coming together and it was a heck of a lump…. ahem. I kept looking at the instructions thinking I must have misread something but I’d followed those dang instructions exactly. Poor quality control.

Had I watched the Accuquilt video first, or used the downloadable directions from the website, I’d have been at least somewhat better off as they both had correct instructions for the cutting and sewing. Mostly.

The downloadable instructions tell you to use a different seam allowance than the video I was watching (which was from a quilt shop) because the Accuquilt tutorial video also leaves out a key step: how to attach the ties or elastic.

C’mon, Accuquilt. Get your act together.

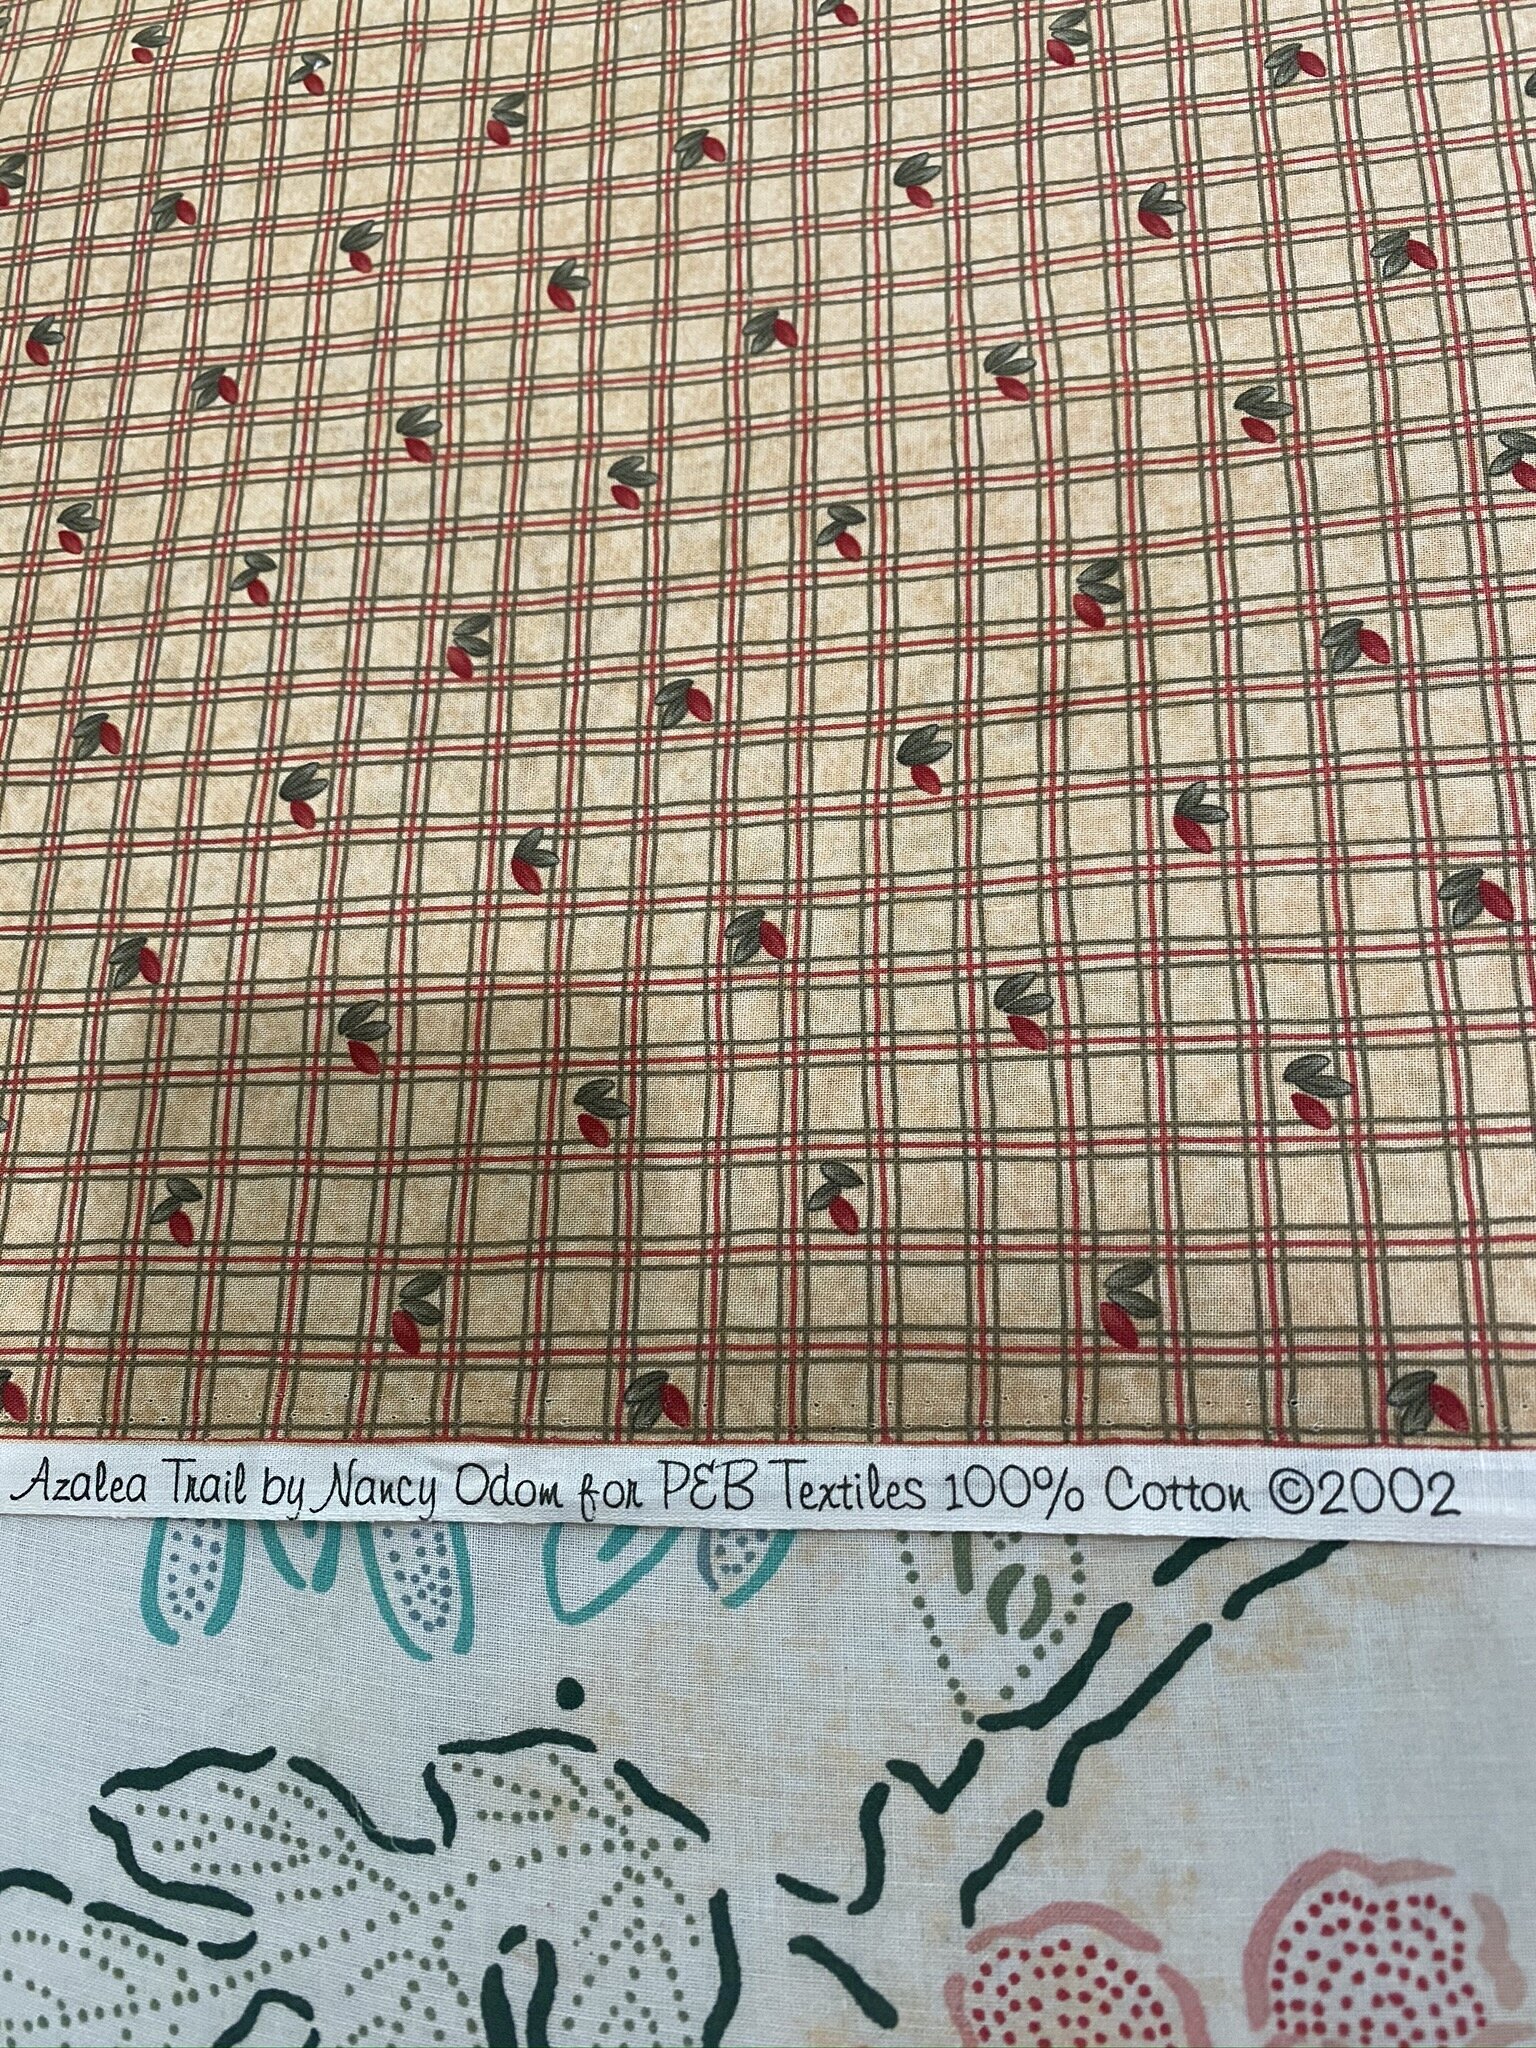
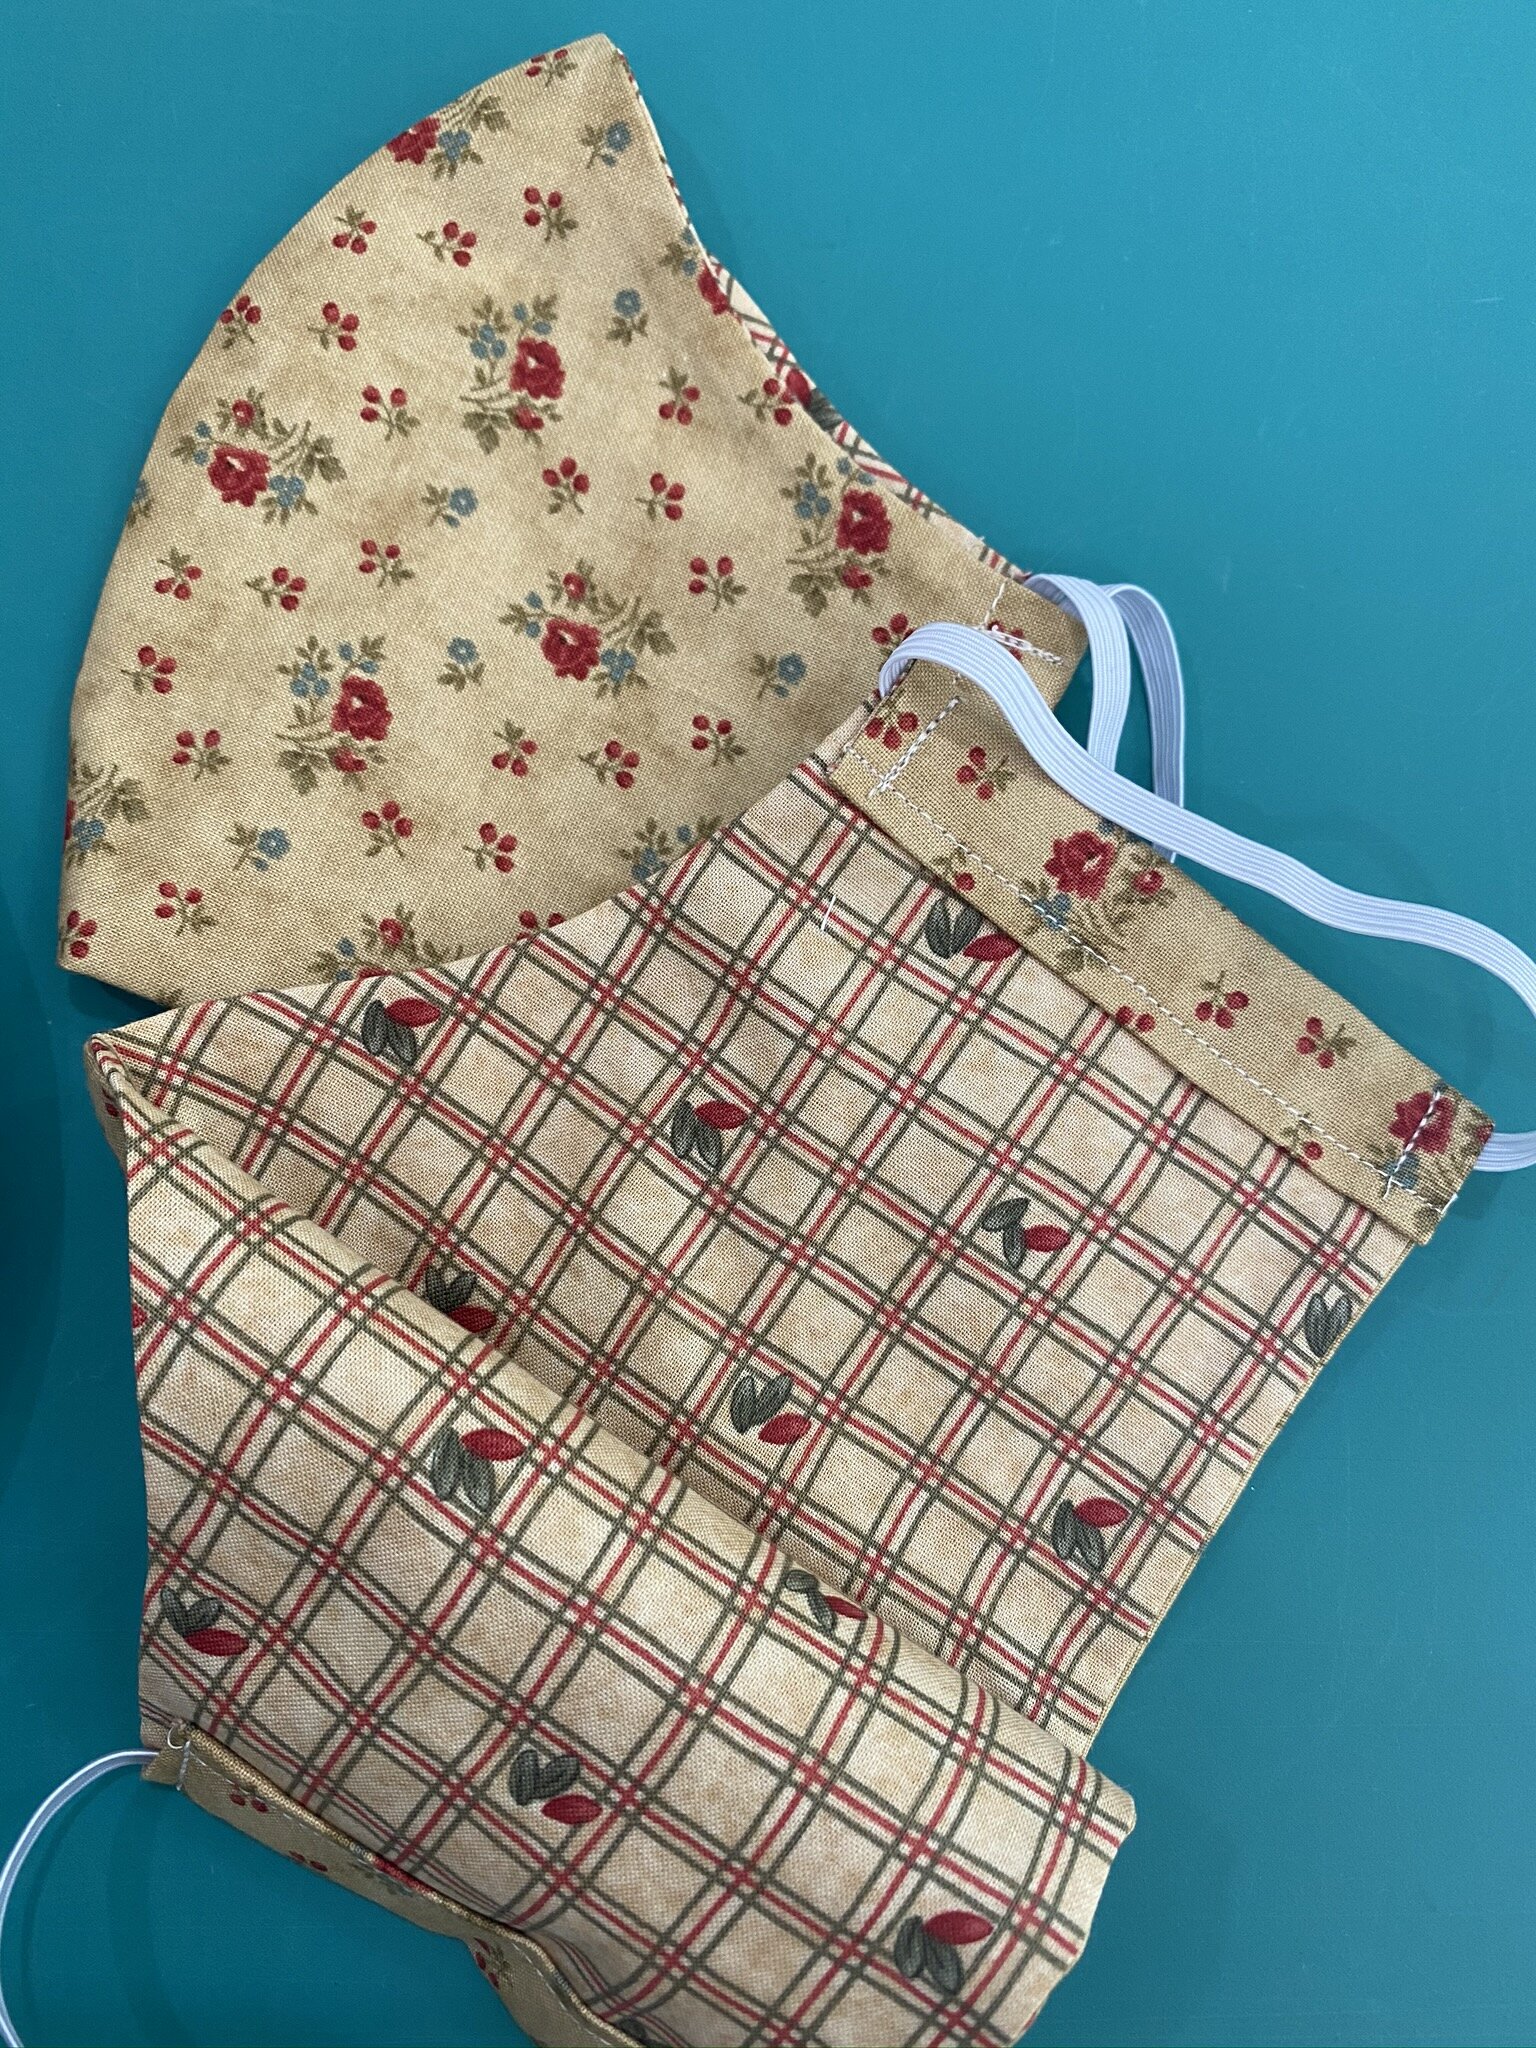
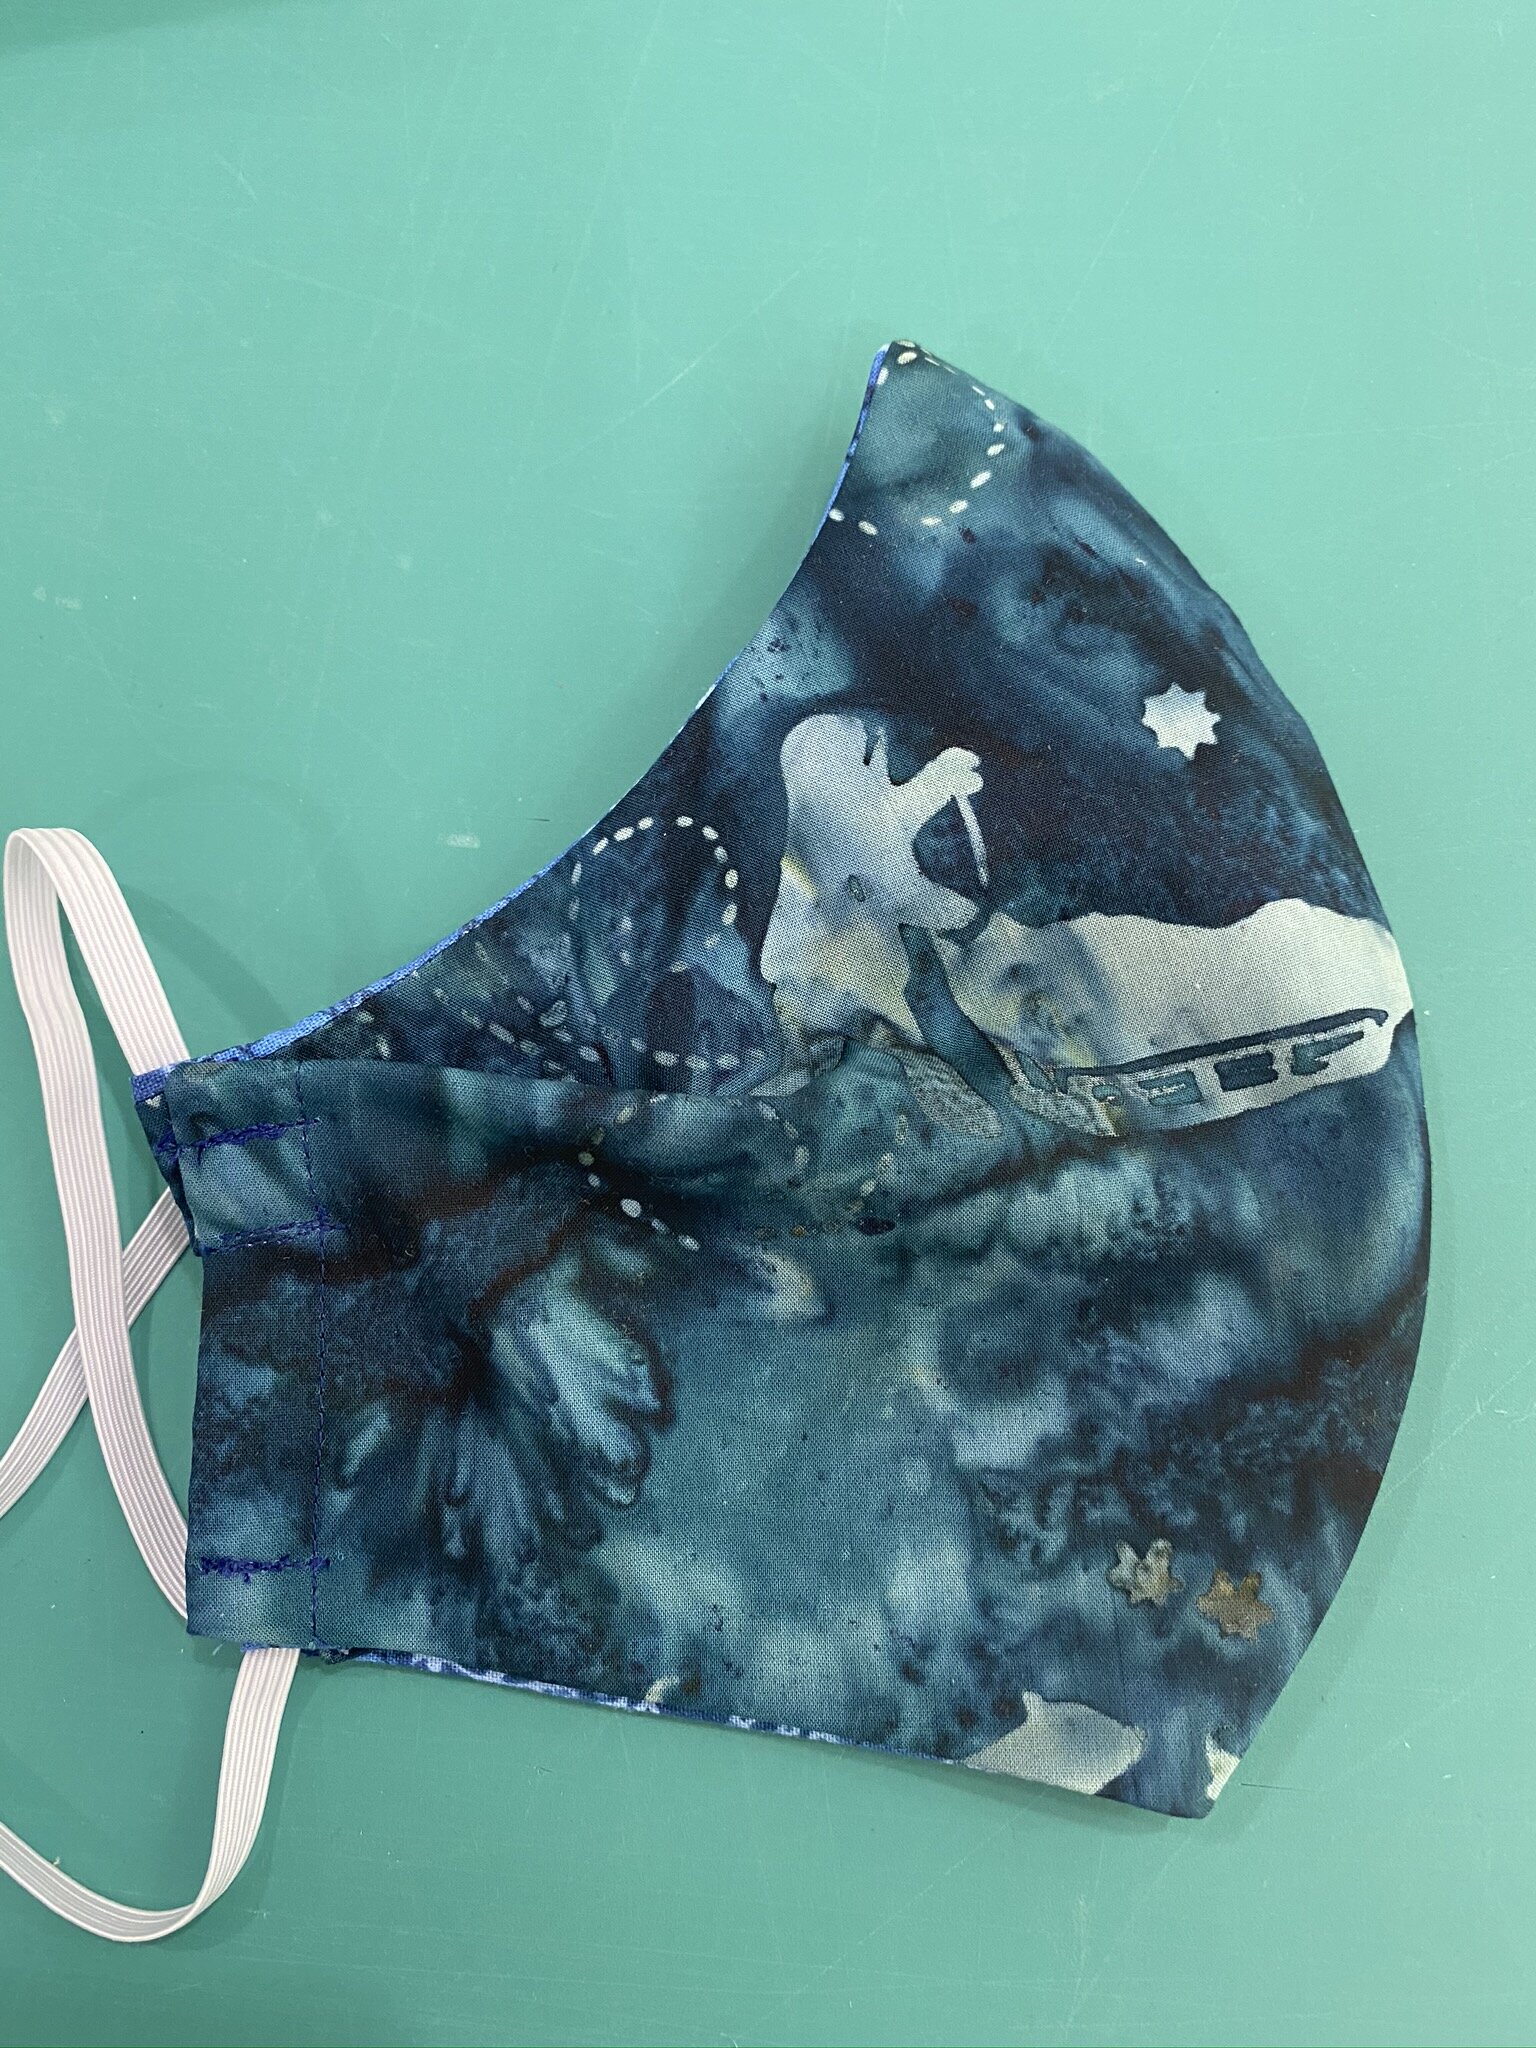
Anyway, between the downloaded directions, the quilt shop’s video, and what I’d already figured out how to do by making other mask patterns, I finally got some made. The first photo shows you just how old some of these fat quarters are that I’m using up to make masks—2002? Yikes. My Thimbleberries Era. They make very pretty masks, even if they’re not really my jam anymore. The blue mask is one I made for my husband. The outer fabric is a batik he brought me back from a work trip he took to Alaska—the lining is another really old fat quarter I was glad to use (and it’s cotton, which is far more comfortable against the face than batik is). He didn’t like the way his bulged out at the sides so I took in a quick tuck on either side. It’s not pretty but it’s wearable. I don’t mind mine bulging out—I don’t have to wear mine for as long at a time as he does.


Then I got to work making “kits” to give to a friend of mine who is making masks to sell as a fundraiser for an orphanage in her home country of Myanmar.

She’s going to use elastic so I’m not worrying about cutting the ties. This is the perfect partnership as I don’t mind doing the cutting and donating lots of fabric to the cause, and she doesn’t mind doing the sewing.

I have 13 medium-sized sets cut right now—that represents lots of fat quarters. For the medium and large dies, I get two out of each fat quarter—haven’t done any small ones yet but I’m thinking I may be able to squeeze three. Sadly, I haven’t even made much of a dent in my fat quarter stash yet, but at least it’s no longer overflowing its drawer.

And I’ve got lots of decent-sized scraps left over that I’ll be able to cut down into usable sizes for other scrap projects.


IMG_0744.JPEG

Finally, I mentioned in the Twilters! Facebook group that I’ve registered for the Mancuso Online Quilt Festival this coming week. I’m taking Thursday and Friday and all next week as vacation, and I plan on sewing my head off!

I’m taking a class on the curved log cabin on Friday (I think—not sure which class is which day). It uses 2 1/2 yards of lights and 2 1/2 yards of darks, so I’m pulling entirely from my strip stash. 80 strips total, and I still have a ton left. However, it feels good seeing all of these finally getting used!

I’ve got a pretty wide variety in my darks but I’m hoping that helps it have a little sparkle. The yard of burgundy is the center squares, and can I tell you how glad I’ll be to use that one? It’s one I inherited from my Mom’s stash, and she passed away in 2009, and it looked like it had been on her shelf for quite awhile before I took it. That one is just crying for a home. It’s just an odd enough color that I’ve never found a project I could use it in—so this one is perfect. Cut into pretty small squares, the oddness of the color won’t stand out.

I’m trying to channel my Inner Charlotte with the randomness of the darks. I was mostly sticking to “colonial” and/or “country” tones (again, from my Thimbleberries Years and a whole lot of strip exchanges at my guild), but have a few ringers in there. I think it’ll be okay.

Now I have to start chopping all of these down into the appropriate sizes for the blocks. That’ll be tedious. Saving that for tomorrow.


Last news of the day: Doggos got into the groomer today for the first time since February. Sadly, this turned out to be the last time Princess Doggie goes. She’s going to be 16 in September and is showing her age in rapidly increasing stages. She’s deaf, almost blind, has joint issues, and this past week has started losing her balance pretty frequently. She only let the groomer give her a bath but only one toe got its toenails trimmed before she freaked out. I’ll have to see if I can get her to let me do the rest of them. Otherwise, it was clearly just too stressful for her at this point. Aug-dog, though, was in his glory, having people pay so much undivided attention to him. As the groomer said, “He has so much [pregnant pause] personality!” I’ll bet.

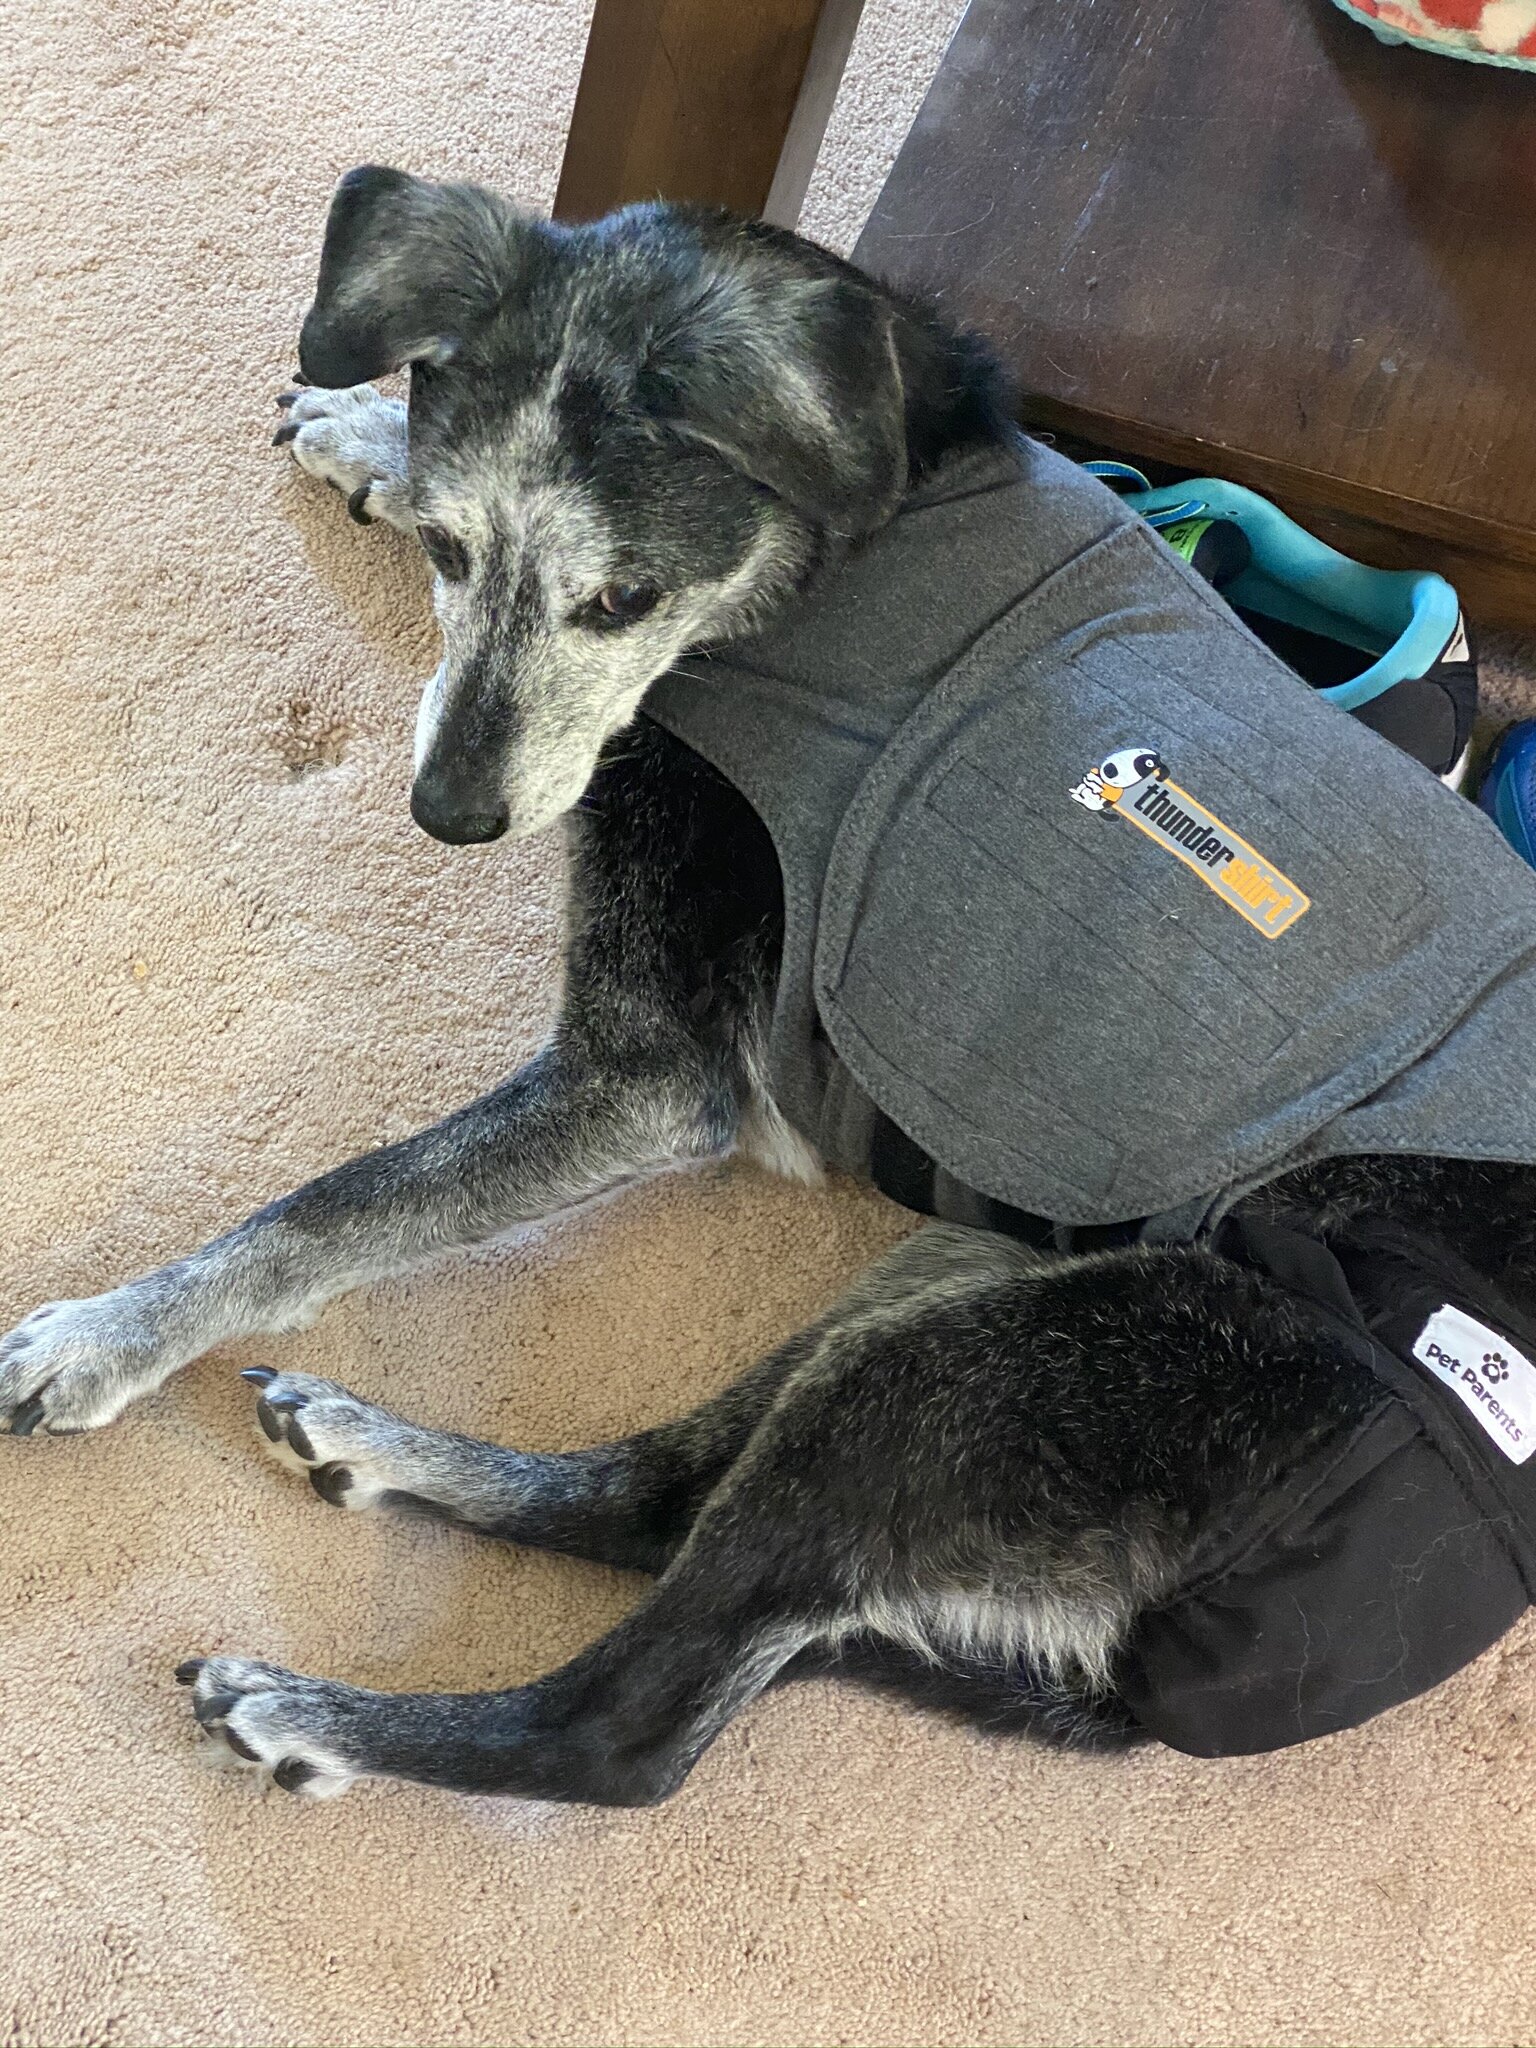
Spencer was in such a fuss when she got home I put her thundershirt on her to help her calm down.

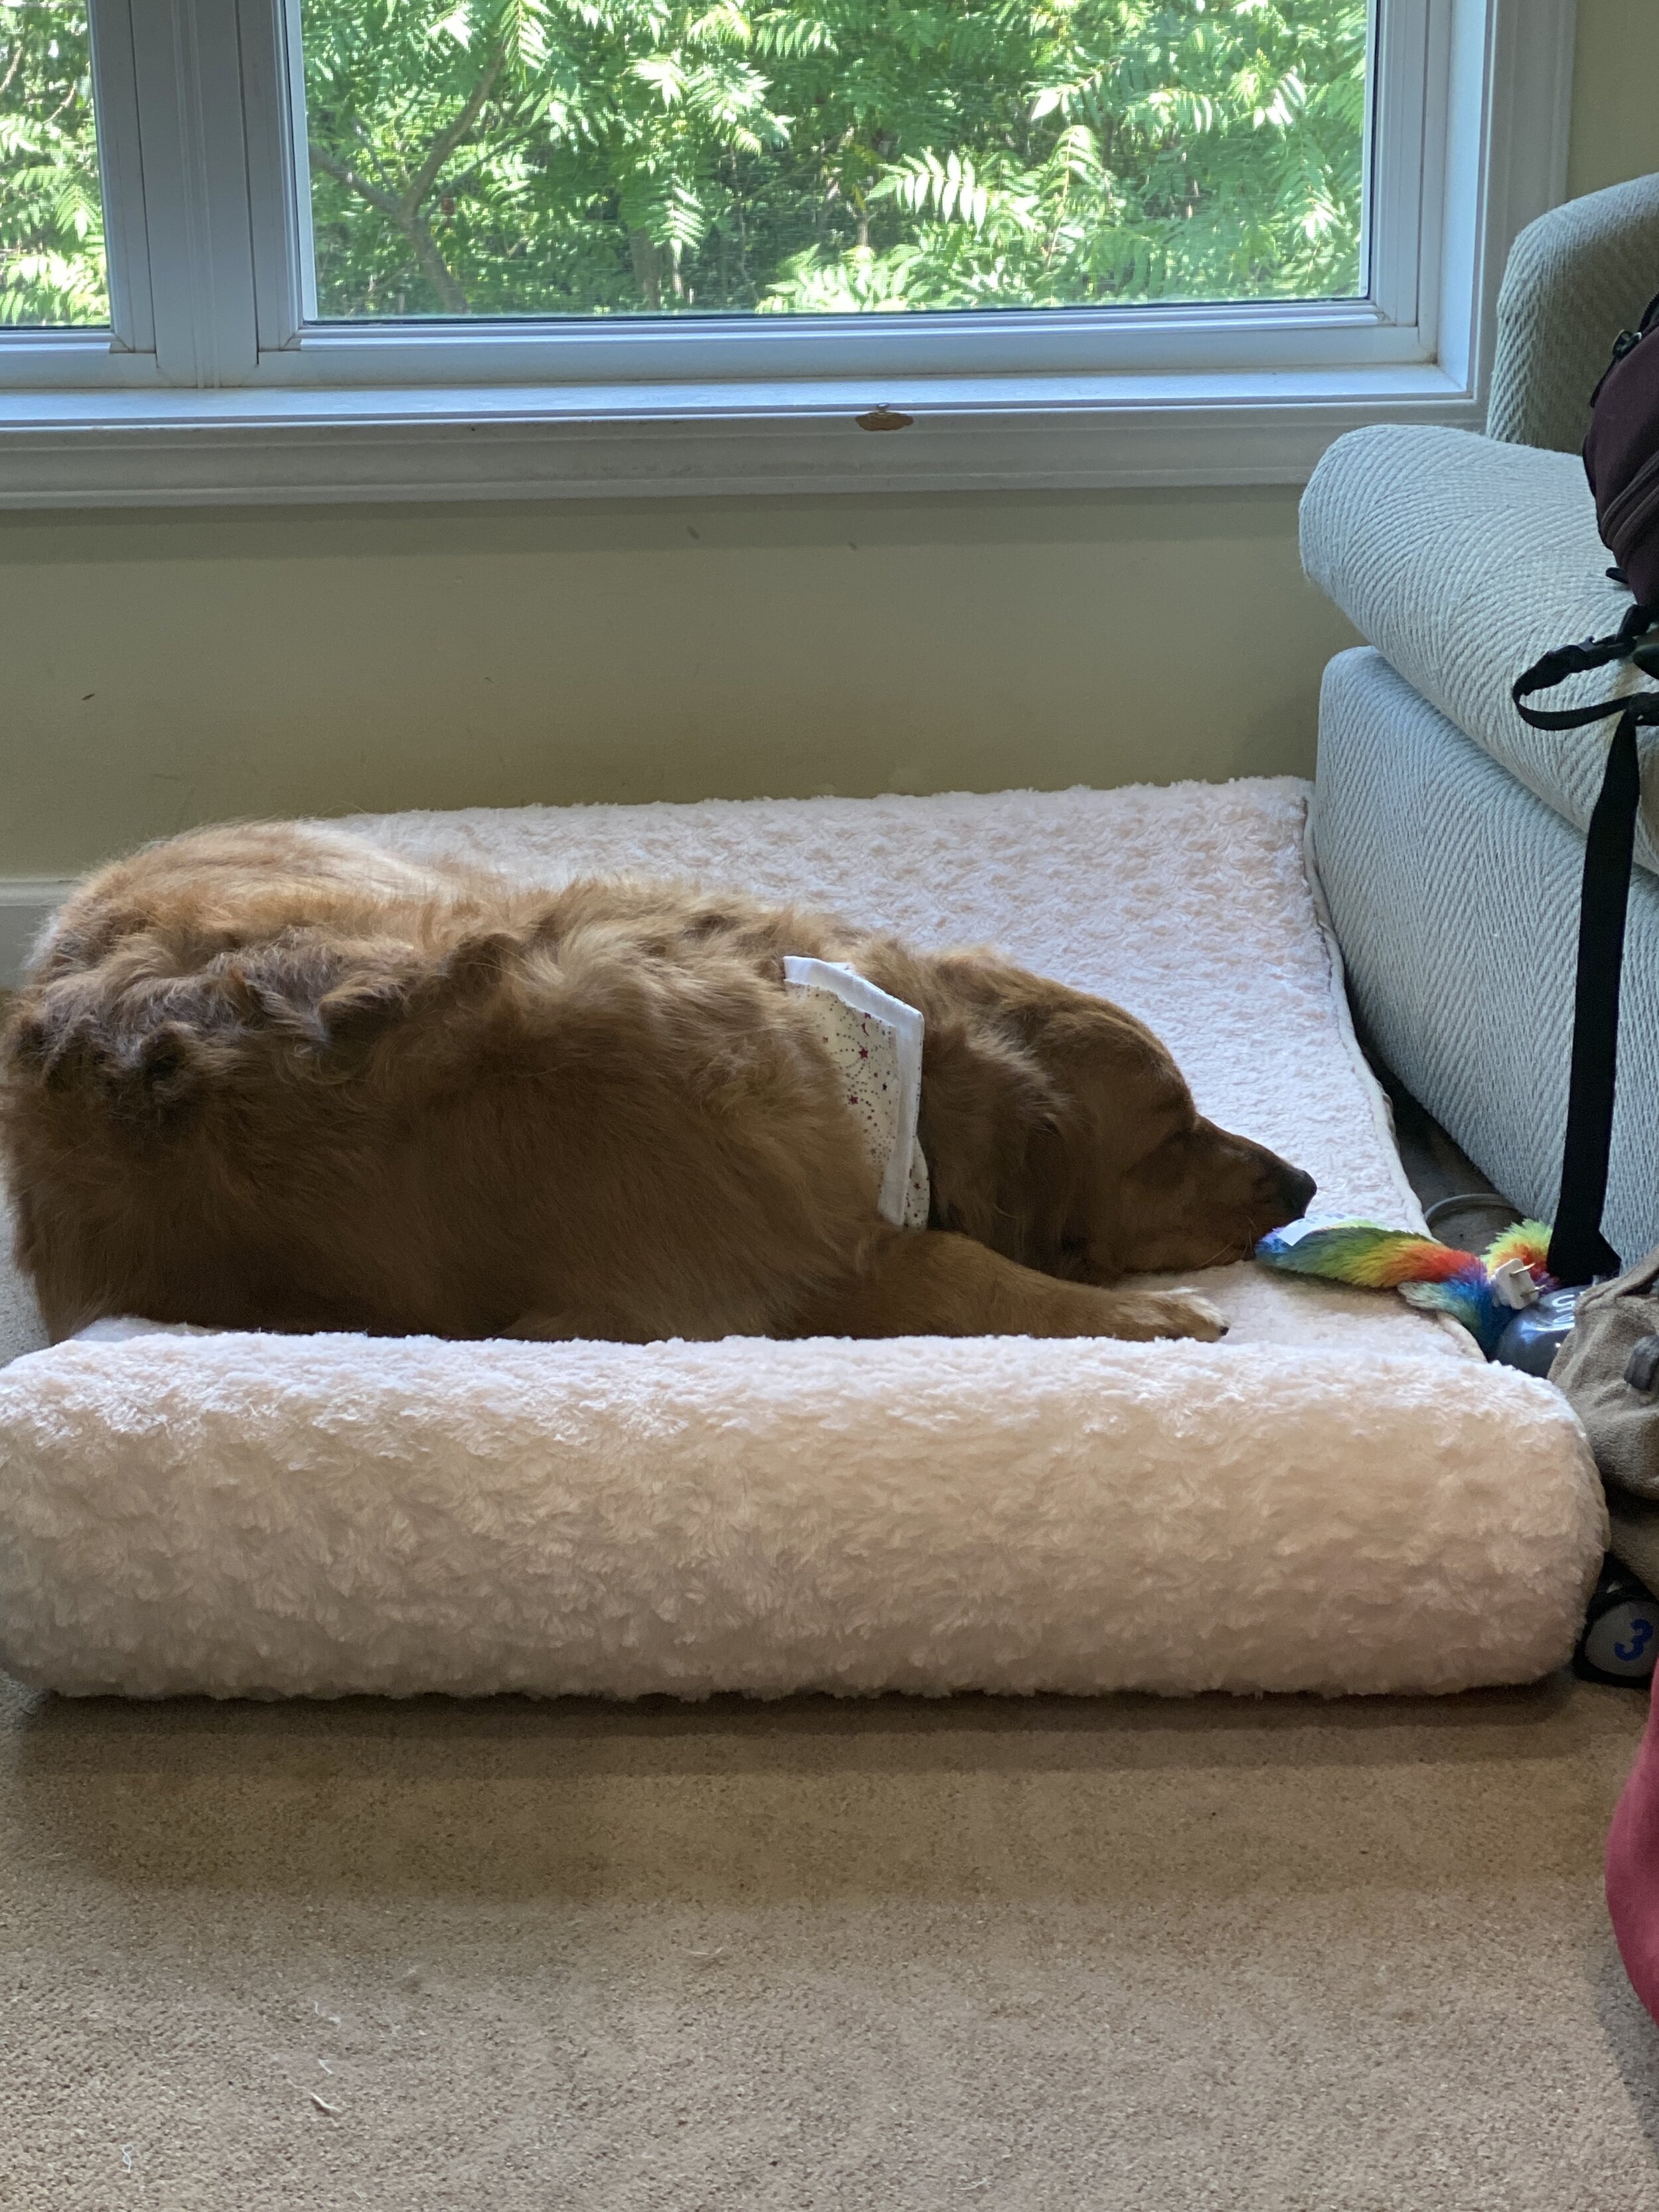
Auggie came with me up to my sewing room and crashed on his bed.

Hygiene is tiring.

(And btw, they got groomed before I did. I still haven’t brought myself to make a hair appointment yet!)

Another finish! Baby Quilt #2

What a week. I did some protesting last weekend which, go figure, being outside all weekend in the pollen-filled air, subsequently felled me for much of this week. I did go in for my COVID-19 test as suggested for all protestors and it came back negative. I wasn’t expecting anything else. Everyone was masked at the protests and although we weren’t always able to keep the 6’ distance with a couple of thousand of us marching through city streets, it was still pretty amazing that no one even bumped into me. I’d say we were keeping 3’. All of my symptoms this week were my regular ol’ allergy symptoms—sinus, fatigue, itchy eyes, etc.

So, unfortunately, although I’d planned on finishing baby quilt #2 last weekend, I didn’t feel up to doing anything with it until this afternoon.

Yay—it’s done!

IMG_0692.JPEG

To recap: This started out as a way for me to play with some of my (at the time brand-new) Accuquilt dies, and a fat quarter collection I’d had for a long time, focused on the alphabet fabric. I scanned the fabric and did a quick design in EQ8 to figure out fabric layout.

I then miscut the fabric that was supposed to be in the corner squares of the star blocks, and didn’t have enough left to be able to fix it with the same fabric. Lo and behold, I decided to fussy cut some valentine fabric I’ve had in my stash for years, not using any squares that had “Feb 14” on it so it could be more generically lovey-dovey. Don’t like it as well as the original posy fabric but it works and I’m glad to have that fabric out of my stash.

When it came to the border, the butterfly fabric was the only thing I had that was even close to the right red. Again, wouldn’t have been what I picked if I were in a quilt shop with all sorts of options, but it works and, again, nice to have that fabric out of my stash. (I believe both fabrics came from the same scrap box from Fat Quarter Shop or wherever I used to periodically buy those from. Neither of them are anything I’d have selected myself for my stash.)

I dug into my strip stash for the binding and found four strips of the same mottled red that works just about perfectly. Phew.

In the grand question of “do you buy for a project or do you buy for a stash,” this project is an excellent example of why it’s handy to buy for a stash. I created this whole quilt on impulse without buying a single piece of fabric. We won’t include the money spent on the AccuQuilt, of course.


IMG_0693.JPEG

If you remember some previous waffling I was doing about this, I did end up doing the whole binding by machine this time.

I watched a quick refresher video from Jenny Doan (I’ll post it below) and realized that in my past efforts I’d chosen stitches that required me to stick right along that seam line and have everything lined up with a precision that just made life more difficult than I needed. After watching the stitch that Jenny Doan used, I decided to use a fun loopy stitch on my machine and life was ever-so-much simpler!

And can’t beat the speed. I had the whole binding put on within 30-45 minutes. Sure, it’s a small quilt, but still. Love that kind of a finish.


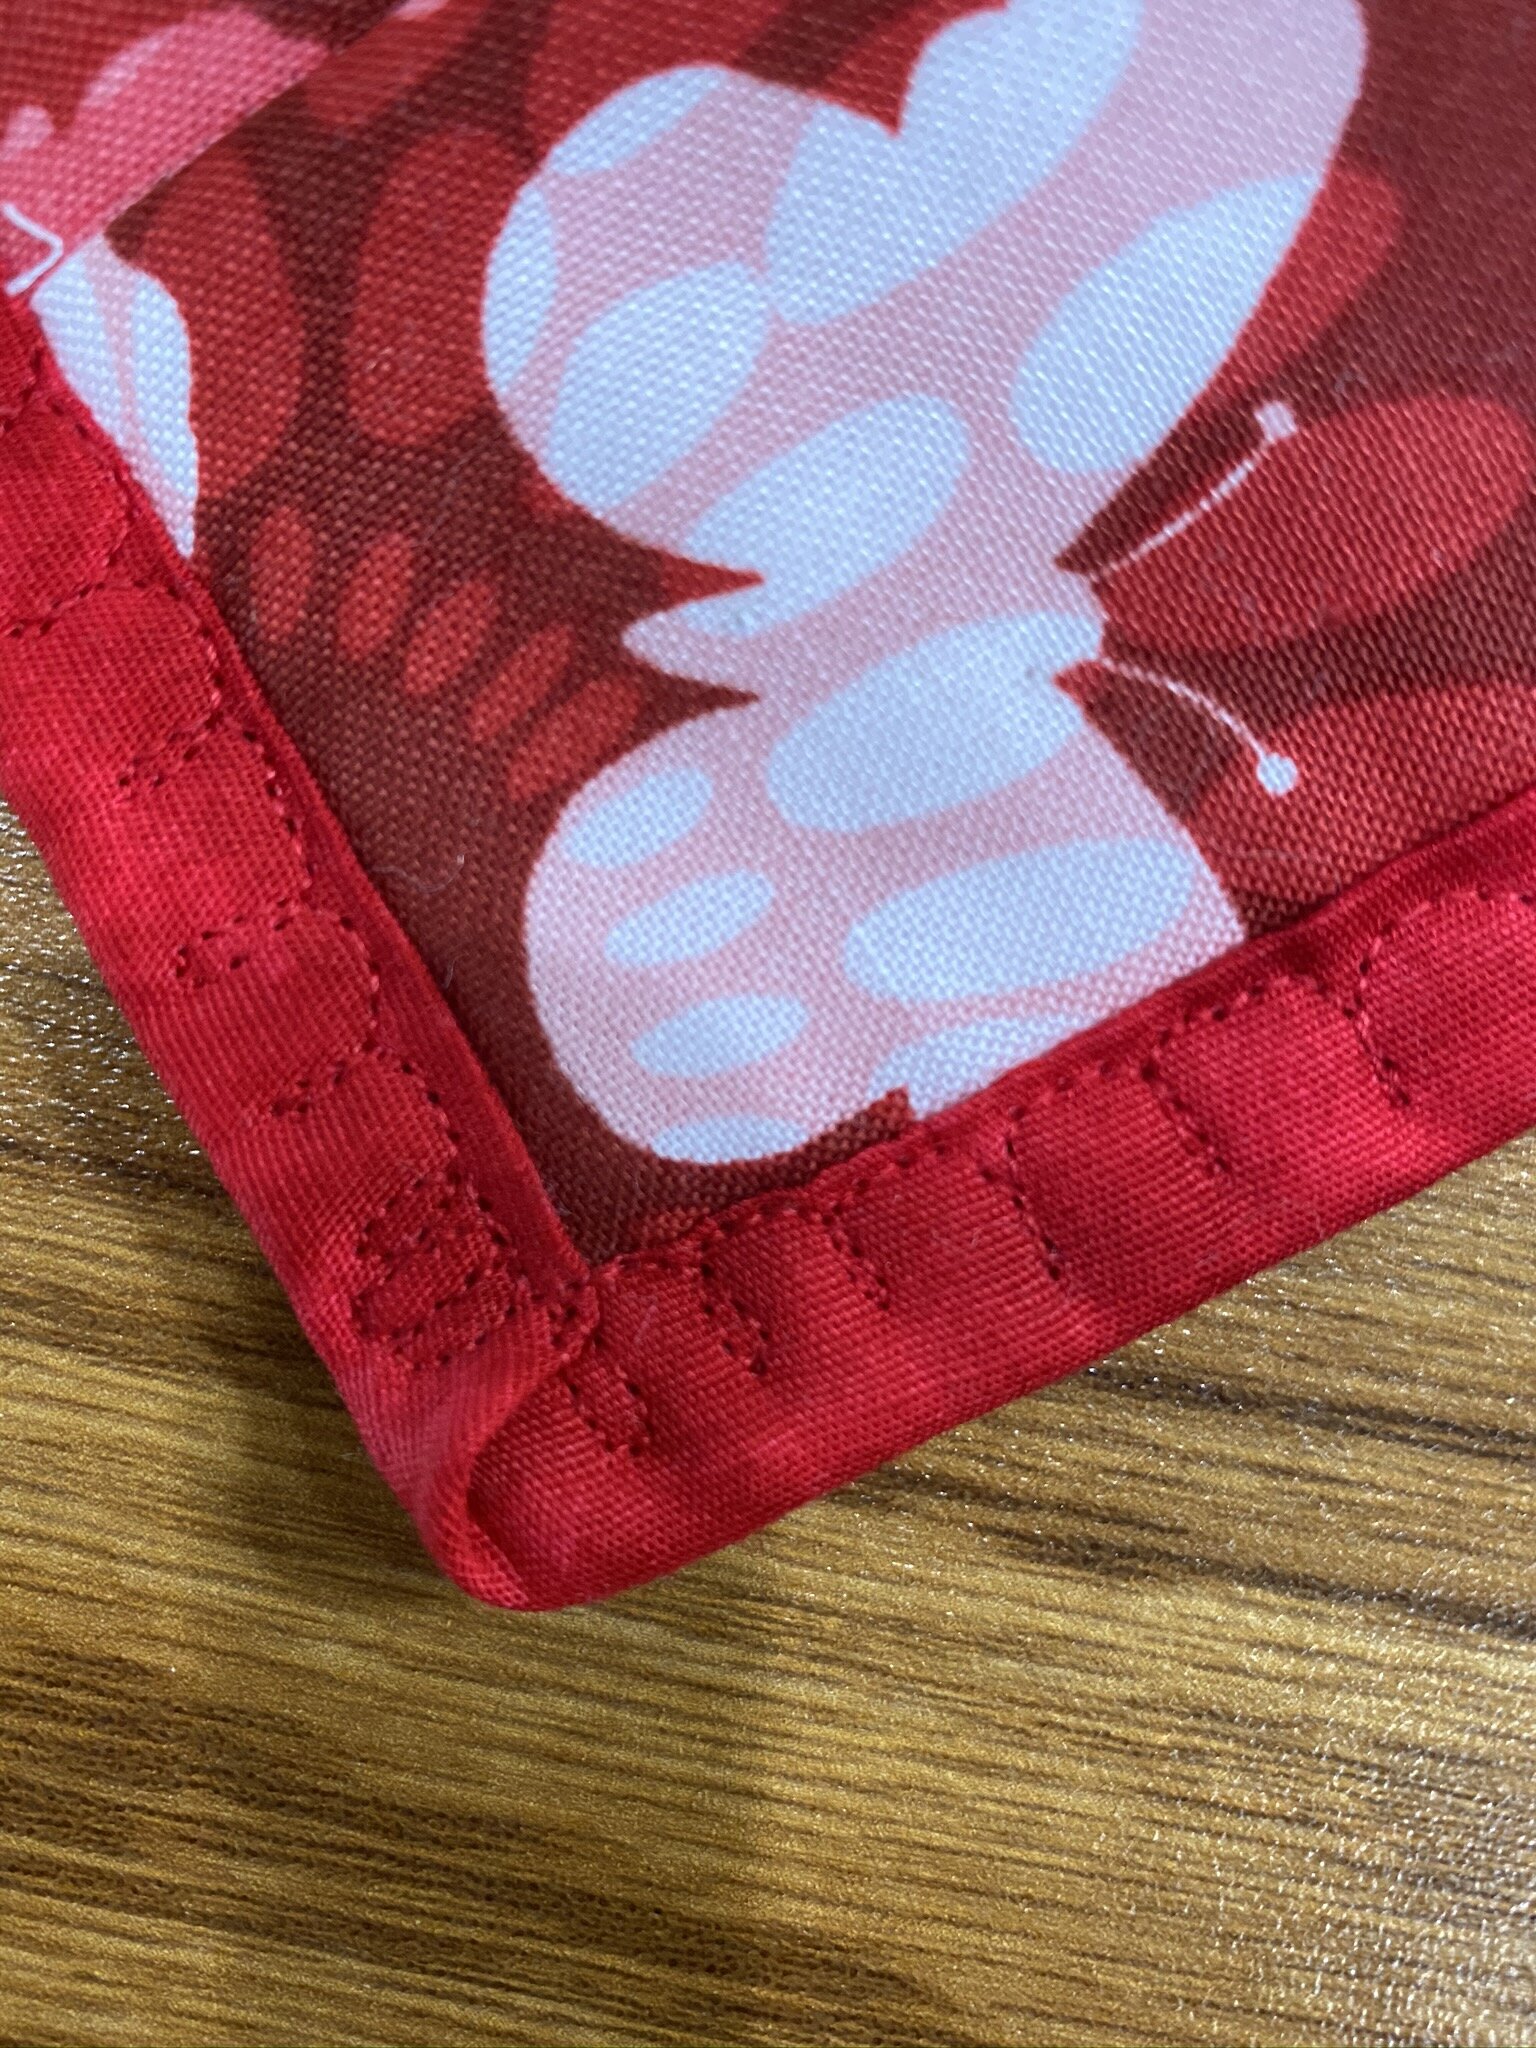
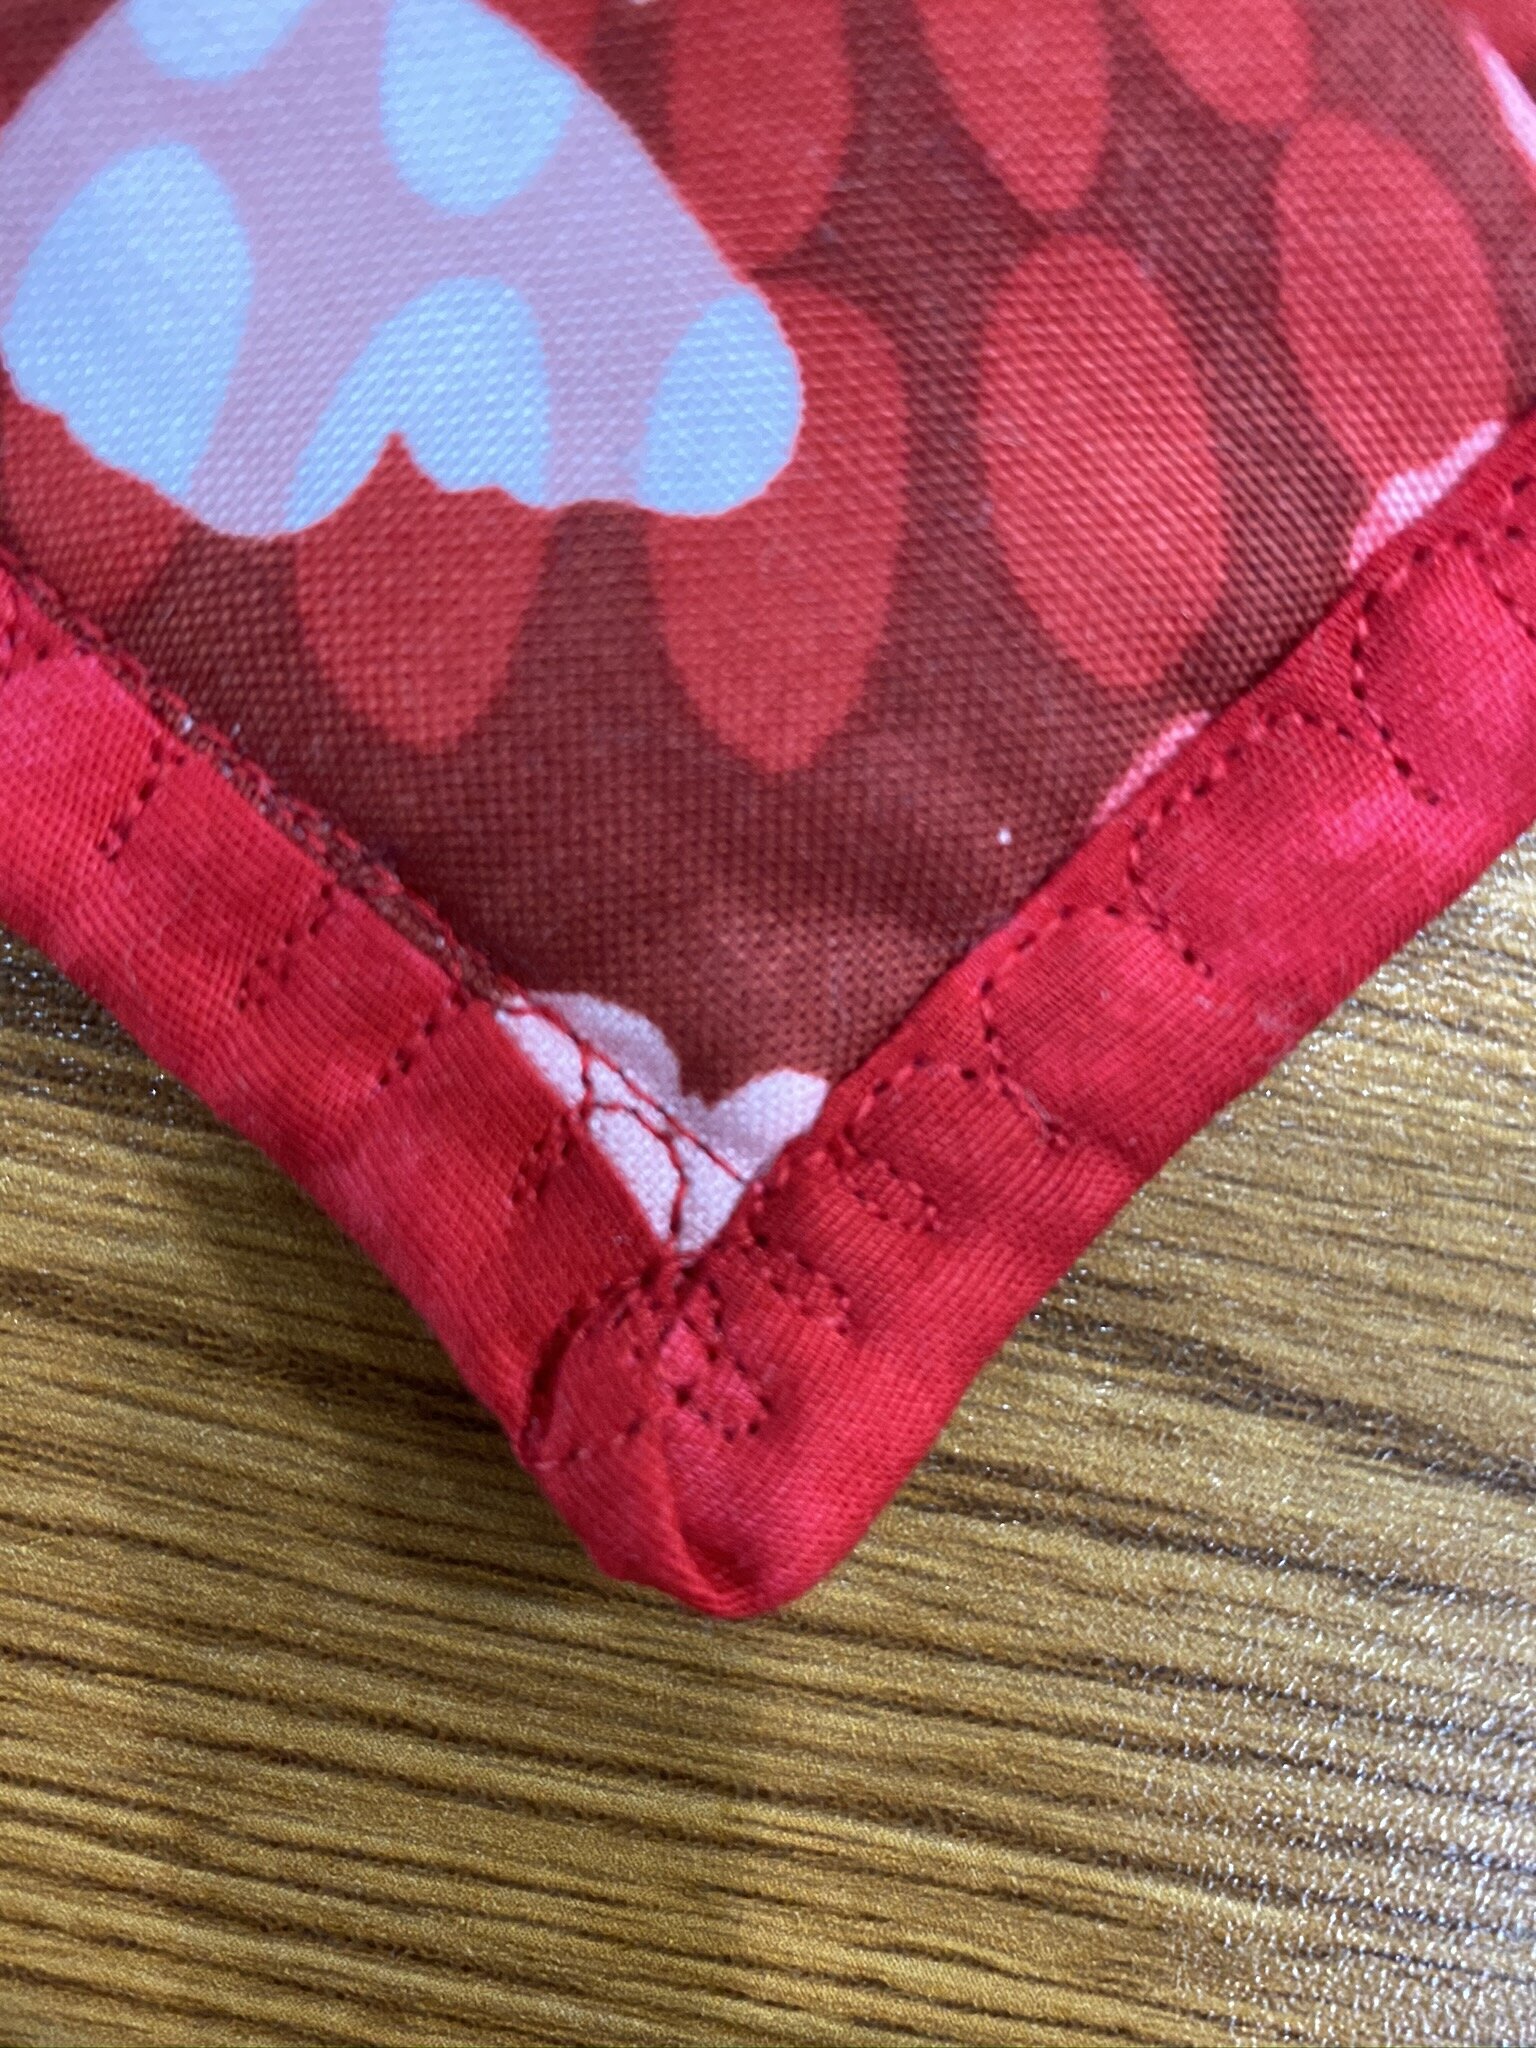
I’d mentioned during my “waffling” comments that I’d had difficulty with the corners in previous attempts at machine binding. That was the only reason I’d gone to the Jenny Doan well, to see if she had good tips. And sure enough she did—just sew right over the top of them! So I got my miters folded down neatly and then just continued the design right around the corner. It worked really well, 50% of the time.

Best corner in image on top; worst corner in image on the bottom. The other two were pretty dang good and not quite so bad, respectively.

The worst corner was the last one, and I think I was having problems with stuff getting a little stretchy by then. Plus I was wearing out (still allergy-ridden), so I wasn’t being quite as patient and careful.

But what do we say? Altogether now…

“Baby quilt. Baby quilt. Baby quilt.”


IMG_0696.JPEG

And in the same theme of using up my stash, the backing was a random yellow flannel sitting on my shelves that I can’t identify at all. No idea where or how it came to be living in my sewing room. Apparently it was waiting for me to have a new baby niece.

You can see the extremely simple ditch quilting I did on this puppy. I really wanted this to be as worry-free a baby quilt as possible for the parents, so I made an effort not to make an effort, if that makes sense.

Now that it’s done, I’m going to toss it in the wash with a handful of color catchers and a prayer that all that red stays exactly where it is.

Baby quilt. Baby quilt. Baby quilt.


Join me, why don't you? Crazy Quilt Blocks

It struck me this morning, as I was thinking about the crazy quilt block I need to make for my stitching group, that I should invite y'all to join me on this adventure! This would be a very simple, very s-l-o-w stitch-a-long.  

If you've listened to my most recent episode, you already know the backstory to this. In a nutshell, I've started meeting with a couple of quilty friends who are also embroidery enthusiasts and we've decided to start working on crazy quilt blocks. We're not swapping or putting them all together into a single quilt or anything; we're each just making our own blocks and then bringing them to our coffee shop meet-ups to work on the embroidery while we're together. We are, however, swapping some fabrics and threads with one another to help augment our stashes.  

I'm also using it as an opportunity to finally do Allie Aller's Crazy Quilt class on Craftsy;* I've owned the class for a long time and have watched it before, but never made the time to actually do a crazy quilt. So my first few blocks will be based on her techniques in the class.

Our blocks are supposed to be 8" finished which, handily enough, turned out to be the same size as the ones in Allie's class. Convenient, that. I'm using my collection of cross-woven cottons (aka "shot cottons")  from Indonesia as my base fabrics though I'll be throwing a lot of scraps into the mix. 

So, if you'd like to play along, we're aiming to have our first block done (just made, not fully embroidered) by Saturday, December 12. Leave a comment here if you're interested in joining in a crazy-quilt stitch-along--if there's a few of us, I'll set up a Flickr group for us to share our pics-in-progress! Maybe I'll throw a give-away in there somewhere along the way. Can you tell I haven't really thought this through in any formal way yet? I just wanted to invite y'all in on the fun!

I've got some crazy quilt resources to recommend, too, if you're interested.

Books:

Blogs on embroidery or crazy quilts

And I now have a Crazy Quilt board on Pinterest that one of my stitchy friends and I collaborate on. 


(*As a Craftsy affiliate, using this link helps support my podcast and blog. Thank you!)

Craftsy Class Review: Strip Your Stash with Nancy Smith

I've owned this class for awhile. A l-o-n-g while. I waffled frequently about whether or not I was going to use it to actually make a quilt. I've ultimately decided that this kind of quilt is a fantastic retreat project, and since I'm not likely going on retreat anytime soon due to scheduling issues, I may as well go ahead and review it in concept, because I know it's a concept that works. (I've done similar in the past.) So, unfortunately, no photos of my own work based on the class!

Strip Your Stash with Nancy Smith shows how to cut your stash fabrics into strips of varying sizes, sew them back together to make a new "fabric," then cut different types of shapes out of that fabric to create some really fun quilts. It's more or less string quilting, although with bigger and, in her examples, more color-coordinated "strings."

Why would it make a great retreat project? Because part of the process is extremely repetitive--cut, cut, cut, cut...sew, sew, sew, sew. Once you've got your new fabric made, of course, then it gets really interesting again. So I need the kind of setting in which I can have all sorts of other things going on to entertain me while I'm cutting, cutting, cutting, and sewing, sewing, sewing. 

In the class, Nancy walks you through how to choose effective color combinations, and then walks you through the cutting, sewing, and pressing of the strips. This is the lesson you'll really want to pay attention to as she gives good advice for how to keep those strips from going all whacked when you're sewing them together. (Never sewn a bunch of long strips together side-to-side? It's not as easy as it feels like it should be!)

After the fabric is created, the remainder of the lessons go through several possible block variations cut from this stripped yardage, including very helpful tips relevant to each one. And let me tell you, the quilts are all just so much fun. I do really like the designs and could easily see myself designating one of them as a retreat project in the future.

The last lesson, entitled "Good to the Last Scrap,' gives several examples of how to use up the progressively-smaller pieces of scrap stripped-fabric you'll have left from doing any of the previous quilts. There are some cute ideas here!

Want to see some pictures of projects based on the class? Check out the class project page here. (You may have to be a member of Craftsy for that link to work--apologies if that's true!)

The Basics

  • 8 lessons, ranging from 8 to 35 minutes, though most are in the 20 minute range.
  • Lesson 1 is Nancy's introduction, as well as a really good discussion of color choices.
  • Lesson 2 is making the stripped yardage. She really takes her time with this and offers a lot of tips along the way, so it's worth paying attention to even if you already know the concept.
  • Lesson 3 starts the block designs with Carnival Squares in two variations--I love this block; Lesson 4 is Candy Strips; lesson 4 is Paint Box--another of my favorites; lesson 5 is Kaleidoscope with some great information about putting the rows together; and lesson 7 is Curved Play, which introduces curved piecing. '
  • Finally, as mentioned above, Lesson 8 gives several great ideas for using up the scraps. 

I did enjoy watching Nancy Martin and I really do like several of the block designs. As I said above, I could see myself doing this sometime in the future--just not right now. So, with apologies for a photo-free-post, I'm giving Strip Your Stash with Nancy Smith two thumbs up.

Announcing...Scrapitude 2015, or "Scrap-in-a-Box"!

ScrapiBonzaTude--my version of Charlotte's first Scrapitude quilt this past year.

ScrapiBonzaTude--my version of Charlotte's first Scrapitude quilt this past year.

Yes, folks, the time is almost upon us! Charlotte's ready to lead another mystery scrap quilt!

The Schedule

Fabric and cutting instructions will be posted this coming week (Tuesday, 9/6). You'll then have a few months to get yourself ready to go.

The first piecing clue will be posted January 13. There are five clues altogether, and we'll be posting them the second Tuesday of every month from January through May, 2015.*

Wanna play along?

The Size

This time, Charlotte has let us know that the completed quilt will be a "snuggly couch size approximately 58" x 74", including borders." She also describes it as being for confident beginners or intermediate quilters. If you are a beginner, you'll just need to go slow and watch some bias edges. But you should be able to do it. Nothing too off-the-wall! And advanced quilters will enjoy it too, of course.

So, what are you waiting for? Join the fun!

On Palettes

Some people love doing controlled palettes. Charlotte prefers doing full-on scrap in her own quilting, so her instructions are set up that way. I suggest you pay attention to the information she gives for value and suggested fabrics. (It's a gorgeous design and you don't want it to get lost!) Controlled palettes can simply be "controlled" along the same value lines.

See below for a little more about controlled palette versus full-on scrap.

Sharing

We'll still use #Scrapitude on Twitter and the same Flickr group. (Didn't do Scrapitude last year? Go ahead and check out the Flickr group to see what-the-what!)

Asking Questions

My travel schedule is nuts this year. So that my absence doesn't slow things down for those of you working on Scrapitude, I've set up a form for you to use to submit your questions about Scrapitude. Charlotte will get the questions herself and be able to respond to you directly. I'll see the questions and responses and if there's something that may be helpful for everyone to know, I'll post it to my blog whenever I land again.

So please use this form to submit your questions. If the form doesn't work for you, email your questions to me and I'll forward them to Charlotte when I see the email. Please do NOT use Twitter to ask questions--they get lost in the stream too easily.


Never Done a Scrap Quilt?

If you want to brush up on your scrappy knowledge, here's the listing I provided last year of past episodes I've done on scrap quilts.

Some Mistakes I've Made Along the Way

A few things I've learned from having done two biggies in a row now (Bonnie Hunter's Easy Street and Charlotte's Scrapitude), with a few smaller scrap projects in between, and having had a few things go awry on me here and there:

1. Unless you're intentionally going for a low-volume or watercolor effect, be sure your background fabric/s have good contrast with your scrap (main) fabrics. Otherwise you lose the design as your block edges fade into the background fabric.

Some of my scraps for the original Scrapitude

Some of my scraps for the original Scrapitude

2. In the same way, when you're choosing your scraps, it's generally a good idea to avoid any large-scale prints with parts of the print that are too close to the color of the background fabric. When you cut those large-scale prints into pieces, you might lose the sharpness of the edge when a big white flower suddenly lands right up against your white background and makes your block look like someone took a chomp out of the edge.

      In a normal non-mystery quilt, large-scale prints can be planned for places where they'd work well. In a mystery quilt, though, you never know how pieces are ultimately going to be used, so large-scale prints can be very tricky unless the mystery quilt designer tells you where it would be okay to use one. If, however, your large-scale print has good contrast with the background overall, these can be great to use in scrap quilts because cutting it into smaller pieces will give you a huge variety of end results--it'll look like you used five different fabrics where it was only one to start.

3. If you have one really dark fabric, balance it out with other really dark fabrics. If you have one really light fabric, balance it out with other really lights. My difficulty on Easy Street was I was trying for a span of values in my controlled palette and ended up with one really dark green mottled-read-as-solid that just sticks out like a sore thumb on the finished quilt. All I can see when I look at it is this dark green visual hole plopped around the quilt. It was my first scrap quilt, and it was a mystery, so I had no way of guessing the end result. Since then, I've done a couple of other scrap projects where I suddenly realized I had one fabric really standing out in an unpleasant way; but rather than removing that one fabric, I balanced it out with others of similar value, and suddenly it all worked beautifully. So while testing the new Scrapitude, I chose a wide variety of scraps and made sure I had a good mix of values (according to Charlotte's directions, which you'll get in another few days). And it's worked really well.

4. Don't be afraid of full-on scrap! I was. I really struggled with Easy Street and the first Scrapitude. In fact, I was pretty sure after Easy Street I didn't want to do another scrap quilt. Ever. (Or another mystery, for that matter.) But when I let myself do full-on scrap, and let Charlotte keep telling me, "It'll be okay! It'll be okay!" every month at guild, I ended up having a ball and completely loving the end product. I had to fight with myself not to control the way those scraps were coming together in the piecing. I confess to a couple of times picking up two pieces and saying, "Yikes! No way am I letting those two colors near each other!" and swapping one out before piecing the unit. But I only did that once or twice before I convinced myself that would be crazy-making and just released myself to the process. When you see the finished quilt, you never see those two fabrics that maybe don't play nice in the sandbox together. Because they're part of a whole, overall wonderful scrappy design.

That's it...although I may have other tips along the way. But for now--start staring at your scrap stash and thinking, "Yay! It's time for Scrapitude again!"

Please note: The original Scrapitude instructions have now been removed from my blog, as Charlotte is in the process of writing it up as a pattern for eventual sale. You will still find my in-progress and completed posts, none of which contained instructions.

*The second Tuesday of every month is my guild meeting. You'll be getting the clues the same day my guild-mates do!


WIP Wednesday--String Star

I think I've only managed to connect to Freshly Pieced's WIP Wednesday once, but I've finally managed to time it right this time!

Last weekend I finally got the borders on my string star quilt, started in a class with Ami Simms at the AQS quilt show in Lancaster, PA, back in April. I took the class mostly because I've always wanted to take a class with Ami Simms--she's a hoot. (I have an interview with her on my podcast too--great fun!)  I used a collection of African fabric fat quarters I'd been gathering over the years--I'd never figured out the best way to use them and decided this class was as good an experiment as any. I was very unsure how everything would turn out, but I'm quite pleased!

The background fabric is from my LQS--I like the cross-hatch design on it (sort of "thatch-y"), and the light gray sets off the fabrics really well without being the more jarring contrast of a plain white.

The biggest challenge on this was the African fabrics themselves. There was a lot of variation in thread count and weave. Some were very stiff, others were really stretchy. That border caused me some grief. Besides, mitering string pieced borders isn't fun--seams ending up in all sorts of wrong places. But it worked out better than I worried it would, so it's all good.

As of this writing I'm still pondering quilt designs. I think I'll have awhile to do that--I'm unlikely to get back to this until August when my work travel is over for a few weeks.

This has already been designated for a recipient, but I've really fallen in love with it. I do have enough of the fabrics and even enough cut borders left to do a second quilt for myself. I haven't decided if I'm up for that yet--I'm not a huge fan of doing the same thing twice. We'll see.

Here's my traditional "Dog with Quilt" shot. He was apparently quite pleased to be included. Smiley guy. But he kept his tennis ball nearby just in case I put the camera down.

And yes, I dragged my portable quilt hanger out of the pool for the photo op. Because I'm just that kind of Mom.

Be sure to check out all the other WIP Wednesday bloggers at Freshly Pieced!

Lookie What I Learned in Nebraska! (Eileen's Dimensional Bow-Tie Block Tutorial)

Last weekend I was in Nebraska with women of my denomination. Despite it being a work event, I found plenty of ways to Talk Quilt while there! One woman named Eileen had organized a large number of donation lap quilts and afghans to be donated to a home for the elderly. She'd made all the quilts that were present at this event herself, so we spent some time during a break going through her quilts: She was telling stories behind the patterns, quilting designs, and fabrics, while I was admiring all the same.

One quilt in particular caught my eye as the block was a dimensional bow-tie block. I've seen those here and there online, but had never had the chance to see one in person. Eileen explained to me how she did the block. She'd actually figured it all out by herself (she's definitely not an Internet person) but she is aware that others also do them. So there may be other methods, but I'm giving her due credit for figuring it out on her own! Hence, I'm presenting this as Eileen's Tutorial. 

Eileen gave me a nice little set of demo squares and I took some pictures while she walked me through the process. After I got home and got some sleep (!), I pulled some 5" squares out of my scrap stash to see if I could remember how she did it. My first one turned out perfectly! My second one, not so much--I somehow reversed the squares. Twice. But the third (and fourth) time's the charm!

So let's walk through the process....

Eileen's Dimensional Bow-Tie Block Tutorial

With pictures I took of my own blocks back home. Again, yes, you can find this elsewhere--I'm just giving credit where credit's due to the person who taught me!

For each block, you need five squares of the same size. You can use any size square you want, you just have to make sure they're all the same measurement.

You also get to make some choices about color arrangement. I did my blocks with three squares of the same color for the bow tie, and two light background squares. I did that mostly because I have lots of multiples in my scrap square stash and this is a great way to use them up. But there are lots of possibilities, here: I could see having the bow tie ends being scrappy but all of the tie knots in the middle of the blocks being the same color to bring the whole design together; or using all solids; or prints in the background with solid bow ties....

For the purposes of this tutorial, your bow tie fabrics will be referred to as "dark", and the background as "light." This is key to keeping everything straight later!

1. Fold one of the dark squares you're using for the "knot" in half, right side out. It's not necessary to press and, in fact, you may not want that kind of a hard crease in your finished product.

2. Sew the folded "knot" piece, fold towards the top, between one light and one dark square: light square on the bottom, dark square on the top. Make sure the raw edges (unfolded side) are aligned with the bottom edge of the squares, and sew along the right-hand edge. Be sure the light piece is on the bottom, the folded piece in the middle, and the dark piece is on top. (If you do it in the reverse you'll need to flip things around later!) The light and dark squares should be right sides together.

Press towards the dark.

3. Now comes the first tricky part. Flip the unit over so the folded square lays to the right of the seam you just sewed. The folded edge will now be on the lower edge and raw edge side towards the top. Fold the already-sewn dark square to the left and out of your way.

4. Lay the remaining dark bow tie square, right-side up, underneath the folded square and line up their right and top edges.

Then lay the remaining light background square, right-side down, on top of both, lining up the top and right edges. It's critical here to make sure you've got the two colors in the right place. The first time, you have the light on bottom and dark on top; this time the dark is on the bottom and the light is on the top. If you reversed it in the first step, you'll need to reverse it again here.

Sew the seam on the right hand-side and press towards the dark again.

5. And now for the second tricky part. You need to open that folded square and line it up between all four blocks for the final seam. The only way to describe this is in pictures...


I found it helpful to pull the knot sides fully open with my thumb and forefinger of one hand, then flip the top squares out of the way with my other hand to make sure I had the sides of the knot fully extended. (Don't let the quick-swap of fabrics fool you--this picture was taken while working on a later block.)


They won't come to points--it's sort of a blunt end.  And here you need to be pretty careful that you don't get the fabric that's in that fold caught in the seam you're about to sew. Keep moving things around until you're sure you're not sewing extra layers. This is virtually impossible to describe and although I tried, I couldn't get a good picture of what I mean. But you'll know if you've done it wrong when you flip open the finished block--more about that later.

For this part, I did what you usually do with matching seams--I scooched it around until the seams felt like they were really butted up together. Then I pinned that center down so it would stay in place. Next, I reached under each side to make sure the knot was really fully extended, evenly pleated in the center, with raw edges flush. I pinned each end of the knot once I had it in place. I also pinned both ends of the unit because that center knot seemed to want to knock everything a little out of whack.

6. And finally, you sew that last seam. And the magic happens!


Press the last seam whichever way you choose, depending on how you're setting these finished squares. Then open it up and thar she blows! A bow tie with a fun dimensional knot in the middle!

As mentioned earlier, you'll know you've caught a fold in a seam if you open it up and see a sewn crease down one of the lines of your knot. It should look nice and flat and open, like this.  (And yes, ask me how I know. That same block in which I sewed the squares in the wrong placement twice in a row also ended up with a sewn line down the middle of the knot at the end. Go figure. It was doomed, but me and my seam ripper beat it into submission.)


The first one took me all of about 10 minutes. The second one...well, you've already heard about all of that. My trusty new electric seam ripper was put to good use. 

But the third and fourth blocks were back to about 10 minutes each again. What a fun way for me to burn through some of these 5" squares and eventually have some donation quilts! Woo!

Again, I know there's likely other methods out there, but I need to give props to Eileen from Nebraska for figuring all this out herself, and then teaching me so easily. And not least for making several dozens (perhaps even hundreds!) of donation quilts herself. Go, Eileen!

A Finish! Scrapitude--or, as it's known in my house, ScrapiBonzaTude

It's finally totally, completely, without a doubt, done!

Scrapitude done and on my bed!

Scrapitude done and on my bed!

I had it quilted at Mt. Pleasant Quilting Company. I only asked for a pantograph (all over design) on this because to do anything else on a quilt this size would've been too expensive. I left it up to "quilter's choice" on the pattern and just ask for a thread that would blend. Here's a detail of the design. (The thread is a light beige.)

And finally, the lovely border fabric that pulled it all together. I think I already talked about finding this fabric in a previous blog post--it wasn't what I went looking for, but it just made the quilt sing! The motif speaks well to the shape of the star in the blocks, and it echoes many of the more prominent colors in the quilt. Love it.

Because of the motif, my borders are something like 9" wide. So the entire quilt came out to around 96" square--which was, as it turned out, just the size I needed to drape over our tall mattresses and reach to the top of the box spring with it's dust ruffle. I've never had a blanket or bed covering that did that on this bed. Woo! I hadn't planned that specifically when I chose the border, but boy, was it a nice outcome!

Because this quilt is so large, and because the border fabric is an Australian aboriginal fabric design (Stella Black by designer Cathy Turner), I pulled in my Head Australian Quilting Consultant, @ozzypip, and asked her for any Australian slang terms that meant "stinking huge." (Okay, I may not have included the word "stinking" in my query, but it was definitely in my head!) Philippa consulted with some of her compatriots and sent me a list of possibilities. Although she warned me that "Bonza" is older slang, I decided it was the one that worked best in this case. Hence, "ScrapiBonzaTude" was born!

And so, ScrapiBonzaTude is finally complete. Just in time, too. Yep, I'm already working on a secret mystery project scheduled for launch in early 2015... (and this message will self-destruct in five seconds...)

Scrapitude Progress and Linky Party #1

scrapsquares.jpg

Here's how far I've gotten on Scrapitude, and I started a whole lot sooner than all y'all!

I still have about 60 scrap squares and nearly all my background to cut.


twopatches.jpg

But wait! I do already have bunches of squares sewn into pairs. Okay, so I cheated a little. I raided a project bin I'd started last spring to do a Jacob's Ladder scrap quilt. Holy Moly, I have enough 2 1/2" squares for probably four Jacob's Ladder quilts after I get Scrapitude done, so all's fair in UFOs and Finishes.


2-4patches.jpg

And, since I did that little tutorial on nested seams in four-patches last time, I do have two four-patches done. Yay me.


Are you doing the Scrapitude Mystery Quilt by Charlotte? If so, link up your blog post about your progress so far here! 

Everyone else, check out the linkies below and cheer people on. And who knows? You might just catch the bug! (You'll need to click on the InLinkz widget below to see the links or add your own.)


Past Podcast Episodes about Scraps

I'll be talking about scraps again in this week's podcast episode (coming soon!), but meanwhile, I thought it would be worth re-posting some of the past episodes I've done on scrap quilts. Unfortunately, with the move to the new website last spring there's not an easy way for me to do older episodes here. If I repost them into my podcast feed, it'll suddenly confuse the heck of out things to see a bunch of random old episodes appearing out of order. And links just redirect back to this website where the podcast files don't exist. But what I can do is embed players for each of them in this blog post. You can listen from your computer, but you can't download. Sorry! I'm also going to copy the original show notes from each episode above it, so you'll be reminded what was in it.

 EPISODE 7: In Which We Get Scrappy (April 7, 2010)

I really want to get better at using my scraps, so I decided to do some research on scraps and scrap quilts. I found so much, though, that I'm having to use two episodes to cover it! So, in this first episode, after doing some catching up with listener comments and contributions, I share with you my experience, my research, and some listener suggestions, as we talk about a glossary of scrap-related terms, a little history of scrap quilting, how to collect scraps, getting yourself used to doing scrap quilts, what the best sizes are to cut your scraps into, and a little bit about storing and organizing scraps. (In episode 8, I'll share ideas for using your scraps!) 

EPISODE 8: In Which We Revisit Scraps (May 2, 2010)

Welcome to the second episode on scraps! In this episode, we get right down to business and I talk about specialty rulers for scraps, and share a lot of ideas about how to use scraps, including some books.

 EPISODE 51: In Which We Get Scrappy Again (May 30, 2011)

Charlotte Hawkes is our local Queen of Scrap Quilts. A quilter for 10 years, Charlotte's very first quilt was scrappy and she never looked back. In this episode, I interview Charlotte about her system for cutting and saving scraps, choosing quilts, and keeping track of all the projects she's got going on at once. I got a lot of great ideas from her, and I'm sure you will too!

I haven't been able to dig up a picture of the blue and white quilt she made that I referenced in the episode yet, but here is one of Charlotte with one of her more recent scrap projects.

Also in this episode: Sandy Update, Listener Comments, and many, many thanks!

 EPISODE 92: In Which We Talk Scraps with Charlotte (May 24, 2012)

Charlotte's back! Woot woot! You may recall meeting Charlotte Hawkes, the scrap quilter from my guild, from episode 51 In Which We Get Scrappy Again. Some of you asked for more detail, so I invited myself over to her house and set up cameras and all sorts of equipment to go step-by-step through her process. As I mention in the episode, the originally-planned video episode didn't quite work out, so after listening to this audio podcast, please go to my blog for pictures of her system and her quilts. Educational, and eye-candy to boot!

Clearing the Decks, Starting Anew...

I had a sort of "clearing of the decks" this weekend. I had both my mystery quilt tops and backings ready to go to the longarmer for awhile, but I was waiting to get the backing put together for another quilt so I could run all three down at once. I realized Saturday morning after I got home from the grocery store that if I worked quick-like-a-bunny I had a shot at getting that backing complete, and the rest of the paper pulled off the pp'd blocks on the quilt, in time to run it 45 mins south to the LQS before they closed. I just barely made it!

Photo Apr 06, 4 03 34 PM.jpg

So I treated myself to some new fabric as a reward, of course.

​Yum.

It's better for me than buying chocolate. That's my story and I'm sticking to it.​

I posted last week about my progress on the house on the hill project (yet to have it's own name). I'm doing the hand-stitching on that now, which is giving me the chance to do some embroidery. ​

2013-04-03 17.43.08.jpg

​Here's a fairly bad picture of my first attempt at french knots, which, as opposed to the picture, weren't too bad.

The thread I was using was a bit too thick for this particular project, and is very rough to the touch, which means tons of friction trying to pull it through fusible and batting. My fingers ached after the first three, and I believe I did 39 altogether. For the next stitches, I switched to a different thread (an actual perle cotton) and it's been going much more smoothly ever since. More pictures later.​

Once my quilts were at the longarmer, that freed me up to work on other projects. Something I've been wanting to do for awhile, inspired by yet another Craftsy class, Magical Jelly Roll Quilts with Kimberly Einmo, is a scrap quilt using the Jacob's Ladder block. It's a traditional block that I've always liked because you can lay it out in a hundred different ways. Okay, I've never actually counted. A lot of different ways, in any case. Kimberly's directions are all based on a 2 1/2" strip so she's done the math by looking in my stash. Very convenient and kind of her, I thought.

Photo Apr 07, 5 55 51 PM.jpg

I'm doing the larger half square triangles all out of a single red paired with a single white; that will (I hope) create the path for the eye through the quilt. The white looks solid here, but it's tone-on-tone.

I'm trying to once again push myself to make the rest of it as scrappy as possible. I need 390 @ 2 1/2" squares. ​I have a collection of 2 1/2" squares I've been cutting off project scraps for awhile, so I started there.  However, I have a few fabrics that have dozens of squares, and others with only one or two. In order to avoid having blocks dominated by a particular fabric, I separated out my squares by fabric and then started by pulling a consistent number from each pile so the scraps would at least be fairly evenly distributed. Once I got to the point where I had a lot of the same fabrics left, I put those aside and dug into my strip collection.

Photo Apr 07, 5 58 07 PM.jpg

Now I'm going to start cutting more squares from my strips to get even more distribution of fabrics. Strips? I got me plenty o'.

I intentionally chose some strips from my collection that I particularly dislike, under the theory that no fabric is ugly if you cut it small enough.​

I'm pushing my comfort envelope here. I don't do random well. Must. Control. Must. Control. Someone pat me on the back and tell me it's all going to be okay.​

(Not familiar with the Jacob's Ladder block? Check it out here on About.com.​)

Goals for this week:

  • Keep stitching House on the Hill (not sure when I'll decide it's done)​
  • Get squares cut from strips for Jacob's Ladder
  • Fuse more fabrics in preparation for next fused art quilt. Maybe my design, maybe the second one in Laura Wasilowski's class--haven't decided.​
  • Make two pillowcases from sets of scrap fabric I've had sitting on the edge of my cutting table for awhile now and they're just starting to bug me.​