Finally! A finish that's been a long time a-comin'...

Remember oh-so-long ago when I started Annie Unrein's Travel Organizers class on Craftsy? Remember that I did actually finish the Everything in It's Place bag and post my class review back in the yesteryear? Remember how I mentioned in that review that it would probably "take me six months" to get the second bag done?

Ahem.

At least it's not a full year. Not quite. I'm about three weeks shy of a full calendar--which is, in this case, very similar to being a few cards short of a full deck.

Ah well, it's done. There was a bit of cussing, a couple of broken needles, some major surgery and a mulligan on a whole section of it, then finally just bagging any idea of something I'd be happy with other people seeing when I then messed up exactly the same part the second time and just moving on so I could get 'er done.

This puppy ain't making it to show n' tell at guild. It's definitely a note in the category of "I learned a lot, and mostly I learned I'm never making this stinkin' cosmetics bag pattern again." This is not an Annie-Unrein-Pattern problem. This is all in my execution. And this was a particularly challenging project for someone with my fairly newbie status when it comes to sewing accessories like this.

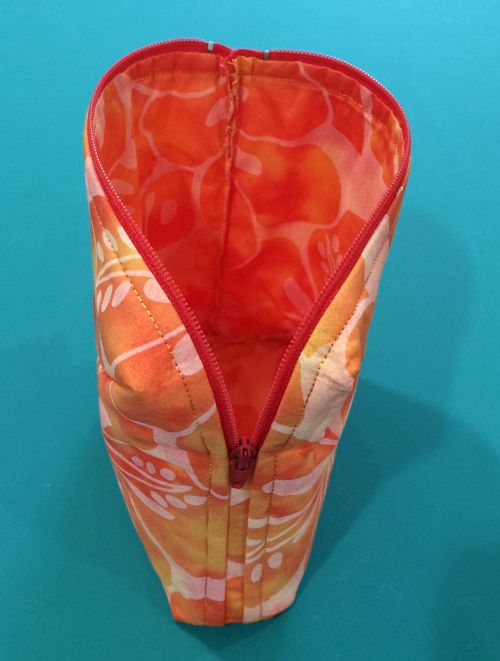
It actually mostly went swimmingly until the very end. I was extremely optimistic, indeed. And then the whole project went pear-shaped, to make the whole experience sound far too gentle and sweet, in the last couple of steps. The binding is my Waterloo, as it turns out. And Annie sure is fond of her binding--inside and out. I had similar problems with the EIIP bag binding, but this one took those problems and magnified them to the nth degree.

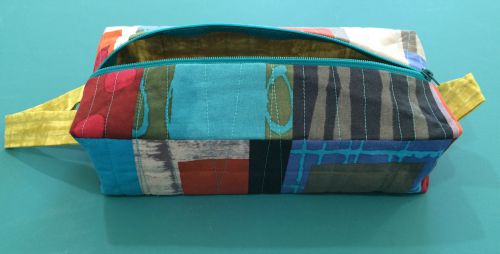
The first little snafu was with the webbing that goes in the handle. I'd had an early piece completely shred on me so I'd had to cut a second piece, which then meant the remainder was a bit too short for the piece it was to be used in. So I had to "franken-webbing" the unshredded part of the discarded webbing back to the longer piece. I tried zig-zagging it together. 

It felt strong enough, but as I was pulling it through the fabric casing the ends shredded again and the whole thing fell apart--which subsequently required about 10 minutes of fishing to get the short end back out of the middle of the fabric tube.

Fortunately, I happened to be on a Google Hangout sew-in hosted by the Stitch crew and got some good advice for options. The one that worked (I believe maybe originally from Nancy Zeiman?) was to wrap a piece of scrap fabric around it and then stitch the fabric to the webbing. Beautiful. Although, by the way, I learned that webbing--made from nylon which wasn't really on my radar--hardens into a tough plastic mess when you accidentally hit it with an iron. (Fortunately, I was able to clean up the iron.)

And then everything was fine for a few more steps (representing a few more hours). And then I got to the binding. Oh well. It's done.

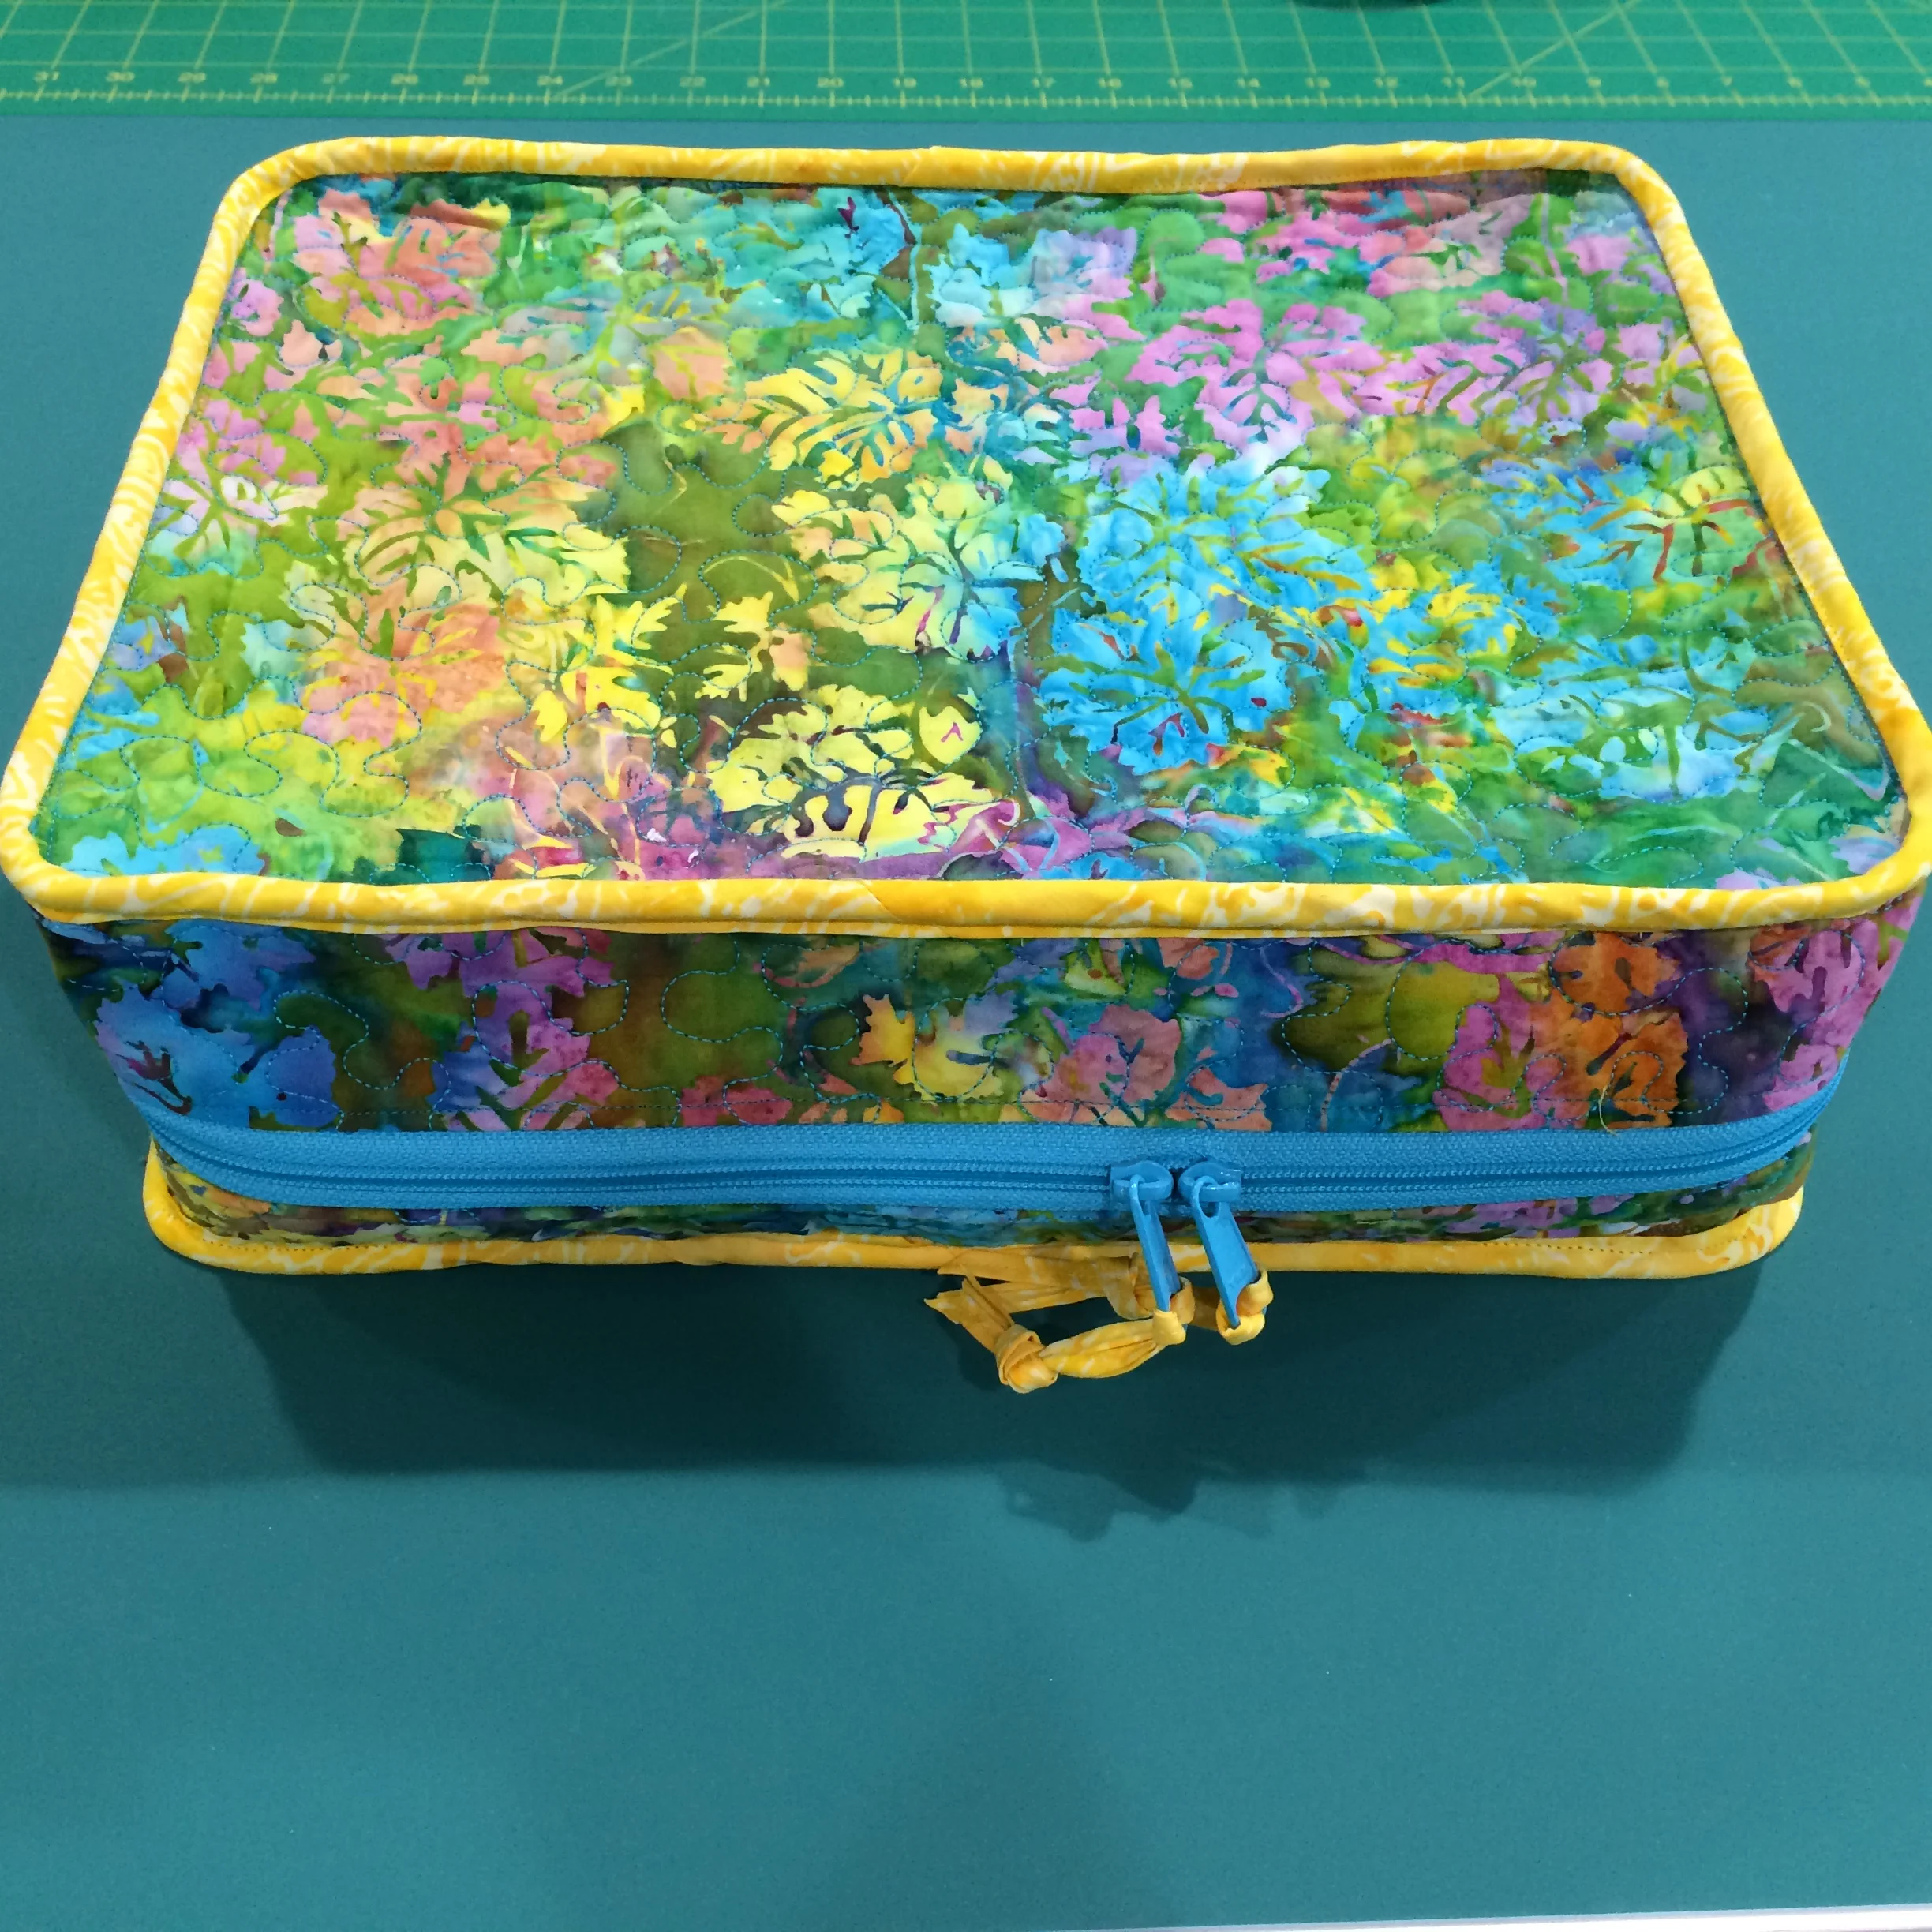
Here's the outside, all hooked up. 

The fabric is a batik that had been given to me as a thank-you gift when I did a speaking engagement in ...where? Can you guess? Yep, Kansas, the Sunflower State. I've held onto it for a few years to try to find the right project for it. I thought it would be fitting to have a travel bag for work made from a gift received through work. And it still is--even if no one ever actually sees this thing. I won't be sending them pictures. 


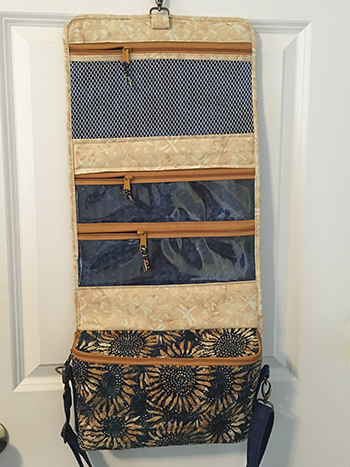
And here's the inside in all its four-pocket glory.

Strangely, that pouch pocket on the bottom didn't really give me any problem at all. Nor did the vinyl pockets, since I've now got my handy-dandy Teflon foot (or, in the Janome world, the Ultra-Glide). Yep, if you're going to work with vinyl, that is well worth the purchase. My Ultra-Glide foot just skated right over that vinyl with no problem whatsoever. If only I'd just bitten the bullet and bought it when I was working on the EIIP bag. Life would've been much easier!

However, getting the binding on around that same darn pouch pocket was a real... ahem. This is a family blog. There will be none of that language here, young lady.

Now, the real question is--will I really use this when I travel? The jury is out on that. I'm going away with my husband on vacation next week and we're driving so, in that instance, yes, I'll take it for a spin. Luggage space isn't really an issue. 

However, for air travel? Probably not so much. Pam of Hip to Be a Square made this bag awhile back and told me she had problems traveling with it because the hook on the top is too small to hang on the clothing hooks on the back of hotel bathroom doors, which is what you're supposed to do with a toiletries/cosmetics bag like this. So that's kind of a pain.

Of bigger concern is the overall size. Here's a comparison photo with my usual L.L. Bean (well-worn) toiletries bag.

Compared to a bag that I already sometimes have difficulty finding room for in my suitcase, the Annie Unrein bag is a bit of a behemoth. I like to travel really light. In fact, when I'm only gone a couple of days I don't even bother with the L.L. Bean bag--I just use a zippered pouch or two and use as many hotel-provided toiletries as possible.

So the jury's out on how useful this new cosmetics bag will be. I strongly suspect I'll find some other use for it--like as another embroidery project bag or something like that. As long as it's something that doesn't have to appear in public, I'm good.

But it's done. And sometimes, done is even better than not-particularly-good, let alone perfect.

Craftsy Class Review: Zip It Up: Easy Techniques for Zippered Bags with Joan Hawley

It feels odd for me to be saying I just took a sewing class, but there it is. In my attempts to conquer my dislike of fiddly bits, I've just completed another bag-making class on Craftsy.

If I'd been able to go straight through this class in one fell swoop, it probably would've only taken a weekend. It only took me as long to finish the class as it did because I'm deep into coursework now, so I only take random chunks of time to sew when my brain fritzes out from all the reading. Consequently, the sewing I do needs to be as close to mindless as possible (as I have few functioning brain cells left by the time I put down the books).

Enter Zip It Up: Easy Techniques for Zippered Bags with Joan Hawley. I've been a fan of Joan Hawley's Lazy Girl Designs for awhile; I own a couple of her bag patterns although I've never actually gotten them made. The three bags featured in the class were cute as well as seemingly functional. When it comes to physical things like this, I'm a much better visual learner so when I can watch someone do something rather than trying to read a pattern, I'm happier. Joan's step-by-step instructions on the video as well as the written materials that come with the class were very easy to follow. 

First, there's the "Runaround Bag." I finished this one a few weeks ago and blogged about it here. I think the bag took me less than two hours to make, and that was only because I was closely consulting the video lessons all the way through to make sure I didn't go horribly awry. Plus, I did a little fussy-cutting, which always takes a little longer.

I was able to use the bag immediately after I made it, which was a plus in my book.


The second bag in the class is the Nikita Bag. This is a basic boxy pouch--there are a boatload of patterns for doing boxy pouches out there and I'm sure they're all probably fairly similar when it comes down to it. But once again I found Joan's way of putting it together very easy to follow. I got this one done in about an hour and a half, all in. Again, that was with a lot of referring back to the video. It would go a lot faster next time.

I absolutely loved the fact that I was finally able to use some of my Marcia Derse fabrics. I bought a couple of panels and several coordinating fat quarters years ago at the show in Houston--If I recall, it may have even been the first year her fabrics were introduced. (She had her own booth and I paid her in person for my fabrics, which always makes you feel a little more connected to those fabrics, doesn't it?) I'd never found the right project for them. It works really well for this.

This if my favorite bag of the three. I really like the design of this pouch and could see me making more, although at the moment I don't know exactly what I'll be using this one for. Wait until my next trip when I'm looking for all the best containers for the tchotchke that always has to come with me.

The third class project is the Bendy Bag. I'm not such a fan of this design--I'm finding it a bit hard to work the zipper once it's all put together. I know that part of that is user error--I needed a slightly wider space between the zipper teeth and my seam. I used the same needle position I had on the other bags, but in this particular design I could've used a little more breathing room. Still, that bend doesn't help.

I used a half-yard of fabric I'd bought while in Hawaii in 2008. I've got a couple of other half-yards of the same print in different colors. I'd had half a thought of using all three fabrics in a fast lap quilt as a souvenir of my trip, but the quilt never got made and I've got plenty of lap quilts now, so this is just as good a way to use it. It's the same fabric outside and lining.

So--all in, I had no difficulty whatsoever making any of these bags. I would have no concerns about deciding I wanted to make any one of them again, maybe two or three times even. (I have a lot of fat quarters I'd love to use up!) The one least likely to get made again is the Bendy Bag, but if it proves itself to be the perfect travel bag for cords or adapters or any of the other multitude of electronic gadgets that travel with me, I'd even be willing to give that one another go.

Joan Hawley is easy to follow and now that I've done her class and several of her bags, I'd be willing to revisit the thought of making one of her patterns that I own. On the flip side, having now done two and a half bag-making classes--and yes, I do plan on finishing Annie Unrein's!--I've also gotten more comfortable with the idea of branching out and making other bags. 

Mind you, I still don't enjoy doing it the way I enjoy doing art quilting, hand-dyeing, or embroidery. But I can do it, and that's all I was shooting for. I do still avoid patterns with too many fiddly bits, though. Still not a fan.

The Basics

  • 7 lessons, ranging from 18 to 30 minutes.
  • Lesson 1 reviews the three bags in the class, gives some advice on choosing zippers and fleece, then talks about presser feet and needle positions. (Do pay attention to the needle position thing, and write it on a post-it note. You reference those needle positions frequently throughout making the bags.)
  • Lessons 2 and 3 are the Runaround Bag; Lessons 4 and 5, the Nikita; and Lessons 6 and 7 are the Bendy Bag.
  • Each lesson not only gives instructions for the bag itself, but also offers some nice take-away tips that would be useful in other places. 
  • Class materials are full step-by-step instructions with plenty of photos for making the bags.

If you're a beginning sewist or a beginning bagmaker, I definitely recommend Zip It Up: Easy Techniques for Zippered Bags with Joan Hawley. Great entry-level stuff. If you're more experienced, you may still enjoy her tips and tricks, plus the bag designs. 

(Note: Using Craftsy links in this post helps support my podcast and blog. Thanks!)