
I have very little time to spend in my sewing room these days so fast finishes are of appeal. Plus, as I've said before, I have a sickness: I keep buying bag and tote patterns even though I really don't enjoy making the things. I am in a constant search for the perfect travel bag and I really want to use up some fabrics from my stash that I love and want to keep around, but don't want to commit to turning into a quilt. So bags are sort of the perfect solution, if I can get around my dislike of the process. Since I knew I'd have a few hours as fabric therapy at my disposal this weekend, I decided to make myself something useful given the travel I'll be doing over the next couple of months. To whit: A travel carry-on for flights that would also be fine for normal running about and trips to libraries and coffee shops for school work.
I've posted the pic of a couple of the bag patterns I bought from a vendor at AQS Quiltweek in Syracuse. As soon as I got home, I started digging through my stash to see if I had fabrics that would work well with either of the patterns. I found a winner: I'd bought three fabrics from a collection a few years back, then found another fabric that worked beautifully with them. Then they sat on my shelves. And sat. And sat. They were enough for this bag pattern plus enough leftover to make a coordinating wallet or some such should I decide to do that later on.
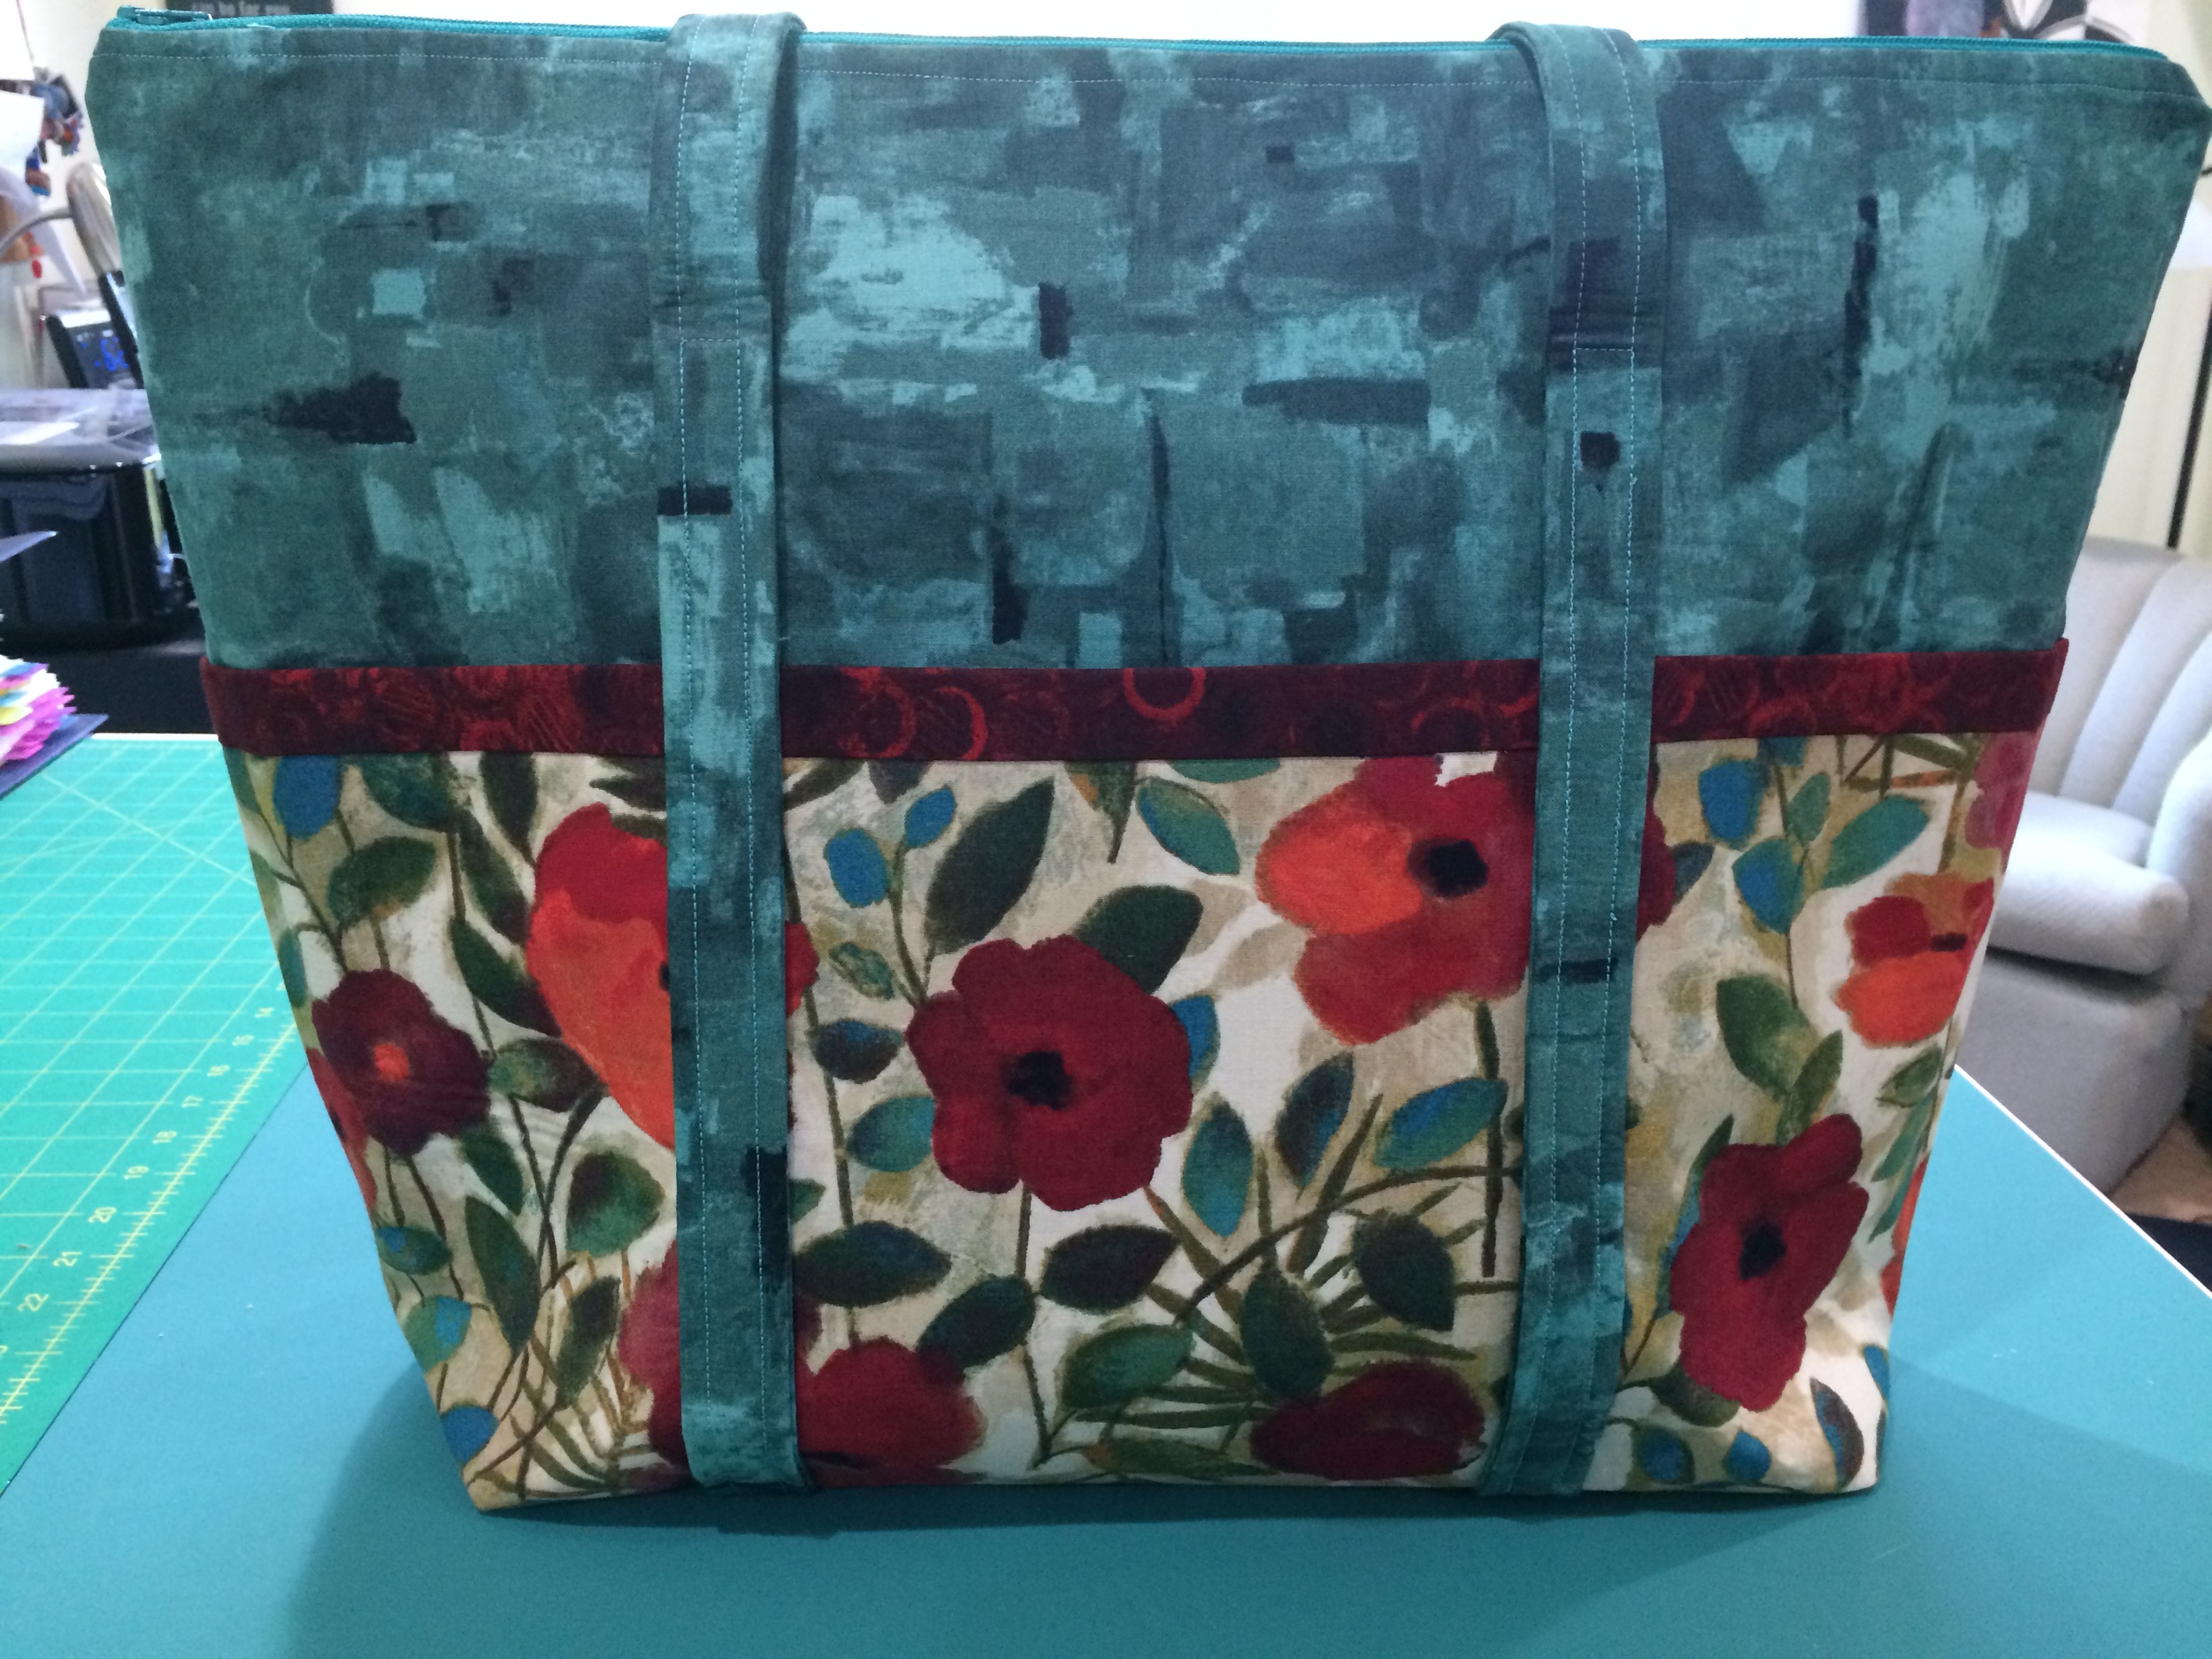
Final results! This is the "Laura's Zippered Tote" pattern from The Creative Thimble. It really is pretty straightforward. I took my time with it and still had it done in something like 4 or 5 hours all-in. As a still-not-confident bag maker, I didn't run across anything that gave me the heebie jeebies.
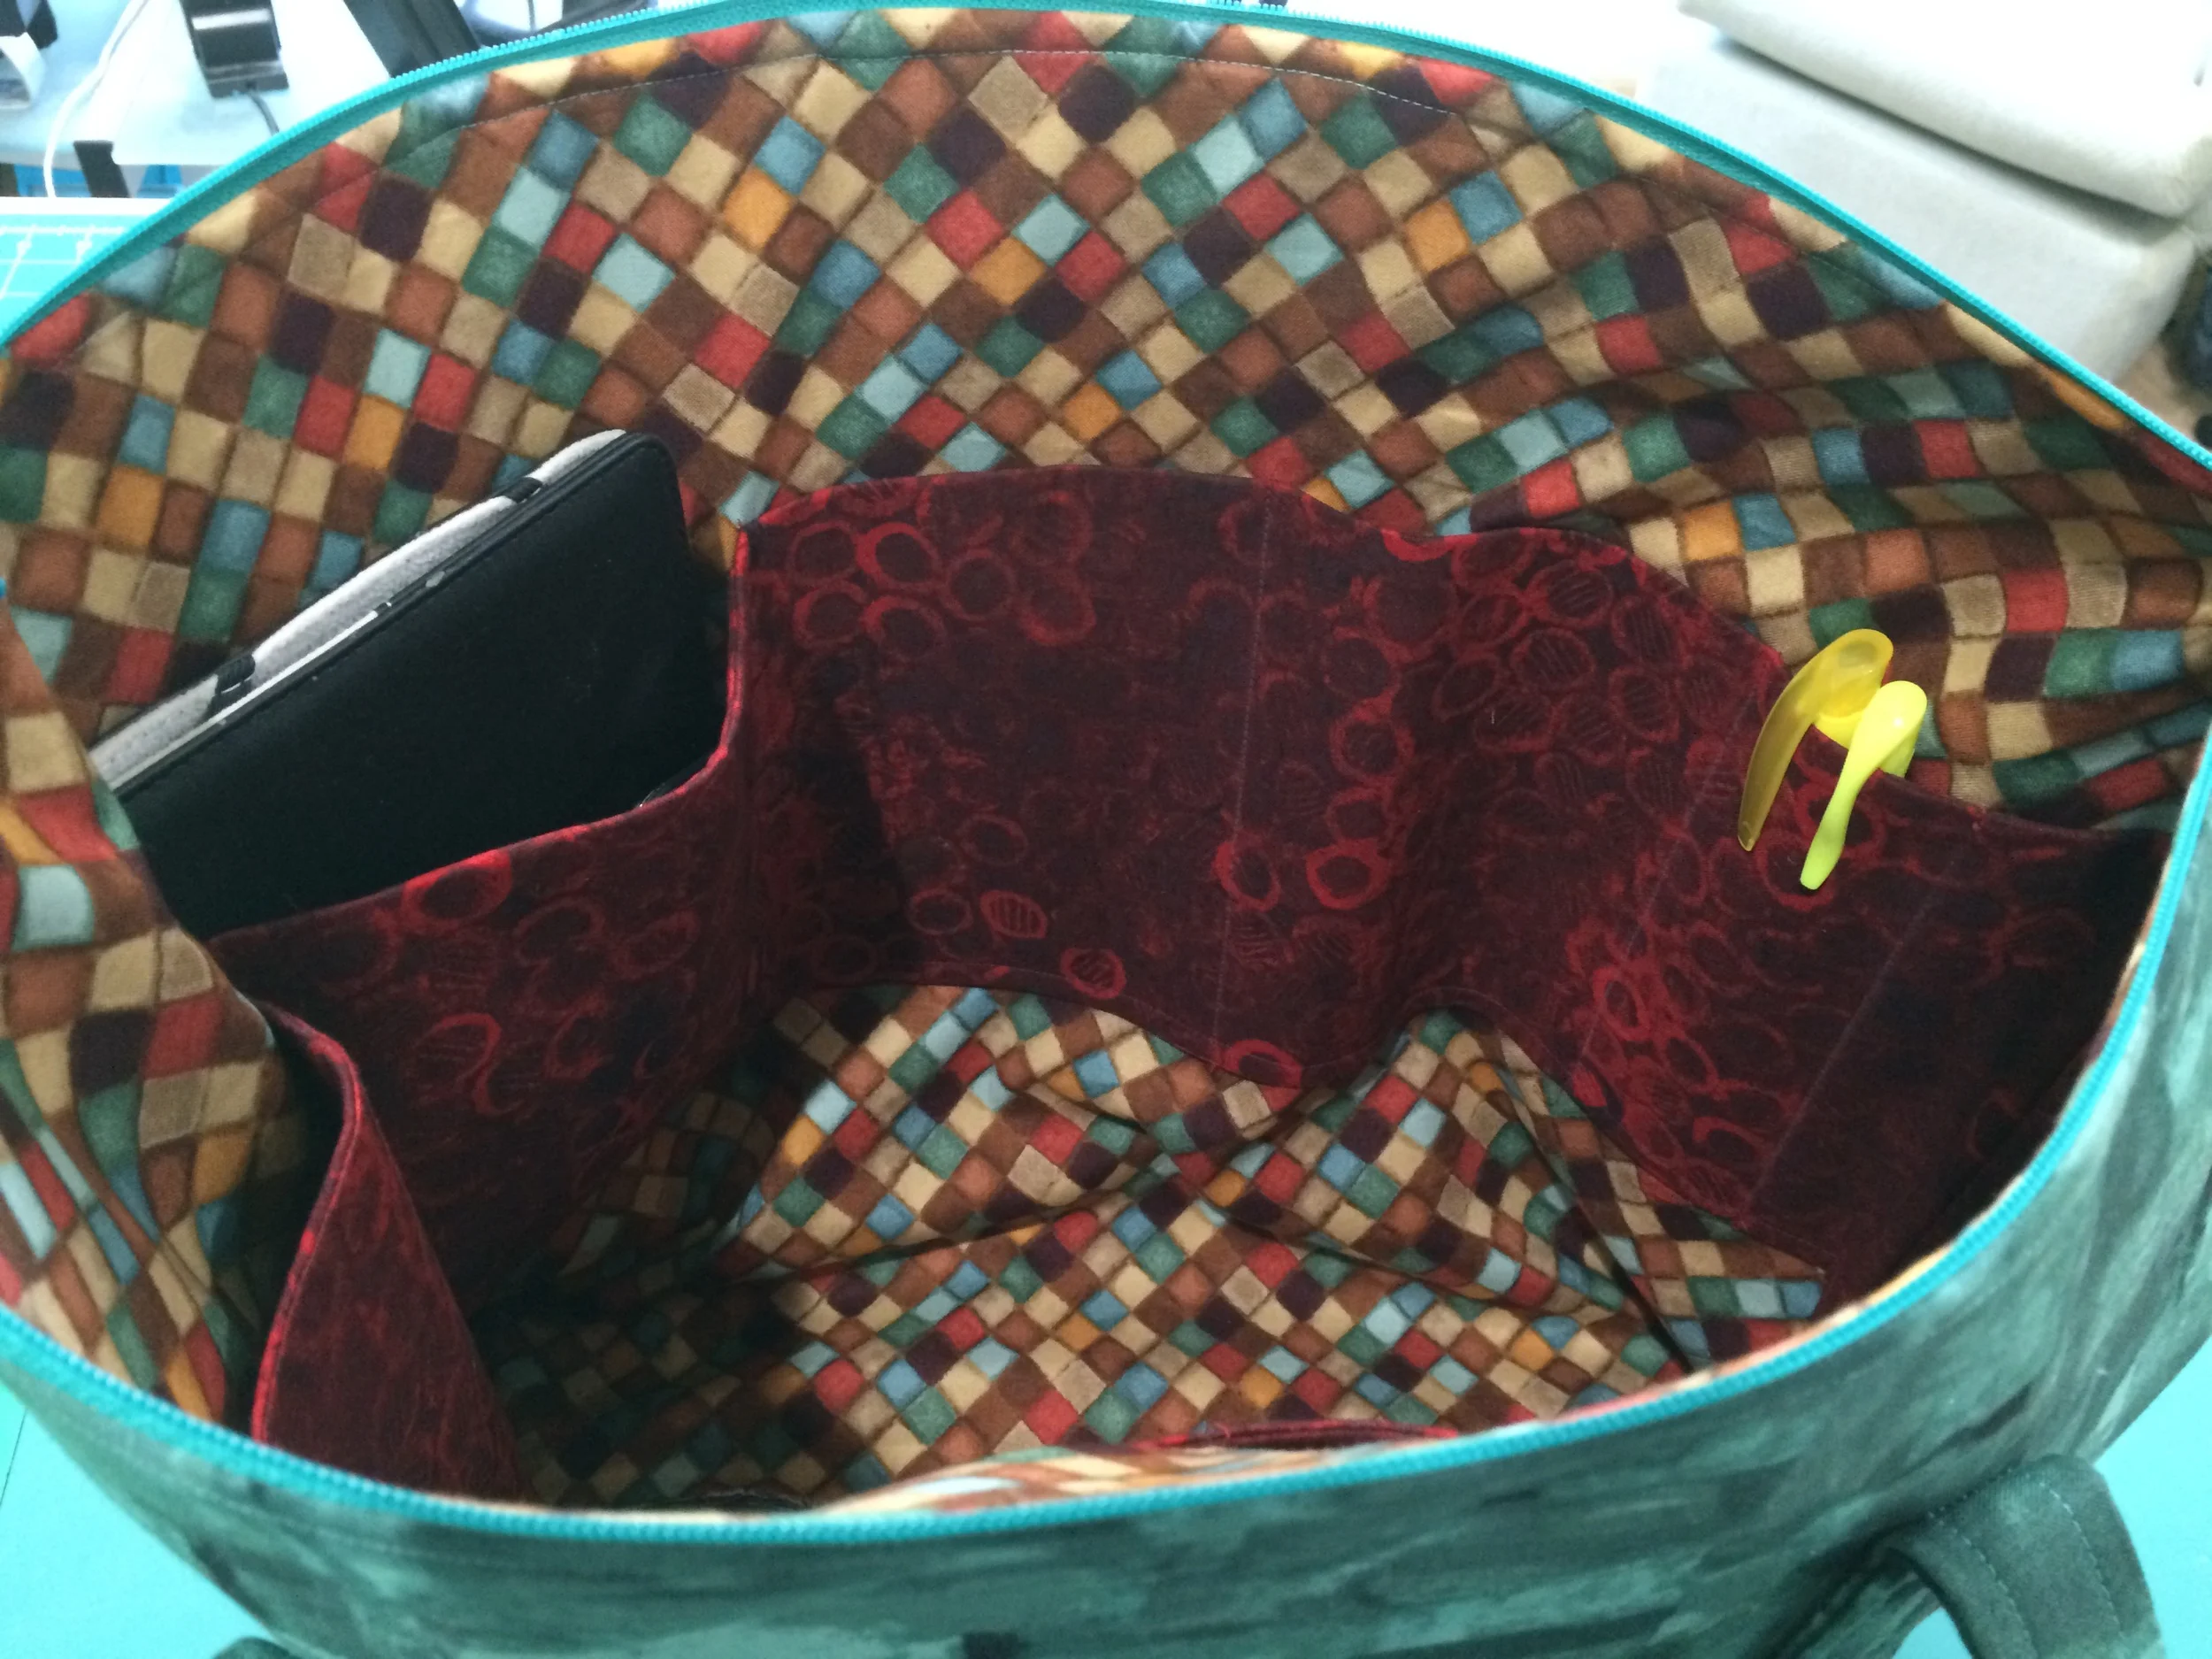
Here's the inside. The pattern calls for pockets on only one side of the interior; I added another set of pockets on the other side as well. The more pockets, the better.
I measured the divisions to fit my Kindle, phone, and some pens, etc., on the one side.
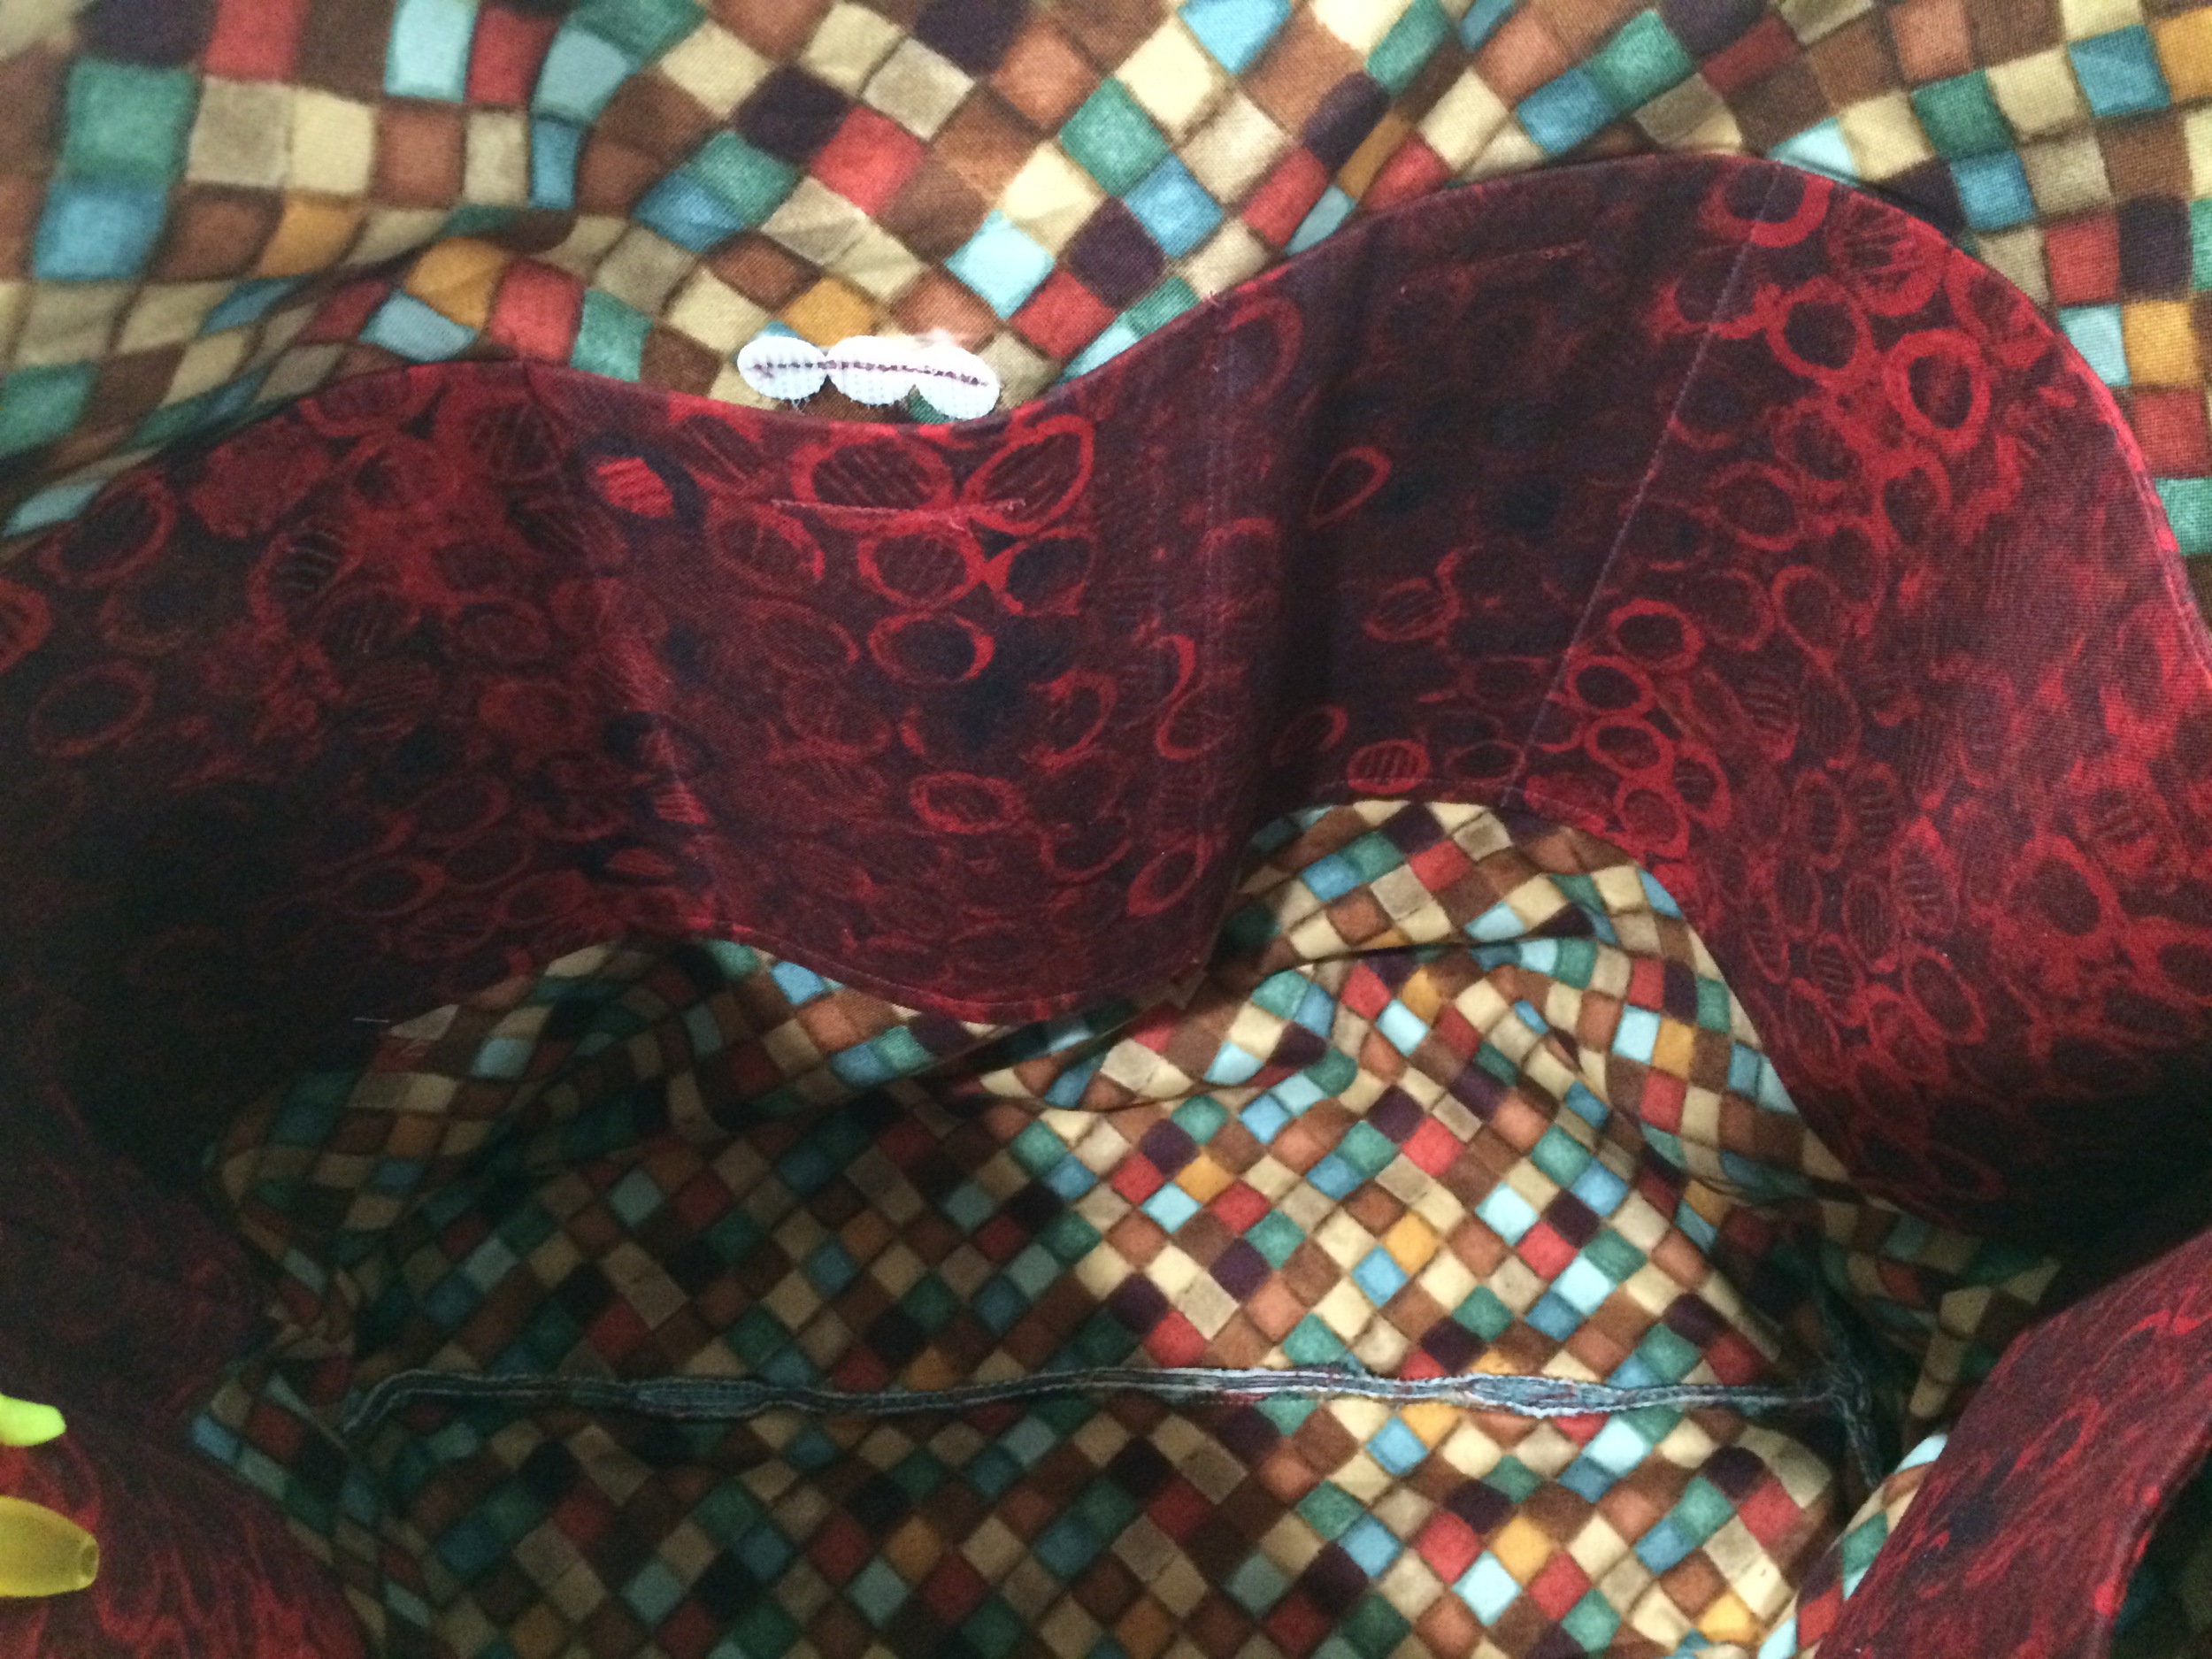
The other side of pockets were less specifically measured but divided slightly differently to give myself more options. I also added some little velcro dots to two of the pockets. Why dots? That's all I happened to have on hand. So I used three dots attached to each other to make it about as long as a regular rectangle of velcro would be. I didn't bother changing thread to white to attach the velcro because at that point I was tired of changing thread colors and I figured that, other than this blog post, I'd be the only one ever seeing it. So yes, the velcro is attached with burgundy thread. I can deal with that.
There are two things I'm not thrilled with about this design. The first, and main thing, is that there's a raw edge seam at the bottom of the interior. You can see it in the above photo. The instructions have you zig-zag the edge and I used Fray Check as well, but still n' all, I'd prefer a hidden seam. I'd have had to completely re-do the pattern to get rid of that seam and that's just not my thing. So I'm living with it.
The second thing is that it uses Pellon Decor Bond (809) as the stabilizer. It does give it good structure, but I didn't really like working with it. Plus, the fabric puckered a little when I was fusing it to the Decor Bond. Were I to make this pattern again, I think I'd probably use Annie Unrein's Soft and Stable. I really like the way that one felt when I was using it for the EIIP bag; I don't think using it on this design would make a noticeable different to the process of making the bag.
I did skip one part of the pattern--when you box the corners, the instructions have you folding those corners back into the inside of the bag and gluing them down to give the bottom more structure and stability. I don't have any glue on hand that would work and, again, I wasn't keen on a bunch of stuff hanging out in the bottom of the bag that loose coins and such could get stuck under, so I just cut those off as you normally would.
And one other note: The numbering of steps is incorrect in one part of the pattern. I had to read it a few times to figure out why I couldn't quite figure out how she'd gotten from point A to point B, but it didn't take too long to see where the mistake was and just move on from there. She doesn't have that error posted in the corrections on her website so I need to remember to email it to her. Other than that, the pattern was pretty easy to follow, even for a noob like me.

By the way, those are outside pockets as well--six in all. And the straps are the perfect length to carry it comfortably over my shoulder. Finally--a good carry-on bag for airline travel that zips on top so I don't have to worry about stuff dumping all over under the seats!
And I just love that I could finally use these fabrics--they've been on my shelves for a couple of years and now I get to keep looking at them in a far more useful form.
Overall, I'm pleased with the results and am giving myself grace on those parts that are less than perfect.