Making It Monday--Sundry Edition

I finally got him done.

It's ridiculous when you only have five minutes' worth of work left to do on something but you keep putting off doing it. 

Pshaw.

Whatever. It's done.

What else did I make? I guess I made a proposal. I spent most of my long Easter weekend (I had Friday and today off) working on school stuff. I once again give tremendous thanks to my D.Min. advisor who took time out of her Easter weekend to review my thesis proposal another time or two in the final throes of trying to get it prepared for the review committee. I'm not sure if I actually made their deadline for this month's meeting or not, so it may not actually get reviewed until their May meeting. Still n' all, May is a very busy month for me so I'm just as happy to get it done now. Fingers crossed that, whenever it goes to committee, it passes!

Let me take a moment, though, to list all the things I made this weekend using my Instant Pot! It's time for you to be dropping broad hints about Mother's Day or Father's Day gifts you'd like--or your birthday--or, just plain go shopping yourself. Let me just say it here, if I haven't said it enough times before. I LOVE MY INSTANT POT!

This weekend, I used my IP to:

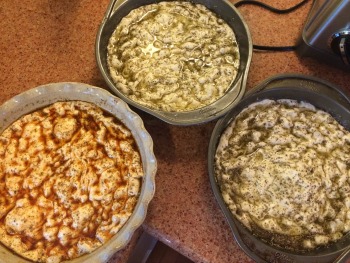
  • Make split pea soup (using my favorite recipe here and great smoked hamhocks from an Amish grocery store)
  • Make "baked" potatoes for Easter dinner (30 mins all in)
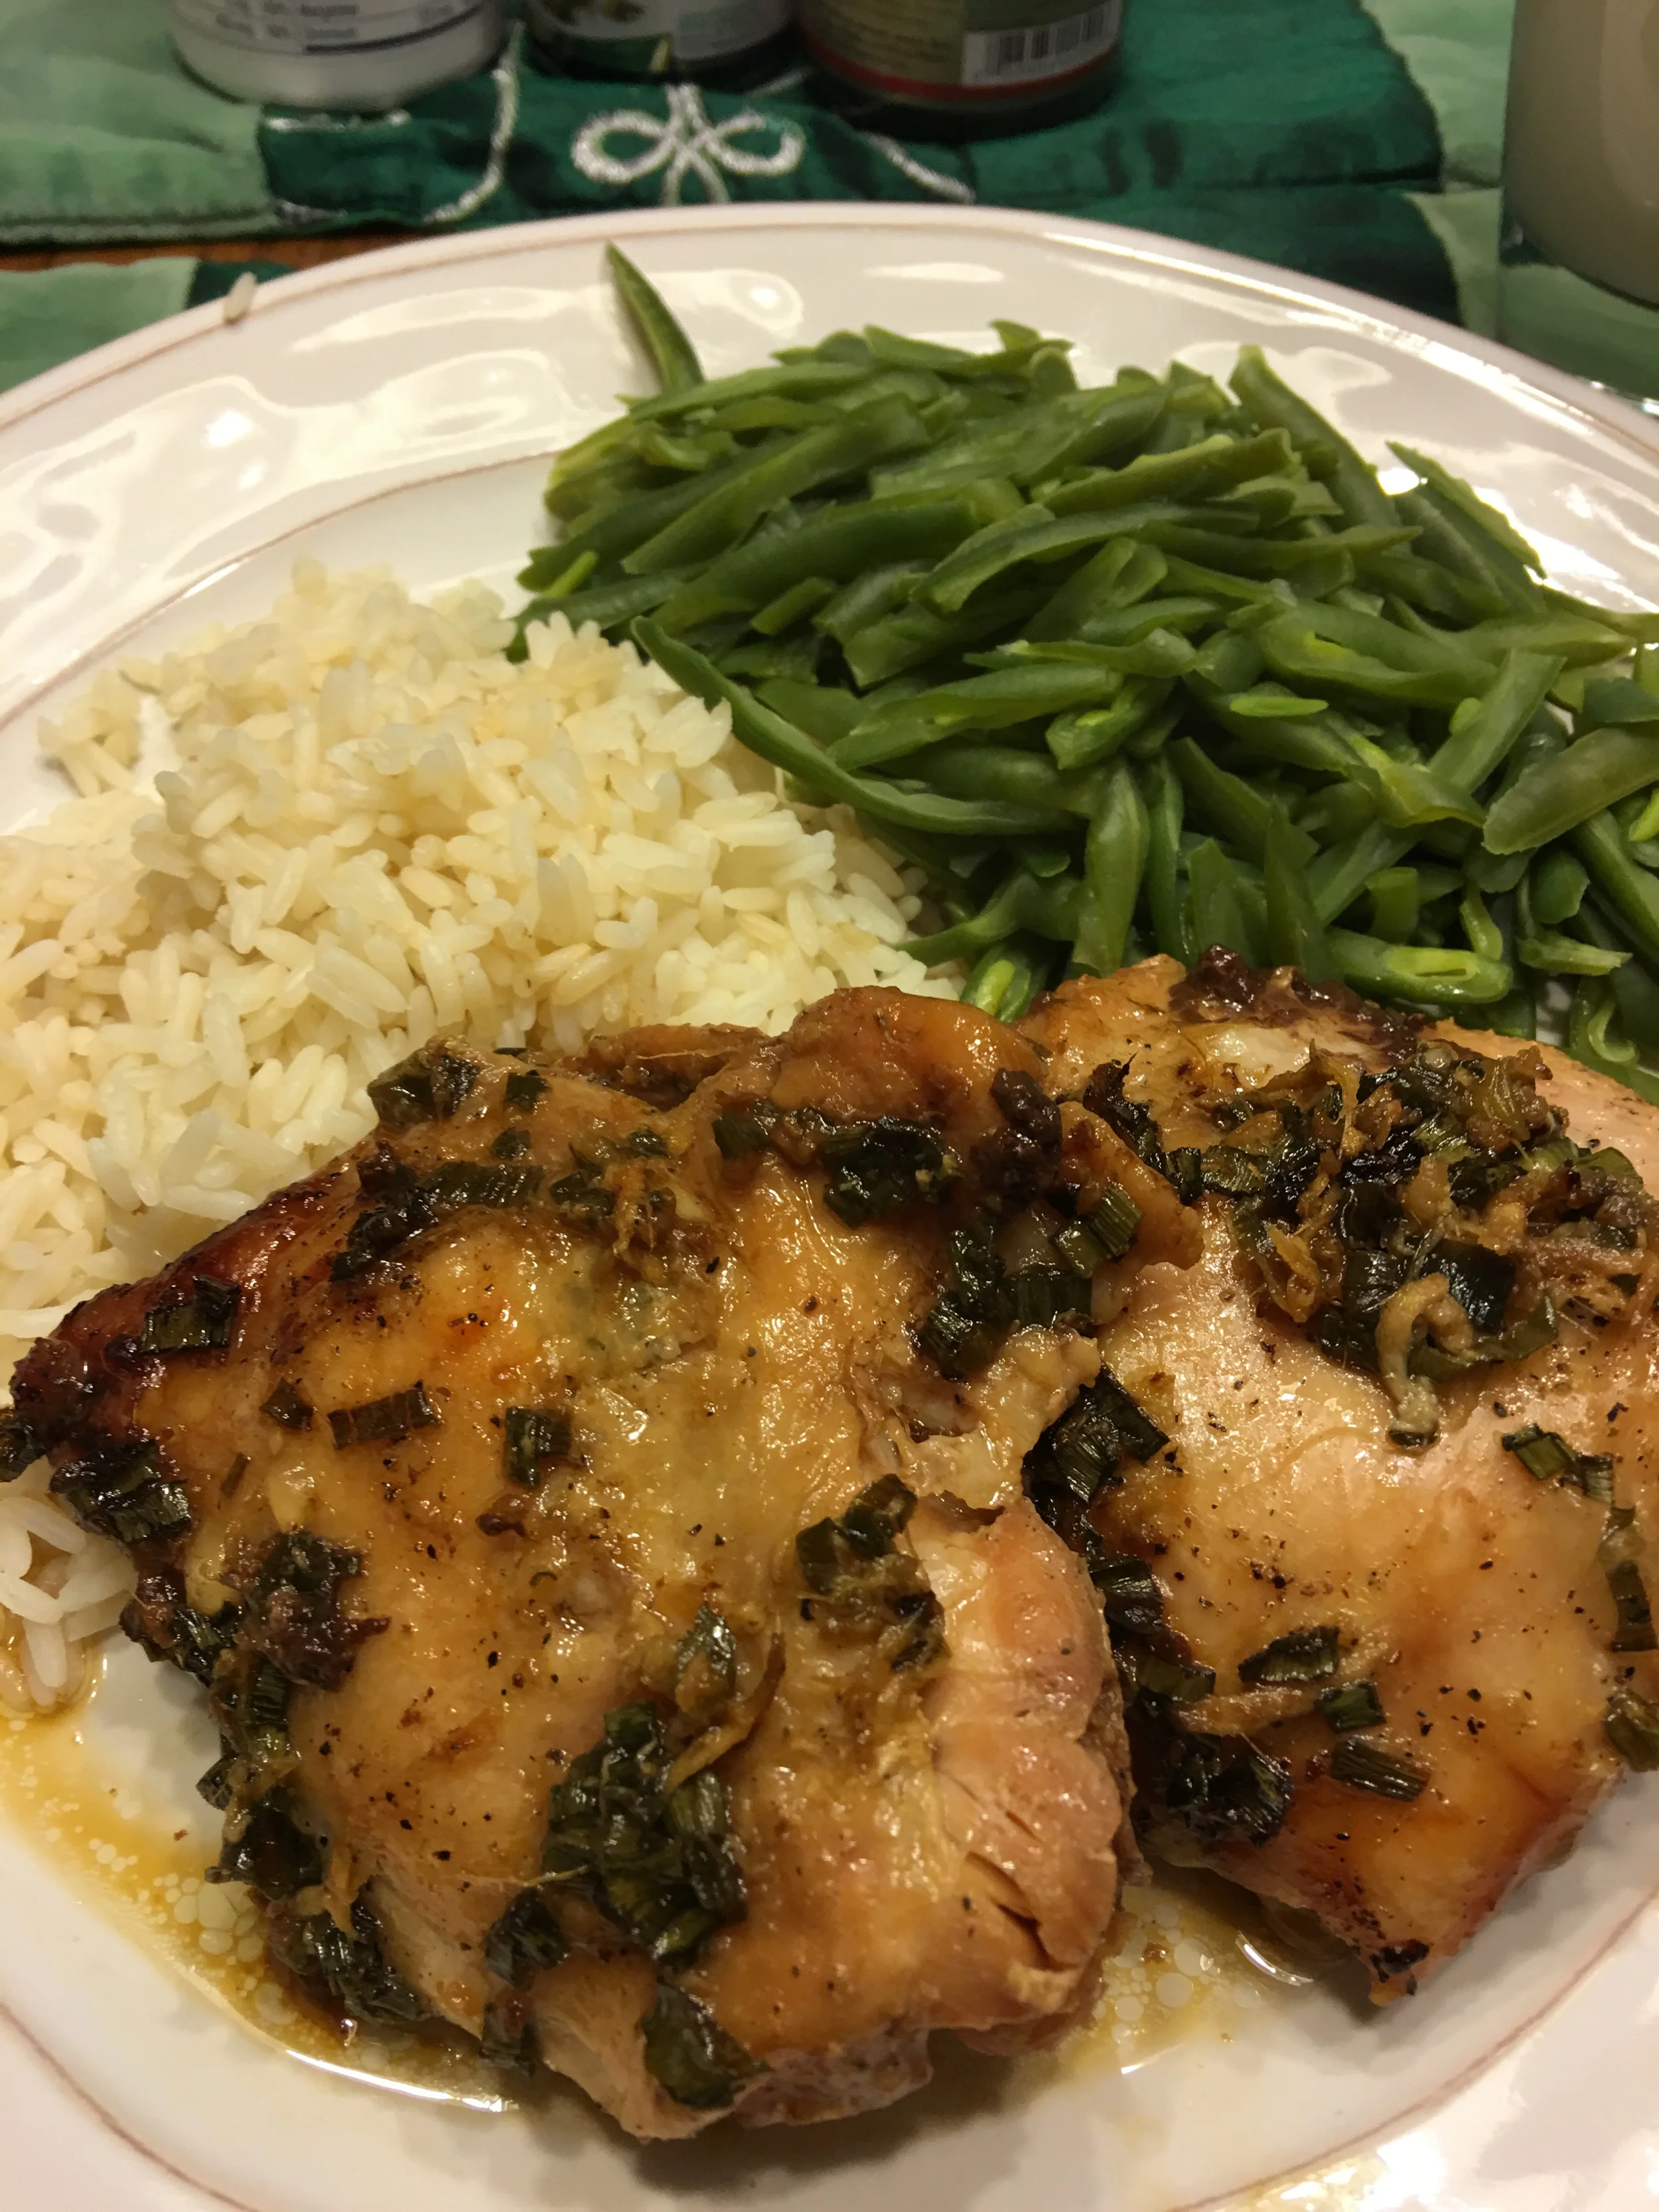
  • Steam green beans for Easter dinner (5 mins all in)
  • Make Chocolate Lava cake for Easter dinner dessert (using this really easy and incredibly tasty recipe)
  • Make hardboiled eggs for the week (doing them in the IP makes them super easy to peel, regardless of how fresh they are)


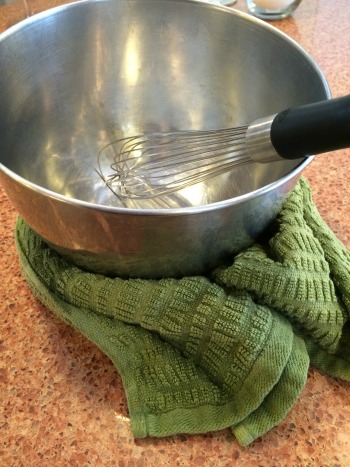
  • Make my weekly batch of yogurt, and this week's batch is the best one I've made yet. I got the perfect consistency, and I switched to vanilla bean paste, which has a much better flavor than vanilla extract. There's a bunch of instructions for making yogurt in your IP on the internet--it's super, super easy. 

If you're new to IPs, let me suggest the following accessories:

  • If you want to make yogurt, it's worth buying a yogurt strainer. I tried the cheesecloth thing and I tried the coffee filter thing and it was messy and a pain in the.... Well, anyway. Since I make it every week, I decided to go ahead and pony up for actual strainers and I'm thrilled. So much easier! I do a gallon of milk's worth of yogurt every week so I bought two strainers. The amount of yogurt fills both strainers to the brim.
  • Get two inserts. Really. This way you can rotate stuff through more quickly. I bought my second insert about two weeks after I started using my IP because I discovered just how much I could get done in a weekend to prep for my week ahead.
  • These steamer baskets work really well. (There are a lot of them; I linked to the ones I actually use and can speak with authority about.) I use these when I do potatoes, eggs, vegetables, and so forth.
  • I took advice from the Facebook IP group early on and got a second silicone ring because the ring does take on the smells of whatever you're cooking. There was a lot of fear voiced in FB about whether those smells would then have an impact on cooking something else. I have to say, though, that in the six months or so I've been using my IP, I've never used the second ring. In my experience, I've had no problems with tastes transferring; washing the ring seems to be good enough. If you're interested, though, here's a link. They also have color-coded ones for "sweet" and "savory."
  • Speaking of that Facebook group, here's the main one I'm part of, and you'll notice a few other #Twilters hanging out there too. There are many other electric pressure cooker and IP-specific groups on Facebook as well. It's a great place to get new ideas and recipes!

(This post contains Amazon affiliate links. Thanks for the support!)

Craftsy Class Review: Slow-Cooker Savvy with Michele Scicolone

For awhile there, the only Craftsy classes I had time to do were the cooking ones. After all, a girl's gotta eat even in the midst of writing papers! That being said, this is another class I finished awhile back while snow was still on the ground.

Let me clarify, since we had snow on the ground well into April. I finished Slow-Cooker Savvy: Make Your Best Meals with Michele Scicolone in early February. Just the [normal] season for slow-cookers. Nothing like smelling your dinner cooking all day long when the snow is falling outside your window. (Although by mid-April even the smell of dinner couldn't make me feel any better about that snow. But I digress.)

This was a good class, and I tried several of the recipes out of it. I do have to give you fair warning, though: These are not your typical "dump it in, turn up the dial, walk away" recipes. Some of them take a fair amount of work either before the slow-cooker does its job or after. The Beef and Beer Stew, for example, took me about half an hour to get everything ready just to go in the slow-cooker. (That also didn't turn out to be my favorite recipe, but you may enjoy it.)

IMG_0001.JPG

I made her White Beans with Sage recipe, although I didn't have any sage so I did thyme and rosemary instead. I used them as a side dish with some other ingredients here and there over a period of days. I intend to use the techniques again with a variety of other beans as I like the idea of having beans on hand to use in other ways.


The Peking Chicken recipe was quite good. My husband even liked it, which is saying something since he approaches any slow-cooked meal with suspicion, plus I used the chicken thighs the recipe called for and he is not a fan of dark meat. This recipe is definitely a keeper. (That being said, I may do chicken breasts next time to cut him some slack.)


For me, the Beef and Beer Stew recipe, maybe not so much of a keeper. I've got other stew recipes I like better. Still, there are several other recipes in this class that I'm looking forward to trying, now that I have time to cook again. (Even the "dump and cook" recipes take too long when I'm on the road more than I'm home!) For example, there's a pulled pork recipe that's intriguing--I want to try it out to see if it beats my others. Hmmm. Maybe this weekend--more time for sewing if the slow-cooker is working for me!

Michele Scicolone is a polished instructor and has written twenty cookbooks--if you dig this class, you can pick up some of her cookbooks and have all sorts of slow-cooked recipes in your repertoire.

The first lesson talks about the varieties of slow-cookers on the market, and gives pros and cons to several of them. I already own three slow-cookers of varying sizes and after watching this lesson, I've started thinking about getting a fourth for some of the very handy features I don't have on any of the others. She also shares some cautions about using older slow-cookers, such as ones you might find at a garage sale. Michele goes through safety concerns and caring for your slow-cooker, as well as how to calibrate the temperature settings.

The rest of the classes walk through different types of meats, side dishes, and "fast slow-cooking" (frittata and creme caramel). In each, she not only talks about the one recipe used to show the technique but also shares substitutions and basic information about considerations you need to keep in mind for cooking that particular type of food using this method.

I don't tend to use my slow-cooker as much in the summer, for some reason, but I think this class may make me adjust my usual habits. After all, there are some great summer salads using beans, and a frittata would be a nice brunch dish. Something to consider, anyway!

The Basics

  • 7 lessons ranging from 16 to 30 minutes
  • Lesson 1 is an introduction and includes lots of fantastic information about slow-cookers
  • Lesson 2 is cooking a whole chicken (which includes good information about how volume affects cooking)
  • Lessons 3-5 are various types of meet: chicken pieces, beef, lamb, and pork
  • Lesson 6 is side dishes--mashed potatoes, beans, and polenta
  • Lesson 7 is "fast slow-cooking," including an egg dish (frittata) and a creme caramel. 
  • The class materials include a brief list of some of the slow-cookers she talks about in the class, as well as 12 recipes. 

I did find Slow-Cooker Savvy: Make Your Best Meals with Michele Scicolone very helpful. Recommended!

(Transparency: Using Craftsy links in this post help support my podcast and blog. Thank you!)

CSA Tuesday Week 1

Woot! It's the first week of our CSA (Community Supported Agriculture) season. This always feels a bit like Christmas every week--I never know what I'm going to get until I go to pick it up.

This week, we received:

  • Four kohlrabi with leaves attached
  • A bundle of rhubarb
  • Some very pretty garlic scapes 
  • A boatload of snap peas
  • A boatload of apples

I was a bit surprised by how much there was in the box: This is only a half share or, as they suggested, enough for 2-3 people. The three of us in our house will be sharing it with a couple of other people as well, I think--I'm sending my daughter over to her grandparents' house tomorrow to share a bit of the bounty. Since I don't have time to can and my freezer's pretty small to start with, it's hard for us to prep things for long-term storage. I have yet to buy the vacuum sealer I keep talking about getting. Maybe this weekend I'll finally get out to take care of that.

I know: apples aren't exactly in season in these parts; I believe they're from the farm's cold storage. I already ate one--very yummy. Not sure what type they are--not an Empire or Macintosh, but somewhere in between, sweetness-wise. My daughter and I also dove into the snap peas pretty fast--we both love to eat them raw. 

What I'm thinking I may do:

  • Kohlrabi:
    • Kohlrabi and apple slaw: I have a few different recipes in various CSA-related cookbooks I bought in previous years, but I've never tried it. Since I have both kohlrabi and apples, seems like a great way to use two CSA products at once. 
    • Roasted kohlrabi: I'm proud of myself because I'd already been thinking, "I bet that would roast up nicely," and then I saw it in one of my cookbooks. Bingo! Guess I'm figuring out some stuff about this cooking gig.
    • Haven't decided about the leaves yet--maybe a soup?
  • Garlic scapes:
    • Garlic scape and potato soup: I'm a big fan of potato soup anyway, so it's not at all a stretch to throw some garlic scapes in there.
    • Stir-fries, of course. 
  • Snap peas:
    • Stir-fries, if any of them make it past my daughter and I munching them raw. I'll also probably be sharing these with my MIL--we really do have a lot.
  • Rhubarb:
    • I'm pondering a cold strawberry-rhubarb soup. The tough one on this is that I'm the only person in the house that likes rhubarb at all, and I really only like it when it's combined with strawberry and baked into a pie. I cannot be eating pie all by myself. Ahem. I'm thinking I may keep a couple of stalks to play with and then share the rest with my MIL. She loves it.
  • Apples:
    • These are easy--we'll mostly just eat them raw although see above reference to the kohlrabi slaw.

Stay tuned to see what actually happens!

If you're curious, here are the cookbooks I got a few years ago when I first started down the CSA road:

(Using these Amazon links does help support this blog, so thanks if you do!)


Craftsy Class Review: Love Your Vegetables with Anna Bullett

Time for another food class review: Love Your Vegetables with Anna Bullett. It's been awhile since I've done a foodie post. However, for this one, I don't have any photos of dishes I've made from the class since I'm holding off trying the recipes until my CSA begins in another couple of weeks. So you'll be hearing more about the recipes themselves later.

I decided to do this class because of the aforementioned CSA, or Community Supported Agriculture. If you're new to my blog, just a short backstory: I've subscribed this summer to a CSA, and deliveries start the second week of June. I've done CSAs two other years but skipped last year because I travel a lot during the summer and was having problems juggling the schedule. This year, I found a CSA much closer to me so doing the weekly pick-up will be a lot easier, and I think I'm getting a smaller share, so it should be easier to keep up with the produce. I don't have time for canning and I have limited freezer space so I really do need to be able to use the produce up the week I get it, as much as possible. That means collecting a ton of vegetable-focused recipes. This class seemed just the ticket.

One of my 2013 CSA pick-ups

One of my 2013 CSA pick-ups

Anna Bullett reminds me a bit of Rachel Ray in terms of perkiness. If you love Rachel Ray, you'll probably really enjoy Anna Bullett. 

As a learning experience, it was a good one. Each lesson focused on a particular family of vegetables and, through the recipe or recipes covered in the lesson, Anna gives rationale behind different types of preparations for the vegetable in question. She also gives all sorts of good tips for washing, slicing, and storage. There are several recipes that I'm looking forward to trying when my produce starts rolling in.

Another ghost of CSAs past

Another ghost of CSAs past

Additionally, every lesson except the last includes a "Chef's Tip," or a brief tidbit of additional information about something else you can do with that family of vegetables. These were nice little additions--one of them helped me understand why my attempt at Kale chips a couple of years ago failed miserably. I think I'll be better prepared for the inevitable influx of Kale from the CSA this year. 

If you're looking to expand your repertoire for vegetable dishes--either as a side or a main--I do recommend this class. Just be prepared for the perky.

The Basics

  • 8 lessons, ranging from 15 to about 30 minutes; most are in the 15-20 minute range.
  • The first lesson starts right out with one of my all-time faves: butternut squash. Generally I want to rush my CSA through to get to fall so I can get my hands on the various forms of winter squash. I'm a fan of pretty much all of them.
  • Lesson 2 is root vegetables, lesson 3 "hearty greens" (aka Kale and the like), lesson 4 is Cabbage & Friends (including the very Dr. Seussian Romanesco broccoli)--and included a very helpful tip on keeping your cole slaw from going watery; lesson 5 may convince me to give eggplant another try; lesson 6--the beautiful tomato (yum); lesson 7 is about fava beans which I will likely never buy raw because I don't see myself putting that much work into a bean; and lesson 8 ends with a couple of ways to make easy, quick refrigerator pickles that will definitely be happening in my kitchen at some point this summer.
  • The class materials are extensive: 26 pages including 30 recipes. You're basically buying a cookbook with this class. The recipes are all quite do-able, too--only a couple have ingredients you may not already have in your pantry (depending on your fave styles of cooking).
  • The recipes are mostly side dishes but there are quite a few that either are, or could easily be, main dishes if you're going meat-free. In my case, there were a couple that I thought we could make vegetarian so my daughter could eat it, and then I could just throw in some diced cooked chicken in my portion to meet my more carnivorous needs. 

Two thumbs up. Basically, Love Your Vegetables with Anna Bullett is just increasing my yearning for Tuesday, June 9, when I get to do my first CSA pick-up of the season. I can't wait to dig in!

(Using Craftsy links on this website helps support my podcast and blog. Thank you!)

Craftsy Class Review: Secrets to Cooking Fish: Eight Essential Techniques with Joel Gamoran

As I've referenced in other posts, my husband and I periodically talk about how we really should eat more fish. I'm a bit iffy on fish in general; I have a few types of fish and a few ways it can be prepared that I can almost say I enjoy. He likes fish better than I do, but it's still not something he really looks forward to. I have been wanting to learn more about different ways to prepare fish (in the ever-diminishing hope I'd ever find something I really, truly loved), so I was thrilled when I saw that Craftsy now has a second class on fish. I had already done Fire up the Fish with David Bonom and enjoyed it (here's my review of that one). So, here's my review of Secrets to Cooking Fish: Eight Essential Techniques with Chef Joel Gamoran.

Joel Gamoran is executive chef at Sur La Table. You can tell he's used to teaching classes--he's very easy to watch: he's dynamic without being over the top, and makes you feel immediately comfortable. One very nice twist to this class is that he brings in a student for each lesson; the student serves as a visual "stand-in" for you as the viewer, of course. It's nice to see someone slicing and chopping as slowly as I might, and giving him the occasional uncertain look. I enjoyed how that made this class feel a bit different from other cooking classes I've done on Craftsy. 

Because he's associated with Sur La Table, there is a certain amount of product placement in this class. And I did almost "bite," so to speak, because my fish spatula is a very cheap one that's not at all flexible when I try to get fish out of the pan, so I tend to end up with crumbly bits on the plate rather than a pretty filet. Still, I decided I'd wait to treat myself to a decent fish spatula for if I ever start cooking fish on a more regular schedule than Once in a Blue Moon.

Each lesson introduces different ways of cooking fish by going through a recipe for that technique. There were only a couple of the recipes that I thought my husband and I would be able to agree on, so I ended up making the Sole with Browned Butter, Lemon and Almonds recipe, although I substituted tilapia for sole. In the grand scheme of fish, I will say I enjoyed this fish more than most, and it was certainly a very easy recipe to throw together on a weeknight. Next time I make it, though, I think I'm going to throw a little Panko crumb on that fish as my husband and I both like our fish to have a bit of a crispier outside. 

On the other hand, by the time it's soaking in that very tasty butter/lemon sauce, you've probably negated the vast majority of the health factor to eating fish in the first place. But that's beside the point.

I did really enjoy the class, despite my half-hearted feelings about the main course. I feel like I understand a little more about fish and what types of fish work best with what kinds of preparations, and I really appreciated his discussion of sustainability in the second lesson; great information there. There was a decent amount of information in regards to blending flavors and what kinds of sauces, salsas, or side dishes work well, although I always wish for more along those lines.

Still n' all, I do really recommend this class. For this non-fish-aficionado (see what I did there?), it was a good class. For someone who actually likes fish, it would be a great class!

The Basics

  • 8 classes; absent the 2 1/2 minute introduction of lesson 1, the other 7 range from 14 minutes to 26 minutes.
  • Lesson 2 is an excellent overview of types of fish, what to look for when buying fish, and sustainability; it also has a no-cook recipe included.
  • Lessons 3-8 go through grilling, roasting, poaching, sauteing and pan-frying, steaming, and curing and smoking. The recipes range in complexity but none are very difficult--they're all quite achievable by the average home cook. Some excellent tips for testing for doneness and how to slice and serve certain fish dishes are also useful.

I can't allow my two-thumbs-sideways attitude about fish to color my review of Secrets to Cooking Fish: Eight Essential Techniques with Chef Joel Gamoran, so I'm giving the class two thumbs up. And if you act fast, it's on sale right now!

(Using Craftsy links in this post helps support this podcast and blog. Thank you so much!)

Craftsy Class Review--Cooking the Perfect Steak with Bruce Aidells

Hello, World!

I finished all the cooking classes I had bought from Craftsy in 2014. I love taking cooking classes because even with stuff you think you know how to do, you can generally pick up some great new tips. (Brendan McDermott changed forever how I scramble my eggs, and Molly Stevens put a big twist on how I'll be roasting chicken from now on.) So, one weekend in January when I was hanging out in my hotel room trying to turn my brain off from a day of meetings so I could go to sleep, I was tooling around in Craftsy's sale section and landed on Cooking the Perfect Steak with Bruce Aidells. 

Now, mind you, my husband has it down when it comes to using our grill in the summer. No problem there at all. But he was convinced there was no point in having steak in the winter. In his mind, there was no way you could do a steak as well in the kitchen. So I figured this class might offer us some alternative cooking methods that could keep us in steak year-round. 

NY Strip Steaks with two different dry rubs to suit our differing tastes, searing pleasantly in their cast iron skillet.

NY Strip Steaks with two different dry rubs to suit our differing tastes, searing pleasantly in their cast iron skillet.

Bruce Aidells clearly knows his stuff and he's good at explaining everything he does. I still have difficulty remembering which cut of beef is which when I'm facing the butcher case trying to pick out the right cut for the method I want to use it for, but Bruce's explanation of the different types of steaks and their respective levels of tenderness was very helpful and clarified for me some things I've run into over the years.

His class does cover outdoor grilling techniques, and I may have picked up a tip or two there; however, for me, the real benefit of the class was the first couple of lessons that all involve the stove and oven. I bought a couple of strip steaks and used his techniques to make them for dinner one night, fervently hoping I didn't mess something up because those puppies aren't cheap.

Fortunately, I didn't mess anything up. I used a dry rub we already had on hand because I discovered I'm out of a few of my go-to seasonings (when did that happen?). He gives a recipe for a dry rub but it didn't appeal to me--he has other recipes for condiments in the class I can more easily see myself adapting, but I get a kick out of creating those things myself anyway. But this time, I just cut to the chase and opened a jar.  

The steak turned out very well--I was shooting for medium-rare and hit the target. It was an easy enough process, of course, and paying attention to what Bruce Aidells had said to look for at various stages helped me keep on track with getting the level of doneness I wanted. DH and I both liked the results, although he wouldn't quite get to saying it was just as good as the grill in the summer. But hey, it was still good! 

Yum!

Yum!

The Basics: 

  • 7 lessons ranging from 14 to about 24 minutes. The first lesson includes information about what to look for in a good cut of meat, terms, grading, aging, and so forth.
  • Lessons 2-5 each address a different cooking technique--the first two indoor, the second two outdoor. In each, he talks about different cuts of meat that work well for each technique, and gives a recipe (with ideas for variations) for a rub, marinade, or side dishes to go with the steak.
  • Lesson 6 talks about how to measure doneness and gives a very thorough look at different types of thermometers.
  • Lesson 7 addresses knives, carving, and additional condiments.
  • The class materials are 11 pages of recipes, both for the steaks as well as the condiments, side dishes, and so forth.

There was only one "miss" that I noted in the class, and several people had commented on it in the class discussion so he was able to explain. In lesson 6, as he describes each level of doneness (rare, medium rare, etc.), he doesn't show an example of what it looks like. It should have been easy enough to have one steak of each doneness sitting in front of him or flashed on screen as an image. He explained that he expected pictures to be in the class materials but the graphic had gotten inadvertently left out. First of all, there's a reason why you do a PDF: you can fix it and upload a new version easily enough. But even without that, why leave it to the PDF? You're on video, show the examples on the video.

Still n' all, that's my only quibble with the class--and for me, it wasn't a big deal because I know what the degrees of doneness look like. But if I were a new cook, I'd have struggled a bit with that section.

So I give Cooking the Perfect Steak with Bruce Aidells one thumb up, one thumb mostly up but maybe leaning just a hair off-center. Still, if you're a carnivore, this is a good class!

(As usual, using the Craftsy links on this blog post help support my podcast and blog. Thanks so much!)


#BFSI Craftsy Class Review: A Modern Take on the Mother Sauces with James Peterson

Craftsy

Yes, it's Black Friday, and once again I'm refusing to shop. However, I'm also not really hosting my usual #BFSI (Black Friday Sew-in) because I dropped my machines off for cleaning/tune-ups already--since I'll be gone three weeks, I figured this was the best time to do without. Unfortunately, I ended up with more time on my hands today than I thought I would and I'm really missing those machines!

However, it did give me time to finish up a Craftsy class, and I figured I'd quick post the review today since Craftsy is having a big Black Friday sale with all classes $19.99 or less. So grab the ones you've been looking at now!

This morning, sans machine, I took the time to finish A Modern Take on the Mother Sauces with James Peterson. To a certain degree I've been working on this class for awhile, watching lessons here and there, waiting until I had the time to try out one of the techniques. This one was a little trickier to decide what to try than the other sauce class I took awhile back, Homestyle Pan Sauces with Martha Holmberg (see my review here). Homestyle Pan Sauces is geared more at simple and relatively quick sauces you can make even on a weeknight when time is short. Mother Sauces take more investment of time, and willingness to wash a few more pots and pans afterwards. To tell the truth, some of what I learned from this class is, "Unlikely to make that one at home!" But that's part of the learning process--discovering what your limits are. None of the sauces are difficult, really; it's just a matter of time and, again, being willing to wash a bunch of pans. 

Holding steady...

Holding steady...

However--one of his lessons that I was willing to take on: I made myself a cranberry rosemary mayonnaise this morning to use on my leftover turkey sandwich for lunch, it being the day after Thanksgiving and all. I've made homemade mayo before, but I wanted to try his technique. I've used my food processor for this before; this time, I did it by hand. I picked up a nifty technique from him for keeping the bowl in one place on the counter while you're whisking--wrap a damp cloth around the base. My bowl was so lightweight it still bounced around a little unless I held onto it but it did make it wander a lot less than usual. He made some great suggestions for mayonnaise variations and how he serves them at barbecues that I may need to call on sometime over the summer when we've got a crowd over--they sound tasty!

I may do his aioli technique at some point--it's in the same lesson, and takes the same time and number of bowls (one) that the mayo takes. I could see myself doing a Hollandaise sometime, on a weekend or for a brunch. I thought all of the other sauces looked quite wonderful, really, but they're mostly going to have to wait until I have a stay-cation or retire.

I enjoyed James Peterson's teaching style quite a bit. He's very laid-back and can come out with some very funny expressions here and there--he referenced stealing the soul of a particular ingredient, for example, which tickled me. I did find that some of the lessons I was able to watch on 1.5x speed because he speaks relatively slowly, so if I was just wanting an overview of the technique to determine if it was something I'd do again, speeding it up a little was great. Besides, it's fun to watch someone whisk that quickly. Once I decided I wanted to use a technique, I went back and watched it again at regular speed to make sure I hadn't missed anything. Plus, of course, I took lots of notes--one of my favorite parts of the Craftsy platform.

Cranberry Rosemary mayo--tasted far better than it looks.

Cranberry Rosemary mayo--tasted far better than it looks.

The lessons are very comprehensive--in addition to teaching how to make the basic sauce, he gives several variations (sometimes demonstrating them, sometimes simply talking about them), and in most of them he also gives one quick recipe or demonstration of how you'd use the sauce--a cauliflower gratin, for example, or poached fish, and so forth. 

If you're a foodie and are willing to invest some time in getting great results, this would be an excellent class for you. Even if you're not into cooking, I actually found it very interesting to learn what goes into sauces I like to order at restaurants--now I finally know what they're made from and what makes them special, even if I don't ever tackle making them at home. 

The Basics

  • 8 lessons; the intro is 3 minutes, but the remaining 7 lessons range from 20-30 minutes long.
  • Lesson 1, the introduction, does the usual teacher introduction, but then explains what a "Mother Sauce" is and why they're good to learn how to make.
  • Lesson 2 is Béchamel Sauce; Lesson 3 is Beurre Blanc (another one I'm likely to try at some point); Lesson 4 is tomato sauces, although not necessarily "your grandma's Italian pasta sauce cooking on the stove all day," but other types of sauces using tomatoes; Lesson 5 is Brown Sauce, Demi-Glace, Glace de Viande, and Bordelaise; Lesson 6 is Velouté (this was a new one on me!); Lesson 7 is Mayonnaise and Aioli--inclduing a brief discussion of why much of what you see called aioli in restaurants isn't actually aioli; and Lesson 8 is Hollandaise and Béarnaise sauces.
  • The class materials are also very comprehensive. Not only do they include the recipes he demonstrates in class but a ton of variants on a lot of the sauces, and a glossary of terms at the end. 

Even though, the day after Thanksgiving, I'm watching this class and saying, "Nope, not gonna wash that many pots again," the likelihood is that once I'm a few weeks removed from kitchen chaos I'll decide on some relaxed weekend that spending a few hours making a really wonderful, fancy French sauce for dinner sounds like a lot of fun. I would definitely take other classes from James Peterson. Two thumbs up.

Again, that's A Modern Take on the Mother Sauces with James Peterson. And yes, it's on sale today!


Craftsy Class Review: 20 Essential Cooking Techniques with Brendan McDermott

As I'd mentioned in a blog post awhile back, I had submitted a request to Craftsy some time ago to do some basic cooking technique classes aimed at new cooks--thinking especially of my kids and nieces and nephews who all are a lot more interested in food and cooking than I was at their age. Some of them have done in-person cooking classes with me but because of random work schedules, college, and little bitty babies in their respective lives, they don't always have time to haul themselves to a cooking school. Video lessons are the perfect answer. I was thrilled to get an email from Craftsy saying that my request had now been answered. Enter Brendan McDermott--one of my fave Craftsy teachers to date--and 20 Essential Cooking Techniques with Brendan McDermott. Since I'd helped make it happen, I figured I had to buy it myself.

And I'm glad I did!

Hardboiled eggs done perfectly--not over or under done. These turned into egg salad.

Hardboiled eggs done perfectly--not over or under done. These turned into egg salad.

Even a woman who's been scrambling eggs for [ahem] years can learn a few new tricks.

My recent dental issues meant I was having to restrict myself for days on end to soft, mushy foods. I had plenty of opportunities to use skills I'd learned from the class on homemade pasta I'd taken a few weeks ago, but I needed to keep protein in my diet so I started eating a lot more eggs than usual. This class has two entire lessons on eggs and walks through hard-boiled, poached, fried, scrambled, and omelettes. 've done most of those things...a lot...for a lot of years. The only two I hadn't done successfully were poached and omelettes--my poached ended up stringy and my omelettes ended up scrambled. But I always liked my scrambled eggs.


Poached eggs--yums.

Poached eggs--yums.

Still, boredom with soft foods made me willing to try new techniques just to do something different. And this old dog learned a few new tricks! Following his methods, my hard-boiled egg was perfectly done, my poached egg was beautiful, my scrambled eggs were extra fluffy, and my omelette stayed omelette-y!  

Brendan McDermott is fun to listen to, although his humor isn't quite as evident in this class as it was in his free knife skills class. (See my review of that one here.) His teaching style is relaxed, and he explains the whys behind the hows. I feel like I understand why certain techniques work better now than I did before, even where they were techniques I was already using.

​The lessons are each meant to be stand-alone--in other words, their working assumption in the class is that someone should be able to dip in, watch one lesson, and get all the information they need for that one technique without having missed anything from a previous lesson. This means that if, instead, you watch all or many of the lessons in a row, you will hear certain foundational information over and over. I can pretty much quote Brendan's instructions about heating oil verbatim now. But it's good information, so it's not bad to have it drilled into my head. 

Steak and shredded cheddar omelette, with the steak diced very, very small as I was testing whether I could handle chewables yet.

Steak and shredded cheddar omelette, with the steak diced very, very small as I was testing whether I could handle chewables yet.

I've watched most of the lessons at this point and plan on using his techniques for making clarified butter (something I've never done), and I'll be making fish for dinner tonight based on his lesson on working with fish and shellfish. 

Can you tell that I really enjoy Craftsy's cooking classes--perhaps even more than the quilting ones? I know, that's nearly blasphemy to admit on a quilting blog. But there you go. 

This is not a recipe-oriented class like other technique classes are. He does give some very simple, quick instructions for pan sauces and the like as he's talking through the techniques. The class materials, however, do include 6 recipes, only a few of which I remember him mentioning in the class itself. This truly is a technique class. I didn't miss the recipes at all, though I will be using one of the quick pan sauces he does with my fish tonight--it's a way to make something just a little more special and flavorful without taking any more time or dirtying any other dishes. FTW.

I recommend this class particularly for newbie or less confident cooks, of course. But I also recommend it for anyone who is interested in tweaking their techniques after a lot of years of cooking. There's a lot of good information packed into each lesson. And, again, Brendan McDermott is a really good teacher--easy to listen to, explains everything well, and with a deadpan humor that I enjoy.

The Basics

  • 9 lessons; the first lesson is just an introductory piece about a minute long. The other 8 lessons range from 9 1/2 minutes to nearly 40 minutes.
  • Lesson 2 lays the foundation with "Enhancing Flavors," explaining how to toast various spices and nuts, clarifying butter, and making infused butters. Lessons 3 and 4 are about eggs--hard-boiling, poaching, frying (sunny-side up and over-easy), scrambling, and omelette, plus tips on how to tell if an egg is fresh and so forth. Lesson 5 covers blanching and shocking vegetables, lesson 6 is working with chicken, lesson 7 is making stock, lesson 8 is fish and shellfish, and lesson 9 is pork tenderloin.

So, my final verdict on 20 Essential Cooking Techniques with Brendan McDermott: Two thumbs up!

(Note: Using the Craftsy and Amazon links on this post help support this podcast and blog. Thanks so much!)

Weekend Progress

Sorry about completely blowing off my Fight the Funk Friday post. I was fighting the funk in many other ways! Thursday through Saturday were a mite busy in these parts and I just wasn't on my computer much. 

I actually touched my sewing machine for awhile on Sunday afternoon. I could've spent more time sewing this weekend but my BBW project is one of those that just needs time. As I'm working on one step, my mind is brewing possibilities for the next step. I'm pleased with where it's at but I needed another brief pause before I make final decisions about the last part I need to do. No pics until final reveal, though--the individual parts don't make much sense without the whole. And the backstory. So wait until next Sunday!

Meanwhile, I made pasta.​

I've been anxious to work on whole wheat pasta. I've tried eating whole wheat pasta a few times (dried, boxed, from a grocery store) and just couldn't get into it. Not so much a flavor thing as a texture thing. Too chewy or something. It just didn't jazz me enough to bother. 

But when I decided I wanted to learn how to make pasta myself, my primary goal was to make whole wheat pasta to see if I liked it any better than the boxed stuff.

And oh, I do.

This was definitely a success. I'll be making a lot more.


And, subsequently...dinner.

Whole wheat pasta with a quick sauce made of diced onions, garlic, diced tomatoes, diced roasted red pepper, Italian seasoning, leftover rosemary garlic chicken (Saturday night's dinner that's going to be a Craftsy class review as soon as I have a few minutes to really pull it together), and fresh shredded Parmesan. 

Very, very tasty. And pretty dang healthy, all in. Absent the Parmesan. (There's not as much pasta on that plate as it looks--I'd spread it out bowl fashion and put the sauce in the middle.)

So, of course, we have to figure out dessert.  

Yes, Virginia, there IS chocolate pasta. 

I know it may sound odd. When I bought the book Artisan Pasta and flipped it open to have my very first peek at the inside, it fell open to the chocolate pasta recipe. "How very weird," I thought, intrigued and a bit horrified at the same time. But it had to be tried. 

Mind you, this chocolate pasta isn't sweetened at all; you just add some unsweetened Dutch Process cocoa and a dash of cinnamon to your pasta flour. It's just about the prettiest pasta I've ever seen.

Look at that, all creamy brown ribbons. Gorgeous.


My first experiment for dessert tonight: I boiled the pasta (then drained and cooled it) and melted some Nutella with a dash of Canola oil to make it a little more of a syrup. Then I sliced up some strawberries into the pasta, drizzled the Nutella over the top, added a spoonful of Cool Whip Lite (had to save calories somewhere!) and sprinkled just a few chopped hazelnuts over the top.

I was shooting for a good balance of bitter, tart, sweet, and crunchy--and I did achieve that, at least--it wasn't too bad, but I don't think it let the chocolate pasta really shine. I'm intrigued by some ideas I saw online for using it Mexican-inspired preparations. After all, cocoa is an ingredient in molé so why not? This begs more experimentation. I've appointed fellow-twilter-foodie @HQSuz as my research assistant on this one.


On a day filled with pasta, it was a darn good thing I still managed to get in my canal walk despite threatening skies. No rain, though. I took my good camera along to play with some new filters I'd bought for it. No really exciting pictures, although you can see things are still pretty lush and green around here. While I walked I was pondering some hand-dyes to capture all those lovely variations on green. I'm starting to see some reds and yellows develop, though--just a couple more weeks and these pictures will look very different!

And, for those of you in his fan club, I'll leave you with a picture of a very happy mid-walk dog.


Craftsy Class Review: Homemade Italian Pasta with Giuliano Hazan

So you may recall my recent birthday celebration held at the New York Wine and Culinary Institute in the Finger Lakes of New York State. 

And how I learned how to make pasta.

And how I fell in love with making pasta.

And how my husband bought me a pasta machine, and I've been off and running. (Amazingly, even with all this homemade pasta in the house, I've still managed to lose weight the last couple of weeks. Must be all the calories I'm burning cranking the rollers on the machine.)

Well, finally--as promised awhile back--here's my review of the very tasty and very helpful Craftsy class: Homemade Italian Pasta with Giuliano Hazan. 

My first pasta made at home.

My first pasta made at home.

I. Loved. This. Class.

Giuliano Hazan is the son of the woman who has been credited for bringing Italian food into American (and British) home kitchens, Marcella Hazan. I'm not familiar with Marcella's work as I don't own any of her cookbooks. But I can say that Giuliano is a wonderful teacher in his own right. I found his lessons very easy to follow. In fact, the first couple of times I went through the process of making pasta with my new pasta machine, I did it side by side with him, having the videos running while I was doing the steps. Remarkably easy to follow, in fact, as I didn't have to keep jabbing at my iPad screen with pasta-covered fingertips to go forward or back. Smooth sailing.

The very first time you use a new pasta machine you have to make a batch of "waste dough," so to speak, because sending the dough through the rollers cleans any manufacturing or shipping dirt off the rollers and prepares it for service. This gave me the perfect opportunity to make my first batch of dough using his techniques because I had nothing to lose.

First taste--noodles with butter and poppyseeds--the way Mom made then when I was little.

First taste--noodles with butter and poppyseeds--the way Mom made then when I was little.

Admittedly, though, I didn't see much stuff coming off on the pasta as I rolled it through, so I tossed the earlier bits more likely to have invisible gook and still cooked up the later bits so I could see how everything was going. Since I'm still with us to write this blog post, I must not have ingested anything too suspect. 

I've been playing with different flours, which I will say comes more from the Artisan Pasta cookbook I bought than it does from Giuliano's class. He does talk about flours at the beginning and helped me understand why there were so many different ways to approach making pasta (in short: it's a regional thing) as well as a little more about the different types of flours you might use, but Artisan Pasta goes a bit more in-depth on the subject. I've been going back and forth between using an unbleached white flour and a pasta flour (which has semolina and durum in it). I also bought a whole wheat flour but haven't had a chance to test that one yet--that's next week's batch, I think. Giuliano also talks about making "green pasta" (with spinach mixed into the dough) and explains how to adapt it to "red pasta," (with tomato mixed in), but I haven't tried either of those yet either. Artisan Pasta also has a ton of recipes for flavored pasta doughs that I haven't gotten to yet.

So much pasta, so little time.

Ah, but back to the class. 

My most recent batch of pasta.

My most recent batch of pasta.

Giuliano is very easy to listen to, tells little stories here and there through the class so you get a real sense of how pasta and Italian food is such a part of who he is, and does a great job at filling in "dead air time" (while he's kneading or rolling or whatever) with extra information, substitutions, and great tips and tricks. He took all the concern out of trying to use a pasta machine myself, without a partner, by explaining some extremely easy fixes. Doh. Of course. 

He also explains how pasta is rolled out without machines, and gives information for using electric machines such as the type that attaches to a KitchenAid mixer. Because the electric ones are noisier, though, he mostly uses a hand-crank machine in the videos so as not to interfere with the sound.

Again, I really, thoroughly enjoyed taking this class. I'm looking forward to mixing his techniques with recipes from Artisan Pasta, as well as learning how to adapt the techniques to different ingredients. It's a matter of getting a feel for the proportions needed of liquid to flour depending on the density of the flour you're using, as well as how thick a pasta you need for the shape you're making. So far, I've been keeping it simple, but oh, I can see the possibilities.

Noodles in soup

Noodles in soup

Since I'm also one-tooth-short-of-a-full-mouth these days (and no, that's not a euphemism), I've been finding that pasta is a very easy-to-gum meal. So last night I combined a Parmesan broth recipe from Peter Berley's Building Flavorful Soup class (see my review of that one here), with homemade noodles from this class, threw in some diced tomatoes, crumbled chicken sausage (Wegmans Fire Roasted Tomato & Basil--my all time fave), and some fresh basil from my garden, and yum yum. I almost didn't mind having a sore tooth for a few minutes, there.

I highly, highly recommend this class. Everyone should be making their own pasta, in my opinion.

The Basics

  • 7 lessons ranging from 10 to 25 minutes
  • The class begins with a brief introduction to Giuliano but dives almost immediately into making the dough. The first lesson includes the instructions for making spinach pasta with a mention of how to adapt those instructions for making tomato pasta, and concludes with information about how to use and store the dough.
  • The next lesson covers how to roll out and make basic cut pastas. The rolling technique in this class is where he varied most from what I learned from the chef in the culinary center on my birthday--I've been using Giuliano's technique and it works great, so I'm sticking with it. 
  • Lessons 3 through 6 are how to make a variety of shaped and filled pastas, and each includes a recipe for that particular pasta. I liked that he talks about what kinds of dishes each pasta works best in, and sometimes how they're used traditionally in Italy as well as more modern uses. 
  • The final lesson talks about how to cook and sauce pasta. It may seem straightforward, but I found that lesson gave me, if you'll pardon the pun, food for thought. 

Even if you don't plan on learning to make your own pasta (but why wouldn't you?) I think you could still get something out of this class, just in knowing what the shapes of pasta are and how to use them most effectively, plus a lot of great recipes.

I do have to also mention that Hazan has two other Craftsy classes. I don't own either of these yet but I imagine I can see them ending up in my shopping basket in the not-too-distant future:

Classic Italian Pasta Sauces: Meat & Tomato with Giuliano Hazan

Classic Italian Pasta Sauces: Seafood and Vegetable with Giuliano Hazan

Review complete. Two thumbs up!

(Transparency statement: Using the Craftsy and Amazon links in this post help support this blog and podcast. Thank you!)

A Little Bit about Birthdays and Food

So yep, a birthday happened here. This week, I turned 49. Age doesn't bother me--I guess I figure I've earned every one of these years or something. Still n' all, it often surprises me to think, "Oh. I'm 49. How did that happen?"

I'd rather have reached 49 than the alternative. Thus, no hiding my age or being coy or cagey here. It is what it is, and I've had a great 49 years. Looking forward to the rest!

(For those of you reading this through feed readers or email, there's a photo gallery that appears here with controls for sliding photos back and forth. You may not see it in feeds and may need to check the website version.)

This year for my birthday, I did a cooking class at the New York Wine and Culinary Center and invited a few family members to join me. There were eight of us: me and my husband, my son and daughter, my nephew, my mother-in-law, and my brother-in-law and his girlfriend.  You work in pairs, so I paired with my daughter, my husband was with my mother-in-law, my son and nephew worked together, and my brother-in-law and his girlfriend were a pair. I went with eight as that's the number to fully surround one island in the classroom (four stations of two people each at every island). Everyone cooks their own dishes, but then you can share around the island--or even through the classroom--as you may choose. (The gallery shows my family and everyone's dishes--my son and nephew brought in a ringer and a chef-in-training did their plating for them. You can tell.)

I've taken several classes there before and have blogged about them in the past (here's one, and here's one, and here's one with a recipe I learned at a class, and here's another one). My favorite is the Farmer's Market class, so that's the one I chose for my birthday celebration. You start out by meeting at the Farmer's Market in the town where the institute is located, and the chef talks you through the process, lets you know what proteins and pantry items are available at the institute, and then gives you a portion of your registration fee back in cash and sets you loose on the vendors. You make up your meal plan as you go, making use of the chef as consultant as needed. My daughter and I were partners since she's a vegetarian and I was game to go meat-free, and we decided it would be fun to learn how to make pasta. I've looked into doing it in the past, but had never taken the dive. What better time, though, than when surrounded by chefs and culinary students?

DD and my ravioli

DD and my ravioli

And now I'm hooked.

I made the ravioli, and my daughter made the sauce. She riffed off a sauce she sometimes makes at home--also with no recipe. (My daughter has developed my love for free-wheeling cooking. Recipe? We don't need no stinkin' recipe.)

We filled the ravioli with a mixture of risotto, arugula (we wanted spinach but there wasn't any at the market--at this time of year? Really?), and garlic. The sauce has roasted red peppers--and she roasted those peppers too--tomato, onion, garlic, and fresh basil. Then we sprinkled some of the arugula over the top for pretties. Everyone loved it!

I fell in love. Just like making bread from scratch, there's something so wonderfully elemental about creating your own pasta from the egg up. I immediately started dreaming up all sorts of combinations of ravioli fillings and sauces.

The next day, on Sunday, I made homemade ravioli for a pasta salad for our family celebration (me and my father-in-law share a birthday). Without a pasta maker, I was rolling it out by hand with a rolling pin so it wasn't quite as thin, and I wasn't able to make as many ravioli. So, rather than pasta salad as a side dish, I served it as an appetizer. This time the ravioli was filled with ricotta, roasted red peppers bought from a store, fresh grated parmesan, and garlic; I tossed it with grape tomatoes, fresh basil, and more fresh grated parmesan. Even though the pasta was a little more chewy and thick because my rolling technique was a little rough, people still loved it. And I had a blast.

And so, my husband bought me a pasta maker for my birthday--and a drying rack, and a ravioli mold. The shipment should get here tomorrow. Mind you--this isn't self-serving for him. He doesn't actually like pasta, and he hates gooey cheese (so he's not big on cheese-filled anything). He'll eat it if I make it but it's nothing he'd look forward to. So buying me a pasta maker is truly an act of love on his part. And I'll be giving a lot away.

I also ordered the book Making Artisan Pasta by Aliza Green. It got good reviews; I should get that one later today.

And then, because it was on sale and I'm on fire, I bought a new Craftsy class: Homemade Italian Pasta with Guiliano Hazan.

So...be ready for more pics of pasta to come!


Craftsy Class Review: Building Flavorful Soups with Peter Berley

Craftsy Logo


And now, it's time for my review of Building Flavorful Soups with Peter Berley.

As summer winds its way down towards fall, I start thinking of chilly nights with the smells of something tasty cooking on the stove. I've been wanting to focus some energies around learning how to build my own soups for awhile. The fact of the matter is, I only have one soup I make regularly that I use a recipe for (Pumpkin Bisque with Smoked Gouda--amazing); the rest I make up on my own anyway. But I wanted a few more ideas, better techniques, things that could send me off and running in any number of directions. 

Parmesan broth with toast, a poached egg, shredded Gruyere, and chives. 

Parmesan broth with toast, a poached egg, shredded Gruyere, and chives. 

And so, I bought this class. Peter Berley provides techniques and recipes for several types of broth that can be used as the base for a variety of soups. He starts out pretty simple, with a very basic tomato broth and a Parmesan broth, both of which I was immediately ready to try out myself. It uses Parmesan rinds and since I've gotten in the habit in recent years of buying good Parmesan and grinding it in my food processor, now I know what to do with all those rinds I slice off first!

I made the Parmesan broth and dressed it up exactly the way he suggested in the class--not too bad. I'd never poached an egg before without using my egg cooker--it didn't turn out pretty, but it worked.* And I was surprised that I actually enjoyed a poached egg floating around in a soup! Still n' all, I'll want to do some more doctoring to that one. I can imagine using the Parmesan broth with tortellini, diced tomatoes, and fresh basil, for example, or as a cooking liquid for any sort of pasta or rice. Yum.

I've bought a bunch of tomatoes to try out his method of making tomato broth, but our family plans changed on Sunday so I haven't had a chance to make it yet. I'm hoping to get to that sometime later this week, and turn the broth into tomato rice soup, a family fave.

I'm also looking forward to following his instructions for making chicken broth. It's similar to what I've seen before but has some differences to it, so I'm anxious to try it out. However, that will probably wait until a rainy weekend as it has more kitchen prep time involved.

Peter Berley has a very relaxed delivery. Indeed, sometimes I felt it was a little too relaxed. I've grown accustomed to food instructors who use cooking time as a chance to give more information, some chemistry background to what's happening on the stove or in the oven, suggest substitutions, and so forth. With Peter Berley, there is occasionally "dead air," and it feels a hair awkward at times. Still, he's easy to listen to when he is talking, and I did learn a fair amount more about making broths as bases for soups.

That being said, I do wish there had been something along the lines of the chart that Molly Stevens provides in her Secrets to Slow Cooking: Mastering the Braise class (see my review here), to give me more ideas about how to combine different ingredients within flavor profiles. He mentions variations in passing, but having an actual chart in the class materials would've been very helpful so I wouldn't have to keep running back to the different lessons to remind myself of the possibilities.

However, one soup helps keep away vampires and ghosts. So that's a win.

While this wasn't my favorite of the Craftsy cooking classes, I did still learn a lot from it and will be continuing to play around with his recipes and suggestions. The printed materials will stay in my kitchen recipe binder for reference. If you're a fan of soups, I do think this one is worth adding to your queue.

The Basics:

  • 6 lessons, ranging from about 24 minutes to about 37 minutes (absent the first lesson which is his three minute introduction)
  • Lessons cover vegetable and herb broths and soups, Japanese Dashi variations and Asian soups, using shellfish, meat, and poultry in broths, soups, and stews, and pureed soups.
  • Many of the broths he covers are either vegetarian-friendly or could be easily made so. I was specifically watching for this as my daughter's a vegetarian. 
  • He briefly touches on refrigerating or freezing the broths, although he doesn't spend a long time on that. 

So, for Building Flavorful Soups with Peter Berley, I think I'd give this class one thumbs-up, one thumb in the middle. Again, not my most favoritist of the cooking classes I've taken on Craftsy, but I definitely learned quite a bit and have some good ideas for moving forward. My second thumb would be fully up if there'd been a chart as I'd suggested above, or if Peter Berley had filled some of the dead air with more information about flavor profiles and other ingredients that play well together in soups with certain bases, that kind of thing.

*For instructions on poaching eggs, I did a quick refresh-my-memory check and used Alton Brown's method. Peter Berley doesn't cover that in the class.

(Transparency: Clicking on Craftsy links in this post helps support this podcast and blog. Thanks!)


Craftsy Class Review: Perfect Pizza at Home with Peter Reinhart

Craftsy Logo

Yes, I got another class completed this month! I introduce you to... Perfect Pizza at Home with Peter Reinhart.

(Before you gluten-free folks out there think, "Pizza? I can't eat that, I'll stop reading this post right now...." Stick it out. You'll get rewarded at the end!)

This is a quick little freebie class--one of the freebies that Craftsy offers to rope you in...I mean, to introduce you to the Craftsy platform. I chose it because we're big fans of pizza in our house, especially grilled pizza, and because I really like Peter Reinhart as a teacher. (Click here to see my review of his Artisan Bread Making class.) He's really good at what he does! It's been waiting for me on my list of classes for a long time, only because making pizza from scratch takes time I don't often have these days. But I found myself with a little time available this past weekend so bumped it up to the head of the pack.

Fri PM pizza--using Reinhart's sauce recipe with my own dough recipe (for speed). Standard toppings: tomato sauce, sliced Roma tomatoes, fresh basil from my garden, shredded mozzarella.

Fri PM pizza--using Reinhart's sauce recipe with my own dough recipe (for speed). Standard toppings: tomato sauce, sliced Roma tomatoes, fresh basil from my garden, shredded mozzarella.

The lesson on pizza dough felt pretty familiar to me, having already done his bread class. Other than the process of making dough, however, he goes through four different recipes for dough, depending on what style of pizza you want, and talks about the slight difference in baking and results given the different doughs.

The catch here: These dough recipes all require refrigerating overnight, which I hadn't realized when I set out Friday afternoon to make pizza for Friday night dinner. So I stuck that dough in the fridge and then went back to my usual pizza dough recipe that only needs to rise about an hour or so. But I did use his sauce recipe for the Friday night version. The sauce recipe is very simple, requires no cooking, and was exactly the kind of sauce we like! Definitely a keeper.

After doughs, he talks about sauces and toppings--pesto, tomato sauce, herb oils, and then options for what goes on top of the sauce. Again, recipes are included in the class materials, and he does a nice job talking through considerations for ingredients, possible substitutions, and what each ingredient brings to the table. By the way, if you're a fan of cheese--he spends several minutes talking about different cheeses, fat contents, moisture contents, and flavor profiles, including a couple of cheeses I'd never even heard of!

Saturday Lunch pizza--his dough, his stretching method. It looks more pale in this picture than it was. I always brush olive oil with herbs and garlic on the crust right before and immediately following baking, so that's what you're seeing on the cr…

Saturday Lunch pizza--his dough, his stretching method. It looks more pale in this picture than it was. I always brush olive oil with herbs and garlic on the crust right before and immediately following baking, so that's what you're seeing on the crust. This version: Parmesan cream sauce, caramelized onions, spinach, and goat cheese. Yum!

The lesson on making and baking pizzas includes a demonstration of how to stretch the dough with your hands--not the tossing-in-the-air-and-spinning technique (and he explains why that wouldn't work with these dough recipes), but a gentle turning around your fists to make it stretch evenly and in a neat circle. I tried it for the first time making both pizzas and it worked well, but I had problems getting them round. Fortunately, geometry has no impact on flavor.

Finally, he walks through the making and baking process for each style of pizza, offering lots of great tips and what to watch for along the way. When the demo pizzas come out of the oven, he then discusses several options for finishing touches and presentation.

Focaccia prepared for second rise, doused in herb oil. I used an Italian seasoning blend with garlic powder and a little salt for the two that are green; the third is the same blend with some paprika added just for fun.

Focaccia prepared for second rise, doused in herb oil. I used an Italian seasoning blend with garlic powder and a little salt for the two that are green; the third is the same blend with some paprika added just for fun.

One of the pizza dough recipes is a focaccia recipe, so when my MIL asked me to bring an appetizer for Father's Day dinner at her house, I jumped at the chance to make that one too. You refrigerate it overnight in the cake pans, so on baking day you just add your herb oil, do another "dimpling" with your fingers, give it a second rise (1-3 hours depending on a lot of factors) and bake. It seems like an impressive dish to other people but the dough is super-simple and does most of the work itself while you're off doing other things. Note here: I had to go back to the Artisan Bread class for more complete information about making focaccia; in the pizza class he uses the focaccia dough for making pizza and gives only cursory information about the baking.

Focaccia complete. And very yummy, too.

Focaccia complete. And very yummy, too.

The catch with the freebie classes is the course instructors don't necessarily participate in the conversations the way they do on their for-sale classes, but there's always an active conversation among students. So you should still feel free to ask questions--surely someone will answer! It's also worthwhile to read through others' questions and the responses to see what tips you might pick up.

One thing I've learned from doing a few cooking classes on Craftsy--print off all the materials first and have them at your side as you're watching the lessons. Often the course instructor gives extra information or clarification in the video lessons that's not on the materials. Yes, I take video notes, but I often prefer to have the printed version at my side while I'm actually cooking, so it's helpful to write the info from the video lessons on the print materials for reference later. (For example, in the pizza class, you won't find the information about baking in the print materials--that's in the video lessons.)

Is it the perfect pizza? Depends on your definition of perfect but I have to say, it's pretty dang good. Being able to do a nearly side-by-side comparison between his dough recipe and method and my usual one: his had a nicer texture, I think. Flavor-wise, hard to tell as I added herbs to my usual recipe and didn't when I did his recipe--I probably will do that in the future; I love herbs baked right into my crust. The pizza dough recipe made enough that my daughter and I each had a "personal sized" pizza for lunch, and I froze five more personal-sized balls of dough for later. (I didn't cut them completely evenly--probably could've gotten six if I'd weighed them out.) The focaccia recipe makes three pans full, if you're using round cake pans or, in my case, two cake pans and a deep dish pie plate.

The Basics:

  • It's free!
  • 6 lessons, ranging in time from about 5 minutes to nearly 40 minutes
  • The first lesson is the usual less-than-one-minute introduction to Craftsy. if you're an old hand like me, you can just skip that one. Lesson 2 starts the class proper with a discussion of the class and then a little more about the Craftsy platform.
  • Lesson three is about dough, lesson four about sauce and cheese, lesson five about making and baking the different styles of pizza. And then some of you will be thrilled to see lesson six: Gluten-Free Pizza. Yep, there it is, gluten-free folks--your reward! I didn't test that recipe out so I can't speak to it. But I trust Peter Reinhart!

I highly recommend this class. Why? First of all--ummm...it's free? Why not? Second, I'm a fan of Peter Reinhart, as I said before. You can tell he's been teaching for awhile--very smooth, easy to watch and easy to follow, knows how to fill time with more great information while waiting for things to bake, and shows his enthusiasm for his topic. Plus, even though I've been making homemade pizza for awhile, using a few different methods, I still learned a lot from this class!

Again, that's Perfect Pizza at Home with Peter Reinhart, and it's free!

(Usual transparency statement: Clicking on Craftsy links in the blog help support this blog and podcast. Thanks!)

Craftsy Class Review: Homestyle Pan Sauces with Martha Holmberg

Craftsy Logo

Yum.

Somewhere along the way, from some Food Network cooking show or another, I picked up the little tidbit that a simple sauce can go a long way towards making a basic piece of meat seem just that much fancier. I've mostly only waded in the gravy pond when it comes to sauces, but have always wanted to learn more. This class is definitely the way to go!

I actually started this class late last fall and did several of her recipes back then. A couple of days ago when I was tooling through my class list trying to decide what to do next, I looked at this one and realized how close I was to finishing it. Apparently I'd gotten distracted by the holidays. So, now...done!

Homestyle Pan Sauces with Martha Holmberg walks you through the steps of making several sauces, from simple to slightly more complex, though all of them are things you can do pretty easily on a weeknight. As usual in Craftsy food classes, there are several recipes available but each recipe is used as a way to teach different techniques that you can apply across the board.

The class begins with some basic information about pans, tools, and supplies, then the best techniques for seasoning and browning meat. I've been browning meat for years, and still picked up some good information. After laying this foundation, the rest of the lessons work through various types of sauces and techniques that you need to know in order to pull them off with success.

Again, none of it's complicated!

Blue Cheese-Stuffed Strawberries with Balsamic Reduction

Blue Cheese-Stuffed Strawberries with Balsamic Reduction

The first sauce she teaches is a balsamic reduction. I'd done reductions once or twice before, and rarely with confidence that I was doing it right. But after watching her do it, I created a balsamic reduction that weekend to use in an appetizer for a party I was hosting--and it turned out beautifully! (Have you ever had Blue Cheese-Stuffed Strawberries? Yum. I used what I'd learned about balsamic reductions in this class to make the strawberries and it was beautiful.)

Lesson two works with additional kinds of reductions, as well as doing some teaching around aromatics. (She spent a lot of time talking about chopping and sauteing garlic--again, something I've been doing for awhile but still learned something.) As she talks about the reductions, she explains different types of liquids you can use, things to be aware of with each, and what you're trying to accomplish in the cooking process. I loved the amount of information she gives behind each step. She also gets into using cream and cheeses in sauces.

The rest of the lessons are different types of sauces, gravies, and jus, each again teaching several techniques within the lessons. Even if you're not interested in the recipe or type of sauce she's talking about in that lesson, it's worth watching anyway just to see what other techniques and information you might pick up. I'd also made her recipe for Chicken with Meyer Lemons and Capers last fall (never took a picture--sorry!)--it all went fine as per her technique, but we only very rarely see Meyer lemons in these parts, and using regular lemons instead made the sauce too sour for our tastes, even though she said you'd use the same amount either way. I'd still make the recipe again, I'd just cut way back on the amount of lemon I use. In another lesson she has a Lemony Cream sauce for pasta with vegetables--I made that recipe too (again, no pictures--sorry!) and liked it quite a bit.

Martha Holmberg is, as I've said about so many other Craftsy teachers, very good at what she does. You can tell she's got a lot of experience teaching. She's very easy to follow, easy to watch, and she occasionally throws in a little humor--nothing rip-roaring, but enough to make me chuckle.

And she has a way of talking about food that can turn one's head. No one in my family likes caramel sauce but I still sat and watched her bonus lesson on salted caramel sauce and found myself thinking, "Hmmm. Maybe I would like it if I made hers!" Probably no time soon. We really don't like caramel here. But still, she's that good.

The Basics:

  • 7 Lessons ranging in time from about 15 minutes to around 40 minutes.
  • The sauces start right out in the very first lesson--she takes just a few minutes to introduce herself and the course, and then gets right down to business. The lessons include  working with multiple reductions, butter, cream and parmesan, vegetables and herbs; reduction sauces--base liquids, spices and herbs, more about aromatics, a lemon cream sauce, using sauces on pasta and vegetables; gravy; jus; and the aforementioned salted caramel sauce.

I did like her recipes--or will, once I adjust for missing ingredients--but even beyond that, I learned quite a bit from watching the lessons even if I hadn't made those specific recipes.

So I highly recommend this class. A quick sauce can make the difference between the same-old-same-old on a weeknight, and something that feels just a bit more special!

That's Homestyle Pan Sauces with Martha Holmberg. Yummy stuff.

(Transparency: Clicking on Craftsy links in this blog post helps support this podcast and blog. Thanks!)


Craftsy Class Review: Artisan Breads with Peter Reinhart

e.jpg

I know, I know. This is "OT" when it comes to quilting. But a quilter's gotta eat, right? And if she's eating, she might as well be eating really, really good bread.

I believe I've mentioned before that I grew up as a child of the Back to Nature Movement. In 1970, my parents moved our family from the city out to a house in the country on seven acres--a house Dad built himself (well, more correctly, "was building" himself as it was little more than a frame when we first moved out there--but that's a story for another blog). Dad lived by the Farmer's Almanac and Mother Earth News. I often joke now that Dad would mow the lawn and we'd get it for dinner: Lamb's Quarters are something vegetarians could eat, if you didn't know. Put enough butter on it....

But more than the canned-just-about-anything, the homemade maple syrup, and definitely more than the homemade wine (a subject for that same other blog), what I appreciated about my growing-up-hippie years was Mom's homemade bread. Every Saturday, 15 loaves. The woman had serious biceps. Kneading, punching down, putting in the oven to rise*, then baking batch after batch well into the dinner hour...it was a weekend ritual. My favorite moments were Saturday nights, when Mom would let us slice into one loaf fresh out of the oven and have a big, thick hot slice slathered with butter (well, those were the margarine years) and strawberry jam (usually also homemade).

As an adult, I rarely had time to bake homemade bread . I did it once or twice, using Mom's techniques and recipe, and the kids loved it. To try to fill the need, I owned a bread machine a couple of different times--until, well, see the rather tragic blog post about the demise of my most recent one.

Now that the kids are grown and my schedule has seriously eased up, I felt the desire to start baking bread again. Enter Craftsy and Peter Reinhart and Artisan Bread Making.

Mom's method was great...but oh, the bread I've been baking! Peter's method is quite different, and produces a very different type of bread. I've been making baguettes, boules, and batards (O My). I plan on making a chocolate babka for an upcoming guild meeting. I'm putting the information about marbled ryes in my back pocket for future reference. Great stuff.

But even beyond the bread recipes which, arguably, you can find on the Internet or in any of Peter's books, there's Peter himself. He's an excellent teacher. His passion for bread-making comes through so clearly that he makes you want to jump up and run into the kitchen as soon as you're done watching a lesson. And his statement that bread is a metaphor of transformation imbues each loaf you shape with your hands with a depth of meaning beyond just, "Hey, this tastes pretty dang good."

And yet, it does taste pretty dang good.

So, the basics:

  • 10 lessons in all, most 30-40 minutes (a couple are shorter, one is 47 mins).
  • The first lesson talks about baker's math and gives a tremendous amount of background information that lays an excellent foundation for everything that follows, the second talks about supplies, definitions, and the 12 steps of bread making.
  • In each lesson following, Peter gives very clear directions on how to measure and mix ingredients, shape, and rise the dough, bake the bread; as well as how to be ready to make adjustments based on your room temperature and relative humidity.
  • The lessons go from straight lean dough, to country variations, rustic breads, enriched breads, marble rye, and that amazing chocolate babka that I'm going to make this weekend.
  • The downloadable materials are excellent reference when you're actually in the kitchen and don't want to get flour or oil on your iPad. Ahem. (Don't ask how I know.)

I had to make a judgment call as to when I'd consider this class completed for the purpose of my tracking. If I had said to myself that I'd have to bake one of every type of bread he teaches before I call the class finished, I'd either be done in 2017 or I'd be the size of a house. I've now baked three batches of bread, using one method twice when the first results weren't what I'd hoped (second results turned out fantastic after I made a few adjustments as per his suggestions to take into account the cold snap we're now living in up in these parts). I'll be baking one more batch in the next couple of weeks--the aforementioned chocolate babka. I've watched all the lessons and made copious notes. Therefore, I've decided to call it done, knowing I'll keep going back and referencing this class for years to come.

I'm putting all the pictures into a gallery--just click on the picture to see the next photo in the gallery. If you're reading this by email, the gallery may not come through. If not, use this link to see it in Flickr.

Haven't tried out Craftsy yet? Use this link to find out more.

Want to check out Peter Reinhart's Artisan Bread Making class? Use this link!

(Full disclosure: Using those Craftsy links helps support this blog and podcast--thanks so much!)

*Backstory: Mom would put the huge batch of dough in a big plastic bucket in the oven to rise. We were all strictly warned never to turn on the oven without looking in it first. When I was somewhere around middle-school aged, one day my sister and I decided to bake a cake. "Flick," went the oven switch to bake, and "Swish" went the temperature control knob. About half an hour later, Mom came running up from the basement where she'd been in her quilt studio. "What's that I smell? What do I smell burning?" She raced into the kitchen and threw open the oven door, to reveal a mass of dough and melting plastic. I don't exactly remember what happened next. I don't, however, recall that my sister and I played any role in helping to clean up. My guess is that, in those moments, Mom didn't particularly want to even lay eyes on us so sending us to our rooms was likely the better option for her. Frankly, I'm surprised I lived to tell about it. To this day, I always open an oven door before I turn it on. Some lessons do stick.