Craftsy Class Review: Building Better Bags--Interfacing and Structure with Sara Lawson

I admit: I can get obsessive sometimes.

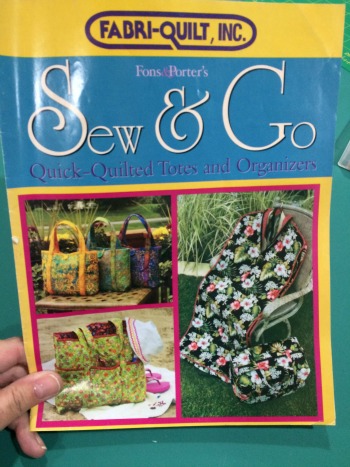
Yes, I'm so determined to get more comfortable with bag-making that I bought Building Better Bags: Interfacing and Structure with Sara Lawson (of Sew Sweetness).

Nope, still really don't like making bags. Probably never will--it's just not my bag (ar ar ar). For some reason, though, I'm feeling a bit stubborn about making myself get better at it. As I think I've mentioned in previous reviews, one of the big issues when it comes to following patterns and tutorials for bag-making is that I didn't come to sewing from garment-making, I came to it from quilting. I had to learn how to stitch in a straight line and keep an accurate 1/4" seam and that was about it.

So, one of my weaknesses when it came to sewing bags has been a lack of knowledge about interfacings. One doesn't run into interfacings much in the quilting world. I'm figuring it's lucky I had even absorbed the definition of the word from my Mom's years of garment-sewing when we were kids and before we rebelled against wearing homemade clothes--a rebellion, however, that had a happy ending as it's what propelled her into the world of quilting. But I digress.

When I saw Building Better Bags: Interfacing and Structure with Sara Lawson pop up on sale, I decided that although it would probably be a bit like watching paint dry, it was information I should probably have. Plus, I do really like Sara Lawson's bag designs--I'd like to get comfortable enough in my skills that I could tackle some of her more interesting patterns and not end up wanting to throw things or swearing a blue streak through the entire process.

My goals are small, really. Less throwing and swearing. That would be good.

I have to say--the class did have really good information. I do feel like I have a much better understanding now of the variety of interfacings and stabilizers that are available and what each one of them brings to the table. I feel like I could more easily approach some bag patterns and perhaps substitute different innards if I want a different result. So that's all really good--and I'm glad I have the class for reference in later bag-making endeavors. I would have liked Sara Lawson's presentation style to be a little more relaxed in the class, but she did give the information very clearly and in a very easy-to-understand manner. 

I immediately felt the benefit of the class, by the way, when I started watching again the Crazy Quilt class with Allie Aller and she referred to the interfacing/stabilizers she used. I knew what she was talking about now!

This is purely an informational/reference class: There are no class projects, although she shows tons of examples from her really wonderful bag designs. (Hence, no pictures to share with this post.) The class materials include an excellent reference chart for stabilizers and interfacings that I'm going to hang on my wall to check whenever a pattern calls for a particular brand that I can't find, or just says the type and I have no idea what they mean. 

If you're an old-hand at this kind of thing, you could probably bypass it. But if, like me, you have only passing reference to the fact that there even is such a beast called "Interfacing," you will find this class tremendously helpful. If also, like me, you're a relative newbie on the bag-making scene--take advantage of this class earlier in your journey down this path than I was able to. This information would probably have lessened my frustration level somewhat in my prior bag-making endeavors. 

The Basics

  • 8 classes, ranging from 10 minutes to 23 minutes, although most are about 12-15 minutes.
  • Lesson one is simply a brief introduction of Sara Lawson and Sew Sweetness designs.
  • Lesson 2 gives the foundational information about what interfacing is, how to choose and purchase the best one for the job, and how to test it before committing your project to it.
  • Lessons 3 through 5 cover the different weights and types of stabilizers in categories, and she gives very helpful tips for how to use each with the most success (tips for sewing, fusing, and so forth).
  • Lesson 6 is entitled "Structured Reinforcements" and covers the other types of materials you can use as a stabilizer, how to do a false bottom, and reinforced handles.
  • Lesson 7 is about creating and attaching bias binding for seams and how to make and install piping.
  • Lesson 8 offers great finishing touches appropriate for any bag design, and how to care for your bags long-term.

So, while not the most exciting class I've ever taken, in terms of the information Building Better Bags: Interfacing and Structure with Sara Lawson presents it's a solid addition to my repertoire. I do recommend it if you've had the same questions swimming in your head as I have!

(Transparency statement: As a Craftsy affiliate, using Craftsy links in this post help support my podcast and blog. Thanks so much!)


An Easy Win

I'm a bit behind in my class reading this week but I decided I didn't care--I really needed me some fabric therapy. Let's just say, it's been so long since I sat at my sewing machine that it took me a few minutes to figure out I had the foot pedal positioned wrong. Note to self: Foot pedals don't work as well sideways. 

In any case, I knew I'd only have a couple of hours this afternoon/evening so I decided to give myself an easy win and finish up a UFO that's been on my shelf since last spring. 

This is the second project I've made out of this little booklet that came as a freebie in a Fons and Porter magazine years n' years ago. The first, made about 8 or 9 years ago, was a super-easy tote bag (my first tote bag ever, in fact) that went together pretty quickly even though I really didn't know what I was doing. The only hitch I ran into was when it said "box the corners" and I had no idea how to do that, so I skipped it. No biggie--I still use the bag frequently.  (I've since learned to box corners, by the way. I do occasionally have some forward progress in my skill set!)

Ever since I made that first bag I've intended to do a duffle bag pattern in the same booklet. I bought some pre-quilted fabric while on a shop hop a long time ago--2009 comes to mind--with the intention of making that duffle. The fabric sat on my shelves...and sat...and sat...

Finally, last spring, after I'd done a couple of Craftsy classes on bags and zippers and such, I decided doing that duffle bag would probably not be that big a deal. I pulled out the fabric and got it about half done. And then it sat...and sat...and sat...

Today, when I got as much classwork done as I could stand for the day, I pulled the duffle-in-progress off my shelves to assess where I was at. As it turned out, it apparently had ended up on the shelf because I had some unsewing to do. Once I got myself oriented to where I was in the pattern again, and ripped out some stitches that were clearly not in the right place, it only took maybe another hour and a half total to finish. I'd taken a couple of breaks in there to get myself dinner and such so I'm not entirely sure, but it didn't feel onerous.

And so... Ta da!

A duffle is born.

I stuffed it with a lap quilt to try to give it some shape for the photo, but it is a pretty mushy duffle. The prequilted fabric only gives it so much heft. But that's fine--all the more stuffable.

The prequilted fabric is reversible, so the print is one side and the blue mottle the other. It's really simple to use, although I wasn't keen on the quality of this fabric. The stitches in the quilting left a little to be desired but I think it'll hold up okay to the light use I'll give it.

I had to restitch the handles on about three different times because the blue pocket pieces kept popping out of the seams. It was really hard to keep all those layers of fabric together. I couldn't use my Wonder Clips for that part so I had pins that were hanging on for dear life. Things were a little shifty.

I was, however, loving my Jumbo Wonder Clips for this part. (I have the smaller ones too--if you don't have these, you need them!)


There are two end pockets as well. (The blue horizontal strip is the binding on the top of the pocket.) None of the outside pockets have closures--this is a pretty strip-down duffle bag design. But for the way I'll be using this I won't really mind not having zipper or velcro closures on the outside. 

By the way: There are supposed to be zipper tabs. I made the zipper tabs. They're still sitting on my cutting table. Oops. 

So, yay! A UFO knocked off the list, a finish, and another usable bag, all in one fell swoop!


Speaking of usable bags: I put all my little zipper pouches to good use on my work trip last week. I finally found the perfect use for that Bendy Bag--it's exactly the right size for pads of sticky notes! I use those for group brainstorming so I always carry a bunch with me. Now I can keep them from flying all over the insides of my larger bags.

So, another yay! Forasmuch as I'm still not keen on the process of making these bags, it is nice to be able to use them. 


Craftsy Class Review: Zip It Up: Easy Techniques for Zippered Bags with Joan Hawley

It feels odd for me to be saying I just took a sewing class, but there it is. In my attempts to conquer my dislike of fiddly bits, I've just completed another bag-making class on Craftsy.

If I'd been able to go straight through this class in one fell swoop, it probably would've only taken a weekend. It only took me as long to finish the class as it did because I'm deep into coursework now, so I only take random chunks of time to sew when my brain fritzes out from all the reading. Consequently, the sewing I do needs to be as close to mindless as possible (as I have few functioning brain cells left by the time I put down the books).

Enter Zip It Up: Easy Techniques for Zippered Bags with Joan Hawley. I've been a fan of Joan Hawley's Lazy Girl Designs for awhile; I own a couple of her bag patterns although I've never actually gotten them made. The three bags featured in the class were cute as well as seemingly functional. When it comes to physical things like this, I'm a much better visual learner so when I can watch someone do something rather than trying to read a pattern, I'm happier. Joan's step-by-step instructions on the video as well as the written materials that come with the class were very easy to follow. 

First, there's the "Runaround Bag." I finished this one a few weeks ago and blogged about it here. I think the bag took me less than two hours to make, and that was only because I was closely consulting the video lessons all the way through to make sure I didn't go horribly awry. Plus, I did a little fussy-cutting, which always takes a little longer.

I was able to use the bag immediately after I made it, which was a plus in my book.


The second bag in the class is the Nikita Bag. This is a basic boxy pouch--there are a boatload of patterns for doing boxy pouches out there and I'm sure they're all probably fairly similar when it comes down to it. But once again I found Joan's way of putting it together very easy to follow. I got this one done in about an hour and a half, all in. Again, that was with a lot of referring back to the video. It would go a lot faster next time.

I absolutely loved the fact that I was finally able to use some of my Marcia Derse fabrics. I bought a couple of panels and several coordinating fat quarters years ago at the show in Houston--If I recall, it may have even been the first year her fabrics were introduced. (She had her own booth and I paid her in person for my fabrics, which always makes you feel a little more connected to those fabrics, doesn't it?) I'd never found the right project for them. It works really well for this.

This if my favorite bag of the three. I really like the design of this pouch and could see me making more, although at the moment I don't know exactly what I'll be using this one for. Wait until my next trip when I'm looking for all the best containers for the tchotchke that always has to come with me.

The third class project is the Bendy Bag. I'm not such a fan of this design--I'm finding it a bit hard to work the zipper once it's all put together. I know that part of that is user error--I needed a slightly wider space between the zipper teeth and my seam. I used the same needle position I had on the other bags, but in this particular design I could've used a little more breathing room. Still, that bend doesn't help.

I used a half-yard of fabric I'd bought while in Hawaii in 2008. I've got a couple of other half-yards of the same print in different colors. I'd had half a thought of using all three fabrics in a fast lap quilt as a souvenir of my trip, but the quilt never got made and I've got plenty of lap quilts now, so this is just as good a way to use it. It's the same fabric outside and lining.

So--all in, I had no difficulty whatsoever making any of these bags. I would have no concerns about deciding I wanted to make any one of them again, maybe two or three times even. (I have a lot of fat quarters I'd love to use up!) The one least likely to get made again is the Bendy Bag, but if it proves itself to be the perfect travel bag for cords or adapters or any of the other multitude of electronic gadgets that travel with me, I'd even be willing to give that one another go.

Joan Hawley is easy to follow and now that I've done her class and several of her bags, I'd be willing to revisit the thought of making one of her patterns that I own. On the flip side, having now done two and a half bag-making classes--and yes, I do plan on finishing Annie Unrein's!--I've also gotten more comfortable with the idea of branching out and making other bags. 

Mind you, I still don't enjoy doing it the way I enjoy doing art quilting, hand-dyeing, or embroidery. But I can do it, and that's all I was shooting for. I do still avoid patterns with too many fiddly bits, though. Still not a fan.

The Basics

  • 7 lessons, ranging from 18 to 30 minutes.
  • Lesson 1 reviews the three bags in the class, gives some advice on choosing zippers and fleece, then talks about presser feet and needle positions. (Do pay attention to the needle position thing, and write it on a post-it note. You reference those needle positions frequently throughout making the bags.)
  • Lessons 2 and 3 are the Runaround Bag; Lessons 4 and 5, the Nikita; and Lessons 6 and 7 are the Bendy Bag.
  • Each lesson not only gives instructions for the bag itself, but also offers some nice take-away tips that would be useful in other places. 
  • Class materials are full step-by-step instructions with plenty of photos for making the bags.

If you're a beginning sewist or a beginning bagmaker, I definitely recommend Zip It Up: Easy Techniques for Zippered Bags with Joan Hawley. Great entry-level stuff. If you're more experienced, you may still enjoy her tips and tricks, plus the bag designs. 

(Note: Using Craftsy links in this post helps support my podcast and blog. Thanks!)


A Finish! Zippered Tote

I have very little time to spend in my sewing room these days so fast finishes are of appeal. Plus, as I've said before, I have a sickness: I keep buying bag and tote patterns even though I really don't enjoy making the things. I am in a constant search for the perfect travel bag and I really want to use up some fabrics from my stash that I love and want to keep around, but don't want to commit to turning into a quilt. So bags are sort of the perfect solution, if I can get around my dislike of the process. Since I knew I'd have a few hours as fabric therapy at my disposal this weekend, I decided to make myself something useful given the travel I'll be doing over the next couple of months. To whit: A travel carry-on for flights that would also be fine for normal running about and trips to libraries and coffee shops for school work.

I've posted the pic of a couple of the bag patterns I bought from a vendor at AQS Quiltweek in Syracuse. As soon as I got home, I started digging through my stash to see if I had fabrics that would work well with either of the patterns. I found a winner: I'd bought three fabrics from a collection a few years back, then found another fabric that worked beautifully with them. Then they sat on my shelves. And sat. And sat. They were enough for this bag pattern plus enough leftover to make a coordinating wallet or some such should I decide to do that later on.

Final results! This is the "Laura's Zippered Tote" pattern from The Creative Thimble. It really is pretty straightforward. I took my time with it and still had it done in something like 4 or 5 hours all-in. As a still-not-confident bag maker, I didn't run across anything that gave me the heebie jeebies.


Here's the inside. The pattern calls for pockets on only one side of the interior; I added another set of pockets on the other side as well. The more pockets, the better. 

I measured the divisions to fit my Kindle, phone, and some pens, etc., on the one side. 

The other side of pockets were less specifically measured but divided slightly differently to give myself more options. I also  added some little velcro dots to two of the pockets. Why dots? That's all I happened to have on hand. So I used three dots attached to each other to make it about as long as a regular rectangle of velcro would be. I didn't bother changing thread to white to attach the velcro because at that point I was tired of changing thread colors and I figured that, other than this blog post, I'd be the only one ever seeing it. So yes, the velcro is attached with burgundy thread. I can deal with that. 

There are two things I'm not thrilled with about this design. The first, and main thing, is that there's a raw edge seam at the bottom of the interior. You can see it in the above photo. The instructions have you zig-zag the edge and I used Fray Check as well, but still n' all, I'd prefer a hidden seam. I'd have had to completely re-do the pattern to get rid of that seam and that's just not my thing. So I'm living with it. 

The second thing is that it uses Pellon Decor Bond (809) as the stabilizer. It does give it good structure, but I didn't really like working with it. Plus, the fabric puckered a little when I was fusing it to the Decor Bond. Were I to make this pattern again, I think I'd probably use Annie Unrein's Soft and Stable. I really like the way that one felt when I was using it for the EIIP bag; I don't think using it on this design would make a noticeable different to the process of making the bag.

I did skip one part of the pattern--when you box the corners, the instructions have you folding those corners back into the inside of the bag and gluing them down to give the bottom more structure and stability. I don't have any glue on hand that would work and, again, I wasn't keen on a bunch of stuff hanging out in the bottom of the bag that loose coins and such could get stuck under, so I just cut those off as you normally would. 

And one other note: The numbering of steps is incorrect in one part of the pattern. I had to read it a few times to figure out why I couldn't quite figure out how she'd gotten from point A to point B, but it didn't take too long to see where the mistake was and just move on from there. She doesn't have that error posted in the corrections on her website so I need to remember to email it to her. Other than that, the pattern was pretty easy to follow, even for a noob like me. 

By the way, those are outside pockets as well--six in all. And the straps are the perfect length to carry it comfortably over my shoulder. Finally--a good carry-on bag for airline travel that zips on top so I don't have to worry about stuff dumping all over under the seats!

And I just love that I could finally use these fabrics--they've been on my shelves for a couple of years and now I get to keep looking at them in a far more useful form.

Overall, I'm pleased with the results and am giving myself grace on those parts that are less than perfect. 


Craftsy Class Review: Learn to Sew: Simple Bags with Nicole Vasbinder

Craftsy

So, if you've been listening to my podcast or following my blog for awhile, you'll know my intense dislike for fiddly bits and anything that even vaguely smacks of garment sewing. 

I love seeing other people's completed fabric purses, totebags, and duffle bags. But let's just say that my own brief forays into the field haven't been stellar. I made one totebag years ago that I still use frequently but I can still see the places where seams didn't match up and I didn't quite box the bottom correctly. Still, it's pretty functional and nice fabric so I live with it. I had another attempt at a purse that ended up in the trash. My biggest issue? I'm not a garment-sewer, and a lot of purse/tote/duffle patterns are written with the assumption you are.

Foldover tote completed

Foldover tote completed

While toodling through Craftsy classes a week or so ago to see what was new, I saw Learn to Sew: Simple Bags with Nicole Vasbinder. I thought, maybe that's the ticket. Maybe if I take a step back and put myself in garment-sewing school (just the basics, ma'am), I'd grow more comfortable and wouldn't find these kinds of projects as frustrating. 

I completed the class in one weekend. It wasn't too painful, and I completed both projects in a reasonable length of time and with only a few curse words here and there (all while working on the dang boxed bottom of that pouch when my machine decided to throw a hissy). Enough background. Here's the review:

Demonstrating the pockets on the front (1 pocked subdivided into 3 parts)

Demonstrating the pockets on the front (1 pocked subdivided into 3 parts)

This class would be great for someone who's never touched a machine before. It really does start out with how to sew, as per the name of the class, "Learn to Sew." The first lesson walks through parts of a sewing machine (in brief), how to thread machine and bobbin, and so forth. There are some neat graphics in the first lesson about how the sewing machine works. The second lesson is sewing seams--of course, this class is doing it "garment-style" so seams are generally wider than this quilter is used to. I was proud of myself that I only went to default-mode of 1/4" seams twice--for the most part, I remembered to do those gargantuan 1/2" seams she uses. 

The third lesson had a little information about fabric in general, as well as some suggestions for picking fabric for the totebag. From there, it goes directly into the projects with some "teachable moments" interspersed. 

Showing the interior pocket and lining

Showing the interior pocket and lining

True confessions: I watched most of the lessons on 2x speed, until I got to parts I felt I needed to watch more carefully. I did get frustrated a few times because the video doesn't always completely match the written instructions in the downloadable materials, and the instructions sometimes leave out key information about placement and so forth. I had to keep referencing the video over again to make sure I was doing things correctly. It's not a huge issue in this case, but I would have wished for more accuracy in having the written and verbal instructions match. I made notes on the written instructions just in case I ever go back to use them again and don't want to have to watch the whole lesson over.

Zipper pouch completed

Zipper pouch completed

My suggestion is, if you're new to sewing or new to this kind of sewing, watch each whole lesson first, and then back up and start doing the steps with her. In some things it's confusing until she gets to later steps and finally explains how she's got things laid out or why she's doing something the way she's doing it. 

I can't say this class has made me all gung-ho to run out and start churning out purses and bags. But I think it did increase my comfort level with the differences between garment-sewing and quilting to a degree. The totebag and zippered pouch are cute, but if I were to make either of them again there are several adjustments I'd make to them to have them work better for me. I'm just not committed enough to either design to poke at them like that. I already own a lot of patterns for totes and purses; I guess this is something I can just keep plugging away at when I get in the mood...once in a blue moon.

Interior

Interior

The Basics

  • 7 lessons, ranging from 11 minutes to nearly 30 minutes
  • The first two lessons are introductions to the basics of your sewing machine and sewing in general. Lesson 3 includes some more of that introductory information, but then goes into the cutting of pieces for the tote.
  • Lessons 4 and 5 are the foldover tote, and lessons 6 and 7 are the zippered clutch. 
  • The class materials give some troubleshooting information about sewing on your machine, and then supply lists, instructions, and templates for the two projects. As noted above, I was disappointed that there were some discrepancies between the materials and the video lessons. Just have the materials in front of you while you're watching the lessons so you can make notes to yourself as you go.

This is a tough one for me to rank because it's a topic that I come to having a bit of an attitude already. In the grand scheme of learning how to do garment/accessory sewing rather than quilting, I guess I can give Learn to Sew: Simple Bags with Nicole Vasbinder my usual thumbs up. But I'm still not an enthusiastic garment/accessory sewist. 

Don't forget, Craftsy is having a Valentine's weekend sale--lots of great classes to check out. I'm working on another one I just picked up this weekend that's just chock-full of great information and much more in my wheelhouse...but more on that one in a later post!

(Using Craftsy links in this post helps support my podcast and blog. Thanks so much!)