A couple of weeks ago I was perusing my fabric stash for a new project. In this instance, “perusing” is defined by “digging through, excavating, precariously balancing stacks of fabric while pulling possibilities out of the bottom, pushing stacks back into place with elbow while holding found possibilities in both hands….”
And I reached a breaking point.
For almost the entirety of my quilting life (read: 20 plus years), I have used the ruler technique for folding my fabric. You know the one—use your 6”x24” to fold fabric neatly into a bundle to stack on your shelf. In fact, even after I’d changed my rulers to Creative Grids and had changed to a 6 1/2” by 24”, I kept my original 6x24 just to fold my fabric. It actually works quite well.
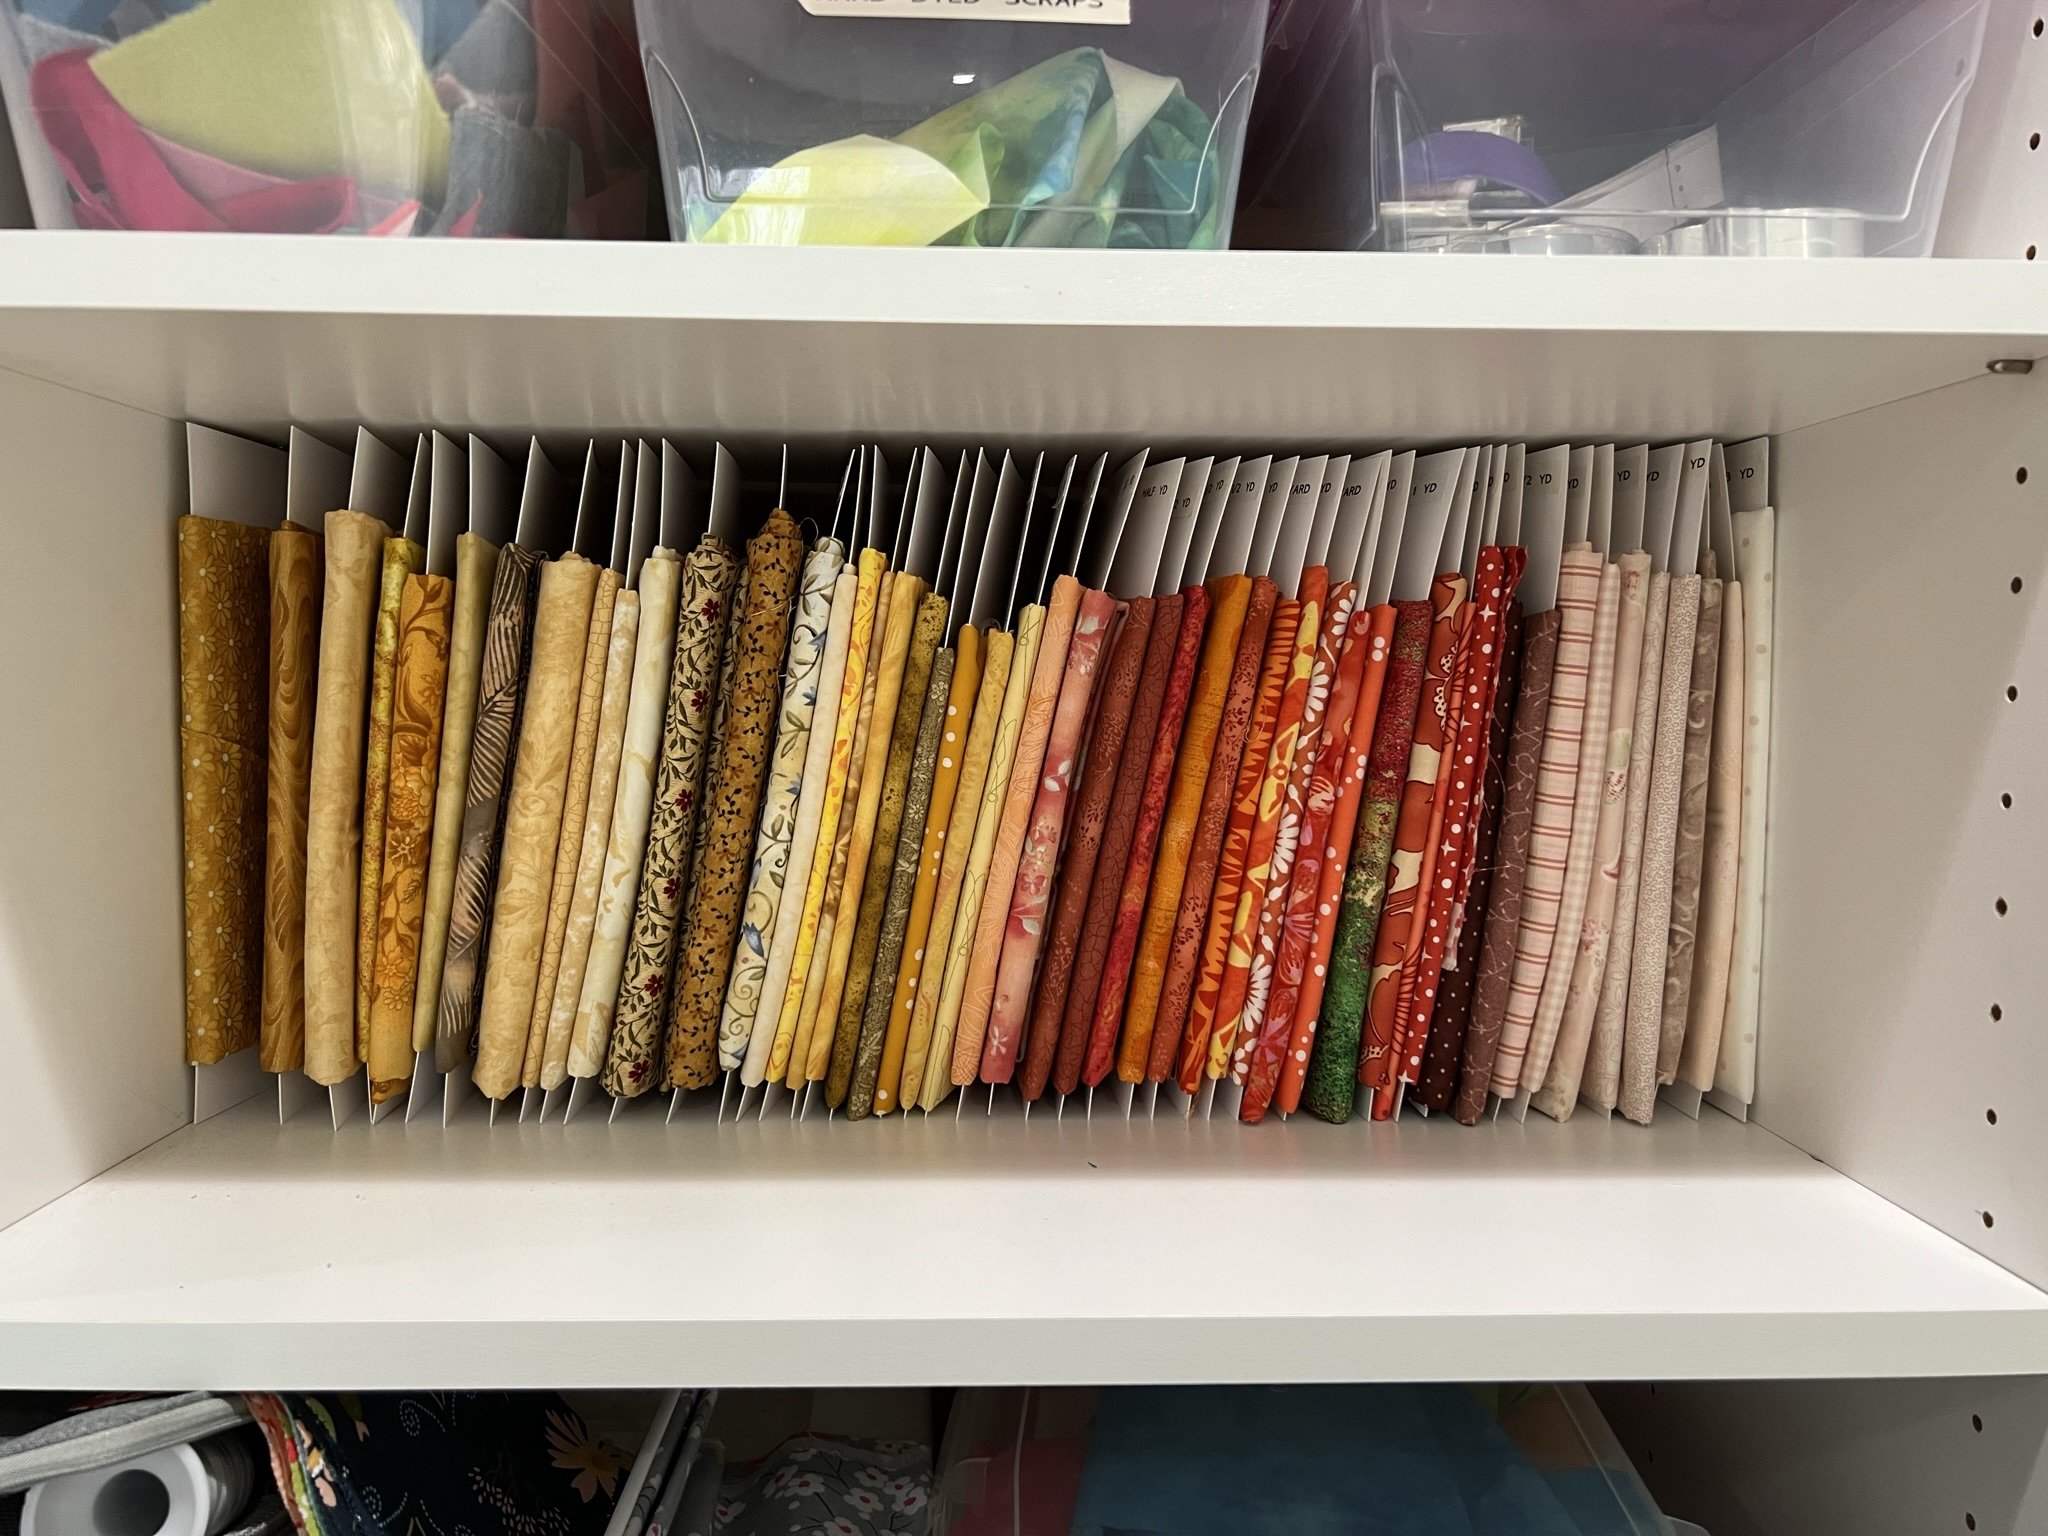
In the ideal world, you end up with stacks that look like this.
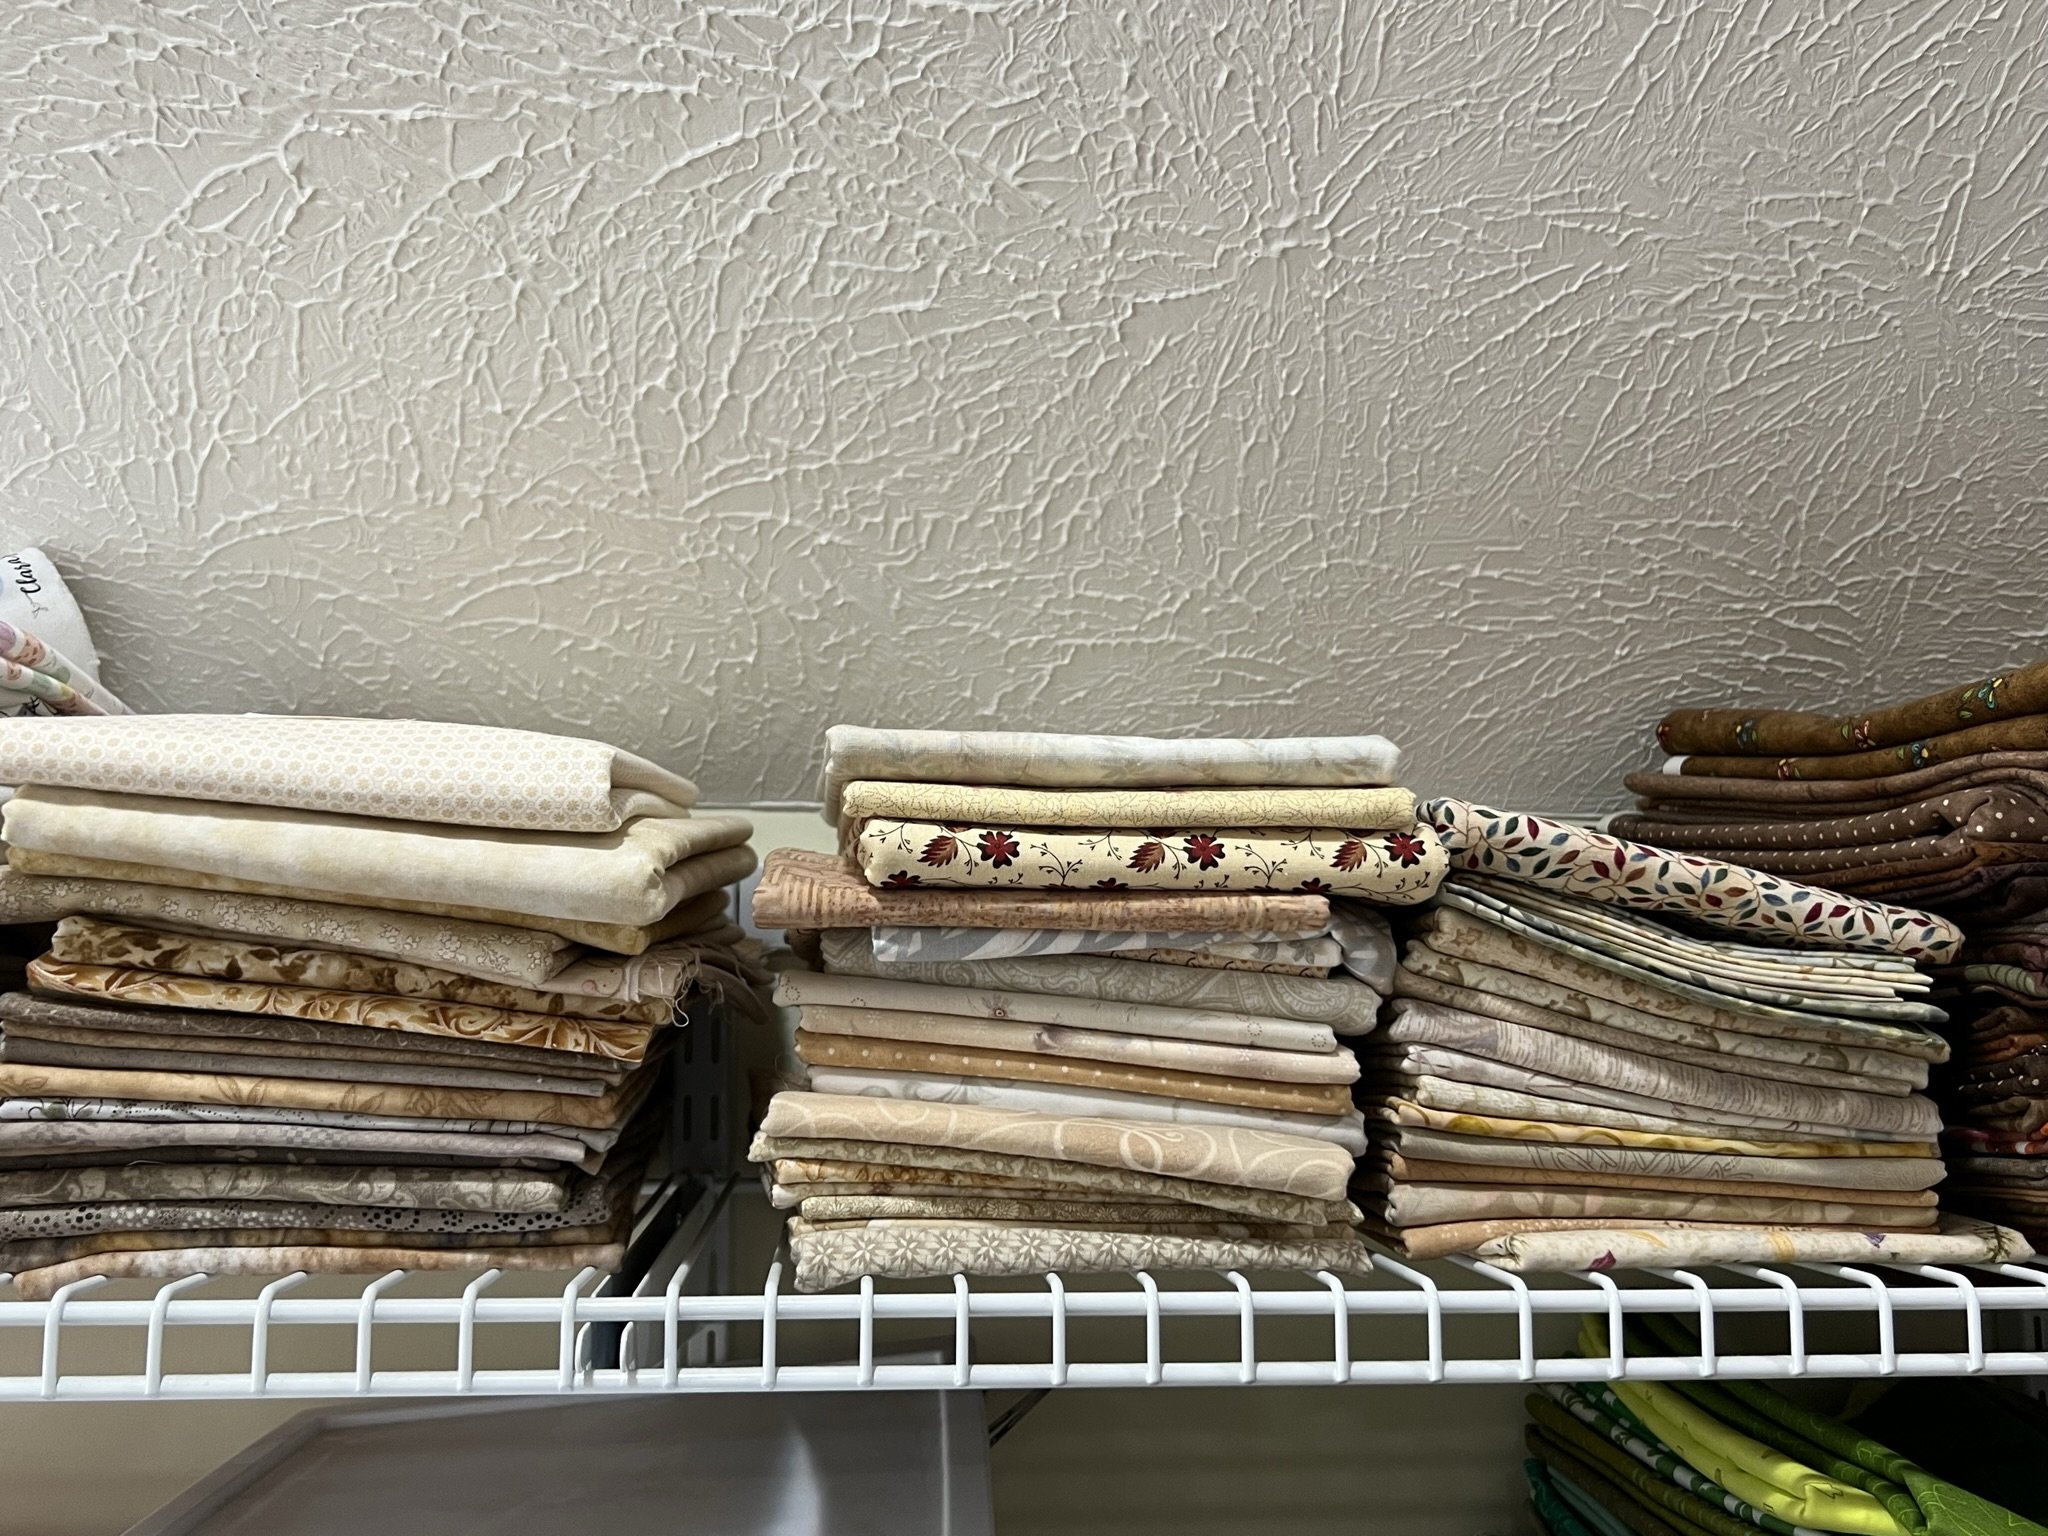
In the real world, you end up with stacks that look more like this.
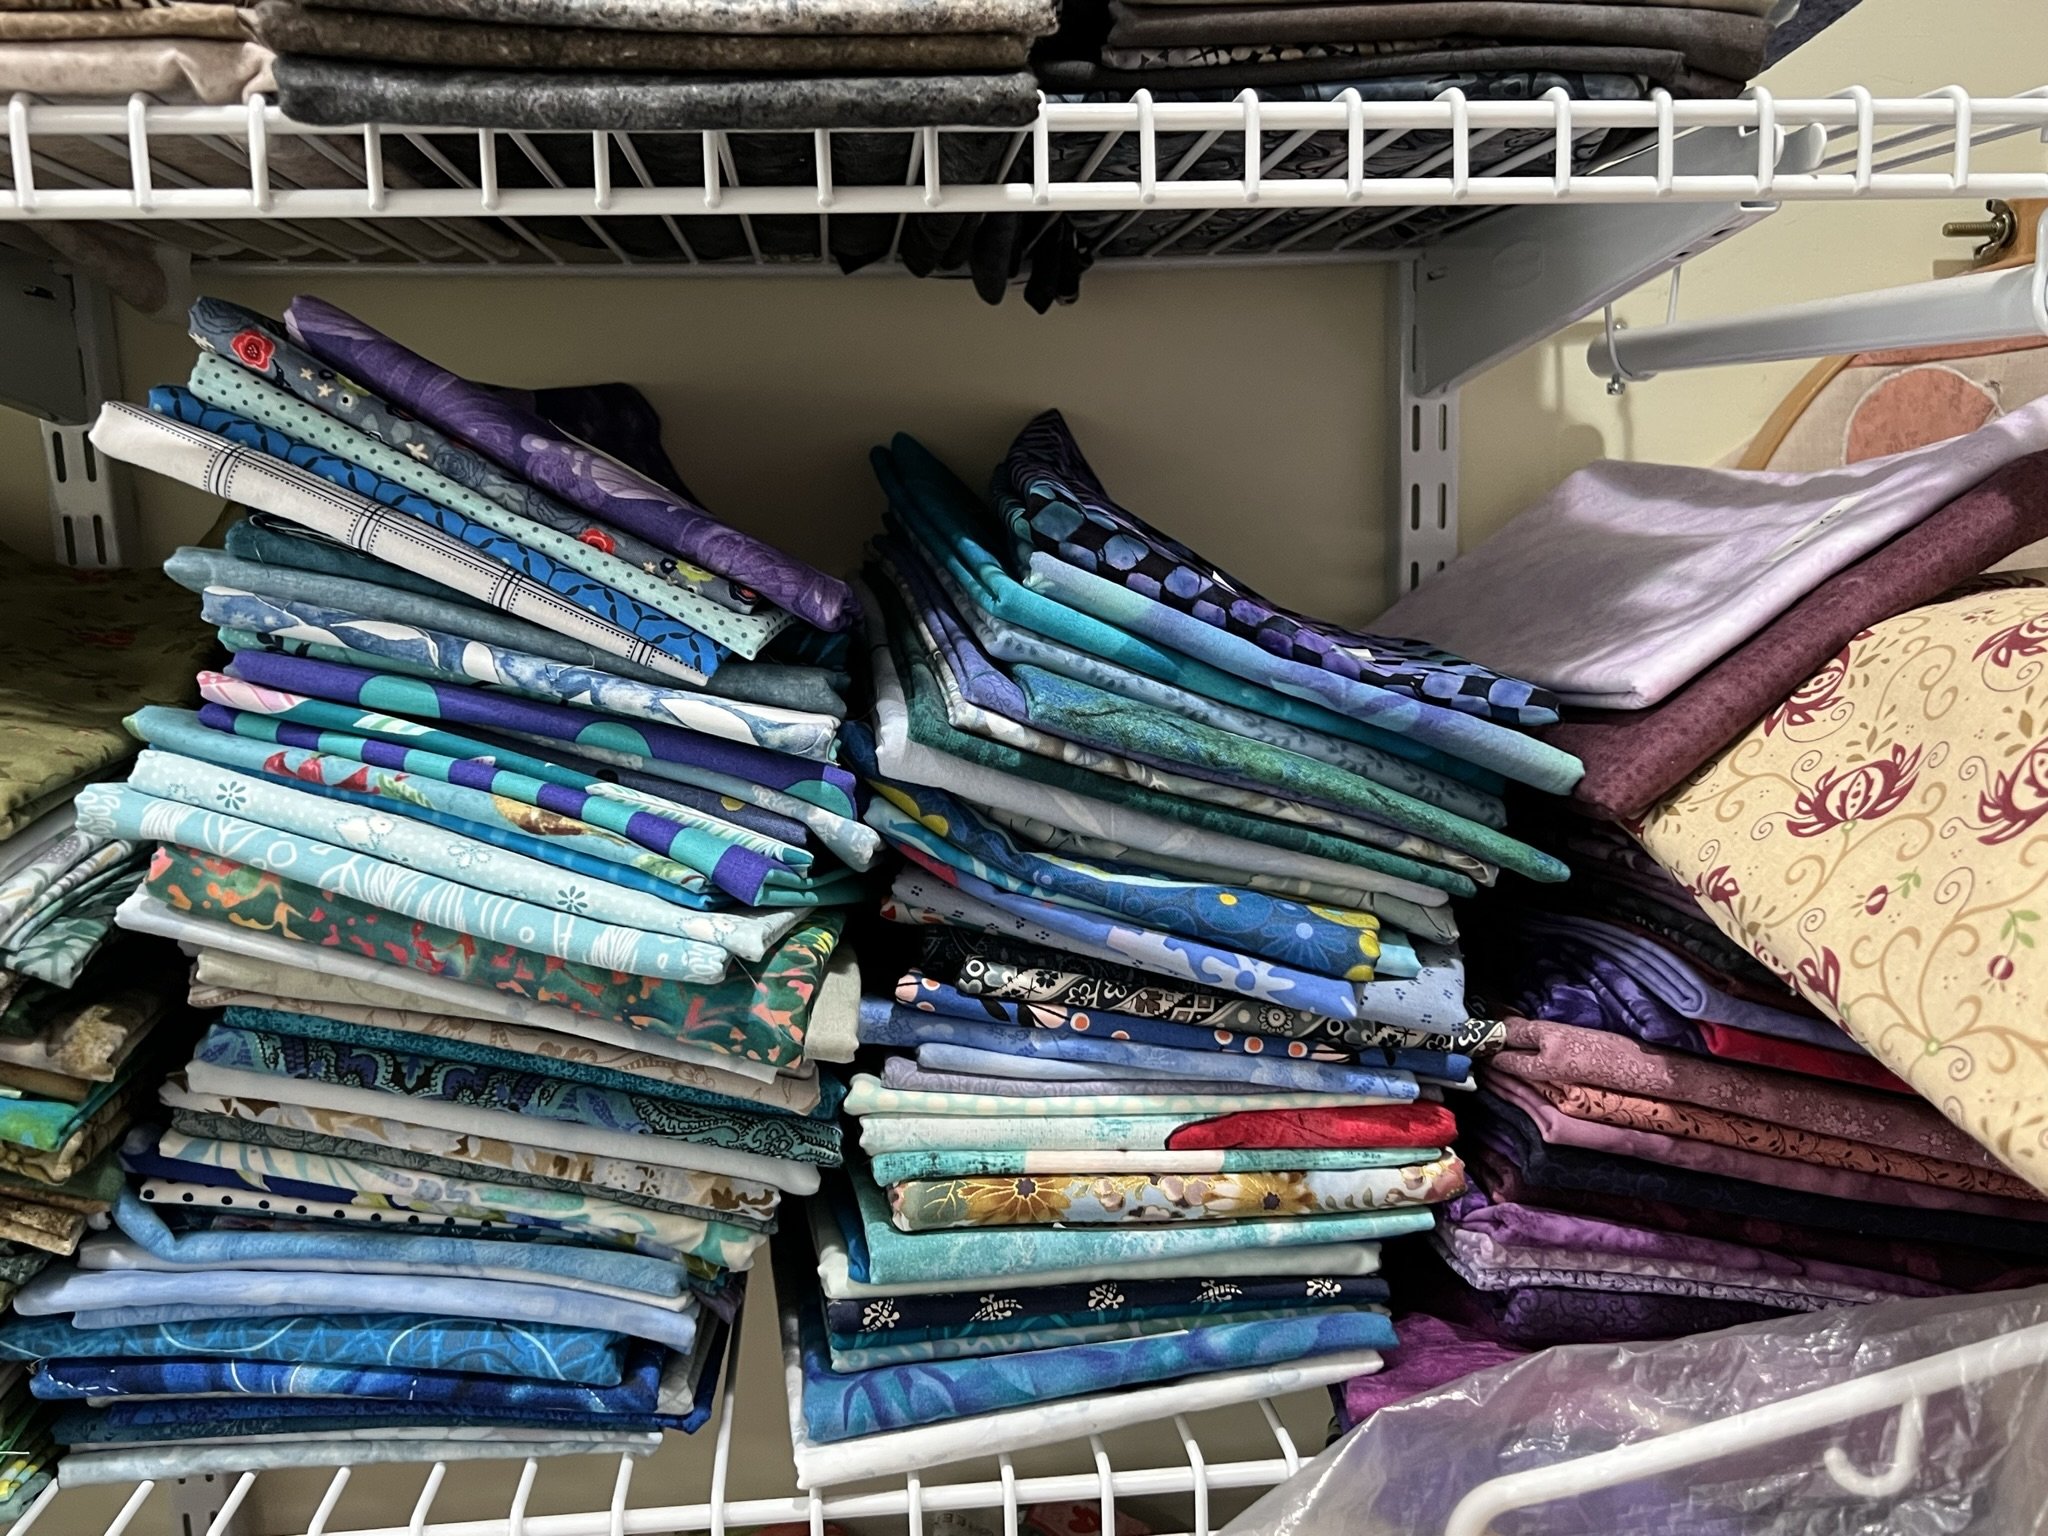
And just imagine that same stack post-fabric-audition-session.
So I did something I’ve been thinking about for a long time. Like, years. Like, since whenever it first hit the Internet. I ordered comic book boards. I bought a double pack of reams of 100, so I have 200 total. I don’t actually know how much fabric I have in my stash. I probably should have counted folds but…well, you know me. I’ve always been a visual person—I know whether my stash is getting too big when I no longer have space on this one set of shelves for it. Who needs to know more than that?

Today, when I wanted a break from brain work, I set about refolding my fabric onto comic book boards.
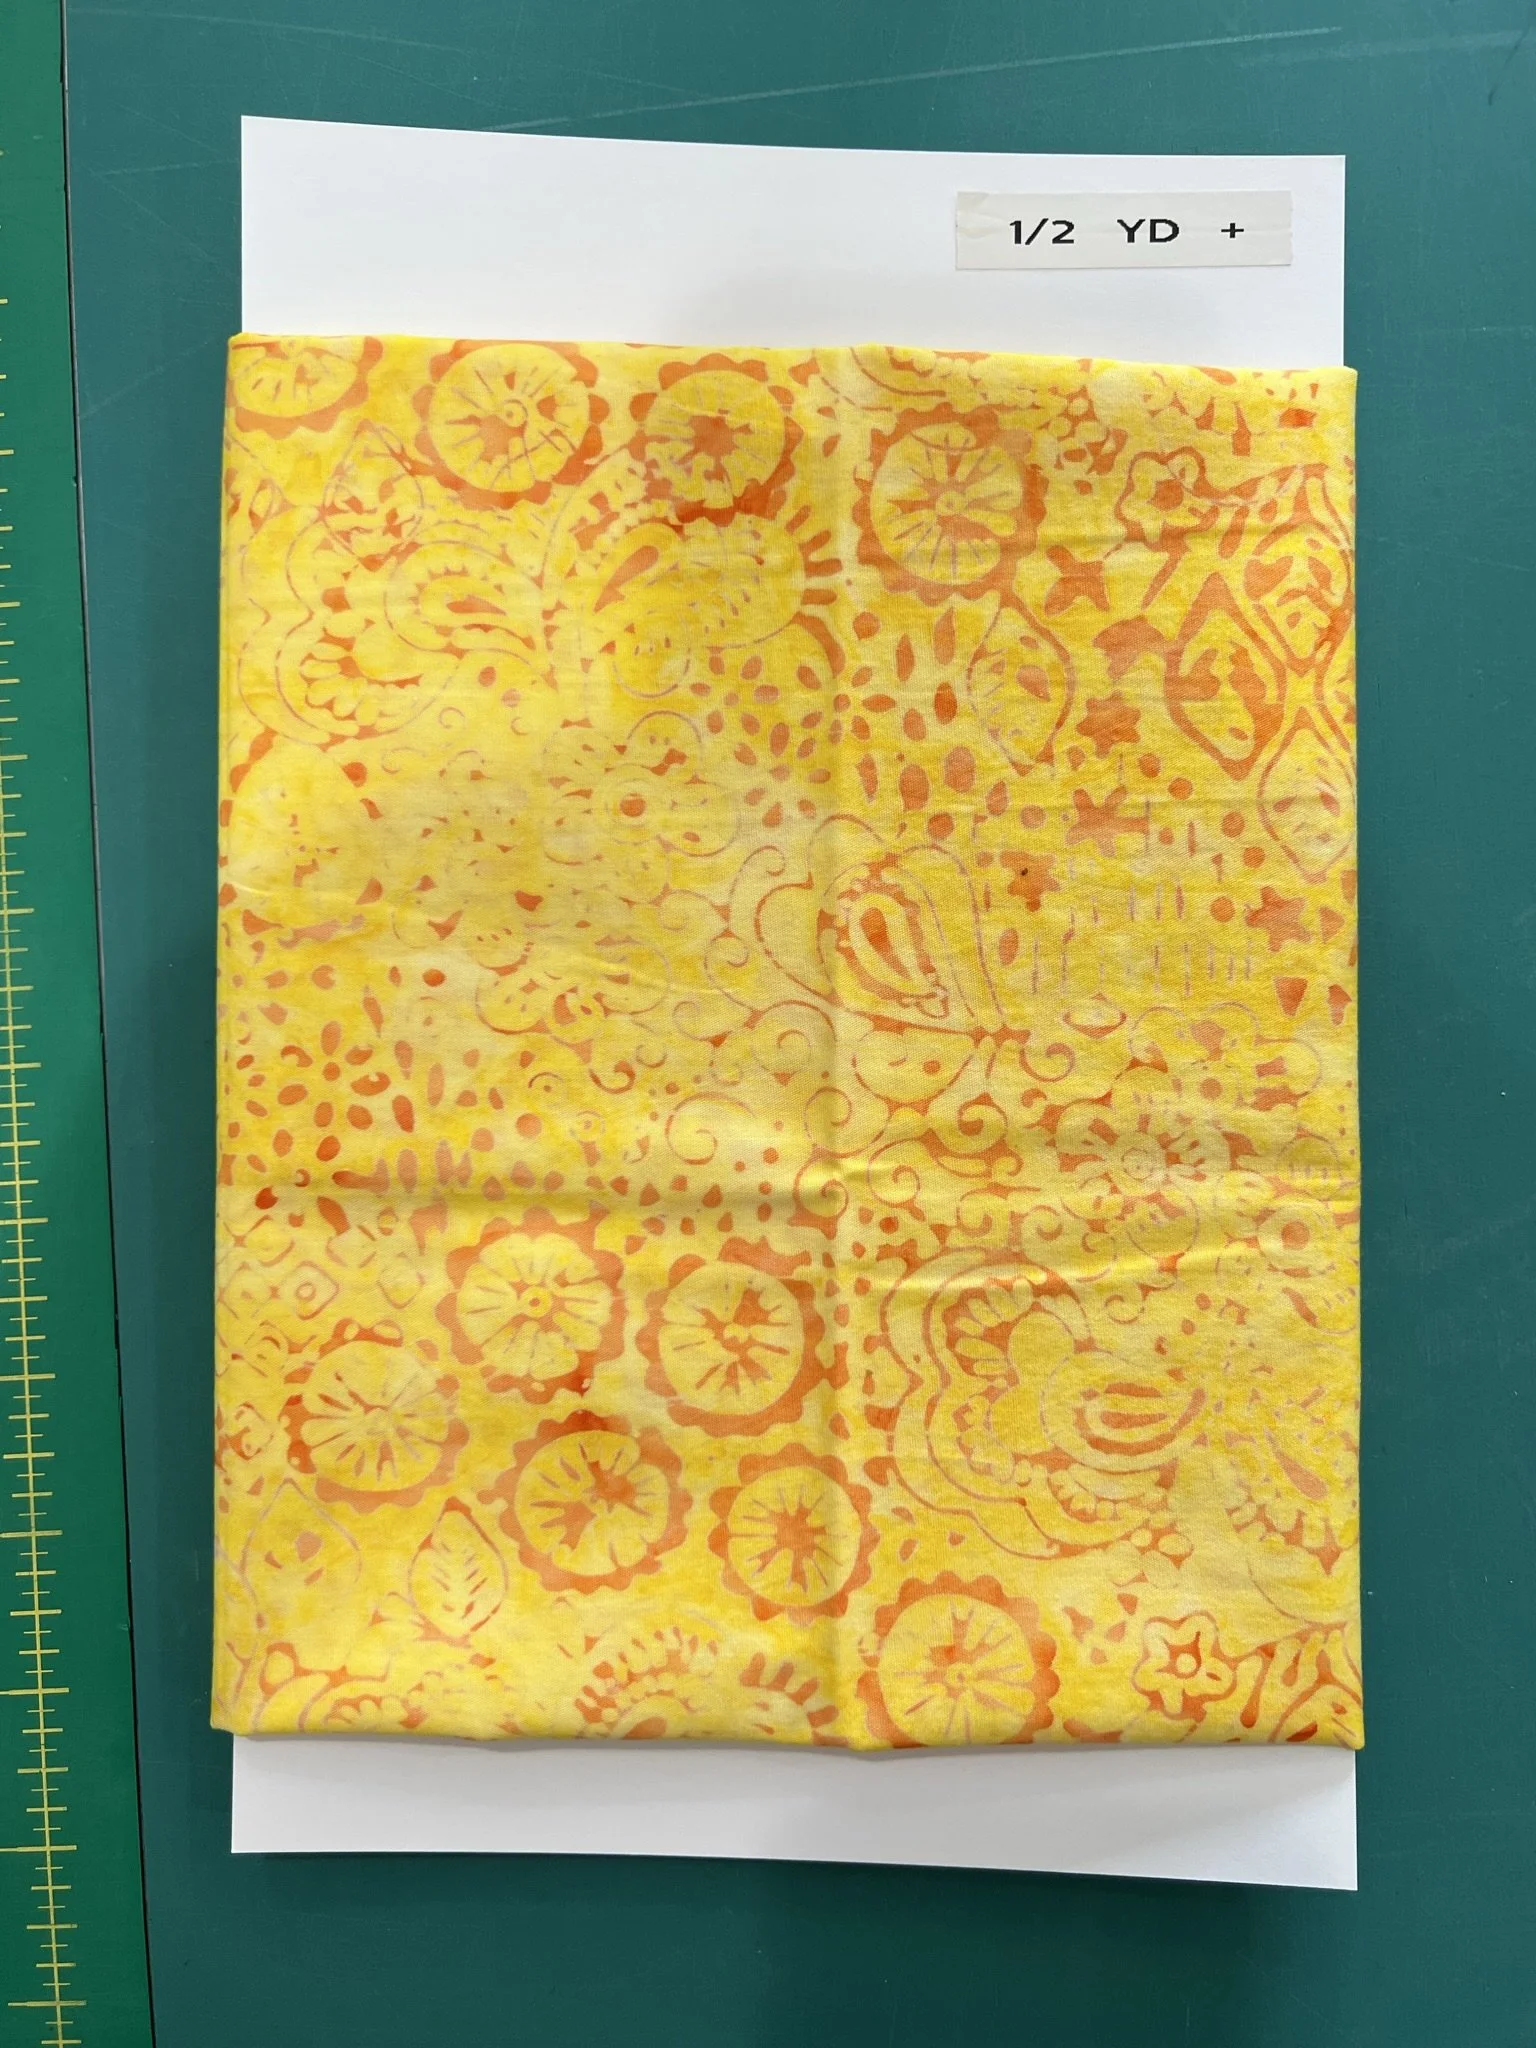
Here’s a nice, neatly ruler-folded example of one of my yellows, with my usual yardage label.
I unfolded it, laid it selvedge to selvedge, and then re-folded it into thirds horizontally.
No magic to my choice of thirds. I’d looked at a couple of Youtube and blog tutorials about how various people fold their fabrics onto comic book boards and decided there’s no real trick to it—it’s just how you want the finished product to look and work for you.
So thirds was easy to eye-ball, fast to fold, and allows some of the paper board to stick up out of the top…you’ll see why I like that approach in a minute.
Here it is, folded onto the board.
Yep, I gave myself permission to be lazy and didn’t press the original folds out before re-folding it. I want to get this done in this century.
See why I like having the board sticking up a little bit? Yep—same label! And so easy to see now! Plus I know the label will stay on the board. Those labels were forever flying off the fabric when I was digging through stacks to find what I needed.

I also ordered little plastic clips (also dirt cheap) to make sure the fabric stayed folded around the board. You don’t necessarily need these, but I can be a little compulsive that way. On the other hand, the first few times I pull fabrics for future projects, I may decide the clips are a pain in the tuckus and stop using them. We’ll see.
For most of the half yard or yard cuts, I only use one clip on the top. Some of the bulkier cuts, or ones with more “freeform” cut ends, have two clips.
Unfortunately, doing my fabric this way also means I need to move it onto different shelves. The shelves I’ve been using for my fabric stash are coated wire, and the wire goes in one direction, so the boards will slip between the wires. I debated buying a vinyl or rubber shelf mat, but then I’d also have to figure out how to keep the boards upright as the shelves are 5’ long with no dividers—and once I put down shelf mats, I can’t put up dividers…or I could buy new laminate shelving but would likely also need new brackets to hold them…. If you give a mouse a cookie…
So it’s faster, easier, and far cheaper to simply reorganize my shelves. Again.
Experimental Shelf #1 Complete. Now I just need to redo ALL my shelves to make the new system work. Sigh.