A sad bit of news...

For those of you who have been following along with Charlotte's Scrapitude mystery quilts these last couple of years, I wanted to let you know that Charlotte's husband, Ray, passed away suddenly on Thursday, November 3. Please keep her and her family in your thoughts and prayers during this difficult time.

For those of you who had asked me over the last few weeks about whether she was doing a mystery quilt again this year, she was working on one. Her website hadn't been updated yet but she has a little information posted in her Facebook group with some initial cutting instructions. You'll need to scroll down on the wall in the group to find it. I haven't been to guild in a few months so I can't clarify anything for you--sorry.

Scrap-in-a-Box (Scrapitude 2015)--Step 1 reporting in

Okay, you may recall me talking about my "secret project" that I was working on last summer, that really wasn't actually all that secret. I was working my way through Charlotte's 2015 Scrapitude mystery quilt "Scrap-in-a-Box" as a pattern tester/mystery tester  last summer so that I'd be prepared to have everything on my blog this year when she was ready to go.

And then she was able to launch her own blog. Woo hoo for yoooo, Charlotte! I was thrilled! And I immediately ceased work on the final stages of Scrap-in-the-box knowing that I'd be able to catch up with everyone once y'all got to play along too. I had a few other pressing-need-projects to refocus on at that point, and I thought it would be more fun to do the last couple of steps in a crowd.

Unfortunately, because I'd originally been taking pictures with the intention of posting steps, I have great photos of individual units under my sewing machine, but not the nice reveal of all the completed units for any one step. And after having worked through the mystery steps with me, Charlotte changed them up a bit so my unit photos don't always match what you're actually going to be doing--at least, in terms of what units get done when. 

So this is all I have to show you for Step 1. One measly unit.

But really, I did get all 82 of those units done; it was just a long time ago and they all got...well...I can't really tell you now, can I? 

Be sure you've subscribed to Charlotte's blog to get the rest of the Scrapitude steps: scrapitudequilts.com.  The next one is released on February 10, 7:00 p.m. Eastern (or thereabouts). You'll also want to check out one of her recent posts on what "random but pleasing" means--great information!


Woot! Charlotte's in the Blog-o-Sphere!

ScrapitBonzaTude--my version of Charlotte's 2013 Scrapitude mystery quilt.

ScrapitBonzaTude--my version of Charlotte's 2013 Scrapitude mystery quilt.

You've been waiting and waiting...and your patience has been awarded. Our talented Charlotte of Scrapitude Fame now has her blog up and running!

http://scrapitudequilts.com/

Go add her to your feeds and give her some commenty-love! 

She's got the cutting instructions for Scrap-in-a-Box posted (but I'll still be leaving them on my blog here as well). She'll be starting to post the mystery clues in January--and I won't be posting them here so make sure you're following her blog to get them as soon as they go live!

Scrapitude 2015: Scrap-in-a-Box--Cutting Instructions

Charlotte is still working on getting her blog set up, so I'm posting cutting instructions for Scrapitude 2015: Scrap-in-a-Box here. We'll transfer everything over to her blog once it's ready to go!

The Specs

Finished size: 58" to 74" including borders.

Finished block size: 10"

  • Instructions will be given for both “traditional” cutting (using your normal rulers) as well as instructions if you choose to use the Easy Angle ruler for those of you who may own it.
  • You’ll be sewing some diagonals. You may want to check out the Clearly Perfect Angles tool from New Leaf Stitches. I love mine.

Fabric and Cutting Requirements

(Abbreviations: WOF = Width of Fabric or selvedge to selvedge; HST = Half-Square Triangles)

From assorted medium to dark scraps:

Just a few of my scraps that have been put to use.

Just a few of my scraps that have been put to use.

  • (18) 2 1/2" squares
  • (82) 1 1/2" squares
  • (23) 1 7/8" squares
  • (96) 2 7/8" squares, cut on the diagonal. OR (192) 2 1/2" HST using the Easy Angle Ruler
  • (41) 4 7/8" squares, cut on the diagonal. OR (82) 4 1/2" HST using the Easy Angle Ruler
  • (6) different strips at 1 1/2" by WOF
  • (7) 5 1/4" squares
  • (8) 3 1/4" squares

From background fabric:

(Charlotte recommends white, off-white, or very pale color tone-on-tone, preferably all the same fabric but could be scrappy if all the same color. If you're a fan of print backgrounds, just be careful--too busy a background and you'll lose the design on this one.)

I 'm a huge fan of a nice, crisp, white background on a scrap quilt. My white background is scrappy, but all the same white.

I 'm a huge fan of a nice, crisp, white background on a scrap quilt. My white background is scrappy, but all the same white.

  • (96) 2 7/8" squares, cut on the diagonal. OR (192) 2 1/2" HST using with the Easy Angle Ruler
  • (96) 1 7/8" squares, cut on the diagonal. OR (192) 1 1/2" HST using the Easy Angle Ruler
  • (6) strips at 1 1/2" by WOF

Blender Fabric:

(Charlotte recommends medium value blender/tone-on-tone fabric, preferably all the same fabric, but like the background fabric this could be scrappy as long as it's all the same color and intensity. Again, too much variation here and you'll lose the design.)

  • (96) 2 1/2" squares (Approximately six 2 1/2" strips will yield 96 squares.)

Sashing, Borders, and Binding

You'll eventually need approximately 3 yards plus 1/2 yard for contrasting border. However, you may want to hold off choosing this until you see the blocks. Plus, the sashing is kinda special so don't get ahead of yourself here!

Okay--get sorting and cutting! You've got until January 13, 2015, to have everything ready to go.

Sandy’s Notes

I have a freaking boatload of 2 ½” and 5” squares in my stash. So after I’d set aside the 2 ½” squares I needed, I then cut a bunch more down to make my 1 ½” squares. I also got heartless and cut down a bunch of 5” squares for both my 2 7/8” and 4 7/8” squares. I know some of you may think, “Cutting a 5” square down to 2 7/8”? Isn’t that a huge waste of fabric?” Well, sure. But as far as I’m concerned, it was better than (1) taking the time to cut individual scrap pieces into squares, or (2) cutting more strips for the squares and ending up with leftover squares at the end thereby increasing my stash rather than decreasing it. Plus it’s worth the “real estate” those stinkin’ squares are taking up in my scrap bin. The more ways I can use them up and move them out, the better!

It took me awhile to choose a blender fabric. I finally settled on a medium tone-on-tone blue that’s been in my stash for a long, long time. I like the print but I don’t love it, so I thought it was a good one to cut into smaller pieces and spread throughout a scrap quilt.

Remember what they say about ugly fabrics? "You just haven't cut it small enough." Scrap quilts are a great time to use those less-favored fabs up!

Questions for Charlotte


Not familiar with the Easy Angle Ruler? Check out this YouTube video.

(Transparency statement: Amazon links in this post help support this blog and podcast. Thank you!)

Announcing...Scrapitude 2015, or "Scrap-in-a-Box"!

ScrapiBonzaTude--my version of Charlotte's first Scrapitude quilt this past year.

ScrapiBonzaTude--my version of Charlotte's first Scrapitude quilt this past year.

Yes, folks, the time is almost upon us! Charlotte's ready to lead another mystery scrap quilt!

The Schedule

Fabric and cutting instructions will be posted this coming week (Tuesday, 9/6). You'll then have a few months to get yourself ready to go.

The first piecing clue will be posted January 13. There are five clues altogether, and we'll be posting them the second Tuesday of every month from January through May, 2015.*

Wanna play along?

The Size

This time, Charlotte has let us know that the completed quilt will be a "snuggly couch size approximately 58" x 74", including borders." She also describes it as being for confident beginners or intermediate quilters. If you are a beginner, you'll just need to go slow and watch some bias edges. But you should be able to do it. Nothing too off-the-wall! And advanced quilters will enjoy it too, of course.

So, what are you waiting for? Join the fun!

On Palettes

Some people love doing controlled palettes. Charlotte prefers doing full-on scrap in her own quilting, so her instructions are set up that way. I suggest you pay attention to the information she gives for value and suggested fabrics. (It's a gorgeous design and you don't want it to get lost!) Controlled palettes can simply be "controlled" along the same value lines.

See below for a little more about controlled palette versus full-on scrap.

Sharing

We'll still use #Scrapitude on Twitter and the same Flickr group. (Didn't do Scrapitude last year? Go ahead and check out the Flickr group to see what-the-what!)

Asking Questions

My travel schedule is nuts this year. So that my absence doesn't slow things down for those of you working on Scrapitude, I've set up a form for you to use to submit your questions about Scrapitude. Charlotte will get the questions herself and be able to respond to you directly. I'll see the questions and responses and if there's something that may be helpful for everyone to know, I'll post it to my blog whenever I land again.

So please use this form to submit your questions. If the form doesn't work for you, email your questions to me and I'll forward them to Charlotte when I see the email. Please do NOT use Twitter to ask questions--they get lost in the stream too easily.


Never Done a Scrap Quilt?

If you want to brush up on your scrappy knowledge, here's the listing I provided last year of past episodes I've done on scrap quilts.

Some Mistakes I've Made Along the Way

A few things I've learned from having done two biggies in a row now (Bonnie Hunter's Easy Street and Charlotte's Scrapitude), with a few smaller scrap projects in between, and having had a few things go awry on me here and there:

1. Unless you're intentionally going for a low-volume or watercolor effect, be sure your background fabric/s have good contrast with your scrap (main) fabrics. Otherwise you lose the design as your block edges fade into the background fabric.

Some of my scraps for the original Scrapitude

Some of my scraps for the original Scrapitude

2. In the same way, when you're choosing your scraps, it's generally a good idea to avoid any large-scale prints with parts of the print that are too close to the color of the background fabric. When you cut those large-scale prints into pieces, you might lose the sharpness of the edge when a big white flower suddenly lands right up against your white background and makes your block look like someone took a chomp out of the edge.

      In a normal non-mystery quilt, large-scale prints can be planned for places where they'd work well. In a mystery quilt, though, you never know how pieces are ultimately going to be used, so large-scale prints can be very tricky unless the mystery quilt designer tells you where it would be okay to use one. If, however, your large-scale print has good contrast with the background overall, these can be great to use in scrap quilts because cutting it into smaller pieces will give you a huge variety of end results--it'll look like you used five different fabrics where it was only one to start.

3. If you have one really dark fabric, balance it out with other really dark fabrics. If you have one really light fabric, balance it out with other really lights. My difficulty on Easy Street was I was trying for a span of values in my controlled palette and ended up with one really dark green mottled-read-as-solid that just sticks out like a sore thumb on the finished quilt. All I can see when I look at it is this dark green visual hole plopped around the quilt. It was my first scrap quilt, and it was a mystery, so I had no way of guessing the end result. Since then, I've done a couple of other scrap projects where I suddenly realized I had one fabric really standing out in an unpleasant way; but rather than removing that one fabric, I balanced it out with others of similar value, and suddenly it all worked beautifully. So while testing the new Scrapitude, I chose a wide variety of scraps and made sure I had a good mix of values (according to Charlotte's directions, which you'll get in another few days). And it's worked really well.

4. Don't be afraid of full-on scrap! I was. I really struggled with Easy Street and the first Scrapitude. In fact, I was pretty sure after Easy Street I didn't want to do another scrap quilt. Ever. (Or another mystery, for that matter.) But when I let myself do full-on scrap, and let Charlotte keep telling me, "It'll be okay! It'll be okay!" every month at guild, I ended up having a ball and completely loving the end product. I had to fight with myself not to control the way those scraps were coming together in the piecing. I confess to a couple of times picking up two pieces and saying, "Yikes! No way am I letting those two colors near each other!" and swapping one out before piecing the unit. But I only did that once or twice before I convinced myself that would be crazy-making and just released myself to the process. When you see the finished quilt, you never see those two fabrics that maybe don't play nice in the sandbox together. Because they're part of a whole, overall wonderful scrappy design.

That's it...although I may have other tips along the way. But for now--start staring at your scrap stash and thinking, "Yay! It's time for Scrapitude again!"

Please note: The original Scrapitude instructions have now been removed from my blog, as Charlotte is in the process of writing it up as a pattern for eventual sale. You will still find my in-progress and completed posts, none of which contained instructions.

*The second Tuesday of every month is my guild meeting. You'll be getting the clues the same day my guild-mates do!


A Finish! Scrapitude--or, as it's known in my house, ScrapiBonzaTude

It's finally totally, completely, without a doubt, done!

Scrapitude done and on my bed!

Scrapitude done and on my bed!

I had it quilted at Mt. Pleasant Quilting Company. I only asked for a pantograph (all over design) on this because to do anything else on a quilt this size would've been too expensive. I left it up to "quilter's choice" on the pattern and just ask for a thread that would blend. Here's a detail of the design. (The thread is a light beige.)

And finally, the lovely border fabric that pulled it all together. I think I already talked about finding this fabric in a previous blog post--it wasn't what I went looking for, but it just made the quilt sing! The motif speaks well to the shape of the star in the blocks, and it echoes many of the more prominent colors in the quilt. Love it.

Because of the motif, my borders are something like 9" wide. So the entire quilt came out to around 96" square--which was, as it turned out, just the size I needed to drape over our tall mattresses and reach to the top of the box spring with it's dust ruffle. I've never had a blanket or bed covering that did that on this bed. Woo! I hadn't planned that specifically when I chose the border, but boy, was it a nice outcome!

Because this quilt is so large, and because the border fabric is an Australian aboriginal fabric design (Stella Black by designer Cathy Turner), I pulled in my Head Australian Quilting Consultant, @ozzypip, and asked her for any Australian slang terms that meant "stinking huge." (Okay, I may not have included the word "stinking" in my query, but it was definitely in my head!) Philippa consulted with some of her compatriots and sent me a list of possibilities. Although she warned me that "Bonza" is older slang, I decided it was the one that worked best in this case. Hence, "ScrapiBonzaTude" was born!

And so, ScrapiBonzaTude is finally complete. Just in time, too. Yep, I'm already working on a secret mystery project scheduled for launch in early 2015... (and this message will self-destruct in five seconds...)

Boo Yah! Weekend Goals Met! Plus DPW, Scrapitude, and Daisy's Quilt Reveal

This time around, I did great on my weekend plans!

SDHDPWTop3914sm.jpg

Remember that Disappearing Pinwheel extravaganza from way back at the MLK Jr Day Sew-In? I finally got my top completed! I also did a backing for this one, a nice turqouise or aqua blue marbled cotton. It's now in the hands of the longarmer at my LQS. I'm having it pantographed, quilter's choice. Still haven't entirely decided what I'm going to do with this one but I'm thinking it may be a gift for a friend.


And now, the big reveal....

SDHScrapitude3914sm.jpg

My Scrapitude top!

I haven't come up with a spiffy name for this yet.

SDHScrapitudeborderdetail3914.jpg

The narrow inner border was from my stash, so the only purchased fabric for this was the outer border and backing.

I fell in love with this border fabric. Not at all what I'd originally had in mind when I ventured to my LQS to find something. I'd been thinking a large print multicolored floral to balance out all the sharp pointy things going on in the center. I'd seen the bolt of this fabric on the shelf and liked that it had all the colors I was looking for, but since it had the vibe of an Australian aboriginal print design I didn't think it would really fit the feel of the traditional scrappy top. Later in my search, the staffperson pulled it off the shelf and we laid it out next to the quilt. There was a moment of silence, and we both said, "...Oh." And then, "Oh..." again. I loved the way the border motif mimicked the shape of the block, and it spoke to the colors in the quilt. I fell in love with it. Unique and unexpected--even better.

I only debated it for several moments longer because it's a directional print with a distinct motif and I thought I'd hate myself for trying to work with that. Yeah, I probably would, but it was too perfect to pass up.

My original intention was to do all sorts of math to get those motifs to work out as perfectly as possible, by taking little tucks in the border  to pull the motifs together in a shorter repeat as needed. When it came right down to it, though...I was really trying to get the borders done in time to get the quilt to the LQS before it closed on Saturday. Plus, I'd already lost so many points and had so many things not meet up as they should've (you'll need to listen to my rant about a particular ruler for the backstory on that one) that this is nowhere near an heirloom or show-quality quilt anyway. It's going to be on a bed in my house...which bed is yet to be determined. So, in any case, me and my family are the only ones that will see it. My husband really likes it as-is, so I decided not to sweat the border and just get it on there.

Magically, and thankfully, this is the first fabric I've worked with in this way in years that was actually mostly printed on grain! As I cut the fabric lengthwise (so I wouldn't have to piece the border), it was mostly in line with the motif. Amazing. So my priority of at least having the motifs appear relatively straight along the borders worked out pretty dang well. I didn't worry about where the motifs ended or mitering borders to make them match or anything. We were in Get-'Er-Done mode and I was absolutely thrilled to Get-'Er-Done!

This is also now in the hands of my LQS longarmer and it's also going to get a pantograph. As I said to the woman taking my quilt, "If I'm ponying up for custom, it's going to be on a quilt where I can see all my points!"

StringStarPrep3914.jpg

Other projects done this weekend...

Got all my cutting done for my String Star class with Ami Simms at Lancaster AQS quilt week. I'm using various ethnic design fabrics. We're supposed to bring the uncut fabric to class "pressed and ready to cut." The best way I could think to do that was to press it, then lay it out flat one on top of another and carefully roll it all together. Here's hoping it's not a mess if we do get to the point of cutting that.

dyeclassprep.jpg

And I collected all my supplies for the dye class with Frieda Anderson. I already had most of it, but I did take this as an opportunity to pick up more small containers with lids from the Dollar Store--they're a good size for fat quarters and you can even scrunch a half yard down in there if you're going for the scrunchy look, which I normally am. Pack of five for a buck. Can't beat it.

I don't have to bring a ton of supplies because I did buy her kit, so she'll be giving us the dyes, gloves, a face mask, and some fabric. I'm also bringing extra fabric that I cut and folded later after I'd already taken this picture; she invited us to bring whatever else we might want to dye since we may have time to do more in the afternoon. I couldn't bring my dog (What? You can't imagine a Turquoise Retriever?) so I'm sticking with doing more PFD fabrics I can add to my collection.

I got more done on my Spring postcard swap--can't show that yet, though!

DaisysGrace3914.jpg

And, finally, in a last-Hurrah of the weekend, I got the binding on the quilt I won from Daisy in her giveaway a couple of months ago! Woot! If I recall, the name of the design is "State of Grace," so I've named this quilt "Daisy's Grace." My daughter wanted it for her dorm room, so I did a machine binding. She's very happy with it!

DD is holding it up for the photo, and she's standing on the second step up on our staircase. She refers to herself as "fun-sized," so this is the perfect size quilt for her. She'll easily be able to wrap herself up in it while...ahem...studying.

DaisysGracedetail.jpg

Detail of the pantograph design. I almost inevitably leave it up to "Quilter's Choice" on design and thread color--the most I'll usually say is "I want it to blend," or "I don't mind something that stands out on this one" or whatever. They used a nice beige thread that stands out a little, but not so much as to detract from the design. They always do a great job...which is why I usually say "Quilter's Choice!"

I am so thrilled to be able to report that I'm not longer feeling overwhelmed by the number of projects I've got going on! Getting all this done this weekend has  cleared off the top of my cutting table and my sewing table, plus a shelf or two. Things feel organized and in control again.

Breathe.


Thank-you Gifts for Charlotte

About a week before my last guild meeting, a few of the #twilters (quilters on Twitter) decided they wanted to show their thanks to Charlotte for Scrapitude by making "wee gifties," as @verylazydaisy called them. They mailed the gifts to me and I made a surprise presentation of them to Charlotte at my guild meeting.

With the short notice, I had gifts in hand from three people. Thanks so much to @SewExcitedQuilts (the keyfob), @artquiltmaker (the needle case), and @ddrquilter (the small wallhanging). I have been told to expect more so I'll be checking my PO box regularly. I won't be at my March guild meeting as I'll be at the AQS show in Lancaster, but I'll figure out some way to get them to Charlotte anyway.

As you may be able to tell from the photos, Charlotte was very touched. She couldn't stop grinning and saying, "I don't believe it!" Thank you, everyone, for showing Charlotte some love!


What's on for the weekend...

I'm writing this blog post on Saturday morning and thinking through what my long weekend will bring. I'm caffeinating and "charging" (as my husband calls it when he sees me sitting in front of my light box), and watching another lesson in one of my current Craftsy classes, "Complete Knife Skills" with Brendan McDermott--a freebie that has quickly become one of my favorite classes I've taken from Craftsy so far. But you'll just have to wait for my full review when I'm done with the class entirely.

Speaking of Craftsy--they're having another sale this weekend, the "Perfect Match Flash Sale" in which you can get two classes paired together, both on sale. I've already glanced at some of the offerings but haven't spent a lot of time on the site yet. I have other things I need to get done today!

In any case, as I'm sitting here getting ready for my day (which begins with a run to the grocery store), I thought it might keep me on track if I listed here my quilty-related goals for the weekend, and then I'll check in again sometime Monday evening and let you know what I actually accomplished. As we know, I'm a list-maker!

1. Post a podcast episode. (Sorry about missing last week; as it turned out, it was a very busy weekend followed by a busy week!)

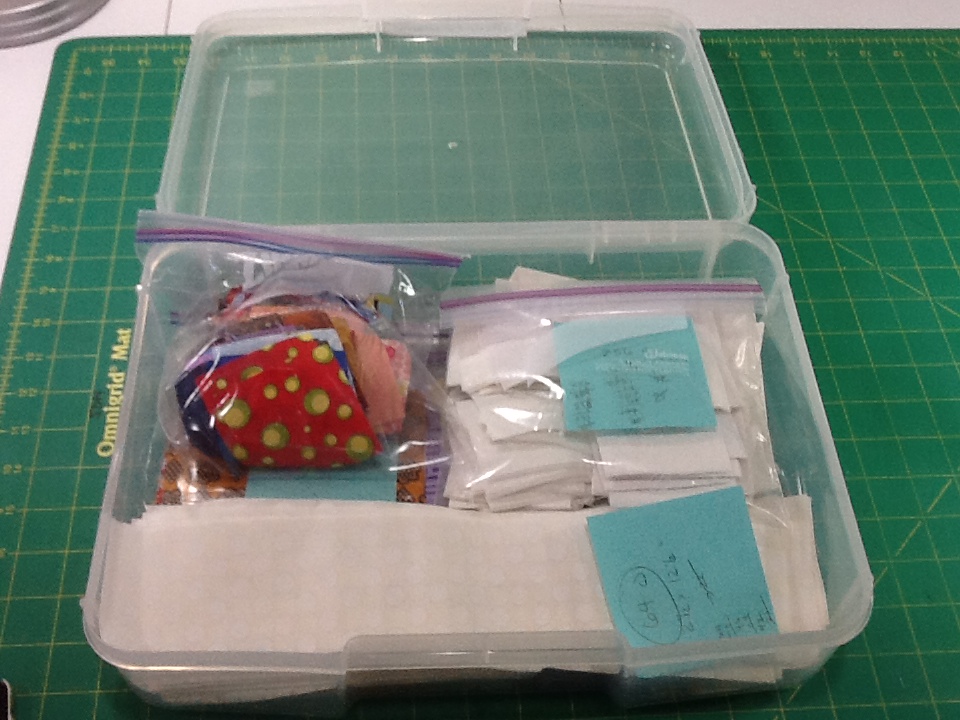
2. Get my Scrapitude blocks and triangles made. If I can manage it, I'd really like to get the whole Scrapitude top pieced.*

3. Put my dye studio back together. It's still dismantled from when I had to repurpose one of the tables for Thanksgiving dinner. I also still need to haul my old cutting table from my second-floor sewing room to my basement dye studio. This requires my husband's involvement.

4. Put the finishing touches on new cutting table--using my 3M adhesive strips as I mentioned in a previous podcast episode, and heat-setting the edging strip around the top.

Now, here's the thing--some of my weekend schedule is still a bit up on the air. I may be making a nice dinner tonight, which means some of today will be spent in the kitchen, or we might be going out for a nice dinner, which means I'd not have to spend time in the kitchen. I can actually go either way on this one--after being gone for a week of vacation I'm very okay with spending a night in my kitchen. I enjoy cooking when I've actually got time to do it. But I'd also be very okay with having a whole afternoon to spend in my sewing room. So I'm viewing this as a win-win whichever way we end up going. Tomorrow I've got a commitment in the morning which means we may not be home until about 3p, and although I've got Monday off, I've got an appointment in the morning so may not have much sewing time until the afternoon. I still think I'll be able to accomplish all of the above.

So here's to a long weekend, and being home, and getting homey kinds of things done. What are your plans for the weekend? For U.S. readers, do you have Monday off? I believe we've got a #PDSI going on, though it won't be as active as usual since this is a much-less common day off for most people. Indeed, this is the first year that I can remember actually having it off! Yay!

*Whether I get the whole Scrapitude top pieced is less dependent on the amount of time I have this weekend, and more so on how long I can sit at my sewing machine doing the same thing over and over again. This is why I rarely make bed-sized quilts. Even with movies or audiobooks, I just get stir-crazy after awhile, so I may switch up what project I'm working on rather than plowing through one project for the whole weekend.

#MLKSI--join us for another sew-in

As per my previous post about what @knittyAJ can talk me into, just wanted to remind y'all that there's another online sew-in this weekend as [some of us] have Martin Luther King Jr. Day off from work on Monday. I'm actually quite excited--I'm normally traveling for work over this weekend so I'm usually observing the incredible work of Martin Luther King Jr by being crammed in coach class on a plane or waiting for delayed flights. This year, I plan on listening to recordings of his sermons while I'm sewing. Seems much more fitting.

So, join us for our sew-in! As usual, there's a Twitter hashtag: #MLKSI. If you're not on Twitter, you can still play along--you'll just miss some of the fun!

A lot of us are going to have fun together by all sewing one or both or a combo package of the two versions of the Disappearing Pinwheel (DP) in that previous post. I've set up a Flickr group to make it easier for us to look at it in different color ways and settings. Anyone can check it out, even if you're not doing the sew-in or the DP! You'll find it here: http://www.flickr.com/groups/disappearingpinwheel/. People are already posting photos of their fabric choices...it'll be fun watching these develop!

Also, Craftsy is doing a "flash sale" this weekend--January 18-19, over 50 classes will be up to 50% off, so check it out! (Here's a link. Full disclosure, I'm an affiliate so using that link will help support my podcast and blog. So will clicking on the Craftsy banner in the sidebar. Thanks!)

As soon as I'm done with work on Friday, I'll be doing the second part of Step #4 of #Scrapitude so I can get that one posted. Then I'll be choosing fabrics for my DP--and let the #MLKSI fun begin!

Vacation Accomplishments and Ready for 2014

(Caution: Long post ahead!) I talked about this on my podcast, but here are the pictures.

Recall my blog post on spending Friday at my church sewing "Little Dresses"?

I didn't get any made that day, but I'd gotten some pieces cut out and brought them home to finish. And had to re-do it three times because I couldn't figure out how they were supposed to go together. I'd gotten a less-than-five-minute tutorial in the midst of chaos that Friday; now a few days later I was trying to recall what had seemed like a simple process at the time, but I just couldn't get it to make sense in my head. After ripping seams out for the second time (yay for my Havel's seam ripper!), I walked away in frustration and did something else for awhile. Then it came to me: Was it possible I was missing a piece?

littledresses1.jpg

After thinking it through, I decided to make a fourth piece from scrap in my stash. Sure enough, once I made that piece and sewed everything together in a way that seemed to make sense, I had a completed dress that, while not elegantly sewed by any means, is at least wearable and from a distance on a galloping horse, kind of cute.


littledresses2.jpg

I stuffed some scrap fabric in the pocket so you could see that feature better. Basic pockets I've done before, so no seam-ripping required there. The fabric is a Hawaiian "bark cloth" that I got in Hawaii a few years back. It makes a nice sun dress as it's a little lighter weight than traditional quilting cotton, but it frays like nobody's business. Ripping out those seams got harder and harder every time!

I was thrilled to hand that off following our Christmas Eve service at church to the woman in charge of the project. Done and done!

I then moved on to things I feel much more confident in, LOL.

 
Scrapitude 1-3.jpg

I completed Scrapitude Step 1, Step 2, and Step 3. Caught up! Well, okay, still need to trim some dog-ears and square up some units, but I'm considering it done. I'll trim here and there as I'm working on other things.

To set myself up for making serious progress on my 2014 Quilty Resolutions, I bought muslin for and made a boatload of quilt sandwiches for practicing my machine quilting. I think I now have 16 or so, all somewhere around 12-16" square. That should supply me for some time to come, anyway. (No pics since they're just boring white squares!)

Also towards my resolutions, I prepped several new pages so I can finish my Stitch Bible for the Carol Ann Waugh Craftsy class "Stupendous Stitching." I got about halfway through my Stitch Bible last January/February and ran out of pages; that became a stopper. I think I've now got enough pages to finish up the Stitch Bible so that's a priority for the rest of my vacation. (Also no pics yet--I'll wait 'till there's stitching on there.)

huntersstarcenter122013.jpg

I finished the center of the Hunter's Star quilt I'm making using the Deb Tucker Rapid Fire Hunter's Star (petite) ruler I won from AJ at the Quilting Pot podcast.

Ain't it pretty? Points all met perfectly! The fabric is leftover from my grand-niece's baby quilt. I decided on my border fabric yesterday so now that I'm caught up on Scrapitude, this project is back on deck!

For the last couple of days I've been spending most of my time on this: After my husband surprised me by deciding to move his computer to another room (thereby also removing his computer desk), I moved the furniture around in my sewing studio/home office. And then moved some of it again. And a third time. And vacuumed a whole bunch. I think I'm now at an arrangement I really like; I'm going to live with it for a few weeks and then probably build myself that solid-surface cutting table like Tanesha's--boy, have I wanted something like that for a l-o-n-g time!

And then there were all those other extraneous cleaning and organizing things: the spice cupboard, the pantry (yikes!), my Dropbox folders, my photo files on my external hard drive (still in progress), and learning a new calendarizing/organizing mobile app that I believe is the app of my dreams, but with a big learning curve.

Apparently my sunlight lamp is really working--it's unusual for me to have this much energy at this time of year!

One more day off tomorrow, and then it's back to work. I hope everything I've put in place will make it easier to continue to make progress on my goals.

My word for the year in 2013 was "play." I really do feel like I achieved that. In 2014, I'm going to do my best to live out the word "balance." Everything I tackled this week was with both of those words in mind--what I could do that would be fun, and what I could get done that would help me maintain better balance in the coming year.

Have you done yourself any favors towards the future? If not, what's one thing you could do in the next couple of days that might make life a little easier for yourself in the months to come?

#Scrapitude Step 1--Finally!

With my "found time" yesterday and a couple of hours this afternoon, I finally have Scrapitude Step 1 done--woot!

(If you're not seeing the image below in the emailed-blog version, use this link to see it in Flickr. Not that it's really all that exciting at this stage...)

I'll probably do another Scrapitude linky sometime next week to let everyone check in on their progress. So you may want to put that on your to-do list for #BDSI!


Reminder about Scrapitude Schedule and BFSI

It's Thanksgiving week here in the U.S., so it's time to start looking ahead to our traditional Black Friday Sew-In on Friday. If you've listened to one of my recent episodes you may recall that I'm not entirely sure what my schedule is going to be on Friday due to family being in from out of town, so Pam is going to be doing something for BFSI, as is Daisy. So be sure to check them out! (There are likely others--those are just the two I'm aware of at the moment. If you're also going to be hosting something on BFSI, leave a link to your blog in the comments so people can find you!)

I do know that my schedule will not include any shopping. My hope is that I'll be spending at least some portion of the day having my traditional Jammie Day with my sewing machine. So, mentally, I'm listing the projects I'll be working on.

One of those projects is, of course, Scrapitude. You may remember I get the new clues every month at my guild meetings. I posted November's clue the day after our November guild meeting. Back when Charlotte was setting this all up, our guild asked her to skip giving us a clue in December because everyone felt they'd be too busy with holiday gifts to keep up. So you've now got until January to catch up with Scrapitude! (Or, if you're all caught up, maybe do it in a second colorway! Or, if you're Daisy, a third!)

So, to recap: the next Scrapitude clue will be posted after my guild meeting in January--we meet the second Tuesday, so you can expect it within a day or two of whatever that date is. 

If you haven't checked out the Scrapitude Flickr group yet, be sure you do!


Scrapitude Progress and Linky #2

scrapitude103013.jpg

I consider it a significant benchmark that I finally finished cutting all my Scrapitude pieces.

Woohoo, yay me, happy dance, n' like that. 

I got home Tuesday afternoon from my week of back-to-back meetings. Wednesday was a comp day, and I was a bit fried. I didn't feel like going out of the house to get batting for Baby Quilt Remix and was a little worried about trying to do any machine quilting, as tired as I was. I decided, therefore, it was a good day to crank up Netflix on my iPad (Midsomer Murders, my second time through the series) and simply knock out the rest of the cutting I had to do for Scrapitude. I do already have a little sewing done on the four-patches from Step 1, but not much. 

I'll be putting out a podcast episode this weekend (already started making my notes!). Meanwhile, I decided it might be time to do another Linky Party.  I'm going to leave this one open until next Wednesday so you'll have the weekend to make as much progress as you'd like. That also means you may want to check back periodically to see who has linked up!

Are you doing the Scrapitude Mystery Quilt by Charlotte? If so, link up your blog post about your progress so far here! 

Everyone else, check out the linkies below to see how everyone is doing! (You'll need to click on the InLinkz widget below to see the links or add your own.)


Scrapitude Progress and Linky Party #1

scrapsquares.jpg

Here's how far I've gotten on Scrapitude, and I started a whole lot sooner than all y'all!

I still have about 60 scrap squares and nearly all my background to cut.


twopatches.jpg

But wait! I do already have bunches of squares sewn into pairs. Okay, so I cheated a little. I raided a project bin I'd started last spring to do a Jacob's Ladder scrap quilt. Holy Moly, I have enough 2 1/2" squares for probably four Jacob's Ladder quilts after I get Scrapitude done, so all's fair in UFOs and Finishes.


2-4patches.jpg

And, since I did that little tutorial on nested seams in four-patches last time, I do have two four-patches done. Yay me.


Are you doing the Scrapitude Mystery Quilt by Charlotte? If so, link up your blog post about your progress so far here! 

Everyone else, check out the linkies below and cheer people on. And who knows? You might just catch the bug! (You'll need to click on the InLinkz widget below to see the links or add your own.)


Past Podcast Episodes about Scraps

I'll be talking about scraps again in this week's podcast episode (coming soon!), but meanwhile, I thought it would be worth re-posting some of the past episodes I've done on scrap quilts. Unfortunately, with the move to the new website last spring there's not an easy way for me to do older episodes here. If I repost them into my podcast feed, it'll suddenly confuse the heck of out things to see a bunch of random old episodes appearing out of order. And links just redirect back to this website where the podcast files don't exist. But what I can do is embed players for each of them in this blog post. You can listen from your computer, but you can't download. Sorry! I'm also going to copy the original show notes from each episode above it, so you'll be reminded what was in it.

 EPISODE 7: In Which We Get Scrappy (April 7, 2010)

I really want to get better at using my scraps, so I decided to do some research on scraps and scrap quilts. I found so much, though, that I'm having to use two episodes to cover it! So, in this first episode, after doing some catching up with listener comments and contributions, I share with you my experience, my research, and some listener suggestions, as we talk about a glossary of scrap-related terms, a little history of scrap quilting, how to collect scraps, getting yourself used to doing scrap quilts, what the best sizes are to cut your scraps into, and a little bit about storing and organizing scraps. (In episode 8, I'll share ideas for using your scraps!) 

EPISODE 8: In Which We Revisit Scraps (May 2, 2010)

Welcome to the second episode on scraps! In this episode, we get right down to business and I talk about specialty rulers for scraps, and share a lot of ideas about how to use scraps, including some books.

 EPISODE 51: In Which We Get Scrappy Again (May 30, 2011)

Charlotte Hawkes is our local Queen of Scrap Quilts. A quilter for 10 years, Charlotte's very first quilt was scrappy and she never looked back. In this episode, I interview Charlotte about her system for cutting and saving scraps, choosing quilts, and keeping track of all the projects she's got going on at once. I got a lot of great ideas from her, and I'm sure you will too!

I haven't been able to dig up a picture of the blue and white quilt she made that I referenced in the episode yet, but here is one of Charlotte with one of her more recent scrap projects.

Also in this episode: Sandy Update, Listener Comments, and many, many thanks!

 EPISODE 92: In Which We Talk Scraps with Charlotte (May 24, 2012)

Charlotte's back! Woot woot! You may recall meeting Charlotte Hawkes, the scrap quilter from my guild, from episode 51 In Which We Get Scrappy Again. Some of you asked for more detail, so I invited myself over to her house and set up cameras and all sorts of equipment to go step-by-step through her process. As I mention in the episode, the originally-planned video episode didn't quite work out, so after listening to this audio podcast, please go to my blog for pictures of her system and her quilts. Educational, and eye-candy to boot!