Neutral Essentials with Alex Anderson: 7 Quilt Projects o 3 Keys to Fabric Confidence o Fat-Quarter FriendlyNeutral Essentials with Alex Anderson: 7 Quilt Projects o 3 Keys to Fabric Confidence o Fat-Quarter Friendly by Alex Anderson

My rating: 5 of 5 stars


Neutral Essentials with Alex Anderson is one of my favorite quiltmaking books in my library, partly because at the time it was the only book specifically focused on quilts using neutrals that I'd seen published at the time. (After having done a quick Google just now, there seems to be only one other book currently available and that's on Japanese blocks done in neutrals, but there also seems to be a book about to be published by Martingale Press by Pat Wys, entitled Spotlight on Neutrals.) I love neutral quilts. I find them soothing and energizing at the same time. But there's definitely a knack to making one that really showcases the neutrals and the design at the same time, and Neutral Essentials gives fantastic guidance as to how to do that.


In the Introduction, Alex Anderson describes how she came to make her first neutral quilt and fell in love with the genre. She also describes the process of creating the quilts and designs used in the book--she gathered a group of other "extraordinary quilters....for a day at [her] house and swapped ideas and fabrics, and then each quilter put her personal spin on a quilt made with neutral fabrics." The quilters then each went off to do their own thing and Anderson didn't really know what the final outcome would be until the quilts were delivered back to her. My first thought when reading this paragraph was, "how great that she was willing to relinquish some of the control of her book to others!" Then my second thought was, "What a hoot that would've been!" and wishing I'd been a fly on the wall in her living room that day!


The book then moves into a chapter entitled "Working with Neutrals," which offers a pretty comprehensive look at what constitutes a neutral, then lists "three keys to success" in working with this group of fabrics: color, value, and character of print. Eight pages devoted to the exploration of neutrals really made me look at my stash with a very different eye. After reading this book, I've been much more conscientious about staying on the lookout for really great neutrals, and a wide variety of them. They truly are more than simply a background fabric. (The chapter also includes a section entitled "Permission to Stretch" to offer some options to those who aren't ready to give up color entirely.)


The chapter closes with sections entitled, "Building and caring for a neutral collection," and "choosing and implementing a design," each with really useful guidelines for helping you set neutrals to their best advantage in a quilt.


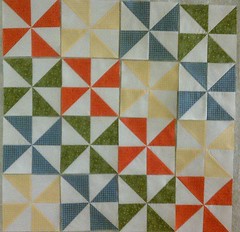
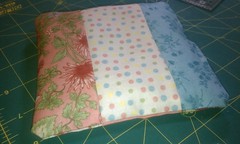
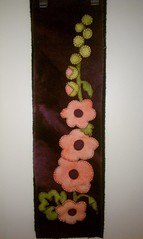
There are seven projects in the book that represent piecing and applique, traditional and more contemporary designs. The projects in this book are universally gorgeous--there isn't a single one of them I wouldn't love to make at some point. My only very slight quibble is that every one of the projects is rated as "confident beginner," but they represent varied level of difficulty. I can understand the editors wanting to make anyone feel as if they could make any of these patterns, but at some point skill level ratings become meaningless if applied across the board. Might I just suggest that a couple of the patterns might have been more appopriately rated as "intermediate," or "very confident beginner?"


The book concludes with the standard basic quiltmaking instructions, but the section concludes with a couple of paragraphs specific to neutral quilts, "Quilting your neutral quilt." In this part, Anderson makes a couple of points about considerations that need to be made when planning your quilting here because neutral quilts behave differently visually than other quilts do. This is something I probably wouldn't have thought about on my own without her giving me fair warning.


If you love neutral quilts and are contemplating making one, or if you made one and aren't thrilled with the results but aren't quite sure why, this is definitely a book you should pick up. Even if I never get around to making one of the projects in the book, I already regard and use neutrals differently than I did before just having read it. It's also just gorgeous eye-candy--I keep pulling it off my shelf just to thumb through it again and again. Beautiful stuff.Neutral Essentials with Alex Anderson: 7 Quilt Projects o 3 Keys to Fabric Confidence o Fat-Quarter Friendly


View all my reviews

Hand Applique with Alex Anderson: Seven Projects for Hand AppliqueHand Applique with Alex Anderson: Seven Projects for Hand Applique by Alex Anderson

My rating: 3 of 5 stars


Note: I can't quite figure out how to do an accented letter in this format so please forgive that the word "applique" never appears with the accent over the "e" as would be proper. Just imagine that it's there.


See my other Alex Anderson book reviews for background information as to what I generally like about Alex Anderson books. In a nutshell: always well laid out, always very clear in instructions, approached with humility (IOW, she doesn't claim to know the only right way but rather presents what works for her). Now, to move on...


Hand Applique with Alex Anderson is a good way to introduce yourself to the techniques of hand applique. In her brief introduction, Alex states "There are several ways to approach applique, each with its own benefits," (p. 4), and this book will introduce you to a few of those methods. While not an exhaustive exploration, she does a good job at getting you started in the right direction. It seems that her purpose is to introduce you and get you hooked--then you can continue to build your skills through other resources or classes.


First, Hand Applique starts with a look at the necessary supplies: Fabric--with tips about what types of fabric will tend to work best in different situations; equipment (needles, thread, thimbles, scissors, pins); template materials (plastic, freezer paper, bias bars); and marking tools, plus reference to a few other "miscellaneous" supplies. With each of these, she gives a brief explanation of some considerations to keep in mind as you explore the possibilities open to you.


The general instructions cover fabric grain, pressing, pinning, sets, borders, and finishing. She doesn't spend a lot of time in any of these--I think her expectation is that you already have at least some quiltmaking experience before picking up this book so she can afford to skim through the basics and only highlight how they may be different in an applique situation. If you've never quilted before, you might need other resources to cover the basics first. But you don't need to have done a lot of quilting to be able to pick up where this book starts.


The section entitled "Basic Applique Preparation" discusses thread basting on paper; glue-stick basting on paper; drawn line for needle-turn applique; preparation for reverse applique; preparation for buttonhole stitch; arrangement of applique pieces; and preparation for the applique stitch. Mind you, this section is three pages long with a whole bunch of white space and very few images. She describes the method, beginning with particular situations in which it is useful. The descriptions are clear enough but a few images would have helped tremendously. I questioned whether I understood her descriptions so easily because this wasn't my first book on applique, and I've taken a class. So for me, reading her descriptions of the methods had more the feel of a refresher course. If I had never been exposed to it at all, it may not have been as clear. Hard to tell on that one. I'm always for a good picture to illustrate a method and her books typically excell on this point. This book fell a bit short.


The section on "The Applique Stitch" was superior to the previous section by far. With plenty of photos showing both left- and right-handed approaches, she outlines the basic applique stitch, outside curves, inside curves, V's or inside angles, points, circles, bias strips without bias bars and bias strips with bias bars, and a button-hole stitch. This was an excellent section--clear descriptions, good illustrations.


As in all her books, the bulk of the teaching is through projects. While I usually like Alex Anderson's project designs, the ones in this book didn't do a whole lot for me, although I can see their usefulness as teaching tools. And whether you like or dislike a pattern is such a personal thing--you may certainly completely disagree with me! The first project, "Color Sampler," is intended to teach a wide variety of applique situations--with flowers, stars, leaves, berries, and a curving stem, you'd be exposed to most of the basic applique shapes and considerations. "Autumn Leaves," "Cherries," "Hearts," "Rail Fence with Stars," and "Mittens" are each a practice opportunity for a single shape. "Rose Sampler" is also primarily a single set of shapes--rose, rosebud, leaf, vine--set in a variety of designs, so it looks less repetitive than the others.


I only gave this book three stars rather than my usual four for Alex Anderson books because of the lack of illustrations in the applique preparation portion and that some portions of the book are quite cursory. That being said, it's still quite useful and would be a good way to get your feet wet with applique.Hand Applique with Alex Anderson: Seven Projects for Hand Applique


View all my reviews

Start Quilting with Alex Anderson: Six Projects for First-Time Quilters, 2nd EditionStart Quilting with Alex Anderson: Six Projects for First-Time Quilters, 2nd Edition by Alex Anderson

My rating: 4 of 5 stars


I bought Start Quilting with Alex Anderson several years after I had, well, started quilting. Periodically I go through a few days of what I refer to as "sending myself back to quilty boot camp," reaching a level of frustration with myself that sends me into a frenzy of using books or DVDs to remind myself of basic quiltmaking skills. I bought this book in one of those fits. It was up to the task although, as is the case with most of my quiltmaking book reviews, it seems, I have to admit to never having actually made any of the projects in the book. However, reading the text of the book was enough to get me started again in a forward motion, plus I found several helpful tips, charts, and suggestions that have now been added to my quiltmaking arsenal.


See my review of Fabric Shopping with Alex Anderson for the background to why I like Alex Anderson books in general (hint: it's not because of her celebrity). I won't bother re-walking that ground in this review.


"...I decided to write this book to get the beginning quilter started with the basics. You must remember that there are many different approaches to quiltmaking, one not better than the others, just different," (p. 4). Refreshing. I've read other books in which the author takes potshots at people with different approaches than the author's own. I much prefer Alex Anderson's style, in which she attests to there being multiple "right ways," and then simply goes on to present her own methods and techniques as an option. I do wish sometimes she would give a little more background as to the benefits of her particular method (what problems it avoids, and so forth). But she's also being pretty careful, I suspect, not to overwhelm new quilters with too much information right at the outset.


The book is laid out very well, as all her books are. Lots of white space, great images, easy-to-follow instructions. The project pages includes little tips or definitions within the instructions as well. The projects are not shown in alternate colorways, although she does explain how she chose the colors she did for each project and, again, includes teaching tips therein, so you'd be able to adapt it to your own preferences fairly easily.


The introduction to the book begins with some basic information about the different parts of a quilt, standard widths of fabric, and so forth. She meshes that with her own personal history as a quilter and some nice foreshadowing of the wide world of quilting that's open to the new quilter to explore. She also recommends that a new quilter start with a small project to avoid being overwhelmed, and then ends with, "Besides, if you start small, you can begin another quilt sooner." Hear hear! She also gives a very brief explanation of how to make any given project from the book larger, and includes a helpful chart of standard mattress sizes for reference. (However, she includes "three-year crib" and "six-year crib" in her mattress sizes. Is that a California thing? My kids both had just a plain ol' crib.)


Additional sections cover tools and fabric (including color/value, grain, and preparation suggestions). Then it goes into "The Basics," which take you step by step from choosing the block you want to work on from the book, rotary cutting, pinning, stitching, seam ripping, pressing, settings, borders, planning the quilting, backing, batting, and basting for both hand and machine quilting. The next section, "Quilting," gives information for both hand and machine quilting, and binding.


The projects in the book, intended to introduce a new quilter to squares, rectangles, and triangles in easy-to-chew-portions, are a Rail Fence, Nine-Patch Variation, Log Cabin Variation, Friendship Star, and Flying Geese. The projects are all wallhanging size as presented--around 30-36" square. The final project is a sampler quilt made up of a few of each of the blocks. You don't see many sampler quilts in blog-land but they have always been an excellent way for new quilters to learn a variety of skills in a single project. Her sampler quilt is extremely attractive--it's not the standard blocks-and-sashing presenation. It looks wonderfully--shall I say it?--modern in its layout.


I would easily recommend this book and, in fact, have loaned it to new quilters a couple of times. I think it's an easy way to get your feet wet and gain comfort level with the basic skills.

Start Quilting with Alex Anderson: Six Projects for First-Time Quilters, 2nd Edition


View all my reviews

Fabric Shopping with Alex Anderson: Seven Projects to Help You: ¥ Make Successful Choices ¥ Build Your Confidence ¥ Add to Your Fabric StashFabric Shopping with Alex Anderson: Seven Projects to Help You: ¥ Make Successful Choices ¥ Build Your Confidence ¥ Add to Your Fabric Stash by Alex Anderson

My rating: 4 of 5 stars


Fabric Shopping with Alex Anderson is out of print at this point but you can still purchase it through Amazon (and its network of independent booksellers). I got it for 50 cents plus shipping a few months ago. It was not only worth the 50 cents, it would've been well worth the original list price had I bought it when new.


I'm not one to buy a book simply because it's written by a celebrity quiltmaker, but I do quite routinely check out Alex Anderson's books when they first come out to see if it's a topic I'd want. Her books are very high quality--very well written, clear instructions, nice patterns that are mostly fairly simple in construction but attractive and more complex-looking in completion. Any of her books would be excellent additions to a beginner's bookshelf. Even as an intermediate quilter, I will occasionally go back to her books for a refresher course or simply design inspiration.


Fabric Shopping is as much a book on color, value, print, and design as it is on how to purchase fabric. As the coverleaf states, the book has "Seven projects to help you: Make successful choices; build your confidence; add to your fabric stash." I can hear you laughing now--does a quilter really need help adding to her fabric stash? Isn't that something we all excell at? What the statement should have said more specifically is "add to your fabric stash intelligently." We're all great at buying the pretty, pretty fabric that catches our eye. But when we look at our stash as a totality, how usable is it? This book will help you build a stash that is well-thought out, filled not only with attractive focus fabrics or a few collections, but would have enough background fabrics, blenders, and other fabric for "supporting roles" that you'd have a much better shot at making an entire quilt from what you already own.


Additionally, in her introduction, Anderson relates this story: "One day in a class while attending San Francisco State University I decided to voice my strong personal likes and dislikes of certain colors. The teacher, Marika Contompasis, who could make color magic from a bag of ugly wool yarn, stopped the class and said, 'To say you hate a color tells me you are ignorant of its use.' I felt pretty embarrassed and have never looked at color the same since that day." First, I like that she's willing to tell a story about her own embarrassment. Second, that's exactly right. I might have favorite colors and color combinations as well as those colors I naturally turn away from, but all colors can be beautiful and perfect in just the right way. Fabric Shopping helps you think through the fabrics you already own and how to continue to build your stash in a way that will make all colors available to you for beautiful design.


The chapters are:

--"Shopping Sense," which talks about how fabrics are organized in a quilt shop, deciding which fabrics you need and how much--including a description of the different categories of fabrics including tone-on-tone, novelty, and so forth (although she breaks them into different categories than I've heard others use but I do like her descriptions), and fabric quality.

--"The Three Rules," which includes value, character of print, and color families, plus a discussion of the color wheel. (Before you get itchy about the word "rules" and start thinking quilt police, she doesn't give specific guidelines as to what you should and shouldn't do so much as things to keep in mind as you're going about your stash building.)

--"Fabric Groups," a discussion of things such as holiday fabrics, monochromatic fabrics, neutral fabrics, solids, focus fabrics, "personality" fabrics (her term for a group that includes novelties), and scrap fabrics.

--"Care, Storage, Design Wall," where she addresses briefly the pre-wash-or-not argument, storage tips, and ideas for creating a design wall. This is by no means an exhaustive discussion of any of these items--the entire chapter is two pages with a ton of white space. But it gives you some ideas that you could then follow up with your own research later if you so chose.

--"General Instructions," which is the usual general quiltmaking instructions included in most pattern books. However, since this book is aimed specifically at beginners, she does cover such things as pinning, seam ripping, sets, pressing directionally, and basting for either hand or machine quilting, and so forth.


One of my fave things about Alex Anderson's books is that, even though she is clearly a "celebrity quilter," she comes at her books with humility. She often references that there isn't a single way to do things, then goes on to present how she does it with no judgment whatsoever. To whit: "I like to pin. As host of 'Simply Quilts,' I discovered that half the quilting world runs the other direction at the mention of pinning. But I find my results to be much more pleasing when I take the time to pin," (p. 23), then she goes on to describe her pinning process. Rather than stating unequivocally "you must pin," as some quilt books are wont to do, she's basically saying that some do, some don't, she prefers to herself. Great! Now I feel free to either do it or not do it as I so choose rather than feeling scolded or shamed into the sense that if I don't pin I'm somehow being lazy or rebellious.


Just as a point of interest, sometimes I pin, sometimes I don't. Depends on the situation. Thanks, Alex, for making me feel like that's OK!


To me, the seven quilt projects presented in the book are almost beside the point, although they're all quite nice. I haven't made any of them, although I do enjoy the patterns. They're not overly simplistic but they're also all within reach of a beginner. They have a lot of pieces but they don't require advanced techniques--just paying attention. But the point is the use of color and different types of fabric, so from that perspective I find looking at the images of the completed quilts very useful from a design inspiration standpoint. Each one shows the block units presented in different colorways (not the entire quilt) so you can see how it takes on a different feel. Her books always have extremely clear instructions with good images throughout. I'm a particular fan of the "Snail's Trail Variation" in nuetrals, but then I also have her book Neutral Essentials (which I'll also review at a later date) and am very much looking forward to making a neutral quilt myself. She's definitely sold me on that concept.


If you aren't sure whether your stash makes sense or are looking for more education on different types of fabric and the use of color in design, this book is a fantastic one to take the effort to track down. Sadly, again, it is out of print but still available in some venues.

Fabric Shopping with Alex Anderson: Seven Projects to Help You: ¥ Make Successful Choices ¥ Build Your Confidence ¥ Add to Your Fabric Stash


View all my reviews

Book Review: The Creative Pattern Book by Judy Martin

The Creative Pattern Book: Complete Patterns, Intriguing Ideas & Musings on the Creative ProcessThe Creative Pattern Book: Complete Patterns, Intriguing Ideas & Musings on the Creative Process by Judy Martin

My rating: 4 of 5 stars


I've been seeing a lot about "Shakespeare in the Park" on various quilty blogs lately. Intrigued, I looked up the quilt and it's gorgeous. Then someone mentioned what book it was in and...lo and behold...it was a book I already owned! I inherited The Creative Pattern Book: Complete Patterns, Intriguing Ideas & Musings on the Creative Process by Judy Martin from my mother when she passed away and it's been on my shelf for three years. I'd glanced through it once or twice when I first got it, but hadn't spent much time with it. The other night, I pulled it off my shelf and have now spent several nights reading through it. Figured it was time to do a review!


I actually have somewhat mixed feelings about The Creative Pattern Book, although I do give it four stars. I like it very much for where I am now in my quiltmaking journey--I've been doing it for several years, and could probably rank myself somewhere in the intermediate category. This book has some elements that suggest it's for beginners but to be very candid, if this is the first book I'd ever picked up, I suspect I'd have been scared off before I even got to the third page. Hence, my mixed feelings.


Martin's writing style is engaging and there are several excellent elements to this book that are missing in a lot of other pattern books or books on technique and skills. And the quilts are beautiful. But the text is extremely dense and the layout doesn't help it any--I could've used a few more bullet points or some such method of separating ideas out from one another and making the lists more clear.


I liked her "7 Secrets of Sewing Success." I had seen most of them before, of course, but there were a couple that I don't normally see in beginners technique books, such as #4 "Practical Point Trimming," and #7, "Finger-Press for Finesse." She comes across rather strongly in #5 "Aim for Accuracy" as she takes a potshot at the school of thought which says, essentially, "don't stress so much about perfection--you can usually fix things along the way." Instead, "Don't let anyone tell you that you can fix it later," she states unequivocally on p. 29. I don't have any issue with encouraging someone to be accurate. Yes, it does save you a lot of headaches in the long-run. But my mom taught me the "how to fix it" tricks when I was first learning to quilt, and I loved knowing those techniques. I don't need them nearly as much now as I did then as my skills have definitely improved. But I'm very afraid that if I'd been sweating perfection so much when I first started, I'd have quit in frustration. Instead, I could experience the pure joy of creation and playing with fabric for awhile, until I knew this passion had fully taken hold. Then I started working on my accuracy and made life easier for myself. Is that the long way around? Perhaps. But it worked for me.


I love the fact that not only does she have "spool ratings" for the difficulty of the quilt patterns, but that she also includes a "lightbulb" rating. The spool rating is as you would imagine: the relative difficulty of the sewing techniques needed. She points out that none of the patterns is actually all that difficult, but three spool patterns include set-in seams which can take a little doing. But the lightbulb thing? Brilliant! As she says, "One-bulb patterns are repetitive and can be made with one lobe of your brain tied behind your back." Then she goes on to say that she's not included any one-bulb patterns in the book because they bore her. Two-bulb patterns "require that you stay awake" but aren't overly difficult; and three-bulb "require the full participation of an operational brain." I've never seen that type of a rating system and I actually find it much more helpful than the more typical sewing difficulty rating. Most quilt patterns only require a few techniques to pull them off. But some patterns require a whole bunch of paying attention. I like that she's called that out right up front.


Once you get into the pattern section, I like the fact that she gives so much background information on the design choices she made along the way, including things she changed from start to finish. She also outlines information about different color choices in the variations presented. My favorite components, however, are "Ideas for Taking [name of quilt pattern] Further," and "Ideas to be Gleaned from [name of quilt pattern]." I've not really seen either of those things dealt with--at least as thoroughly--in other books. They are extremely helpful ways to look at a pattern as not just a pattern, but a learning experience.


And finally? She includes suggested quilting patterns with the designs ready to be turned into stencils. So if you're still learning how to choose quilting patterns, you aren't peering at a 6" picture in a book and holding it up to different lights trying to figure out where the stitches are. (Come on, you know you've done it!) She also spends some time discussing why different quilting patterns work with each quilt patterns and suggests others you could use as well. Excellent learning material.


I wasn't as keen on how the book was laid out--it's difficult to tell where each new quilt pattern begins. Rather than having the picture of the quilt right at the front of the pattern, it appears two or three pages in. All that separates one pattern from the next is a heading with a bar of color. They chose this layout because she starts with some overall information about the pattern in general, then gives several variations on each pattern--so the pictures show up right before their cutting and sewing instructions. Still, I would've preferred to see a picture of the quilt first before reading the background information so I'd know what she was talking about, without having to flip back three pages to check it out each time.


All in all, I did find a lot of extremely useful information in the book. It's more than just a pattern book, although the patterns are gorgeous. It was inspirational and educational as well. If the layout had been different, I probably would be even more enthusiastic.


If you're a rank beginner, you could certainly use this book. It'll just take some commitment. If you've made a few quilts and are ready for some more in-depth training, this is definitely the book for you. If you've been quilting for a long time, you'll still find lots of great information, tips, and inspiration here.


The Creative Pattern Book: Complete Patterns, Intriguing Ideas & Musings on the Creative Process


View all my reviews

Pinwheels Progress


Pinwheels Progress
Originally uploaded by sandyquiltz
It's been awhile since I posted--sorry. I've had a lot of evening commitments lately and what time I had free I was trying to spend sewing. That being said, not a lot of sewing getting done! I've got all the pinwheels done for the center of my wallhanging. I'm partway through with the pinwheels I'm doing for the corners of the borders. The pinwheels in the center won't be set like this--I'm going to be doing white sashing to float them a little bit.

Haven't entirely decided what I'm doing with the borders yet. I'm debating a couple of possibilities--I'll make the final decision once the center is done.

And then I'll have fun with some embellishments!

I'm on the road this weekend so I'm not sure I'll get a lot more done anytime soon. Fortunately, this is an easy project to pick up where I left off anytime I can get back to it.

Book Review: Schnibbles Times Two, by Carrie Nelson

Schnibbles Times Two: Quilts from 5Schnibbles Times Two: Quilts from 5" or 10" Squares by Carrie Nelson

My rating: 5 of 5 stars


I. Love. This. Book. Carrie Nelson's Schnibbles Times Two: Quilts from 5" or 10" Squares is one of my favorite new additions to my quiltmaking library. Is it the designs? Partly. Is it that it uses those cute little precut packs we love so much? Partly. Most of my love, though, is engendered by the way the book is written. With all of the quiltmaking books on my shelf, I have never sat down and read word-for-word the basic quiltmaking instructions section that's always included. I ordered Schnibbles last summer after reading about it on several blogs. The day I got it in the mail, I sat out on my back patio with a glass of ice tea and the book in my hands and a stack of magazines beside me. I expected to take about 10 minutes flipping through the designs and then moving on to the magazines. After paging through the patterns and realizing how much I was enjoying her descriptions of the development and naming of each one, I went back to the beginning to read her introduction, and then the basic instructions. I never got to the magazines. She is a hoot. She has a way of giving the same kinds of directions as every other quiltmaking book but in a way to make you actually enjoy reading them. To whit:


"Mise en place (meeze on plahs) means to have on hand all the ingredients, already measured and prepared, so that you can cook efficiently and without interruption. We do the same thing with quilting, we just call it...what do we call it? Whatever, that's what we're going to do now," (p. 8). I love someone who approaches what we do with tongue firmly in cheek, but still taking it seriously. That's a tough balancing act and I think Carrie does it extremely well.


This book was also the first book on precuts that I've seen which actually tells you how to approach the fact that many of them come with pinked edges. I never knew whether to measure from the outside point or the inside angle. She tackles that topic in a sidebar and I loved her for it. Thanks, Carrie!


Before I ordered the book, I had a slight hesitation about buying a book that simply presents every pattern twice--one using charm packs, one using layer cakes. But yes, while I should be able to do that math myself, it's so much easier to let someone else do it. Plus, it's interesting to see how different a pattern can feel when you simply change the size of the pieces.


The patterns in this book are light-hearted, and although they're based on traditional blocks they certainly have an approach to them that falls neatly into the "modern quilting" category as well. This book has launched a lot of quilt-alongs and chatter on the blogs: you hear about Schnibbles everywhere now. In my opinion, that's with good reason. The patterns are approachable without being simplistic. Some are good for beginners while others will challenge beginners to advance further in their skills. For advanced quiltmakers, you'll still find plenty of inspiration in the colors and designs, and while you may find the patterns easier to put together, if you're looking for a challenge you will find plenty of opportunity for great quilting designs.


While I'm giving this five stars, I would say my only slight gripe with it is the same gripe I have with most other books based on pre-cuts. Almost without exception, they require two packs of whatever--two charm packs, two layer cakes, two jelly rolls. I understand that's the economy of size--you can only do so much with 40 5" squares, after all. And I know you can add from your own stash, of course, but I don't often have the right mix of colors to be able to get the equivalent of another coordinating charm pack. I'm just not much in the habit of buying two of whatever catches my eye. Maybe I should start. The fabric manufacturers are nodding their heads in excited agreement right now.


That slight gripe aside, my copy of Schnibbles Times Two is already bent and worn from being read through so many times. I'm just waiting to clear the decks of other projects before I make one of these, but it will happen before the year is out. Schnibbles Times Two: Quilts from 5" or 10" SquaresCarrie Nelson


View all my reviews

More progress...and a new trick

More progress--another four pinwheel blocks done. This is only half just to show you the color combo so far. Two more colors (and 8 more blocks) to go.


I tried a new trick tonight. I've seen it demo'd lots of places and it's in lots of books; I'd just never tried it myself.

Add caption
It's hard to tell from this picture, but peer very, very closely and you can see that the center of the block where all the points connect is just a little puffy. My points came together exactly as they should, but because of the bulk of the seams in the center, it pokes out a little bit. Used to be, I'd just live with it. But I decided to take the time to make it better.
 Here's the result--see how nicely the center lays? It even makes the points look even better!


So, how does that happen?


Instead of pressing the center seam all one direction, you press half of it going the opposite direction--so all the center seams are now chasing each other around the block, so to speak. You then pick apart the center where all four seams come together and press it flat. See that cute little itty bitty pinwheel? How adorable is that?

Cute, but a little bit of a pain. With a pinwheel block there's all sorts of seams coming together and it takes a bit to sort out which ones want to go in which direction. You might have to pick apart a couple of stitches as well.

But boy, does it make a difference to the block. I like this little trick!

Next Work in Progress--Pinwheel Wallhanging


Pinwheel
Originally uploaded by sandyquiltz
I finally got going on my next project tonight--I designed a fun, simple little wallhanging for the spring/summer seasons in EQ7. It's got four sets of pinwheel blocks in four colors--sixteen in all. I plan on doing something fun with the borders and maybe some embellishments to perk it up a little bit, but my main goal is, like I said earlier, simple and fun!

It felt good to get back at my cutting table and sewing machine after a couple of week's break. I'm gone a lot of this week so I won't be making much more progress but it's a simple enough design that it shouldn't take me all that long. I'm enjoying working on this--it's cute!

I'm working to access my QFTRU podcast stuff again. 24 hrs & I should be up and running; will get an episode out asap! http://bit.ly/i8lwJp

Another project completed--yippee!

My MIL's quilt is done! Just as a reminder, it's a pattern named "Floral Bouquet" from the book Jelly Roll Quilts by Pam and Nicky Lintott. (This time DH is playing quilt hanger. He didn't complain as much as my usual DD quilt hanger does!)

It wasn't a hard pattern to put together, although I discovered this time how very stretchy jelly roll strips can be. You don't expect it because they're not on the bias, but they're on the width-wise grain which can be a bit bouncy. I had a little more problem keeping my blocks square with this pattern than I expected, but at the same time it was a very forgiving pattern because it had all that nice white space to give me room for squaring things up every step along the way.


Here's a close-up of one of the blocks. I tried to stay as random as possible without repeating a fabric in a block. I then mostly stayed random with placing the blocks in rows but I did switch out one or two that had too much repetition right next to each other.


Here's my label. (Yes, although I said in my podcast episode today I was considering not doing one, that was mostly due to time. But I ended up with time I didn't expect to have. It looks out of line because I blurred out part of it in the photo.) This is the first time I've made a label using the embroidery stitches on my sewing machine. It's not an embroidery machine so I don't have a ton of options, but it does have lettering. I had to practice on several scraps because I couldn't quite figure out how the embroidery would line itself up but finally got it. I drew some guide lines to keep each line relatively straight and each line evenly spaced from the other. The label doesn't have as much information on it as I usually do but it's never going in a show and I'm documenting all the additional information in my own records.


I left the lighting unbalanced in this one so you could see the quilting better (I hope). It was done by Andrea of Olde Glory Quilting. She doesn't have a website or I'd link it--sorry! She's a local long-arm quilter that only does pantograph--all over--quilting, but does a really nice job and was amazingly fast! I had it in a week. All I had told her was that I wanted something that would pick up on the floral but would stay "open and airy." She showed me this pattern and I knew she was right. It was perfect.

So that's it! My MIL will love it, I know. I also know I probably should have ripped the binding out and redone it because it really didn't work the way I wanted it to, but in the "real world," it's fine. And it's done, and now I can move on to the next project!

A wonderfully quick gift--sachets


Lavender Sachet
Originally uploaded by sandyquiltz
I whipped up this sachet tonight adapting a tutorial from Quilting in the Rain blog at quiltingintherain.blogspot.com. Her tutorial has a different design which I really, really like and will do at some point--it just didn't fit the particular scraps I wanted to use tonight. These are scraps from my MIL's quilt so guess who's getting the sachet?

My LQS had bags of dried lavender there when I stopped by last week. Couldn't resist picking up a baggie. Now I want to go buy more and use up a lot more scraps. I just started growing lavender myself last summer. We'll see if I get enough expansion this summer to be able to dry some myself.

The corners aren't pointy because I decided to reinforce the corners a bit by sewing a short seam diagonally across the corner seam. I had a sachet years ago (it was either a gift or I'd picked it up at a gift shop at one point--don't recall how it came to me now) that popped a seam in a corner and I ended up with little whatever-they-weres all over my drawer. So now I'm a bit nervy about those things. I decided I'd give up a bit of corner perfection for a bit of reassurance.

Anyway, cute project. Fun project. Fast project. Check out her blog!

A completed project I forgot to mention...

...because it was laying on the side of my cutting table for awhile waiting for me to do that one last step before I could call it done!

When I was at the quilt festival in Houston last November, I discovered the vendor booth of "Wooly Lady," who had all sorts of wonderful colors in felted wool, and fantastic kits and designs, different from the usual country colors and primitive-art-inspired felted wool kits I know and love. I succumbed to the lure of this kit, mostly because I knew this one would actually fit in my suitcase. Others that made me drool would've required a little extra ingenuity in packing to get home.

This photo really, really doesn't do the colors justice. If you want to see the original, use this link and scroll down until you see "Hollyhock Wool Applique Bell Pull." I'm noticing as I look at the one on her site that she did more embroidery on hers than I did on mine. Oh well--mine is reveling in its basic-ness.

I had a near tragedy with this, though. I had the top piece (the purple with all the applique pieces) downstairs where I could work on the applique while I was watching TV. Meanwhile, the black backing piece was folded up on the edge of my cutting table. I noted its presence there as I began one evening to cut fabric for another project. "Hmm...I should probably move that," I thought, "before I accidentally clip it with the rotary cutter." Did I move it? No. Did I clip it with the rotary cutter? Ahem. There's a nice little wedge-shaped piece now that I had to sort of glue into place. Good thing the black was on the back.

This is a fun little narrow wallhanging that will be able to move around my house as whim and decorating schemes require--just right to fill in an odd little blank spot. Love it.

And My Next Project Is... (Drumroll please)

OK, I think I know what my next quilty project will be. We finally finished putting away the Christmas decorations today--they'd been down for some time, but stacked on our dining room table. For awhile. It's amazing what you can learn to ignore. My husband decided to tackle the job this afternoon and got everything packed away, then turned to me and asked, "Do we have something more springy to hang up in here?"

The wallhanging I have in our dining room is actually non-seasonal, but I will admit it leans towards fall and winter months better than spring and summer. It's a 9-Patch Pizazz in coppers and golds. It's supposed to go with how we'd planned on decorating our dining room when we first moved in, but we never quite got the dining room actually, well, decorated. It's still a bit plain. So the 9-Patch Pizazz pretty much determines the mood of the room completely on its own.

As soon as my husband asked me the question, my mind immediately started running through my stash. "I don't have anything yet...but I could make something!" I scurried right up to my sewing room for a fun hour of choosing some fabrics, scanning them into EQ7, and creating a design. I'm keeping it simple--just pinwheel blocks, each of one of four different colors, a couple of borders, and multi-colored pinwheel corner blocks (pictured). I played with several variations then showed my husband the top 4--he liked one better than the others so I let him make the call. I was pretty evenly divided between a couple of them.

The only thing stopping me from diving right into this tonight is the fact that my design calls for white-on-white background and I ran myself completely out of that on my MIL's quilt. I'll have to make a run to my LQS sometime this week.

The design only requires about a third of what I have of each of my chosen stash fabrics. I'm thinking if I really get going on this, I may make a tablerunner for the dining room table or for the top of the buffet out of the remaining fabric. Might be fun to have something that coordinates. One of my 2011 quilty goals is to have more seasonal quilts to use year-round and I have almost nothing for spring and very little for summer, so it'll be nice to meet one of my goals while still doing something purely on impulse--what fun!

I'll let you know how it goes...

More fabric somehow found its way onto my shelves...


More fabric purchases
Originally uploaded by sandyquiltz
My son had an appointment today conveniently near my LQS. So while I was waiting for him I scooted over because I knew they were having a sale. These four beauties were just calling my name. Nice stash builders. (And yes, they're already folded and labeled to be stacked in their appropriate new homes.)

Meanwhile, I'm now sort of waffling about what I want to tackle next. Do I want to finish a UFO? If so, which one? What about that last Momufo still on my UFO shelf? What about those charity quilt projects in the plastic bag next to my cutting table? Or do I want to start something new? Would it be a pattern using some of the pre-cuts that I have so many of in my stash, or playing with some of my new fabrics?

Choices...choices...

Apparently I've been so driven the last couple of years that, now that I've done all the projects I absolutely wanted/needed to get done, my mind is flailing a bit trying to figure out where to go next!

Never fear. I'll figure it out. Meanwhile, I'm having fun going through my stash and my books in an effort to see what grabs me...

Check out the video of entrants into the "Quilting...for the Rest of Us" March Stash Mystery Challenge! http://bit.ly/eRZYdw

Of Cabbages...and Fabric...


IMAG0676.jpg
Originally uploaded by sandyquiltz
Tonight, DH and I took my IL's to a beer and food pairing event at the NYS Wine and Culinary Center. In honor of St. Patrick's Day but in keeping with the NYSWCC's emphasis on eating locally, it was various NYS beers paired with traditional St. Patrick's Day foods made from local ingredients.

It was amazingly good, and it was an amazing amount of food. I always think of "tastings" as being little nibbles of something and little sips of something. I had actually had the passing thought of eating a small dinner before I left home. Glad I didn't! This was an actual meal. Appetizer of cold salmon on Irish Soda Bread with an herbed mayo--amazing, and I'm not a fan of cold fish. Corned beef and cabbage--very good, and I'm not a fan of corned beef. My fave was the lamb stew with potato three ways, although I only ate my potato one way, so to speak, because at that point I was ready to burst. Dessert was a chocolate bread pudding kind of thing, with ice cream made from Irish Red Ale. Sounds weird? Yes, it was a bit mind-bending to be able to taste beer in my ice cream but it was also surprisingly tasty! The pudding was also good but by then I had to admit defeat and left quite a bit of it on my plate. Each course had a different type of beer paired with it; they were more circumspect with their servings in that regard--probably all four tastings added up to one actual glass, and maybe even a short one at that. But that's all you needed. Again, any more and....kablam. Plus there was that hour drive home to think about.

In any case, we had a really nice time. That was our first time doing one of those events and we're definitely going back for other ones. They do a wide range of food-related programs and cooking classes focused on using local ingredients. I think I've found something to add to my Empty Nest List--cooking classes!

On the fabric front, pictured is my recent medicinal fabric purchase. When I was down with food poisoning, I fell victim to a Hancock's of Paducah sale email. It hit me at a weak point. On the other hand, I also figured that form of doctoring was still cheaper than a hospital stay. In any case, I had enough presence of mind to only purchase fabric that would fill in some blanks in my stash. I ignored all the pretty, pretty prints that threatened to turn my sleep- and food-deprived head. All of these were somewhere in the neighborhood of 50% off, and I got a yard of each. Not terribly exciting, but definitely useful!

I had a little bit of time to work on the Floral Bouquet quilt today--got the center part trimmed and squared up and the border segments sewn together. Tomorrow I just put the border on, get the backing ready, and hopefully drop it off at the long-armers. I'll post a photo once the border is on. I'm pleased with the way it's come together, although I've got an amazing amount of scrap I'll now feel the need to do something creative with...

But I'm Working on White Fabric!!!


Dinner Injury
Originally uploaded by sandyquiltz
Last spring, my son worked for awhile as a Cutco knife salesman. He actually did quite well, and ended up with almost a complete set between the samples he had to purchase to start and what he earned as rewards for high sales. Since he's still in a dorm, I get the benefit of the cutlery. They're good knives. However, I manage to cut myself just about every time I user them--they're dangerously sharp.

So I'm getting dinner ready tonight and slicing potatoes (I should learn not to use Cutco while chopping potatoes--I inevitably cut myself that way). Sure enough, this time I lopped off half a finger nail. As I'm holding my hand under the tap and my daughter and husband are running about trying to find the first aid supplies, all I kept saying was, "*!&!&*%$. This is going to bleed like the dickens and I'm sewing on white fabric tonight!!"

We have our priorities, after all.

Pictured is my daughter's attempt at bandaging. Not very skilled or pretty. I said I was tempted to draw a face on it and put on a puppet show. But at least it kept the fabric blood-free.

Doesn't do much for typing, though. I'll have to work something else out in the morning.

Finally...The End in Sight

The end of illness as well as the end of piecing!

If you're in the podcast BigTent group or connected on Facebook you already know that I've been down for the count for the last several days. I flew to NYC (delayed on the way there) on business Monday morning and by Monday night was laid out with food poisoning. Camped out in the hotel room all day Tuesday--up and around Wednesday but still not a whole lot better. Flew home Wednesday night (delayed, got home at midnight), took a step backwards Thursday. Finally today, I can say that I'm starting to feel somewhat human again.

As I'd posted in BigTent yesterday, I decided to release myself from the thought I'd pull off a podcast episode this week. My first goals were to eat, and then to sew. Anything after that is frosting. Not that I can face frosting at the moment. In any case...

Eating. Check. (Well, as long as I keep it small and very, very bland!)

Sewing. Check. Woohoo!

At about 5:30 tonight I decided I thought I could tackle the sewing machine. Funny, I worked all day with relative success, but the idea of being around sharp pointy things was a little more daunting. I'm pleased to say, though, that I have now finished piecing all the blocks for the Floral Bouquet quilt. I decided not to push my luck and try to start putting the blocks together--plenty of time for that tomorrow and Sunday. Like my meals, I think I'm better off for the moment keeping my quilting small and very, very bland. A few straight seams, no corners to match, we're golden.

And by the way, I've mentioned to friends that NYC is not my fave place in the world. And this trip didn't do much to endear it to me. Flight delays coming and going and it bit me, to boot. Maybe it's just getting me back for talking bad about it behind its back.

How does my garden grow?

"Floral Bouquet" in progress
Slowly but surely!

Spent a couple of hours at my sewing machine today and am now up to 21 blocks done, 18 to go. A little better than halfway. I'd originally thought I might get all the flower blocks done today but I was a little overtired, had a few other things I also had to get done, and ultimately lost energy and decided to stop before I got stupid. I was noticing that I was having to square up some of the later blocks a little more than I had been so clearly I was starting to lose my accuracy. Time to stop. Fortunately, the way the blocks make up, there's a little wiggle room for squaring them up. I love a forgiving block.

Tomorrow's another day. Not much on the schedule, so I should be able to knock out a lot more of those remaining 18 blocks. My plan is to pace myself and schedule a few shorter sewing periods through the day rather than trying to sit down in one long session. Should stay fresh that way!

Want to check out what we were doing on our vacation earlier this week? Here's a peek!