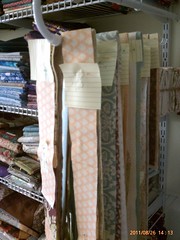
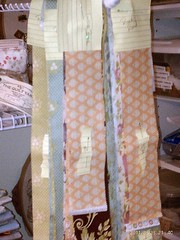
Paint Chip Challenge...the story continues...
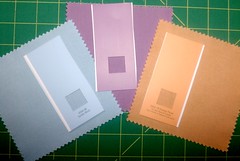
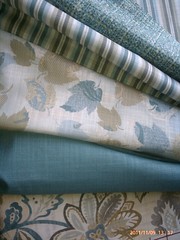
In any case, I matched my paint chips pretty dang closely, don't you think?
I also got another fabric to go with this too--but can't show a picture of it because it would completely give-away what my plans are for the challenge project. And I want to keep that a surprise...at least, until I know if I can actually pull it off!
By the way, don't forget to leave your own thoughts about what you'd make from these colors on the first post on this topic to have your name entered for a give-away. (Please do leave it on that first post--can't guarantee I'll catch your name for the drawing if you leave it on a different post!) Thanks to everyone who has already commented--I've really enjoyed reading them!
WIP: Niece's quilt
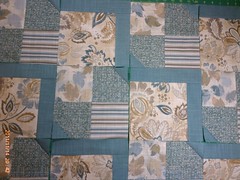
I hope to get the center pieced tonight, and then borders on tomorrow, so I can get it to Andrea (my fabulous long-arm quilter) early next week.
What Would (a) Quilter Do?
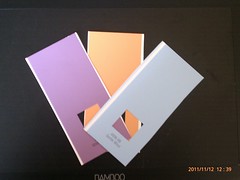
I know what I'm doing--I immediately saw it in my mind when I looked at these three colors in my hand. I just went online this morning and bought the fabric I'll be using; although I've got plenty of black and white in my stash, I didn't have anything distinctly any of these colors.
I'm curious: What would you do with these? What do they say to you? (Leave your own response by November 27th and I'll draw one lucky commenter's name for a fabricy gift! *Editor--I've extended the deadline a few days because of a glitch in my podcast that meant I couldn't give listeners as much lead-time as I'd like. So you have a few more days to respond!)
Yes, it's another WIP
I'll keep you posted!
Working on this week's podcast episode--should go live tomorrow...
Hand-dyeing Fun
The first example is my least favorite, which is why I'm starting out with it. Maybe seeing the others below will blank this one out of your memory.
That being said, parts of the stripes look like a reflection on a calm lake...so I can easily see some fussy-cut-utility here.
I heart this one. Blues, greens, and lots of white space.
My first attempt at the Shibori technique. (For a great blog post about Shibori, visit here.)
Didn't work so well because my fabric really wanted to come unwrapped when I scrunched it down the PVC pipe. I like the colors and it's still a very usable result, but I wanted a more distinct pattern...
...and so I tried it again. Got a much better pattern this time, but traded off the heavy orange at the end of the last one with a lot of white at the end of this one. This technique takes some practice.
I had no idea the blue was going to turn out this brilliant...and no, no photo-editing involved! The other color is raspberry, which also came out pretty intense, but I did dunk the hey out of it so I suppose it's no surprise. Digging the results.
I believe I just wadded this one up randomly and wrapped rubber bands around it at a variety of angles.
No idea how I did this. Wish I could remember because it's a look I'd love to replicate in other colors. It's a mix of teal and plum. (The center looks bright white in this picture--it's actually more of a very, very soft teal.)
And my other fave. Looks like a frosty windowpane, doesn't it? Super cool. Too bad I have no idea how I did that one either.
I had a blast dying fabric. So much so that I've promised myself I'm not going to buy any of the supplies to do more until I've used at least a few of these pieces in a project.
So I guess that means I have to get to work!
Retreat Progress
In episode 66, I give an overview of my quilt guild retreat a couple of weeks ago, with some product reviews and project updates. I promised pics...here they be!
One of the only two blocks I got done for the Jelly Roll Sampler quilt, "Tulip" block. (From Jelly Roll Sampler Quilts by Pam and Nicky Lintott. I think this is the Fig & Plum jelly roll by Fig Tree Quilts for Moda.)
Because of the way the dark strip gets cuts, some of the print makes certain pieces blend a lot with the background. Fussy-cutting isn't really an option when you're trying to stick with just using a single jelly roll with no additions for the project. Oh well. C'est la vie.
"Rocky Road" block (from same).
I really like the blue in this fabric line. Nice cross between beachy and cottage-y.
"Triangle Tablerunner" kit from Generations Quilt Shop.
(I talk about Generations in episode 64.)
Not hard to put together as long as (as they suggest) you keep track of where the straight-of-grain edge is on each of the triangles and make sure they're on the outside edge--keeps the strip a lot more stable. I like the red sashing.
Close-up of part of "Triangle Tablerunner" kit to show fabrics.
I'm bumming I can't see more of my fat little birdies with Santa caps. They're dang cute, aren't they?
...And finally, the "stack n' slash" using flannel fat quarters. I didn't do too much variation in this. When I've done others in the past, I've divided into two or three different piles so I'd have different looking blocks. Rotated throughout, in some cases it's hard to tell where the blocks are. In this, all the blocks are the same so there are definite visual lines.
But it's still a nice cuddle quilt for a rainy day.
Of course, now that I'm looking at it again, I'm seeing blocks I'd like to swap around. Random. Pshaw.
Stay tuned for another blog post in a couple of days with hand-dyed goodness!
Fabric Mysteriously Appearing on My Shelves
The first few pics are from my most recent purchase at The Quilter's Daughter during my quilt retreat weekend. (They don't have a website yet but this link gives you their info.)
Picked these out as rough coordinates but may not keep them together. A couple are from the "Swanky" line by Chez Moi for Moda. It's a couple of years old now so I couldn't find any good links to use--sorry! (Yellow dots is from Deb Strain's "LoveU" line for Moda. The green floral had no selvedge on it to label it.)
General blender fat quarters. Always helpful!
Another collection of bright, fun fat quarters. One of these (the trees) is from "Summer Song" by My Mind's Eye for Moda; the print with flowers and butterflies is from Deb Strain's "LoveU" line for Moda. Neither of the other two had selvedges so I can't identify them for you. Apologies!
And this grouping was my souvenir from Ye Olde Fabric Shoppe in Stratford, Ontario--I talked about that in episode 60. I love the fact that these are holiday fabrics without being overtly traditional Christmas colors of green and red. I put some green and red in there with the coordinates I chose, but they're still more muted than typical. And I love the neutrals and gray-blues.
I have more Christmas fabric than I know what to do with. Some year I'll just have to do a year-long holiday project challenge to clean out my collection!
Attack of the Yo-Yos
UFO Finish! The "Cautionary Tale Quilt"
Actually, it's been done for a couple of weeks. I just finally have the time to sit down and blog about it. Doing lots of catch-up this week!
This is the "cautionary tale" quilt I talked about in episode 56 of my podcast, "Quilting...for the Rest of Us." (A lot of listeners shared their own cautionary tale quilt stories in episode 59 as well. Entertaining--be sure to check it out. And it's never too late to leave comments with your own cautionary tales!)
Due to the wonders of photo-editing you can't really see how completely out-of-square it is, although if you look closely you can figure it out. Do me a favor: Don't look closely.
Still, I love the fabric and the colors, and my niece will presumably love it as well. This is based--with the greatest apologies to--a Fons and Porter episode in which they did the "Flip-a-Coin" design. The issues are not with the design; the issues are completely the quiltmaker's. I'd put a link to it but you have to be a F&P member to see it anyway so, if you're a member, just search for "Flip-a-Coin" on their website.
Here's a close-up of the quilting detail. The quilting was done by Andrea Nardi of Olde Glory Quilting. She doesn't have a website, but if you live more or less in my area email me and I'll send you her contact info. She does pantograph (all-over) designs--no custom--but has a great eye for what patterns will enhance a quilt. Love her work!
Off to take advantage of an unscheduled afternoon and make more progress on other projects. Now that I'm done traveling for awhile, my blogging will resume it's usual much-more-regular schedule. I've missed y'all--glad to be back!
Lines in Quilts--Supplemental Post to Episode 63 of Quilting...for the Rest of Us
First is a picture of Mom's Irish Chain (actually, technically, a Triple Irish Chain, I believe, as it's three rows of squares in a column). Clearly the blocks themselves create strong lines here--including the darks and the mediums in the squares themselves creating several visual lines in tandem. This photo was evidently taken before it was finished--whatever quilting she ended up doing on it (I don't remember and one of my sisters has this quilt) would have created another set of lines that either emphasized or complemented the strong diagonals. Dig those crazy 80s colors.
Here is one of my early quilts, "Bugs in the Cabin." The basic log cabin is extremely versatile and a fantastic example of how blocks themselves create lines and understanding how those lines work are important in understanding design. Here I liked having the stair-step feel because this quilt was originally intended for a impending baby who would have been attracted by the repetition of high contrast. (This quilt was made using the Eleanor Burns quilt-in-a-day method, btw, one of my earliest quilts, probably circa 2000-ish. I later quilted it with invisible thread and made a huge mess and finally consigned it to the basement for my kids to use while watching TV. Too bad. It was a cute quilt. Said baby was probably about 6 or 7 years old by the time I finally sat down to try to fix my original mistakes and ultimately gave up. Fortunately, said baby's mother never knew I'd been working on a quilt and was quite happy with the set of onesies she got instead.)
The log cabin block is one of my faves because of it's versatility. Here's another one I made a year or so after the one above--probably somewhere around 2002 or so.This one turned out much more nicely! Note that it's the same block as the image above. But a different setting creates an entirely different feel. In this case, you have a couple of different sets of lines--the light and dark "barn-raising" setting, plus the more zig-zaggy lines of the fabrics themselves: the heavy blue that appears as cross-shaped outlines, and the directional floral print also create lines of its own.
You can't see it in the picture but after consulting with Mom, she suggested that I could quilt each "log" down the center to make each individual piece of fabric look like two pieced together--very strongly emphasizing the lines of the blocks. And boy, did that make it look even more impressive! Loved that effect. Took for-freakin'-ever, but turned out nicely. This wasn't anyone's pattern--just a standard, traditional log cabin quilt I made for an extended family member. I miss it. Someday I'll make myself one with these exact colors, sigh.
Mom also made me a quilt with the log cabin that, using variable width and length "logs" (fabric strips) creates a circular line. Very cool. Unfortunately, I don't seem to have any pictures of it. I'll try to remember to take pics of that one later.
Back to Mom's quilts for an example of how line can become evident through settings. Here's a sampler quilt with sampler blocks alternated with an Irish Chain variant block to create strong diagonals.
I don't know anything about this quilt--found it after Mom had passed away. Has the look of a block-of-the-month to me, and it's clearly a more recent quilt based on the fabrics, but Mom wasn't particularly consistent about labeling. If anyone recognizes the pattern and can identify it for me, let me know! (I kept this one--it's so cheery!)
Here's another example out of Mom's lifetime compilation of quilt-work. I'm guessing 80s, again, based on colors and fabrics. No idea about the pattern or designer--anyone recognize it?
In any case, here the line is created by block, color, and quilting lines. Notice how the quilting lines in some places echo the general hexagonal shape of the overall design, whereas in other places it emphasizes the individual lines of the blocks themselves.
Keep this quilt in mind whenever we do start talking about balance. It's also a good example of radial symmetry. Gotta love a two-fer.
Now we're going to get even more funky. How many lines does this design have in it? And how many types of lines?
Lots of wonderful eye-travel going on in this one--your eye follows the diamond around the center and then swirls through the fan shapes that are both diagonal and curvy at the same time. Very cool.
Another of Mom's quilts--it had been completed except for the binding when she passed away (although I think the top was several years old at that point), so I finished off the binding. This became a wedding gift for a close family friend that Mom would have most certainly given a quilt to had she still been with us.
Again, no idea on pattern or designer. If someone recognizes it, let me know. (Mom did design some quilts herself but not usually in this style.)
Sorry about the bad picture--I think I might have taken this one on my cell phone. Mom did this one sometime in the late 90's, I think. Again, this is someone's pattern/design that I can't identify and (sigh) Mom didn't label it. Now you know why I'm such a label evangelist on my podcast.
Would you normally look at a design like this one and think "line?" Why or why not? What basic lines do you find here? How do the blocks work together to create those lines?
Does it help is allow your eyes to blur just a little bit so you're seeing shapes more than individual pieces? You'll get more of a sense of line that way.
And finally, for a wild-and-crazy line. We're finishing with one of my favorite of Mom's quilts. And this one I can identify as a pattern by designer Karen K. Stone. I seriously dig it. It always reminds me of a story Mom told about another New York Beauty-esque quilt she'd made: Dad, who was normally extremely supportive of her quilting, had said he'd never sleep under that quilt because it looked "too sharp and pointy." So think about that design question next time you're making a quilt for a bed. Is it too sharp and pointy for comfortable snoozing? Tee hee.
In any case, what does this quilt tell you about line? (I did eventually get a binding on that one and it went to one of my very funky nieces.)
That's it for this week, podquilters!
Snails Trail WIP
Tonight I've got the first meeting of my quilt design study group--we're going to figure out our methods and meetings, to be very alliterative about the whole thing. I'm looking forward to it! I'll be talking more about that group in my podcast this week so stay posted.
Whenever I need a smile...
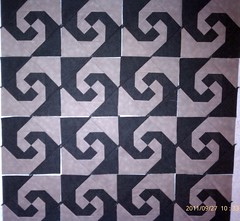
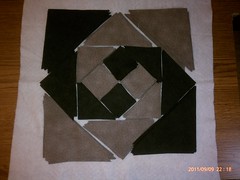
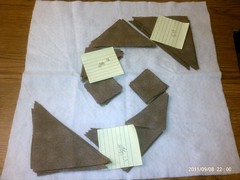
And the answer is...Snail's Trail!
I've always wanted to make one of these blocks. Not quite sure what the allure is for me. It's just so charming. Or a little yiccky, if you allow yourself to imagine what it's actually named after. But I used to keep little snail "farms" in bowls over the summer when I was little, so maybe there's a nostalgia factor at work.
Not sure I'll end up with any time to start sewing tomorrow--packed day. Sunday looks a little better for progress on this front. I guess you could say I'm working at a (wait for it...) snail's pace, guffaw.
I can't get the lighting quite right--this is taupe and black, not taupe and green as it sort of looks in this pic. "But I thought it was a warm color challenge, Sandy?" Hold your horses, sister. It's coming!
This is actually a little higher contrast than I'd been picturing when I did the original design in EQ but it should still work. Could also turn out to be a hot mess. This is the stage at which I always start doubting myself. But I've learned that's just part of the process. I'll get over myself soon enough.
DD made her first solo trip home today from college for a weekend visit--something around 4 hours by herself involving expressways and thruways and tollbooths. I tried to busy myself with other things so I wouldn't keep imagining the burning heap of rubble at the side of the road. She made it safely as I really knew she would when my Catastrophic Thinker Brain wasn't taking over, and we saw her all of about two hours before she was back out the door again to hang with her local buds. Yep, she's a college girl for sure now!
Finally--a little progress on the stash challenge
I got half the pieces cut tonight for the pieced blocks in my stash mystery challenge wallhanging before my back started whining at me. Some day I'll get one of those nice comfy pads they sell for you to use at the kitchen sink--I'd love one at my cutting table. I've got good carpet but I'm past the age where I can comfortably stand barefoot a couple of hours at a time, dang it. I really should've taken the time to put on a pair of shoes but I got involved and lost track of time until I realized I was starting to shift my weight back and forth repeatedly. Aging. Bah.
In any case, so far EQ7 hasn't steered me wrong. I had a brief moment of math panic when I couldn't figure out how I was going to get the requisite number of pieces out of the yardage I had, even though EQ assured me I could. Then I realized where it was saying "two patches," it really meant "cut that one piece and then slice it in half to get two patches." So I only had to cut half the pieces I originally thought I did. If that makes sense to you. It does to me, so we'll move on now.
I should be able to get the other half of these block pieces cut tomorrow night. It'd be nice if I came out of this weekend with the center pieced--we'll see. I know I won't have much time Saturday and Sunday is still a bit murky to me. And I suspect the piecing will be a bit pokey, for all I'll be doing it whiz-bang-chain-style.
B.T.Dubs, I'm glad to finally be using this fabric. I've had it for a couple of years, I think, and really love it, but hadn't yet found the right application. I think this is it. At least, I hope this all turns out as nifty-keen as it looks in my head!
Quilt Design Progress
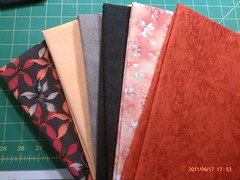 Remember these?
Finally. Phew. After poking away at it here and there all summer (well, okay, more "here" than "there" since I was on the road so much), I have finished my stash mystery challenge design for this quarter--the one using warm colors. I've had the design in my head since a couple of weeks after I announced the challenge itself last June, but wasn't able to take the time I needed to learn what I needed to learn in EQ7 to finally get the design done. Last night did the trick--I brought my laptop down to wrangle with EQ while my husband was watching "Top Shot." I could be companionable while still quilty, and mostly ignore what was going on on TV. Admittedly, some of their shots are pretty impressive, but I'm just not a ballistics kinda gal.
In any case, I got the design finished last night and just completed the process of printing off all the requisite rotary cutting and template pages this evening. Lots of templates. Dang applique. What am I doing to myself? Oh well--won't be too futzy; planning on doing it raw-edge-style by machine. I'm also still leaving a bit of room for design changes; I have the overall outline done, but may continue to tweak it as I go.
I should be able to start getting some of the cutting done tomorrow night, but I'll be gone this weekend. That being said, I still have some hope I might be able to make my own deadline for the challenge! How are you doing on yours? Remember, there's a fabricy prize awaiting!
A Little Perfume Behind Each Ear...
Birthday Mini-Quilt-Retreat Part 2
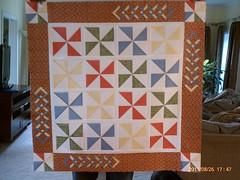
Steeling myself, I returned to the pinwheel quilt. Ah, the lowly pinwheel. It so innocently sparked such controversy in the quilting world a few months ago when it became the calm in the eye of a storm regarding the "dumbing down of quilting." Like all storms, I believe that one has subsided. Myself, I have no particular opinion as to whether pinwheels are beginner, intermediate, or advanced. I just think they're dang cute.
I wanted a light summer wallhanging, and I also wanted to use up some fabrics from my stash. This puppy is completely from stash. Woohoo! And then, the piece de resistance, which I can't put appropriate accents on at the moment--the Double Diamond Ruler from Bright Quilting Notions. (Kim, are you paying attention? Tee hee.)
Kim, a listener as well as the inventor of the DD ruler, sent me a sample ruler set to use as a giveaway and one for me to play with. I messed around with it immediately and loved the effect, although I didn't love my initial efforts. I made some bad fabric choices. Since it was just a tablerunner, I had no problem deep-sixing that baby and chalking it up to experience, but I really wanted to mess with the rulers again. The pinwheel quilt gave me the perfect opportunity.
I think this wallhanging will end up being named "Pinwheel Garden" or "Summer Garden" or something--not sure. But I like the idea of pinwheels as flowers and the DD affect as a picket fence around the outside.
I'm going to tackle the quilting this weekend too, I think. Should get more time on Sunday morning. Then I want to play with some embellishing. So keep posted!
Happy birthday to me--a mini-quilt-retreat
I took this afternoon as a half day vacation for my birthday, and am celebrating in my sewing room. My first task of the afternoon: Finish getting the Jelly Roll Sampler strips sorted for blocks.
If you buy this book, do pay attention when the authors say to sort all your strips first, before you start cutting the strips for blocks. I did fine for the first 6 or 7 blocks; the last 5 got a little trickier and I had to start doing some swapping off with earlier blocks to get better contrast. Although my jelly roll had the same number of overall strips as the one in the pattern I'm using, it has a different proportion of darks, mediums, and lights. And although I was quite freely recategorizing strips based on how they related to other strips in the set, there are some combos that just don't work as well. So by the time I got down to the last two blocks, I was digging into my 2 1/2" strip stash to find some alternatives.
Let me just say--if you're a jelly roll fan, be sure you buy the Moda Marbles jelly rolls. The link happens to go to the one I used today; but there are a couple other colorways available. I also own the Brights roll. These help support your other jelly rolls by providing a wide selection of solids or marbles to fill in gaps of whatever jelly roll you're using. At a quilt show recently, I also picked up a couple of rolls of 20 strips each of lights (made up by the quilt shop); I've found that often jelly rolls don't have enough lights or darks--they're heavy on the mediums. Makes sense, since they're strips from a collection of fabric and most collections produce mostly mediums with just a few darks and lights tossed in. Anyway, in today's case, I could've used a few more darks but was able to fill in with one strip from my Moda Marbles roll, plus a strip from my stash, and then just went with a more muted look on the final block than I would've normally. I think it could actually be kind of pretty. It'll be interesting to see how it all turns out.
Enjoying my quiet afternoon catching up on some other quilty podcasts, finishing up cataloguing my quilt books on GoodReads, and moving forward on another quilt project. My son, nephew, niece, and nephew-in-law (said niece's husband), are taking me out for a birthday dinner tonight as my husband's out of town today--that'll be fun, but I've got about 3 hours left of mini-quilt-retreat before that happens!
Jelly roll sampler in progress
This really poor picture is of the only sewing I've gotten done this week so far. And, technically, there's been no sewing involved yet. I'm puttering away at sorting a jelly roll for sampler blocks using the new Jelly Roll Sampler book by Pam and Nicky Lintott. The jelly roll I chose (Fig & Plum by Fig Tree Quilts for Moda) isn't high contrast, so the blocks will be fairly muted. I think the overall effect will be fairly shabby chic or something. If it turns out nicely, it might go well in my aunt-in-law's cottage, but I'm not marrying myself to any particular thoughts of how the end results might be used yet.
That's what every college girl needs, right?

