Carol Doak Mariner's Compass Star block done!

Finally! It's done!

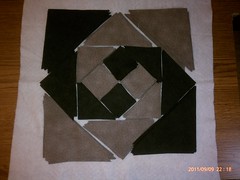
After several ill-fated attempts at a Mariner's Compass block using one book, I finally called it a day on that one and pulled off the shelf one of my beloved Carol Doak books.

Mind you, I've never actually made a Carol Doak block before. But between what I had purchased myself and what I'd inherited from my Mom, I'd guess I probably have most of what Doak has published over the years. I own and use her DVD on paper piecing quite frequently. Her directions are so clear and straightforward, she doesn't leave anything to guesswork. So when I couldn't make it work with the other designer, I decided to give Carol Doak a shot, and it worked. This was so much easier!

First, she did the math for me. Always a plus in my book. Rather than having to try to expand a smaller design to get the size block I needed, Doak's designs happened to be the right size already. Doak also gives cutting lists for each of her designs, so I didn't have to try to figure out what size fabric piece would cover the needed space. Third, her compass blocks are done in square quarters rather than the traditional circles, which just make them easier to handle.

(As a note, I'd already determined my color choices and placements before going to Doak's book. It just happened that I ended up choosing the Africa block from the book, which has very similar colors and placement! I was just looking for something that had roughly the same number of pieces that I'd been doing before so I could use the same fabrics. Go figure.)

This isn't quite a traditional Mariner's Compass block, which is why I refer to it as a "compass-esque" block. Still, I was able to use the same fabrics I'd intended to use the first time around and get pretty much the same effect, so I'm a happy camper.

Isn't that Stonehenge line just absolutely gorgeous? I'm in serious love.

Now, by my next guild meeting next Tuesday night I really should have two more borders done. Maybe three. I forget how many, I'm so far behind now. The first border is supposed to be pieced. My original thoughts were a very complicated applique but the center block turned into such a saga I'm thinking I'm going to cut myself a whole lot of slack and do something much simpler. But that's a problem for tomorrow.

BTW, the picture makes the light green in the center look a little more neon than it does in real life. Everything blends better than it looks like it does. The darker green on the other half of the center also has splotches of purple in it so it really pulls everything together. Mmmm. Stonehenge. Yum.

And just because I could.... I had to make a stop at a quilt shop yesterday and they had these stacks of gorgeous batik fat quarters, so I picked out a bunch in teals, aquas, greens, & turquoises, and paired them with blacks and grays. I'm thinking maybe disappearing nine-patch, but don't hold me to that. Right now they're just seducing me from their stack on the cutting table.

So all that's to say, I've decided I'm sending Fortunate out to my long-arm quilter because I have too many other projects I want to get to!

And also by the way, my sister and niece just came back from a mission trip to Ghana and she informed me tonight that she bought me fabric. Yay! Can't wait to see it!

Back on a Roll...Jelly Roll, That Is...

I got another block in the Jelly Roll Sampler project done (using the book by the Lintott Gals) today. This is the one I started last fall and worked on during my October guild retreat. Got two blocks done then; just got block #3 done this afternoon. They're not hard--just pokey. The project has been sitting in a bin on my shelf since shortly after I got home from the retreat. It's not a high priority project so it kept getting shuffled down the line behind other stuff. I'm going to try to keep poking away at the remaining 9 blocks over the next few weeks as I'm finishing up other projects.

The Mariner's Compass? Deep-sixed. (Going back to the jelly roll project was a bit of therapy for me--Quilt Trauma Recovery.) I'm working on another concept for the guild challenge now. One thing I've learned in years of quilting: When to cut my losses and move on. My theory is that when I used my copier to expand the block it didn't expand both units equally. There is often a slight variation in a copy. Well, what can be just a hair's breadth off for one unit, multiplied by 8, can create real issues by the time you're done. I had the same issue with matching certain points with each unit, very consistent, even though I was dead on that line every time. That says to me there's something wrong with the unit itself as it came off my copier. Too bad--I liked the color combinations. I'm using basically the same color combination with some slight variation in my new attempt, so hopefully I'll be as happy with it. And hopefully it'll actually work this time. Still paper-piecing, just using a Carol Doak book this time and a slightly different approach to a mariner's compass. I think I'll call it "compass-esque." I've got the fabrics figured out, so after I run some errands this afternoon I'll probably start working on that one.

I'm now in week four of my sabbatical and just now feel like I'm getting into a groove. Illness, travel, and the hectic first couple of weeks of taking care of stuff that had gotten put off for months before meant I didn't accomplish as much quilty-wise as I wanted. So I'm struggling not to let myself "feel behind," because I'm really trying to take seriously my goal to accept what I'm able to do as I'm able to do it and not get into mind games with myself over what I feel like I have to get done. But if I don't get called up for jury duty this week (I have to call every afternoon to find out whether I need to show up the next day) I'll have lots of time to make some progress on current projects and play with some new ideas.

Here's to playing with fabric. Yay.

Donation Quilt Wednesday--and some Progress!

As I was doing some surfing-of-the-cyber-type recently, I ran across another great site full of free, downloadable patterns that make great donation quilts, the Q.U.I.L.T.S. group in Schenectady, NY. (QUILTS stands for Quilters United in Learning Together, Schenectady--love that acronym!) Check it out.

Remember to share pictures in the Quilting for the Rest of Us Flickr group for donation quilts!

On to the progress: I also finally got back to my sewing machine yesterday--woot.

We're doing a "roosting robin" in our guild this year--in other words, a round robin that you don't pass. (Someone in my guild used the term "roosting robin" for it--I don't know if that's the official name or was just her joke but I find it a good descriptor so I'll roll with it.) The way it works is that we each do our own projects rather than passing them along, but the leader tells us what we're adding to it each month. We started in January and I'm already behind. The first month (for January) we were to make a 12 1/2" unfinished center block, then the second month, for February, we were to have made 4 1/2" borders. I'm just working on my center block now. I decided to do a simplified Mariner's Compass for the center, made entirely from the Stonehenge line. I've been collecting Stonehenge for awhile waiting for just the right project, and I hope this is it. The concept I have in my mind is something that will look like inlaid tile.

I had to refresh my memory on paper-piecing since it's been a couple of years since my last pp project. But Carol Doak lives on my bookshelf (she's very comfortable in her little DVD home) so I invited her in for a visit for a refresher course and then dove in. I have 8 Unit As and 8 Unit Bs to do for the compass. Got through all the Unit As with only one little, easily flixable glitch (sometimes a little hard to tell right side from wrong side on some of those Stonehenge, until you've done it the wrong way once and it sticks out like a sore thumb). Finished Unit As are pictured.

Unit Bs started out well, but when I got to seam 2, I couldn't for the life of me figure out how to sew the piece on to get it to cover the space needed. I knew it really should work, I just couldn't figure out how to make it work. Turned everything every which way; no dice. My brain had just completely shut off.

I glanced at the clock. Oh. 9:00 p.m. Yep, that's why. I learned years ago I can't sew past 9:00. My brain completely shuts down, like clockwork. Even, like tonight, when I have no idea what time it is, there's some little internal trigger. Bam. Stupid Time.

So this morning, after caffeinating, I sat down again to look at the Unit Bs and decided, actually, I think it's OK--I may just have to press it a little crooked to get it to fit exactly right. The angle of the seam doesn't really match how the cut piece of fabric would fold across the space needed, if that makes sense without a diagram--so I'm sewing on the seam and but pressing a little off. Probably not paper-piecing-standards but works for me. Unit As and Unit Bs have the same pieces and the same angles--it's just that on Unit As you sew top to bottom and Unit Bs you're sewing bottom to top, and that makes a surprisingly big difference in the geometry.

I've only sewed one test Unit B so far and am about to try to sew a Unit A and Unit B together to see how it all comes out. Once I see that they really do fit together, I'll finish the rest of the Unit Bs. Should have enough time this morning before I need to head out for the day. I've got a lot going on today so I probably won't be able to put the the whole thing together until tomorrow.

Feels good to be back at the machine, even if I did have my Stupid Time glitch. Actually, that felt welcomingly familiar as well. Sandy's back.

Donation Quilt Progress--"Fortune"

And so....here's how it all turned out.

As you can see, I ended up choosing "none of the above."

I had originally been leaning towards option 6. But as I kept pondering, I finally decided I really wanted to offset the center diamond, so I dropped it over and down.

My 18-year-old daughter gave it her thumbs up of approval. And she played quilt hanger--I like having her home. My husband fails as a hanger.

The only other thing I'm going to do tonight on it is choose my backing. Tomorrow I'll put it together and hopefully get it quilted. I'm going to do straight-line in the diamonds--so it'll be stich-in-the-ditch through the strips with those lines extending through the white half blocks. It'll emphasize the diamonds while still being pretty fast to do.

By the way, if you were keeping track, majority rule would have been traditional Roman Stripe setting. And I love Roman Stripe quilts. And I'll probably do one at some point. I just wasn't feeling it this time. Loved reading everyone's opinions and rationale, though--thanks for playing along! I enjoyed it!

Second by the way, I've named this quilt "Fortune," since it's the first "fortunate donation quilt" made after my rant. Normally I don't think I'd name donation quilts--you name something, you develop an attachment to it. But this one seemed to need the honor.

Donation Quilt Progress--Opinions Welcome!

So, as you may recall after my rant of a couple of posts ago, I've been bound and determined to make a donation quilt that's aesthetically pleasing, doing my best to work exclusively from my stash. I even took it a step further and gave myself a little additional challenge. I've mentioned before my sizeable collection of 2 1/2" strips. I have several jelly rolls, but I also have a few jelly-rolls-worth of just scrap strips, collected through strip exchanges, as giveaways on shop hops, and those I've cut from my own scraps at the end of projects. This was the stash I dug into for this project. (I'll post separately later about the Strip Tubing book and method I used--there's a few tips I'll pass along for anyone else considering the same technique.)

And a further challenge: start with an unfortunate strip. I chose a strip from my stash that I really didn't like, and used that as my jumping off point to choose all the other strips.

You can see right in the center of this layout the teal strip with a small floral print. That was my starting point. I like teal, but this is a particularly murky one with a very odd little floral.

Working off the teal, I pulled blues and greens, and then used the fuschia of the floral to pull me to the opposite side of the color wheel; hence, the pinks/fuschias.

I took a b&w shot just to check my contrast. I wasn't worried about having a ton of contrast in the strips because they were going to be against a white background. (Which, by the way, I did end up having to go out and buy because I didn't have enough true whites in my stash.)

Editor's note: I should apologize for the photography. I was relying on my cell phone which takes decent pics in the great outdoors, not so great in the dimly lit indoors. Plus, I can't stand far enough away from my design wall to get the full design.

Blocks complete. Ignore the setting for now--we'll come back to that in a bit.


Here's the challenge strip in the center row of the strip sets on these four blocks. Not too bad!


The strip tubing pattern I used creates "roman stripe" blocks--each strip set creates between 4-6 blocks, depending on how long the strips are (again, posting on that later so don't sweat it now), with alternation between the first and third strip.
OK--now we're getting into the setting options. I'm going to give you all the pictures here, and you get to tell me your opinion! I think I know which way I'm leaning after looking at all the pics, but would be interested in hearing what you have to say.

N.B.: I'm not going to spend much time quilting this. Most likely, I'll do an all-over meander or something along those lines, as the idea is to still keep it fairly fast and easy as a donation quilt. That's an important point to keep in mind as we look at the setting options: some are the type that scream out for really nice quilting, others can carry an all-over design a lot more easily.

OPTION 1: Matched Up

I'm not sure that this one is really an option for me--but it's a kind of cool effect of the alternating strip sets when you put the four matching blocks together.

For me, this isn't really an option mostly because you'll see one lonely block at the bottom that wouldn't fit with this set...and...
...a whole pile of leftover blocks. Most of my strip sets made 5 blocks, one made 6. Option 1 only uses four blocks per strip set, leaving me with 9 or 10 blocks leftover.

Yes, that means I could get a second quilt out of this but I'm trying to expedite my time on this project at the moment. (Normally, potentially getting two quilts from one set of blocks would be a whoop-de-doo moment, so keep that in mind when planning your own donation quilts--this might be a method for you.)

So here are the real options I'm offering up to you.

OPTION 2: Traditional Roman Stripe set.

Very scrappy, nicely geometric, easy to see done with an overall meander quilt. No one fabric really sticks out this way.

(BTW, note about fabric: there are a couple of blues in these pictures that seem to jump off the page. They're not that stand-out-y in real life. Sorry about that. Lighting and bad cell phone picture issues.)


 And this setting--and all that follow--only leave me with three little orphan blocks, that I can easily use up somehow. Or hand them off to someone in my guild to figure out how to use. In any case, manageable.


OPTION 2: Horizontal Stripe

Funky!


OPTION 3: Vertical Stripe

Still funky!


OPTION 4: I call this one "Echo"

I really like it in theory, but the white space seems to really want feathers or something fancy like that. Not likely to happen. Could, however, do some fast vines with leaves or something. So, not out of the running yet.


OPTION 5: Radiant, Version 1

Nice!

(By the way, I realized after taking this picture that there's one block I'd forgotten to flip. Oops.)


OPTION 6: Radiant, Version 2

Also nice!


So, "what would a quilter do?" If you were making this quilt, which of these options might you lean towards?

I'm not likely to get much sewing time today so I thought that would give y'all some time to give me your thoughts. I've got a couple of front-runner options for myself but it'll be interesting to see if there's a majority of opinion anywhere!

#BDSI Projects--at least to start

I woke up this morning (at 2:00 a.m., with visions of Boxing Day Sew-In dancing in my head) with the realization of the projects I really should tackle on BDSI. Since I'd like to honor the origins of Boxing Day, a day of charitable giving, by encouraging folks to consider doing a donation project at some point during the day, I realized I had the perfect projects sitting in a plastic back in my sewing room.

You may recall my previous adventure doing five donation quilts last year--unfortunately, they weren't the kind of projects that inspired me with the joy of giving. Rather, they were teeth-gnashing, hair-tearing-out kinds of projects. But I did celebrate when they were done (completed projects here) and I was thrilled to know they would be going for a good cause in our area. However, I became haunted by the project (check out this blog entry for the continuing story) and got another pieced top from the same fabrics several months later. So now, merely a year later (!), this has become BDSI Project #1. Fortunately, this one doesn't look as tricky as the other ones were, and having done a few of these now, I think I'll know how to tackle it most effectively.

All I have to do is find backing and batting (both from my stash). I'll probably just grid quilt it. It's an odd shape--it'll work for a very, very, very tall baby.

BDSI Project #2, if #1 doesn't do me in and doesn't take too long, will be a donation quilt challenge of sorts from my guild. We had a boatload of donated fabric, blocks, and scraps from somewhere or other--I'm not sure what the origin story is. But one of our guild's leadership team divided it all up into packs and encouraged us all to bring one home and turn it into a donation quilt or two.

This is what was in my bag. There are two pieced tops, but neither is really big enough even for a crib quilt, in my opinion. So I'll either put them together for one big one, or throw borders of some sort on each for two normal-sized quilts. The one on the left has the last row of blocks pinned on, but not sewn on. I almost killed myself on the pins when I pulled them out of the bag.

The little star block on the top is a lonely little solo block. Haven't decided what I'll do with that yet. Maybe a pillowcase?

It would be nice to get these all done before the new year, wouldn't it? Clean slate sort of thing?

If I manage to get all those done--or at least seriously moved along, I'll probably be working on UFOs or WIPs. I'll have a lot of sewing time next week, I think, since I have the week off, so I'm looking forward to serious forward progress!

So--remember to check back here anytime after midnight Eastern time (US) on Monday, December 26, for your chance to enter into a bunch of great give-aways and fun mini-challenges for our Boxing Day Sew-In!

ABFSI Report--Anti-Black-Friday Sew-In

Got all my hexies cut...finally... (218 in total.)

Got my Christmas table runner done. 

(Well, technically, that project stretched into Saturday and Sunday but it all blurred together so I'm counting it as ABFSI.) This was the one that I started at my quilt retreat--just had to do the backing, quilt and bind it. This was a "Triangle Tablerunner" kit from Generations Quilt Shop in Pottstown, PA. It's almost 50" long, about 13" wide. I even remembered to put a little label in the corner--which will be handwritten with a sharpie where right now you can barely see my pencil markings. Nothing fancy there. The backing is something I inherited from my Mom--she'd have appreciated this particular use. Stitched in the ditch, no quilting on the border. Very, very basic. This is going to be a gift for a home with little tots so I wanted something sturdy and that wouldn't be fancy enough that it would break anyone's heart if something happens to it. A Very Practical Christmas. But aren't those pudgy birds with Santa hats just the cutest dang thing?

I was supposed to go somewhere Sunday afternoon and it got cancelled, so I made very good headway on my pinwheel wallhanging, too. It was a banner weekend for quiltmaking up in these parts!

Get 'er done...Niece's quilt on to the next steps

"Shadow Boxes" Full
I was able to get the top and the backing completed tonight--woohoo! Now I've just got to put in a call to My Fabulous Long-armer and see if I can drop it off tomorrow. The pattern is "Shadow Boxes" by Mary Danielson, #506 in the Five Yard Quilt collection from easyquilter.com. Fast pattern for a gift. The fabric is the Sausalito collection from P&B Textiles. I'll be talking about this project, the pattern, and the fabrics in my next episode--hopefully posting tomorrow...
"Shadow Boxes" Close

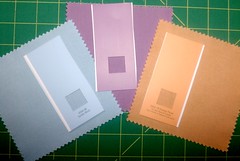
Paint Chip Challenge...the story continues...

Kona Solids charm packs to the rescue! I ordered three charm packs of Kona Solids from Fat Quarter Shop: Brights, Pastels, and one in grays and blacks that I think was named "Silent Movie" or something like that. Even though I technically only needed three colors, I decided it wasn't such a bad idea to add some solid charms to my charm stash to help round out charm packs for projects. As I've talked about in past episodes, pre-cut packs are always way heavy in the mediums and struggle a bit with lights and darks; plus, solids in small pieces can sometimes provide a nice counterpart to a whole lot of pattern going on.

In any case, I matched my paint chips pretty dang closely, don't you think?

I also got another fabric to go with this too--but can't show a picture of it because it would completely give-away what my plans are for the challenge project. And I want to keep that a surprise...at least, until I know if I can actually pull it off!

By the way, don't forget to leave your own thoughts about what you'd make from these colors on the first post on this topic to have your name entered for a give-away. (Please do leave it on that first post--can't guarantee I'll catch your name for the drawing if you leave it on a different post!) Thanks to everyone who has already commented--I've really enjoyed reading them!

WIP: Niece's quilt


IMAG1042.jpg
Originally uploaded by sandyquiltz
A quick update on my goings-on, as I've been going-around. I was out of town for a few days again this week...last trip until February! Woohoo! But that meant I had to do a little radio silence again as I had very little Internet access while I was gone. I did manage to knock out some more blocks on my niece's Christmas quilt on Sunday afternoon, though, so here's a sneak preview of what we're aiming for.

I hope to get the center pieced tonight, and then borders on tomorrow, so I can get it to Andrea (my fabulous long-arm quilter) early next week.


Yes, it's another WIP


IMAG1037.jpg
Originally uploaded by sandyquiltz
I just can't seem to stop myself. Yet another project in progress. This is the Sausalito line from P&B Textiles--very purdy. The quilt should come together pretty quickly...a girl can dream, anyway.

I'll keep you posted!

Working on this week's podcast episode--should go live tomorrow...

Retreat Progress


In episode 66, I give an overview of my quilt guild retreat a couple of weeks ago, with some product reviews and project updates. I promised pics...here they be!


One of the only two blocks I got done for the Jelly Roll Sampler quilt, "Tulip" block. (From Jelly Roll Sampler Quilts by Pam and Nicky Lintott. I think this is the Fig & Plum jelly roll by Fig Tree Quilts for Moda.)

Because of the way the dark strip gets cuts, some of the print makes certain pieces blend a lot with the background. Fussy-cutting isn't really an option when you're trying to stick with just using a single jelly roll with no additions for the project. Oh well. C'est la vie.


"Rocky Road" block (from same).
I really like the blue in this fabric line. Nice cross between beachy and cottage-y.

"Triangle Tablerunner" kit from Generations Quilt Shop.
(I talk about Generations in episode 64.)

Not hard to put together as long as (as they suggest) you keep track of where the straight-of-grain edge is on each of the triangles and make sure they're on the outside edge--keeps the strip a lot more stable. I like the red sashing.


Close-up of part of "Triangle Tablerunner" kit to show fabrics.

I'm bumming I can't see more of my fat little birdies with Santa caps. They're dang cute, aren't they?
...And finally, the "stack n' slash" using flannel fat quarters. I didn't do too much variation in this. When I've done others in the past, I've divided into two or three different piles so I'd have different looking blocks. Rotated throughout, in some cases it's hard to tell where the blocks are. In this, all the blocks are the same so there are definite visual lines.

But it's still a nice cuddle quilt for a rainy day.

Of course, now that I'm looking at it again, I'm seeing blocks I'd like to swap around. Random. Pshaw.

Stay tuned for another blog post in a couple of days with hand-dyed goodness!

Snails Trail WIP


Snails Trail WIP
Originally uploaded by sandyquiltz
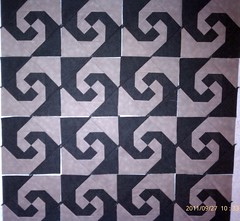
Had a marathon sewing session last night and got all the blocks pieced. Now I just have to square them up and get them put together. I think I will use this setting--I messed around with the other typical setting for snails trail blocks but I really sort of like the swirly nature of this one. The other one felt like it would compete too much with the applique.

Tonight I've got the first meeting of my quilt design study group--we're going to figure out our methods and meetings, to be very alliterative about the whole thing. I'm looking forward to it! I'll be talking more about that group in my podcast this week so stay posted.

And the answer is...Snail's Trail!


IMAG1010.jpg
Originally uploaded by sandyquiltz
I probably threw some of y'all off since I didn't exactly have things laid out where they'd eventually end up. Hard to do that when you only have half the pieces.

I've always wanted to make one of these blocks. Not quite sure what the allure is for me. It's just so charming. Or a little yiccky, if you allow yourself to imagine what it's actually named after. But I used to keep little snail "farms" in bowls over the summer when I was little, so maybe there's a nostalgia factor at work.

Not sure I'll end up with any time to start sewing tomorrow--packed day. Sunday looks a little better for progress on this front. I guess you could say I'm working at a (wait for it...) snail's pace, guffaw.

I can't get the lighting quite right--this is taupe and black, not taupe and green as it sort of looks in this pic. "But I thought it was a warm color challenge, Sandy?" Hold your horses, sister. It's coming!

This is actually a little higher contrast than I'd been picturing when I did the original design in EQ but it should still work. Could also turn out to be a hot mess. This is the stage at which I always start doubting myself. But I've learned that's just part of the process. I'll get over myself soon enough.

DD made her first solo trip home today from college for a weekend visit--something around 4 hours by herself involving expressways and thruways and tollbooths. I tried to busy myself with other things so I wouldn't keep imagining the burning heap of rubble at the side of the road. She made it safely as I really knew she would when my Catastrophic Thinker Brain wasn't taking over, and we saw her all of about two hours before she was back out the door again to hang with her local buds. Yep, she's a college girl for sure now!

Quilt Design Progress

Color palette Remember these?

Finally. Phew. After poking away at it here and there all summer (well, okay, more "here" than "there" since I was on the road so much), I have finished my stash mystery challenge design for this quarter--the one using warm colors. I've had the design in my head since a couple of weeks after I announced the challenge itself last June, but wasn't able to take the time I needed to learn what I needed to learn in EQ7 to finally get the design done. Last night did the trick--I brought my laptop down to wrangle with EQ while my husband was watching "Top Shot." I could be companionable while still quilty, and mostly ignore what was going on on TV. Admittedly, some of their shots are pretty impressive, but I'm just not a ballistics kinda gal.

In any case, I got the design finished last night and just completed the process of printing off all the requisite rotary cutting and template pages this evening. Lots of templates. Dang applique. What am I doing to myself? Oh well--won't be too futzy; planning on doing it raw-edge-style by machine. I'm also still leaving a bit of room for design changes; I have the overall outline done, but may continue to tweak it as I go.

I should be able to start getting some of the cutting done tomorrow night, but I'll be gone this weekend. That being said, I still have some hope I might be able to make my own deadline for the challenge! How are you doing on yours? Remember, there's a fabricy prize awaiting!


Birthday Mini-Quilt-Retreat Part 2


Pinwheels in Progress
Originally uploaded by sandyquiltz
So after I finished those strips, I spent a few minutes posting the rest of my quilt library on GoodReads, then putting all those books away (thereby regaining some serious shelf space). A few more minutes of straightening up and my sewing room was once again a clean slate.

Steeling myself, I returned to the pinwheel quilt. Ah, the lowly pinwheel. It so innocently sparked such controversy in the quilting world a few months ago when it became the calm in the eye of a storm regarding the "dumbing down of quilting." Like all storms, I believe that one has subsided. Myself, I have no particular opinion as to whether pinwheels are beginner, intermediate, or advanced. I just think they're dang cute.

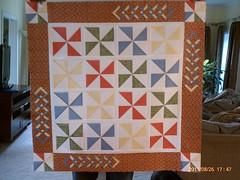
I wanted a light summer wallhanging, and I also wanted to use up some fabrics from my stash. This puppy is completely from stash. Woohoo! And then, the piece de resistance, which I can't put appropriate accents on at the moment--the Double Diamond Ruler from Bright Quilting Notions. (Kim, are you paying attention? Tee hee.)

Kim, a listener as well as the inventor of the DD ruler, sent me a sample ruler set to use as a giveaway and one for me to play with. I messed around with it immediately and loved the effect, although I didn't love my initial efforts. I made some bad fabric choices. Since it was just a tablerunner, I had no problem deep-sixing that baby and chalking it up to experience, but I really wanted to mess with the rulers again. The pinwheel quilt gave me the perfect opportunity.
I think this wallhanging will end up being named "Pinwheel Garden" or "Summer Garden" or something--not sure. But I like the idea of pinwheels as flowers and the DD affect as a picket fence around the outside.

I'm going to tackle the quilting this weekend too, I think. Should get more time on Sunday morning. Then I want to play with some embellishing. So keep posted!

Happy birthday to me--a mini-quilt-retreat


I took this afternoon as a half day vacation for my birthday, and am celebrating in my sewing room. My first task of the afternoon: Finish getting the Jelly Roll Sampler strips sorted for blocks.


If you buy this book, do pay attention when the authors say to sort all your strips first, before you start cutting the strips for blocks. I did fine for the first 6 or 7 blocks; the last 5 got a little trickier and I had to start doing some swapping off with earlier blocks to get better contrast. Although my jelly roll had the same number of overall strips as the one in the pattern I'm using, it has a different proportion of darks, mediums, and lights. And although I was quite freely recategorizing strips based on how they related to other strips in the set, there are some combos that just don't work as well. So by the time I got down to the last two blocks, I was digging into my 2 1/2" strip stash to find some alternatives.


Let me just say--if you're a jelly roll fan, be sure you buy the Moda Marbles jelly rolls. The link happens to go to the one I used today; but there are a couple other colorways available. I also own the Brights roll. These help support your other jelly rolls by providing a wide selection of solids or marbles to fill in gaps of whatever jelly roll you're using. At a quilt show recently, I also picked up a couple of rolls of 20 strips each of lights (made up by the quilt shop); I've found that often jelly rolls don't have enough lights or darks--they're heavy on the mediums. Makes sense, since they're strips from a collection of fabric and most collections produce mostly mediums with just a few darks and lights tossed in. Anyway, in today's case, I could've used a few more darks but was able to fill in with one strip from my Moda Marbles roll, plus a strip from my stash, and then just went with a more muted look on the final block than I would've normally. I think it could actually be kind of pretty. It'll be interesting to see how it all turns out.


Enjoying my quiet afternoon catching up on some other quilty podcasts, finishing up cataloguing my quilt books on GoodReads, and moving forward on another quilt project. My son, nephew, niece, and nephew-in-law (said niece's husband), are taking me out for a birthday dinner tonight as my husband's out of town today--that'll be fun, but I've got about 3 hours left of mini-quilt-retreat before that happens!


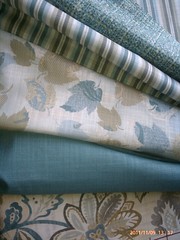
Playing with the Palette for my Next Project

Nice alliteration in the title, eh?

So apparently it's not enough that I currently have four projects in the works; I have to start thinking about my fifth. Someone shoot me before I hurt myself.

What's on my design wall, cutting mat, or sewing machine right now?

(1) Pinwheel project (it's made significant progress since the last post that talked about it); (2) Serengeti project (from my May quilt retreat--apparently I've not posted a pic of it yet, sorry); (3) Chicken Butt project; (4) Hexie project (have 39 out of about 180 hexies cut). Plus two UFOs that really just need to get done this summer because they're starting to annoy me, hanging on their hangers, mocking me every time I walk by them.

But still, I can't help myself. I started playing with fabrics in my stash the other night. Here's the palette that resulted.

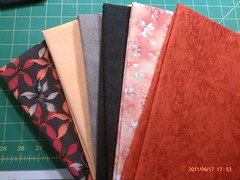
The two that got things rolling are the second and third in from the left. Several weeks ago I'd been moving fabrics around and just tossed one of those on top of the other to get it momentarily out of the way. When I went to pick it up later to put it away, I was struck by the two sitting side-by-side. Not my normal color palette at all. But even after I'd put them back in their normal locations, I found myself thinking about those two colors again and again. I finally put myself out of my quilty misery and started pulling other pieces off my shelf.

I was a little worried about contrast until I took the black and white version. It actually seems to be OK. I might still want something a hair lighter in there, maybe another print, but since I don't even know what I'm doing with them yet, I'm not sweating it at the moment.

I think I know what they're destined to become a part of, but it's all very misty in my head. I'll let it percolate on its own for awhile; it'll all come together in due time.

Apparently I'm working at a very high level of distraction these days. I suspect that has to do with the fact that it's crunch time at work right now; lots of deadlines hitting all at once. I can keep track of everything and stay head-down-blinders-on-nose-to-the-grindstone while I'm working. Then I get off my computer at the end of the work day and it's like every methodical part of me flies out the window and I can't keep focus for more than seven seconds at a time. I can live with that--I know it's not Normal Me so I'll roll with it and welcome Normal Me whenever she decides to come back and live in my house again.

Meanwhile, I have some fabric to go pet.

My Stash Challenge Project Results

I started another blog entry and then decided I really should devote one to my stash challenge project first. This quarter's challenge was to do something inspired by children's artwork and to use at least three fabrics from my stash. Well, if you read this blog entry a few days ago, you'll know it started out a bit rocky. But it got better from there. It's not completely done, but at least the main part is done and it wouldn't really take me all that long to finish him up. I just need to figure out when I'm going to do that. (See my next blog entry for my current quilty distraction level!)

So--before I show you the artwork it was based on, let me give you the backstory. When my daughter was a sophomore in high school, her art teacher had the class do a project on shadowing, which had the main purpose of teaching kids that shadows don't always have to be black or gray. The teacher hung a bunch of beanie babies from the ceiling (can't imagine how gruesome that may have appeared!) and instructed the kids to sketch the beanie baby nearest them in colored chalk on black paper. My daughter was the only kid in the class to take that quite literally--she drew exactly what she saw.

Introducing...Chicken Butt.

Yes, this is the only beanie baby backside represented in the entire art class. My daughter has a true sense of the ridiculous. That's my girl.

He's been hanging on the bulletin board next to my desk ever since she brought him home at the end of the year. He makes me laugh every time I look at him. So, when I hit upon the idea of making a challenge based on children's artwork, he became the obvious first choice. (I have another one of my daughter's artworks from around the same time that's also destined to be a wallhanging at some point, but it's much more sophisticated. No fluffy backsides involved.)

I decided to turn him into fused applique and then threadpaint him, trying as much as possible to imitate her cross-hatching and use of color.

Here's my result.

The background got a little puckery, although not as bad as it looks in this photo because I'd just pulled him out of the totebag I bring to my guild meetings--he got a little wrinkly in his trip to show n' tell.

The puckering is because I used a lighter weight stabilizer than I should have, but I followed the advice of my thread-painting teacher and used a steam iron frequently during the process, so the puckering actually isn't all that bad. And I think a lot of it will actually quilt out. Whenever I get around to quilting it, that is.


I had a ton of fun figuring out what color thread to use where. Mostly I used stuff in my thread collection (not quite big enough to be considered a "thread stash" yet). I did have to buy orange, pink, and blue thread since I didn't have any of the right shades. The blue came out darker than I thought it would--I'd have preferred something a little lighter.

His comb was fun to do. Also, you can sorta-barely tell in this photo that I used a tone-on-tone white for his body. I wanted to see what it would look like. I think it just adds a little extra dimension and fills in where I may have not been quite as even-handed with the thread.


I also had fun with the feet--I loved the way my daughter had shaded his feet in the original artwork. If I'd had an additional orange that was a few shades darker than the main orange here, I could have done even more shading. But it's still cute.

The biggest issue I had throughout this process was deciding what direction I was going to thread-paint in. Some places I went north-south; others east-west; others diagonal, or curvy. Sometimes (like on the top of the feet) I painted myself sort of a border around the outside edge if I wanted it to be more clean. Other places, like the body, I intentionally went out and over the edge of the fabric to depict his fur. I kept her original drawing close by so I could check directionality and do my best to follow it.

It was an absolute blast. I only broke one needle (on his puffy little tail--the purple thread I had was far too thick for this project) and had a few thread-nests (same place, same reason). Otherwise it was a hoot and I can't wait to do it again!

Chicken Butt needs to be finished, and then I suspect he's destined to become one of a series. I have so many images of him in my head now. So stay tuned!