

This class has been in my queue for some time now, but I moved it up to the top of the pack this month because I have several UFOs all in the same stage: They need to be quilted. I've been working my way through all my free-motion quilting (FMQ) classes most, to be honest, to get inspiration for designs. I feel like at this stage I know how to do FMQ--it's just a matter of a lot more practice and better thoughts about design patterns.
And this class immediately paid off.
And so, my review of Continuous Line Quilting with Ann Petersen.
I'd already taken another of her Craftsy classes--check out my review of Beyond Basic Machine Quilting. I liked her then, and I still like her now. I won't take time here to talk about her teaching style and such as I've already covered that in my previous review.
Just for a quick definition, if this is an unfamiliar term for you: "Continuous line quilting" is doing a quilt design in a single pass, without cutting thread and restarting somewhere else. It's the best way to make FMQ fast and simpler, rather than having to keep stopping at the end of one line, locking the stitch in some way, breaking thread, moving to another section, and starting all over again.
practicing
This class is very helpful (1) if you're looking for more quilt design ideas (most in this class were not ones I've already found in other classes, or she brings a new twist to the design); or (2) if you've been trying to figure out how to use some of the standard (traditional) quilt designs in a continuous-line way. For me, with all the studying-up I've been doing on FMQ for the last couple of years, I found that aspect of the class (especially lesson 8) the most useful for what I needed; that's where she walks you through the process of how to take a standard traditional quilt design--often those developed with hand-quilting in mind--and make it work better for FMQ by figuring out where the continuous lines could be. Now-a-days, more and more designs made with FMQ in mind are being published and produced as stencils. However, there are still a lot of great quilt designs out there that need some slight adjustments to make them easier to do FMQ-style, and this class is really helpful in teaching you how to look at designs differently, break them into component parts, and think through your quilting plan.

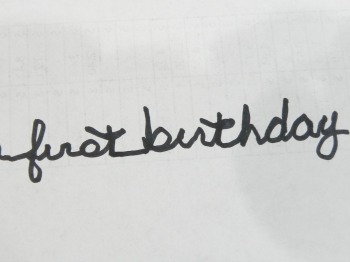
Signature as seen from the front
I chose not to do the class project and, rather, look at how I might use any of the designs on current projects I need to finish. As it turned out, it was the very last few moments of the very last lesson in the class that inspired me. I'd just finished the baby quilt for my great-niece earlier this week but was realizing, over my morning coffee today, that I hadn't put a label on it. Since it is for her first birthday, a very momentous occasion in any person's life, I felt badly that I hadn't put something on there marking that.
And then I watched the last class while I was eating breakfast. And there, at the very end, Ann FMQ'd her name onto the corner of the quilt as her label. Well, of course! I've done words on quilts once or twice before but it rarely comes to mind as a first option. I was pleased to be reminded.

Signature from the back
From the pictures on this blog you can see the results. I practiced with a sharpie on paper first because, face it, it's been awhile since I've written in cursive--or, at least, a cursive that would work in FMQ. Then I practiced on a quilt sandwich to make sure I had the tension right--it took a few passes. But then I was ready to do it on the quilt.
It's a secret message, to be sure--I intentionally chose thread that would blend on both sides. It says, "To [name] for her first birthday" in one border, then "Love Great Aunt Sandy"; no comma because it wouldn't have been visible anyway, but it has the nice grammatical effect of commanding her to love her great-aunt so I'm okay with that. Then the other two borders include words that come from the meaning of her name, almost as sort of a blessing. I was very pleased with the way it turned out. So, thanks for the idea, Ann!
The Basics
- 8 Lessons, ranging from 36 1/2 minutes to 8 minutes, although the 8 minute one is an outlier--they're mostly 20-30 minutes long, so you really get your bang for your buck in this class.
- The introduction talks about fabrics and tools, tracing the stitch path, transferring the design, and some basics about FMQ and troubleshooting.
- Lessons 2 and 3 present several motifs and variations on them
- Lessons 4 and 5 address ways to travel from one part of the design to another, some of which help make simple designs appear even more complex
- Lesson 7 walks through the process of breaking a design down into component parts to make it easier to quilt in a continuous line
- Lesson 8, as mentioned above, addressed converting a non-continuous line design into continuous line. As always, she gives several options here for you to consider.
When I'm back in the saddle after the holidays, I plan on practicing some of the designs from her class a little bit to get myself back in the habit of FMQ after a bit of an absence from my sewing machine. But mostly I'm looking over my UFOs to see if any of the motifs or suggestions from her class will inspire me to finish one or two of them!
Once again, that's Continuous Line Quilting with Ann Petersen. Two thumbs up!
(Usual transparency statement: Using Craftsy links or banners on this post help supports this podcast and blog. Thanks!)