I know, I know, it's been awhile...

A mixture of being out a lot of evenings, having family events on weekends, trying to fit more exercise into my schedule, and having several days of being just plain' dumb-tired after work have meant that I've been a social-networking slacker of late.

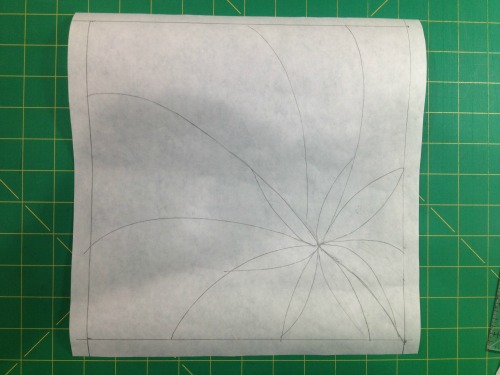
The upside is that I've been getting some quilting done in there too. And I hope to get some dyeing in this weekend. So there is that. 

Also in the works: Two new interviews! Look at it this way: I'm not Podfading, I'm Podbrewing.  Things are just roiling around in my head until I have both the time and the verbal energy to sit down at my microphone again.

Meanwhile, back at the ranch: I've determined my winners for the 2013 Banned Books Week Challenge. Congratulations to Dianne, Jackie, Carol, Daisy, and Carole! Yep, I threw in one more book so all five of you could win something! I love being able to say thank you for playing along.  Whee!

I plan on getting a podcast out in the next couple of days even if it's a shortie. Bear with me... 

A Bit More about My Banned Books Week Quilt

The completed project

The completed project

I've had a couple of folks ask how I put together "If You Walk By." Fortunately I'd taken pictures during the process, half-thinking I might do a photo-journal of it, but that idea got put by the wayside this past week while I was completely immersed in work. (It was an "event" week that tied me up day and evening, even though I was home.)

So here it is, such as it is. I would definitely do a few things differently next time but I do want to use the basic process again. 

Rather than having a solid background, I wanted there to be distinct changes in the texture to give it a little more interest. This meant either piecing or fusing. I choose fusing whenever possible, especially when I'm under a deadline. So I decided to create freezer paper "templates," cut everything out, fuse it back together, and then satin-stitch over the "seams" to create line and definition. 

I also had the purple and yellow thing in my head from the get-go, and later realized I could also use this for one of my assignments in my Quilt Design Study Group. We're working our way through this book and the assignment was on complementary colors. Bingo. Since I'm a bit of a purist on my homework assignments, I needed to also use purple or yellow thread for the surface design. Fortunately, I had a great variegated yellow in my thread collection.

The rest of this photo-journal will be in the captions to the photos. 

Free-hand sketch of design directly onto freezer paper (matte side). The way I was going to be fusing this, I didn't have to worry about reversing anything so I just drew out the design the way I wanted it to end up. I also didn't worry too much abo…

Free-hand sketch of design directly onto freezer paper (matte side). The way I was going to be fusing this, I didn't have to worry about reversing anything so I just drew out the design the way I wanted it to end up. I also didn't worry too much about exactness--whatever I cut was going to fit back together so at this stage I worried more about making sure the general design was what I wanted.

This little 18mm rotary cutter is just the ticket for free-hand cutting of smaller pieces. 

This little 18mm rotary cutter is just the ticket for free-hand cutting of smaller pieces. 

I put fusing on my fabric. I'd have put it on the wrong side if there were a wrong side--these are my hand-dyes so it didn't matter which side it went on.  This is Pellon 805 if you're interested.

I put fusing on my fabric. I'd have put it on the wrong side if there were a wrong side--these are my hand-dyes so it didn't matter which side it went on.  This is Pellon 805 if you're interested.

I then cut out my freezer paper templates. I remembered to label them after I had the first couple cut out. If this were a more complex project, I'd have created myself a second drawing to use as a "map," but didn't feel the need on this. I also did…

I then cut out my freezer paper templates. I remembered to label them after I had the first couple cut out. If this were a more complex project, I'd have created myself a second drawing to use as a "map," but didn't feel the need on this. I also didn't leave any seam allowances because I didn't need them for this technique. 

I then pressed the freezer paper templates onto my fabric, where the fusing was on the back. This way, when I cut them out, they'd be ready to fuse in the direction I wanted them to appear. Again, I didn't have to worry about reversing anything in t…

I then pressed the freezer paper templates onto my fabric, where the fusing was on the back. This way, when I cut them out, they'd be ready to fuse in the direction I wanted them to appear. Again, I didn't have to worry about reversing anything in this technique. Very straightforward. 

And here I've reassembled the pieces in order. I'm fusing them onto a very thin piece of batting. I wasn't planning on doing much quilting and didn't want the "quilted" look, so I found a scrap of the thinnest batting I had. If I recall, it might ha…

And here I've reassembled the pieces in order. I'm fusing them onto a very thin piece of batting. I wasn't planning on doing much quilting and didn't want the "quilted" look, so I found a scrap of the thinnest batting I had. If I recall, it might have been a little leftover "Fusiboo," which is a fusible bamboo batting. I did overlap just by a hair a couple of the purples and yellows, because I thought that might give me more of a pieced look. In retrospect, I wouldn't do that again. It was unnecessary and there's a little shadowing in the finished project.

I press-tacked it all down (which is just tapping the fused fabric with the iron long enough to hold it in place but not be permanent) then carefully removed the freezer paper template pieces. When they were gone and I was satisfied with the placeme…

I press-tacked it all down (which is just tapping the fused fabric with the iron long enough to hold it in place but not be permanent) then carefully removed the freezer paper template pieces. When they were gone and I was satisfied with the placement, I pressed it to permanently fuse the layers. You'll see here I now also have a background fabric on the other side of the fusible batting, so everything got fused together at once. 

By the way, you'll note in the fused piece above that alot of the joins between colors aren't clean. The beauty of the satin stitch was that I knew most of that would be covered up. I did use my thread snips to clean up some of the edges, but not much.

I did a couple of tester stitches on my practice quilt sandwich I keep by my sewing machine for just this purpose--I wanted to make sure I had the width of the satin stitch where I wanted it. I then used the satin stitch on all the "seams". I haven't done a lot of satin stitching to date so I was pretty happy with the way that part of it turned out. Again, in retrospect, I'd have worked out the center a little differently--the way the stitching came together in the middle of the flower is a bit awkward. However, I will say that satin-stitching is fairly forgiving. I was able to go back in and stitch over a few places with new seams to clean it up some.

I don't have a picture of the original binding. I tried a new-to-me technique of cutting the backing enough bigger to fold it and bring it to the front, and then machine stitch it down so it's self-binding. I used the satin stitch there too. Hated the results. The stitching skipped over bulkier areas and I couldn't get the corners to look like clean miters. I set the project aside for a day because the binding really ruined the whole project and I wasn't sure how to fix it at the moment. In the interim, I finished a project I'd been working on for Laura Wasilowsky's Craftsy class and did her fused binding method. Bingo! I went back to this project and just fused a binding over the top of the original satin-stitched binding. Completely covered it up and looked a zillion times better. A little decorative stitch with that same yellow variegated thread, and I was suddenly happy with the project again.

So now I'm adding to my repertoire of "how to fix errors quickly" (a repertoire which includes Sharpies and rotary cutters), fused bindings. Very handy. 

Again, there are a few things I'll do differently the next time I do this, but I am planning on using this method again. I like having the look of a pieced background without having to figure out how to do the piecing. 'Cause I'm just kinda lazy that way.

And now, back to working on #scrapitude. 

My Banned Books Week Mini-Quilt

If you missed the original post with the information about this week's Banned Books Week mini-quilt challenge and giveaways co-hosted by Tanesha of CraftyGardenMom podcast and myself, click here.

I wanted to try to embed a gallery of the Flickr group with everyone's entries so far but the Interwebs are not cooperating with me today. Here's a link to the Flickr group. Be sure to check it out!

My Banned Books Week Challenge is "If You Walk By."  I used a few new-to-me techniques on it so there's a couple of rough patches but I'm mostly very pleased with the way it turned out. And, yep, my own hand-dyes.

"If You Walk By" by Sandy Hasenauer, Banned Books Week 2013

"If You Walk By" by Sandy Hasenauer, Banned Books Week 2013

Listen, God love everything you love? and a mess of stuff you don't. But more than anything else, God love admiration.

You saying God vain? I ast.

Naw, she say. Not vain, just wanting to share a good thing. I think it pisses God off if you walk by the color purple in a field somewhere and don't notice it.

What it do when it pissed off? I ast.

Oh, it make something else. People think pleasing God is all God care about. But any fool living in the world can see it always trying to please us back.

Yeah? I say.

Yeah, she say. It always making little surprises and springing them on us when us least expect.

You mean it want to be loved, just like the bible say.

Yes, Celie, she say. Everything want to be loved. Us sing and dance, make faces and give flower bouquets, trying to be loved. You ever notice that trees do everything to git attention we do, except walk?

(From The Color Purple, by Alice Walker) 

I must have read and written papers on The Color Purple about five times through my college career, and somehow I never minded that it kept showing up on the syllabi of my English Lit classes. Every time, I read it over again. Every time, I got a little something different out of it. When the film version came out late in my college years, I pretty much had the book memorized and was pleased to see that the film stayed fairly true to the novel. In fact, I'm reading the book again this week in recognition of Banned Books Week. I might even watch the movie again.

The Color Purple is a book about finding one's voice, finding one's power, learning to write one's own story. It's about racism, sexism, and abuse, but it's also about deep friendships that help one grow into more than one would be alone; it's about love, it's about healing and reconciliation. It's about strength. It's about faith.

Oh, and by the way, there's a quilt in it.  

 'Nuff said. 


Banned Books Week Challenge and Giveaway!

Woohoo! After months of planning, Tanesha at CraftyGardenMom podcast and I are finally able to officially launch the 

2013 Banned Books Week Challenge and Giveaway!

Post your Banned Books Week projects in our Flickr group anytime this week (September 22-28). Tanesha and I will be haunting the group and choosing winners at random throughout the week. We've each got a number of great prizes to give away so you really want to get in on the fun! (Need to remember what the challenge is? Click here.)

I'll have four winners myself--Thanks to C&T Publishing/Stash Books and Tanesha, I've got four books to give away! (One per winner, my choice).


cozymodernquilts.jpg

Bright & Bold Cozy Modern Quilts, by Kim Schaefer, is her follow-up to her first book, Cozy Modern Quilts. All of the projects in the book are made up of just two shapes: squares and rectangles. They're simply put together but with beautiful results. There are 20 projects in this book: lap quilts (some quite sizeable!), wall quilts, table runners. This book is great for beginners and folks who have been around the quilt block awhile, alike! Great ways to bust your stash, or great excuses to pick up some new fabric.  


modernmix.jpg

Modern Mix by Jessica Levitt is 16 sewing projects (quilts, pillows, bags, and more) that combine solids and designer prints in beautiful ways. The book is divided up into sections based on how the solids are used: as background, in strips, as accents, and projects that only use solids. There is also a section with some design tips and, of course, basic sewing techniques. This book will definitely have you looking at your stash a little differently, or maybe planning on some stash enhancement.


monthofsundays.jpg

A Month of Sundays: Family, Friends, Food & Quilts, by Cheryl Arkison is really an entire lifestyle book. It has 16 projects that are "pre-cut friends," as well as recipes and ideas for ways to relax with your family, friends, or just by yourself. The quilt designs are modern in sensibility, low-volume in color choices (although you could certainly adjust that to your own taste), and fairly simple to piece. There are plenty of other projects, such as little fabric flags, game surfaces, napkins, and other small projects meant for family fun time. This book fits right in with everything I've been saying about the Slow Quilt Movement!

quiltessential.jpg

And finally... QuiltEssential: A Visual Directory of Contemporary Patterns, Fabrics and Color, by Erin Burke Harris. I have a ton of quilt reference books on my shelves and still, boy-o, was I tempted to keep this one! Harris has put together a basic reference book with information about quilt math, types of fabrics, design elements, different quilt "genres," and techniques, interspersed with spotlight articles on some current modern quilt artists. The layout is extremely user-friendly, and the photos are both helpful and beautiful at the same time. If you're a beginner, you would definitely want to have this one on your shelf, I think; if you're a not-so-beginner, there may be pieces of information in here missing from your other reference books (like I found!). Great stuff.

So that's it! In order to be eligible for this giveaway, just include photos of your finished Banned Books Week Challenge projects in our Flickr group for the challenge, clearly labeled with "2013" somewhere in the title or description so we can keep them straight from last year's. Don't forget to include your artist's statement or a link to your blog where your artist's statement resides. Tanesha and I will be choosing winners through the week, including Monday, September 29th just to give you that one last Sunday evening to get yours posted. Don't forget to visit Tanesha's blog throughout the week to see her giveaways!

I'll be posting about my own challenge quilt later this week, as well as posting pictures of my local public library that's displaying our guild entries in this challenge during the week as part of their own Banned Books Week publicity. They may even show pictures of your quilts from the Flickr group! 

Looking forward to seeing your entries, and good luck on the giveaway! 

Banned Books Week Challenge

Finally, the official blog post about the Banned Books Week Challenge! If you've been listening to my most recent podcast episodes, you'll already know all about this. Yay you! If you've been listening to CraftyGardenMom podcast or following Tanesha's blog, you'll also already know all about this. Yay you!

If you've not done either this is hitting you out of the blue. But you're a quick study--you'll be up to speed in no time. Yay you! 

Announcing...

The 2013 Banned Books Week Challenge

(and giveaway!) 

Once again, Tanesha and I are co-hosting a Banned Books Week mini quilt challenge. Our form of non-violent protest, I guess, of the idea that anyone would want to ban books. Just so not our style.

Banned Books Week is September 22-28, 2013. You may find information on the issue of censorship, lists of what books have been banned or challenged, and other resources on www.bannedbooksweek.org or the American Library Association website at www.ala.org. You can find lists of Banned or Challenged Classics here, and the Top 100 Banned/Challenged Books: 2000-2009 here, and the Top 100 Banned/Challenged Books 1990-1999 here. (Those dates, by the way, are when those books were banned/challenged, not when they were published.)

You are challenged to create a small wall quilt that somehow represents a book from the banned/challenged book list that you have read and particularly loved, found meaningful, or otherwise want to celebrate. How you choose to represent the book is up to you—it could be a scene from the book, words from the book, or just represents the book in some way.

            Please be aware that book cover images and illustrations in books are copyrighted art. You would need permission from the publisher/artist to depict those images exactly. You may, of course, use them as inspiration for your own artwork!

The pert-details:

2012 BBW "Alice's Spider," by me. Based on Go Ask Alice. 

2012 BBW "Alice's Spider," by me. Based on Go Ask Alice

  • Create a mini-quilt based on a book on a banned/challenged book list that you read and enjoyed. Really, the quilt can be any size, but "mini" keeps it manageable. You can do a mug rug if you want! No specific sizes required.
  • Use any type of quilt techniques you enjoy, any type of surface embellishment you choose--whatever flips your switch! 
  • Post pictures of your completed quilt(s) in the Flickr group for this challenge. We're using the same Flickr group as last year, so please clearly label your post with "2013" in the title so we know what the new ones are!
  • Include your artist's statement in the description of your photo in the Flickr group. (Or, should you be a blogger, just include a link to your blog post about the quilt in the description. ) The artist's statement should include the title and author of the book, why you chose that book, and anything else you want us to know about your mini-quilt.

During Banned Books Week, Tanesha and I will be blogging/podcasting about the entries and there will be...yes!...prizes!  

Here's another idea: I'm also co-facilitating this same challenge in my quilt guild, with fellow guild member Kate who is a librarian in our local public library. We've arranged for the library to display during Banned Books Week quilts from our guild members who participate.  Woo! That meant having a few more guidelines about sizes and deadlines and such, but I'm very excited about it. I'll post pics of the display when it's up and ready. Why don't you ask your local library if you can display your finished project there?

Whatever you do, Tanesha and I are looking forward to seeing it!  

For inspiration, here are the pictures from last year.