2015 Quilty Resolutions: March Journal Quilt

It's been awhile since I've posted about a journal quilt, so let me recap: My 2015 Quilty Resolution was to do one journal quilt per month. In my definition, a journal quilt is a small project (approximately 8"x10") that allows me to experiment with a technique, a theme, a color scheme, or whatever. My main focus is on experimentation (my 2015 word of the year).

January's journal quilt was Sunset in Bagan, in which I was experimenting with netting. 


I had to cut myself some slack on defining February's journal quilt. That whole month was experimentation! I was playing around with a lot of different design experiments based on having taken the art quilt class as well as some other things that caught my creative eye, as it were. So I decided that, rather than getting all legalistic on my own butt about how I was defining "journal quilt," I'd focus on the "quilt project that involved experimentation" concept, and thus declared Neumes my February journal quilt, despite the fact that it's quite a bit bigger than 8"x10".

March was a very busy month, and I wasn't home much. But I was still experimenting. I did Cindy Walter's fabric painting class on Craftsy in March, and was just having all sorts of fun messing around with all the different types of fabric paints and inks I've amassed over the last couple of years. In her class, she showed a way to do an abstract paint design that brought back to mind my favorite way of coloring when I was in high school--basically just sketching random lines and shapes that connect together and then going to town with the color. I used to do a lot of this when I was a kid!

March Journal Quilt--just named "March Journal Quilt"

March Journal Quilt--just named "March Journal Quilt"

So, my nostalgic painting experiment became March's journal quilt. I'm pleased to announce it's finished! It measures out to 8 1/2" x 10" but that was happenstance--I was just using a spare piece of muslin I had on hand to do the painting and it happened to be almost journal quilt size--phew.

Please note that I did this without any concern for color scheme. My goal was simply to use every paint or ink I had on hand (except my Tsukeniko inks--those remain for another day). Thus: almost every one of the sections in this piece is a different paint. I had a couple of spaces more than I had paints on hand so I did repeat a couple, but probably not as many as look repeated in this photo; some were two different types of paint in basically the same color; another one or two were experimenting with a Pearl-X powder mixed into paint (the Pearl-X isn't showing up well on the photo); I started by mixing one of the purples and, when I was unhappy with the result, I went out and bought a pre-mixed purple that I liked much better so I also painted over the original yuckier one, and so forth. Still working on mixing colors--Joen Wolfrom is very helpful on that!

It took me until the end of April to finish this because (1) you have to let the paint dry and (2) you have to let it cure. All that can take 2-3 weeks, depending on how thick a layer of paint you have. Mine's pretty thick in some places. I sat down this past weekend to add the finishing touches: I used invisible thread to quilt along all the lines to make it look a little more like it was pieced or appliqued. For the most part, I was able to stay in the lines but don't look too closely at the yellow. (Besides, the yellow ended up having the stiffest hand when dried so the needle just poked holes right through it.) I just did a fast fused border using the remainder of my hand-dyed black fabric that I'd used for the backing. This will never go in a show so I didn't want to spend much time on binding.

I learned an absolute ton on this project. I've got a much better feel for what different types of paint are good for, things to consider when approaching a paint project, and so forth. 

April's journal quilt may end up being another "cutting myself some slack" project as I'm still doing a lot of experimenting but not specifically on a journal quilt project. I suppose I could say that my journal quilt resolution has already served its purpose: I wanted to do it to encourage myself to experiment. So far, in 2015 I've been doing very little other than experimenting!

Craftsy Class Review and some reveals! Fun Techniques with Fabric Paints with Cindy Walter

Online Quilting Class

Dyes are great. I love dyes. But using fabric paints as well just gives me more ways I can create really, really cool original fabrics.

So the #madquiltscientist has expanded her repertoire.

Now, here's a true confession moment: I've owned a lot of different types of fabric paints for awhile. I kept collecting them, swearing to myself that I'd immediately spend time figuring them out. And they were all neatly organized and sitting in labeled bins in my dye studio in the basement. Collecting dust.

Finally, last weekend, I got the fire lit under me to pull them out and start playing. I honestly can't remember what the catalyst was, but whatever it was, the bug hit fast and hard. I spent a couple hours on Saturday messing around with my PROfab opaque textile paints. They come with instructions but not much in the way of guidance beyond that and, as usual, I didn't bother to first go on YouTube or sit down with one of the many art quilt books I now own. I just pulled out the paints, grabbed a piece of the PFD fabric that's always sitting at the ready in my dye studio, and went to town. It wasn't bad, but I wasn't getting quite the results I was going for. Then I remembered--Doh! I owned a Craftsy class on this, didn't I?

Yep, several weeks ago I'd bought Fun Techniques with Fabric Paints with Cindy Walter. Woot woot! I spent several hours on Sunday just blasting my way through watching all the lessons, then descended back into my dye studio freshly armed with knowledge and a few new techniques to try. I had an absolute ball.

I switched to the Dye-na-Flow paints I also owned (ahem) and tried the same effects I'd been going for on Saturday, but to much better end results this time after watching Cindy Walter's techniques. 

I did a colorwash on a cotton PFD piece I had left over from a previous project, and then (again, testing out something she teaches in the class) salted it with Kosher salt, the largest salt crystal I had in my house, my husband having used up the last of our rock salt on the driveway in the most recent snowstorm. 

I also had a leftover piece of what I think is silk--although I bought it at a sewing guild's rummage sale and it was unmarked, and once you get me out of the world of cotton and wool, I'm a bit lost in the fabric-identification department. But it's shiny. And it feels like silk. So that makes it silk in my world. 

I also salted this one.

Part of what I love about paints versus dyes is they're not fiber-specific. I can use my dyes on silk but the colors come out a little different than they do when used on cotton. With paints? It makes nary a never-mind what you're painting. I could paint my dogs and it would still work just as well. (Whether the dogs enjoyed it would be another story.)

Then I did some colorwashes and, instead of salting, did some scrunching and folding to test out some other things that Walter teaches in the class. Being my first time out of the gate on this one, I learned a lot about how much I need to scrunch or fold to get the volume of lines I want. But still, as a test, it's all good. And these can still be overdyed or painted again or whatever, so it's just a start.

I've heat-set all of these, but they have to cure for a bit before I can run them through the wash and really finish the process, so you can still see some leftover salt-crunchy that's embedded in the fabric until I can give them a good wash, and lots of wrinkles that didn't want to come out with just using a dry iron. 

A little tired of being in the basement, I moved my operations to the kitchen table to do some more work with the thicker PROfab paints. I'll post pictures of that one later on when it's finished. I also (sigh) couldn't resist running out Monday evening to an art supply store in the city that carries a decent selection of fabric paints. I picked up a couple more Dye-na-flow colors, plus some Jacquard Textile Colors, Jacquard Neopaque, a handful of Jacquard Lumiere (and I already have a specific project in mind for those), and one Jacquard Pearl-Ex Pigment so I can add it to my other paints to turn anything I want into a Lumiere-style paint.

So much like Jane Dunnewold did to me a couple of years ago with hand-dyeing, Cindy Walters has now done to me with fabric paints. It's a logical addition to my arsenal of textile art and surface design. And I'm just having a blast. 

Ah, you want to hear about the class now, is that it? 

It's just boatloads of fun. If you need more detail than that: She does an excellent job giving tips about setting up a work space, the difference between the types of paints, how to dilute thicker paints for different effects, and a variety of techniques for using several types of paints. She also shows examples of how to use the painted fabrics (and garments too!), so there's a lot of visual inspiration alongside the practical information. 

I think this class most likely marks another turning point for me in my development with art quilting. I've owned Painted Pictorial Quilts with Annette Kennedy for a couple of years now--it's one of the first Craftsy classes I ever bought, but I always found it a bit intimidating to think about diving into that one. Now I feel so much more prepared--it's just gotten bumped up to the top of my "next class" list! I've also pulled out my art quilt books and am going over anything related to fabric paints, and spent a pleasant hour or so reviewing Mickey Lawler's SkyDyes, which my BFF/BQF gave me a few months ago. I enjoyed it then, but I'm enjoying it even more now!

The Basics

  • 7 classes, ranging from 14-45 minutes--most are around 25-30 minutes.
  • Lesson 1 gives an overview of fabric paints in general, and she talks about the difference between dyes and paints, and color theory as it relates to fabric paints. 
  • Lesson 2 goes into more detail about types of fabric paints, how to buy paints, and how to set up your work space.
  • Lesson 3 and 4 are about doing color-washes and variations; lesson 5 is about using thick paints (stamping, stenciling, and painting); lesson 6 gives direction for painting a miniature quilt in a couple of different ways (this is the project I'm currently working on, to be revealed later); and lesson 7 goes into mixed media--including 3D paints, ink pens and pencils, oil sticks, and using yarns and embroidery for embellishments. 

Do you even need to ask? Two thumbs up for Fun Techniques with Fabric Paints with Cindy Walter.  Way, way, way up with a bit of dancing around involved to boot. 

(Using Craftsy links in this post helps support this podcast and blog. Thank you so much!)

Oops...Some Snow Dyes I Never Posted...

I got so caught up in my sewing room I forgot that there was a set of snow-dyes I never revealed here. Plus, I got some regular hand-dyeing done too. These are all from a week or two ago. They're not terribly exciting and I had some issues with a couple of them. But still n' all...

Fuchsia and grape scrunched

Fuchsia and grape scrunched

Fuchsia and grape folded

Fuchsia and grape folded

Fuchsia and grape spiraled

Fuchsia and grape spiraled

Strong orange, mixing red, fuchsia spiraled

Strong orange, mixing red, fuchsia spiraled

Same mix as above, but folded. And clearly there was a little drop of a former dye bath still left on the grate that I hadn't seen when I washed it. Oops. This just shows what havoc one tiny little drop of the wrong color can wreak! Oh well, not one…

Same mix as above, but folded. And clearly there was a little drop of a former dye bath still left on the grate that I hadn't seen when I washed it. Oops. This just shows what havoc one tiny little drop of the wrong color can wreak! Oh well, not one of my faves anyway. Ripe for overdyeing.

A v-neck shirt done in the same color combo as the above. This didn't have nearly as much going on with it as I thought it might, but it's fine as a knock-about summer shirt.

A v-neck shirt done in the same color combo as the above. This didn't have nearly as much going on with it as I thought it might, but it's fine as a knock-about summer shirt.

Lounge pants--woo! These are pretty oversized on me; PFD clothes from Dharma are often on the small size, plus they're 100% cotton so they shrink when washed. These didn't shrink as much as I thought they would, so they're very comfortable but not p…

Lounge pants--woo! These are pretty oversized on me; PFD clothes from Dharma are often on the small size, plus they're 100% cotton so they shrink when washed. These didn't shrink as much as I thought they would, so they're very comfortable but not particularly flattering! Fine for quilt retreats, though! This is teal, intense blue, and turquoise.

Here's a closer-look at the embroidery thread I dyed along with these lounge pants. A little tangled, but I think I could sort it out to use. 

Here's a closer-look at the embroidery thread I dyed along with these lounge pants. A little tangled, but I think I could sort it out to use. 

Some of these other embroidery threads are going to take a little more untangling, though....

Some of these other embroidery threads are going to take a little more untangling, though....

This set is a more prosaic gradation of blacks. The two on the bottom are a blue-black and a purple-black--I wanted different tones. There was something going on, though, as many of these ended up with sort of an orange-y tinge to them. I'm thinking…

This set is a more prosaic gradation of blacks. The two on the bottom are a blue-black and a purple-black--I wanted different tones. There was something going on, though, as many of these ended up with sort of an orange-y tinge to them. I'm thinking I may have left them too long without soda ash (I forgot to put it on until several hours later), so it's possible the belated addition reacted differently with the dyed fabric. Anyone...?

And, just for kicks n' giggles, I dyed some scraps of cotton batting, inspired by some things that @madquiltlady (aka Charlotte) did awhile back. You can see one of the batting scraps was pieced--apparently it had scrim on one side and not on t…

And, just for kicks n' giggles, I dyed some scraps of cotton batting, inspired by some things that @madquiltlady (aka Charlotte) did awhile back. You can see one of the batting scraps was pieced--apparently it had scrim on one side and not on the other. When you flip the piece over, it's the reverse of this side (one half lighter than the other). No idea what I'll do with these but it's fun to know what it looks like!

Snow-dye Challenge Reveal

Sandi of Quilt Cabana Corner and I have both completed our snow-dye challenges early--or, at least, we're both close enough to do reveals this week. Mine's completely done--hers is pretty dang close by all accounts. 

Abundant natural resources...

Abundant natural resources...

If you've listened to either of our more recent podcast episodes you'll know the backstory--we're both happy snow-dyers, but often have difficulty deciding how to use the resulting fabric. So we challenged one another to do something that used at least one snow-dye, if not more. 

When I took the Designing Art Quilts class with Tina Somerset on Feb 7th (which I talked about in this episode), I came home with a notebook full of sketches and stacks of hand-dyes picked out for several of them. It was so much fun, I knew I just had to stay on that roll!

For one of the exercises in the class, Tina had us listen to a few different songs she'd selected, and we sketched as we listened, making notes of what images came to mind. This is actually something I do periodically in my head when my husband and I go to the Philharmonic, but I can't tote a sketchbook into the theater with me and certainly wouldn't be able to see what I was sketching once those theater lights dim. So images dance in my head and disappear as soon as the piece is over. It was fun to do the same thing when I actually had pencil and paper in hand! 

artquilt notebooks.jpg

The sketch that ultimately became my snow-dye challenge project is at the left. The song it's based on is "Grace," by Michael Jones on his album Touch (1996--scroll down to find a sample of the song). If you listen to the sample, you'll hear that it's a pretty spare arrangement--lots of air. I kept seeing long rectangles, muted colors, space. 

And so, that sketch became "Neume."

The background is one of my recent snow-dyes done with Camel, Old Rose, and Smokey Grey. The rectangles are all my own hand-dyes. This project just kept building--I started with the base rectangles as in my sketch, but then decided they needed more dimension so I did a second layer. I fused the rectangles and did a very simple outline quilting around them. After consulting with my daughter, we decided the best quilting design would be straight horizontal lines, which really sealed the image it had come to represent as it developed--notes on a music staff. The rectangles float over the top of the horizontal lines. I did a faced edge so there wouldn't be any visual barriers on the piece.

"Neumes" is the name given to musical notation that developed in the Middle Ages, the precursor to today's written music. (You can still find them today in some chant music.) Neumes were square and mostly represented ascending or descending pitch, but not necessarily specific notes or rhythm until later in their development. The word "neume" comes from the Greek word for breath, "pneuma." I knew about the square notation but I didn't know what it was named until I looked it up after I had the piece done--the fact that it is related to the word for breath really sealed for me what this piece came to represent--a quiet peace. And so, it became the name of the quilt. 

The quilt shop where I took Tina's class is having a quilt show coming up in March--I think I'll be putting this in the show. Now it's time to get to work on some of those other sketches!


Snow Dyes Chapter 3

Get ready for some serious cool.

In more ways than one. (Ar ar ar.)

Here are the results of the second batch of snow-dyes I did this weekend, the 3rd batch for the winter (hence, "chapter 3"). I may do another batch tonight since we have about 12" or more of fresh snow out there. Hate to let it go to waste!

For each set, there are two 1/2 yard pieces, and then I took detail shots just so you can really get a feel for the effect that snow-dyeing creates.

First batch: Turquoise and Black.

(Sorry--forgot to write down which black was which. I used 628 for one and 629 for the other--ProChem names.)  Yes, it looks like I threw purple in there, but I didn't! That's the black breaking.

The next batch was one of my favorite combinations to ice dye or snow dye, because it breaks so wonderfully. 

Batch 2: Teal, Grape, and Black.

(Whatever number black the other one wasn't). Teal is a Dharma color, the other two are Pro-Chem.

1st piece

1st piece

1st piece detail 1

1st piece detail 1

1st piece detail 2

1st piece detail 2

1st piece detail 3

1st piece detail 3

2d piece

2d piece

2d piece detail 1

2d piece detail 1

2d piece detail 2

2d piece detail 2

Third batch: Ecru, Old Rose, and Camel.

Now, the final batch heads in a completely different direction. Neutral dyes are just so much fun to break!

Ecru, Old Rose, and Camel 1st piece

Ecru, Old Rose, and Camel 1st piece

1st piece detail

1st piece detail

2d piece

2d piece

2d piece detail

2d piece detail

It all looks so cosmic, doesn't it? Groovy.

If you've listened to my most recent episode (posted 2/1/15), you'll know that Sandi of Quilt Cabana Corner and I have challenged one another to a Snow-Dye Duel. Well, okay, a Snow-Dye Art Quilt Challenge. We've both been snow-dyeing lately (she's in MA, I'm in Western NY, we have a lot of raw material to work with these days) so, in order to be sure we use some of these wonderful new creations we're making, we've challenged one another to make some sort of project using at least one--if not more--of our snow-dyes by March 15. At some point, I'm going to have stop dyeing and figure out what I'm going to make.

But wait...What's that I see? More snow falling outside my window? Heading to the basement...


More Snow Means More Snow Dyes

We got more snow! So, of course, I ran to the back yard, shoveled some into a bucket, and headed for the basement.

I did half yards this time, and in this batch stuck with variations on yellow/orange/red (mostly) so I could play with proportions of each, variations on each (tangerine dye versus orange dye, etc.), and also be able to more easily rinse/wash it all together.


Tangerine and Strongest Red combination. The one in the back has more tangerine and the one in the front more red.


Once the snow has melted--so you can see how I had the fabrics arranged for the dye process.


Tangerine and Strongest Red #1 (the one from the back of the snow picture)


Tangerine and Strongest Red #2 (the one in the front of the snow picture)


Next batch: Golden Yellow, Strong Orange, and Mixing Red


Now with snow melted.... These were both just sort of scrunched up, although I did a few little loose spins in the one on the bottom. I used a lot less red in the one in the back, emphasizing more of the yellow and orange; the one in the front got a lot more of the Mixing Red.


Golden Yellow, Strong Orange, and Mixing Red #1. 


Golden Yellow, Strong Orange, and Mixing Red #2. Although it was quite interesting to me that some of it looks more fuchsia. I'm thinking that must come from the Strong Orange breaking.


Finally, the yellows. In this one I combined Sun Yellow and Antique Gold. I wanted to see how Antique Gold would break.


Here they are dyed. I did a loose pleat on the one in the back. The one in the front is just scrunched, nothing fancy. I believe I used about the same proportions of dye on both, although the one in the back may have gotten a little less of the gold.


Sun Yellow and Antique Gold result #1. The white splotches at the top are likely places where a little bit of fabric hung out over the edge and wasn't getting hit directly by snow and dye. I tried to keep track of that but things can move around when you're stacking the snow up.

The pleat isn't all that pronounced, but I could use this fabric for depicting reflections on water and that kind of thing. (The "Rorschach Test" of hand-dyeing: "What do you see in this fabric?")

And obviously Antique Gold has a lot of green/brown in it. Makes sense, when you think about tarnish and all that.


Sun Yellow and Antique Gold result #2.

You can see a lot more of the green coming through in this one. That's why snow dyeing is so much fun. You never quite know what you're going to get!

Stay tuned for Snow-Dye Batch #3, which is in the rinse/soak cycle as I write this. And we're due for another storm tonight and tomorrow, woo!

Mad Quilt Scientist Walks Again--Snow Dyeing

When life hands you lemons, you make lemonade.

When life hands you bales of snow...

When I started feeling somewhat better from the Great Sinus Infection of 2015, I decided I could probably handle doing a little dyeing. It's been a long while since I've been in my dye studio in the basement, so after I did a little cleaning up and removing of cobwebs (!) I made good use of the dogs' time outside and filled up three buckets of snow while they were snuffling about. 

This is not the first time I've snow-dyed, but last year when I did it, I followed directions on on a few blogs that all said about the same thing, but I wasn't pleased with the results. Most snow-dye instructions I've found call for creating the dye concentrate with water first, then using the water dye on the snow. Well, what happens when you take a water-based dye and let it melt with snow? Of course--it dilutes. I got very pale pastels. Pastels are all well and good but I like a little more saturation, so this time I did what I do with ice dyeing--I just dumped that dye powder right on top of the snow.

It does, indeed, use up more dye powder that way but hey, I only do this a couple of times a year so I'm okay with that. 

I did three different color combos and three different folds on the fabrics (one yard each). 

The first was fuschia and intense blue, and I folded the fabric in quarters lengthwise and then did a loose pleat.

The second was stormy grey, old rose, and boysenberry, and I spiraled the fabric.

The third was turquoise, lemon yellow, and tangerine, and I just scrunched it up.

So here's what I remembered while I was rinsing the fabric. Turquoise and tangerine are pretty close to being complementary colors, which means that mixing them gives you something in the neighborhood of brown or gray.

I'd been thinking more about the turquoise and yellow, and about the tangerine and yellow, without really thinking through the tangerine and turquoise. So, this isn't the most attractive end result but I already have some ideas for possible overdye designs I might do. (I like a nice neutral but I'd want it a little more intentional and not just muddy like this.)


And here's what I learned: Boysenberry is an aggressive little fella. I used more gray and rose than I did boysenberry--I just barely dotted the boysenberry on there. But it ran amuck.

I was surprised with the amount of light I ended up with in the middle (a very pale gray-purple with one bright random splotch showing). I thought I'd spun it more loosely than that. However, I can play with that, so no worries there. I don't mind this result at all--it's just not what I was picturing it would be. But that's what I like about hand-dyeing. There's always that surprise element involved.


Finally, the fuschia and intense blue combination--this one I knew what I'd get, more or less. There's a lot less variability when you're only working with two colors.

Because of the way it was folded and pleated, one end has more blue than the other. I'd planned on cutting all of these into fat quarters but I'm thinking this one will probably do better has half yard pieces so each piece would have both blue and pink; the spiral one above will stay as a whole piece; and the muddy mess at the top needs more work done on it anyway.

It was fun to be in my dye studio again, but I want to actually have a plan for my next dye session so I've got to do some thinking first. Plus, I think it's time for me to break out the wax resist (batik) supplies...

A Couple of Finishes and a WIP

scarves.jpg

Yep, got those purple scarves done. The ones on the bottom are those I had leftover from the summer events. And yes, they are darker. I must have used a slightly different concentration for this newest batch. Which tends to happen when you don't write things down. Which is the beauty of handmade--the individual uniqueness. Which I'm going to say is my reason rather than just "I didn't bother to take the time to write the darn proportions down."

These will be gifts to women I meet on my trip. I have 25 altogether--no idea how many women I'll actually be meeting.

I'd also mentioned on somewhere along the way that I made a last-minute decision to make something for a special visit I'm hoping to make. This will be for the man who in the 1990s invited my father to work with him on peace-making. I thought a peace dove would be a suitable recognition of their shared work and token of my great appreciation for him and all he's done. 

It's roughly 9" square. Commercial fabric for the dove, my hand-dye for background, backing, and binding--all the same piece. The dove is fused to the background, and I did a hand blanket-stitch around the outside with a variegated perle cotton (I don't recall where I got it--I think from a vendor at Lancaster). Even though I've done blanket-stitches a whole lot, I had difficulty keeping my stitch even because I'm too used to doing it on felted wool, not fabric, and I was struggling to hold the piece comfortably in my hand. For some reason it was all kinds of awkward. But overall it looks okay.

I then hand-embroidered the olive branch with a variegated hand-dyed perle cotton from Artfabrik. Love those perle cottons--very tasty.

As opposed to the blanket stitch, I'm really pleased with the way the olive branch turned out. First time ever doing a stem stitch, first time ever doing a herringbone stitch for the leaves. It looks a little more pine-y than olive-y but hey, you know what it's supposed to be so it's all good. 

It's possible I should've done the quilting first and then done the olive branch. Oh well.

I really enjoyed doing hand embroidery. I may do more free-form embroidery of my own designs in 2015. And yep, I've already got Craftsy classes on my wish list to help me out with that! BTW, I also talked about this on my last podcast episode and mentioned the book I used as reference. Oh, and yes, I did remember to put a label on the back of this too. Cookin' with gas.

And then, also on a whim but with far less purpose than the dove... Remember that Jenny Doan trunk show I went to? Ever since, I've been jonesing to dig into my pre-cut stash and whip something up. Last weekend, when I'd gotten all my scarves pressed and done as much work on the dove as I felt up to doing that day, I pulled out a charm pack, consulted a Missouri Star Quilt Company tutorial, and started cutting.

Introducing: My Disappearing 4-Patch Work in Progress As-Yet-To-Be-Named

I'm hoping to get the blocks done before I leave; I'll not worry about getting it put together into a top until I'm back. I only had one charm pack of this fabric (Good Morning by Moda, an older collection) so it'll be a baby-sized quilt. At the moment, this quilt has no purpose--no one in mind. I don't think I'll donate it, though. I'm starting to realize it may be helpful for me to have a certain number of finished quilts on hand for those last-minute gifts (illness, shower gifts, etc.). And, if truth be told, every other time I've started a quilt without a designated recipient, it seems the designated recipient appears before the quilt is done anyway. So who knows?

Here's the tutorial!


So I have gotten a couple of things done...

(Quick note: Craftsy is having a sale from Sept 9-15 with some of it's best-selling classes discounted up to 50% off. Here's the link: Save up to 50% off on Sewing, Quilting & Knitting classes. You might want to check it out! From, The Enabler. Using this link helps support this blog and podcast--thank you!)

The big news is...

I'm done making purple scarves! 

Woot woot woot!

75. Count 'em. 75 purple scarves.

I actually probably only need something like 65 to cover this event, but the number tends to keep waffling a bit so I needed a little cushion. And whatever is left over will come to good use for other purposes in our organization.

Meanwhile, I'm not dyeing anything purple again for awhile. Mostly because I ran out of Grape 801 (Prochem). The last few scarves were, ahem, a bit less saturated a purple, shall we say. But hey, that all just adds to the uniqueness of a handmade-with-love item, right?

The other thing I got done was a gift for my friend. My nickname for her is "Crunchy Dirty Gurrl" (long story having mostly to do with the dye class we took together in Lancaster last spring), so I used resist to write her nickname at the top of an apron and ice-dyed it. But when I went to post the picture in this post, I realized--for the very first time as I looked at the picture--I'd misspelled a word. And not the one I'd MEANT to misspell. No, that one I misspelled perfectly correctly, thank you very much. Oi. As I said to her in my apology email, just goes to show the kind of summer I had. 

Dang it. 

ice-dyed apron

ice-dyed apron

I think we'll try to pull out a bleach pen. Or I'll make her version 2. I wasn't keen on the results of the resist anyway, so maybe this isn't such a bad thing.

Here's a bad picture of the bottom of it, offending misspellings cut off. You actually can't see the colors that well as it was taken at night in another friend's living room so it's darker and more yellow than it is in real life. I used fuschia, turquoise, and lemon yellow dye powders so it's a very pretty blend. But still, it proves I did actually finish something, even if I finished it all wrong.

Sadly, that gets me all caught up in finishes. A picture and a half to represent over 6 weeks of productivity. I toss the gauntlet. Beat that, slackers. 


A Finish and a Craftsy Class Review: Thread Art with Lola Jenkins

Online Quilting Classes

Let me just start by saying, I had a ball with this!

The Craftsy class at hand is Thread Art with Lola Jenkins. My project ended up varying greatly from what she did in the class--so what you see here is inspired by, but not an exact replica of, the techniques she teaches in the class.

I'm hoping you'll see what fun I had with this and want to hightail it right over to Craftsy to sign up for her class!

Hawaiian flower, my own photo taken in 2010

Hawaiian flower, my own photo taken in 2010

The foundation of the class project is using a copyright-free image to base your artwork upon. She gives a lot of ideas about where to get your copyright-free images, and provides one in the class materials (The Girl with the Pearl Earring); it was one I do really like and debated doing myself. But I generally don't want to do what I know a bunch of other people are doing, and it wasn't a portrait I had ever wanted hanging in my house. I went back to one of my own photos (taken in Hawaii in 2010)--one I've always intended to translate into fiber in some way or another.

Photoshopped outline of flower

Photoshopped outline of flower

I'm not particularly good at drawing realistic things freehand, so I used PhotoShop to get an outlined version--more or less. There was at least enough outline for me to follow and trace the main parts. 

I stuck to the outline of the flower and each petal, plus the center stamen. I knew I'd be doing later quilting to give it more dimension.

I chose to do it on a white background so that the oranges and yellows of the flower would really show up well. I used one of my PFD fabrics as I had nothing else white in my stash that didn't have any print to it.

Windowpane light box

Windowpane light box

Then I used my trusty built-in lightbox (!) to do the tracing. Someday I'll have neighbors in that currently-empty-lot and and they'll wonder why the crazy lady next door keeps taping things in the window. I should come up with  messages to write on the back of the images I'm tracing. "Call the Mothership." "The Bear Flies at Midnight." "Send brownies." Messing with the neighbors' minds: always a good time.

Lola Jenkins makes several suggestions in the class (for which you're going to need to buy the class to find out!) about other things to do to your design, but none of them were speaking to me for this particular image. I finally landed on what I think was probably my most brilliant idea of the whole process. I pulled out my Hawaiian quilt block book, chose a block design that had a great outside edge to it, and used only that part of the block to create a frame for the project from one of my hand-dyes. Love it. May have to do that more often! I also free-hand drew leaves around the outside of the flower to help balance the entire thing. I drew the leaf I'm most comfortable free-handing. @Nonnie_p pointed out that it looked suspiciously philodendron-esque. Hey, when you find what works, stick with it. 

I knew I'd be able to shade the leaves fairly well--I've done that before. The flower was a bit intimidating, though, with all the ruffley bits. I kept going back over and over again with slightly different colors or adding in a line here or there, and I'm fairly pleased with the way it turned out. 

Dimension in the petals

Dimension in the petals

I debated for awhile what color thread to use in the petals to make the dimension even more obvious. Black would be too heavy. But invisible thread may not be interesting enough. I had finally settled on red thread until I actually sat down to do the stitching...the red wasn't jazzing me as I pooled it on the petals to test it out. Then I realized--wait! I had all those Superior "Try Me" special variegated threads I'd been picking up lately. Bingo! One in orange, yellow, and red variegation. FTW.

I had a lot more fun stitching the petals than I thought I would--I was a bit nervous about this part, as I knew it could go from helpful-dimension to way-wrong-angles in the blink of an eye. But, again, I was pretty happy with the way it turned out. And that thread really is pretty. I also did some thread painting in the black center, and you can nearly see a corner of the stamen. I'd used a yellow thread to do circles in the stamen area, but the circles are so dinky and I could see what I was doing so poorly that it ended up being more of a scribbly-fill. But it worked, so I moved on.

I stuck to the theme of Hawaiian quilting and echo-quilted both the flower and the border, and I went with a simple fused binding with one of my black hand-dyes--nothing fancy.

And so, my finished class project!

And the back looks pretty spiffy too! (Used another of my hand-dyes)

And the back looks pretty spiffy too! (Used another of my hand-dyes)

And so, for my review of the class itself:

1. I had a ball doing this. It was a fun combination of quilting with my old fave hobby, coloring. (Coloring in geometric design coloring books was my main form of stress relief in college, in my pre-quilting days.)

2. I learned a new technique that can be applied in many ways in future art quilts.

3. I got more comfortable with free-form thread sketching, contouring, and so forth.

4. I realized I'm actually not too bad at shading and drawing. Still no Van Gogh, but hey, good enough for horseshoes!

5. Lola Jenkins is a very artistic person and I enjoyed hearing her tips and suggestions for tools, techniques, and different ways to achieve results. Please note that the description of my approach above is inspired by her class but doesn't follow it exactly. You really should check out her class to see how she does things. I have a few take-away ideas that I can easily see myself putting into practice in other projects even if I didn't use them here.

The Basics:

  • 11 lessons, ranging from about 6 minutes to 35 minutes
  • She addresses choosing materials, supplies and resources, how to set up your sewing machine, etc, and then has one full lesson on finding copyright-free art with some very helpful ideas.
  • The next lessons are about turning a photo or image into something you can trace on fabric, adding other elements to the design, transferring the designs onto fabric, creating your quilt sandwich, stitching it out, coloring (over two lessons, with specific tips about eyes, lips, and shading), and final steps to set the color. The last lesson is a gallery of her own work which gives plenty of inspiration!

I really enjoyed this class. Two thumbs up! 

One more time, that's Thread Art with Lola Jenkins. Get out your colored pencils and get ready to have fun!

(Transparency statement: Clicking on Craftsy links in this post helps support this blog and podcast. Thanks!)


Gift Project Complete

A friend commissioned me to make a gift for her daughter who graduated from high school a few weeks ago. Yes, "graduate-d." I missed the deadline a bit. But still, she hasn't started college yet so it's still good. Isn't that in the etiquette books somewhere?

In any case, it took me a long time to decide what to do. When I'd asked my friend whether she wanted me to hand-dye something or quilt something, she said, "Whatever you want to do!" So, as it turned out, I did both. This projects is done on my hand-dyed fabrics, and its quilted. To within an inch of its life, actually.

I decided to do a word quilt. I chose a Scripture that felt to me like it fit her daughter, who is a tremendous vocalist, planning on continuing music in college, and whose faith is very central to her life. Since I didn't have it in me to do a lot of words, I just cited the verse. I thought it might be a little intuitive, anyway, since it'll make people have to go look it up. I'm a teacher at heart, I guess. That's my story and I'm sticking to it.

I started out by using a new product: Sticky Fabri-Solvy.

I. Love. This. Stuff.

This photo is from my test sample--I kicked up the contrast in the photo so you could see it well enough. You can run Sticky Fabri-Solvy right through your printer. So after I designed my lettering in some software or another, I just printed it right off on the stabilizer. I didn't have to reverse it or anything, because it has a paper backing that I peeled off and it adhered to the right side of my fabric. I then stitched around the design, and soaked  the stabilizer off the fabric. Easy Peasy.

I decided to do it that way after my chalk-stencil method was a big fat fail (the chalk wouldn't stay in place long enough for serious stitching); and this was just so much faster. And, to be honest, I wanted to play with the stabilizer to see how it worked. The test sample worked beautifully, so I went right to work on the real thing. After I soaked the stabilizer off, I put my quilt sandwich together and then just outline-stitched the lettering again. That also gave the letters two thicknesses of thread/outline, which helped set it off even more.

I did have a bit of a glitch at that point.

I'd practiced on a test sandwich to set my tension and everything--it was all working beautifully.

I started stitching away on the real thing and it all felt like it was going swimmingly. I'd flipped up the back and checked after the first half inch of stitches or so, and it looked fine.

I should've paid more attention to how the bobbin was sounding. Something got unhooked somewhere and chaos was breaking loose on the back. I didn't see it until I came to the end of the word. Out came my new electric seam ripper. And then the Havel. And then my traditional seam ripper. Eventually, between the three of them, I did get it all undone. (Each seam ripper has its special gifts!)

That being said, that was really the only major snafu in the whole project. Everything else went pretty well, given how many new-to-me techniques I was throwing in this thing.

Free-motion feathers, using techniques I learned from Ann Petersen.

Background quilting circles and straight lines--the straight lines particularly being a design thought I got from Cindy Needham.

Shiva Paint stick highlights--it's been awhile since I got to play with my paint sticks and I haven't used them on a quilt like this ever.

Metallic thread--which I haven't used in probably over 10 years.

And bling. I've never blinged before. What a hoot.

And so...the end result. (Drum roll please.....)

Psalm 98 quilt complete. Approx 14'x16".

Psalm 98 quilt complete. Approx 14'x16".

And, because it's hard to see the sparkle in that lighting...

(Actually, the picture above is also the result of what I've been learning in my Craftsy photography class. To try to get the sparkle to show, I worked with some settings I recently learned that I have on this camera. But more about that class in a different blog post.)

Can you see the metallic thread outlining the feathers in this picture?

It's subtle, but it's there.

I'll probably talk more about this in my podcast episode this week (which, as of this writing, hasn't been recorded yet). I'll talk about using that metallic thread, especially, and some other slight hiccups along the way, and what I did about them.

So, there it is. Of course, as I look at it, I see all the things I'd have liked to have done better. But it's done, and it's not bad, and I think both the mom and daughter will enjoy it. And I had fun doing new stuff. Though, admittedly, it'll be awhile before I'm ready to sit down and stitch little bitty circles and very-close-together lines again.


Postcard Swap Reveal (and a Little More about Cindy Needham)

If you're looking for the original resolutions check-in blog post with the Rafflecopter giveaway and Linky party, click here.

...but life moves on...

Thanks so much, once again, to Sandi of Quilt Cabana Corner for hosting another seasonal postcard swap! This time around the theme was summer, and we were supposed to get them to our partners by June 21st, the first day of summer. Oops. Well, if I got my postcard *finished* on the first day of summer, that still counts, right? I got it in the mail on Monday, the 23rd, so I wasn't too far off. Sorry, partner!

My partner for this swap was @eileensideways (aka Sue). She sent me her postcard way in advance because she's in the midst of a move and was afraid she'd lose her supplies in boxes. Here's the card she sent me.

It definitely took me back to childhoods at our summer cottage on Lake Ontario. The bay our cottage was on was always filled with sailboats. We even had sailboats of our own periodically, although of the little "sunfish" variety, with all the requisite adventures and misadventures ensuing. This postcard breathes summer to me--thanks, Sue!

Great fabric choices, by the way--and I love the detail of the star on the sail. Altogether, a very fun postcard that I love having hanging on my wall!

For the postcard I was to make, I'd known immediately what design I was going to use as soon as I signed up for the swap. It just took me awhile to get around to doing it. Ain't that always the case?

If you've been following my blog for awhile, you might recall Chicken Butt. I ran a challenge about three years ago to do something based on children's artwork, using fabrics entirely from your stash. Chicken Butt is based on an art class project of my daughter's when she was in high school (original drawing pictured at left). Here's the blog with the backstory.


And here's the finished product. I just love this guy--he makes me grin every time I see him. Consequently, I've been wanting to do a series about the Adventures of Chicken Butt. And so, the summer postcard gave me the perfect opportunity.


Introducing: "Chicken Butt Takes a Dive."

It's all fusible applique, all with my own hand-dyes, except Chicken Butt himself, who was done with a tone-on-tone white I had in my scrap bin. I'd debated whether to do his feet and cockscomb as threadpainting, but ultimately ended up doing them as little-bitty-put-them-on-with-a-tweezer fused pieces because I didn't have a thread the right color. Really. Tweezers.

I made some quilting design choices based on Cindy Needham's Design It, Quilt It class on Craftsy (see my review here).  I'd outline-stitched Chicken Butt and the clouds, but he still wasn't standing out enough. Recalling what Cindy Needham had said about "sunshine and shadows", I used her scribble stitch throughout the sky to really make everything else pop. It worked beautifully. Then my swirls in the waves didn't turn out quite as well as I'd hoped, so again recalling Needham's lessons ("If you have an awkward moment, fill it with a distraction") I went back in and just did a few more whonked swirls and, overall, it doesn't look half bad. I did a fused binding again, a la Laura Wasilowski's Hand-Stitched Collage Quilts class on Craftsy. I find fused bindings the easiest for me to do on postcards. easy, stable, and a whole lot faster than satin-stitching those edges.

And so, Summer Postcard Swap complete. Thanks, Sandi--and thanks, Sue!

My daughter got a kick out of seeing how her past art lives on. I may have to do a larger version of Chicken Butt Takes a Dive to hang on my wall next to the original Chicken Butt.

Which begs the question: How many more times can I manage to say Chicken Butt in one blog post? Chicken butt chicken butt chicken butt...


Hand-Dyed Results--A Little More Experimentation

I did some more ice-dyeing last weekend; I'm not entirely thrilled with some of the results but that's the serendipity of this method--you never entirely know what you're going to get. Most times, it's a wonderful surprise and you get funky-fun things you could've never managed if you'd tried to control what was going on. Once in awhile, though, you get the other kind of funky. The not-so-good kind. That being said, beauty is the in eye of the beholder so who knows?

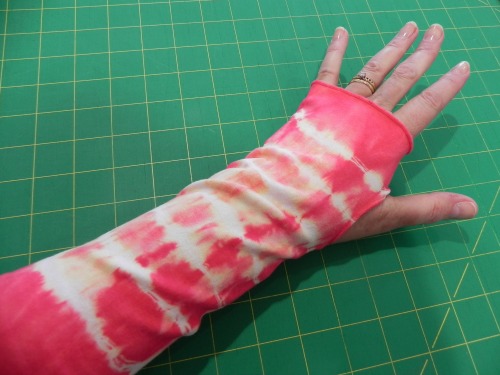
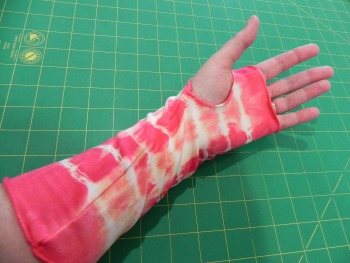
Some background: I've been testing out different types of dyeable clothing and accessories to see what I might want to continue working with. So far, I've not landed on anything other than scarves--and possibly the wrist-wrist warmers--that I've loved. Well, other than baby clothes. Those are just dang cute. In any case, you'll see here some more of my testing.

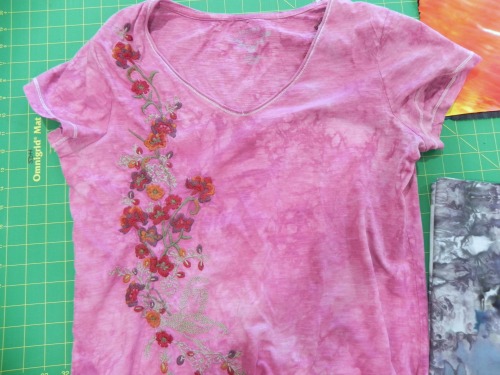
First up: A tshirt done with Fuschia, Grape, and Boysenberry dyes.

I ended up piling too much ice on this one in an attempt to cover all the pieces I was doing in this one dye bath. The items were therefore soaking in dyed ice-melt and blurred some of the normal ice-dyed effect. I'm also not keen on the way the t-shirt fits, although it's wearable. So, the results are nice enough but nothing to dance a jig over.

Twist-shirt front

Twist-shirt front

Next up, another style of t-shirt. This one has a twist in the center. I actually own a few store-bought shirts in this style, so I was jazzed when I saw a dyeable version on Dharma's website. However, I'm also not keen on the way this one fits--I ordered it in the larger size I used to wear rather than the size I'm wearing now, knowing that typically dyeables run a bit small. And yet, it's still tighter than I like. I knew that before I dyed it so I was more willing to try out a new color combination as well as a new fabric-manipulation technique on the shirt as I had nothing to lose--I wouldn't be wearing it in public anyway. (BTW, I've now ordered one in a size larger than I've ever worn in my life. We'll see if that one works!)

Twist-front back--the spiral is a little more evident here, as is the migrated purple dye

Twist-front back--the spiral is a little more evident here, as is the migrated purple dye

This one was done with Antique Gold and Old Rose, and I spiraled the shirt before putting it under the ice to echo the twist on the front. I think I sort of like the color results, although it's not a combination I can wear myself--not particularly flattering for me. Yellows are generally not my friend. I do like the spiral effect, though you can't see it as well on the shirt as you can on another example coming up. What I'm a little annoyed at with this one, though, is that I followed a tutorial on a hand-dyer's blog about using Retayne and she swore she dumps all her colors in one bucket and has never had a problem. I trusted her. And yet, some of the purple migrated onto this shirt. I'll be going back to separating my colors. Not blaming the blog--there are just too many variables.

And then, just for kicks n' giggles, I threw in a few scrunchies.

They're not exciting, though not bad (although the gold/rose is a little more muddy on these). It's not worth doing ice-dye on them because there's not enough surface area to really see that effect. So if I do more of these in the future I'll use different techniques.

And then there was the fabric.

First, one that was in the fuschia/boysenberry/grape container--I like this color combo. I'll probably use it again in the future.

However, again, too much ice = too much water = muted ice-dye effect. Nice, but not exciting. Still n' all, I could see this being a background for something or getting cut up into smaller pieces for a scrappy-project or...whatevs. It's nice enough.

Then there's a more standard and striking ice-dye. I tweaked up my current-fave combo of Teal and Black (629? Can't remember which I used) by adding in some Intense Blue. I very much like that combination. This is one that'll sit on my cutting table for awhile so I can play "Rorshach Test" with it: IOW, "What does this design look like to you?"

And, finally, I spiraled this fat quarter the same way I did the twist-front t-shirt, but in this sample you can really see the spiral.

Again, this is the Antique Gold and Old Rose combination. I think I could like it as long as I'm not wearing it. It's kind of weird, but sometimes weird can be good. (It looks a hair more green in this picture than in real life--lighting is such a difficult thing!)

I also did a few more onesies as a gift for a new grandma in our guild. (I'm posting this after she'll get the gift so it should be okay!) The baby is a boy so I went for the gender-stereotyped-darker colors. It was fun playing around with mixing my dyes to get colors I liked. I used Ann Johnston's trick of having a piece of fabric that you drip a little of your dye combination onto to see what color you're making and what you might want to add to it. Helpful, plus I'm developing quite a fun piece of fabric with multi-colored splatters on it!

I photo-edited a big black box over the one that's personalized. You can see the last letter because last time I posted photos of a onesie I'd personalized without showing the actual personalization for privacy reasons, I got a couple of requests to see how the lettering worked.

And here's a closeup of the lettering. This is done with a stencil and Color Magnet. I've learned that Color Magnet works best with diluted versions of the dye color; that way, it's more obvious where the Color Magnet has drawn more dye. If the dye is too saturated, the Color Magnet disappears altogether.

The stencil has sort of a "Disney's Animal Kingdom" feel to the font. If I'm going to keep personalizing stuff, I should probably buy more lettering stencils. But it's kind of a pain and time-consuming to do so I don't see a ton of it happening in my future.

I had a few other results too, but can't post them at the moment for reasons best left unexplained. Until later. I've already got ideas for what I want to work on next in my dye studio, but it's likely to be another couple of weeks before I can get back down to the basement--which means I may completely change my mind about what happens once I'm there!

Birthdays all around!

birthdaytreat.jpg

Happy birthday to Bubba Jr, @ltdermdvm's Golden who's turning 14 today! Sammy sends birthday greetings and had a piece of birthday Milkbone in his honor. (It's blurry because although he posed for me he was a bit impatient to get at that treat! Princess Doggie's hindquarters in the background show her wagging tail as she quickly downed her birthday Milkbone. She's highly suspicious of cameras as a rule--no posing for her.)

Meanwhile, it's Craftsy's birthday too! They're having a big sale this weekend, through Sunday, May 11th, ad midnight Mountain Time. The banner on the right sidebar will take you to the sale, or you can just click here. Selected classes are up to 50% off. Yeah, I'll probably be checking it out myself, sigh. (Usual transparency statement: using Craftsy links on this page helps support this blog and podcast. Thanks!)

And, what am I doing for Mother's Day? Also a birthday of sorts--after all, it's a couple of births that got me the name "mother," right? Well, the day itself is still a bit under construction. I'm waiting for the first-born to let us know what hours he's working so we can plan around him. Meanwhile, yesterday the second-born came home from college for the summer, and she brought her bad cold with her. She ignored my pleas to pack those cold germs in a box and leave them there. I'm just hoping that cold doesn't turn out to be her Mother's Day gift to me.

I'm still recovering from a couple of back-to-back busy weeks with work, but I'm awake enough today to be decently productive. I got groceries this morning. Woo. Better than I did last weekend!

icedye51014.jpg

I also got this in the works.

Indeed, it's about 70-something degrees outside and our lilacs are a few days away from blooming, and yet I'm still ice-dyeing. I can't help myself. This batch is using some color combos I've not done before, and the one in the center is my new Antique Gold dye, so I'm anxious to see how that plays with the ice--as well as how it works with the Old Rose dye I combined it with. The one in front is Fushchia, Grape, and Boysenberry, and the one in back is Teal, Intense Blue, and a little Black (629, I think, but might be 628, not sure which one I grabbed off the shelf). I've got some fat quarters in each as well as some clothing items. Should be a fun rinse-out in the morning!

Groceries. Check. Ice-dye prepped. Check. Chicken breasts in marinade for grilling tonight. Check. Shower. Check. Lunch. Check.

Hmmm. I think it's time for some Scrapitude binding!

A Finish-- "A Walk in the Woods"

As I talked about in my most recent couple of episodes (154 and 155), I had some homework to do for my design study group around "luminosity." Luminosity, if you're not familiar with it, is making it look like there's an internal source of light in your quilt, as if it's glowing. This is a tricky thing to achieve--it all has to do with value and placement of colors next to one another and such. Just having contrast doesn't necessarily equal luminosity. (This is one of my favorite examples of a quilt with luminosity.)

In any case, I saw this as an opportunity to use one of my favorite hand-dyed pieces from last summer. This is one of several that I refer to as my "tapestry hand-dyeds," because they're a half-yard of fabric, measuring roughly 18" by 42" or thereabouts, and turned out such that I don't see myself ever wanting to cut them into smaller pieces; therefore, I imagine them becoming backdrops for some sort of a long, rectangular, "tapestry-like" wallhanging.

And so, I introduce you to "A Walk in the Woods."

Walk in the Woods complete

Walk in the Woods complete

I wanted the hand-dyed fabric to be the stand-out here, so I kept my quilting and choice of thread more subtle. As it turned out, perhaps I went a little too subtle: When it's on the wall and you stand more than about five feet away, you almost can't see that it's been quilted at all. Oh well, I'm still quite pleased with the way it turned out.

Quilting in progress

Quilting in progress

The above was a picture I took of my quilting in progress. I'm still learning my FMQ and decided to just haul off and have at this one, trying to stay loose and happy while I was doing it. It actually turned out pretty well. A few places got a bit whonky, but again, can't see it from five feet away anyway!

Detail of bottom

Detail of bottom

Detail of quilting around the middle-ish

Detail of quilting around the middle-ish

Detail of quilting at top

Detail of quilting at top

I also did a little perspective, though not religiously so, on the leaves--the ones at the bottom are, for the most part, larger, and the ones at the top are, for the most part, smaller. I tried to make it all one continuous vine but I did end up having two different places, if I recall, that I had to end and start over somewhere else because I worked my way into a corner and would have had to backtrack over my own lines further than I really wanted to. But you can't see it, so let's let that be our own little secret, shall we?

Faced binding detail

Faced binding detail

This was the first time I did a faced binding. I like it. I want to do it again. And again. And maybe even again. Thanks to Susan Brubaker Knapp for her tutorial!

Oh, and I got all those purple scarves done.

(The ones on the bottom of the right-hand pile were my first three test scarves.)

Sprouting Purple Scarves

I may not have crocuses, but I've got me some scarves!

Purple is the signature color of my organization; consequently, I spend a lot of time dyeing things purple for work-related purposes. I'm doing some scarves that we'll be using for a special event coming up, so I started the process this weekend.

First things first: I have to decide, "Which purple?" I own three variants of purple dye. Two are new to me, the other I've used a few times but it behaves differently depending on the fabric. So this weekend I dyed three scarves, one of each purple, so I could compare to see which one comes closest to our signature color.

Left to right: Boysenberry (MX 802), Grape (MX 801), Reddish Purple (MX 804)

Left to right: Boysenberry (MX 802), Grape (MX 801), Reddish Purple (MX 804)

Reddish Purple (804)--on the far right--is the one I've been using for the last year. Unfortunately, when I mixed up my dye concentrates I realized I was nearly out of that one, so it's a more dilute version than the others. It would be more obviously red-purple if it were full strength. However, I think I like the Grape (801) well enough; it's the more blue-purple scarf in the center. After dropping a bundle at Lancaster I'm trying to hold off buying any more dye for awhile, so I'm going to hold off replacing that 804 and work with the 801 instead for the time being.

Boysenberry is dang pretty, but not even in the ballpark of signature so the scarf will find other uses. And I'll have fun using the color in future dye projects!

So, now that I know what color I'm going to use, the next decision I have to make is: How fancy do I want to get? Stay tuned...


Ice-Dyed Neutrals Report

I only had a little time for fabric arts this week, so I stuck a couple more half yards in an ice-dye bath with the neutrals again. I just love seeing how these colors break and mix and meld.

To begin with, though, this is the first time I've had snow dyes and ice dyes side-by-side (especially using the same dyes) so I can see the difference in results. They're both very nice, so it just depends on what you're looking for.

Here is my original snow-dye from last week (this may be a better picture than the one used for the original post because I was trying to conserve space due to the volume of photos!):


Snow-dye with nuetrals

Snow-dye with nuetrals

Other than the fold lines--sorry--you can see that the design and colors are more muted, more "swooshy" than crystalline. And because of the way I had manipulated the fabric and put the dye on, it ended up with a very nice gradation (not intentional, but a wonderful surprise!) The effect reminds me of photos from nebula in space and such.

And here are the two ice-dyeds using the same colors this week:

Ice-dye neutrals version 1

Ice-dye neutrals version 1

Ice-dyed neutrals version 2

Ice-dyed neutrals version 2

The first one I just sort of scrunched and mooshed up before putting the ice on; the second one I did a little more of a pleat, though not a strong one, and then circled it around a bit to get it to fit under the ice. That creates that sort of...ummm...spinal effect, if that's not too creepy a description.

The four colors used: Stormy Grey (MX 6160), Old Rose (MX 5220), Ecru (MX 5223), and Camel (MX 5181). (Names are Prochem.)

I have a friend who's already expressed interest in buying one of these though I'm waiting to confirm. I just have to figure out some details!

By the way, Craftsy is having a Spring Flash Sale this weekend--selected classes up to 50% off through midnight Mountain Time Sunday! (Using this link helps to support this podcast and blog--thanks!)

Talkin' 'bout some hand-dyes, oh yeah

Yes, indeedy, the mad quilt scientist (who even has her own hashtag, 'cause she's just that cool) has been busy in the basement again.

The stationary tub has been cured. Oh, my, but water slurping down a drain as it should is such a lovely sound.

To catch up on dye progress since my last post on the subject...get ready for a boatload of pictures! (Some of the pics are singles, others are galleries. The galleries are set to autoplay but also have controls so you can move through them at your own pace. If you're getting this by email and the galleries don't work, you may have to view it on the website.)

This time I re-did the pastel version of the gradations from the Frieda Anderson class in Lancaster (and her book). The Lancaster ones are on the right, the new ones are on the left.

Just as in the first gradations re-do, most are about the same but a couple of colors vary pretty significantly. And, just as in the first gradations re-do, there are oh so many possible reasons why.

I do think I didn't dilute my concentrate quite as much as we must have in Lancaster, since mine aren't quite as pastel-y. But I'm quite okay with that.

Still n' all, I like what I ended up with, so all's fair in the world of hand-dyeing.


Then I did a different kind of gradation--gradation all on one piece of fabric.

I'd taken a picture of these in their dye baths so you could see the before-n-afters, but can't find the picture now. Sorry about that. I did sort of a loose pleat on one and a scrunch on the other, folded them in the middle to get them to fit the container, and laid them lengthwise. Then I poured three different colored dyes on them in sections--one in the reverse order of the other. These were still the pastel (diluted) versions of the dye concentrates--turquoise, fuschia, and yellow, which is why they look a little washed out. They're half-yard lengths, if you're curious. Don't even ask what I'll do with these. No idea, but that's not really the point for me!

And here's a gallery of other random bits I dyed trying to use up the rest of this set of dye concentrates so I could move on. I included the picture of one in the dye bath--it's a great example of how some colors are quicker to move into available space than others. That turquoise, he's an aggressive little fella. "Me first! Me first!"

And there was evening and there was morning, the second day. (Well, okay, a few "second days" later.)

This past weekend, I finally got myself over to Lowes to ask if they had the equivalent of a remnant bin of PVC pipes. I only needed sections about 12" or so long, and didn't want to ask them to cut that length off several different widths. I was hoping they'd have a scrap bin or something. Some of you may already have your eyebrows raised. "Has this woman never bought PVC pipe before?" Nope. I've now learned that home stores routinely carry 2-foot lengths of certain widths to be used as couplings or whatever. I am now the proud owner of four PVC pipe tubes ranging in diameter from 1 1/2" to 4". Whee! I was finally ready to do some shibori!

Shibori has all sorts of facets to it (I own this book for future playing), but what most people are familiar with is wrapping fabric around a cylinder and either tying it tightly with string or using rubber bands. The wrapped fabric then gets shoved down to the bottom of the cylinder creating a number of folds. When it's dyed, the folds create visual texture.

I was using Mixing Red, Lemon Yellow, and Deep Navy Blue on this one. The navy blue is a new dye for me so I wasn't sure how it would behave. Turns out, it's just as aggressive, if not more so, than the turquoise.

Here's a photo of the shibori dye bath.

shibori.jpg

And that turned into these...

I did one with just the navy blue because I wanted sort of an indigo effect. However, due to it's aggressive nature, the blue paid very little attention to the resist of the rubber bands so the resulting shibori pattern is very subtle. I like it, but next time I'll dilute the dye more so perhaps it becomes a little more humble in its approach.

And then I went back to my ice-dyes. As I've mentioned before, ice-dyeing is the best way to break a compound color to see all the colors that go into making it. I decided to ice-dye my two black dyes (628 and 629) side-by-side to see if, by breaking down the colors, I could see a difference.

Here's 628.

Kind of fun to see all the blue, yellow, and a bit of red appear here and there!

And here's 629.

According to ProChem's website, 628 is more of a blue-ish black, and 629 has more of a green cast to it. They were described to me as one being a bit warmer and the other a bit cooler. I've yet to use either in a circumstance in which it seemed to make a difference, but I haven't really pushed the envelope yet either.

Going back in time a little bit: The weekend before last we had a spring snowstorm. Not altogether unusual around here, though the 11" in my backyard the next morning was pushing it, in my opinion. I decided to find the silver lining and did some snow dyeing.

Yummy. Love this one. I used Stormy Grey, Old Rose, Camel, and Ecru (ProChem names) because I thought these neutrals would break in interesting ways. I was right!

Next up, turquoise and fuschia. This one didn't have as interesting a result because (1) turquoise and fushchia are pure colors so nothing breaks and (2) they were the leftover pastel versions of the dye concentrates I'd mixed, and with the snow, they just became even more dilute. Still, pretty enough...

And, for the last bit of snow-dyeing, I went back to my standard favorite mix: teal and purple. I just can't stay away from these--different results every time but always gorgeous!

And the last little gallery--all the other bits I tossed into dye baths. Some more yellows since I'm working on "luminosity" for my design study group (although after this I found something else that's just PERFECT to use for that homework assignment...but I'll keep that under my hat until later); a tshirt of mine that had gotten stained so I tossed it into a dyebath of colors I had handy, not overly worrying about whether the color would work with the embroidery; and my first test run of wrist warmers. Which I love and have been wearing for the last two days, so I'll definitely be making more of those!


A Finish! Craftsy Class Review: Stupendous Stitching

I finally finished another Craftsy class, and this one has been a l-o-n-g time in process. I first started working on this sometime around January 2013, made a little progress, hit a stopper, and subsequently let it languish until sometime around mid-January of this year. That wasn't because it was difficult, or boring, or something I wasn't enjoying; it was pure "Dang, I can't finish this until I..." and then getting distracted before I completed the "until I..." portion.

But I'm done! Woot woot! And so, I can now officially post my review of...

Carol Ann Waugh's "Stupendous Stitching" class on Craftsy

I did have a whole lot of fun with this class!

Well, that is, I had fun once I finished this.

The first part of the class is making a "Stitch Bible." Carol Ann suggests starting out by creating a record of every stitch your machine can make. You start stitching each stitch in the default settings, then you make it wider, then longer. As she points out, some designs actually look like they're completely different stitches once you start monkeying with the settings. This was an extraordinarily helpful project--as she comments in this lesson, we probably have boatloads of stitches available to us on our machines that we've never used. Ahem. Yep. Now I've always got a quick reference. (And yes, they do look quite different stitched out for realsies than they do in the little diagram on my machine, so there's that, as well.) You can tell I didn't worry about having matching pages--I just used scrap fabrics and scrap threads so it's not a very pretty Stitch Bible. But I wasn't going for pretty. I was going for functional...and done.

Yes, this was the step that hitched me up and made this class take me over a year to finish. I made the first page or two, ran out of the stiff stabilizer I was using, and took about a year to get back to buying the supplies and creating myself enough pages to finish this. Over Christmas break this year, I got the remaining pages prepped so I could blast through and get the Stitch Bible complete. Boy, was that tedious work! Useful now that it's done, but mind-numbing to complete.

In this detail photo you can see the copious notes I took, ahem. Since I was generally using about the same settings every time, I didn't bother writing them down. It's enough for me to see the difference in stitch.

This was before I had an appropriately-sized grommet-maker. So I stabbed a hole in the corners with very sharp, pointy scissors. At that point, stabbing the pages over and over again with a sharp object was a bit therapeutic. This really was a tedious endeavor.

Ah, but once it was done, on to the fun stuff!

Carol Ann spends an entire lesson on how to choose a background for the Stupendous Stitching project. She does a great job showing choices that would work well and others that wouldn't work so well, and explaining why. It took me some deliberating to settle on which of my hand-dyes would work best for the actual class project. I needed something interesting, but not too busy.

This was the winner. I thought the sort of circular "blasts" of color might give me some design inspiration as I went. (It looks a little more vibrant/busy in this photo than in real life. I think you'll see that better in the finished reveal.)

The first step is couching. You couch a few lines on the project that sort of lay the foundation for everything that comes next. I ended up buying a special couching (piping) foot as the foot my machine came with didn't have a deep enough groove for the couching I was doing. This is the "Pearls and Piping" foot--I believe it's the one Carol Ann recommends in the class. I love it. It's a great foot. The one trick is remembering to move the little plastic piece that sits on the bar where it latches onto the shank--that little plastic piece adjusts the placement of the foot in relationship to your needle, which changes where the needle hits in relationship to what you're couching. Got it? This caught me up a couple of times--I'd get started and take a few stitches, then realize I'd not adjusted the little plastic piece. Still n' all, a great foot.

I had a blast using some great sari ribbons and sari yarns--ribbons/yarns created from scraps of old Indian saris. Beautiful stuff, bought a couple of packages of them two or three years ago, never knew how to use them. Wow, did I have fun! Well, except that the sari ribbons had a lot of fraying along the edges that eventually caused a bit of a mangled rats nest under the needle.

I call shenanigans.

Fortunately, nothing broke, and after 10 minutes with a very sharp pair of snips, tweezers, and a quick vacuum with my mini-attachments, we were back in business.

I used three large sari ribbon pieces and one narrower sari yarn. They added great color and texture, but the three ribbon pieces were a bit visually overwhelming. I sent @knittyAJ (AJ of The Quilting Pot podcast and I Knit N Quilt 2 blog) a quick email, since she'd done this class last year at the same time I started, to get her suggestion. She suggested I get over myself. Well, okay, she said it a whole lot nicer than that and it was one of the options I'd said I was considering in the first place, so I agreed. Thanks for the "call a friend" lifeline, AJ! Very helpful. I decided to leave it until much further in the process to see if doing everything else would soften the impact.

The next step is using your decorative stitches. Here I got to play with a whole lot of gorgeous threads I've collected over the years and, again, never really knew what to do with. (This was just what I started with--I added a lot more later!)

You do more lines with decorative stitches, and then you do some hand-stitching as well.

I had a whole lot of fun trying out some new stitches and getting ideas from the Creative Stitching book by Sue Spargo that I reviewed on a podcast episode awhile back. I got pretty good at French knots and lazy daisies, although my daisies were a bit hodge-podgey in size and petal direction. I choose to call it whimsical and move on.

Here's another example of my couching and some hand stitching.

In this one, you can see my ultimate solution for those overwhelming sari ribbons. When I was doing my hand-stitching, I decided I could try hand-couching them down and seeing what happened. I liked it! Nothing had to get ripped out, and now they're all interesting texture without taking over the piece.

(The hand-couched ribbon is on the left. The thicker couching on the right was sari yarn machine-couched. Hand-stitched lazy-daisies, hand-stitched threaded chain on far right.)

And some more detail of decorative stitches, hand-stitching, and couching.

You can see how much fun it is to just cut loose and say, "What can I try to do next??"


By the way, when you take this class (and you know you will!) pay attention when she says to stop the hand stitching a fair amount inside the edge. I didn't. Oops. I cut through some of my knots when I trimmed up the edge and had to go back to hand-tack a couple of my hand-stitching ends back down. Glue may have been involved.

You can also see in this picture the rat-tail binding technique she shows--a new technique for me! I had a little trouble with it here and there because I was using a braided cord that frayed like the dickens when I cut the end, and I also had very thick couching pieces that my zig-zag had to wrestle its way over. I used my Pearls n' Piping foot again for this step and it worked much better than my regular presser foot. Still, I couched over it twice to be sure, and then had to shave off some frayed ends with my snips. It's a nifty technique, though.

So here's all the fun stuff I played with through this process in one shot.

Pretty threads from a variety of sources, hand-dyed perle cotton from Laura Wasilowski's Artfabrik shop (bought in Houston a few years back), sari ribbons and yarns from Meinke Toy (check out their "toy boxes").

And, of course, my hand-dyes. (Also a hand-dyed on the back but there's a reason that hand-dyed piece ended up as backing. It's not exciting enough for a picture, but it's similar colors to the front.)

And here's the final reveal:


Sure, there's some things I'd approach differently if I were to do this again. I enjoyed it, though, and I did learn a lot about my machine, using different materials, and hand-embroidery. I can easily see myself using the techniques I learned from this in other projects, or creating "stupendous stitching fabric" for other uses, as Carol Ann Waugh shows in the final lesson (see "Basics" below). And I could imagine doing a few 9" or 12" blocks with this technique, set into a wall quilt with other blocks. That could be cool. I could see adding beadwork, or including needle felting....Lots of possibilities here!

So, if you're in the mood to play, to use a lot of intriguing materials and methods, and just be foot loose and fancy free for awhile (her mantra through the class is "there are no mistakes!"), this is exactly what the quilt doctor ordered. I do recommend this class. Once that dang Stitch Bible was out of the way, it was just a-whole-lotta-rockin' fun!

Again, that's "Stupendous Stitching" by Carol Ann Waugh. You won't be sorry.

The Basics:

  • 11 lessons, ranging from 5 minutes (the last lesson) to about 30 minutes.
  • After the introduction, the first lesson is a very helpful overview of the kinds of materials you could use; then the next lesson talks about the Stitch Bible. The following lessons then take you step by step through the process, with a ton of helpful tips along the way.
  • Last lesson is about five minutes of ideas for other ways you can use Stupendous Stitching techniques--pillows, purses, shoes, tablet covers, and the like.
  • The downloadable materials were great reference, and one, the "No Mistakes Poster," is worth sticking on the wall in your quilt studio!

(Transparency statement: using the Craftsy links on this blog help support this blog and podcast. Thanks!)