Craftsy Class Review: Bead Embroidery--Beyond the Basics with Myra Wood

Online Machine Embroidery Class

Fair warning: Adding beads to your embroidery is pretty addicting. I'm still working on embroidering my first crazy quilt block because after adding a little bit of beady-bling to the first section I embroidered, I'm suddenly off and running with those beads. Every section now has beads added, and I'm finding myself planning my embroidery designs based on where I'll be able to add the beads. Who knew? (Knitters and crocheters, check out the very end of this post for including beads in those crafts--you too can join in my addiction!)

My sudden increase in using beads meant that I was looking for as many ideas as I could get, so I quickly dove into Bead Embroidery: Beyond the Basics with Myra Wood.

Bead Embroidery: Beyond the Basics is a sequel class to Myra Wood's original Bead Embroidery class which I reviewed a few weeks ago. If you've never used beads before, you could certainly start with this Beyond the Basics class, but I'd recommend starting with her other class first as this one only has a short segment about the basic stitches. In fact, within a few minutes of watching the first lesson, I realized this class would be a "watch only" class for me. Beyond the Basics focuses on pure beadwork, rather than beads added to embroidery projects (as in her first class). This class is about how to do those beautiful, wonderful, over-the-top bead encrusted accessories such as amulets, cuffs, buttons, and boxes (etc.). Those are something I enjoy looking at and can appreciate, but it's not at all on my radar to do at this point. 

My quickly-growing bead stash

My quickly-growing bead stash

However, even if this style of beadwork isn't something I'm doing right now, I don't feel that watching the class was a waste of time. First of all, who knows? Someday I may decide I need a big ol' bead encrusted amulet necklace that's just the right finishing touch on a special outfit. Not something I see happening anytime soon, though. However, mostly, I did pick up some good information about color planning and design that's been useful as I've been doing the mostly-embroidery-with-beads-thrown-in work on my crazy quilt block. Besides, after watching this class, I could see myself adding beaded fringe to the finished crazy quilt since it'll likely be a wall-hanging and, if I do, lesson 7 will come in very handy.

So, dear readers, it's really up to you to decide what your goals are for learning bead embroidery. Do you mostly want to add beads as accents to your embroidery? If so, Bead Embroidery would be the class for you. If, however, in your viewpoint The Bead is the Thing, then you'll want to ratchet up to Bead Embroidery: Beyond the Basics for sure. 

In either case, Myra Wood is an excellent teacher. She takes you step-by-step through each stitch or technique and discusses how to fix it if things go awry. The information about products to use is very helpful, especially when it comes to making cuffs or things you need to be able to bend; she also gives extremely helpful tips about covering edges and gaps that may appear.

The invasion of the beads

The invasion of the beads

This is definitely a technique class rather than a project class. Although she makes several suggestions of projects (a bracelet/cuff, amulets, beaded boxes, fringe on lampshades and such) and gives some verbal direction as to how to do them, there aren't a lot of step-by-steps for them. The only class project that's covered in the downloadable class materials is the bracelet/cuff, and even that is definitely sketchy in the materials. It doesn't really give a pattern or dimensions, just a suggested design. If you choose to do any of the projects she talks about in the class you'll be listening to her verbal directions and figuring a lot of it out on your own.

As always, I highly recommend reading the discussion threads in the class itself. You'll pick up a lot of good information from her responses to other students' questions. Plus, there's some nice eye candy as people post pics of their works in progress. Also, do check out the student project section for the class (which you can do without buying the class)--great inspiration!

The Basics

  • Seven classes, from 18 to 22 minutes each.

  • The first lesson talks about materials and a little about overall design; lessons three and four cover additional design considerations such as focal points and dimension. 

  • Lesson two is about the four basic stitches used in this type of bead work.

  • Lesson 5 gives basic instructions about how to finish off projects such as a beaded cuff and buttons, as well as how to attend to the edges of the beadwork for any project.

  • Lesson 6 is how to do beaded embellishments and appliques, which a very helpful tip about using store bought applique patches as your foundation for the beadwork.

  • Lesson 7 is fringe and beaded accents.

I enjoyed Bead Embroidery: Beyond the Basics with Myra Wood even if I won't be doing this level of beadwork anytime soon. As I said above, there were a lot of good tips and design information in this class that have been useful to me as I've been doing my more embroidery-based beadwork. Certainly, if you're into doing some serious beadwork, I'd highly recommend this class!

P.S. For you knitters out there, did you know you could also play with beads? Check out Laura Nelkin's Knitting with Beads or Betsy Hershberg's Brilliant Knit Beads! Also, if you crochet, there's Amazing Crochet Textures with Drew Emborsky that includes beadwork.

(Disclosure: As a Craftsy affiliate, clicking on Craftsy links in this post help support my podcast and blog. Thank you!)


Two Christmas Finishes

image.jpg

(The #BDSI giveaway is still live until midnight Eastern time tonight, Sunday! Just go back one blog post to enter.)

I can finally post the pics of the pudgy bird garland; I gave my MIL hers a couple of days before Christmas although I snuck it into the house and hung it across her tree while she was occupied with other things, so she didn't see it until a few hours later. She knew it came from me, though, so I got a phone call immediately upon its discovery.

If I were to make this again, I'd do two things differently: 

1. Cut both sides of each bird at the same time rather than separately. No matter how accurately you try to cut, that darn felted wool always scootches so I had to do a lot of trimming once I put the birds together to get them to match. 

2. Rather than inserting the ribbon between the bird halves, I'd just put them all on one side of the ribbon. That way I could've stitched the birds together and, again, kept them evenly matched.  

image.jpg

Here's the second one I ended up making and keeping--if you don't know the backstory, I talked about it a couple of podcast episodes ago.

It does look pretty cute hanging on the mantle. Especially when it's largely covered up by other stuff. I don't like this one as well as the other because I attached it to the ribbon differently and the end result wasn't stellar. Oh well, lesson learned. And that's why my MIL got the other one.  (Note the quilted postcards that are now a permanent part of my Christmas decorations--thanks to a couple of postcard swaps hosted by Sandi of Quilt Cabana Corner podcast.) But no, I didn't make any of those stockings. Someday...

image.jpg


Here's the first of the two framed embroidery projects I did for my daughter to hang in the kitchen of her apartment. The patterns are from Kelly Fletcher Design, or KFNeedlework Design on Etsy--great shop! 

I changed up the colors from her original design because my daughter likes blue,though the colors in the original design were quite nice. 

 
image.jpg

And here's the matching project. Kelly Fletcher actually has several designs revolving around tea that are all quite wonderful. It took me awhile to decide which I wanted to do.

I also bought another of her designs to do just for me when my schedule allows; she has a couple of others that I'm looking at for future projects. I really enjoy her work--great stuff! 

Now I'm only working on one quilty project for someone else--everything else is just for me and for fun! Woo!

Finally--a Finish! Butterflies are Free to Fly

Finally, it's done!

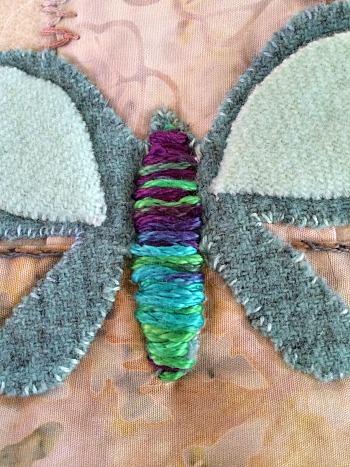
This is my completed project from Sue Spargo's Craftsy class Embroidering Texture and Dimension by Hand. Click here for my review of the class and a couple of pictures of the project in progress.

I'm not loving the final product but that has nothing to do with Sue's design or class--I love her work and the class was great fun. 

No, the issues are all "user error." So--if you take her class or use one of her patterns or books, follow her directions! She knows what of she speaks. I didn't, and it bought me all sorts of trouble.  (I went into more detail on that on my last podcast episode, so check it out if you want to avoid the same difficulties.)

Still n' all, I had a lot of fun for most of the process. I question a couple of my design choices but I did achieve my overall goals, which were (1) learning embroidery, and (2) using as many different types of threads as possible. I even threw some beads on there.

Mostly--yay, it's done!

Meanwhile, you can tell I've been bitten by the embroidery bug hard--here's a picture of more pretty mail I got this week.

Check out www.colourcomplements.com. Hand-dyed embroidery threads tastiness. She's also got a great blog to follow. She ships from Canada, by the way, but it came fast!


 I love these threads. So much so that I couldn't wait to put them to work so I added a bullion rose to my free-form sampler piece I've got working. 

Not too shabby for my first attempt at one of those roses. But that thread-gorgeousness makes anything look good. Yums.

Banned Books Week Apologies and Pretty Mail

Yes, I dropped off the face of the earth. I suppose it was wildly optimistic of me to think I'd get a blog posted during my most busy weeks of 2015. Still, I was with BBW in spirit!  

For those of you who did participate and post photos in the Flickr group, I will be awarding prizes as promised! I'm about to head out of town again but will take care of contacting y'all as soon as my life returns to my (new) normal after October 20th.

Meanwhile, the closest I've gotten to anything fiber-related the last few weeks is the delivery of my MassDrop score of a collection of Aurifil embroidery floss. Pretty mail--FTW. 

image.jpg

image.jpg

I also got some Karen Kay Buckley Perfect Pins from another MassDrop. But they're not as exciting to photograph. Just picture them. Shiny. Skinny. Pointy.  

Product Review: Janome Free Motion Couching Foot

Recently I read an article from Quilting Arts Magazine when I was in a bit of a weak spot, I suppose, and I immediately bit and ordered the foot it spoke of, without reading any reviews of the foot first. Fortunately, I wasn't overly disappointed--I think I've probably used enough of these tools now to know none of them is perfect. The product in question is a free motion couching foot for Janome machines*. Couching is when you hold one larger cord or yarn down on fabric by crossing back and forth over it with a smaller thread--you can do it by hand, of course, or you can do it with a sewing machine by using a zig-zag stitch. I've done it by machine a handful of times; it works okay, but it's hard to do tight or really smooth curves by the standard methods. I thought this FMQ couching foot may be the answer. 

It is, partly. I give it maybe a 6 out of 10--possibly a 7 if I have more practice with it.

I talked about this foot on my podcast episode this week, so here are the photos that may help illustrate some of the drawbacks I talked about.

It comes with two sizes of feet in the package; one with a slightly larger hole and one slightly smaller. It would probably take some trial and error to figure out which foot you need for the yarn/cording you're trying to use.

Here's how you thread it--it was a little tricky to get the yarn up and over from the back of the foot. It involved lots of bending over and squinting, but I persevered.

You have to pay attention to the settings the package tells you to use for your needle. I broke my first needle. Oops. There's a very tight little hole for that needle to zig-zag over the couched thread so you've got to make sure the zig-zag settings are correct. 

The package suggests to allow the cording/yarn that you're couching to "pool" behind the foot. Believe them. It really needs a lot of slack to work right--every time it used up the pool and started feeding right off the little ball of yarn I had, it would start skipping stitches and missing the yarn altogether. This might be tricky if you were couching on a larger project that would limit the amount of space you have for pooling the yarn; I was just doing a small test piece so I didn't have any problem.


As long as you move slowly and work with the limitations, it does actually work. Here's some of what I was able to do. This is all free-hand; I didn't sketch anything out ahead so I was truly, truly free-motioning. 

Normally I'd probably use an invisible or matching thread so the thread wouldn't be visible; I used a beige thread because that's what happened to be in my machine at the time, and this was just a test. Plus, I thought it might be helpful to be able to see the stitches. (The metallic thread you see sticking out is actually part of the yarn.) 

The stitch tended to shred this particular yarn--it would work better with a tighter ply, or a cording. Still, this sort of "foamy" look could be cool if that's what you're going for. Just test any cording you're planning to couch with this foot first to make sure you're getting the results you expect.

The foot works remarkably well, really, given that the concept of couching and the concept of free motion quilting are sort of counter to one another. The only consistent time I had problems (other than when the yarn wasn't pooled loosely enough behind the foot) was when I moved left to right. It missed the yarn just about every time. That's where I'd have to do more experimenting to see if I could figure out a way to counterbalance that.

Anyway, using the free motion couching foot worked better than doing the same thing with a regular foot. It still has weaknesses, but with what I'm doing, they probably aren't huge weaknesses. The long and short of it is, I'm glad I got this foot; I think it'll be fun to play with in the future.

*There are also FMQ couching feet for other brands of machines. Just Google!

Craftsy Class Review: Design It, Stitch It: Hand Embroidery with Jessica Marquez

Surprise, another embroidery class! This time I'm reviewing Design It, Stitch It: Hand Embroidery with Jessica Marquez. Yet another very good, very enjoyable class on embroidery! And yes, even though this is the third embroidery class I've taken in a row from Craftsy, I did still learn a few things.

Of the three, this is the most straight-up embroidery class. Jessica teaches traditional embroidery using traditional methods and traditional types of design. She's working on linen with "normal" embroidery floss; therefore, she doesn't spend a ton of time on talking about supplies: No information about types of needles or types of threads. She just mentions the type of needle she likes (not by name, but by description), and shows the one type of floss (read: DMC embroidery floss). She talks about using different quantities of strands of floss, and demonstrates the best way to separate those strands and then thread your needle. She talks a little bit about hoops, (although not as much information as I got from other classes, but different types of embroidery have slightly different needs), and how to load your fabric into the hoop. 

Based on this class, I picked up a handful of new supplies--some linen for testing and a few different types of image transfer pens/pencils.

Based on this class, I picked up a handful of new supplies--some linen for testing and a few different types of image transfer pens/pencils.

I think, having now done a couple of other classes, the portion of her introductory lesson that was most useful to me was her talking about transferring designs. I picked up information about iron-on transfer pens and water-soluble pens from this lesson. 

The next several lessons go through the different families of stitches, much the same way the other classes did. However, as I said in my review of the crewel embroidery class, every one of these classes had slightly different variations or even a couple of new stitches altogether--so I continually increased my repertoire of stitches with each class. 

My test of Sulky's iron-on transfer pen for my next embroidery project--worked beautifully, though a bit of a thick line.

My test of Sulky's iron-on transfer pen for my next embroidery project--worked beautifully, though a bit of a thick line.

There is a class project if you want something that gives you an easy opportunity to practice all the stitches. It would be extremely easy to put together. However, as per my usual...butterflies on this end. Someday I'll be done with butterflies, and I'll never want to see another one again.

At the end of most of the lessons, she shows examples of how she's used many of the stitches in her own projects. It was good inspiration, thought her style is more traditional than mine. I enjoyed seeing stitches at work in various ways and was generating ideas for where I may use some stitches in my own work.

Caution: the iron-on transfer ink did bleed through my embroidery background fabric onto my ironing board. Oops--didn't see that warning in the instructions until too late. Apparently I was supposed to have protective layer underneath. Unfortun…

Caution: the iron-on transfer ink did bleed through my embroidery background fabric onto my ironing board. Oops--didn't see that warning in the instructions until too late. Apparently I was supposed to have protective layer underneath. Unfortunately, the instructions offer no guidance as to whether this can be fixed!

The final lesson gives some great information about how to create your own patterns from photos or children's artwork or, really, anywhere else you get inspiration. I would have liked to have seen a finished project based on a pattern she did from a photo, though. She does show a finished product based on children's artwork that was pretty cute. That would make a great gift for a mom or grandmom!

Jessica is very easy to listen to. The first lesson felt a bit stiff until she got into the stitching, and then you could almost visibly see her relax and get into a groove. The rest of the lessons were very easy to watch. She clearly loves her embroidery--it's her happy place. I found myself enjoying watching her be so relaxed and happy with it. 

The Basics

  • 8 lessons ranging from 11 to 30 minutes long; most are in the 20-ish minute range.
  • The first lesson talks about supplies, hooping your fabric, fixing mistakes, and doing an iron-on transfer.
  • The second lesson is flat stitches, such as running, back stitch, split stitch, and so forth.
  • The third lesson is looped stitches (chain, fly, lazy daisy, etc.), plus a bit about using a lightbox. 
  • Lesson 4 is knotted stitches, such as the French Knot, coral stitch, boullion stitches, and so forth.
  • Lesson 5 is crossed stitches--here's where I ran into the most new ones compared to other classes: St. George cross stitch, star, herringbone, and leaf stitches all fall into this category.
  • Lesson 6 is fill stitches (satin stitch, long & short, fishbone, Cretan stitch), plus a bit about caring for embroidery.
  • Lesson 7 is all about embroidering on knits (t-shirts, baby clothes, etc.)--how to stabilize the knit, transfer the pattern, use a repeat pattern, using the hoop, and so forth.
  • Lesson 8 is about creating your own patterns.

So, here's the thing: Now that I've taken three of the four classes on hand embroidery in Craftsy (the fourth I'm working on now is on bead embroidery so that's a slightly different category), if I did it again, would I do them in a different order? That all depends on your goal, I guess. If you think you want to do traditional embroidery and want to learn the basics, I think this class, Design It, Stitch It with Jessica Marquez, would be the best place to start. However, me being me, I'm not entirely sure I'd have been as grabbed by embroidery if I'd started here. My design preferences are definitely closer to Sue Spargo's Embroidering Texture & Dimension by Hand than the more traditional style of this class. I think I needed to see the possibilities of Spargo's designs in order for the excitement of embroidery to take hold. I also think I'm more jazzed by the styles depicted in Stitch it with Wool: Crewel Embroidery with Kristin Nicholas. So, for me personally, I think I did the classes in the order I needed to do them in: Be grabbed by design possibilities, then backtrack to build up the technique. If you're more of a technique person, you may want to do the classes in the reverse.

I will admit, however, had I started with  Design It, Stitch It with Jessica Marquez, I might have sped up the pace of becoming confident in embroidery in general, only because I would have seriously reduced the variables. Learning stitches with a single type of thread and needle makes it much easier to focus on the stitch technique. In Sue Spargo's Embroidering Texture & Dimension by Hand, with every new stitch I tried, I was using a different type of thread and needle--so I had a whole lot to get used to and figure out all at once. Nothing like diving into the deep end. Again, just know yourself and what jazzes you and/or makes you most comfortable.

By the way, I did make a run to the needle arts store across town yesterday and picked up a bunch of crewel wool thread, so that class lives on as well. I've got ideas...

(Using Craftsy links in this post and on this site helps support my podcast and blog. Thank you!)

Craftsy Class Review: Stitch It with Wool with Kristin Nicholas

Once again, I loved doing an embroidery class! After doing Sue Spargo's class and still having a boatload of butterflies to finish, I figured the next best bet was Kristin Nicholas' Stitch It with Wool: Crewel Embroidery. I assumed it would be pretty easy to incorporate any new stitches I might encounter into the butterflies.

I wasn't positive what "crewel embroidery" was and how it differed from regular embroidery before I took this class. As I've now learned, the only real difference is the thread. With crewel embroidery, you're embroidering with yarn. There is actual crewel embroidery yarn, but you can also use regular yarn as long as it's a smooth yarn that will glide easily through your fabric. I have a couple of thicker perle cottons that I decided fit the ticket, so I was able to practice one or two of the stitches even though I don't have actual crewel yarn. It's now on my shopping list, though. 

Most people likely associate crewel embroidery with Jacobean design, as crewel was hugely popular in that era. Click here for a great Pinterest collection of Jacobean design in fabrics. However, it doesn't have to be Jacobean to be crewel (which sounds like a song title): You can do any ol' embroidery you want with yarn. Mary Corbet has a nice description of crewel on her website. The thickness of the yarn may dictate a bit what stitches you're able to do, but for the most part, it's the same thing. 

I dig Jacobean design, so that was part of what attracted me to this class--if you do the actual class project, it's got a bit of a Jacobean flair to it. Or maybe it just reads that way to me because they're done in wool. Whatever: they are cute projects, but I chose not to do any of them at this stage: I just wanted to focus on finishing those dang butterflies. I have a couple of books on Jacobean applique that I inherited from my Mom and have never used--I'm now imagining them as embroidery patterns instead of applique patterns. I suspect I may be using those books any time now!

Satin stitch worked in perle cotton

Satin stitch worked in perle cotton

Many of the stitches were the same in this class as in Sue Spargo's, which one would expect; there are certain foundational stitches to embroidery that will show up in any class. It's how those stitches get built upon and layered that can make the difference. That means, of course, that Kirstin Nicholas has few new variations and stitches in this class, even if they were the same stitch "families." Plus, every teacher will have slight variations on technique which are helpful to learn--it gives me more options when trying to figure out which technique I wear most comfortably. Additionally, she gives some tricks to making stitches work as well with wool as with floss, or in terms of helping you learn how to choose the best stitches for success with wool, and so forth.

I enjoyed Kristin Nicholas' teaching style. She's very straightforward and clearly demonstrates each stitch. She also has an excellent lesson at the end about how to keep your skeins of stitching yarn from becoming a tangled mess (something I had to learn the hard way, unfortunately), as well as how to block and steam an embroidery project when it's completed. This wasn't covered at all in Sue Spargo's class, but the difference in materials makes it less necessary for a Spargo-style embroidery project than the Nicholas-style. 

I've only got the one project picture above for this class as now I'm in sort of a free-style mode on the butterflies--just picking and choosing what stitches I want to use from all of the Craftsy classes I've done (another review coming today!), plus a couple of books I've picked up. But the next embroidery project I'm designing in my head is heavily influenced by this class, and I may well end up picking up some crewel wool so I can get a feel for how it works. Unfortunately, most of the yarn scraps I've collected from friends are "weird yarns," or the type that need to be couched rather than used in embroidery.

So, in summary, I did enjoy this class and I feel like it added to my general repertoire and comfort level with embroidery. I don't recommend either Sue Spargo's class or this one higher than another--they have both been great for me!

The Basics

  • 7 classes, ranging from 24 to 34 minutes in length. 
  • The first class discusses supplies, how to begin and end a stitch, how to deal with a mistake (helpful to start right out with that!), some ideas for finishing, and how to transfer a design onto fabric.
  • Lesson 2 is basic stitches and lesson 3 is how to embellish those same stitches to add layers of interest. 
  • Lesson 4 addresses what she calls "fancy stitches," which are largely stitches that involve knots of some kind, such as pistils and bullions.
  • Lesson 5 are fill stitches--I got some good ideas here, although on my butterfly project I don't need much in the way of fill stitches. But they'll likely play into whatever my next project is.
  • Lesson 6 is sculpted stitches, such as Turkey Work and the Spiderweb stitch.
  • Lesson 7 is finishing and inspiration--she has a nice gallery of work, although her examples are all pillows and relatively simple designs. She discusses her focus on beginners which is why I think she only had those examples--they're an "easy bite" of embroidery, so to speak. However, I always like to see what we could aim for as our expertise grows: I'd have enjoyed seeing more complex pieces as well. 

So, my review of Kristin Nicholas' Stitch it with Wool: Crewel Embroidery is definitely two thumbs up. I may actually make a trip this weekend to one of the two places near-ish me that sell crewel wool so I can really go to town!

(Using Craftsy links in this post and on this site help support my podcast and blog: Thank you!)


Craftsy Class Review: Painted Pictorial Quilts with Annette Kennedy

Craftsy

I've been working on Painted Pictorial Quilts with Annette Kennedy for awhile. Let me clarify that: I've been watching Painted Pictorial Quilts with Annette Kennedy for awhile. I've owned this class almost since I first joined Craftsy a couple of years ago. I'd started watching it back then but decided that I needed to have the time and space to commit to the project, so I set it aside. This time around, when I pulled it back into rotation again, I decided not to do the class project but, instead, to watch the lessons and apply techniques to my own projects.

Therefore, there are no pretty pictures of projects-in-progress on this review. That's not to say that the two class projects aren't really wonderful projects--I seriously debated one of them because it's of a calla lily that is gorgeous (and calla lilies are a personal fave). But ultimately, I determined that I didn't need one more project on my list that would distract me from other things already in my head, so I focused instead on watching the lessons and absorbing her techniques.

I had to debate how I was going to approach this review a little bit--I'm not able to be as completely enthusiastic about this class as I have been about most others, but the primary cause of my lesser-enthusiasm has to do with how Craftsy approached the class, not anything to do with the subject or teacher. So let's get that out of the way first...

You can tell this is a very early Craftsy class. They've definitely fine-tuned their methods over the years. To whit: There are some difficult patches in the earlier lessons where the camera was zoomed so close in on Annette's hands doing the painting that it was actually difficult to follow. She encourages you to move the fabric around so you can always be painting from a comfortable angle--great tip, but with a close-in-zoom it actually triggered my motion sickness a bit as the project was constantly flipping back and forth and often moving off-camera, so the camera had to zoom out quickly and then zoom back in to catch up with where she was positioned again. There were several periods in which I just had to close my eyes and wait until things settled down. You don't see that in more recent classes--they've gotten much more professional and polished in their video.

The other thing that Craftsy does much better now is fades/cuts during longer processes. In this class, you are watching every single stroke she makes with the paint brush. Annette does a great job "vamping," or talking while she's painting and occasionally giving additional tips or information, but this class could have been a whole lot tighter without losing any of the content if they'd shown her doing a particular technique for a couple of minutes, then either sped up or cut back in after she'd finished that section. There are a ton of lessons and they're all pretty long--I had to keep sort of gearing myself up to take on another lesson, and I watched most of them at double speed. I think the class could easily have been cut by about a third and we wouldn't have lost any value whatsoever.

It struck me that there are times in this class you are quite literally watching paint dry.

Now, those are my only knocks on this class and, again, it has everything to do with Craftsy getting better at what it does than anything having to do with the content or teacher. So let me get back to the more positive aspects.

Annette Kennedy is an excellent teacher. Earlier lessons talk about how to design a painted project, as well as all the supplies you'll need. She spends one lesson each on how to assemble the two class projects before starting in on the painting, so you pick up some good information about creating applique from photos and how to turn photos/drawings into pattern pieces, and so forth. She explains why different types of strokes are most appropriate for different parts of the painting; she spends a lot of time talking about blending colors and getting different values of a single color. There's a whole lesson devoted to color blending and another devoted to depth and dimension. Even with all the work I've done on color over the last few years, I still picked up some very useful information from these lessons as things work differently in paint than in fabric or other media. 

The class projects really are very cool. If you're looking for some guided projects to help you really have these techniques sink in, I would highly recommend doing the class projects. The class materials include all the patterns and painting guides you need to follow her techniques. As I was watching her paint (and watching, and watching), I did mentally design about five different painted quilts based on what she did. 

Even though I didn't do either of the projects, I did pick up a couple of additional supplies after I had the opportunity to watch how she used them. I've only just recently started playing with fabric paints and hadn't understood what a floating medium was for until I watched this class; I also realized that mixing colors with the brush was far less useful than using a palette knife as she does--so I now own a few inexpensive plastic palette knives, thanks to Joanns. This whole fabric painting thing will go much more smoothly in the future, I think, thanks to Annette Kennedy.

I'm very much looking forward to being able to put Annette's techniques into use in future projects. At the moment, I'm just debating whether my next journal quilt will involve textile paints (and her techniques) or colored pencils (and Lola Jenkins' techniques). Or it may, instead, be straight embroidery based on the crewel wool embroidery class I'm about to finish. So many options, so little time...

The Basics

  • 15 lessons, ranging from 12 1/2 minutes to 1 hour and 8 minutes. Several lessons are around an hour; several others are between 30-45 minutes. Only a small handful are about 15 minutes. You really get a huge volume of material, here.
  • The class materials (9 documents) are several pages long, mostly because of the patterns. There are some helpful reference pages among them.
  • The first lesson spends time on an introduction of Annette Kennedy and of the Craftsy platform, and then she talks a bit about the two class projects.
  • Lessons 2-4 give a nice foundation to what's to come: how to create visual depth, turning photos into designs (you don't need to know how to draw, BTW), and various brush strokes.
  • Lessons 5-7 focus on the calla lily project, which gives you a lot of experience in blending, shading, and creating dimension.
  • Lessons 8 and 9 are on color and depth and dimension, including selecting color schemes, how to achieve different color effects with paint, how to create distance and scale, and so forth.
  • Lessons 10-13 focus on the canyon project; this gives you the opportunity to take what you've learned on the calla lily even further.
  • Lesson 14 is on quilting and finishing, with useful tips about how to emphasize the focus of your project through quilting, and a little bit about painting after quilting as well.
  • Lesson 15 is a "bonus" lesson that describes how to do a sun print collage with fabric paints. If you've never seen how to do this, the lesson will introduce you to a very cool way to create fabric. 

I have sort of a one-thumb-up, one-thumb in the middle on Painted Pictorial Quilts with Annette Kennedy. I want to emphasize, though, that the thumb in the middle would be very much up if Craftsy had done this class using the parameters it has now worked it's way into: in other words, if it had been a bit tightened up and had better camera angles in the earlier lessons. If I only look at content and teacher, it's two thumbs up. 

Progress and Goals--Week of May 3

My goals for this week were to:

  • Make progress on the Annie Unrein bag
  • Complete mug rug for swap
  • Complete three butterflies on Sue Spargo project
  • Make block for friend's quilt

Progress:

Satin stitch with heavier thread--based on new Craftsy embroidery class I'll write about later

Satin stitch with heavier thread--based on new Craftsy embroidery class I'll write about later

  • Annie Unrein bag: This got completely back-burnered this week as I have two time-constrained projects on the docket so I focused completely on those.  
  • Complete mug rug for swap: I haven't completed it yet (sorry, Kerry!) but I've made progress! Unfortunately, what I chose to do is somewhat time-intensive. But I think it'll be fun when it's finished.
  • Complete three butterflies on Sue Spargo project: I'm now using stitches from a different Craftsy class (more on that in a future post), but haven't completed three butterflies yet. Again, those time-constrained projects made everything else take a back seat this week. I'll be bringing this with me on my work trip.
  • Make block for friend's quilt: I'm doing some embroidery on it so it's a long process. I'm writing this post on Saturday and scheduling it to post on Sunday, as I'll be driving most of the day Sunday (see afore-mentioned reference to a work trip). I'm actually hoping to get this block done before I leave; if not, it'll be coming on my trip with me.

Goals for This Week:

This is tricky this week as, when I get back into town from my trip, I'm immediately out two nights in a row, then having family over for dinner the following night. So I really only have next Saturday for any sort of quilting projects, I think. Therefore, my goals for this week revolve primarily around portable projects that I can easily poke away at with 10 minutes here and there. (Read: No Annie Unrein bags on this week's plan!)

  • Get my friend's block done.
  • Make progress on the mug rug. This will be my primary focus on Saturday if I haven't managed to get to it before that. I really want to get it done, Kerry!
  • Complete two butterflies on butterfly project. I knocked it down a butterfly due to my lack of time this week. Still, I think this could be within reach.
  • Complete two Craftsy classes. One is the second embroidery class I mentioned above--a few more stitches and I'll have completed the class, if not the butterfly project; the other class is one I'm just watching to get a feel for techniques, no class project involved. I've only got a couple of lessons left to watch and I'm planning on doing that while I'm in my hotel. I can be embroidering at the same time--way to do the two-birds-one-stone thing!

Craftsy Class Review: Embroidering Texture and Dimension by Hand--with Sue Spargo

Oops. I wanted to get this review done in April. When did it suddenly become May? I think when part of April suddenly became winter again it threw my whole sense of the calendar off. 

If you've been listening to my podcast or following my blog at all in the last few weeks, you'll know that I've just completed a Craftsy class that probably had just as much impact upon me as Jane Dunnewold's The Art of Cloth Dyeing did a couple of years ago. This time it was Embroidering Texture and Dimension by Hand with Sue Spargo. I am off and running with this embroidering thing now! Woo--just watch me go!

I have been a fan of Sue Spargo's designs for years, starting back when I went through my first felted wool stage probably a decade ago or so. I enjoy Spargo's slightly more bright and fun primitive style. She can do the Americana/country thing (popular in the felted wool world), but she also does straight-up funky, which I love. I had bought her Creative Stitching book a year or two ago; it's pricey, but especially after doing this class* it's also become my go-to. Love that book. I'd tried teaching myself some embroidery from books before but there's absolutely no substitute for watching someone do it, so when I saw she had a class on Craftsy, I bit.

I decided to, for once, do the class project. It's been awhile since I've done that, as I usually use techniques on things I've already got going or had already planned to do. But as I looked at her design, I realized it would be a great way to use some of my stash of felted wool that was languishing. Plus, her "project" is more a lot of design suggestions that you can put together any way you want--which suits my "independent cuss" nature. When I started working with her suggestions for building a layered background, I ended up with something I really kind of dig. I went an entirely different colorway than she has (she used brights), based on the wool I already had in my collection. It took me so long to pull fabrics for this that I took some short-cuts on building the background--I fused, rather than needle-turn applique like she does, and later I learned why a standard applique technique would've been far preferable. But that's why we take classes, isn't it? Now I know.

She suggests 15 butterflies for the project, so 15 butterflies I did. I ended up ordering just a little more felted wool for the butterflies because I didn't have quite enough in a color range that really worked together. As a point of interest here, I bought my wool fabrics from Erin Rissberger of Quilting Acres on Etsy. She'd sent me some samples years ago when I interviewed her for the podcast (Episode 45)  and I just love her colors, so I was thrilled to be able to use them in this project.

The butterflies took a long time to put together too, as you layer those as well. I'd approach how I did all that layering very differently next time, so I really should've payed better attention to Sue's advice in the class (and in class discussion). Here's a tip: watch and read before doing! Another note--I also ended up buying her book Creative Texturing to help me make some decisions here. This book walks through the process of fabric selection and layering to create more visual interest on your projects. I'll be referencing that book a lot more in the future too.

Finally, I got to the embroidery. This class walks through several stitches, generally in order of complexity, which often means in order of difficulty. However, I did find stitches in later episodes that were actually easier for me to manage than ones in earlier episodes, so it's not entirely a progressive thing. 

Some stitches I took to like a duck to water. Others took a little more trial-and-error. One was my Waterloo--just couldn't quite get that Rosette Chain stitch down. I'll go back to it again after I've got more experience to see if I can't conquer that darn thing. (She does say it's the hardest one she teaches in the class, so there is that.)

 
And this ain't the half of it...

And this ain't the half of it...

Mostly, I had a ball taking Spargo's advice to heart--play with as many threads as possible! There is so much more to the world of embroidery than DMC embroidery floss and a #8 perle cotton, for as much as both of those are quite nice. Still a fan of the perle cotton, especially hand-dyed types. Yums.

I've used a huge variety of threads in this project so far, and still have more to try. Fair warning: It easily becomes a new addiction. It does also make learning embroidery slightly more complex because threads behave differently and require different needles, so every new stitch I tried was a test of trial-and-error before I finally found the right combination for what I wanted to do. But that's also just practice and experience--after just a few weeks of this I already have a better eye for what types of threads are likely going to give me more immediate (read: stress-free) success for certain stitches. 


I also got into adding beads to my embroidery based on one of her lessons. Another dangerous addiction.

So, can you tell I loved this class? It's definitely two thumbs up! If you're brand new to embroidery (like I was, for the most part), I advise making liberal use of the "30-second repeat" button and changing the speed of the video to go more slowly for certain stitches. (I had to watch the cast-on stitch technique a few times since I'm not a knitter.)

Sue Spargo is an excellent teacher, by the way. I really feel like this class gave me a very firm foundation in embroidery, even if I never took another class again. That being said, I'm now working on my second Craftsy embroidery class, already bought a third, and the fourth is sitting in my wishlist for later. I haven't finished the butterflies yet, so I'm currently using it as the project for these additional embroidery classes--meanwhile, I'm already mentally designing my next embroidery project.

The Basics

  • 7 lessons ranging from about 17 minutes to 30 minutes.
  • The first lesson is about creating the project you'll later be embroidering. I could've done with a little more information here, I think. I suspect the issue is that she's not giving directions for a specific pattern but, rather, making suggestions for things you may want to do; I think, since it was a new technique for me, I'd have preferred seeing her walk through a specific project first, and then talking about how to launch off from that to whatever you wanted to do yourself. In any case, I did figure it out and, of course, you don't have to do a specific class project at all, if you don't want to.
  • The second lesson talks about tools--needles and threads. I found this very helpful the first time, but even more helpful when I went back later after I'd done a lot of embroidery and watched it again. That time I had a better frame of reference for what she was talking about. The second lesson also gives the first couple of stitches--the Pekinese stitch (one of my faves!), and couching.
  • Lesson three is decorative edging stitches, including the fly stitch--which quickly became one of my go-to stitches, crested chain--another great one, and the aforementioned Waterloo stitch, the Rosette chain.
  • Lesson four is dimensional stitches and I had great fun here--bullion knots, drizzle stitches, bullion cast-on stitch, and double cast-on stitch (which I skipped because by then it had taken me so long to circumnavigate a butterfly with bullion knots I wasn't inclined to take on the even-longer-term double cast-on).
  • Lesson five is woven stitches--loved doing the circle with a gorgeous thread on this one.
  • Lesson six is beaded stitches. "Danger, Will Robinson, Danger!" I now have a storage container specifically for the beads that somehow magically appeared in my house after doing this lesson.
  • Lesson 7 is finishing touches, with another couple of slight more extensive stitches, plus a lot of really cool ideas for using embroidery in bindings. Can't wait to get my butterfly project finished so I can revisit this lesson.
  • The class materials are so-so; 6 pages, three of which are templates for the suggested project. There's an extensive supply list that felt overwhelming at first--and you don't actually need all of it to do the project, but you're likely to want all of it and more if you really get into this! The second page gives some hints and tips, which were partially useful.

A long review, I know. But I. Loved. This. Class. Remember, embroidery doesn't need to just be for embroidery projects and crazy quilts. It's easily done as an accent on any quilt or quilted project. I'll definitely be using a lot more of it in my art quilts. If you think you may even vaguely be thinking about adding embroidery to your quilting repertoire, you really need Embroidering Texture and Dimension by Hand with Sue Spargo.

*You don't need the book to do the class, but it was quite helpful to have on hand when I was practicing the stitches she demonstrated.

(Using Craftsy links and banners on this page helps support my podcast and blog. Thank you!)

Thinkin' about It Thursday

This week, I'm thinking... 

  • That I really am loving me some embroidery. 
  • That all those wonderful, funky threads are like candy. 
    • I can't resist. 
    • Give me more. 
  • That adding some beads is a dangerous thing. 
    • Addictive. 
    • Another collection. 
  • How getting fiber art books out of the library can seem like a penny-wise move. 
    • Until I realize I really want to own the book. 
    • Ahem.
  • How nice it was to be able to start playing fetch with Doofus in the backyard this week. 
  • That he and I both need to get into better fetch shape.  
    • Winter was rough on both of us.
  • How I'm sorta looking forward to my work trip next week because I know I can take my embroidery with me. 
    • It's a sickness. 

2015 Quilty Resolutions: April Journal Quilt

Okay, Sandy here, once again cutting myself some slack.

I realized that the prayer flag I've been working on is all one big experiment, so I'm now counting it as April's journal quilt, even though it's not 8"x10" or even, arguably, a quilt. It has two layers, not three, and it's embroidered but not quilted.

Work with me, here.

I present to you my April Journal Quilt project: a prayer flag.

The front is a piece of cotton batting I had experimented on in my dye studio--it was originally a normal cotton batting-cream color; I dyed it black. You can see how mottled it came out. Kinda cool.

I then did some needle felting on it with some dyed wool rovings I'd had in my stash for about a year (not dyed by me). I had fun blending the colors. I've done a little needle-felting here and there but nothing really terribly extensive, so I'm still getting the knack of it. Not hard at all, of course, but now I probably should start actually reading up on it and really figure out what I'm doing.

I also wanted to play around with beading, and I'd picked up some really wonderful beads at a bead shop recently. Dropped a bundle in that bead shop, so you'll be seeing a lot of beads on future projects. That bird (which is likely a swallow given the tail feathers but I'm choosing to call it a peace dove) is one of my faves.

I started working on this prayer flag shortly after I'd received word that I'd been accepted into the D.Min. program (listen to episode 180 if you'd like to hear more about that). At the time I started working on this project, I hadn't really decided what my prayer flag would be about--but then I ran across this great quote from William Shakespeare and it just seemed to completely fit where I am in my life right now: "To unpathed waters, undreamed shores...." Now, to be clear, the quotation is from A Winter's Tale which is one of the few Shakespeare plays I haven't seen or read so I don't know the storyline; it's actually taken from a speech in which the speaker is advising others NOT to go off in unpathed waters but to stay on a more known course. But I choose to rip it heartlessly out of context and cast it in a much more positive light. I'm rather enjoying, for the moment, being in unpathed waters and heading towards undreamed shores.

So there, nyah. It's my prayer flag. I'll do what I want.

I finished it off with a little embroidery accent in the swirls (yummy variegated Razzle thread from Sue Spargo's website), and then put a black felt backing on it and did a blanket stitch around the outside. The stitching isn't nearly as visible in person as it is in this picture; it's largely buried in the felted sections--you really almost can't see it. This picture does demonstrate the great lighting I have in my sewing room, I guess. 

My April Journal Quilt/Prayer Flag is now hanging near my office desk to help me remember this positive attitude when the blood, sweat, and tears start.


2015 Quilty Resolutions: March Journal Quilt

It's been awhile since I've posted about a journal quilt, so let me recap: My 2015 Quilty Resolution was to do one journal quilt per month. In my definition, a journal quilt is a small project (approximately 8"x10") that allows me to experiment with a technique, a theme, a color scheme, or whatever. My main focus is on experimentation (my 2015 word of the year).

January's journal quilt was Sunset in Bagan, in which I was experimenting with netting. 


I had to cut myself some slack on defining February's journal quilt. That whole month was experimentation! I was playing around with a lot of different design experiments based on having taken the art quilt class as well as some other things that caught my creative eye, as it were. So I decided that, rather than getting all legalistic on my own butt about how I was defining "journal quilt," I'd focus on the "quilt project that involved experimentation" concept, and thus declared Neumes my February journal quilt, despite the fact that it's quite a bit bigger than 8"x10".

March was a very busy month, and I wasn't home much. But I was still experimenting. I did Cindy Walter's fabric painting class on Craftsy in March, and was just having all sorts of fun messing around with all the different types of fabric paints and inks I've amassed over the last couple of years. In her class, she showed a way to do an abstract paint design that brought back to mind my favorite way of coloring when I was in high school--basically just sketching random lines and shapes that connect together and then going to town with the color. I used to do a lot of this when I was a kid!

March Journal Quilt--just named "March Journal Quilt"

March Journal Quilt--just named "March Journal Quilt"

So, my nostalgic painting experiment became March's journal quilt. I'm pleased to announce it's finished! It measures out to 8 1/2" x 10" but that was happenstance--I was just using a spare piece of muslin I had on hand to do the painting and it happened to be almost journal quilt size--phew.

Please note that I did this without any concern for color scheme. My goal was simply to use every paint or ink I had on hand (except my Tsukeniko inks--those remain for another day). Thus: almost every one of the sections in this piece is a different paint. I had a couple of spaces more than I had paints on hand so I did repeat a couple, but probably not as many as look repeated in this photo; some were two different types of paint in basically the same color; another one or two were experimenting with a Pearl-X powder mixed into paint (the Pearl-X isn't showing up well on the photo); I started by mixing one of the purples and, when I was unhappy with the result, I went out and bought a pre-mixed purple that I liked much better so I also painted over the original yuckier one, and so forth. Still working on mixing colors--Joen Wolfrom is very helpful on that!

It took me until the end of April to finish this because (1) you have to let the paint dry and (2) you have to let it cure. All that can take 2-3 weeks, depending on how thick a layer of paint you have. Mine's pretty thick in some places. I sat down this past weekend to add the finishing touches: I used invisible thread to quilt along all the lines to make it look a little more like it was pieced or appliqued. For the most part, I was able to stay in the lines but don't look too closely at the yellow. (Besides, the yellow ended up having the stiffest hand when dried so the needle just poked holes right through it.) I just did a fast fused border using the remainder of my hand-dyed black fabric that I'd used for the backing. This will never go in a show so I didn't want to spend much time on binding.

I learned an absolute ton on this project. I've got a much better feel for what different types of paint are good for, things to consider when approaching a paint project, and so forth. 

April's journal quilt may end up being another "cutting myself some slack" project as I'm still doing a lot of experimenting but not specifically on a journal quilt project. I suppose I could say that my journal quilt resolution has already served its purpose: I wanted to do it to encourage myself to experiment. So far, in 2015 I've been doing very little other than experimenting!

Craftsy Class Review and some reveals! Fun Techniques with Fabric Paints with Cindy Walter

Online Quilting Class

Dyes are great. I love dyes. But using fabric paints as well just gives me more ways I can create really, really cool original fabrics.

So the #madquiltscientist has expanded her repertoire.

Now, here's a true confession moment: I've owned a lot of different types of fabric paints for awhile. I kept collecting them, swearing to myself that I'd immediately spend time figuring them out. And they were all neatly organized and sitting in labeled bins in my dye studio in the basement. Collecting dust.

Finally, last weekend, I got the fire lit under me to pull them out and start playing. I honestly can't remember what the catalyst was, but whatever it was, the bug hit fast and hard. I spent a couple hours on Saturday messing around with my PROfab opaque textile paints. They come with instructions but not much in the way of guidance beyond that and, as usual, I didn't bother to first go on YouTube or sit down with one of the many art quilt books I now own. I just pulled out the paints, grabbed a piece of the PFD fabric that's always sitting at the ready in my dye studio, and went to town. It wasn't bad, but I wasn't getting quite the results I was going for. Then I remembered--Doh! I owned a Craftsy class on this, didn't I?

Yep, several weeks ago I'd bought Fun Techniques with Fabric Paints with Cindy Walter. Woot woot! I spent several hours on Sunday just blasting my way through watching all the lessons, then descended back into my dye studio freshly armed with knowledge and a few new techniques to try. I had an absolute ball.

I switched to the Dye-na-Flow paints I also owned (ahem) and tried the same effects I'd been going for on Saturday, but to much better end results this time after watching Cindy Walter's techniques. 

I did a colorwash on a cotton PFD piece I had left over from a previous project, and then (again, testing out something she teaches in the class) salted it with Kosher salt, the largest salt crystal I had in my house, my husband having used up the last of our rock salt on the driveway in the most recent snowstorm. 

I also had a leftover piece of what I think is silk--although I bought it at a sewing guild's rummage sale and it was unmarked, and once you get me out of the world of cotton and wool, I'm a bit lost in the fabric-identification department. But it's shiny. And it feels like silk. So that makes it silk in my world. 

I also salted this one.

Part of what I love about paints versus dyes is they're not fiber-specific. I can use my dyes on silk but the colors come out a little different than they do when used on cotton. With paints? It makes nary a never-mind what you're painting. I could paint my dogs and it would still work just as well. (Whether the dogs enjoyed it would be another story.)

Then I did some colorwashes and, instead of salting, did some scrunching and folding to test out some other things that Walter teaches in the class. Being my first time out of the gate on this one, I learned a lot about how much I need to scrunch or fold to get the volume of lines I want. But still, as a test, it's all good. And these can still be overdyed or painted again or whatever, so it's just a start.

I've heat-set all of these, but they have to cure for a bit before I can run them through the wash and really finish the process, so you can still see some leftover salt-crunchy that's embedded in the fabric until I can give them a good wash, and lots of wrinkles that didn't want to come out with just using a dry iron. 

A little tired of being in the basement, I moved my operations to the kitchen table to do some more work with the thicker PROfab paints. I'll post pictures of that one later on when it's finished. I also (sigh) couldn't resist running out Monday evening to an art supply store in the city that carries a decent selection of fabric paints. I picked up a couple more Dye-na-flow colors, plus some Jacquard Textile Colors, Jacquard Neopaque, a handful of Jacquard Lumiere (and I already have a specific project in mind for those), and one Jacquard Pearl-Ex Pigment so I can add it to my other paints to turn anything I want into a Lumiere-style paint.

So much like Jane Dunnewold did to me a couple of years ago with hand-dyeing, Cindy Walters has now done to me with fabric paints. It's a logical addition to my arsenal of textile art and surface design. And I'm just having a blast. 

Ah, you want to hear about the class now, is that it? 

It's just boatloads of fun. If you need more detail than that: She does an excellent job giving tips about setting up a work space, the difference between the types of paints, how to dilute thicker paints for different effects, and a variety of techniques for using several types of paints. She also shows examples of how to use the painted fabrics (and garments too!), so there's a lot of visual inspiration alongside the practical information. 

I think this class most likely marks another turning point for me in my development with art quilting. I've owned Painted Pictorial Quilts with Annette Kennedy for a couple of years now--it's one of the first Craftsy classes I ever bought, but I always found it a bit intimidating to think about diving into that one. Now I feel so much more prepared--it's just gotten bumped up to the top of my "next class" list! I've also pulled out my art quilt books and am going over anything related to fabric paints, and spent a pleasant hour or so reviewing Mickey Lawler's SkyDyes, which my BFF/BQF gave me a few months ago. I enjoyed it then, but I'm enjoying it even more now!

The Basics

  • 7 classes, ranging from 14-45 minutes--most are around 25-30 minutes.
  • Lesson 1 gives an overview of fabric paints in general, and she talks about the difference between dyes and paints, and color theory as it relates to fabric paints. 
  • Lesson 2 goes into more detail about types of fabric paints, how to buy paints, and how to set up your work space.
  • Lesson 3 and 4 are about doing color-washes and variations; lesson 5 is about using thick paints (stamping, stenciling, and painting); lesson 6 gives direction for painting a miniature quilt in a couple of different ways (this is the project I'm currently working on, to be revealed later); and lesson 7 goes into mixed media--including 3D paints, ink pens and pencils, oil sticks, and using yarns and embroidery for embellishments. 

Do you even need to ask? Two thumbs up for Fun Techniques with Fabric Paints with Cindy Walter.  Way, way, way up with a bit of dancing around involved to boot. 

(Using Craftsy links in this post helps support this podcast and blog. Thank you so much!)

Oops...Some Snow Dyes I Never Posted...

I got so caught up in my sewing room I forgot that there was a set of snow-dyes I never revealed here. Plus, I got some regular hand-dyeing done too. These are all from a week or two ago. They're not terribly exciting and I had some issues with a couple of them. But still n' all...

Fuchsia and grape scrunched

Fuchsia and grape scrunched

Fuchsia and grape folded

Fuchsia and grape folded

Fuchsia and grape spiraled

Fuchsia and grape spiraled

Strong orange, mixing red, fuchsia spiraled

Strong orange, mixing red, fuchsia spiraled

Same mix as above, but folded. And clearly there was a little drop of a former dye bath still left on the grate that I hadn't seen when I washed it. Oops. This just shows what havoc one tiny little drop of the wrong color can wreak! Oh well, not one…

Same mix as above, but folded. And clearly there was a little drop of a former dye bath still left on the grate that I hadn't seen when I washed it. Oops. This just shows what havoc one tiny little drop of the wrong color can wreak! Oh well, not one of my faves anyway. Ripe for overdyeing.

A v-neck shirt done in the same color combo as the above. This didn't have nearly as much going on with it as I thought it might, but it's fine as a knock-about summer shirt.

A v-neck shirt done in the same color combo as the above. This didn't have nearly as much going on with it as I thought it might, but it's fine as a knock-about summer shirt.

Lounge pants--woo! These are pretty oversized on me; PFD clothes from Dharma are often on the small size, plus they're 100% cotton so they shrink when washed. These didn't shrink as much as I thought they would, so they're very comfortable but not p…

Lounge pants--woo! These are pretty oversized on me; PFD clothes from Dharma are often on the small size, plus they're 100% cotton so they shrink when washed. These didn't shrink as much as I thought they would, so they're very comfortable but not particularly flattering! Fine for quilt retreats, though! This is teal, intense blue, and turquoise.

Here's a closer-look at the embroidery thread I dyed along with these lounge pants. A little tangled, but I think I could sort it out to use. 

Here's a closer-look at the embroidery thread I dyed along with these lounge pants. A little tangled, but I think I could sort it out to use. 

Some of these other embroidery threads are going to take a little more untangling, though....

Some of these other embroidery threads are going to take a little more untangling, though....

This set is a more prosaic gradation of blacks. The two on the bottom are a blue-black and a purple-black--I wanted different tones. There was something going on, though, as many of these ended up with sort of an orange-y tinge to them. I'm thinking…

This set is a more prosaic gradation of blacks. The two on the bottom are a blue-black and a purple-black--I wanted different tones. There was something going on, though, as many of these ended up with sort of an orange-y tinge to them. I'm thinking I may have left them too long without soda ash (I forgot to put it on until several hours later), so it's possible the belated addition reacted differently with the dyed fabric. Anyone...?

And, just for kicks n' giggles, I dyed some scraps of cotton batting, inspired by some things that @madquiltlady (aka Charlotte) did awhile back. You can see one of the batting scraps was pieced--apparently it had scrim on one side and not on t…

And, just for kicks n' giggles, I dyed some scraps of cotton batting, inspired by some things that @madquiltlady (aka Charlotte) did awhile back. You can see one of the batting scraps was pieced--apparently it had scrim on one side and not on the other. When you flip the piece over, it's the reverse of this side (one half lighter than the other). No idea what I'll do with these but it's fun to know what it looks like!

Snow-dye Challenge Reveal

Sandi of Quilt Cabana Corner and I have both completed our snow-dye challenges early--or, at least, we're both close enough to do reveals this week. Mine's completely done--hers is pretty dang close by all accounts. 

Abundant natural resources...

Abundant natural resources...

If you've listened to either of our more recent podcast episodes you'll know the backstory--we're both happy snow-dyers, but often have difficulty deciding how to use the resulting fabric. So we challenged one another to do something that used at least one snow-dye, if not more. 

When I took the Designing Art Quilts class with Tina Somerset on Feb 7th (which I talked about in this episode), I came home with a notebook full of sketches and stacks of hand-dyes picked out for several of them. It was so much fun, I knew I just had to stay on that roll!

For one of the exercises in the class, Tina had us listen to a few different songs she'd selected, and we sketched as we listened, making notes of what images came to mind. This is actually something I do periodically in my head when my husband and I go to the Philharmonic, but I can't tote a sketchbook into the theater with me and certainly wouldn't be able to see what I was sketching once those theater lights dim. So images dance in my head and disappear as soon as the piece is over. It was fun to do the same thing when I actually had pencil and paper in hand! 

artquilt notebooks.jpg

The sketch that ultimately became my snow-dye challenge project is at the left. The song it's based on is "Grace," by Michael Jones on his album Touch (1996--scroll down to find a sample of the song). If you listen to the sample, you'll hear that it's a pretty spare arrangement--lots of air. I kept seeing long rectangles, muted colors, space. 

And so, that sketch became "Neume."

The background is one of my recent snow-dyes done with Camel, Old Rose, and Smokey Grey. The rectangles are all my own hand-dyes. This project just kept building--I started with the base rectangles as in my sketch, but then decided they needed more dimension so I did a second layer. I fused the rectangles and did a very simple outline quilting around them. After consulting with my daughter, we decided the best quilting design would be straight horizontal lines, which really sealed the image it had come to represent as it developed--notes on a music staff. The rectangles float over the top of the horizontal lines. I did a faced edge so there wouldn't be any visual barriers on the piece.

"Neumes" is the name given to musical notation that developed in the Middle Ages, the precursor to today's written music. (You can still find them today in some chant music.) Neumes were square and mostly represented ascending or descending pitch, but not necessarily specific notes or rhythm until later in their development. The word "neume" comes from the Greek word for breath, "pneuma." I knew about the square notation but I didn't know what it was named until I looked it up after I had the piece done--the fact that it is related to the word for breath really sealed for me what this piece came to represent--a quiet peace. And so, it became the name of the quilt. 

The quilt shop where I took Tina's class is having a quilt show coming up in March--I think I'll be putting this in the show. Now it's time to get to work on some of those other sketches!


Snow Dyes Chapter 3

Get ready for some serious cool.

In more ways than one. (Ar ar ar.)

Here are the results of the second batch of snow-dyes I did this weekend, the 3rd batch for the winter (hence, "chapter 3"). I may do another batch tonight since we have about 12" or more of fresh snow out there. Hate to let it go to waste!

For each set, there are two 1/2 yard pieces, and then I took detail shots just so you can really get a feel for the effect that snow-dyeing creates.

First batch: Turquoise and Black.

(Sorry--forgot to write down which black was which. I used 628 for one and 629 for the other--ProChem names.)  Yes, it looks like I threw purple in there, but I didn't! That's the black breaking.

The next batch was one of my favorite combinations to ice dye or snow dye, because it breaks so wonderfully. 

Batch 2: Teal, Grape, and Black.

(Whatever number black the other one wasn't). Teal is a Dharma color, the other two are Pro-Chem.

1st piece

1st piece

1st piece detail 1

1st piece detail 1

1st piece detail 2

1st piece detail 2

1st piece detail 3

1st piece detail 3

2d piece

2d piece

2d piece detail 1

2d piece detail 1

2d piece detail 2

2d piece detail 2

Third batch: Ecru, Old Rose, and Camel.

Now, the final batch heads in a completely different direction. Neutral dyes are just so much fun to break!

Ecru, Old Rose, and Camel 1st piece

Ecru, Old Rose, and Camel 1st piece

1st piece detail

1st piece detail

2d piece

2d piece

2d piece detail

2d piece detail

It all looks so cosmic, doesn't it? Groovy.

If you've listened to my most recent episode (posted 2/1/15), you'll know that Sandi of Quilt Cabana Corner and I have challenged one another to a Snow-Dye Duel. Well, okay, a Snow-Dye Art Quilt Challenge. We've both been snow-dyeing lately (she's in MA, I'm in Western NY, we have a lot of raw material to work with these days) so, in order to be sure we use some of these wonderful new creations we're making, we've challenged one another to make some sort of project using at least one--if not more--of our snow-dyes by March 15. At some point, I'm going to have stop dyeing and figure out what I'm going to make.

But wait...What's that I see? More snow falling outside my window? Heading to the basement...


More Snow Means More Snow Dyes

We got more snow! So, of course, I ran to the back yard, shoveled some into a bucket, and headed for the basement.

I did half yards this time, and in this batch stuck with variations on yellow/orange/red (mostly) so I could play with proportions of each, variations on each (tangerine dye versus orange dye, etc.), and also be able to more easily rinse/wash it all together.


Tangerine and Strongest Red combination. The one in the back has more tangerine and the one in the front more red.


Once the snow has melted--so you can see how I had the fabrics arranged for the dye process.


Tangerine and Strongest Red #1 (the one from the back of the snow picture)


Tangerine and Strongest Red #2 (the one in the front of the snow picture)


Next batch: Golden Yellow, Strong Orange, and Mixing Red


Now with snow melted.... These were both just sort of scrunched up, although I did a few little loose spins in the one on the bottom. I used a lot less red in the one in the back, emphasizing more of the yellow and orange; the one in the front got a lot more of the Mixing Red.


Golden Yellow, Strong Orange, and Mixing Red #1. 


Golden Yellow, Strong Orange, and Mixing Red #2. Although it was quite interesting to me that some of it looks more fuchsia. I'm thinking that must come from the Strong Orange breaking.


Finally, the yellows. In this one I combined Sun Yellow and Antique Gold. I wanted to see how Antique Gold would break.


Here they are dyed. I did a loose pleat on the one in the back. The one in the front is just scrunched, nothing fancy. I believe I used about the same proportions of dye on both, although the one in the back may have gotten a little less of the gold.


Sun Yellow and Antique Gold result #1. The white splotches at the top are likely places where a little bit of fabric hung out over the edge and wasn't getting hit directly by snow and dye. I tried to keep track of that but things can move around when you're stacking the snow up.

The pleat isn't all that pronounced, but I could use this fabric for depicting reflections on water and that kind of thing. (The "Rorschach Test" of hand-dyeing: "What do you see in this fabric?")

And obviously Antique Gold has a lot of green/brown in it. Makes sense, when you think about tarnish and all that.


Sun Yellow and Antique Gold result #2.

You can see a lot more of the green coming through in this one. That's why snow dyeing is so much fun. You never quite know what you're going to get!

Stay tuned for Snow-Dye Batch #3, which is in the rinse/soak cycle as I write this. And we're due for another storm tonight and tomorrow, woo!

Mad Quilt Scientist Walks Again--Snow Dyeing

When life hands you lemons, you make lemonade.

When life hands you bales of snow...

When I started feeling somewhat better from the Great Sinus Infection of 2015, I decided I could probably handle doing a little dyeing. It's been a long while since I've been in my dye studio in the basement, so after I did a little cleaning up and removing of cobwebs (!) I made good use of the dogs' time outside and filled up three buckets of snow while they were snuffling about. 

This is not the first time I've snow-dyed, but last year when I did it, I followed directions on on a few blogs that all said about the same thing, but I wasn't pleased with the results. Most snow-dye instructions I've found call for creating the dye concentrate with water first, then using the water dye on the snow. Well, what happens when you take a water-based dye and let it melt with snow? Of course--it dilutes. I got very pale pastels. Pastels are all well and good but I like a little more saturation, so this time I did what I do with ice dyeing--I just dumped that dye powder right on top of the snow.

It does, indeed, use up more dye powder that way but hey, I only do this a couple of times a year so I'm okay with that. 

I did three different color combos and three different folds on the fabrics (one yard each). 

The first was fuschia and intense blue, and I folded the fabric in quarters lengthwise and then did a loose pleat.

The second was stormy grey, old rose, and boysenberry, and I spiraled the fabric.

The third was turquoise, lemon yellow, and tangerine, and I just scrunched it up.

So here's what I remembered while I was rinsing the fabric. Turquoise and tangerine are pretty close to being complementary colors, which means that mixing them gives you something in the neighborhood of brown or gray.

I'd been thinking more about the turquoise and yellow, and about the tangerine and yellow, without really thinking through the tangerine and turquoise. So, this isn't the most attractive end result but I already have some ideas for possible overdye designs I might do. (I like a nice neutral but I'd want it a little more intentional and not just muddy like this.)


And here's what I learned: Boysenberry is an aggressive little fella. I used more gray and rose than I did boysenberry--I just barely dotted the boysenberry on there. But it ran amuck.

I was surprised with the amount of light I ended up with in the middle (a very pale gray-purple with one bright random splotch showing). I thought I'd spun it more loosely than that. However, I can play with that, so no worries there. I don't mind this result at all--it's just not what I was picturing it would be. But that's what I like about hand-dyeing. There's always that surprise element involved.


Finally, the fuschia and intense blue combination--this one I knew what I'd get, more or less. There's a lot less variability when you're only working with two colors.

Because of the way it was folded and pleated, one end has more blue than the other. I'd planned on cutting all of these into fat quarters but I'm thinking this one will probably do better has half yard pieces so each piece would have both blue and pink; the spiral one above will stay as a whole piece; and the muddy mess at the top needs more work done on it anyway.

It was fun to be in my dye studio again, but I want to actually have a plan for my next dye session so I've got to do some thinking first. Plus, I think it's time for me to break out the wax resist (batik) supplies...

A Couple of Finishes and a WIP

scarves.jpg

Yep, got those purple scarves done. The ones on the bottom are those I had leftover from the summer events. And yes, they are darker. I must have used a slightly different concentration for this newest batch. Which tends to happen when you don't write things down. Which is the beauty of handmade--the individual uniqueness. Which I'm going to say is my reason rather than just "I didn't bother to take the time to write the darn proportions down."

These will be gifts to women I meet on my trip. I have 25 altogether--no idea how many women I'll actually be meeting.

I'd also mentioned on somewhere along the way that I made a last-minute decision to make something for a special visit I'm hoping to make. This will be for the man who in the 1990s invited my father to work with him on peace-making. I thought a peace dove would be a suitable recognition of their shared work and token of my great appreciation for him and all he's done. 

It's roughly 9" square. Commercial fabric for the dove, my hand-dye for background, backing, and binding--all the same piece. The dove is fused to the background, and I did a hand blanket-stitch around the outside with a variegated perle cotton (I don't recall where I got it--I think from a vendor at Lancaster). Even though I've done blanket-stitches a whole lot, I had difficulty keeping my stitch even because I'm too used to doing it on felted wool, not fabric, and I was struggling to hold the piece comfortably in my hand. For some reason it was all kinds of awkward. But overall it looks okay.

I then hand-embroidered the olive branch with a variegated hand-dyed perle cotton from Artfabrik. Love those perle cottons--very tasty.

As opposed to the blanket stitch, I'm really pleased with the way the olive branch turned out. First time ever doing a stem stitch, first time ever doing a herringbone stitch for the leaves. It looks a little more pine-y than olive-y but hey, you know what it's supposed to be so it's all good. 

It's possible I should've done the quilting first and then done the olive branch. Oh well.

I really enjoyed doing hand embroidery. I may do more free-form embroidery of my own designs in 2015. And yep, I've already got Craftsy classes on my wish list to help me out with that! BTW, I also talked about this on my last podcast episode and mentioned the book I used as reference. Oh, and yes, I did remember to put a label on the back of this too. Cookin' with gas.

And then, also on a whim but with far less purpose than the dove... Remember that Jenny Doan trunk show I went to? Ever since, I've been jonesing to dig into my pre-cut stash and whip something up. Last weekend, when I'd gotten all my scarves pressed and done as much work on the dove as I felt up to doing that day, I pulled out a charm pack, consulted a Missouri Star Quilt Company tutorial, and started cutting.

Introducing: My Disappearing 4-Patch Work in Progress As-Yet-To-Be-Named

I'm hoping to get the blocks done before I leave; I'll not worry about getting it put together into a top until I'm back. I only had one charm pack of this fabric (Good Morning by Moda, an older collection) so it'll be a baby-sized quilt. At the moment, this quilt has no purpose--no one in mind. I don't think I'll donate it, though. I'm starting to realize it may be helpful for me to have a certain number of finished quilts on hand for those last-minute gifts (illness, shower gifts, etc.). And, if truth be told, every other time I've started a quilt without a designated recipient, it seems the designated recipient appears before the quilt is done anyway. So who knows?

Here's the tutorial!