30 Questions Thursday

I followed a few links recently (thanks to Nonnie) and decided it would be fun to play along with this. From what I can tell, the original came from here. I believe I saw this (or a version of it) swimming around Facebook awhile back. But to give myself something to blog about on a regular basis, I decided to work my way through these lists. I originally intended to do one a day in January but, unfortunately, January was halfway gone before I found the time to blog. Instead, I've decided to declare Thursday as "30 Questions Thursday" and do a few a week until I've worked through all of them.


1. List 20 random facts about yourself.
  1. I was an English Lit major in college.
  2. I played flute for many years.
  3. I stopped playing flute when I got pregnant with my son because it aggravated my morning sickness (IOW, it made me want to throw up--but then, everything did back then).
  4. I haven't really played flute much to speak of since. 
  5. I would love to start playing flute again. 
  6. I am a dog person.
  7. I am a cat person.
  8. I basically like anything furry, and some reptiles.
  9. Birds and insects don't do much for me, though.
  10. Not in cages, anyway. I like birds outside. Insects I could take or leave.
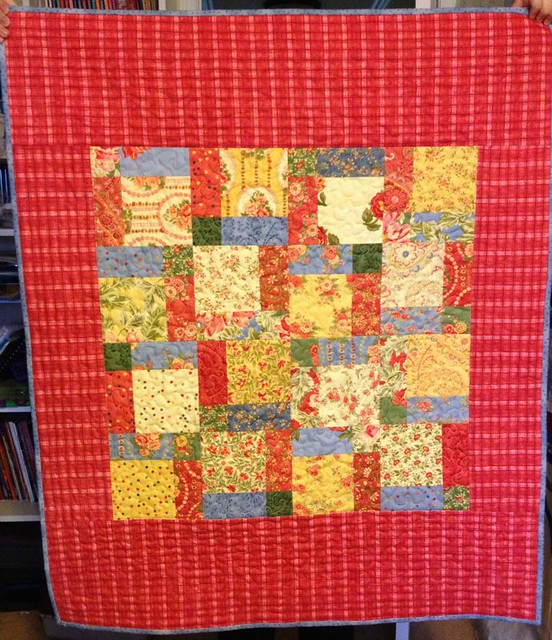
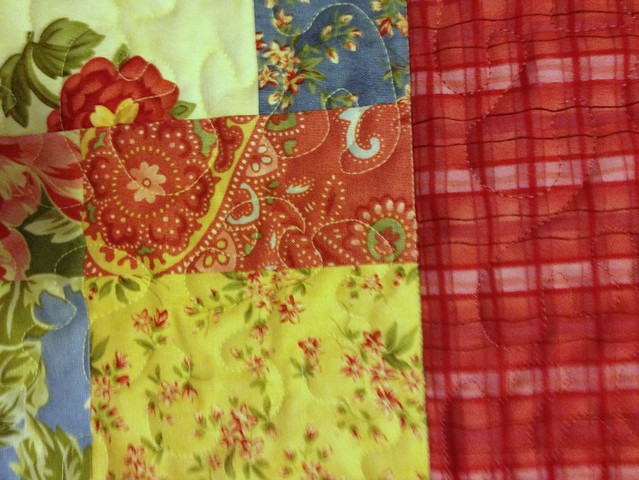
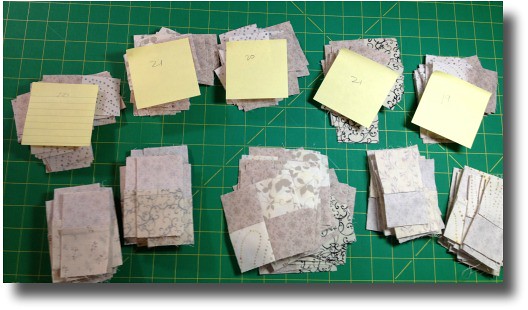
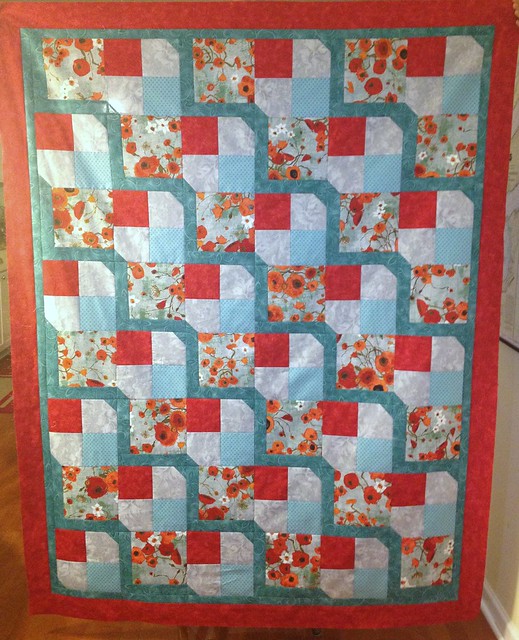
  11. It seems too easy to say "I'm a quilter." Y'all probably know that already.
  12. The book that made me fall in love with the written word as a child was Wind in the Willows by Kenneth Grahame. That's when I realized how lovely language could be.
  13. I came to my love of clean, neat, organized spaces as an adult. I wasn't particularly that way as a child.
  14. Which made me only somewhat more patient with my own kids' lack of love of clean, neat, organized spaces. 
  15. But I still yelled once in awhile.
  16. I love Disney World in Orlando.
  17. I especially loved it more the older my kids got. You lose the magic, but you gain in relaxation and really enjoying it together as a family on a different level.
  18. I plan on taking my kids and grandkids there, if and when grandkids ever become part of the picture.
  19.  I've more recently developed a real love of creative cooking without recipes. Which drives my family nuts because if they really like something, they're unlikely to get exactly that version again.
  20. My kids have reached an age where we no longer refer to it as parenting or (less respectfully) nagging, but, rather, life coaching. "Son, I'm about to do a little coaching." Somehow that makes it easier for them to hear. Why didn't I think of that when they were 13?

2. Describe 3 legitimate fears you have and explain how they became fears.

  1. I'm afraid of the dark. That's legitimate because it's, well, dark. Things can hide there. Icky things with big teeth or, worse, guns and knives. I don't know how it became a fear since I've been afraid of the dark for as long as I remember. 
  2. I'm afraid of heights. That one I do know when it started: I was fine with heights until I fell off a 10' balcony when I was around 11 or so. My family home had a second-story balcony off the back of the house. My dad built our house himself (literally, bare hands, with very little outside help). He was not a construction guy or anything--he was a college professor that simply loved to do everything himself. The balcony railings were, at the time, 2x4s nailed horizontally between the posts holding the balcony roof up. We weren't supposed to lean against them and most of the time I remembered that. But one of my sister's friends who was playing outside with her had gotten a phone call and I ran out to the balcony to holler out to her to come inside to answer it; I leaned against the railing and out over to see around the corner. I remember hearing the railing come loose, and then it was sort of like a cartoon where the horizon stays stable for a moment and then suddenly everything drops. I landed sitting on my ankle. I was very fortunate that all that happened was a sprained ankle. (Wrought iron railings were installed shortly thereafter.) But from then on, whenever I've been on a height, the bottom of my feet start aching and I freeze and get short of breath. I've even had panic attacks. I tried to do a high ropes course as part of a team to get over the fear and had a complete melt-down--and, in fact, that experience only aggravated the fear now. I've decided it's a fear I can live with. If my life were at stake, I trust that adrenalin would kick in and I'd do what I need to do. Meanwhile, no more high ropes courses. (I do climb up on my kitchen counters every year to put my Christmas village on the top of my kitchen cabinets. I don't like doing it, but it gets done. So the fear of heights isn't completely debilitating!)
  3. Like a lot of people, I do have a fear of failure. But I can deal with that pretty easily. It's not nearly as bad as my fear of heights!
3. Describe your relationship with your parents.
I had a great relationship with both parents. They both encouraged creativity; they encouraged us to be individuals. They weren't big on telling me what to do, most of the time--pretty much helped me just figure things out for myself once I hit about middle school or so. I was more comfortable talking to my mom than my dad but that was probably more a generational thing--Mom was around more and interacted with us more directly, although Dad was very present as well. Dad was a great storyteller and taught me what it means to have passion for a cause; Mom taught me how to make that passion work in the real world. The older I get, the more I turn into my Mom, although I'm also very aware of certain parts of my personality that are just Dad all over. And then there's a lot that's just me. Dad passed away in 2001 and Mom in 2009. I miss them both.
 

4. List 10 things you would tell your 16 year-old self, if you could.
  1. That guy you think was all that and a bag of chips? Not so much. Stop sweating that he doesn't even know you're alive. There's a really, really great guy that you'll meet just three years from now. Be patient.
  2. You're right that you feel different from everyone else. You learn later that your personality type is only something like 5% of the population and that answered a whole LOT of questions. But you know what? That's okay. You'll still find plenty of people that love you and that you can love! And you'll learn to appreciate and make your wierdisms work for you--and then you'll also be able to help your daughter deal with it when she inherits the same basic personality.
  3. Keep writing. You love it, and you'll miss it later.
  4. Don't be as intense about everything. Wait--I'll save my breath on that one. Adolescence is defined as "intense." Go ahead and be intense. Just know that eventually it all gets a lot easier when the hormones stop flying. And yes, life really is unfair. Or, rather, fairness is in the eye of the beholder sometimes.
  5. Keep riding your bike. That's another thing you really love right now that you'll really miss later. And later, you could really use the exercise!
  6. Appreciate how thin you are now rather than worrying about what size jeans you're wearing compared to your friends. You're in good shape! That's another thing you'll really miss later!
  7. Stay out of the sun. 
  8. Those couple of besties you have now that sometimes you get aggravated with? News flash: They're still your besties 30 years from now. I know--who'd a thunk it, right?
  9. Clean your room. (Yes, you do become your Mom a few years from now!)
  10. You have a unique and beautiful family environment that at times is embarrassing, at times painful, at times annoying, but admittedly, quite often a whole lot of fun. Appreciate it and just know that every bit of that makes you who you become when you're 47 and are sitting there writing a blog post to your 16-year-old self.
 (Questions to come in following weeks)
5. What are the 5 things that make you most happy right now?
6. What is the hardest thing you have ever experienced?
7. What is your dream job, and why?
8. What are 5 passions you have?
9. List 10 people who have influenced you and describe how.
10. Describe your most embarrassing moment.
11. Describe 10 pet peeves you have.
12. Describe a typical day in your current life.
13. Describe 5 weaknesses you have.
14. Describe 5 strengths you have.
15. If you were an animal, what would you be and why?
16. What are your 5 greatest accomplishments?
17. What is the thing you most wish you were great at?
18. What has been the most difficult thing you have had to forgive?
19. If you could live anywhere, where would it be and why?
20. Describe 3 significant memories from your childhood.
21. If you could have one superpower, what would it be and what would you do with it first?
22. Where do you see yourself in 5 years? 10 years? 15 years?
23. List your top 5 hobbies and why you love them.
24. Describe your family dynamic of your childhood vs. your family dynamic now.
25. If you could have dinner with anyone in history, who would it be and what would you eat?
26. What popular notion do you think the world has most wrong?
27. What is your favorite part of your body and why?
28. What is your love language?
29. What do you think people misunderstand most about you?
30. List 10 things you would hope to be remembered for.

Catching Up...WIPs, BOMs, and Finishes, O My

Boy, howdy, has it been awhile since I've written a blog post! My apologies. It's not for want of quilting to show, it's for want of time to write the posts about the quilting I've been doing. It's time to play catch-up, and the fastest way to do that is with a little photo-essay...

The Progress Down Easy Street (not in strict complete weekly order)


I have everything pieced--just have to put the top together. I'll be talking about this in an upcoming episode.

My Guild Paper Pieced Block of the Month
We're using Carol Doak's 300 Paper Pieced Blocks book. The BOM leader is choosing the block each month. I'm using only scraps from my scrap bin as much as possible--so far, with only two months under my belt, so good. We'll see what happens when I get into months 10-12! I'm trying to keep all the colors at the same intensity and saturation level, with scrappy white backgrounds, so no matter what the blocks are I'm hoping they'll all hold together at the end. But I'm also being flexible--if I can't get them all into one project I won't sweat it.

January's block


  February's block already done (woot! I'm ahead!)


My little growing village. 
@verylazydaisy said they looked like gnome houses; 
so now I think of this as Gnome Village. 
We'll see what the next block brings!


An Impulse Project: Christmas Tablerunner

I bought some Christmas fabric on sale that I really had no right to be buying given that (1) it was a couple of days before Christmas and (2) I already had a respectable stash of Christmas fabric at home that hasn't been used. So, to waylay the guilt factor, I immediately made a table runner out of it that weekend and successfully used up all the Christmas fabric I'd bought plus some white from my stash. So while I still have the aforementioned respectable stash of Christmas fabric, at least I didn't add to it! (My apologies--I stuck a black border on the picture and belatedly realized it makes it look like there's a black border on the tablerunner itself. There's no black border on the tablerunner.)

I also poked away at a quilt for a family member but it got set aside until I can finish Easy Street. That one really isn't picture-worthy yet--mostly a bunch of cut fabric at this point.

We have family in from out of town for the rest of this week/weekend so no more sewing for a little while. Things should settle down next week so I can get back into a blogging routine again!

Boxing Day Sew-In Giveaway

It's that time of year again! 

Join us for the 

Boxing Day Sew In

Wednesday, December 26th.

THIS GIVEAWAY IS NOW CLOSED

Our family has a tradition of having a "Pajama Day" the day after Christmas. The change in the tradition is that where I used to spend the day on the floor playing with Legos or whatever the toy of the year was with my kidlings, now I spend the day in my sewing room recuperating with fabric while my grown children are doing whatever college kids do. 

In honor of my friends from other places of the world for whom the day after Christmas is a venerable tradition named Boxing Day, my Pajama Day has become the Boxing Day Sew-In.

So why don't put on your jammies and slippers, and join me? We'll be chatting away on Twitter through the day (I'm @sandyquiltz if you're not already connected with me there).

In honor of yet another day of giving, I'm holding a give-away here on my blog. You can enter beginning as soon as this blog goes live at one minute past midnight on December 26th, until 11:59 p.m. Almost a full 24 hours to take your chances!

The one lucky winner will win two things--count 'em: Two!

The first item in my giveaway is one brand new DVD of a quilting documentary named "The Skin Quilt Project." From the back cover: "....This provocative film explores the significance of preserving the African-American quilting tradition, as well as how the practice of quilting brings self-confidence, cultural awareness, and self-esteem to the African cultural heritage. As they share their stories, the women and men in this film help us to consider a quilter's unique ability 'to see the beauty in all colors.'"

I own a copy of this documentary and found it extremely thought-provoking, as well as a wonderful celebration of quilting, quilting communities, and the artistic impulse that anyone can relate to regardless of their skin color. I highly recommend it and hope whoever wins it will enjoy it as thoroughly as I did1


The second item in my giveaway is, honestly, helping me clean out my stash for the new year! I have far too many 2 1/2" strips kicking around. So whoever wins this giveaway will also receive a grab-bag of 50 (fifty) 2 1/2" strips from my stash. The picture is just a conglomeration from the stash--your grab-bag may or may not include strips pictured. Trust me--I won't just send you the ones I don't like. :-)  I'll just close my eyes and grab 50, I'll make sure they're all full WOF and cut straight, and they're yours. You'll be helping me out immensely, and hopefully you'll be able to use them in some wonderful project soon!

To enter this giveaway, all you have to do is leave a comment here saying what you think you'd use a 2 1/2" strip for. You can be as creative as you want--it doesn't necessarily just have to be in a quilt!

Don't forget, you must have your email address included in your comment or accessible on your profile, or I won't be able to include you in the giveaway. 

Have a wonderful Pajama Day-slash-Boxing Day. Don't forget to check out any other giveaways that are linked to this post!

THIS GIVEAWAY IS NOW CLOSED


2013 Quilty Resolutions Giveaway

In episode 113 of my "Quilting...for the Rest of Us" podcast, I describe the requirements to enter into my 2013 Quilty Resolutions Giveaway. I also said that I'd be embedding the online submission form into the show notes for that episode. As it turns out, for some reason Wordpress won't play nicely with this online submission form, so I've moved it here to my blog.

Please be sure to listen to episode 113 (using the link above or the embedded player on the right of this webpage) before completing this submission form to enter the giveaway--otherwise you won't know how to complete the form! The giveaway closes on January 15th, 2013.

Easy Street Weeks 3 & 4

I didn't finish Week 3 until the night before Week 4 was posted so I didn't do the linky last week. And I still haven't finished trimming the blocks, so technically I'm not sure I consider that I've completely finished week 3. But there it is, move on. I can finish trimming later.

I really like the way these blocks look--the colors work well together.


I got Week 4 finished tonight--all trimmed and everything. (Netflix got me through!)

For some reason, even though these are all the same colors as the above blocks, I'm not as keen on the way some of them turned out. Some of my reds are more of a brown-red that isn't quite as striking next to the purple. However, I'm relying on having all of it work together once I'm looking at the entire pieced top rather than individual units.

(Sorry the picture is a little blurry--it was pretty late when I finished!)


Be sure to check out Bonnie's blog and link-up to see how everyone else's are turning out--it's been fun watching how all the different colorways are playing out!

Finish! Disappearing 9-Patch

Disappearing 9-Patch WheelchairI completed the Disappearing 9-Patch I pieced during the Black Friday Sew-In. I've posted pics of this in progress so the finish isn't quite as exciting a reveal as usual, but there it is. They always look that much more interesting when they're completed!

For those of you jumping into the middle of the story, I'd been wanting to make a Disappearing 9-Patch for awhile so I decided a bit on a whim to grab a charm pack I'd had in my stash for a year or more--Moda's "Portugal" line--and just went to town without worrying about how big it would end up. The center came out to something like 26"x26". Since I wanted to make it for a person in a wheelchair, I looked up what other people had found to be a successful size, and the suggested size was a rectangle. Since I wanted this done quickly, I opted for the simplest solution, which was putting honkin' big borders top and bottom with more reasonably sized borders on the sides. I wasn't sure about it at first but it's grown on me. (I put all the measurements in my original post on this linked above. Frankly, I don't even really remember them now! Too many other quilty projects in between.)

Dis9P detailEverything was out of my stash. I got to use not only the charm pack, but about a yard for borders, a couple of yards for a backing (yellow--not pieced), and gee, maybe a quarter yard of the blue for the binding. Probably less.

I did a simple meander with yellow thread in the center and a pretty dark red shinier thread in the borders, so it blends but still gives it a little spark with the shine. (Sorry the picture's blurry--the lighting was bad.)

It turned into quite the happy little quilt. Originally it was going to be a donation quilt but then I realized after I had the top pieced that I didn't have a gift yet for a family friend that I always do something for at Christmas, and since she's in a wheelchair, this was perfect. So it got repurposed for her, and I know she'll love it.

I'll be making more of these in the future as donation quilts, I know--although next time I'll use two charm packs so they'll take up more space!

I got Easy Street Week 3 done, technically, before Week 4 was posted, although I'm still trimming up some dog-ears. I've started the cutting on Week 4. It's going relatively quickly since I had a lot of 2" strips of the required fabrics left from previous weeks. I don't have much doubt I'll have them done by Friday, although we're decorating our tree tomorrow night so I won't get back to my machine until Tuesday. I didn't do the linky on Bonnie's blog last week; may not get to it this week. I'm still playing along, though! (I'll post pics of 3 and 4 together later this week.)

Postcards a-Plenty!

And so the great reveal! Although if you follow Sandi's blog, you've already seen the reveal since she got her post done last night and I'm the Sandy-Come-Lately in this pairing!

Here's the postcard I got from Sandi. Isn't that fussy-cut ornament just adorable? I love how it also includes the little loops on the top of each ornament. She did really nice decorative stitching on them as well with variegated thread. It's just adorable! It's got a place of honor on my mantle this year and will become a decoration that's put up every Christmas. Sandi and I have decided to make our postcard exchange an annual tradition!

Here's the one I sent Sandi.

Someone asked me to describe how I did this. I (oops) neglected to (dang) take photos during the process (shoot). I'll do my best to give a verbal description here. I had a ball doing it, although I made some parts a little complicated for myself. Live and learn. Also, I did this during a sew day with my guild so I was away from all my usual supplies. I'd grabbed some that I thought I might use before I left, but had to improvise a bit here and there.

I had the basic image in my head of a crazy-quilt-esque background and a close-up, off-center pointsettia. From there, however, it was design-as-you-go. I decided to take the log-cabin-style approach to the crazy quilt piece.

  • I had with me a lot of green scraps from my scrap bin plus a couple of holiday fat quarters. I cut a bunch of strips that ranged from about 1 to 2" wide. They were mostly longer than 4" but not entirely--you can see where some of the shorter ones were used in the lower right. 
  • I used a piece of muslin as a background, and cut it slightly larger than 4x6", giving myself a little wiggle room in case things shrunk up on me with all the seams I knew I was going to have.
  • After a false start with the sewing first piece (see below), I realized that I really needed to stabilize the muslin before proceeding. I've decided beginning an experimental project with some seam-ripping is a sign of good luck. My story, going with it.
  • I happened to have some of the Ricky Tims Stable-Stuff Poly with me, which is great but isn't fusible. I had a very lightweight fusible of some sort so I cut the stabilizer to the same size as the muslin, then fused the muslin to the stabilizer. So much for needing room for shrinkage now, since the stabilizer would take care of that. Still, I like me some wiggle room.
  • I started with a yellow-green scrap that I cut into a random pentagon shape and then used just a dab of glue to help hold it on the stabilizer. (See the yellow-green peeking out from behind the flower? That was the starter patch.) Then I took my first green strip, lined it up right sides together along one edge of the yellow-green pentagon, and stitched. I pressed it open and then took my next strip and sewed it to the next edge, and so forth, moving around the sides of the pentagon in succession. I only trimmed anything that was hanging way over--for the most part, you're sewing over any extra bits and since this was all going onto a stiff background and nothing I was going to be trying to hand-quilt through, I didn't have to worry about close trims.
  • Since it's a rectangle, you eventually can no longer go in even rounds and have to just start filling in space with strips. I just had to think through a little bit to make sure the strips would cover the entire space I needed to cover and not leave me with a random blank spot in an awkward location. This is where I did find it helpful to have much longer strips that I'd then trim back to fit better after I sewed.
  • Once the background was complete, my friend pulled up a picture of a pointsettia on her cell phone and I looked at it for some direction--that's when I realized it had several layers of petals, some lighter than others. I had a couple of red fat quarters with me but needed something lighter. Fortunately, my sew-buddies were generous with their scraps! (I traded some back with them too--great way to get new-to-you-fabric!) I just free-handed the cutting of the petals, then used a dab of glue baste to hold them down until I could do the machine blanket stitch around the edge of each petal. Originally I was going to do french knots in yellow for the stamen in the center, but I wasn't sure how much would actually show once I put the binding on (see below) so I bagged that idea.
  • I played with a variety of decorative stitches on my machine along most of the seams. Hadn't used most of those stitches before. Some worked better than others, but hopefully Sandi didn't look too closely. :-)
  • Once it was done, I fused it all to a piece of Peltex double-sided fusible, then cut my backing fabric and fused that on, and then trimmed it all to a true 4x6" size.
  • Because of all the pieces on the crazy-quilt front, and because I now had several layers fused together with the stabilizer still in there (didn't want to risk ripping it off when all those seams were involved--and it doesn't have to be removed) I had to put a binding on it. I didn't think a decorative stitch would really work in that instance, and it would've been a real pill if I'd tried it. So I put a narrow binding on completely by machine, with a certain measure of success. That's something else I need a little more practice on. 
Sandi and I had agreed ahead of time that we'd send each other pictures of what our postcards looked like when they arrived in our respective homes so we could test out whether the postal system would damage them. No damage at all! Now, if we were to have used embellishments of any kind, using an envelope would definitely be safer. But I'm pleased to report that our experiment worked beautifully, we've started a new, wonderful holiday tradition, and we both had a blast.

So, my friends, start making postcards! They're a hoot!

Total Color Tuesday--Last One!

We've done it! We've made our way through all the color harmonies presented in Color Magic for Quilters. By the way, this blog series in no way replaces you buying the book. I've only looked at the color harmonies. The book presents a wealth of other information, "workshop" exercises, tons of examples, and several patterns that will help you explore the harmonies in greater depth. This book is a fantastic reference--several women in my guild swear by it and I've really enjoyed my practice of working my way through each color harmony. Not only do I feel like I've broadened my color horizons, but I also know my stash a whole lot better. I'll be using this book as a reference forever after.

So put Color Magic for Quilters on your holiday gift wish list!

With no further adieu, onto the last two color harmonies.

Throw 'Em All in There

 For this color harmony, you just use 'em all. Or, at least, some significant quantity of the colors on the color wheel.

Your first thought might be, of course, scrap quilts. And yep, those are a great example of this color harmony. Some well-known quilters have said that the more colors you use in a quilt, the better they all work together. There is still some art to doing this well, though--you will want to consider having a place for the eye to rest and so forth. But as usual, it all depends on what effect you want to achieve in your quilt. Maybe you don't want anyone's eyes to rest anywhere!

So here are a bunch of fat quarters I've matched up to various points on the color wheel. You'll note, of course, that several of the fat quarters are multi-colored. That, of course, works well in a color harmony that uses everything! Additionally, those kinds of fabrics will help everything play nicely together.

Here are the same fabrics re-arranged.

What do you think? Would you make a quilt like this?

I can see it.


Another way to approach this--and the way most of us are probably accustomed to--is to find a multi-colored focus fabric and then work off that, but pull several more of the colors off the focus fabric than we might usually. So here I have a multi-colored focus fabric that manages to hit almost every color on the color wheel (although sorry--I covered up some of them with my fat quarters). Then I found fat quarters that picked up a lot of the different colors. This is clearly an example of the multi-colored color harmony. Obviously quite workable.


Once again, the Ives Color Wheel (a.k.a. 24-Point, or the one used in Joen Wolfrom's 3-in-1 Color Tool) was intimidating to my stash. They cowered in fear. I just don't have enough fabrics to really work with the whole 24-pointer on this one.

Of course, this color harmony doesn't mean you have to use every color, just a lot of them. I simply moved on. I have other things I want to accomplish again!


Throw 'Em All in There, But Have One Stand Out

This is simply a twist on the one above. You're still using a boatload of colors, but you're using a bunch of one color to make it stand out. This one is, more simply speaking, multiple colors with one main color.

I didn't bother with the usual color wheel pictures on this one because, well, you get it. But it did give me a chance to mess with a fabric I just bought during the Black Friday weekend online fabric sales. I got the main focus fabric in this picture from Fat Quarter Shop on super-duper sale. I ordered two yards but they only had a yard and a half (plus a few inches) so I took whatever they had left. It's a wonderful, vibrant, chaotic fabric that I have no idea yet what I'll do with but I can't wait to figure it out! Serious love fest with this fabric going on!

Anyway, I pulled a bunch of greens to make that the main color, but it plays up against all the riot of color in the main fabric.

Yep, this would definitely work.


Play time!

This is it. Your last opportunity to play along. As usual, link up your blog posts as you play with these color harmonies. Let me know what you think--have you, or would you,actually use any of these types of harmonies in a quilt? (As a note--I'll leave all these links open until December 31 so you can play catch-up if you want. Thanks for your patience as I went through this process--I learned a lot, and hope you were able to expand your color horizons as well!

Reporting In...WIP (almost done!) and Easy Street W3

Easy Street Week 3 Progress

I got all my pieces cut for Easy Street W3 today, but decided I was going to space out my work on it this week for the sake of my soul. I get irritable when I have to do the same thing over and over again--it loses all sense of joy for me. (Something I've learned from my approach the last two weeks!) So this week I'm doing it in parts--cutting today, sewing tomorrow. Not sure I'll get all the sewing done tomorrow since I'm not sure how long I'll have to work on it, but I should be able to make significant progress after work.

Still can't post pictures of my postcard for Sandi yet, since she hasn't received it. I'm trying not to panic that I somehow misaddressed it! Meanwhile, I've received hers--it's wonderfully fun! I won't post pictures of that one either until the whole story is over. So that gives you something to look forward to. I'll also post more info about how I made mine once she gets it (I'm trying to think positively here....).

Another Work in Progress


Meanwhile, here's what I spent all of Sunday afternoon working on. This was originally going to be a donation quilt when I realized it would actually make the perfect Christmas gift for a family friend who is wheelchair bound. I do usually get her something every Christmas but haven't made her anything quilty yet. This will be a nice bright spot in her apartment, I think.

Hoping to get binding on tomorrow night, and then I'll be able to post it as a finish!


NOTE TO MY PODCAST LISTENERS

I just discovered that Podbean is down because it's moving everything over to Amazon Web Services. I don't know if this means anything to the administration end of my podcast--we didn't get any notifications that it was happening so I'm hoping for the best. (Working on the "no news is good news" theory.) However, it does mean that my podcast, as well as any other podcasts hosted on Podbean (which includes several of us quilty folks) are currently unavailable. Supposedly it should be back up tomorrow morning. Again, here's hoping for the best....

A Finish--Just Playin'


 A few weeks ago, I decided to play with a technique I'd been wanting to mess with for awhile. So I gathered up a bunch of snippets of embellishment threads, yarns, and cords.

This...


Became this... 


 (This a little more close up...)

And soon became this after I soaked off the water soluble stabilizer.

And then it sat for awhile.

Last night I dug into my fat quarter stash and turned it into this:


Which is dimensional, by the way. My current modus operandi.
 Each layer was done by itself, quilted, and then attached the layer beneath or above. 

 (Can you see I free-handed some feathers to frame the thread? First time for that too!)

Ahem. Currently no idea what I'll now do with this. It doesn't have an obvious way to hang it (no binding to sew a sleeve into), so I need to do some more thinkin'. And playin'. But even if it never hangs anywhere, it served it's purpose. I experimented, tried a few techniques at once that I've been wanting to try, and I had a ball playing. What have you experimented with lately? Fabric-wise, that is.

Total Color Tuesday--Gettin' Bizzy

Sorry--last week totally slipped my mind. I was in a Black Friday Sew-In Frenzy all weekend! Got a lot done, but completely blipped on Total Color Tuesday. However, I've discovered we only have two weeks left--this week and next, and we'll be done with our color study. Or, at least, we'll be done with this particular book. Next spring my design study group will be focusing on, yes, you guessed it.... color. So you may be seeing more but it'll have a very different feel. More show n' tell, I suspect.

In any case, back to Color Magic for Quilters and this week's color harmonies. We're gettin' bizzy and inviting all sorts of colors to the party!


Skip, Skip, Skip to My Lou

So in this week's first harmony, we're hopping around the color wheel on one foot and picking up every other color to use in our project.

This is a good harmony for you indecisive folks out there.

The technical term for this one, if you want to impress the troops at an upcoming holiday party, is "full range of alternates." Doesn't that make it sound all scientific-artsy?

I rather arbitrarily started with green and started hopping, which gave me green, blue, purple, red, orange, yellow. (My red looks a little purpley here but trust me, it's red.)

I could see this as a baby quilt, of course. Lots of fun contrast. I could also see doing a scrap quilt with this in a wide range of values--my colors here are all pretty saturated because it's faster for me to put together these harmonies that way. If I wanted to futz with it, I'd have some tints in there (those are hues with white blended in) to soften it up. Maybe even go all Easter Egg on it with a range of pastels. If you used shades (hues with black blended in) you'd be heading into Amish country.So, some definite possibilities there.


The Ives Color Wheel (CMYK, or the one that Joen Wolfrom favors) is a whole different matter on this one. I imagine these color harmonies would be defined somewhat differently. Skipping every other color on a 24-point color wheel looks very different from skipping every other color on a 12-point wheel. I didn't even bother going into my stash--I'd have been here all night.


Meet the Angles

 Now we're into triangle color harmonies. Toning it down a bit and sending a few colors home from the party early.

Colors on a triangle, which you may know as a "triad," is more familiar. These colors are naturally balanced--nature loves a triangle.

We're probably most familiar with the primary color triad: red, yellow, and blue. Can you say, "baby's room?"

There are, of course, the secondary color triad (orange, green, and violet), and the tertiary color triad (yellow-orange, blue-green, and red-violet).
 I went simple and stuck with the primaries. Again, my red is looking terribly purple-ish in this picture. Sorry about that!
 In the Ives color wheel, we have a lovely combination of yellow, turquoise, and magenta.


Margarita, anyone? There's not even any snow on the ground yet where I live and already I'm thinking of tropical beaches.


The Angles Bring a Friend


Start with your colors on the triangle, then jump across the color wheel from one of those colors to find an accent. 


I jumped across from red to pick up green.


For the Ives wheel, I went across from the turquoise to pick up orange.

Now I want a mojito. And a beach chair.


Play time!

Your turn! As usual, link up your blog posts as you play with these color harmonies. Let me know what you think--have you, or would you,actually use any of these types of harmonies in a quilt?

Easy Street Week 2 Progress and Sew-Day Report

I've completed Week 2 of Easy Street--so far, due to some well-timed days off, I've been able to keep up! I hadn't used the Companion Angle or Easy Angle rulers before (Bonnie Hunter's recommended rulers for her mystery quilts) so this was my first run with them. It took me a little bit to figure out the best way to use them without having my hands at odd angles while cutting and risking lopping off a major appendage. I used an Olfa rotating rotary cutter mat, which helped tremendously. If you don't have one of those, add it to your wish list! I use mine frequently.

I was cutting a lot of the purple pieces from small scraps so that took longer since I had to cut all three sides of each piece in most instances (to have straight edges) rather than a strip and a few slices to get multiple units at once. It felt good to use up some scraps I've had around for awhile, but it took so long that I'll be thinking long and hard about that trade-off in future steps, if it comes up again.

I had a sew-day on Friday and half of Saturday with one of my groups of quilty peeps, which is how I was able to get Easy Street done on the day the clue was posted. Woot! I did also get some other stuff done. I can't post a picture yet of my other completion this weekend until the recipient receives it. But it's of the postcard variety.

For more results from Easy Street Week 2, visit Bonnie Hunter's blog and linky.

Food Friday--CSA in Review

This week I decided to just post a general reflection on my experience doing the CSA (Community Supported Agriculture) for the first time last summer (2012). Spoiler alert: I've already sent in my subscription payment for summer 2013. So that tells you something.

Here is what I learned by participating in a CSA:

1. Summer is actually several seasons. Rather than just looking at mid-June to the end of August as one big block of summer, I became much more aware of how the growing season shifts and changes every few weeks. I was much more connected to the passage of time--in a good way! We shortchange our earth when we only subdivide it into four main climate categories: spring, summer, fall, winter. I learned to think in terms of "green leafy things season," "beet season," "zucchini season" (okay, "zucchini millenium"), and so forth. When the acorn squash started showing up, I knew we were moving into fall even though it was still quite warm out in these parts.
       I grew up on a small one-family farm--I grew up eating fresh produce from the garden, my mother canned everything and made homemade bread, and my father made homemade maple syrup. We were a real back-to-nature-movement family. So I'm probably more tied to the land than the average folk my age. But you don't pay that much attention when you're a kid. Now I was paying attention, and it was pretty dang cool. Somehow, it made summer seem to last longer.

2. A little produce can go a long way. At the beginning of the summer we were getting one bag full of stuff. By mid-summer, I was hauling a couple of overfull, incredibly heavy bags plus a few other containers to try to get everything home. I did fairly well keeping up with it, except for when I was on the road. The fam wasn't good at using fresh produce if I wasn't around to force the issue. There were two memorable occasions when I had to toss out a lot of stuff that had gone bad before I had the time to deal with it.
     The reality is, with my job and summer schedule, I just don't have time do canning. That would the ideal, of course. However, until such a time as I'm no longer on the road several weeks out of the growing season, I have begun exploring vacuum sealers and may be able to quickly seal and freeze or refrigerate produce so I can work it into my schedule more easily. I'll come up with something.

3. It's an extraordinarily creative endeavor, finding recipes and inspiration for using (1) vegetables you've never worked with before (yes, I mean you, kale), and (2) vegetables you're getting week after week and are thinking you'll scream if you see another one (stop trying to hide, zucchini--you know who I'm talking about). I had a blast! I was tossing combinations that I'd never tried before into the pan just to see what would happen. I'd wander through my spice cupboard, sniffing spices to see what smelled right for whatever concoction I was working on. Some were more successful than others, but they were all a blast to do!

4. Purple green beans and bell peppers are just fun. 'Nuff said.


So, yes, I'm doing the CSA again next year. And having done it once, I'll be fore-armed with some tried-and-true recipes to turn to while I'm working new ones in. I'll also hopefully be fore-armed with better long-term storage methods so I'll be able to have the benefit of my CSA well into the winter months.

I would adore finding a dairy CSA that's got goat cheese involved. Now that would be heaven!

Check out your area--see if you have a CSA near you. Give it a shot! If you're single or a couple or a very small family, you might want to talk to a neighbor or friend to see if you want to share a subscription the first summer, until you get a feel for how much produce you'll be getting. Each CSA works differently, so be sure you read the information thoroughly. Check Local Harvest for more information about what a CSA is, how they work in general, and listings of CSAs in your area. (And no, this is not a paid endorsement! That's how I found my CSA, and I also check it for area farmers' markets and the like. It's a great resource.)

It's not too early to start thinking about what you'll be eating next summer. In fact, I can't think of anything better to do when the snow starts blowing!

#BFSI In Review

Friday was, yes, our Black Friday Sew-In! Woot! And a great time was had by all. The giveaway on my blog was great fun--loved reading everyone's responses! Congratulations to Brenda J (The Quilt Show subscription) and  Fiber of All Sorts (The Fat Quarter Shop certificate), the lucky winners of my blog giveaway!

Thanks to all the other bloggers who hosted their own giveaways and linked up here. It made the party even bigger!

And even more--I did four mini-giveaway challenges via Twitter through the day. Posted those winners via Twitter. Again, I loved reading everyone's responses to my questions!

What else did I get done on Black Friday, besides hang out on Twitter? (By the way, for me "BFSI lasted through Sunday morning--other than some Christmas decorating and going to a movie with the fam, I basically hung out in my sewing room most of the weekend--so this is a tally of everything done from Friday morning until this writing.)


I took an April Cornell charm pack (Portugal) I've owned for several years...
 ....made some 9-patch blocks out of it....

...and then turned it into this Disappearing 9-Patch.

The astoundingly oversized borders are because I'm making this a wheelchair quilt to donate to a local nursing facility and the one charm pack only makes a 26"x26" square center. Wheelchair quilts should be in the neighborhood of 36"x45" so I added 5" borders (finished) to either side and 9" borders (finished) to the top and bottom. Normally not a design choice I'd make but I think it works okay. I didn't have another charm pack that coordinated and I also didn't want to cut just a few squares from yardage in my stash, so I went with the honking-big-border technique. And hey, I got to use another yard out of my stash for the borders, 2 1/2 yards for backing and another part of a yard for binding. Big stash-busting happening this past weekend!

Disappearing 9-patches are fun. I'm already digging into the rest of my charm pack collection to see what ones I might work with next--they make very fast donation quilts! This only took about 90 minutes total to get to this stage. Since I'm just going to meander-quilt it, it won't take any time at all to finish completely.

Then, rather on a whim, I pulled another set of fabric off my shelf that's been there for a few years. I fell in love with a vendor's booth the last time I was in Houston in 2008. She did all her own hand-dyed fabrics with various surface treatments--super cool stuff. I bought a roughly one yard piece of fabric and then several small pieces that each had leaves stamped onto them. No idea what I was going to do with them, which is why they sat.

Finally today I just bit the bullet, did some arranging, lightly fused them into place as a basting method, pulled some yarn apart to make it a little thinner, then did some stitching and embellishing. I also loved the frayed edge of the background fabric so I frayed all the pieces to give it all a very organic, rough-hewn look.

It's not really a quilt since there's no batting, backing, or quilting. Let's call it a tapestry.


Leaf details 1


 Leaf details 2


I can't put a hanging sleeve on it because stitching would show through front so I need to find a hanging device with hooks that fits the mood of the piece.


And then I finished something I'd been playing with for a bit.

Karen Lee Carter teaches a dimensional flower technique that I've been wanting to try. Since this was a test piece I used some scrap fabric for it, so my fussy-cut flower (center) has a part of another flower overlapping the leaf. That particular fabric doesn't have any whole flowers untouched so it doesn't work well for fussy-cutting. Again, test piece, didn't worry too much. I did some satin-stitching for the first time--need to practice more on that. Then I also used it to test another technique I saw in Quilting Arts Magazine: cut a hole in the center of something and sew across it to create a web effect. Very cool!


Detail of dimensional flower


Detail of webby hole in the middle.

Love both techniques!

I also put together a few new "quilt sandwiches" to practice my FMQ on, and the rest of the time I spent poking away at Easy Street Week 1. I'll put pictures in the Flickr and Threadbias groups tomorrow (Monday) and be linking up to Bonnie's blog then. 

I had a very productive long weekend. What about you?

Black Friday Sew-in Giveaway! #BFSI

This giveaway is now closed!

I am in the process of being in contact with the winners and will announce them later!

Woohoo! 


It's Black Friday again here in the U.S.--the day after Thanksgiving when retailers publicize huge "door-busting" sales to entice as many shoppers through their doors as possible. Lots of people look forward to Black Friday for months, plan their holiday shopping lists around the sales they'll find, and strategize for how to get first dibs on their chosen items. I have a friend for whom heading out to Black Friday sales with her sister is just as much part of the family celebration of Thanksgiving as the meal the day before is.

For me, it sounds like the seventh level of hell.

I'm not a big fan of crowds in general, and crowds whipped into a frenzy of wanting to be first in line at the cash register is even more unsettling for me. I'd much rather unwind after hosting the dinner the day before by hanging out in my sewing room and petting fabric.

So I invite you to stay in with me and sew! 


Even if you do head out for some shopping, check in during the day or put your feet up with tea (or whatever your recovery beverage of choice is) and catch up with what's been happening with #BFSI.

On Twitter, we'll be posting pictures of our progress, asking for advice, cheering one another on, talking about the many ways we're eating turkey leftovers, and in general hanging out and having fun. Just use the hashtag #BFSI. You can also use Tweetchat to track all the tweets in one place: http://tweetchat.com/room/BFSI.

Meanwhile, back at the blog, I'm hosting a giveaway today to make it even more fun to just stay home!

The first winner will receive a:

$50 gift certificate from Fat Quarter Shop


Woot! Even better--Fat Quarter Shop is having a huge-a-mongous Black Friday sale too! Note that the sale ends at midnight CST Nov 29th, so you'll have time to spend that gift certificate during their sale if we can get everything timed right. Meanwhile, I'm just gonna do some cyber-shopping on Black Friday myself. :-)

Thanks, Fat Quarter Shop, for sponsoring this giveaway!

The second winner will receive a:

Gift certificate for a 6-month membership to The Quilt Show

 (Value $24.95.)

This gift certificate will give you the opportunity to try out The Quilt Show, Web TV for quilters and worldwide quilt community with Alex Anderson and Ricky Tims. Internet "TV" episodes, a daily blog, classrooms, and more. It's a great resource, and this is the perfect way for you to dabble your toes to see if you like it.

By leaving a comment here, you are entering both giveaways--I will choose two winners from the total number of comments. (In other words, I can't separate out who wants which giveaway; I'll just be drawing two winners at random.)

Also, your email address must appear in either in your comment or attached to your profile in order for you to be entered in the giveaway. If I draw your name and don't see an email address, I'll move on to another winner. Please check to be sure your profile includes your email address, or include your email address in your comment below. You may want to write it as "screenname at gmail dot com" to avoid web-crawlers.

To enter the drawing, please leave a comment here answering the following question:

What is one thing you have to be thankful for--quilty-related!--in 2012?

You may have a second chance to win!  
Just leave a second comment that tells me you've subscribed to my podcast (which you can find at www.quiltingfortherestofus.com or at iTunes).


This giveaway closes at Midnight Eastern Time Friday, November 23rd. (So it's a 24-hour thing!)

Now, guess what else? 

Other bloggers and podcasters are hosting their own giveaways today too! After you've entered my giveaway, use the links below to check out who else is giving great stuff away. Good luck!


Quilt Top Complete and Easy Street Prep

You're Getting Sleepy
"You're Getting Sleepy" (aka Poppies) top complete.

 I've ordered more of the poppies fabric to use as the backing. I didn't have enough of any of the fabrics to piece a backing and I love the poppies fabric enough that I really wanted more of it anyway. Haven't decided how I'm going to approach the quilting yet, so it may be a few more weeks before this gets done.

Meanwhile, just a few days left until Bonnie Hunter posts the first "clue" for the Easy Street Mystery Quilt. I was just checking out the Flickr group to see everyone's fabric choices so far--very cool! Here's the slideshow from the group (if the embed works correctly).


 If you're on Threadbias, be sure to check out the Easy Street group I've started there as well--more pics of fabric choices.

Total Color Tuesday--Skipping About


We're playing hopscotch all over the color wheel this week. Three color harmonies again. The first one is actually pretty closely related to last week's; the second two are related to each other.

Two Colors, Four Colors Apart

 Start somewhere on the color wheel and choose your color. Then count four colors over, and the fifth color would be the other color you would use.

You're pretty close to complementary so you've got the pizzazz of that combination but it's just enough of a tweak to the side to make it a little different.

I could see putting this red-purple and yellow together if I had a variety of tints and shades of  each of them. Could be pretty.


Using the 3-in-1 Color Tool, even at four colors apart the colors are much closer together on the color wheel than on the standard wheel. Divided into 24 segments, five colors apart on this wheel is the equivalent of 2 1/2 colors apart on the standard 12-point wheel.

So starting with yellow again, I land on blue-green for the second color. I dig this combination. Very tropical. It also works nicely because I have a blue-green that includes some yellow hiding in the background, so I could see myself putting these two into a quilt. I'd probably include a nice, bright white. Summer, here I come!


Three Colors, One Color Apart


In other words, choose a color, skip a color, choose a color, skip a color, choose a color...do si do, change partners, do it again...


I decided to stay on one side of the color wheel and did purple, blue, and green. You could, of course, start closer to the turning point and have both warm and cool colors in a single quilt with this color harmony for an entirely different effect.

I wasn't keen on the dark versions of all three colors together, so I decided to play a little more with contrast.


I switched out the dark blue for a light blue. I'm still not keen on this one. That being said, I could see doing something very scrappy with all sorts of purples, blues, and greens on a white background. That would probably work really nicely.


ZING! Here's the same color harmony on the 24-point color wheel. Again, subdivided more, you have less division between colors when you skip around. I ended up with magenta, orange, and red. Wowzer.

On the other hand, black background and you've got something funky going on. Again, with maybe a little more contrast happening (shades and tints of these colors), it could be pretty exciting.


Three Colors and an Accent


In other words, choose a color, skip a color, choose a color, skip a color, choose a color...then take a big leap across the color wheel and find the opposite of that middle color and grab its hand for a grande allemande...

Okay, so that's a little long for a square dance call. But you get the idea.


Back to the standard color wheel: I started with my three original colors: purple, blue, and green. That makes the accent color orange (the opposite of the middle color, blue).

This time I went into my fat quarter collection and I was able to put together four fat quarters I could easily imagine putting together in a quilt. Some of that is, of course, that my blue fabric also has green and hints of orange, so it pulls everything together.

This combination, I dig.


For the 24 point color wheel, the accent color becomes aqua green.

I've been in a very aqua and turquoise mode lately, so I have plenty of that in my stash suddenly. I used the same red, orange, and magenta fat quarters from earlier and pulled an aqua-green fat quarter to go with them. These particular values of these colors are a little intense but, you know, it would work on a black background? I could see something really interesting that was primarily the warm colors with just little bitty pops of the cool sprinkled through it. It would still be intense, but could be really eye catching.


Play time!

Your turn! As usual, link up your blog posts as you play with these color harmonies. Let me know what you think--have you, or would you,actually use any of these types of harmonies in a quilt?

Slow Quilt Monday--Consider Color

If you follow my blog or podcast, you'll know that at the moment I'm not particularly in a slow quilt mode. Several months of no-time-to-quilt makes Sandy a pent-up-quilter-ready-to-explode-with-fabric. I'm compensating for the dry period now by churning out several immediate-gratification projects. I'll get over myself soon enough and return to former ways. But even while I'm spinning through a variety of projects, my brain is actually still in slow quilt mode. I'm still pondering and brewing. I have some mental quilts I've been working on for some time. I believe after the holidays I'll be going back to having things hanging on my design wall that are talking to me.

My Design Study Group is drawing near to the end of the Lorraine Torrance book Fearless Design for Every Quilter that we've been using for the last year or so. Admittedly, we didn't follow the process to the letter. Sometimes we did homework, sometimes we did the homework assignment right in our session together. Sometimes we said we were going to do homework and didn't. You know how that goes. Sometimes we critiqued, most times we just oohed and aahed. And laughed. Always laughed.

The group has said it wants to continue. And as we discussed how we might continue, the overwhelming interest was in working more with color. We're starting to explore what books we might decide to work through next. One of our members showed me a book at our guild meeting this week that I fell in love with. I think it's a definite contender. I also think it must come to live with me. Time to head to Joanns (where she told me she got it) with a coupon to see if I can do better than Amazon pricing.

So for today's Slow Quilt Monday post, I'm thinking color. With the work we've done in the Design Study Group, and with my Total Color Tuesday posts, I have been challenged to look at color combinations I wouldn't normally consider. I want to keep pushing that. So this week, as part of my Slow Quilt Movement process, I'll be paying close attention to color in the world. As our leaves disappear and the usual winter grayness descends on my area, I'll be looking for monochromatic color schemes in my backyard--the play of neutrals as things hunker down for winter. When I go to my stash, I'll continue to pull out the color wheel and play with creating color combinations from my fabric, just to see what it would look like if....

If you're needing a little slow quilting in your life, I encourage you to join me in just paying attention to color this week. Pull out your colored pencils and make some sketches, using colors you wouldn't normally use. Play with your stash. Take pictures of your yard and look at the palettes that appear. When you catch yourself staring off into space at work, let your eyes land on something and consider what color that thing is, and what colors you might put with it. Dream in color.

Starting to Plan for #BFSI

Friday is my now-annual Black Friday Sew-In, or #BFSI. (Last year I named it the Anti-Black Friday Sew-In which more completely captures my feelings about the day but I'm trying to minimize character count for Twitter purposes.) I'll be doing some fun giveaways and I've invited other podcasters and bloggers to join in as well--I've been hearing rumors of plans so I think it'll be a great day!

But the purpose of the day is really to stay in and sew, so I'm starting to make plans for what I might do. Part of me wants to work on current projects or UFOs, of course, but part of me also really loves the thought of finishing an entire top, beginning to end, in one day, for a donation quilt. I did that last year (mostly in one day) for Boxing Day Sew In (#BDSI). It was a hoot.

If that's what I do, I'm thinking I may play with the disappearing 9-patch design. It's been around awhile. If you're not familiar with it, Missouri Star Quilt Company has a nice, brief tutorial on it.


I've got charm packs galore, plus lots of my own charm squares I've cut from scraps, although no baby-style so I'd be making a lap quilt for an adult. Maybe most appropriate for a wheelchair quilt? Our guild collects a variety of sizes for a variety of places so I'm sure I could find a willing taker. Anyway, that's a thought.

Another thought is, truly, to knock out some UFOs. Here's my current UFO list:
1. Poppies--needs borders, backing, quilting, binding
2. Momufo Flower quilt--needs borders and backing (sending out for quilting)--I've not posted about this one yet because I'm waiting for the "big reveal." I worked on it during my vacation at the family cottage last August. The whole story will come out when it's done.
3. Vickie's Peacock--needs backing, quilting, binding
4. Guild Medallion Challenge--needs backing, quilting, binding
5. Stash Mystery Challenge quilt--needs a whole lot!
6. Hexies--so far, only cut and marked. Needs even more than #5
7. Jelly Roll Sampler--still in piecing phase
8. Guild BOM--still in piecing phase
and now I've added 9. Stack the Deck for niece and 10. Something for nephew--still just in my head, though, so not sure it counts as a UFO. Is there an IOUF category? Intended Objects UnFinished? (Pronounce it like "OOF!" and you're not too far off the mark.)

I guess I should start paying attention to my UFO list. I'd gotten it way down to only having two or three UFOs but now I've been doing more experimental things and my UFOs have been multiplying while my back was turned. They have a way of doing that, you know--sneaky boogers.

Oh, and I'll have some blocks to do for the Easy Street Mystery Quilt. Woot! (Check out pics as we go at the Flickr group.)

So, if you're planning on getting something done over the coming holiday weekend here in the U.S., or the regular weekend everywhere else in the world, what's on your list to do? Let us know your plans!