Lancaster Meet-Up

Okay, y'all: I just sent an email to everyone who contacted me with their availability for the meet-up at the AQS Quiltweek in Lancaster this week. So check your email!

If you didn't get an email and are planning on being there (especially on Wednesday, hint hint), be sure to email me or tweet me (@sandyquiltz). If you leave a comment on this blog post, I'll get it that way too, though if I don't have your email address I won't be able to get in touch with you.

At last count, there could be seven of us at the meet-up--Woohoo!!!!

And a very belated thank-you to...

spooldoily.jpg

...Tina (aka @Weezyworks).

Several weeks ago now...well, okay, maybe a couple of months, Tina sent me a very funny Christmas card and this beautiful little spool pin doily she'd crocheted. It's gorgeous. I immediately put it on my spool pin and have been using it ever since!

I apologize, Tina, for the delay in my response but I've been using it and admiring it every time I change my thread!


fromJackieBerdych.jpg

...and to Jackie (aka @SewExcitedQuilts)

I don't think I've already blogged about this one, anyway. Jackie sent me this around the holidays as well, and I've been using it for (ready for this one?) holding my earbuds in my purse. It's great! They don't get all caught up in everything else, and I can easily get hold of them!

 
ScrapitudethankyouDDR.jpg

...and to Diane (aka @ddrquilter)!

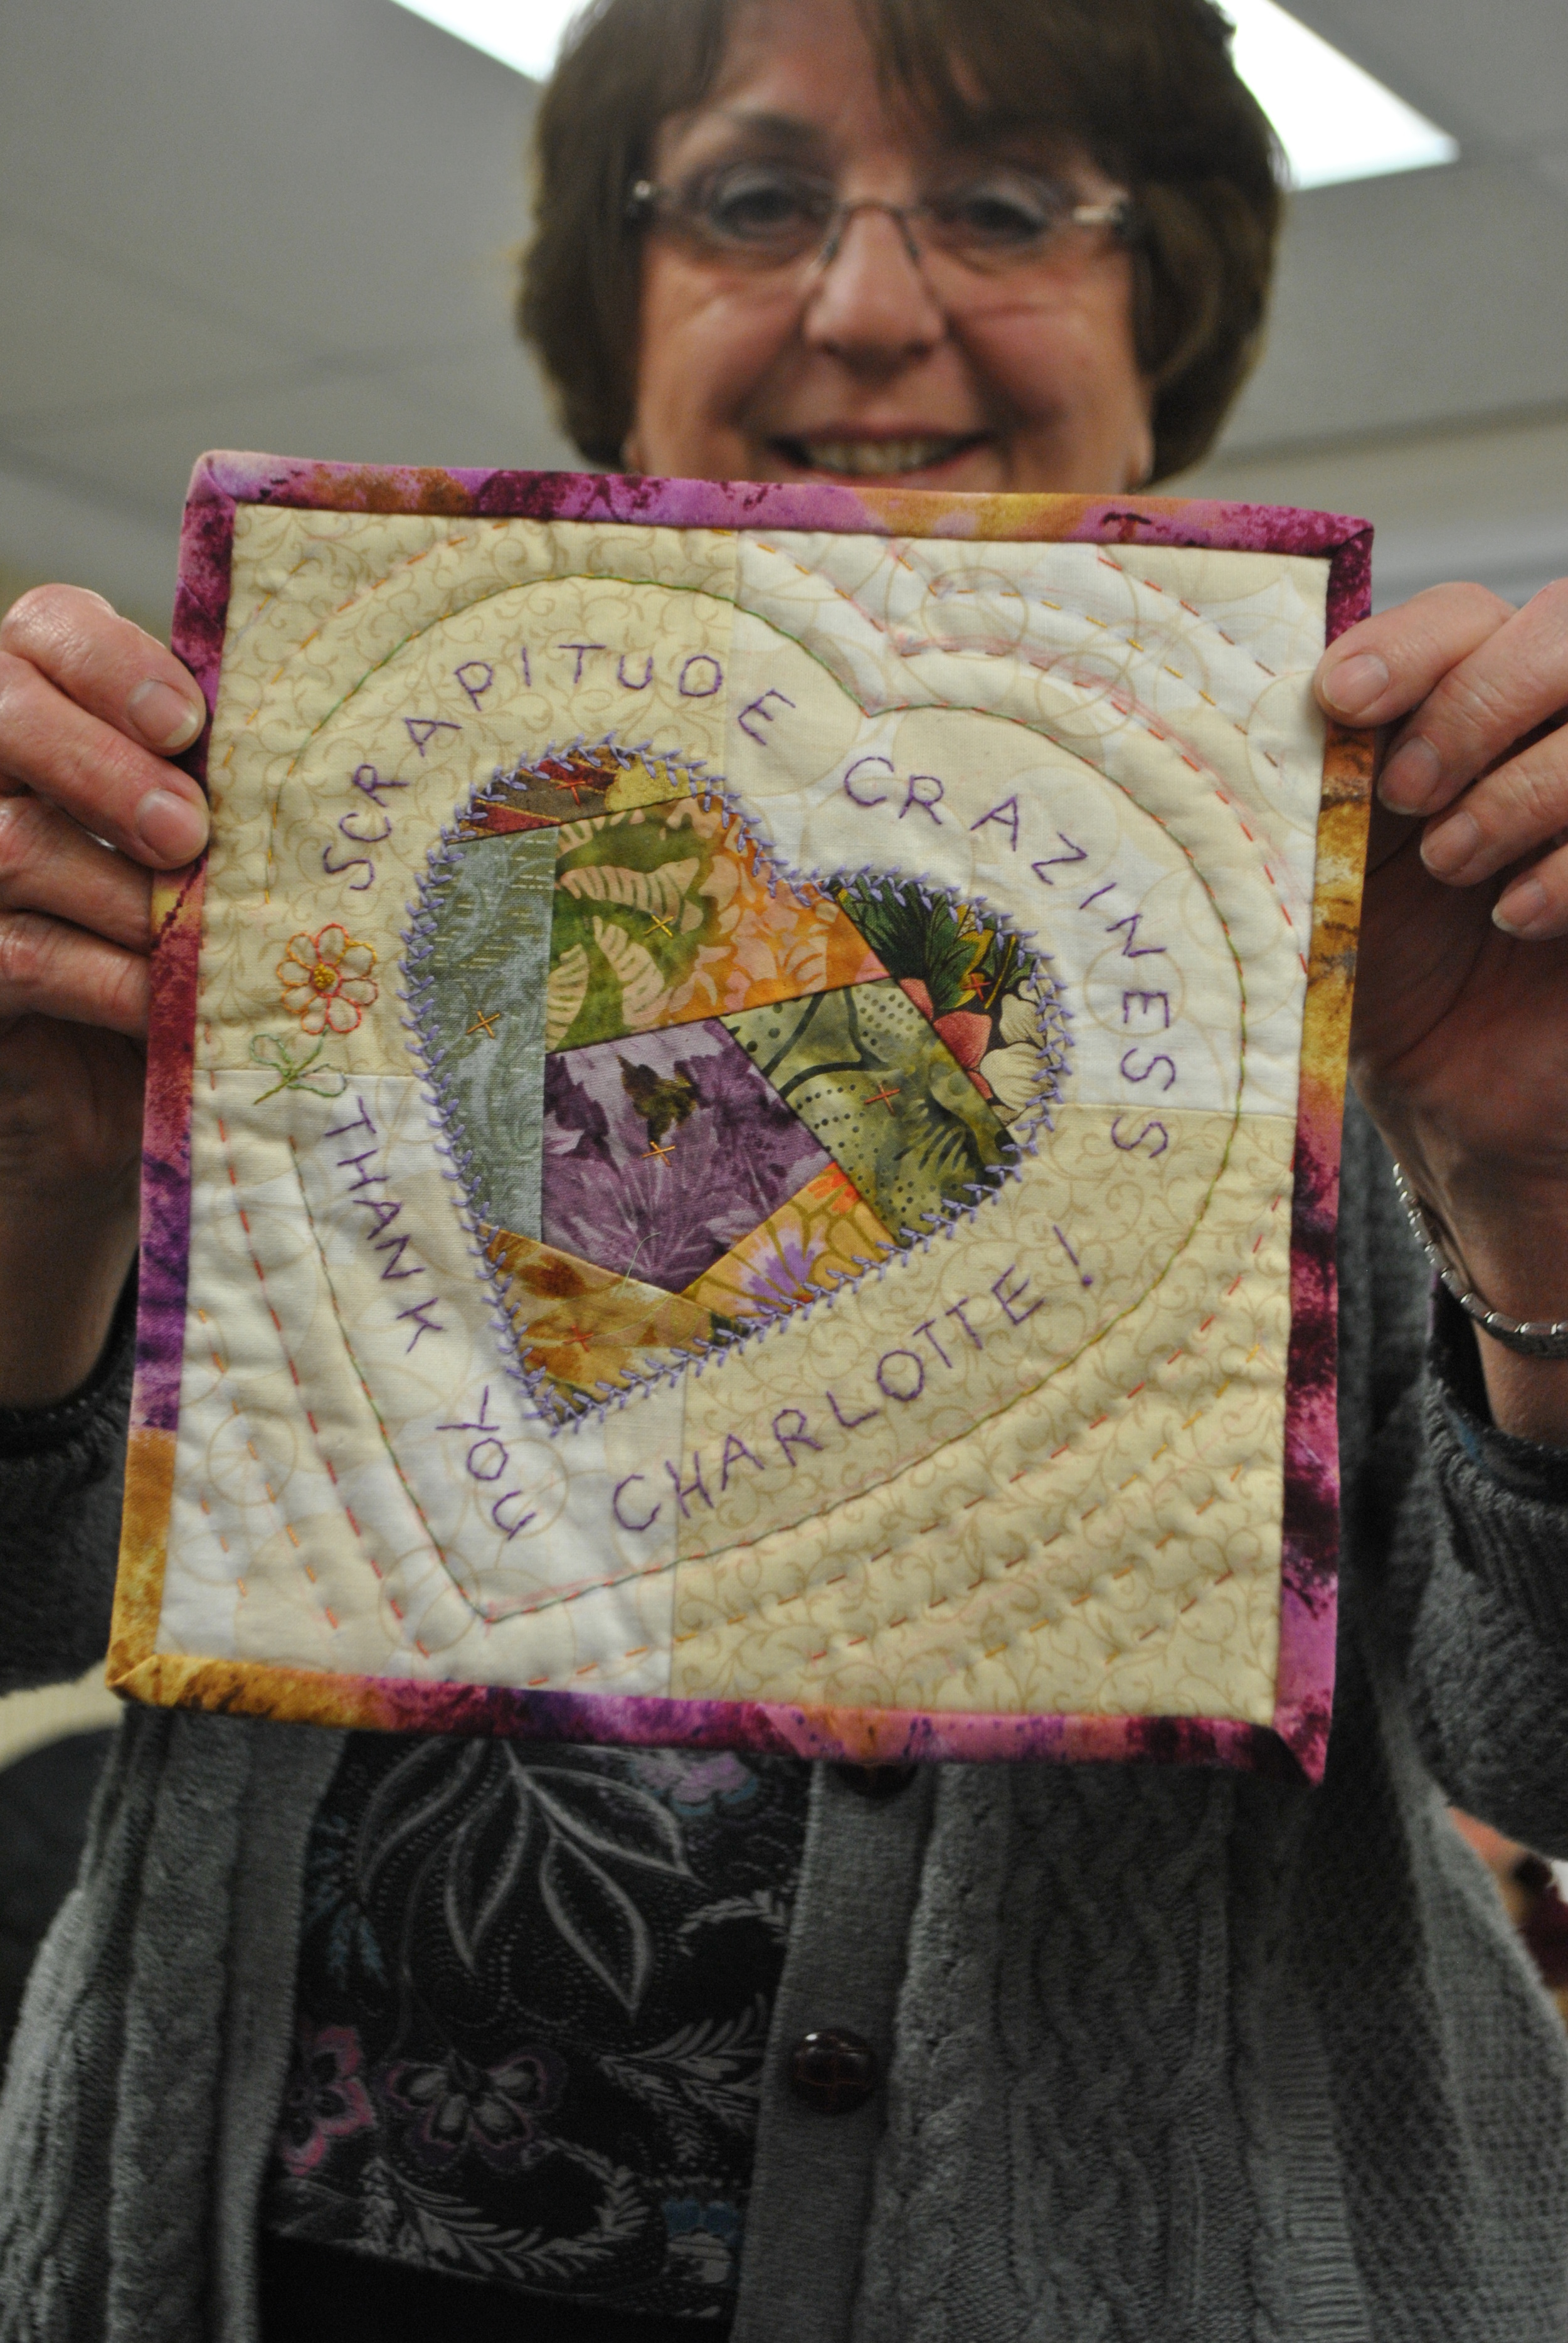
Diane sent me this when she sent her thank-you gift for Charlotte. I held off posting the picture until after Charlotte's gift-giving ceremony had been up for a bit.

It's lovely, Diane! You can see from the 3M tabs it's hanging in my sewing room/office...actually, right above my cutting table.

Thanks so much everyone! I'm very touched by your thoughtfulness, and I love that I'm surrounded every day in my office/sewing room (and my purse!) by my listeners! :-)


Boo Yah! Weekend Goals Met! Plus DPW, Scrapitude, and Daisy's Quilt Reveal

This time around, I did great on my weekend plans!

SDHDPWTop3914sm.jpg

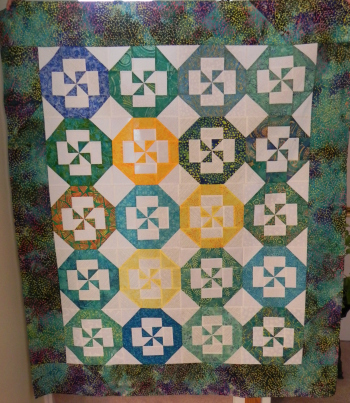
Remember that Disappearing Pinwheel extravaganza from way back at the MLK Jr Day Sew-In? I finally got my top completed! I also did a backing for this one, a nice turqouise or aqua blue marbled cotton. It's now in the hands of the longarmer at my LQS. I'm having it pantographed, quilter's choice. Still haven't entirely decided what I'm going to do with this one but I'm thinking it may be a gift for a friend.


And now, the big reveal....

SDHScrapitude3914sm.jpg

My Scrapitude top!

I haven't come up with a spiffy name for this yet.

SDHScrapitudeborderdetail3914.jpg

The narrow inner border was from my stash, so the only purchased fabric for this was the outer border and backing.

I fell in love with this border fabric. Not at all what I'd originally had in mind when I ventured to my LQS to find something. I'd been thinking a large print multicolored floral to balance out all the sharp pointy things going on in the center. I'd seen the bolt of this fabric on the shelf and liked that it had all the colors I was looking for, but since it had the vibe of an Australian aboriginal print design I didn't think it would really fit the feel of the traditional scrappy top. Later in my search, the staffperson pulled it off the shelf and we laid it out next to the quilt. There was a moment of silence, and we both said, "...Oh." And then, "Oh..." again. I loved the way the border motif mimicked the shape of the block, and it spoke to the colors in the quilt. I fell in love with it. Unique and unexpected--even better.

I only debated it for several moments longer because it's a directional print with a distinct motif and I thought I'd hate myself for trying to work with that. Yeah, I probably would, but it was too perfect to pass up.

My original intention was to do all sorts of math to get those motifs to work out as perfectly as possible, by taking little tucks in the border  to pull the motifs together in a shorter repeat as needed. When it came right down to it, though...I was really trying to get the borders done in time to get the quilt to the LQS before it closed on Saturday. Plus, I'd already lost so many points and had so many things not meet up as they should've (you'll need to listen to my rant about a particular ruler for the backstory on that one) that this is nowhere near an heirloom or show-quality quilt anyway. It's going to be on a bed in my house...which bed is yet to be determined. So, in any case, me and my family are the only ones that will see it. My husband really likes it as-is, so I decided not to sweat the border and just get it on there.

Magically, and thankfully, this is the first fabric I've worked with in this way in years that was actually mostly printed on grain! As I cut the fabric lengthwise (so I wouldn't have to piece the border), it was mostly in line with the motif. Amazing. So my priority of at least having the motifs appear relatively straight along the borders worked out pretty dang well. I didn't worry about where the motifs ended or mitering borders to make them match or anything. We were in Get-'Er-Done mode and I was absolutely thrilled to Get-'Er-Done!

This is also now in the hands of my LQS longarmer and it's also going to get a pantograph. As I said to the woman taking my quilt, "If I'm ponying up for custom, it's going to be on a quilt where I can see all my points!"

StringStarPrep3914.jpg

Other projects done this weekend...

Got all my cutting done for my String Star class with Ami Simms at Lancaster AQS quilt week. I'm using various ethnic design fabrics. We're supposed to bring the uncut fabric to class "pressed and ready to cut." The best way I could think to do that was to press it, then lay it out flat one on top of another and carefully roll it all together. Here's hoping it's not a mess if we do get to the point of cutting that.

dyeclassprep.jpg

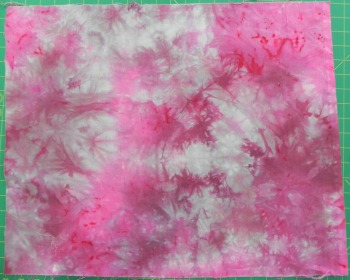
And I collected all my supplies for the dye class with Frieda Anderson. I already had most of it, but I did take this as an opportunity to pick up more small containers with lids from the Dollar Store--they're a good size for fat quarters and you can even scrunch a half yard down in there if you're going for the scrunchy look, which I normally am. Pack of five for a buck. Can't beat it.

I don't have to bring a ton of supplies because I did buy her kit, so she'll be giving us the dyes, gloves, a face mask, and some fabric. I'm also bringing extra fabric that I cut and folded later after I'd already taken this picture; she invited us to bring whatever else we might want to dye since we may have time to do more in the afternoon. I couldn't bring my dog (What? You can't imagine a Turquoise Retriever?) so I'm sticking with doing more PFD fabrics I can add to my collection.

I got more done on my Spring postcard swap--can't show that yet, though!

DaisysGrace3914.jpg

And, finally, in a last-Hurrah of the weekend, I got the binding on the quilt I won from Daisy in her giveaway a couple of months ago! Woot! If I recall, the name of the design is "State of Grace," so I've named this quilt "Daisy's Grace." My daughter wanted it for her dorm room, so I did a machine binding. She's very happy with it!

DD is holding it up for the photo, and she's standing on the second step up on our staircase. She refers to herself as "fun-sized," so this is the perfect size quilt for her. She'll easily be able to wrap herself up in it while...ahem...studying.

DaisysGracedetail.jpg

Detail of the pantograph design. I almost inevitably leave it up to "Quilter's Choice" on design and thread color--the most I'll usually say is "I want it to blend," or "I don't mind something that stands out on this one" or whatever. They used a nice beige thread that stands out a little, but not so much as to detract from the design. They always do a great job...which is why I usually say "Quilter's Choice!"

I am so thrilled to be able to report that I'm not longer feeling overwhelmed by the number of projects I've got going on! Getting all this done this weekend has  cleared off the top of my cutting table and my sewing table, plus a shelf or two. Things feel organized and in control again.

Breathe.


Souvenirs from Alaska

My husband just got back from being in Anchorage on business. This is his second time in as many years being there. Last year, he texted me said, "Hey, I just walked by a quilt shop!" He very kindly included a picture of the front door with the name of the shop.

You know how mean that is? I gave him cr*p when he got home about not getting me anything, although I didn't give him too much of it because he had brought me a beautiful, small stained-glass plate with native designs that still sits on the mantle of our fireplace.

This year, he texted me a picture of the door again. "Really, you COULD buy me souvenir fabric, you know!" I texted back. His response, "I wouldn't know what to get." "Oh, please," I said. "They'd just think you were the cutest thing coming and would love to help you out!"

Turns out, this time he did brave the quilt shop. He put himself at the mercy of the staff, described the kinds of quilting I normally do, and they made some choices for him. Well done, team!

So, thumbs up to The Quilted Raven in Anchorage!

AK1.jpg

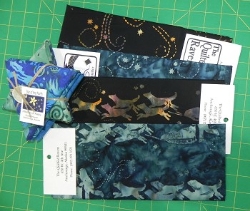
These fat quarters are all done by Alaskan artist Cindy Shake at Cindy Shake Design.

The longer pieces have two each of two designs; one's swirlies and stars, the other is the dog sleds and mushers. (Anchorage is the public starting point of the Iditarod.)

AK3.jpg

I love the many ways fat quarters can be bundled in cute little packages. But I did break open that star collection so you could see those fabrics as well.

Dig those birds!

And what's that little thing down in the lower right?

AK4.jpg

Why, it's a button, of course. It was used in the tie on the packaging. It looks to me like a bone button, but don't quote me on that. Perhaps part of an antler? There was no identifying information.

I won't be putting this on clothes--it'll go in my "random embellishment jar" for safe-keeping.

AK2.jpg

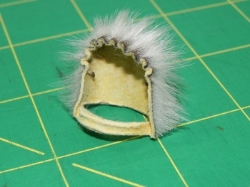
Finally, a traditional seal-skin thimble like those used by the Inuit for generations.

I won't ever use it--it'll sit on a display shelf I have in my sewing room with some sewing-related trinkets he brought me back from a business trip to China, and an antique pincushion  my supervisor gave me for Christmas one year.

AK5.jpg

But before I put it on the shelf, I couldn't resist.

Some Unexciting Hand-Dyeing

Well, I *did* get back into my dye studio this past weekend.

Of sorts.

I finally cleaned up way-old dye concentrate. The last time I'd had a big dyeing session was probably the end of October or early November. Perhaps even before that. I hadn't dumped my dyes because I fully intended to get back down there to use them up. Never happened.

You see, dye concentrates are really only expected to last maybe 2-3 weeks (as long as you've not added soda ash), although I've stretched mine a couple of times as much as 5-6 weeks and there wasn't a noticeable difference. My basement is chill enough, which is probably key.

But. Ahem. Four months was likely seriously pushing it. However, because I'm big into experimentation, I decided to throw a few pieces of fabric into a few Way Old Dyes just to see what happened. The results are unexciting. What happens is that Way Old Dyes lose their chutzpah. The colors aren't as strong and didn't catch as well--it felt like a lot more was washing down the drain than usual.

grays.jpg

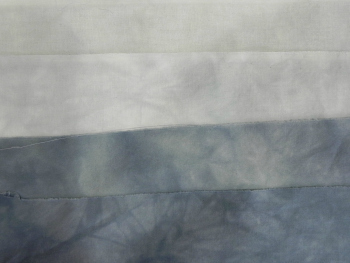
I did four fat quarters parfait-style (stacked one on top of another in a tall cylinder), and used up the leftover black dye concentrate, adding water so I'd get graded fabrics, the ones on top being lighter than the ones on bottom. And it worked, but they're all lighter gray than I think they would normally have been.

The one on the top in this photo is the lightest; I'd refer to it as "Ever-So-Slightly-Gray." It's basically a foggy white. The next one down is slightly darker although that's hard to see in this picture. The other two differ from each other mostly in the middles--the one on the bottom is more consistently dark than the one right above it.

I'm keeping them all, of course. I mean, really--who hasn't gone into their stash thinking, "I wish I had a really good foggy white"?

red1.jpg

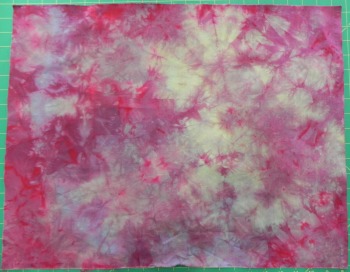
The next set was also stacked parfait-style, but this time I used four different colors. I knew, with the colors I chose, I could end up with sort of a muddy yellowy-brown thing going on, but I dig muddy yellowy-browns. I think they're interesting.

In this set, the colors clearly came out more dulled than they would usually, And the bright red spots you see here and there are the visible evidence of the fact that the red dye concentrates had gotten distinctly crusty. Chunky, even. A bit of a crystallization thing happening.

red2.jpg

I believe (don't really remember now) that the four colors I used were Mixing Red, Mixing Blue, Golden Yellow, and Fuschia, one on top of the other. There's a couple of ways to do parfaits where you get more distinct separation between the layers of color while still getting some artistic blending. But I was just dumping stuff in to empty out dye bottles. Like I said, I wasn't particularly worrying about results--I just wanted to see how Way Old Dye would change.

red3.jpg

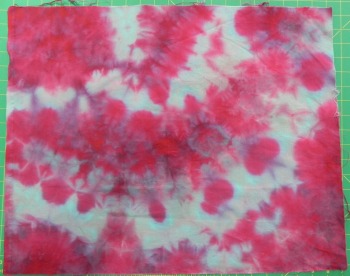
I won't say I'm happy or unhappy with the results. I actually got about what I expected to get: I had assumed Way Old Dye would lose some oomph. I have distinctly less oomph at 48 than I did at 28, so why would dye be any different?

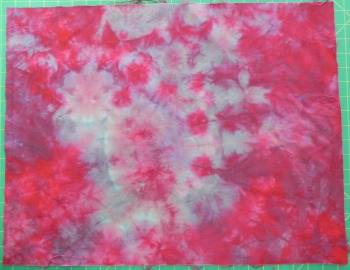
I'm not excited by any of these fat quarters, but they're still usable. In fact, I'm thinking they might be fun to use to practice free motion quilting on. I won't feel like I've got anything to lose and if it turns out looking nice, so much the better!

red4.jpg

I wasn't able to use up all my Way Old Dye in these samples--I did end up dumping the rest down the sink. But now all my bottles are cleaned out and ready to go for when I've got the time to mix up fresh Spry New Dye.

Next week, when I'm at the AQS QuiltWeek in Lancaster, I'll be taking Frieda Anderson's hand-dyeing class. I have her book and have already used her dye techniques, but I haven't done the gradations using the recipes in her book, which is what we do in this class. So I'll have more fun hand-dyeing pictures in a couple of weeks! (And I'll be using Spry New Dye for that!)

What I'm Working On...and 2014 Quilty Resolution Spreadsheet

As I announced on this past weekend's podcast episode, I'll be doing a 2014 Quilty Resolutions First Quarter Check-in at the end of March. A few weeks from now I'll ask you to let everyone know how you're doing so far at keeping your 2014 resolutions and I'll choose a giveaway winner from those who play along. Even if you didn't participate in my resolution challenge, you can report in on your own quilty-related resolutions and how you're doing, and you'll still be eligible for the giveaway drawing.

A few of you, ahem, you know who you are, have admitted to me that you can't remember what you resolved. Perhaps next year's resolution should be, "Improve my memory." So here's a link to a public version of the 2014 Quilty Resolutions spreadsheet. I've removed everyone's email addresses and last names for Internet safety.

I'm looking forward to hearing how you're doing at our first check-in!

How am I doing with my resolutions?

SSinprogress.jpg

Well, as we all know, one of them had to do with Craftsy classes. I've been keeping you updated on that. I'm currently in the finishing stages of Stupendous Stitching with Carol Ann Waugh, and then I really want to get cracking on Thread Art with Lola Jenkins. I already know what artwork I'm going to use and am seriously jazzed!

I'm also going to start working on another machine quilting class (which double-dips in my resolutions) but I'm waffling a bit on which one. I own several, and they've all got benefits. I'm watching all the lessons in two of them now to see which one calls to me more at the moment. Eventually I'll do all of them in my queue, so I could really flip a coin. I honestly don't know why I'm waffling.

I'll do another update when I post the giveaway blog in another few weeks.

What else do I have in progress?

  • I have to do the cutting for my Ami Simms class at Lancaster, and gather all the supplies for my Frieda Anderson class. The first will take a whole lot longer than the second! For the dye class, I already own all the supplies--I just have to pull it together and figure out the simplest way to pack them so they're easy to carry into class.
  • Scrapitude still needs borders (already have the fabric), then I'm taking it to my LQS for longarming--I'll buy backing there. They have a nice selection of wide backing fabrics.
  • My Disappearing Pinwheel quilt still needs borders, and I'm piecing backing for that one (have fabric for both), then I'm also taking it to the same LQS for longarming.
  • My postcard for Sandi's Spring Postcard swap is in progress but I really need to get working on it as technically it's supposed to be in the mail before March 20 and I'm in Lancaster for a chunk of that time!
  • I've got the binding pieces cut for Daisy's Twitter Giveaway quilt top that I won; I just need to get that top bound.

I have no idea how this happened. I rarely, if ever, have so many things going at once. I usually shoot for no more than three projects--one in planning or cutting, one at the sewing machine, and one at handwork (binding) stage. I'm feeling a bit overwhelmed with all of this so I'm just staying organized and focused and reminding myself to just enjoy the process. If it doesn't feel like fun to work on something on a given day, I choose one of the other projects to work on. It's all about having fun, not stressing out!

February Update on Craftsy Class Progress

Here's my February update! A couple of people have mentioned how fast I seem to be whipping through these so far. There's good reason for that. The ones I've decided to focus on first were the ones I was very nearly already done with anyway, those that I thought I could easily accomplish within my current schedule, or those that I knew I'd pretty much just be watching and absorbing information for later use (such as knife skills for cooking). For the most part, however, now I've accomplished most of the classes on my list that fall into those categories. Future classes are going to take much longer so you won't be getting reviews quite so frequently.

Completed Classes (all topics)

Current count: 20 (+3 from last month--yippee!)

Classes in Progress

Current count: 2

Classes To Be Completed

Current count: 17 (-1 since last month, since two of the classes I finished weren't in this list in January's post.)

Classes added this month: None!

Craftsy Class Review: Complete Knife Skills with Brendan McDermott

Another cooking class instead of a quilting class. Hey, a girl's gotta eat.

I've been wanting to do a knife skills class for years. I've picked up plenty from watching cooking shows, checking out YouTube videos, and iPad apps. But it seems that everyone has different techniques and often the demos were poorly done. I do decently well at slicing and dicing, but knew I could use some improvement.

When I saw that Craftsy was offering a class named Complete Knife Skills--and offering it for free, no less!--I spent only a millisecond thinking, "But I already have so many dang classes I need to get through," before I clicked the button and sent it flying into my account.

Photo Feb 27, 4 48 33 PM.jpg

I probably chose a somewhat awkward time to start watching it--I was waiting at my gate in the airport heading home from vacation. I likely gave a few wandering TSA agents pause. "Keep an eye on that woman--she's watching something about knives." They'd have worried even more if they'd seen the grin on my face.

Brendan McDermott, the course instructor, is an absolute hoot. He's a younger guy with tattoos up and down his arms, shaved head, and a very dry sense of humor that just never ceased to entertain me. I texted the link to my 23-year-old son and 27-year-old nephew and told them they both had to take this class--not only because actually learning how to use a knife is one of the best things a beginning cook can do, but because I thought they'd seriously dig the instructor. I confess to getting the giggles when McDermott would pepper his instruction with comments like, "Die, carrot!" and "You can even get into a good-sized watermelon without having to come at it like a Spartan warrior."

As fair warning to those who may be more sensitive to this kind of thing: Once in a great while his language can get ever-so-slightly off-color (he referred to a partially-sliced butternut squash as a "big-a** carrot" which cracked me up, and uses the "d" word once or twice), but it's infrequent and, in my opinion, pretty mild. But we all have different words that push our buttons so you'd need to make your own judgments on that.

Okay, so it was entertaining. But is it informative? Abso-positively! I learned more from this class than I have from years of cooking shows and YouTube. He's very thorough. First and foremost, he's a huge proponent of knife safety, so throughout his demonstrations he's focused on safety as well as efficiency. Although many of the knife skills demos I've seen before have said things like "This is a safer way to do this," Brendan actually explains why it's safer, what the risks are of other methods (interestingly, often other methods I've seen on the cooking shows themselves!), and has just a few guidelines that, if you keep them in mind, will help you figure out how to keep your fingers on every time even if you forget everything else he's demonstrated.

He talks about which knives are essential and what you can do without, tips about cutting boards, and always explains why certain cutting techniques are better than others. The lessons include various types of cuts, and techniques for a variety of foods. He even talks throughout about what remnants left on the cutting board when you're done with your prep work well for stocks and which don't. Each lesson also ends with a "Helpful Hint" (after the close of the lesson, so pay attention--there's more!).

I can't recommend this class highly enough. Unless you're a trained, professional chef, you'll likely learn something. And even if you're a trained, professional chef, the entertainment value is worth it. What do you have to lose? It's free!

The Basics:

  • 5 lessons total, though two of those lessons have a ton of segments so the length of each lesson (not counting the Craftsy promo lesson 1) varies from 8 to 43 minutes.
  • The first lesson is just a brief introduction to Craftsy since this is a free class--it's a promotional tool for them. If you know Craftsy, you can skip lesson 1.
  • Lesson 2 is the introduction--Brendan tells you about himself, and then goes right into choosing knives, the four basic knives you should have in your kitchen, and a few other useful tips.
  • Lesson 3 gets into specifics: how to hold the knife, a variety of cuts, each demonstrated on a particular item and tips about those items as well (what he says about onions was a highlight of the course for me!).
  • Lesson 4 goes into "short cuts" for cutting particular items that can often give people trouble or just ways to go about things more efficiently and effectively (citrus, bell peppers, jalapenos, etc.)
  • Lesson 5 is a shorter lesson on how to sharpen and hone your blade.

I really do encourage you to check it out. This is one of my fave Craftsy classes ever, and you know that's saying a lot! Again, that's Complete Knife Skills with Brendan McDermott. Two thumbs up. Two thumbs that I now feel like I run a far lower risk of slicing off at some point in my future!

(Transparency statement if you haven't seen it before: using the Craftsy links on this blog help support this blog and podcast. Thanks!)

Thank-you Gifts for Charlotte

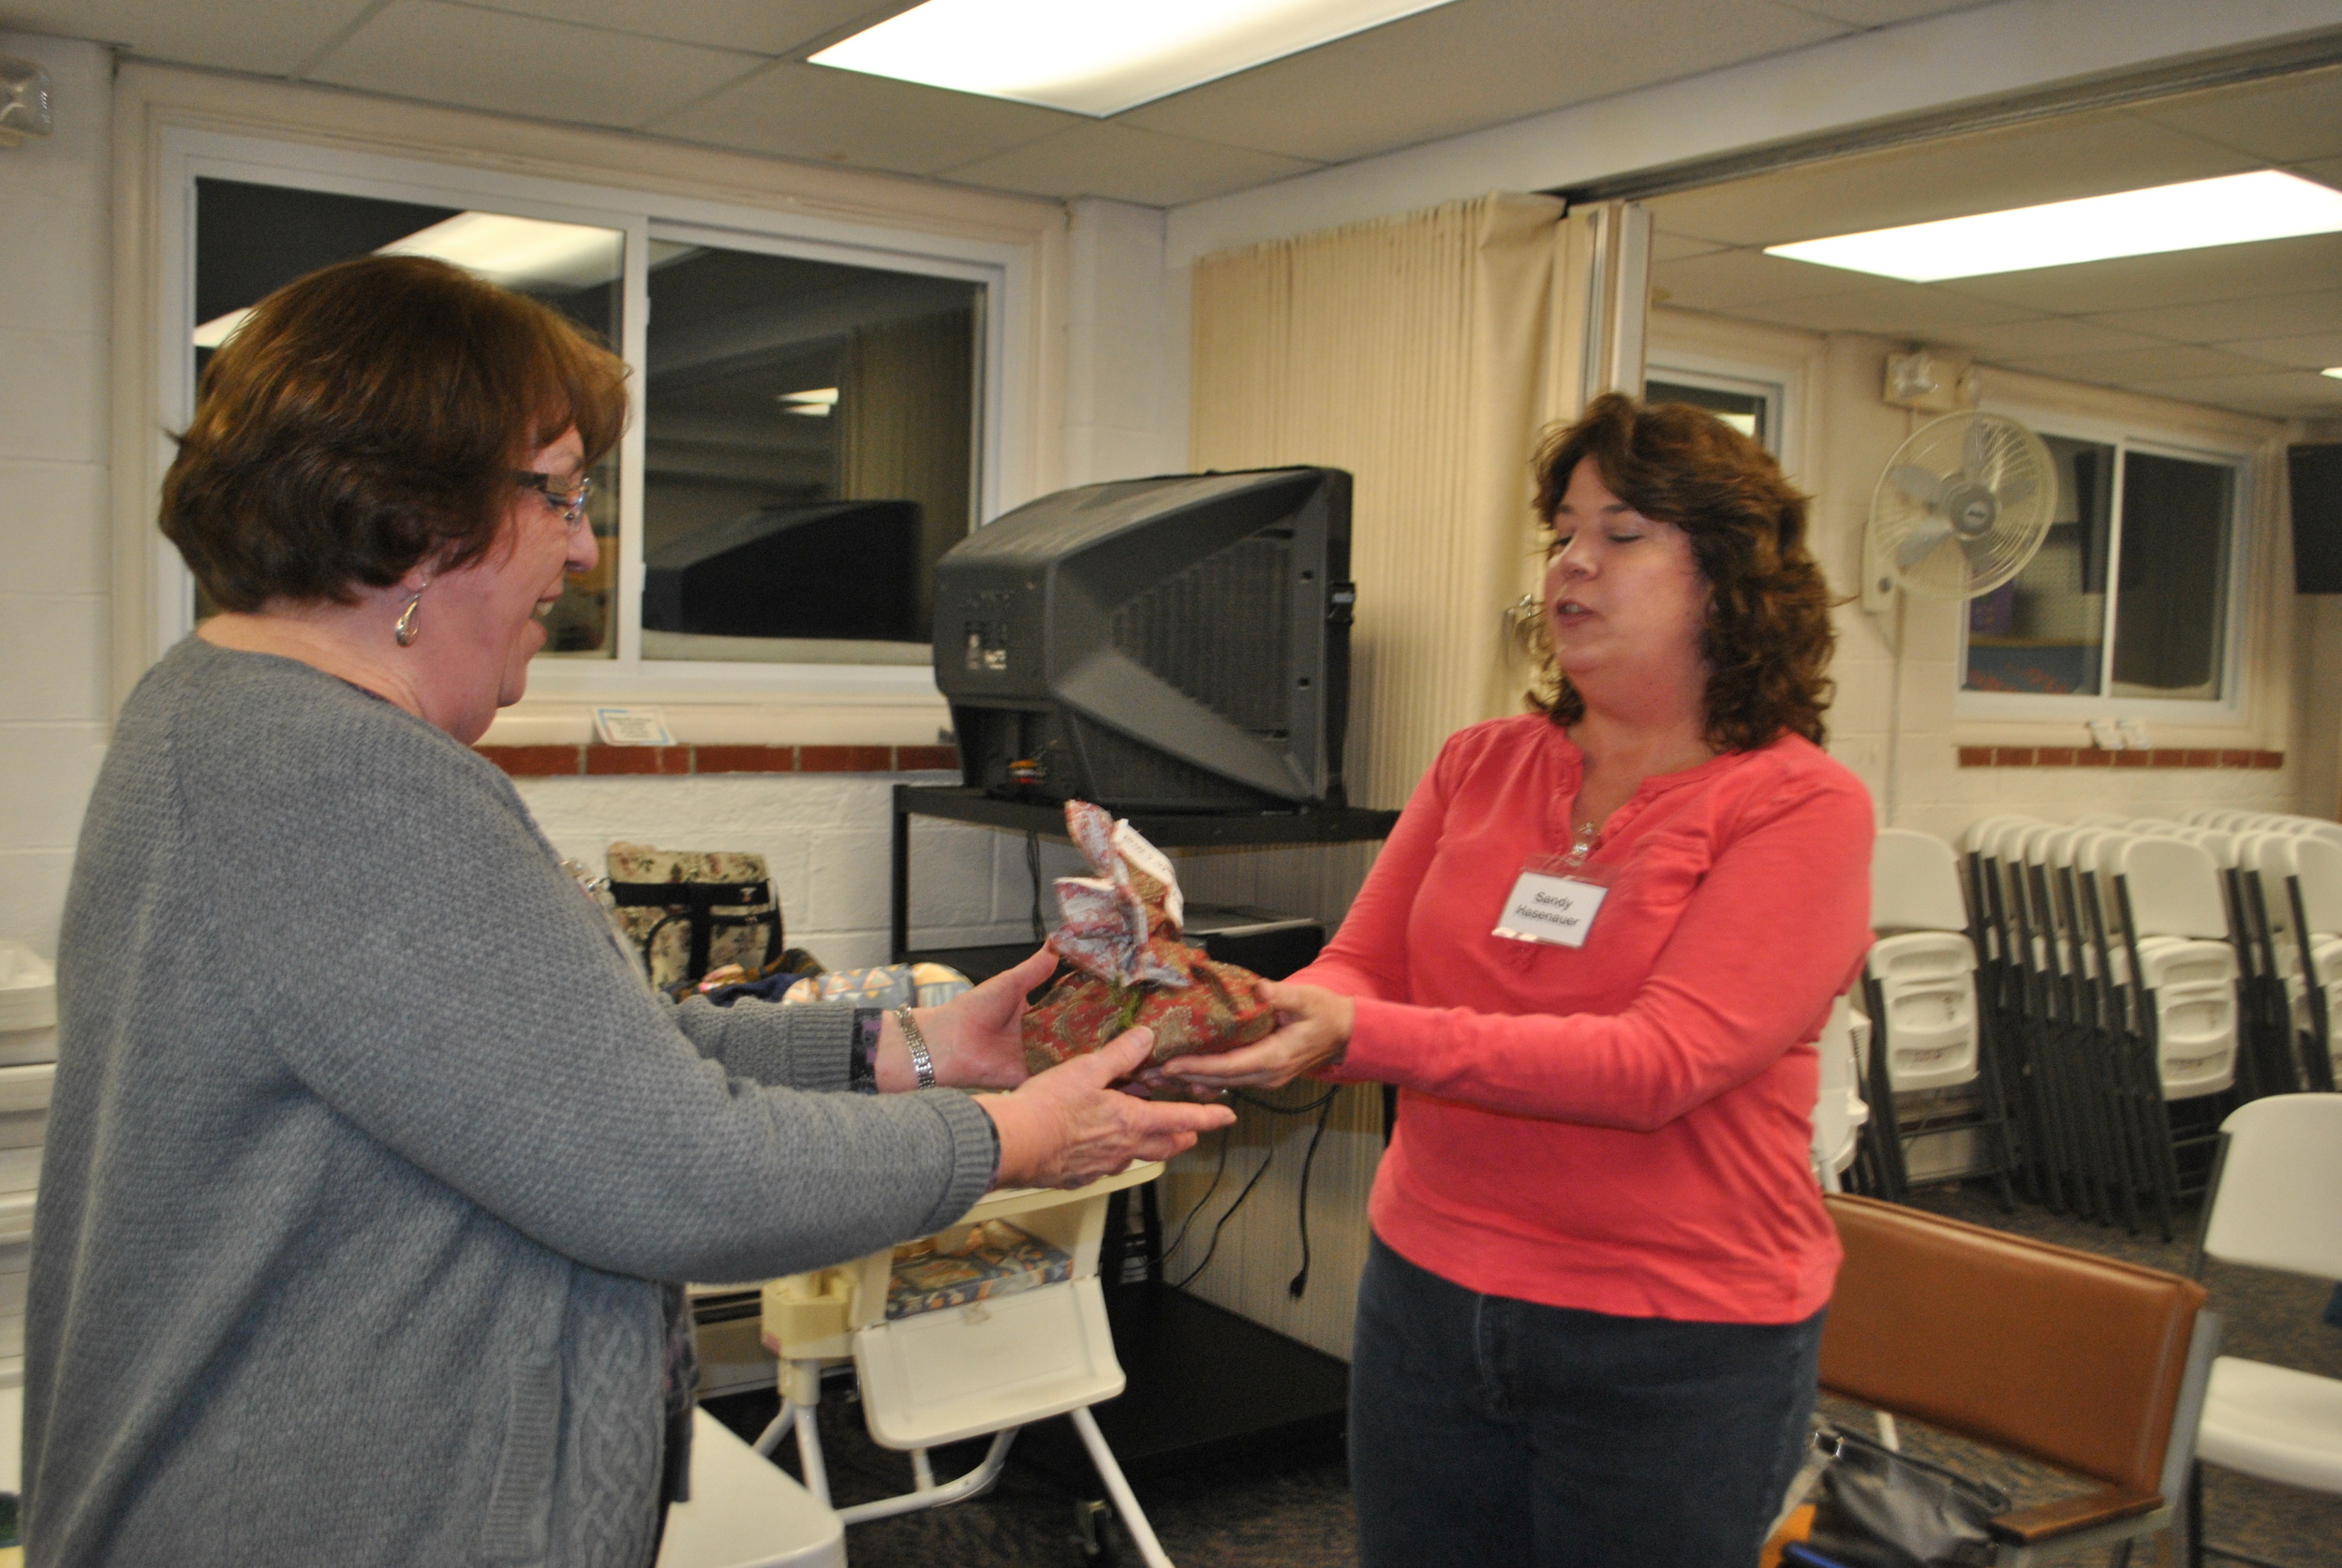
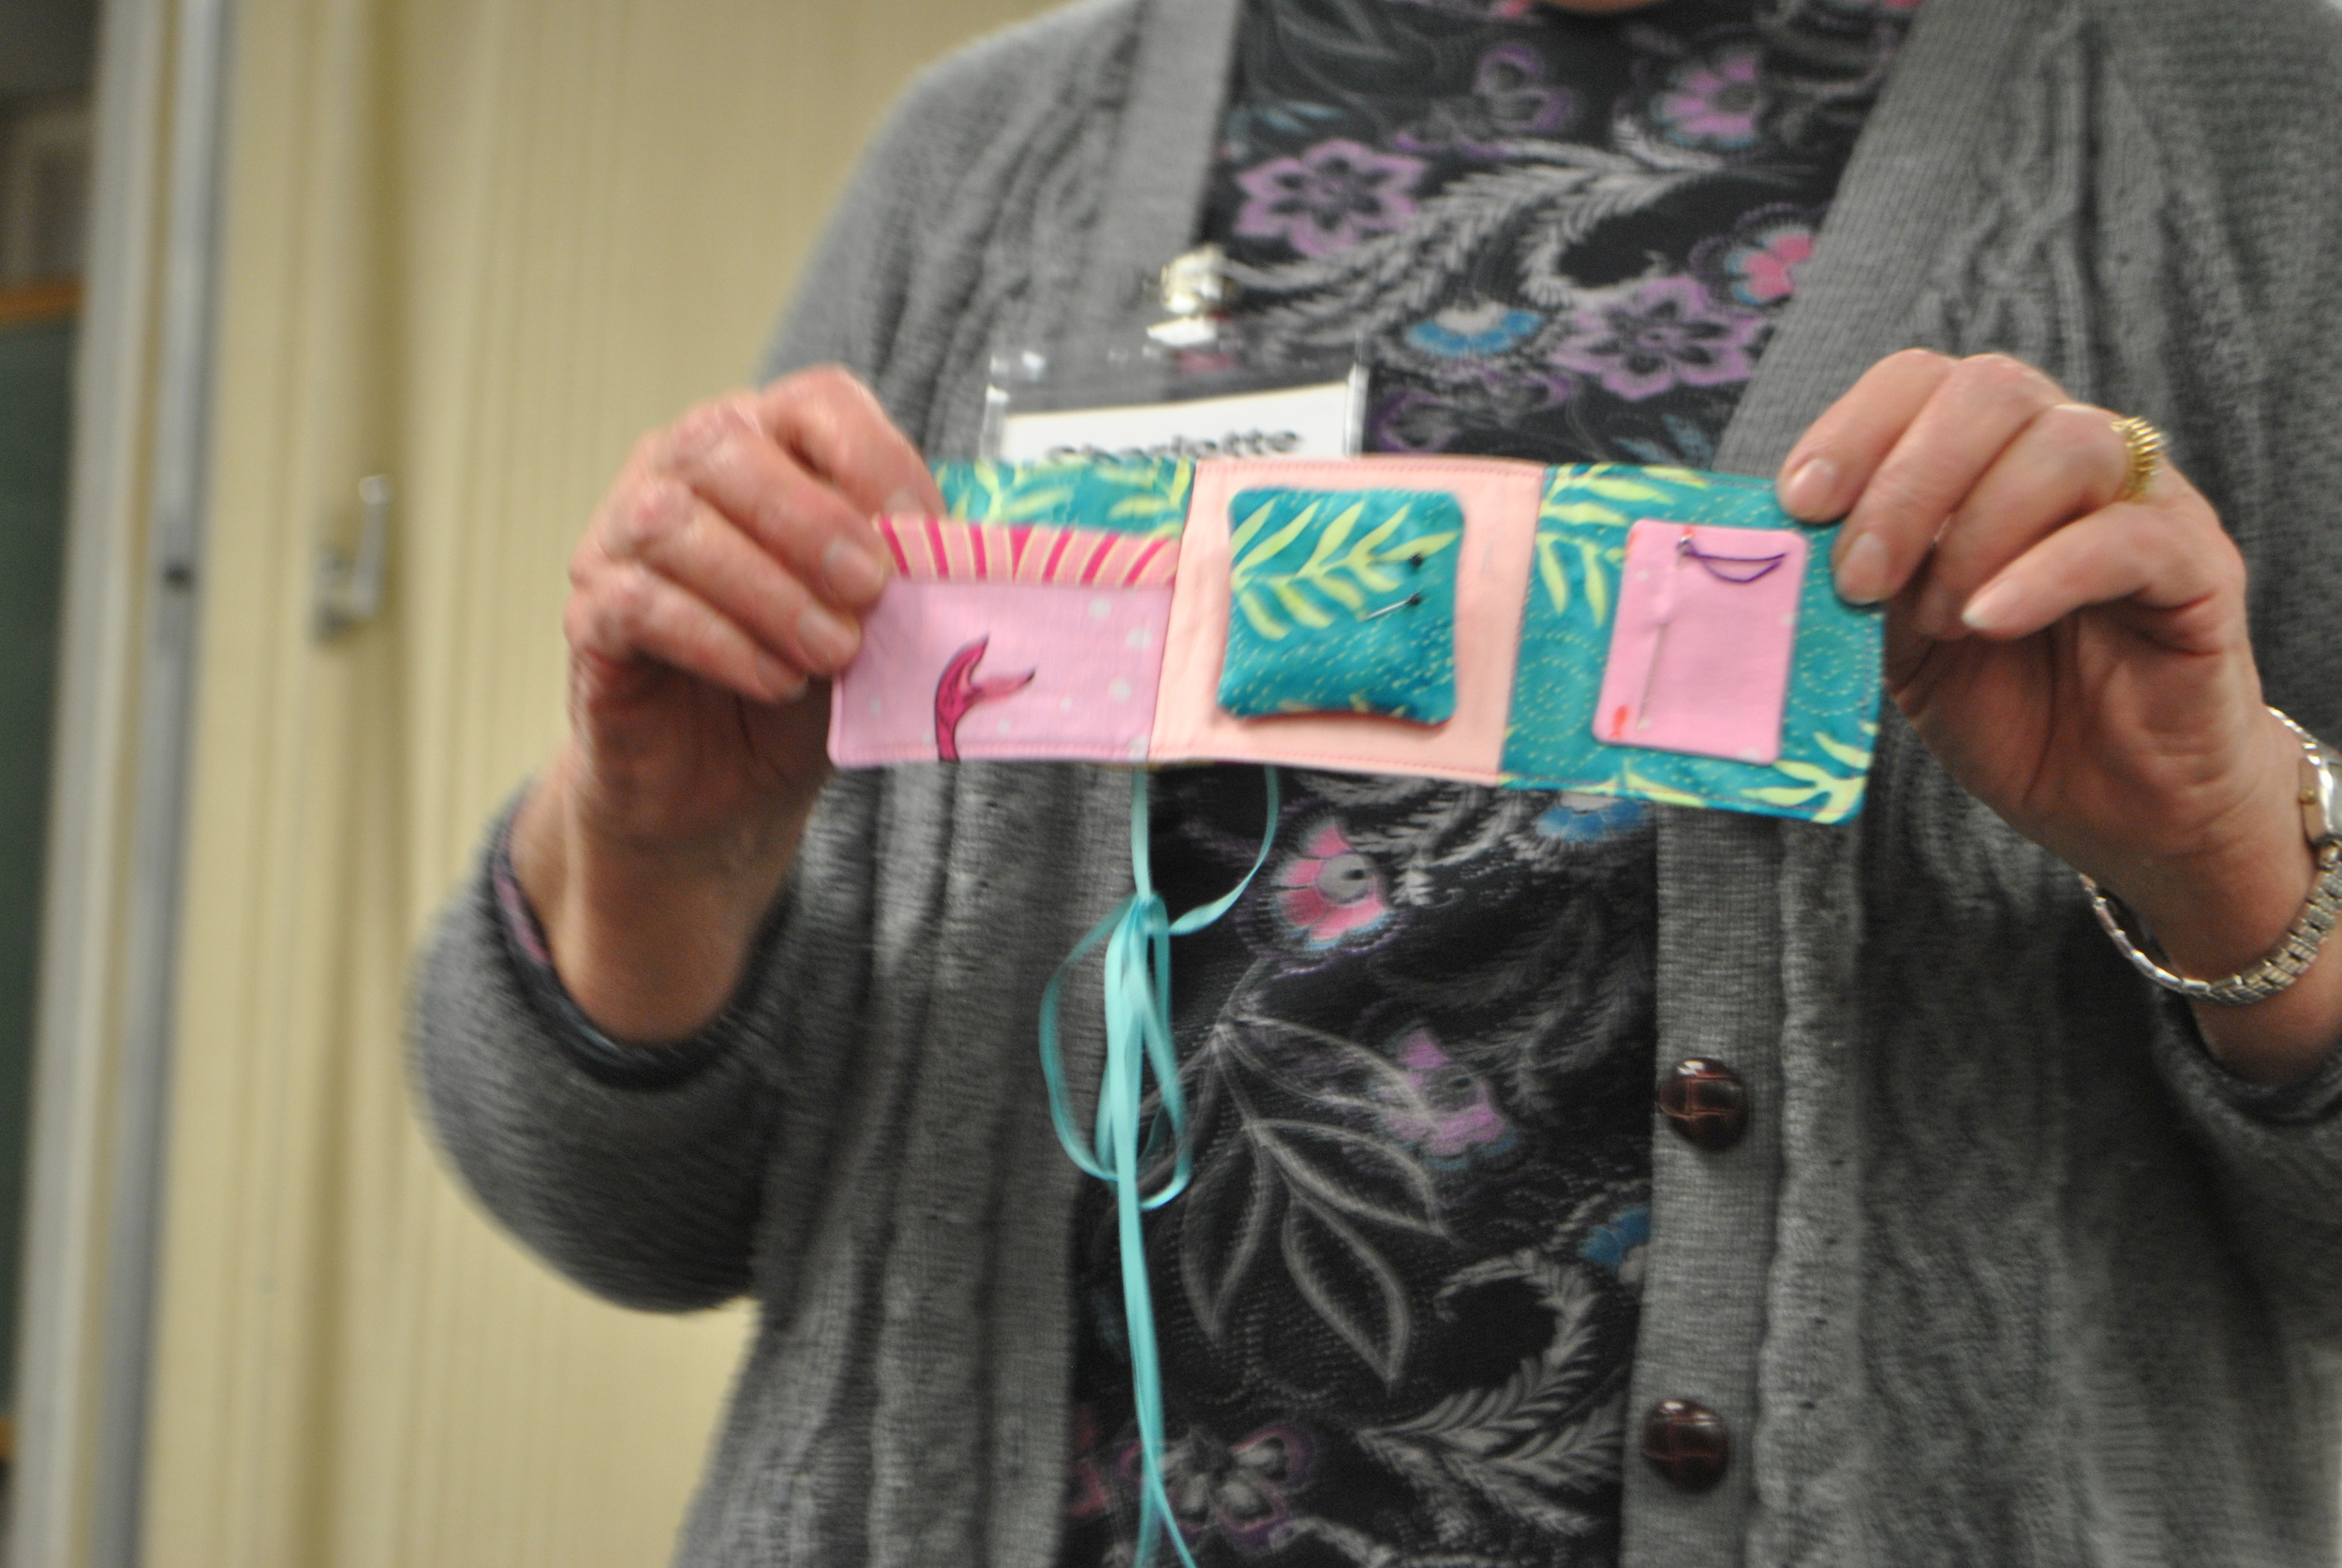
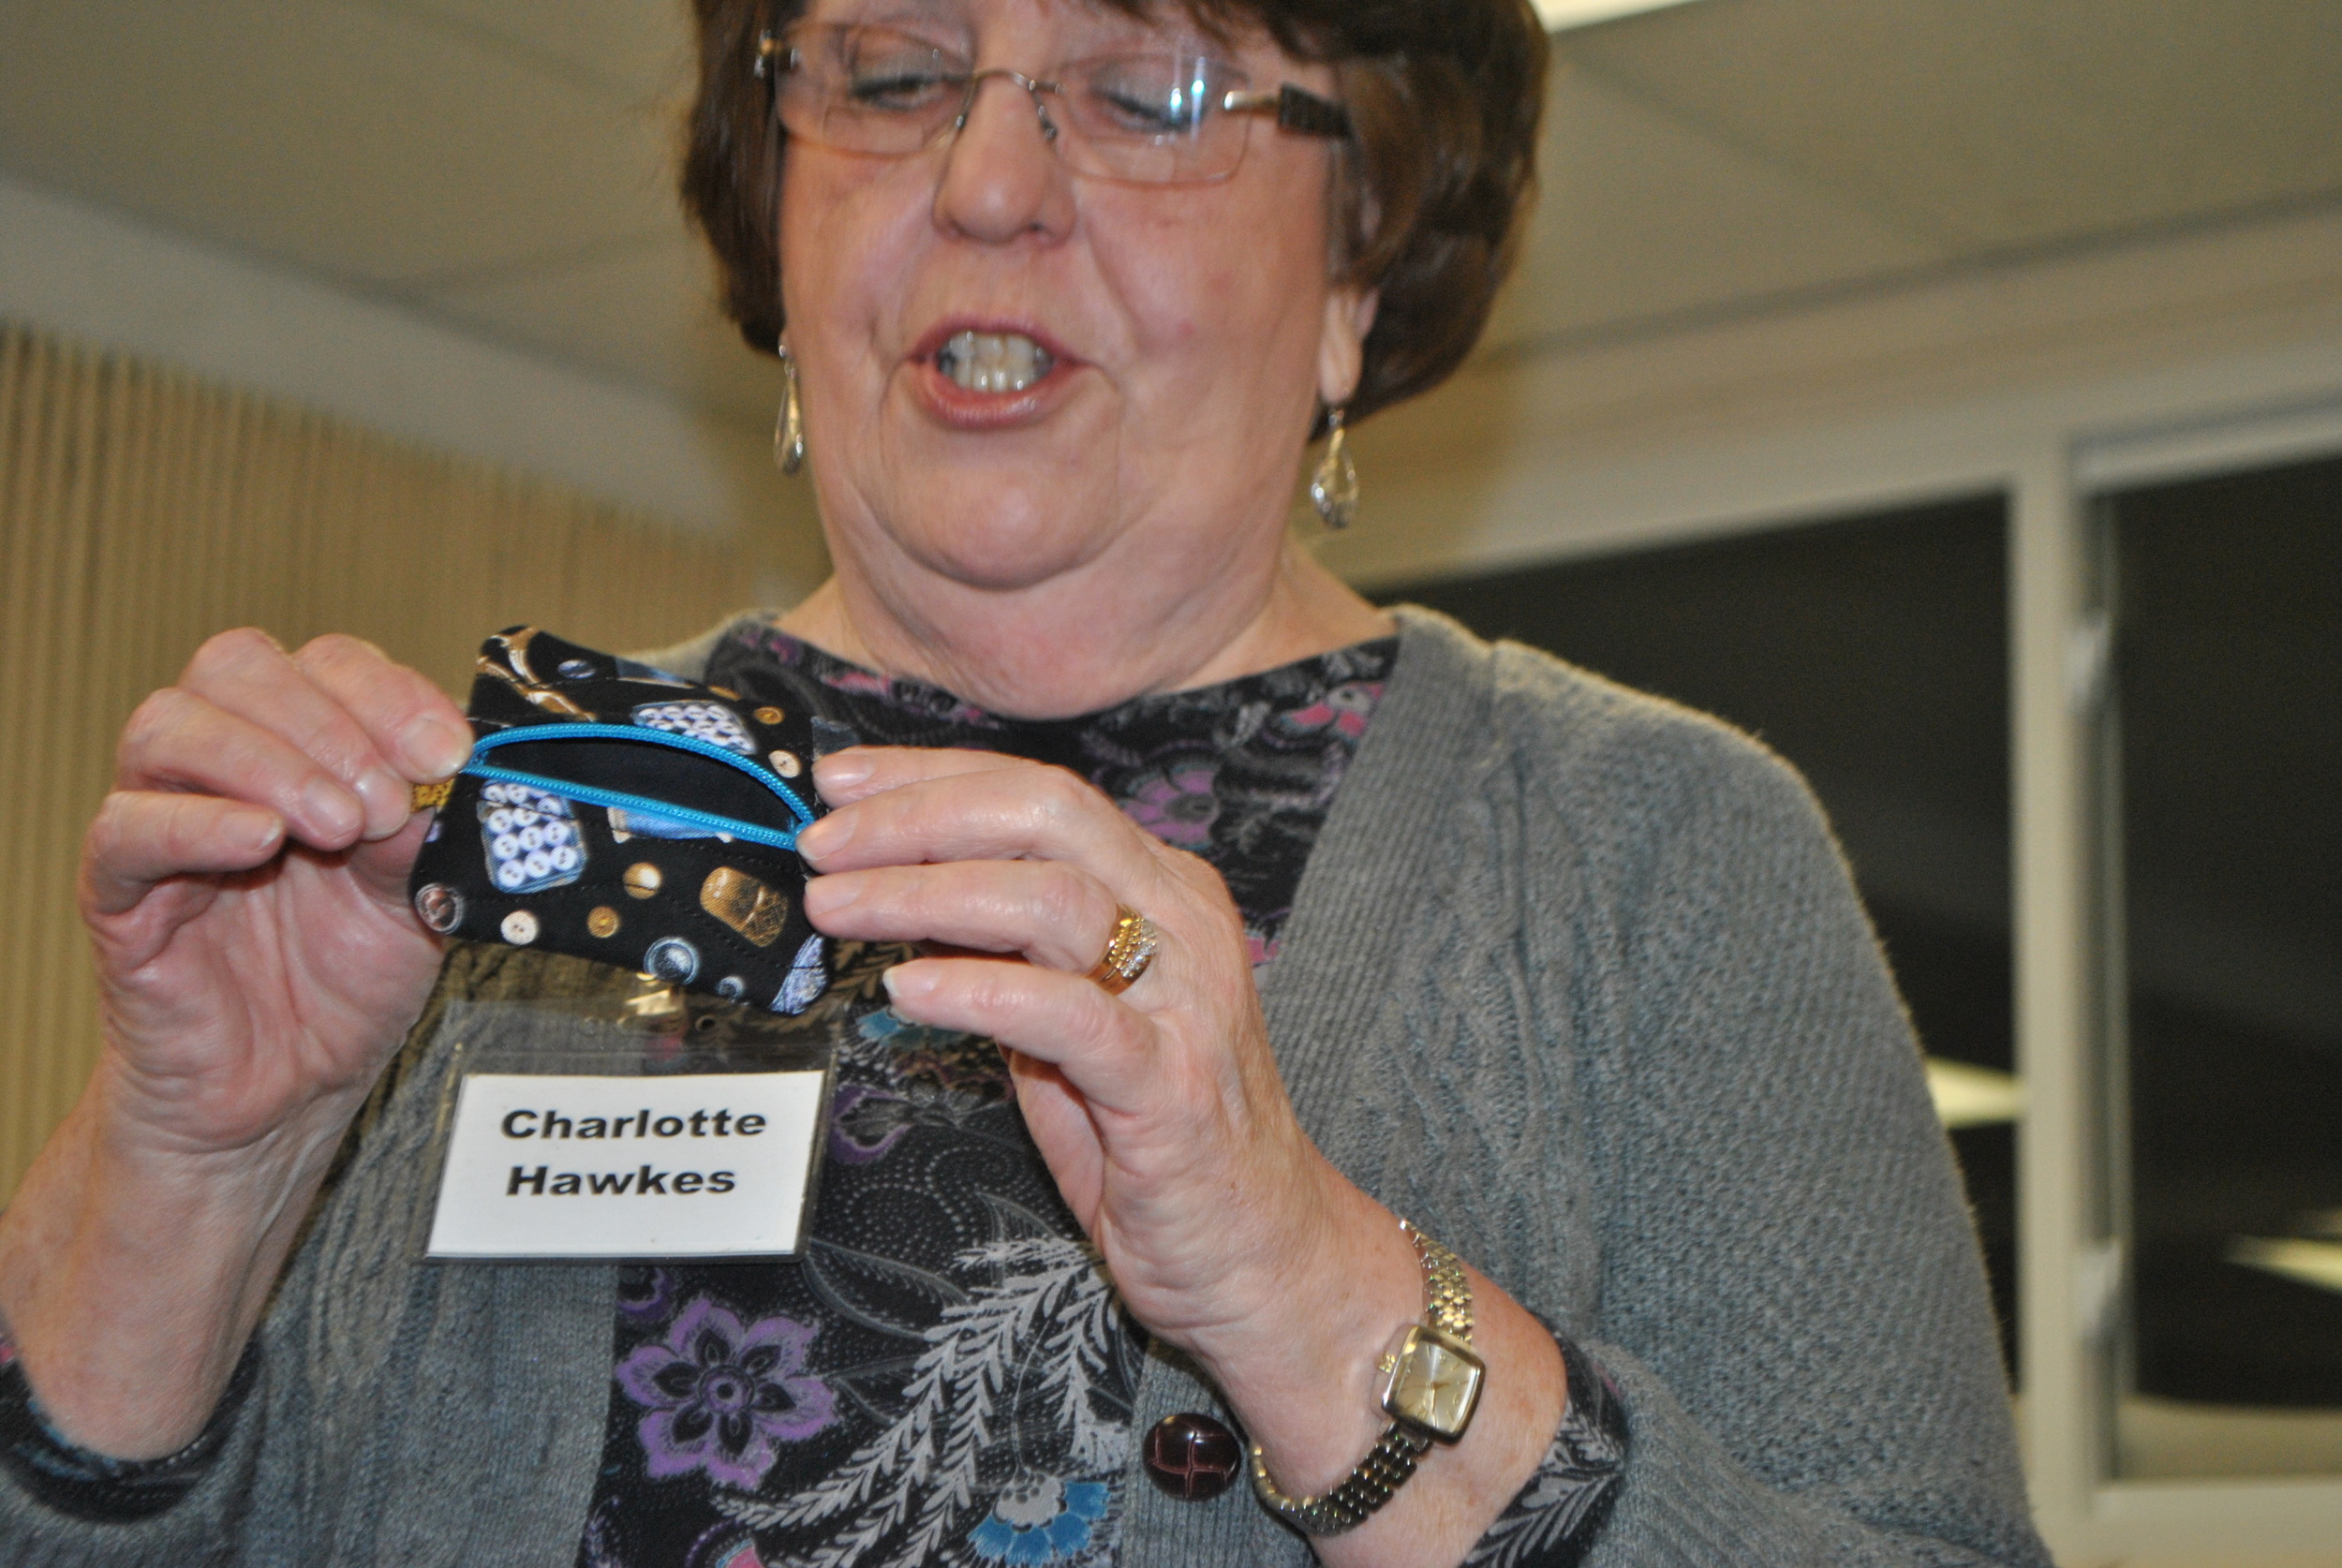
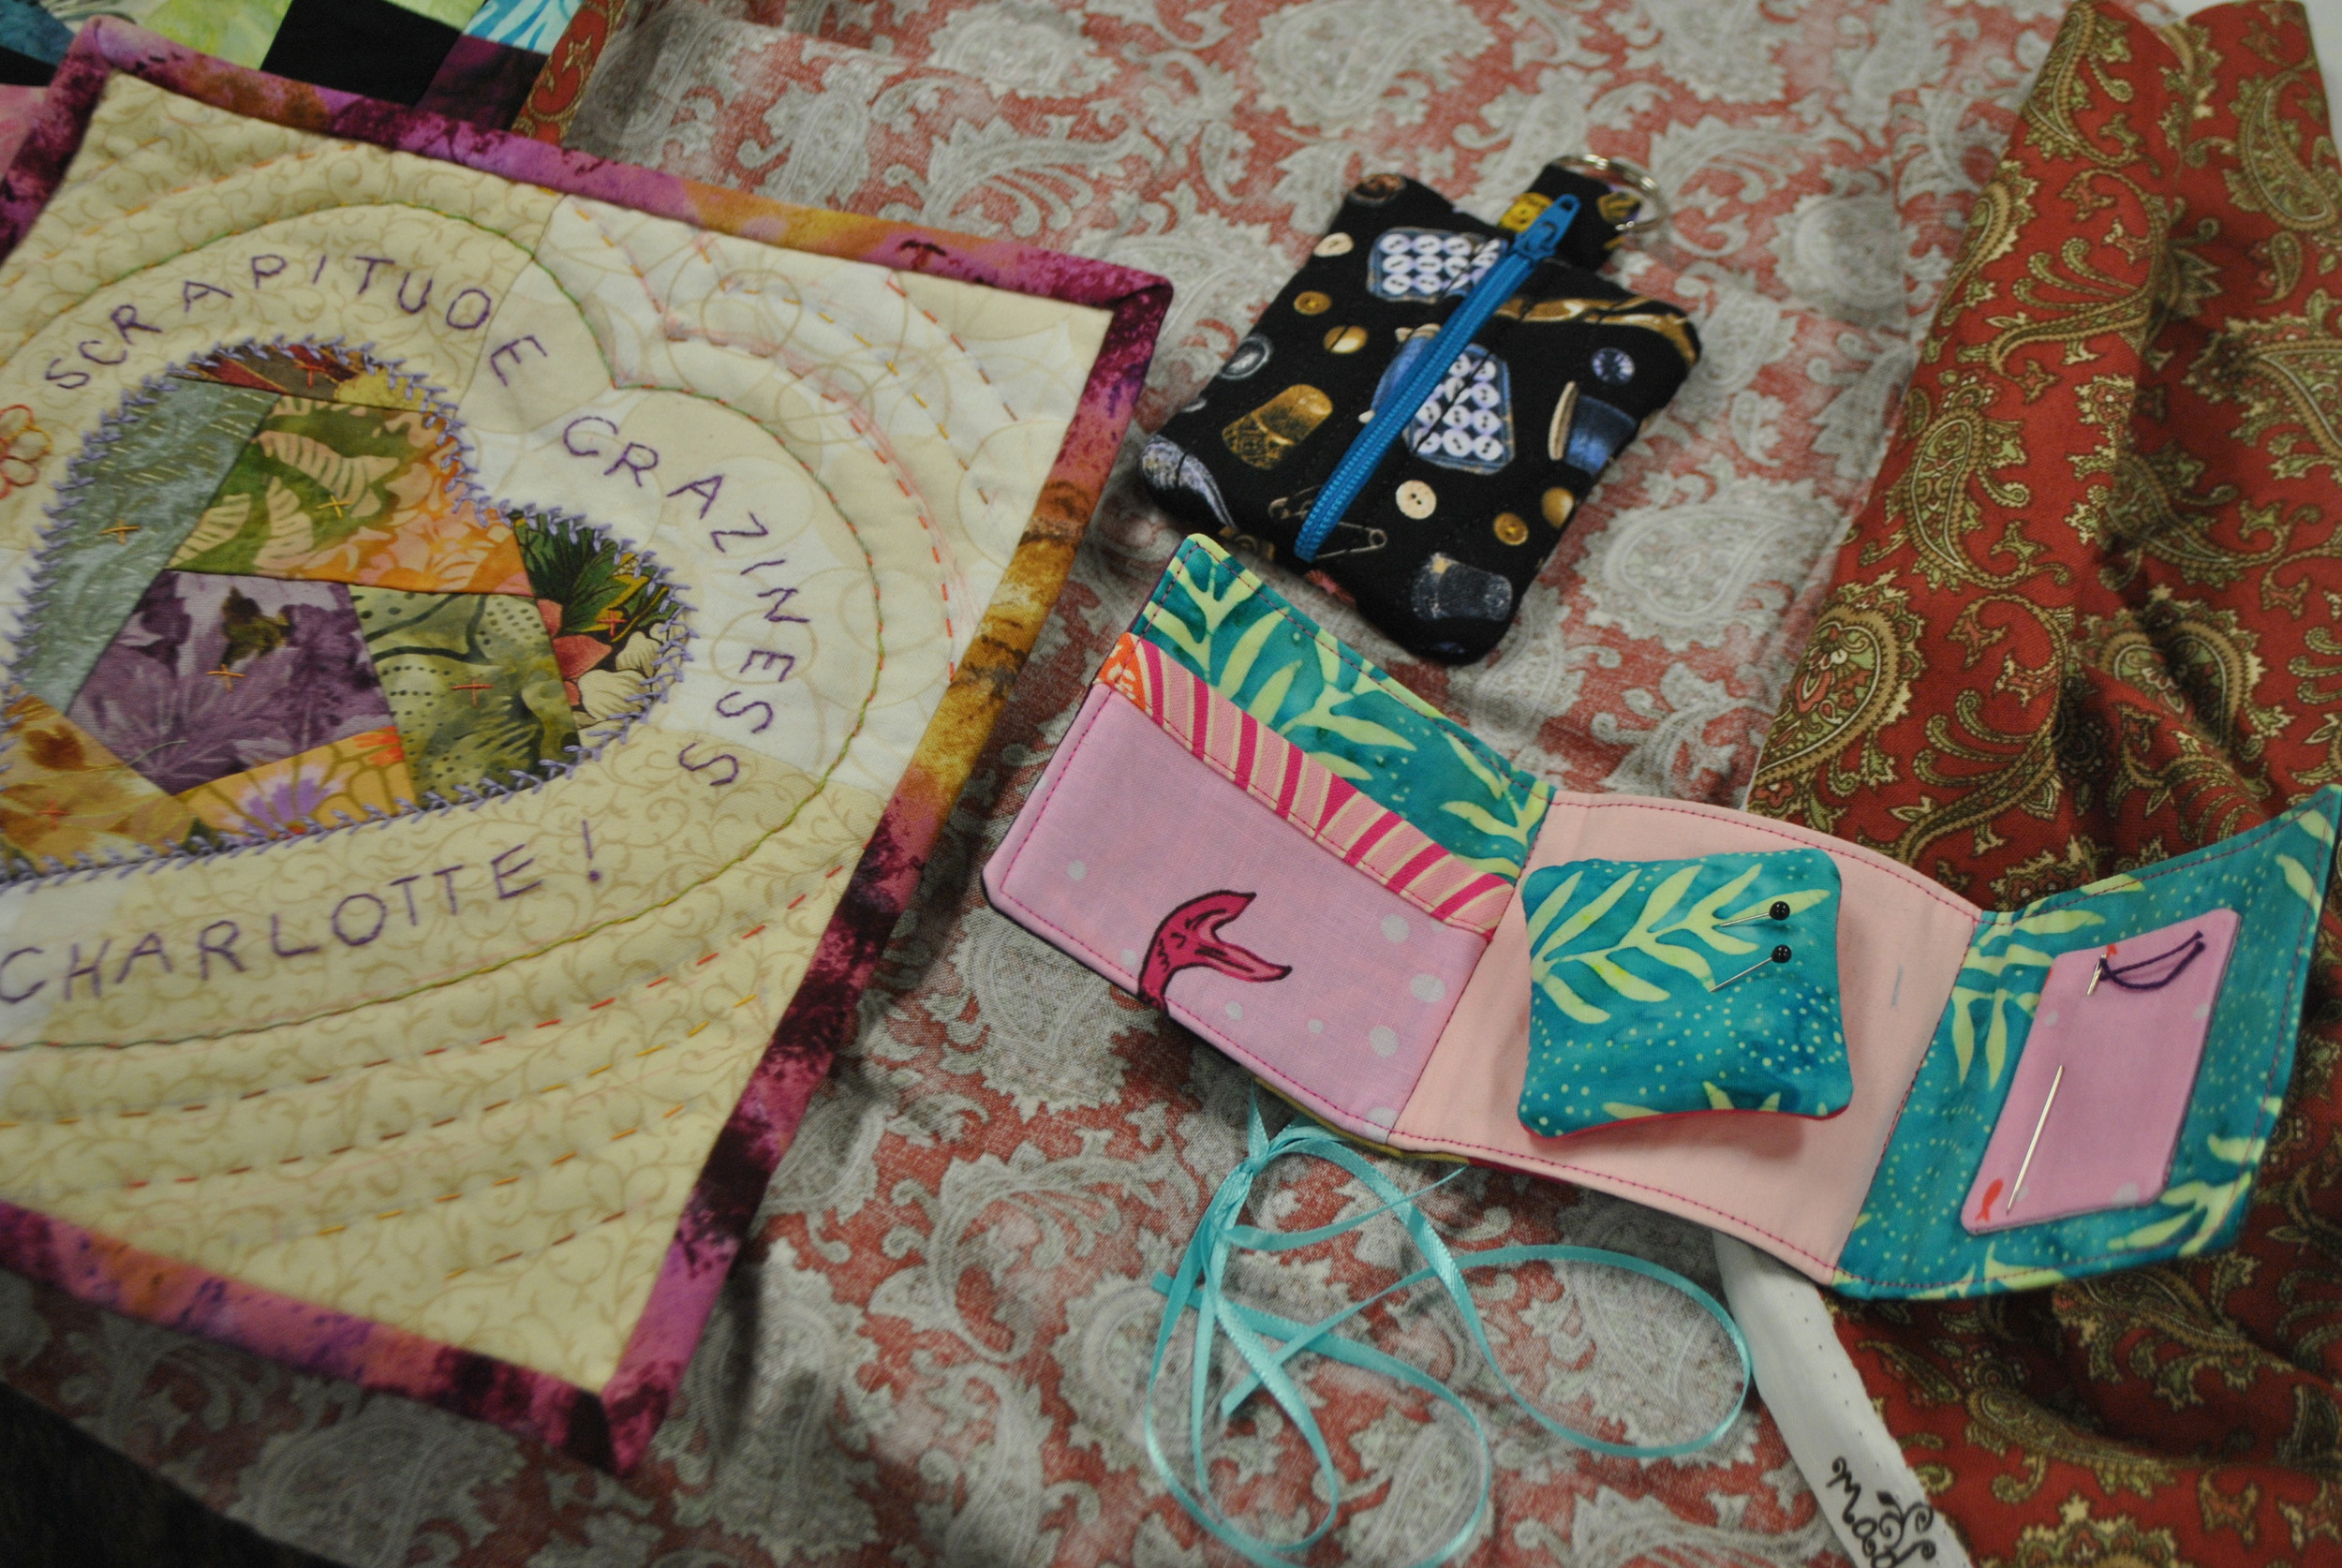
About a week before my last guild meeting, a few of the #twilters (quilters on Twitter) decided they wanted to show their thanks to Charlotte for Scrapitude by making "wee gifties," as @verylazydaisy called them. They mailed the gifts to me and I made a surprise presentation of them to Charlotte at my guild meeting.

With the short notice, I had gifts in hand from three people. Thanks so much to @SewExcitedQuilts (the keyfob), @artquiltmaker (the needle case), and @ddrquilter (the small wallhanging). I have been told to expect more so I'll be checking my PO box regularly. I won't be at my March guild meeting as I'll be at the AQS show in Lancaster, but I'll figure out some way to get them to Charlotte anyway.

As you may be able to tell from the photos, Charlotte was very touched. She couldn't stop grinning and saying, "I don't believe it!" Thank you, everyone, for showing Charlotte some love!


What's on for the weekend...

I'm writing this blog post on Saturday morning and thinking through what my long weekend will bring. I'm caffeinating and "charging" (as my husband calls it when he sees me sitting in front of my light box), and watching another lesson in one of my current Craftsy classes, "Complete Knife Skills" with Brendan McDermott--a freebie that has quickly become one of my favorite classes I've taken from Craftsy so far. But you'll just have to wait for my full review when I'm done with the class entirely.

Speaking of Craftsy--they're having another sale this weekend, the "Perfect Match Flash Sale" in which you can get two classes paired together, both on sale. I've already glanced at some of the offerings but haven't spent a lot of time on the site yet. I have other things I need to get done today!

In any case, as I'm sitting here getting ready for my day (which begins with a run to the grocery store), I thought it might keep me on track if I listed here my quilty-related goals for the weekend, and then I'll check in again sometime Monday evening and let you know what I actually accomplished. As we know, I'm a list-maker!

1. Post a podcast episode. (Sorry about missing last week; as it turned out, it was a very busy weekend followed by a busy week!)

2. Get my Scrapitude blocks and triangles made. If I can manage it, I'd really like to get the whole Scrapitude top pieced.*

3. Put my dye studio back together. It's still dismantled from when I had to repurpose one of the tables for Thanksgiving dinner. I also still need to haul my old cutting table from my second-floor sewing room to my basement dye studio. This requires my husband's involvement.

4. Put the finishing touches on new cutting table--using my 3M adhesive strips as I mentioned in a previous podcast episode, and heat-setting the edging strip around the top.

Now, here's the thing--some of my weekend schedule is still a bit up on the air. I may be making a nice dinner tonight, which means some of today will be spent in the kitchen, or we might be going out for a nice dinner, which means I'd not have to spend time in the kitchen. I can actually go either way on this one--after being gone for a week of vacation I'm very okay with spending a night in my kitchen. I enjoy cooking when I've actually got time to do it. But I'd also be very okay with having a whole afternoon to spend in my sewing room. So I'm viewing this as a win-win whichever way we end up going. Tomorrow I've got a commitment in the morning which means we may not be home until about 3p, and although I've got Monday off, I've got an appointment in the morning so may not have much sewing time until the afternoon. I still think I'll be able to accomplish all of the above.

So here's to a long weekend, and being home, and getting homey kinds of things done. What are your plans for the weekend? For U.S. readers, do you have Monday off? I believe we've got a #PDSI going on, though it won't be as active as usual since this is a much-less common day off for most people. Indeed, this is the first year that I can remember actually having it off! Yay!

*Whether I get the whole Scrapitude top pieced is less dependent on the amount of time I have this weekend, and more so on how long I can sit at my sewing machine doing the same thing over and over again. This is why I rarely make bed-sized quilts. Even with movies or audiobooks, I just get stir-crazy after awhile, so I may switch up what project I'm working on rather than plowing through one project for the whole weekend.

Craftsy Class Review--Shoot It! A Product Photography Primer

DSCN5663.JPG

Yet another Craftsy class finish! This time, we're talking about Shoot It! A Product Photography Primer with Caro Sheridan. I watched this class in its entirety while I was on vacation in Savannah last week (and, in fact, blew out my data plan allotment for the month by doing so on my iPad but it was well worth it!).

If you've got a blog or an Etsy shop, you really ought to get this class. I took photography in high school and have done a fair amount of self-study in it, but have gotten--admittedly--lazy in recent years. I used to be a much better photographer than I am now. I still have a decent eye for composition, but when it comes to taking the time to make sure I've got really well composed, nice looking photos on my blog, I only manage that about a quarter of the time. The rest of the time, I have a "Lookie! I'm finished! Let me quick snap something on my cell phone, upload it, and call it a day!" attitude.

Frankly, I really want to get over myself on that one. I would like to have much better photos on my blog, so I need to make a bit of a mental commitment to that. I can't guarantee that'll happen consistently, but it's something I'm going to...(wait for it)...shoot for more often in 2014.

Back to the class. I enjoyed Caro Sheridan as a teacher. She clearly knows her stuff, and in the class she illustrates her points with a lot of examples so you get the visual of how the background can really add or detract to the subject of your photo, and so forth. And she goes more in-depth than just "get rid of the clutter around it," which I do generally remember to do, even if it's just a quick sweep of my arm across the top of my cutting table to clear it off. She talks about the use of color in the background to highlight your product/subject, lighting and shadows, tools to use that make lighting issues a little easier, composition, and how to tell a story with your shot. She addresses using a point-and-shoot or your phone camera as well as more sophisticated cameras--so you don't have to have a whizz-bang camera to take this class! Probably better than 85% of the information in the class is applicable regardless of what you're using.

If I ever do have an Etsy shop for my hand-dyes, I'm definitely going back and reviewing this class again. For now, though, I've been inspired to drag out the manual on my good digital camera to refresh my memory on some of the settings (said laziness has led me to rely on auto settings far more than is good for me)--which also means, seeing if I can learn to love this camera. I still miss my old one and just haven't bonded with this one even after owning it a couple of years, so I'm giving it another few months before I decide if it's really just a learning curve thing, or if I really need to go back to my original line of camera. I've also been inspired to see if I can set up some sort of studio space in my basement to get better photos of my hand-dyes and small projects. I only need a table (hmmm...a retired cutting table, perhaps?), a few different colored back-drops (solid colored sheets to hang on the wall and drape over the table), and probably a couple of lights and light reflectors on stands--all things I can jury-rig together using hints from this class and stuff I find at Goodwill.

One of the other things I've been inspired to do based on this class is a Self-Portrait Project--the topic of her last lesson. She offers several very helpful tips in how to get a good self-portrait and suggests taking one a day for several days, playing with poses, lighting, camera settings, and so forth. Not only will you get a really good self-portrait out of it eventually but, as she says, you'll also likely deal with some of your own self-image issues. And that's something worth working on!

So I highly recommend this class. I really enjoyed it and, even with a pretty solid foundation of photography experience under my belt, got a lot of very helpful tips and ideas--and plenty of inspiration!

The basics:

  • 10 lessons, ranging from 6 minutes to nearly 30 minutes. The average is around 15 minutes.
  • Lessons begin with an introduction, in which Caro Sheridan talks about her own background and experience.
  • The next lesson is "motivations and style," which talks about why you'd want decent photos in the first place, as well as tips for developing your own style of photography. She offers some very helpful suggestions about how to discover what your style might be that believe I'm going to be trying out.
  • She then goes through color theory and composition in the next couple of lessons, spends a lesson on prepping for a shoot, another lesson on the shoot itself, then she talks about camera settings, editing, post processing, and the self-portrait project in the remaining lessons.
  • The lessons also have sprinkled through good information on working with a model (i.e., if you want someone wearing the sweater you just knit, or wrapped in a quilt, or whatever), including permissions and helpful tips about getting them more comfortable in front of a camera; they also include information about getting permissions for location shots and other considerations.

Again, I highly recommend this class. Here's the link again: Shoot It! A Product Photography Primer with Caro Sheridan. (Usual transparency statement applies: Using that link to purchase the class helps support this blog and podcast.)

I haven't had anything quilty to practice photography on since I got home, really, and it's still too dang cold to go outside for nice nature shots. Therefore, my dogs are getting plenty of attention. Here's a photo gallery from me playing with some nifty flash settings I didn't know I had on my camera the other night.

Sam the Ham was game. He posed, he smiled, he brought me a toy just in case I wanted a prop.

Spencer wouldn't look at me, kept creeping away, and finally started diving under the couch every time I got the camera out. Princess Doggie and I need to come to some sort of arrangement.

(If you're getting this blog by email, you might not see the gallery. Sorry--you'll just need to go to the blog for it.)

Craftsy Class Review--Spindling from Fluff to Stuff

I finished two classes while on vacation this past week. Well, to be honest, one of those "finishes" was simply, "thinking about it awhile and needing to make a judgment call." That'll become clear in my review below. I'll review the classes in separate blog posts, however, so I have a little more room to go into detail.

Photo Jan 22, 2 35 21 PM.jpg

The first class I'm reviewing, Spindling from Fluff to Stuff with Drucilla Pettibone, is a great example of mental bunny trails.

I started hand-dyeing fabrics. "Gee," I thought, "this is great fun! What else can I dye?" The dogs quickly disappeared out of sight, but I began thinking about other fibers. "Wouldn't it be fun to dye my own perle cotton to use as embellishment on art quilts? Wouldn't it be fun to dye my own yarn to use for embellishments? Dye my own yarn? Maybe I should be *spinning* my own yarn!"

Someone stop me before I hurt myself.

Actually, in that, I'm channeling my father in a big way. I've mentioned before being a child of the Back to Nature Movement. I talked on one podcast episode about Dad not only getting into leather tooling, but eventually even learning how to tan hides himself (and I'm not talking the euphemistic, "I'll tan your hide, dang you!" that parents have been known to say on occasion). I don't know that Dad became particularly skilled at tanning hides as--vegetarians may want to close their eyes here--there was still visible hair on the leather he used to make his own briefcase. Not artistically so, either. In any case, if Dad was going to learn a craft, he was going to drill down to the most basic, fundamental component of that craft. I'm probably only one step away from asking my husband if he'd mind having a sheep or two in the back yard.

Well, not really. I've had up-close-and-personal-time with sheep. They're not all that cute and cuddly, despite the Easter cartoons. Digressions aside, I thought it might be fun to learn how to spin yarn, so I went to a Fiber Festival and bought a bunch of different fibers, and bought a drop spindle on advice from a woman demonstrating them as well as from one of the friends I was with who'd done some spindling herself. When I got home, I bought this Craftsy class.

I've now watched it straight through several times and have been practicing, although not as consistently as I should. I'm still not very good, but where I had to make the judgment call was that the only thing that will get me better is more practice--I could watch these videos until the cows (or sheep or alpacas!) come home and it won't add to my mental knowledge at this point. The knowledge know has to come from muscle memory and trial and error. Therefore, I'm now considering this class complete though I've got a l-o-n-g way to go before I feel comfortable spindling.

Did I like this class? I can't say that Drucilla Pettibone's teaching style really grabbed me. That's not a big deal for me as I can still learn, but it didn't make me really want to jump right into watching the next lesson, as other classes have. I also struggled a bit with certain aspects of spindling, and began to wonder if watching someone else's technique might help. I'd gone back and re-watched certain portions of this class several times and still didn't feel like I was "getting it." That could be me, or it could be the teaching style, or it could simply be that I have to do it for a few weeks more before something clicks. Since I have no experience in the world of spindling, it's hard for me to judge that.

Photo Feb 08, 12 17 48 PM.jpg

I even decided to go ahead and buy the kit that went along with the class so I'd be using her spindle and her fibers, hoping that would help. The main benefit to having done that is my original spindle, bought at the festival, was top whorl and somewhat lighter weight than the spindle that came with the kit: a bottom whorl that was a few ounces heavier. That meant I could feel the difference in spin and how they behaved--different spindles work well with different fibers and give you different types of results. She does talk about that in the class but until you feel it in your hands and can watch it in action, you don't really know. So I certainly feel that buying the kit, even though I already owned a spindle and a whole lotta fibers, was still a good expenditure for my learning curve.

There is one big downside to this class, though, which I'm hoping is just a temporary thing. Drucilla seems to be a bit hit-and-miss about answering questions on the platform recently. One of the things I like best about Craftsy is the interaction with the teachers. Some of them are quicker on the uptake than others. But they all answer, even when their classes are a couple of years old. However, Drucilla seems be a bit less responsive to questions of late. I posted about three things in the class and haven't heard back from her on any of them, and can see other students' unanswered questions building up. I saw a little activity from her a few days ago so maybe she's trying to catch up now. I suspect (from researching her blog) she's gotten involved in other interests and isn't as active with the Craftsy class at this stage. And that's fine--people need to be able to be released from responsibilities; I certainly get that one! But if you're not going to be responsive, it would simply be a good idea to let people know that.

In terms of me continuing to learn spindling: Enter listener Daisy F W and her email to me recommending Abby Franquemont's spindling video and book, both entitled Respect the Spindle, available through Interweave Press. They were both on sale that weekend, so I was able to buy the video as a download and the ebook, each for $5. (They're not on sale as of this writing--sorry!) I immediately connected with Abby's teaching style, and Abby's backstory is fantastic--she grew up in the Andes as the child of anthropologists and learned how to spin in very traditional methods from Peruvian women who thought it was pretty shocking that the five-year-old Abby had never held a spindle.

I haven't finished watching the video or reading the book yet, so the jury is still out as to whether I find it more helpful than Drucilla Pettibone's Craftsy class practically-speaking, however. I just have to keep watching and practicing.

To be fair to Drucilla, this is the first Craftsy class I've taken in which I've been starting at a complete ground zero. Every other class I've had at least a certain amount of knowledge--I've been cooking for a long time, and quilting for awhile, and have done a fair amount of work in photography. So the teachers were just building on knowledge I already had. But spindling? This was my first time out of the gate. So Drucilla had a lot of work to do with me.

Therefore, I think I can say that Spindling from Fluff to Stuff is a good introduction to spindling. It did get me going, taught me some fundamentals, and encouraged me to practice; and I did get some yarn made, even if it's not very pretty yet or, perhaps, even usable. But I can see the future if I choose to stick with it, and that's a good thing. Connecting with someone's teaching style is a very personal thing--other students in the class seemed to love her, so you may love her too. Watch her introduction to see what you think. If you decide to take this class, I would recommend buying the kit--it usually is helpful when you're new at something to start out using materials the teacher is using so you're not having to mentally translate every step of the way. I think that slowed me down a bit at the outset.

But I would also recommend, if you're interested in spindling or spinning of any kind, that you check out Interweave Press as well. They have several books and videos--Abby Franquemont's as well as others--on the topic.

The basics:

  • 9 lessons, ranging from about 6 minutes to 30 minutes. (The 6 minute lesson is the introduction.)
  • One lesson covers tools and different types of wools, how they each behave and considerations for each.
  • Through the various lessons, short-draft and long-draft methods are each covered, as well as "park and draft," although that comes later in the lesson line-up than I'd have liked as, from my understanding, it's more of a beginner method than the others.
  • Other lessons cover plying fiber, finishing yarn (soaking, winding into balls or hanks, etc.), other types of spindles, spinning art yarn (thick-and-thin spins, as well as adding other materials into your spinning). As you might imagine, my favorite lesson in here was the one about spinning art yarn--there was some pretty cool stuff in that one. I'm also really interested in the Navajo spindle she demonstrates--looks like cool stuff.
  • One short lesson at the end is "Using your yarn." This one didn't seem to make a lot of sense to me as it would seem that most people interested in spinning are probably already people who have been using yarn for something or other in the first place. But I could easily be mistaken in that.

Have you taken Spindling from Fluff to Stuff and want to chime in with your opinions? Please do! Everyone benefits from hearing reviews!

January Update on Craftsy Class Progress

If you're new to this blog, one of my 2014 Quilty Resolutions is to focus on completing a significant proportion of the Craftsy classes I've managed to amass over the last two years since I first discovered Craftsy. And that's not a fly-by-night resolution. I've got a lot of them. I have learned so much from the classes I've taken so far, and enjoy the opportunity it gives me to continue to expand my skills even when my work and travel schedule don't let me take classes at my LQS.

Mind you, I also want you to be supporting classes at your LQS! Look at your LQS listing first. Nothing can replace that in-person class experience with a teacher that can stand over your shoulder and actually see what you're doing, to offer suggestions for improvement. But if you can't make a class in person, Craftsy is (IMHO) the next best thing.

So, to hold myself accountable and focused on working my way through the classes, I'm posting a monthly update here of what I've accomplished. This is my first official update--here's what I've gotten done in January.

Wendy Butler Berns' Machine Quilting class--done! (See this blog post and this podcast episode for reviews.)

Peter Reinhart's Artisan Bread Making class--done! (See this blog post for the review and photos.)

Molly Stevens' Secrets of Slow Cooking: Mastering the Braise--done! (See this blog post for the review and photo.)

Stupendous Stitching with Carol Ann Waugh: I've made great progress! I imagine you'll be seeing a full report with finished project pretty soon.

Spindling from Fluff to Stuff with Drucilla Pettibone: I've made progress--I'll really have to make a judgment call soon as to when I'll decide I'm done with this one.

So...drum roll please. Here's the updated list. (For the original blog post with more detail on how I define "completed," and notes about individual classes, click here.)

Completed Classes (all topics)

Current count: 17 (+3 from last month--yippee!)

Classes in Progress

Current count: 3

(As I finish classes, I roll new ones into the line-up. So the above are the classes I'm working on as of this writing but will change as I continue to progress.)

Classes To Be Completed

Current count: 18 (-3 since last month)

Classes added this month*

Count: 2

  • Complete Knife Skills with Brendan McDermott. It was free, it's something I've been working on w/ YouTube videos and in-person classes at a local cooking school, and it plays into all the other cooking classes I'm taking. I also figured it wouldn't take me long to go through the class and pick up whatever techniques I'm missing.
  • Free-Motion Quilting with Feathers with Angela Walters. This was my choice for a free class as a thank-you gift for being a Craftsy affiliate. (Small print that I can't make small on my blog, sorry: Interested in being an affiliate yourself? Use this link to check it out. If you become an affiliate through this link, you help support this podcast and blog. End of small print and back to real life.)

*I'm not restricting myself by saying, "I can't get another class until I finish every one I already have!" Heck, if a class on my wishlist comes up for a 50% off sale, I'll quite possibly take advantage of that. And I know myself--as soon as I tell myself I can't do something, that's all I want to do. So I'm better off saying, "Sure, I can if I really want to. No big deal." Then it takes the pressure off and I'm likely to make a more reasonable decision in any given moment. That being said, consistently working on a couple of classes at once keeps me distracted and much less likely to be reading those sale emails. ;-)

(Transparency statement: Using any of the Craftsy links on this post help support this podcast and blog. But I'd be doing these posts regardless for my own accountability, and I wouldn't be talking about Craftsy if I didn't really like it!)

A Finish! Design Study Group Homework on Analogous Colors

My design study group is meeting tonight so I'm scheduling this post to go live after I'm already at the meeting...so thanks to the wonders of technology you'll get the "reveal" at the same time they do.

Our group is currently working with A Fiber Artist's Guide to Color by Heather Thomas, going through one workshop a month. For this month's meeting tonight, we were to do something using analogous colors, while also keeping in mind all the other design principles of balance, unity, repetition, and so forth.

peruviantoad.jpg

On one of my vacation days in December I took myself on an artist's date to our local art gallery and planned on studying such things as use of light, color, line, texture, and other things I could carry into my quilting.

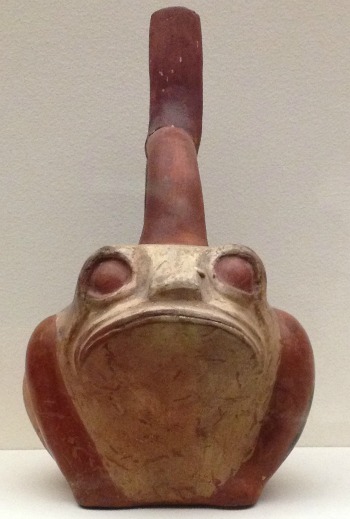
While in the ancient art section, I fell in love with this guy. I just knew he'd end up in a project somewhere.

His face is just too funny.


peruviantoad2.jpg


He's a "Stirrup spout vessel: frog," from the Moche culture of the north coast of Peru, circa 300-450 CE.

Later, when I was pondering what I might do on analogous colors, I decided to challenge myself to use only 2 1/2" squares already cut in my scrap bin, plus hand-dyes if I chose. Once I made that decision, a design popped into my head.


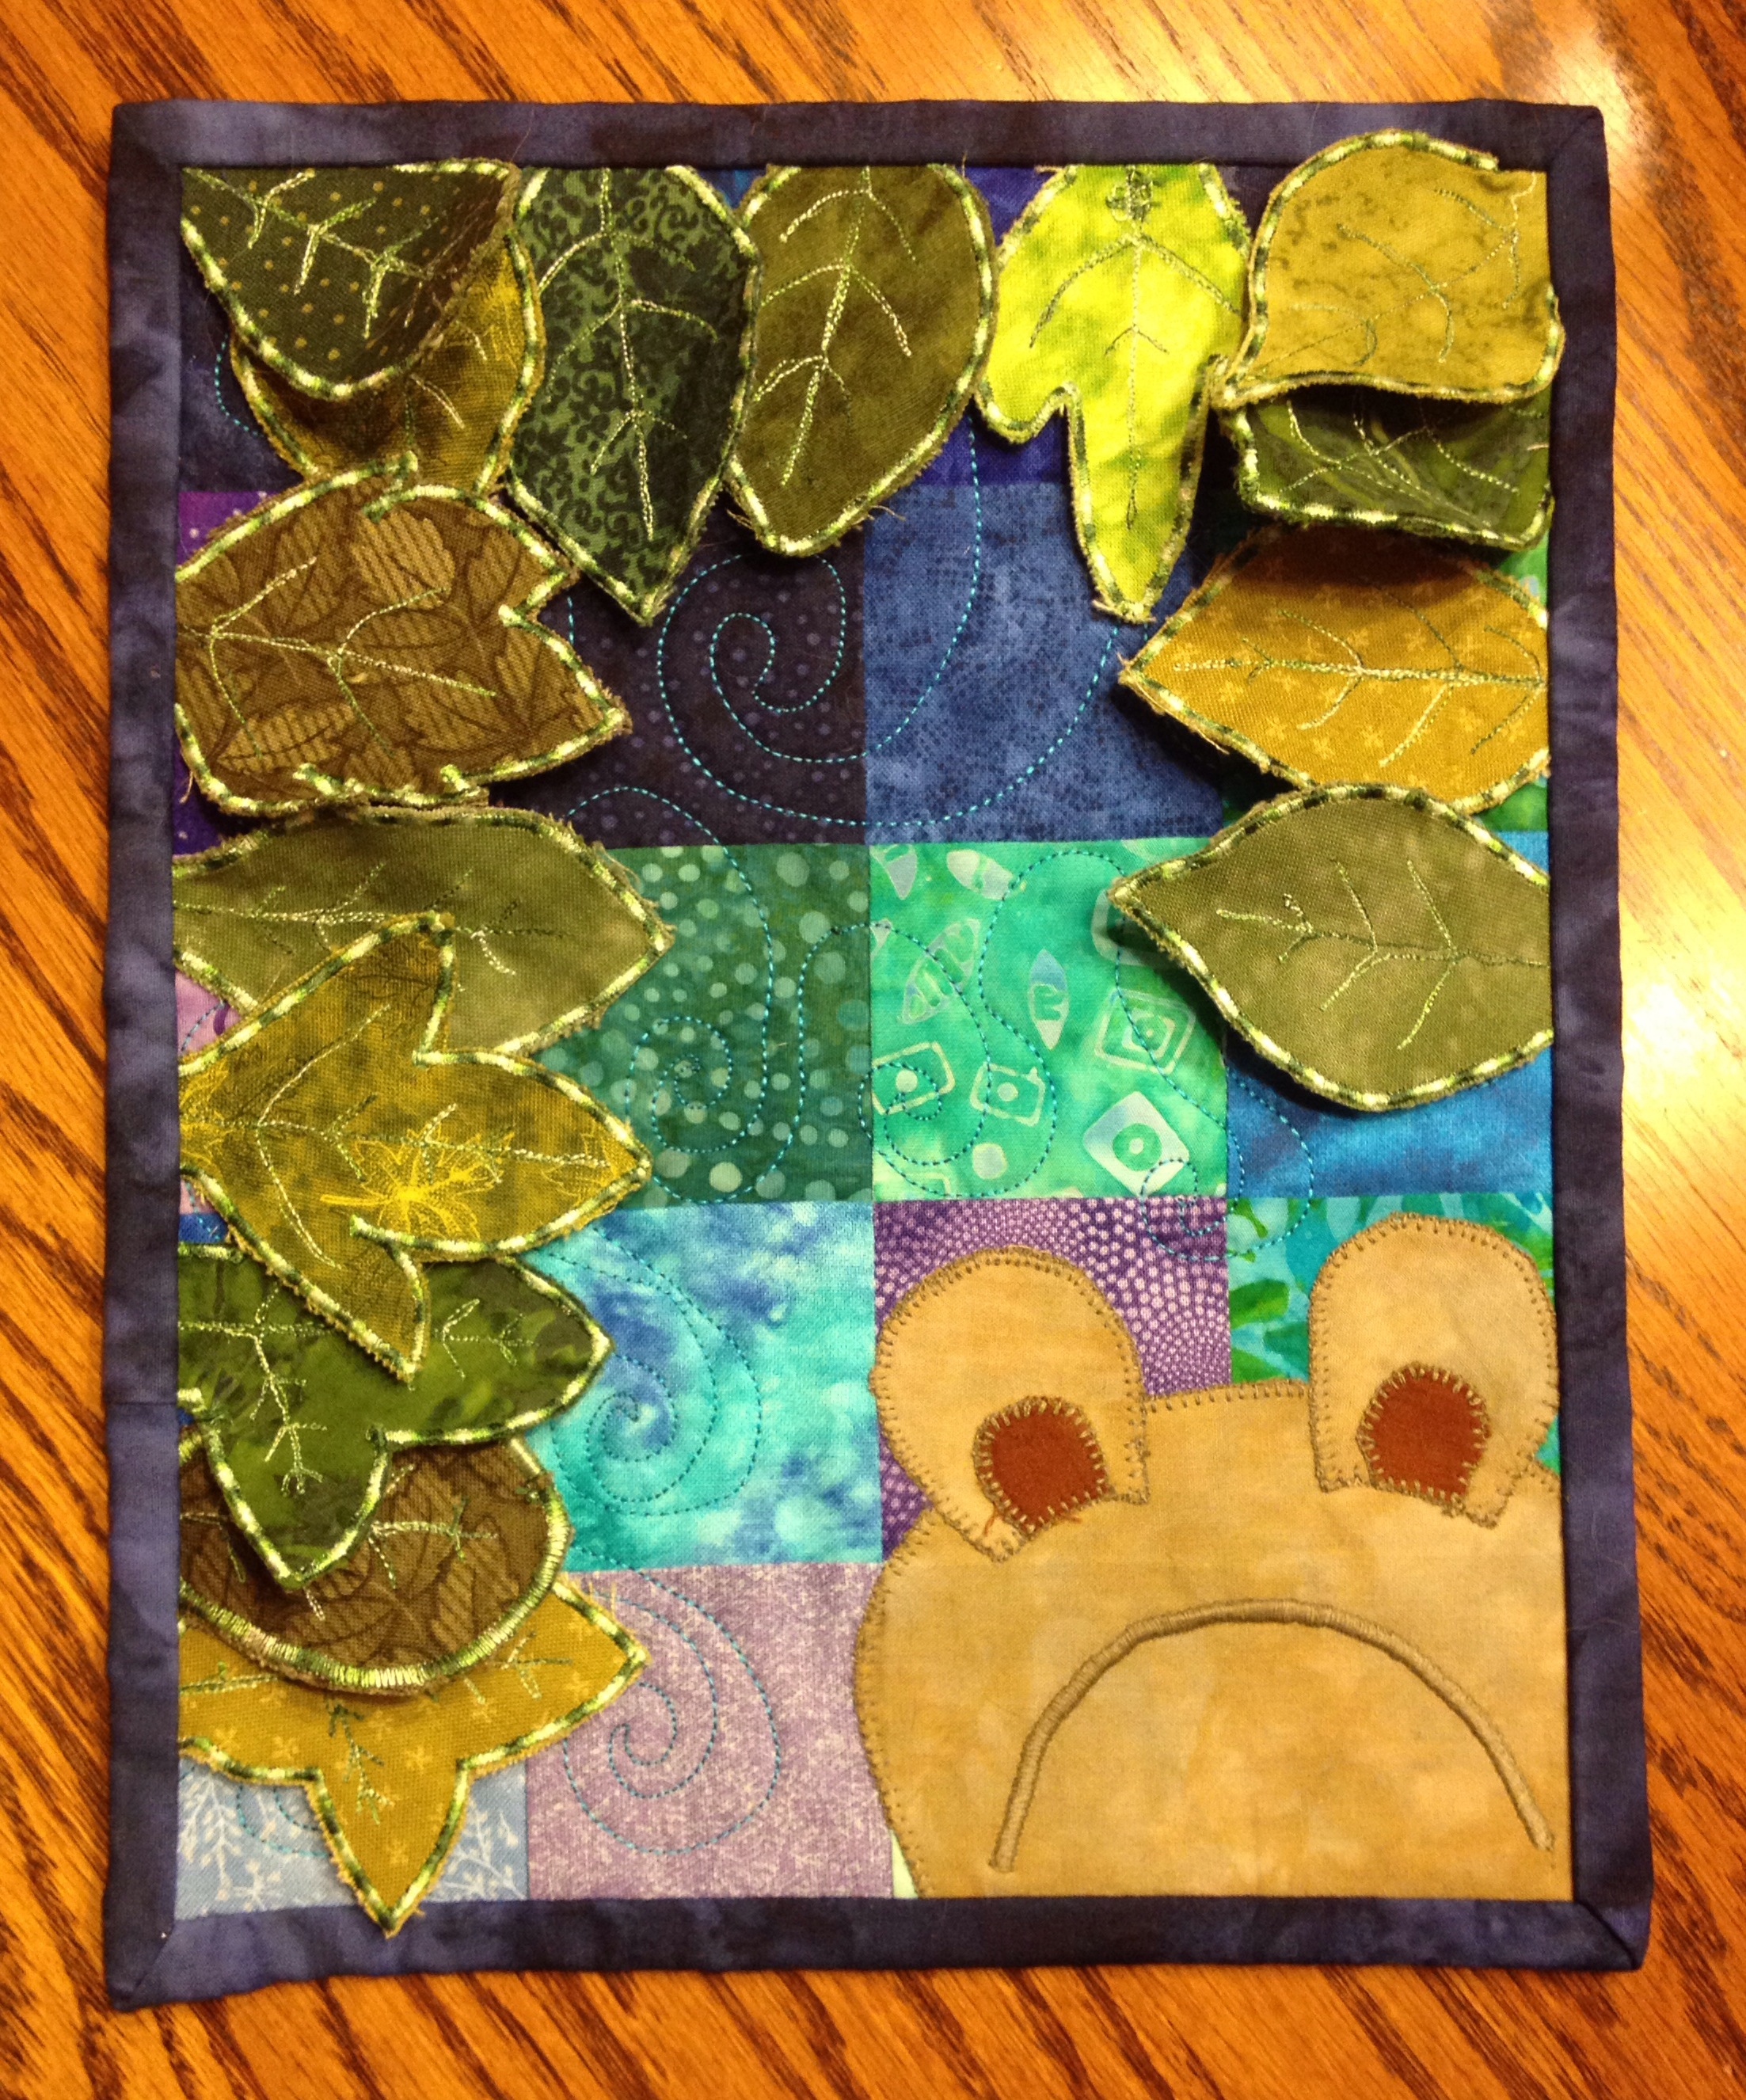
Yep, Mr. Froggie-Fella was part of the design. Here is the end result.

FrogFellaProject2014.jpg
Photo Jan 27, 8 37 36 PM.jpg

I also had fun figuring out how to make the 3-D leaves. I've seen a lot of techniques for doing it in magazines, in blogs, and in classes; I've done some similar dimensional work before. I tried out a couple of different methods before finding a technique that worked well for this project. Different techniques apply themselves to different circumstances.


Photo Jan 27, 9 20 57 PM.jpg

But you've just gotta love that face, don't you?

(If you're curious, Frog Fella is made out of my hand-dyes and a thread that matched amazingly perfectly.)

Although it doesn't have an official name, I've found myself thinking of this as the Frog Fella Project.


Photo Jan 26, 9 42 57 AM.jpg

By the way, I did also make that chocolate babka from the Artisan Bread class that I'd mentioned. Yum.

No, that's not burnt on the top there. That's all nummy nummy dark chocolate.

Godiva dark chocolate chips.

60% cacao.

Can you tell I'm a fan?


Craftsy Class Review--Molly Stevens' Mastering the Braise

Chicken Thighs with Peppers and Onions

Chicken Thighs with Peppers and Onions

I decided, in the midst of sub-zero temperatures and whistling winds outside my door, that a class on braising was just the ticket. And so, after I'd completed the previous couple of classes in my Craftsy line-up, Molly Steven's The Secret of Slow Cooking: Mastering the Braise was a great excuse for me to cook up some comfort food.

I've braised for years, although for most of that time I didn't know that what I was doing was called "braising." I thought it was just "making pot roast." Silly me. It was only a few years ago that I started seeing the term "braising" turning up regularly in cooking magazines and websites and realized that hey, I knew what that was; hey, I'd done it before; and hey, I could learn to do it a whole lot better. My pot roast could sometimes be a bit hit and miss. It was always decent, but I never made it the same way twice and some versions were quite a bit better than others. I didn't make it often enough to really track what I was doing in different parts of the process that made the most difference to the end result.

Enter Molly Stevens. Her class lessons are set up according to the phases of the braising process. She begins by talking about the elements of a braise: pots and pans, what cuts of meat and what vegetables work best, braising liquids, and finishing touches. Then she uses three recipes--one pork, one beef, and one chicken--to walk through each phase of the braise, from browning to finishing. At the end, she has a lesson on braising vegetables in which she uses three additional recipes to show some more techniques and things to consider.

Note, however, that this isn't a recipe class--it's a technique class. Throughout each phase, she's only using those three recipes as examples of variations that can occur in that part of the process. She talks frequently about other ingredients you could be using, and the class materials have an extremely helpful list of options so you can mix-and-match your own braised dinners or side dishes.

I decided to use one of her recipes as it's written first, to be sure I had the technique down, before doing a mix-and-match of my own. I chose her recipe for Chicken Thighs with Peppers and Onions because, well, frankly, that was the recipe with the shortest braising time and I really wanted to also get some sewing done that afternoon!

I thought it turned out lovely. My husband even liked it and he's not a fan of dark meat. (Yes, you can substitute a chicken breast but white meat doesn't work as well in a braise situation.) And I liked it despite the fact that it calls for crushed red pepper flakes and I'm not a fan of heat. I could've left them out, of course, but since my husband likes heat, I decided to leave them in and just use a light hand to see how the recipe worked as written. It was just enough heat to make it interesting and balance out the sweetness of the peppers and onions, without making it difficult for me to eat my dinner. Perfect.

And while the recipe itself is a keeper, that wasn't even the point of the class for me. I have now figured out where I needed to improve my technique, and I've been given the tools to do so. Rather than turning out "decent" braises, I have all confidence that I'll now be able to consistently turn out something far better and have a lot more fun in the process. I find myself wanting to invite people over for dinner just so I can try out new and different braising combinations.

As usual, here are the basics:

  • 8 lessons in all, ranging from 12-30 minutes.
  • The first lesson talks about talks about the science of braising, pots and pans and other tools. In lesson 2, she talks about why certain cuts of meat braise better than others, plus how to prepare them for braising for the best results.
  • In each lesson following, Molly then uses the three main recipes as illustrations while she goes through each phase of the braising process--browning, adding aromatics, choosing and adding braising liquids, the braising itself, and how to finish.  For example, in lesson 3, she browns the pork, then browns the short ribs, then browns the chicken thighs, and talks about the similarities and differences for each given meat--as well as mentioning others you might use. The last lesson is about braising vegetables.
  • My only slight quibble with the class: She addresses briefly in one of the early lessons how to adjust braising recipes for use in a slow-cooker. However, she doesn't spend a lot of time on it. This is one area that most people (myself included) might not mind having had a full lesson devoted to. For us workin' folk, sometimes a slow cooker is the best option we have for eating a braised-style meal on a week-night. But between what she did say about it, and what I can find on the Internet on my own anyway, I'm not overly bothered by this in the grand scheme of things.

By the way, I also really enjoyed Molly herself. She's a very straight-forward, no-nonsense teacher. She only rarely cracked a smile but still, you could feel her enjoyment and passion for food coming through. Perhaps it was a sense of the smile being in her eyes. She's not a "banter" person--filling up space with words just to entertain. But she felt like someone that I could hang out in a kitchen with for hours and have a great time. Very authentic.

I'm going to consider this class complete even though I plan on keeping the PDF print-out in my kitchen for the next time I go grocery shopping so I can have fun creating my own braise combination. From here on out, it's just a matter of continuing to play with different combinations of ingredients and allowing my Creative Braising Maven to shine through! (Well, until our seasons change and I put away the braising pan in favor of the grill. At the moment, that feels like forever-from-now.)

If you think you'd like to check out Molly Stevens' Mastering the Braise class on Craftsy, here's a link. (Transparency statement: Using that link helps support this blog and podcast.)

Don't worry: If you're not a foodie, I'll be getting back to the textile-related class reviews next time around!

Craftsy Class Review: Artisan Breads with Peter Reinhart

e.jpg

I know, I know. This is "OT" when it comes to quilting. But a quilter's gotta eat, right? And if she's eating, she might as well be eating really, really good bread.

I believe I've mentioned before that I grew up as a child of the Back to Nature Movement. In 1970, my parents moved our family from the city out to a house in the country on seven acres--a house Dad built himself (well, more correctly, "was building" himself as it was little more than a frame when we first moved out there--but that's a story for another blog). Dad lived by the Farmer's Almanac and Mother Earth News. I often joke now that Dad would mow the lawn and we'd get it for dinner: Lamb's Quarters are something vegetarians could eat, if you didn't know. Put enough butter on it....

But more than the canned-just-about-anything, the homemade maple syrup, and definitely more than the homemade wine (a subject for that same other blog), what I appreciated about my growing-up-hippie years was Mom's homemade bread. Every Saturday, 15 loaves. The woman had serious biceps. Kneading, punching down, putting in the oven to rise*, then baking batch after batch well into the dinner hour...it was a weekend ritual. My favorite moments were Saturday nights, when Mom would let us slice into one loaf fresh out of the oven and have a big, thick hot slice slathered with butter (well, those were the margarine years) and strawberry jam (usually also homemade).

As an adult, I rarely had time to bake homemade bread . I did it once or twice, using Mom's techniques and recipe, and the kids loved it. To try to fill the need, I owned a bread machine a couple of different times--until, well, see the rather tragic blog post about the demise of my most recent one.

Now that the kids are grown and my schedule has seriously eased up, I felt the desire to start baking bread again. Enter Craftsy and Peter Reinhart and Artisan Bread Making.

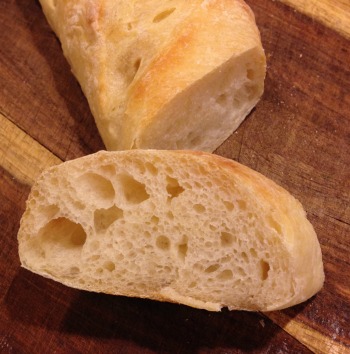
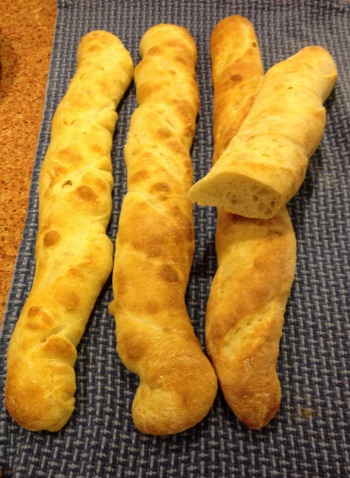
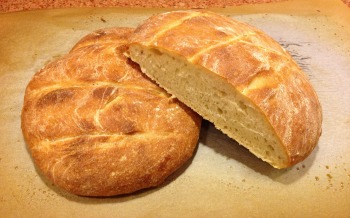
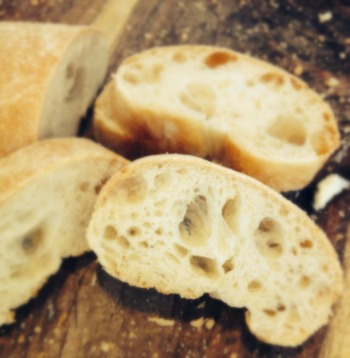
Mom's method was great...but oh, the bread I've been baking! Peter's method is quite different, and produces a very different type of bread. I've been making baguettes, boules, and batards (O My). I plan on making a chocolate babka for an upcoming guild meeting. I'm putting the information about marbled ryes in my back pocket for future reference. Great stuff.
But even beyond the bread recipes which, arguably, you can find on the Internet or in any of Peter's books, there's Peter himself. He's an excellent teacher. His passion for bread-making comes through so clearly that he makes you want to jump up and run into the kitchen as soon as you're done watching a lesson. And his statement that bread is a metaphor of transformation imbues each loaf you shape with your hands with a depth of meaning beyond just, "Hey, this tastes pretty dang good."

And yet, it does taste pretty dang good.

So, the basics:

  • 10 lessons in all, most 30-40 minutes (a couple are shorter, one is 47 mins).
  • The first lesson talks about baker's math and gives a tremendous amount of background information that lays an excellent foundation for everything that follows, the second talks about supplies, definitions, and the 12 steps of bread making.
  • In each lesson following, Peter gives very clear directions on how to measure and mix ingredients, shape, and rise the dough, bake the bread; as well as how to be ready to make adjustments based on your room temperature and relative humidity.
  • The lessons go from straight lean dough, to country variations, rustic breads, enriched breads, marble rye, and that amazing chocolate babka that I'm going to make this weekend.
  • The downloadable materials are excellent reference when you're actually in the kitchen and don't want to get flour or oil on your iPad. Ahem. (Don't ask how I know.)

I had to make a judgment call as to when I'd consider this class completed for the purpose of my tracking. If I had said to myself that I'd have to bake one of every type of bread he teaches before I call the class finished, I'd either be done in 2017 or I'd be the size of a house. I've now baked three batches of bread, using one method twice when the first results weren't what I'd hoped (second results turned out fantastic after I made a few adjustments as per his suggestions to take into account the cold snap we're now living in up in these parts). I'll be baking one more batch in the next couple of weeks--the aforementioned chocolate babka. I've watched all the lessons and made copious notes. Therefore, I've decided to call it done, knowing I'll keep going back and referencing this class for years to come.

I'm putting all the pictures into a gallery--just click on the picture to see the next photo in the gallery. If you're reading this by email, the gallery may not come through. If not, use this link to see it in Flickr.

Haven't tried out Craftsy yet? Use this link to find out more.

Want to check out Peter Reinhart's Artisan Bread Making class? Use this link!

(Full disclosure: Using those Craftsy links helps support this blog and podcast--thanks so much!)

*Backstory: Mom would put the huge batch of dough in a big plastic bucket in the oven to rise. We were all strictly warned never to turn on the oven without looking in it first. When I was somewhere around middle-school aged, one day my sister and I decided to bake a cake. "Flick," went the oven switch to bake, and "Swish" went the temperature control knob. About half an hour later, Mom came running up from the basement where she'd been in her quilt studio. "What's that I smell? What do I smell burning?" She raced into the kitchen and threw open the oven door, to reveal a mass of dough and melting plastic. I don't exactly remember what happened next. I don't, however, recall that my sister and I played any role in helping to clean up. My guess is that, in those moments, Mom didn't particularly want to even lay eyes on us so sending us to our rooms was likely the better option for her. Frankly, I'm surprised I lived to tell about it. To this day, I always open an oven door before I turn it on. Some lessons do stick.


#MLKSI--join us for another sew-in

As per my previous post about what @knittyAJ can talk me into, just wanted to remind y'all that there's another online sew-in this weekend as [some of us] have Martin Luther King Jr. Day off from work on Monday. I'm actually quite excited--I'm normally traveling for work over this weekend so I'm usually observing the incredible work of Martin Luther King Jr by being crammed in coach class on a plane or waiting for delayed flights. This year, I plan on listening to recordings of his sermons while I'm sewing. Seems much more fitting.

So, join us for our sew-in! As usual, there's a Twitter hashtag: #MLKSI. If you're not on Twitter, you can still play along--you'll just miss some of the fun!

A lot of us are going to have fun together by all sewing one or both or a combo package of the two versions of the Disappearing Pinwheel (DP) in that previous post. I've set up a Flickr group to make it easier for us to look at it in different color ways and settings. Anyone can check it out, even if you're not doing the sew-in or the DP! You'll find it here: http://www.flickr.com/groups/disappearingpinwheel/. People are already posting photos of their fabric choices...it'll be fun watching these develop!

Also, Craftsy is doing a "flash sale" this weekend--January 18-19, over 50 classes will be up to 50% off, so check it out! (Here's a link. Full disclosure, I'm an affiliate so using that link will help support my podcast and blog. So will clicking on the Craftsy banner in the sidebar. Thanks!)

As soon as I'm done with work on Friday, I'll be doing the second part of Step #4 of #Scrapitude so I can get that one posted. Then I'll be choosing fabrics for my DP--and let the #MLKSI fun begin!

Machine Quilting with Wendy Butler Berns (Craftsy class done!)

I've already reviewed this class in my podcast, but just to make it official for my 2014 Quilty Resolutions, I now consider myself to have completed Machine Quilting with Wendy Butler Berns.

I really enjoyed this class. Well, to be fair, I enjoy Wendy Butler Berns in general, which is a good thing because I own every one of her Craftsy classes. In any case, her style is very laid back, and she gives great tips and demonstrations. The class includes several designs, starting with simpler ones and building up to slightly more complex (although none of them are overly challenging); it also has lessons devoted to information about needles and threads, ideas for whole-cloth quilting, and troubleshooting. You won't get formal designs needing stencils or measuring or math here--it's very free-flowing and organic, the kind of thing you can (once you get the hang of it) just start rockin'-n-rollin' and having a ball.

I'm not new to free motion quilting (FMQ). I've been poking away at it for years--including having watched all the lessons in Wendy's class when I first bought it maybe 18 months ago. The difference is, this time I actually practiced what she was teaching!

WBBsketchbook.jpg

I watched every lesson with a sketchbook in my hand. As she was describing each design, I'd sketch it out several times in pencil, and sometimes play around with different sizes, variations on the design, and how to tweak the designs into smaller filler designs.

When the lesson was complete (or as soon as I could manage to get to my sewing machine), I'd set my phone timer for 15 minutes and spend 15 minutes--or more, if I was really getting into it and had the time--to practice the designs from that lesson. Some designs came relatively easily as they were similar to things I'd done in the past. Some were trickier. Depending on the design, as is common, I often do better going in one direction than the other, and it's never the same direction from one design to the next! I've learned that half the battle is figuring out what direction you most naturally move in order to make the design work best. Sketching it out first does help, although in a limited way--it's a very different motion to move fabric under the needle. Still, every little bit of practice helps, be it with a pencil or fabric.

WBBFMQpractice.jpg

I'm very pleased to see that the back of my FMQ has improved tremendously over the years--nary an eyelash in sight! On the front, my stitches are generally pretty even*. I seem to have the rhythm between needle speed and hand speed mostly down now. I still have some work to do on hand-eye coordination and actually ending up where I'm aiming, but that's something only practice will help. If I were doing these designs right now on a real-live quilt with blending thread, most of them would actually look pretty decent from a galloping horse.

This consistent practice also gave me the chance to compare my open-toed FMQ foot with my closed, specialty FMQ foot and FMQ bobbin case made for my machine (Janome 6600) and sold as a set, I believe. I've owned that bobbin case and foot for a couple of years, purchased based on a recommendation on someone's blog or something along the way. I've discovered I really don't like it. The bobbin was spinning too fast or something and I kept ending up with thread knots on the top--you can sort of see them in the feathers at the bottom of the sample. Once I switched back to my normal bobbin case and open-toed foot, no more thread knots. So that's good knowledge, too.

FMQcolorsketch.jpg

Just for kicks n' giggles, I was also practicing the designs with colored pencil while watching TV at night. Those bubbles are now completely filled in and I'm playing with other filler designs in other parts.


I'm going to consider this class complete although it's a hard class to determine when you've actually "finished," as it has no project involved. But I will continue to practice the designs during my 15-minutes a day, and they're in my toolkit for future reference. I've got a couple of projects in the works in which I could easily imagine doing one of the designs from this class.

I highly recommend this class, especially if you are brand-spanking-new to machine quilting or free motion quilting. It's a great way to introduce yourself to a variety of designs and ideas.

Full disclosure: If you use this link to purchase the class, you will help support this podcast and blog. Still n' all, my review is honest-n-true; I'm not saying good things just to encourage people to use the link. If you're a podcast listener, you'll have heard past reviews of other things about which I'm not quite so positive!