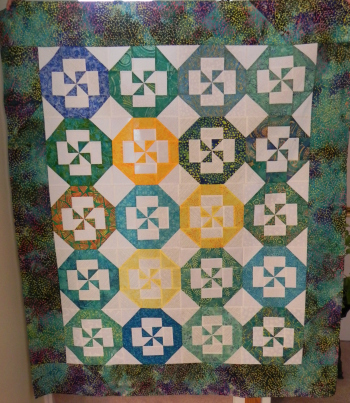
A finish! Disappearing Pinwheel

Remember how this all got started?

Well, it's finally done! Drum roll please:

I had it longarmed at my LQS and, as usual, said "quilter's choice." I didn't have a strong opinion about what I wanted, so I let the experts decide. Here's a close-up of the design and thread they chose. (Sorry it didn't come out very clearly--my portable quilt hanger had problems holding the quilt still while I was doing the close-up. Should've just used a table at that point.)


I'd picked it up a from the LQS a couple of days before I left town but didn't get to it; I was still half asleep from my week of meetings when I tackled the binding this weekend. Fortunately, binding is the kind of thing I can accomplish without having to be overly awake. That being said, I'm quite pleased with how much I've progressed in my skills with doing binding entirely by machine. This one turned out the best yet! I just need to go in and tack down the diagonal seam on the mitered corners by hand to make it look clean. Maybe I should always wait until I'm in full-on zombie mode before I sit to do a machine binding...

A Finish-- "A Walk in the Woods"

As I talked about in my most recent couple of episodes (154 and 155), I had some homework to do for my design study group around "luminosity." Luminosity, if you're not familiar with it, is making it look like there's an internal source of light in your quilt, as if it's glowing. This is a tricky thing to achieve--it all has to do with value and placement of colors next to one another and such. Just having contrast doesn't necessarily equal luminosity. (This is one of my favorite examples of a quilt with luminosity.)

In any case, I saw this as an opportunity to use one of my favorite hand-dyed pieces from last summer. This is one of several that I refer to as my "tapestry hand-dyeds," because they're a half-yard of fabric, measuring roughly 18" by 42" or thereabouts, and turned out such that I don't see myself ever wanting to cut them into smaller pieces; therefore, I imagine them becoming backdrops for some sort of a long, rectangular, "tapestry-like" wallhanging.

And so, I introduce you to "A Walk in the Woods."

Walk in the Woods complete

Walk in the Woods complete

I wanted the hand-dyed fabric to be the stand-out here, so I kept my quilting and choice of thread more subtle. As it turned out, perhaps I went a little too subtle: When it's on the wall and you stand more than about five feet away, you almost can't see that it's been quilted at all. Oh well, I'm still quite pleased with the way it turned out.

Quilting in progress

Quilting in progress

The above was a picture I took of my quilting in progress. I'm still learning my FMQ and decided to just haul off and have at this one, trying to stay loose and happy while I was doing it. It actually turned out pretty well. A few places got a bit whonky, but again, can't see it from five feet away anyway!

Detail of bottom

Detail of bottom

Detail of quilting around the middle-ish

Detail of quilting around the middle-ish

Detail of quilting at top

Detail of quilting at top

I also did a little perspective, though not religiously so, on the leaves--the ones at the bottom are, for the most part, larger, and the ones at the top are, for the most part, smaller. I tried to make it all one continuous vine but I did end up having two different places, if I recall, that I had to end and start over somewhere else because I worked my way into a corner and would have had to backtrack over my own lines further than I really wanted to. But you can't see it, so let's let that be our own little secret, shall we?

Faced binding detail

Faced binding detail

This was the first time I did a faced binding. I like it. I want to do it again. And again. And maybe even again. Thanks to Susan Brubaker Knapp for her tutorial!

Oh, and I got all those purple scarves done.

(The ones on the bottom of the right-hand pile were my first three test scarves.)

Sprouting Purple Scarves

I may not have crocuses, but I've got me some scarves!

Purple is the signature color of my organization; consequently, I spend a lot of time dyeing things purple for work-related purposes. I'm doing some scarves that we'll be using for a special event coming up, so I started the process this weekend.

First things first: I have to decide, "Which purple?" I own three variants of purple dye. Two are new to me, the other I've used a few times but it behaves differently depending on the fabric. So this weekend I dyed three scarves, one of each purple, so I could compare to see which one comes closest to our signature color.

Left to right: Boysenberry (MX 802), Grape (MX 801), Reddish Purple (MX 804)

Left to right: Boysenberry (MX 802), Grape (MX 801), Reddish Purple (MX 804)

Reddish Purple (804)--on the far right--is the one I've been using for the last year. Unfortunately, when I mixed up my dye concentrates I realized I was nearly out of that one, so it's a more dilute version than the others. It would be more obviously red-purple if it were full strength. However, I think I like the Grape (801) well enough; it's the more blue-purple scarf in the center. After dropping a bundle at Lancaster I'm trying to hold off buying any more dye for awhile, so I'm going to hold off replacing that 804 and work with the 801 instead for the time being.

Boysenberry is dang pretty, but not even in the ballpark of signature so the scarf will find other uses. And I'll have fun using the color in future dye projects!

So, now that I know what color I'm going to use, the next decision I have to make is: How fancy do I want to get? Stay tuned...


Ice-Dyed Neutrals Report

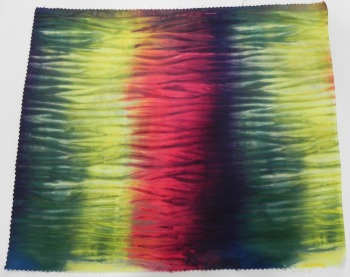
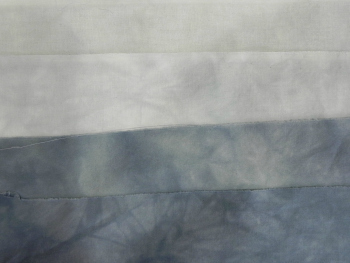
I only had a little time for fabric arts this week, so I stuck a couple more half yards in an ice-dye bath with the neutrals again. I just love seeing how these colors break and mix and meld.

To begin with, though, this is the first time I've had snow dyes and ice dyes side-by-side (especially using the same dyes) so I can see the difference in results. They're both very nice, so it just depends on what you're looking for.

Here is my original snow-dye from last week (this may be a better picture than the one used for the original post because I was trying to conserve space due to the volume of photos!):


Snow-dye with nuetrals

Snow-dye with nuetrals

Other than the fold lines--sorry--you can see that the design and colors are more muted, more "swooshy" than crystalline. And because of the way I had manipulated the fabric and put the dye on, it ended up with a very nice gradation (not intentional, but a wonderful surprise!) The effect reminds me of photos from nebula in space and such.

And here are the two ice-dyeds using the same colors this week:

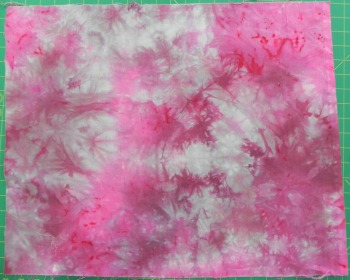
Ice-dye neutrals version 1

Ice-dye neutrals version 1

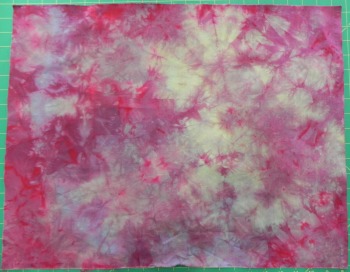
Ice-dyed neutrals version 2

Ice-dyed neutrals version 2

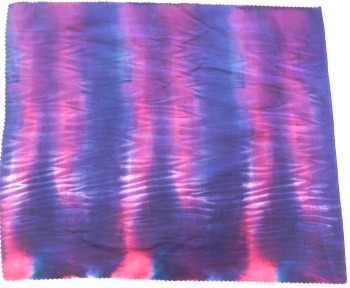
The first one I just sort of scrunched and mooshed up before putting the ice on; the second one I did a little more of a pleat, though not a strong one, and then circled it around a bit to get it to fit under the ice. That creates that sort of...ummm...spinal effect, if that's not too creepy a description.

The four colors used: Stormy Grey (MX 6160), Old Rose (MX 5220), Ecru (MX 5223), and Camel (MX 5181). (Names are Prochem.)

I have a friend who's already expressed interest in buying one of these though I'm waiting to confirm. I just have to figure out some details!

By the way, Craftsy is having a Spring Flash Sale this weekend--selected classes up to 50% off through midnight Mountain Time Sunday! (Using this link helps to support this podcast and blog--thanks!)

Talkin' 'bout some hand-dyes, oh yeah

Yes, indeedy, the mad quilt scientist (who even has her own hashtag, 'cause she's just that cool) has been busy in the basement again.

The stationary tub has been cured. Oh, my, but water slurping down a drain as it should is such a lovely sound.

To catch up on dye progress since my last post on the subject...get ready for a boatload of pictures! (Some of the pics are singles, others are galleries. The galleries are set to autoplay but also have controls so you can move through them at your own pace. If you're getting this by email and the galleries don't work, you may have to view it on the website.)

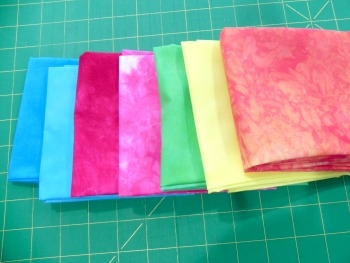
This time I re-did the pastel version of the gradations from the Frieda Anderson class in Lancaster (and her book). The Lancaster ones are on the right, the new ones are on the left.

Just as in the first gradations re-do, most are about the same but a couple of colors vary pretty significantly. And, just as in the first gradations re-do, there are oh so many possible reasons why.

I do think I didn't dilute my concentrate quite as much as we must have in Lancaster, since mine aren't quite as pastel-y. But I'm quite okay with that.

Still n' all, I like what I ended up with, so all's fair in the world of hand-dyeing.


Then I did a different kind of gradation--gradation all on one piece of fabric.

I'd taken a picture of these in their dye baths so you could see the before-n-afters, but can't find the picture now. Sorry about that. I did sort of a loose pleat on one and a scrunch on the other, folded them in the middle to get them to fit the container, and laid them lengthwise. Then I poured three different colored dyes on them in sections--one in the reverse order of the other. These were still the pastel (diluted) versions of the dye concentrates--turquoise, fuschia, and yellow, which is why they look a little washed out. They're half-yard lengths, if you're curious. Don't even ask what I'll do with these. No idea, but that's not really the point for me!

And here's a gallery of other random bits I dyed trying to use up the rest of this set of dye concentrates so I could move on. I included the picture of one in the dye bath--it's a great example of how some colors are quicker to move into available space than others. That turquoise, he's an aggressive little fella. "Me first! Me first!"

And there was evening and there was morning, the second day. (Well, okay, a few "second days" later.)

This past weekend, I finally got myself over to Lowes to ask if they had the equivalent of a remnant bin of PVC pipes. I only needed sections about 12" or so long, and didn't want to ask them to cut that length off several different widths. I was hoping they'd have a scrap bin or something. Some of you may already have your eyebrows raised. "Has this woman never bought PVC pipe before?" Nope. I've now learned that home stores routinely carry 2-foot lengths of certain widths to be used as couplings or whatever. I am now the proud owner of four PVC pipe tubes ranging in diameter from 1 1/2" to 4". Whee! I was finally ready to do some shibori!

Shibori has all sorts of facets to it (I own this book for future playing), but what most people are familiar with is wrapping fabric around a cylinder and either tying it tightly with string or using rubber bands. The wrapped fabric then gets shoved down to the bottom of the cylinder creating a number of folds. When it's dyed, the folds create visual texture.

I was using Mixing Red, Lemon Yellow, and Deep Navy Blue on this one. The navy blue is a new dye for me so I wasn't sure how it would behave. Turns out, it's just as aggressive, if not more so, than the turquoise.

Here's a photo of the shibori dye bath.

shibori.jpg

And that turned into these...

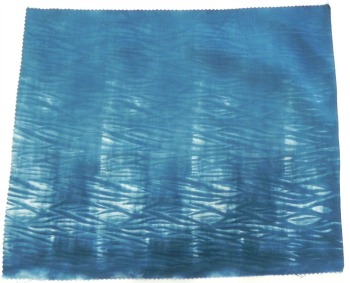
I did one with just the navy blue because I wanted sort of an indigo effect. However, due to it's aggressive nature, the blue paid very little attention to the resist of the rubber bands so the resulting shibori pattern is very subtle. I like it, but next time I'll dilute the dye more so perhaps it becomes a little more humble in its approach.

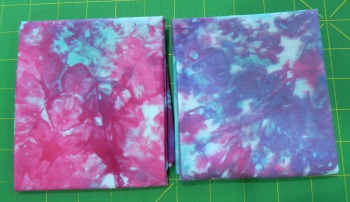
And then I went back to my ice-dyes. As I've mentioned before, ice-dyeing is the best way to break a compound color to see all the colors that go into making it. I decided to ice-dye my two black dyes (628 and 629) side-by-side to see if, by breaking down the colors, I could see a difference.

Here's 628.

Kind of fun to see all the blue, yellow, and a bit of red appear here and there!

And here's 629.

According to ProChem's website, 628 is more of a blue-ish black, and 629 has more of a green cast to it. They were described to me as one being a bit warmer and the other a bit cooler. I've yet to use either in a circumstance in which it seemed to make a difference, but I haven't really pushed the envelope yet either.

Going back in time a little bit: The weekend before last we had a spring snowstorm. Not altogether unusual around here, though the 11" in my backyard the next morning was pushing it, in my opinion. I decided to find the silver lining and did some snow dyeing.

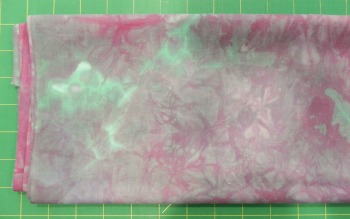
Yummy. Love this one. I used Stormy Grey, Old Rose, Camel, and Ecru (ProChem names) because I thought these neutrals would break in interesting ways. I was right!

Next up, turquoise and fuschia. This one didn't have as interesting a result because (1) turquoise and fushchia are pure colors so nothing breaks and (2) they were the leftover pastel versions of the dye concentrates I'd mixed, and with the snow, they just became even more dilute. Still, pretty enough...

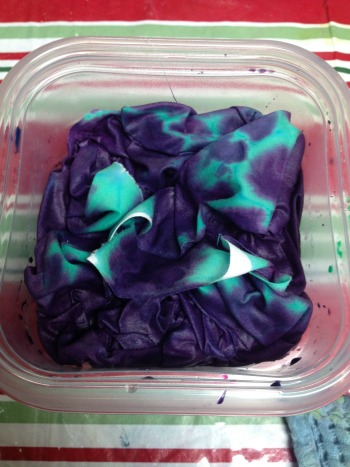
And, for the last bit of snow-dyeing, I went back to my standard favorite mix: teal and purple. I just can't stay away from these--different results every time but always gorgeous!

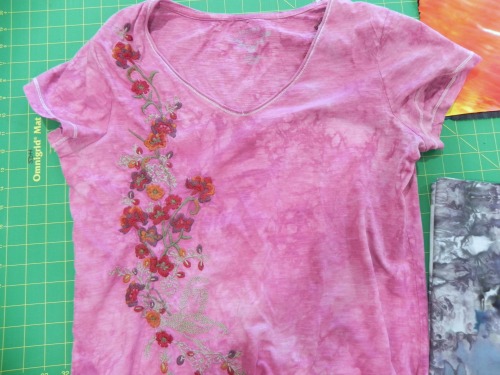
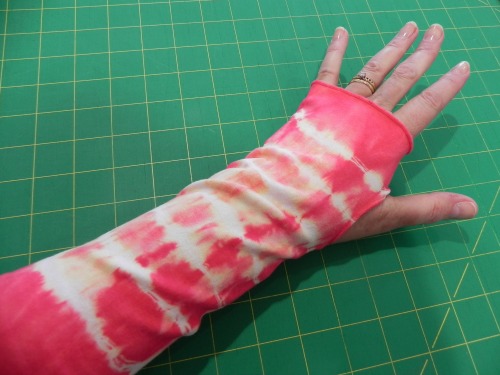
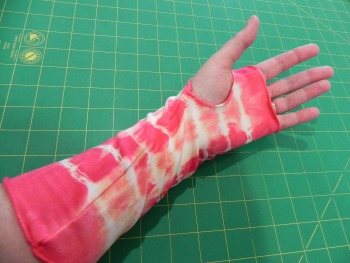
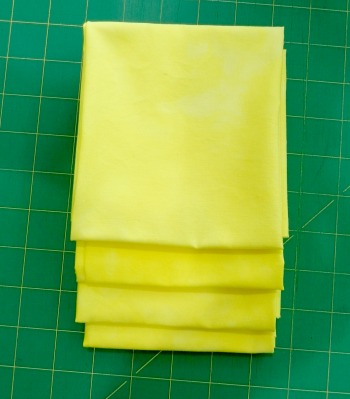
And the last little gallery--all the other bits I tossed into dye baths. Some more yellows since I'm working on "luminosity" for my design study group (although after this I found something else that's just PERFECT to use for that homework assignment...but I'll keep that under my hat until later); a tshirt of mine that had gotten stained so I tossed it into a dyebath of colors I had handy, not overly worrying about whether the color would work with the embroidery; and my first test run of wrist warmers. Which I love and have been wearing for the last two days, so I'll definitely be making more of those!


A Finish! Craftsy Class Review: Stupendous Stitching

I finally finished another Craftsy class, and this one has been a l-o-n-g time in process. I first started working on this sometime around January 2013, made a little progress, hit a stopper, and subsequently let it languish until sometime around mid-January of this year. That wasn't because it was difficult, or boring, or something I wasn't enjoying; it was pure "Dang, I can't finish this until I..." and then getting distracted before I completed the "until I..." portion.

But I'm done! Woot woot! And so, I can now officially post my review of...

Carol Ann Waugh's "Stupendous Stitching" class on Craftsy

I did have a whole lot of fun with this class!

Well, that is, I had fun once I finished this.

The first part of the class is making a "Stitch Bible." Carol Ann suggests starting out by creating a record of every stitch your machine can make. You start stitching each stitch in the default settings, then you make it wider, then longer. As she points out, some designs actually look like they're completely different stitches once you start monkeying with the settings. This was an extraordinarily helpful project--as she comments in this lesson, we probably have boatloads of stitches available to us on our machines that we've never used. Ahem. Yep. Now I've always got a quick reference. (And yes, they do look quite different stitched out for realsies than they do in the little diagram on my machine, so there's that, as well.) You can tell I didn't worry about having matching pages--I just used scrap fabrics and scrap threads so it's not a very pretty Stitch Bible. But I wasn't going for pretty. I was going for functional...and done.

Yes, this was the step that hitched me up and made this class take me over a year to finish. I made the first page or two, ran out of the stiff stabilizer I was using, and took about a year to get back to buying the supplies and creating myself enough pages to finish this. Over Christmas break this year, I got the remaining pages prepped so I could blast through and get the Stitch Bible complete. Boy, was that tedious work! Useful now that it's done, but mind-numbing to complete.

In this detail photo you can see the copious notes I took, ahem. Since I was generally using about the same settings every time, I didn't bother writing them down. It's enough for me to see the difference in stitch.

This was before I had an appropriately-sized grommet-maker. So I stabbed a hole in the corners with very sharp, pointy scissors. At that point, stabbing the pages over and over again with a sharp object was a bit therapeutic. This really was a tedious endeavor.

Ah, but once it was done, on to the fun stuff!

Carol Ann spends an entire lesson on how to choose a background for the Stupendous Stitching project. She does a great job showing choices that would work well and others that wouldn't work so well, and explaining why. It took me some deliberating to settle on which of my hand-dyes would work best for the actual class project. I needed something interesting, but not too busy.

This was the winner. I thought the sort of circular "blasts" of color might give me some design inspiration as I went. (It looks a little more vibrant/busy in this photo than in real life. I think you'll see that better in the finished reveal.)

The first step is couching. You couch a few lines on the project that sort of lay the foundation for everything that comes next. I ended up buying a special couching (piping) foot as the foot my machine came with didn't have a deep enough groove for the couching I was doing. This is the "Pearls and Piping" foot--I believe it's the one Carol Ann recommends in the class. I love it. It's a great foot. The one trick is remembering to move the little plastic piece that sits on the bar where it latches onto the shank--that little plastic piece adjusts the placement of the foot in relationship to your needle, which changes where the needle hits in relationship to what you're couching. Got it? This caught me up a couple of times--I'd get started and take a few stitches, then realize I'd not adjusted the little plastic piece. Still n' all, a great foot.

I had a blast using some great sari ribbons and sari yarns--ribbons/yarns created from scraps of old Indian saris. Beautiful stuff, bought a couple of packages of them two or three years ago, never knew how to use them. Wow, did I have fun! Well, except that the sari ribbons had a lot of fraying along the edges that eventually caused a bit of a mangled rats nest under the needle.

I call shenanigans.

Fortunately, nothing broke, and after 10 minutes with a very sharp pair of snips, tweezers, and a quick vacuum with my mini-attachments, we were back in business.

I used three large sari ribbon pieces and one narrower sari yarn. They added great color and texture, but the three ribbon pieces were a bit visually overwhelming. I sent @knittyAJ (AJ of The Quilting Pot podcast and I Knit N Quilt 2 blog) a quick email, since she'd done this class last year at the same time I started, to get her suggestion. She suggested I get over myself. Well, okay, she said it a whole lot nicer than that and it was one of the options I'd said I was considering in the first place, so I agreed. Thanks for the "call a friend" lifeline, AJ! Very helpful. I decided to leave it until much further in the process to see if doing everything else would soften the impact.

The next step is using your decorative stitches. Here I got to play with a whole lot of gorgeous threads I've collected over the years and, again, never really knew what to do with. (This was just what I started with--I added a lot more later!)

You do more lines with decorative stitches, and then you do some hand-stitching as well.

I had a whole lot of fun trying out some new stitches and getting ideas from the Creative Stitching book by Sue Spargo that I reviewed on a podcast episode awhile back. I got pretty good at French knots and lazy daisies, although my daisies were a bit hodge-podgey in size and petal direction. I choose to call it whimsical and move on.

Here's another example of my couching and some hand stitching.

In this one, you can see my ultimate solution for those overwhelming sari ribbons. When I was doing my hand-stitching, I decided I could try hand-couching them down and seeing what happened. I liked it! Nothing had to get ripped out, and now they're all interesting texture without taking over the piece.

(The hand-couched ribbon is on the left. The thicker couching on the right was sari yarn machine-couched. Hand-stitched lazy-daisies, hand-stitched threaded chain on far right.)

And some more detail of decorative stitches, hand-stitching, and couching.

You can see how much fun it is to just cut loose and say, "What can I try to do next??"


By the way, when you take this class (and you know you will!) pay attention when she says to stop the hand stitching a fair amount inside the edge. I didn't. Oops. I cut through some of my knots when I trimmed up the edge and had to go back to hand-tack a couple of my hand-stitching ends back down. Glue may have been involved.

You can also see in this picture the rat-tail binding technique she shows--a new technique for me! I had a little trouble with it here and there because I was using a braided cord that frayed like the dickens when I cut the end, and I also had very thick couching pieces that my zig-zag had to wrestle its way over. I used my Pearls n' Piping foot again for this step and it worked much better than my regular presser foot. Still, I couched over it twice to be sure, and then had to shave off some frayed ends with my snips. It's a nifty technique, though.

So here's all the fun stuff I played with through this process in one shot.

Pretty threads from a variety of sources, hand-dyed perle cotton from Laura Wasilowski's Artfabrik shop (bought in Houston a few years back), sari ribbons and yarns from Meinke Toy (check out their "toy boxes").

And, of course, my hand-dyes. (Also a hand-dyed on the back but there's a reason that hand-dyed piece ended up as backing. It's not exciting enough for a picture, but it's similar colors to the front.)

And here's the final reveal:


Sure, there's some things I'd approach differently if I were to do this again. I enjoyed it, though, and I did learn a lot about my machine, using different materials, and hand-embroidery. I can easily see myself using the techniques I learned from this in other projects, or creating "stupendous stitching fabric" for other uses, as Carol Ann Waugh shows in the final lesson (see "Basics" below). And I could imagine doing a few 9" or 12" blocks with this technique, set into a wall quilt with other blocks. That could be cool. I could see adding beadwork, or including needle felting....Lots of possibilities here!

So, if you're in the mood to play, to use a lot of intriguing materials and methods, and just be foot loose and fancy free for awhile (her mantra through the class is "there are no mistakes!"), this is exactly what the quilt doctor ordered. I do recommend this class. Once that dang Stitch Bible was out of the way, it was just a-whole-lotta-rockin' fun!

Again, that's "Stupendous Stitching" by Carol Ann Waugh. You won't be sorry.

The Basics:

  • 11 lessons, ranging from 5 minutes (the last lesson) to about 30 minutes.
  • After the introduction, the first lesson is a very helpful overview of the kinds of materials you could use; then the next lesson talks about the Stitch Bible. The following lessons then take you step by step through the process, with a ton of helpful tips along the way.
  • Last lesson is about five minutes of ideas for other ways you can use Stupendous Stitching techniques--pillows, purses, shoes, tablet covers, and the like.
  • The downloadable materials were great reference, and one, the "No Mistakes Poster," is worth sticking on the wall in your quilt studio!

(Transparency statement: using the Craftsy links on this blog help support this blog and podcast. Thanks!)


Spring Postcard Swap and A Tutorial

(Looking for the 2014 Quilty Resolutions Check-in Giveaway and Linky Party? It ends at midnight Saturday! Click here. Meanwhile...)

Kati and I both got one another's postcards, so I can now do "the big reveal" blog post!

Kati of Kati's Quilting and Sewing (and one of my #twilter peeps!) and I were partnered up by Sandi of Quilt Cabana Patterns for Sandi's Spring Postcard Swap. I love doing these postcards! It's a great, bite-sized way to try out new techniques, play with design principles or color combinations, and just all around have a good time.

Here's the postcard Kati sent me--a much-needed glimpse of spring while it was still snowing outside (despite the calendar).

It's wonderful! I love the colors she used, the shape of the tulips and the leaves, and the stitching designs. I especially like how the leaves look like they're jumping right up off the postcard. They're so happy!

Thanks so much, Kati! It's still sitting on my desk, reminding me that yes, spring WILL come eventually!

And here's the postcard I sent Kati.

I was double-dipping and used the postcard as homework for my design study group. We were supposed to do something using a triadic color scheme, so I chose purple, orange, and green. I made the "binding" by fusing narrow strips of one of my hand-dyed fabrics down, intentionally cutting it so I'd get the gradation of color along the edges.

I would've been happier if I'd used a brighter white background, I think. The cream color sort of tones everything down more than I'd like. Overall, though, I was pleased with the results. I mailed it in an envelope, though, as I wasn't sure the thread fabric would survive if I didn't!

Here's a detail shot--I was trying to catch the light so you could see the sparkles in the orange center. That's caused by the Angelina fibers I included in the thread fabric.

You can also sort of see that I did a running stitch a little in from the edge of the thread fabrics to tack it down securely but allow for some fringing on the outside all the way around.

I got to play with a couple of techniques on this.

The background and leaves were basically crumb blocks I made using random pieces of fabric--no foundation. I just started stitching stuff together until I made something big enough that I could then use to cut my shapes/background from. It's an age-old method, though I used Victoria Findlay Wolfe's 15 Minutes of Play book for inspiration. I've not done it before, though, so it was fun to mess with!

The petals and center are made from "fabric" I created using thread and water-soluble stabilizer. I did this technique once a year or more ago as a test project. This time, I wanted to see what would happen if I created a larger piece to cut into shapes. It worked great, though you need to use it for something you really want fuzzy edges on.

I've showed this to a couple of people and they wanted to learn how to do it, so I'm including a tutorial here. I didn't make this up myself, but have seen the technique in so many places now I honestly can't remember where I saw it first, and I just do it off the top of my head with no reference to specific instructions anywhere. So don't give me credit for the technique...just for this particular explanation of it!

I didn't remember to take pictures of each step, so I've added the pictures I did remember to take here and there; sometimes they relate to the step, sometimes they're just so you can see a little detail here and there. I'm also posting them slightly higher res than usual so you may be able to click in closer to see the detail of the thread fabric.

Thread Fabric Tutorial

To do this, you need:

  • Water soluble stabilizer. There are several options for this type of stabilizer; yours may not look like mine as mine's quite old at this point (Sulky brand, inherited from Mom, probably at least 5-7 years old or more). You just need a stabilizer that dissolves in water, regardless of brand or appearance.
  • An embroidery hoop that will easily fit within the throat space of your sewing machine, and is narrow enough to be able to fit under the presser foot. (Mine's an 8" diameter plastic cheapo-model; works great for this!)
  • Thread in the color of your choice to use for anchoring everything down (variegated is very nice; type of thread doesn't really matter much--whatever works best for you in free motion quilting);
  • Scraps of yarn, funky thread, cording, tiny scraps of fabric, Angelina fibers, or other textiles to create the fabric. Avoid anything too nubby as it might rip the stabilizer while you're working.
  • A bowl of water or a sink, and a drop or two of fabric softener (optional)

A note about color choice: Use whatever you want--the funkier the better! Make sure you've got at least some color variation for interest, but also keep in mind that the more you stitch, the more the colors of textiles will get blended into your stitching thread. On my orange piece, I went back in with a different variegated thread at the end because it had blended too much and didn't have quite enough color variation for my taste. That's the beauty of this technique, though--you can keep stitching away until you're happy with the results!

The Play-by-Play

1. Cut two pieces of water soluble stabilizer approximately the same size, a few inches larger than you want your finished piece to be.

2. Lay one piece inside one half of your embroidery hoop. (It's easier to do this now than move it into the hoop later when it's covered in scraps!) Make sure enough extends outside the hoop that it holds firm when the hoop is assembled. Press the stabilizer down so it's sitting on the table surface, and squish the sides over the sides of the hoop as much as possible--the less the scraps get shaken around later when you put the hoop together, the better.

3. Randomly spread your scraps of textiles, fibers, and so forth, on the stabilizer within the space of the embroidery hoop. Be sure to leave enough margin around the edge that you'll be able to get your sewing machine presser foot as far to the edges of your scrap pile as possible. You can pile scraps on top of each other, but try to keep the level of the pile fairly even all the way across. The thicker/more evenly spread your pile, the more opaque your thread fabric will be; a looser, more spread out pile will give a lacier effect. You don't have to be exact about it, but it helps in the stitching if things are pretty even. Higher spots can catch the presser foot and cause problems. If you have a longer length of yarn, loop it around on itself a bit to create interesting designs. Adding some Angelina fibers can create fun sparkle. Cut loose and play with what you can throw in there!

4. When you're satisfied with your collection, lay the other piece of stabilizer on top of it and secure it in the embroidery hoop. Note: Have it so that the stabilizer lays flat on the surface when it's in the hoop, not raised from the surface. In other words, it should be the reverse of what you'd normally do if you were embroidering by hand. Does that make sense? (You should be able to see that in the picture here.)

5. Now comes the really fun part! With a great thread in your machine, and your machine set up for free motion quilting, slide that puppy under your needle and go to town! Stipple, loop-de-loop, jiggidy-jaggedy...just make sure you've stitched enough to secure all those little bits and scraps down. As mentioned above in the "piling your thread" section, stitching more densely makes a more opaque thread fabric, stitching more spaced apart makes a lacier effect. Just make sure you stitch enough that the fabric actually holds together when the stabilizer is removed.

What's even better? Tension doesn't matter! If you see skipped stitches or "eyelashes" on the back, who cares? You're creating fabric! Thread nests can be easily disguised simply by stitching over them again--they become part of the texture of the fabric. (Ahem. Ask me how I know.)

The only problem that can occur in this step is if your stabilizer tears apart while you're stitching. (Again. Ahem. I know these things because....) This can happen if your pile is uneven or you have a textile that's too nubby, as mentioned above. Dull needles may also cause it. Small rips--just back up, and stitch over it to make sure the thread fabric is intact. Big rips, carefully dismantle the hoop and lay a third piece of stabilizer over the top, then start stitching again.

6. When you're happy with where you're at, take a deep breath, grin, then pop that sucker out of the embroidery hoop. If you want to avoid too much extra goop having to dissolve, you can trim off any excess stabilizer as I did in the picture here, but it's not necessary. Soak your thread fabric in a bowl of warm water to dissolve the stabilizer, or follow the directions on the package. I found it helpful to soak it for awhile, then rinse it under running water and rub it gently in my fingers, and then soak it again. I think I did this maybe three times over the course of a couple of TV shows that evening. In the last soak, I added a couple of drops of fabric softener--it helps release the last of the stabilizer and make a more pliable thread fabric.

I don't know exactly how long it takes to dry, since it was a full day before I had time to get back to it again, but I'd allow a few hours to be on the safe side. You can always hit it with a blow dryer as well, depending on what fibers you used.

Use good fabric scissors to cut it into shapes if desired. In fact, if you can, try to use really, really good applique scissors--the kind with the little grippy teeth work great to slice right through the variety of textiles without shredding. Again, I just used a straight-stitch about 1/8" in from the edge all around to stitch mine down, but you can attach it by hand, or tacking it in a few places--all depends on the effect you want in the end.

This is a super-super fun technique. I've gotten in the habit of saving all the raveled threads off the edges of my newly-washed hand-dyes for future use as thread fabric!

So, gonna try it? Huh? Huh?


Hand-dyed Results ('n link to 2014QR giveaway)

If you're looking for the 2014 Quilty Resolutions Check-in Giveaway and Linky Party blog post, click here!

Meanwhile, back at the ranch...Here's what's been going on in my life while y'all have been checking in and linking up!

Despite a flooding stationary tub crisis and dyeing my hand a rather funereal shade of blue (which, actually, was partly related to aforementioned flooding crisis)...

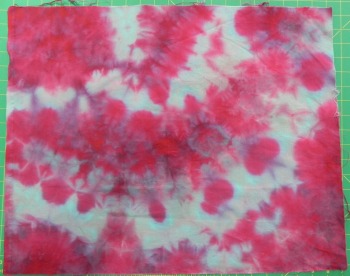
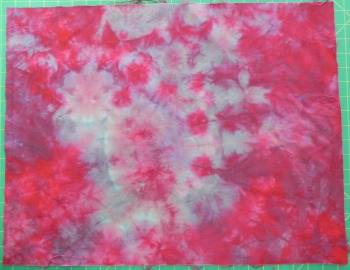
I finally managed to get my most recent set of hand-dyes rinsed, washed, dried, pressed, and photographed!

If you recall my previous blog post, I started out by redoing some of the gradations I'd done in Frieda Anderson's dye class while I was in Lancaster. I wanted to be able to more closely follow the process and take notes on recipes and so forth. Somehow I hadn't managed to bring home the handouts from class, so I was going by the recipes in her book Fabric to Dye For.

The gradation at the top of this photo was the first one done in Frieda's class. The one on the bottom was the one I did at home this weekend. Most look more or less the same, but a couple are slightly different, and others are very different. There are several possible reasons for that--variations in recipes, variations in procedure, variations in water...

In any case, I'm not sweating it. I'm keeping samples of the ones I did here at home as representative for my notes with the recipes I used and all sort of other useful-for-the-future factoids.

And then, just for fun, I'd thrown in...

...some bamboo socks (PFD from Dharma Trading). These were dyed in straight Fuschia, Turquoise, and Lemon Yellow dyes (ProChem names). You can see that, due to aforementioned flooding crisis, I had to fast-track the rinsing process and thereby ended up with some color migration. Minor-league frustrating, but since these socks are for me and I'll only be wearing them under jeans, no one will see that. So shhhh...keep it just between us.

And then...

A pareo (I finally remembered the word!) for myself this summer. A pareo is the cloth you wrap around yourself when you're wearing a bathing suit. I couldn't get the whole thing in one picture, so this is one half of it...

...And then the other half...

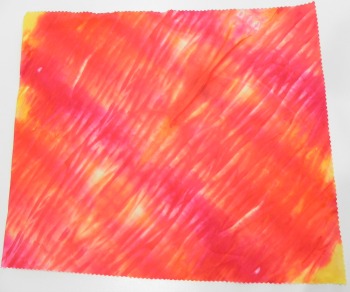
I mostly took this second view because you can see more of the tangerine dye in this one (upper right). That was one of the new colors I was experimenting with. It looks very brown in powder form, so I was gratified to see what a beautiful orange it turns into. This was ice-dyed, by the way. It looks a little less mottled because there was a whole lotta fabric and only a little ice, so it doesn't have quite as strong an ice-dyed effect as others.

I may do more of these--they're fun. Anyone want a pareo? Tee hee.

And then--because who can resist?--more baby stuff!

I'm so pleased! These turned out great! And ya gotta love the little caps too! Don't you just want one? Again, it's all bamboo. The one on the left was ice-dyed, purple and teal. Probably my favorite combo to ice-dye because it just gives the most interesting results. Love the shades of gray that appear!

The middle one was rubber-banded and dyed in a teal-ish mixture. Trying to get those rubber bands off in a hurry (did I mention the flooding already?) is what caused the blue fingers. Rubber bands and rubber gloves don't mix, so I finally bagged the gloves. I love the effect of the onesie, when I don't let myself think, "Gee, kinda looks like an old-timey prison uniform or something." 

The orange onesie on the side is upside-down because I used Color Magnet and stenciled my grand-niece's name on the front. It turned out great, but I don't want to broadcast her name without permission. The Color Magnet draws more dye to the spot where you use it, so her name is a darker orange than the rest of the onesie.

Fortunately, no dye migration on any of the baby clothes. I'm really pleased with how they all turned out.

Mr. Plumber showed up bright and early this morning, and we're hoping the flooding issue has been solved. However, he also informed me that the pump is well past it's average life span. Bully. Just another appliance to add to our list of "everything needs to be replaced at the same time."


Boo Yah! Weekend Goals Met! Plus DPW, Scrapitude, and Daisy's Quilt Reveal

This time around, I did great on my weekend plans!

SDHDPWTop3914sm.jpg

Remember that Disappearing Pinwheel extravaganza from way back at the MLK Jr Day Sew-In? I finally got my top completed! I also did a backing for this one, a nice turqouise or aqua blue marbled cotton. It's now in the hands of the longarmer at my LQS. I'm having it pantographed, quilter's choice. Still haven't entirely decided what I'm going to do with this one but I'm thinking it may be a gift for a friend.


And now, the big reveal....

SDHScrapitude3914sm.jpg

My Scrapitude top!

I haven't come up with a spiffy name for this yet.

SDHScrapitudeborderdetail3914.jpg

The narrow inner border was from my stash, so the only purchased fabric for this was the outer border and backing.

I fell in love with this border fabric. Not at all what I'd originally had in mind when I ventured to my LQS to find something. I'd been thinking a large print multicolored floral to balance out all the sharp pointy things going on in the center. I'd seen the bolt of this fabric on the shelf and liked that it had all the colors I was looking for, but since it had the vibe of an Australian aboriginal print design I didn't think it would really fit the feel of the traditional scrappy top. Later in my search, the staffperson pulled it off the shelf and we laid it out next to the quilt. There was a moment of silence, and we both said, "...Oh." And then, "Oh..." again. I loved the way the border motif mimicked the shape of the block, and it spoke to the colors in the quilt. I fell in love with it. Unique and unexpected--even better.

I only debated it for several moments longer because it's a directional print with a distinct motif and I thought I'd hate myself for trying to work with that. Yeah, I probably would, but it was too perfect to pass up.

My original intention was to do all sorts of math to get those motifs to work out as perfectly as possible, by taking little tucks in the border  to pull the motifs together in a shorter repeat as needed. When it came right down to it, though...I was really trying to get the borders done in time to get the quilt to the LQS before it closed on Saturday. Plus, I'd already lost so many points and had so many things not meet up as they should've (you'll need to listen to my rant about a particular ruler for the backstory on that one) that this is nowhere near an heirloom or show-quality quilt anyway. It's going to be on a bed in my house...which bed is yet to be determined. So, in any case, me and my family are the only ones that will see it. My husband really likes it as-is, so I decided not to sweat the border and just get it on there.

Magically, and thankfully, this is the first fabric I've worked with in this way in years that was actually mostly printed on grain! As I cut the fabric lengthwise (so I wouldn't have to piece the border), it was mostly in line with the motif. Amazing. So my priority of at least having the motifs appear relatively straight along the borders worked out pretty dang well. I didn't worry about where the motifs ended or mitering borders to make them match or anything. We were in Get-'Er-Done mode and I was absolutely thrilled to Get-'Er-Done!

This is also now in the hands of my LQS longarmer and it's also going to get a pantograph. As I said to the woman taking my quilt, "If I'm ponying up for custom, it's going to be on a quilt where I can see all my points!"

StringStarPrep3914.jpg

Other projects done this weekend...

Got all my cutting done for my String Star class with Ami Simms at Lancaster AQS quilt week. I'm using various ethnic design fabrics. We're supposed to bring the uncut fabric to class "pressed and ready to cut." The best way I could think to do that was to press it, then lay it out flat one on top of another and carefully roll it all together. Here's hoping it's not a mess if we do get to the point of cutting that.

dyeclassprep.jpg

And I collected all my supplies for the dye class with Frieda Anderson. I already had most of it, but I did take this as an opportunity to pick up more small containers with lids from the Dollar Store--they're a good size for fat quarters and you can even scrunch a half yard down in there if you're going for the scrunchy look, which I normally am. Pack of five for a buck. Can't beat it.

I don't have to bring a ton of supplies because I did buy her kit, so she'll be giving us the dyes, gloves, a face mask, and some fabric. I'm also bringing extra fabric that I cut and folded later after I'd already taken this picture; she invited us to bring whatever else we might want to dye since we may have time to do more in the afternoon. I couldn't bring my dog (What? You can't imagine a Turquoise Retriever?) so I'm sticking with doing more PFD fabrics I can add to my collection.

I got more done on my Spring postcard swap--can't show that yet, though!

DaisysGrace3914.jpg

And, finally, in a last-Hurrah of the weekend, I got the binding on the quilt I won from Daisy in her giveaway a couple of months ago! Woot! If I recall, the name of the design is "State of Grace," so I've named this quilt "Daisy's Grace." My daughter wanted it for her dorm room, so I did a machine binding. She's very happy with it!

DD is holding it up for the photo, and she's standing on the second step up on our staircase. She refers to herself as "fun-sized," so this is the perfect size quilt for her. She'll easily be able to wrap herself up in it while...ahem...studying.

DaisysGracedetail.jpg

Detail of the pantograph design. I almost inevitably leave it up to "Quilter's Choice" on design and thread color--the most I'll usually say is "I want it to blend," or "I don't mind something that stands out on this one" or whatever. They used a nice beige thread that stands out a little, but not so much as to detract from the design. They always do a great job...which is why I usually say "Quilter's Choice!"

I am so thrilled to be able to report that I'm not longer feeling overwhelmed by the number of projects I've got going on! Getting all this done this weekend has  cleared off the top of my cutting table and my sewing table, plus a shelf or two. Things feel organized and in control again.

Breathe.


Some Unexciting Hand-Dyeing

Well, I *did* get back into my dye studio this past weekend.

Of sorts.

I finally cleaned up way-old dye concentrate. The last time I'd had a big dyeing session was probably the end of October or early November. Perhaps even before that. I hadn't dumped my dyes because I fully intended to get back down there to use them up. Never happened.

You see, dye concentrates are really only expected to last maybe 2-3 weeks (as long as you've not added soda ash), although I've stretched mine a couple of times as much as 5-6 weeks and there wasn't a noticeable difference. My basement is chill enough, which is probably key.

But. Ahem. Four months was likely seriously pushing it. However, because I'm big into experimentation, I decided to throw a few pieces of fabric into a few Way Old Dyes just to see what happened. The results are unexciting. What happens is that Way Old Dyes lose their chutzpah. The colors aren't as strong and didn't catch as well--it felt like a lot more was washing down the drain than usual.

grays.jpg

I did four fat quarters parfait-style (stacked one on top of another in a tall cylinder), and used up the leftover black dye concentrate, adding water so I'd get graded fabrics, the ones on top being lighter than the ones on bottom. And it worked, but they're all lighter gray than I think they would normally have been.

The one on the top in this photo is the lightest; I'd refer to it as "Ever-So-Slightly-Gray." It's basically a foggy white. The next one down is slightly darker although that's hard to see in this picture. The other two differ from each other mostly in the middles--the one on the bottom is more consistently dark than the one right above it.

I'm keeping them all, of course. I mean, really--who hasn't gone into their stash thinking, "I wish I had a really good foggy white"?

red1.jpg

The next set was also stacked parfait-style, but this time I used four different colors. I knew, with the colors I chose, I could end up with sort of a muddy yellowy-brown thing going on, but I dig muddy yellowy-browns. I think they're interesting.

In this set, the colors clearly came out more dulled than they would usually, And the bright red spots you see here and there are the visible evidence of the fact that the red dye concentrates had gotten distinctly crusty. Chunky, even. A bit of a crystallization thing happening.

red2.jpg

I believe (don't really remember now) that the four colors I used were Mixing Red, Mixing Blue, Golden Yellow, and Fuschia, one on top of the other. There's a couple of ways to do parfaits where you get more distinct separation between the layers of color while still getting some artistic blending. But I was just dumping stuff in to empty out dye bottles. Like I said, I wasn't particularly worrying about results--I just wanted to see how Way Old Dye would change.

red3.jpg

I won't say I'm happy or unhappy with the results. I actually got about what I expected to get: I had assumed Way Old Dye would lose some oomph. I have distinctly less oomph at 48 than I did at 28, so why would dye be any different?

I'm not excited by any of these fat quarters, but they're still usable. In fact, I'm thinking they might be fun to use to practice free motion quilting on. I won't feel like I've got anything to lose and if it turns out looking nice, so much the better!

red4.jpg

I wasn't able to use up all my Way Old Dye in these samples--I did end up dumping the rest down the sink. But now all my bottles are cleaned out and ready to go for when I've got the time to mix up fresh Spry New Dye.

Next week, when I'm at the AQS QuiltWeek in Lancaster, I'll be taking Frieda Anderson's hand-dyeing class. I have her book and have already used her dye techniques, but I haven't done the gradations using the recipes in her book, which is what we do in this class. So I'll have more fun hand-dyeing pictures in a couple of weeks! (And I'll be using Spry New Dye for that!)

Craftsy Class Review--Shoot It! A Product Photography Primer

DSCN5663.JPG

Yet another Craftsy class finish! This time, we're talking about Shoot It! A Product Photography Primer with Caro Sheridan. I watched this class in its entirety while I was on vacation in Savannah last week (and, in fact, blew out my data plan allotment for the month by doing so on my iPad but it was well worth it!).

If you've got a blog or an Etsy shop, you really ought to get this class. I took photography in high school and have done a fair amount of self-study in it, but have gotten--admittedly--lazy in recent years. I used to be a much better photographer than I am now. I still have a decent eye for composition, but when it comes to taking the time to make sure I've got really well composed, nice looking photos on my blog, I only manage that about a quarter of the time. The rest of the time, I have a "Lookie! I'm finished! Let me quick snap something on my cell phone, upload it, and call it a day!" attitude.

Frankly, I really want to get over myself on that one. I would like to have much better photos on my blog, so I need to make a bit of a mental commitment to that. I can't guarantee that'll happen consistently, but it's something I'm going to...(wait for it)...shoot for more often in 2014.

Back to the class. I enjoyed Caro Sheridan as a teacher. She clearly knows her stuff, and in the class she illustrates her points with a lot of examples so you get the visual of how the background can really add or detract to the subject of your photo, and so forth. And she goes more in-depth than just "get rid of the clutter around it," which I do generally remember to do, even if it's just a quick sweep of my arm across the top of my cutting table to clear it off. She talks about the use of color in the background to highlight your product/subject, lighting and shadows, tools to use that make lighting issues a little easier, composition, and how to tell a story with your shot. She addresses using a point-and-shoot or your phone camera as well as more sophisticated cameras--so you don't have to have a whizz-bang camera to take this class! Probably better than 85% of the information in the class is applicable regardless of what you're using.

If I ever do have an Etsy shop for my hand-dyes, I'm definitely going back and reviewing this class again. For now, though, I've been inspired to drag out the manual on my good digital camera to refresh my memory on some of the settings (said laziness has led me to rely on auto settings far more than is good for me)--which also means, seeing if I can learn to love this camera. I still miss my old one and just haven't bonded with this one even after owning it a couple of years, so I'm giving it another few months before I decide if it's really just a learning curve thing, or if I really need to go back to my original line of camera. I've also been inspired to see if I can set up some sort of studio space in my basement to get better photos of my hand-dyes and small projects. I only need a table (hmmm...a retired cutting table, perhaps?), a few different colored back-drops (solid colored sheets to hang on the wall and drape over the table), and probably a couple of lights and light reflectors on stands--all things I can jury-rig together using hints from this class and stuff I find at Goodwill.

One of the other things I've been inspired to do based on this class is a Self-Portrait Project--the topic of her last lesson. She offers several very helpful tips in how to get a good self-portrait and suggests taking one a day for several days, playing with poses, lighting, camera settings, and so forth. Not only will you get a really good self-portrait out of it eventually but, as she says, you'll also likely deal with some of your own self-image issues. And that's something worth working on!

So I highly recommend this class. I really enjoyed it and, even with a pretty solid foundation of photography experience under my belt, got a lot of very helpful tips and ideas--and plenty of inspiration!

The basics:

  • 10 lessons, ranging from 6 minutes to nearly 30 minutes. The average is around 15 minutes.
  • Lessons begin with an introduction, in which Caro Sheridan talks about her own background and experience.
  • The next lesson is "motivations and style," which talks about why you'd want decent photos in the first place, as well as tips for developing your own style of photography. She offers some very helpful suggestions about how to discover what your style might be that believe I'm going to be trying out.
  • She then goes through color theory and composition in the next couple of lessons, spends a lesson on prepping for a shoot, another lesson on the shoot itself, then she talks about camera settings, editing, post processing, and the self-portrait project in the remaining lessons.
  • The lessons also have sprinkled through good information on working with a model (i.e., if you want someone wearing the sweater you just knit, or wrapped in a quilt, or whatever), including permissions and helpful tips about getting them more comfortable in front of a camera; they also include information about getting permissions for location shots and other considerations.

Again, I highly recommend this class. Here's the link again: Shoot It! A Product Photography Primer with Caro Sheridan. (Usual transparency statement applies: Using that link to purchase the class helps support this blog and podcast.)

I haven't had anything quilty to practice photography on since I got home, really, and it's still too dang cold to go outside for nice nature shots. Therefore, my dogs are getting plenty of attention. Here's a photo gallery from me playing with some nifty flash settings I didn't know I had on my camera the other night.

Sam the Ham was game. He posed, he smiled, he brought me a toy just in case I wanted a prop.

Spencer wouldn't look at me, kept creeping away, and finally started diving under the couch every time I got the camera out. Princess Doggie and I need to come to some sort of arrangement.

(If you're getting this blog by email, you might not see the gallery. Sorry--you'll just need to go to the blog for it.)

Craftsy Class Review--Spindling from Fluff to Stuff

I finished two classes while on vacation this past week. Well, to be honest, one of those "finishes" was simply, "thinking about it awhile and needing to make a judgment call." That'll become clear in my review below. I'll review the classes in separate blog posts, however, so I have a little more room to go into detail.

Photo Jan 22, 2 35 21 PM.jpg

The first class I'm reviewing, Spindling from Fluff to Stuff with Drucilla Pettibone, is a great example of mental bunny trails.

I started hand-dyeing fabrics. "Gee," I thought, "this is great fun! What else can I dye?" The dogs quickly disappeared out of sight, but I began thinking about other fibers. "Wouldn't it be fun to dye my own perle cotton to use as embellishment on art quilts? Wouldn't it be fun to dye my own yarn to use for embellishments? Dye my own yarn? Maybe I should be *spinning* my own yarn!"

Someone stop me before I hurt myself.

Actually, in that, I'm channeling my father in a big way. I've mentioned before being a child of the Back to Nature Movement. I talked on one podcast episode about Dad not only getting into leather tooling, but eventually even learning how to tan hides himself (and I'm not talking the euphemistic, "I'll tan your hide, dang you!" that parents have been known to say on occasion). I don't know that Dad became particularly skilled at tanning hides as--vegetarians may want to close their eyes here--there was still visible hair on the leather he used to make his own briefcase. Not artistically so, either. In any case, if Dad was going to learn a craft, he was going to drill down to the most basic, fundamental component of that craft. I'm probably only one step away from asking my husband if he'd mind having a sheep or two in the back yard.

Well, not really. I've had up-close-and-personal-time with sheep. They're not all that cute and cuddly, despite the Easter cartoons. Digressions aside, I thought it might be fun to learn how to spin yarn, so I went to a Fiber Festival and bought a bunch of different fibers, and bought a drop spindle on advice from a woman demonstrating them as well as from one of the friends I was with who'd done some spindling herself. When I got home, I bought this Craftsy class.

I've now watched it straight through several times and have been practicing, although not as consistently as I should. I'm still not very good, but where I had to make the judgment call was that the only thing that will get me better is more practice--I could watch these videos until the cows (or sheep or alpacas!) come home and it won't add to my mental knowledge at this point. The knowledge know has to come from muscle memory and trial and error. Therefore, I'm now considering this class complete though I've got a l-o-n-g way to go before I feel comfortable spindling.

Did I like this class? I can't say that Drucilla Pettibone's teaching style really grabbed me. That's not a big deal for me as I can still learn, but it didn't make me really want to jump right into watching the next lesson, as other classes have. I also struggled a bit with certain aspects of spindling, and began to wonder if watching someone else's technique might help. I'd gone back and re-watched certain portions of this class several times and still didn't feel like I was "getting it." That could be me, or it could be the teaching style, or it could simply be that I have to do it for a few weeks more before something clicks. Since I have no experience in the world of spindling, it's hard for me to judge that.

Photo Feb 08, 12 17 48 PM.jpg

I even decided to go ahead and buy the kit that went along with the class so I'd be using her spindle and her fibers, hoping that would help. The main benefit to having done that is my original spindle, bought at the festival, was top whorl and somewhat lighter weight than the spindle that came with the kit: a bottom whorl that was a few ounces heavier. That meant I could feel the difference in spin and how they behaved--different spindles work well with different fibers and give you different types of results. She does talk about that in the class but until you feel it in your hands and can watch it in action, you don't really know. So I certainly feel that buying the kit, even though I already owned a spindle and a whole lotta fibers, was still a good expenditure for my learning curve.

There is one big downside to this class, though, which I'm hoping is just a temporary thing. Drucilla seems to be a bit hit-and-miss about answering questions on the platform recently. One of the things I like best about Craftsy is the interaction with the teachers. Some of them are quicker on the uptake than others. But they all answer, even when their classes are a couple of years old. However, Drucilla seems be a bit less responsive to questions of late. I posted about three things in the class and haven't heard back from her on any of them, and can see other students' unanswered questions building up. I saw a little activity from her a few days ago so maybe she's trying to catch up now. I suspect (from researching her blog) she's gotten involved in other interests and isn't as active with the Craftsy class at this stage. And that's fine--people need to be able to be released from responsibilities; I certainly get that one! But if you're not going to be responsive, it would simply be a good idea to let people know that.

In terms of me continuing to learn spindling: Enter listener Daisy F W and her email to me recommending Abby Franquemont's spindling video and book, both entitled Respect the Spindle, available through Interweave Press. They were both on sale that weekend, so I was able to buy the video as a download and the ebook, each for $5. (They're not on sale as of this writing--sorry!) I immediately connected with Abby's teaching style, and Abby's backstory is fantastic--she grew up in the Andes as the child of anthropologists and learned how to spin in very traditional methods from Peruvian women who thought it was pretty shocking that the five-year-old Abby had never held a spindle.

I haven't finished watching the video or reading the book yet, so the jury is still out as to whether I find it more helpful than Drucilla Pettibone's Craftsy class practically-speaking, however. I just have to keep watching and practicing.

To be fair to Drucilla, this is the first Craftsy class I've taken in which I've been starting at a complete ground zero. Every other class I've had at least a certain amount of knowledge--I've been cooking for a long time, and quilting for awhile, and have done a fair amount of work in photography. So the teachers were just building on knowledge I already had. But spindling? This was my first time out of the gate. So Drucilla had a lot of work to do with me.

Therefore, I think I can say that Spindling from Fluff to Stuff is a good introduction to spindling. It did get me going, taught me some fundamentals, and encouraged me to practice; and I did get some yarn made, even if it's not very pretty yet or, perhaps, even usable. But I can see the future if I choose to stick with it, and that's a good thing. Connecting with someone's teaching style is a very personal thing--other students in the class seemed to love her, so you may love her too. Watch her introduction to see what you think. If you decide to take this class, I would recommend buying the kit--it usually is helpful when you're new at something to start out using materials the teacher is using so you're not having to mentally translate every step of the way. I think that slowed me down a bit at the outset.

But I would also recommend, if you're interested in spindling or spinning of any kind, that you check out Interweave Press as well. They have several books and videos--Abby Franquemont's as well as others--on the topic.

The basics:

  • 9 lessons, ranging from about 6 minutes to 30 minutes. (The 6 minute lesson is the introduction.)
  • One lesson covers tools and different types of wools, how they each behave and considerations for each.
  • Through the various lessons, short-draft and long-draft methods are each covered, as well as "park and draft," although that comes later in the lesson line-up than I'd have liked as, from my understanding, it's more of a beginner method than the others.
  • Other lessons cover plying fiber, finishing yarn (soaking, winding into balls or hanks, etc.), other types of spindles, spinning art yarn (thick-and-thin spins, as well as adding other materials into your spinning). As you might imagine, my favorite lesson in here was the one about spinning art yarn--there was some pretty cool stuff in that one. I'm also really interested in the Navajo spindle she demonstrates--looks like cool stuff.
  • One short lesson at the end is "Using your yarn." This one didn't seem to make a lot of sense to me as it would seem that most people interested in spinning are probably already people who have been using yarn for something or other in the first place. But I could easily be mistaken in that.

Have you taken Spindling from Fluff to Stuff and want to chime in with your opinions? Please do! Everyone benefits from hearing reviews!

A Finish! Design Study Group Homework on Analogous Colors

My design study group is meeting tonight so I'm scheduling this post to go live after I'm already at the meeting...so thanks to the wonders of technology you'll get the "reveal" at the same time they do.

Our group is currently working with A Fiber Artist's Guide to Color by Heather Thomas, going through one workshop a month. For this month's meeting tonight, we were to do something using analogous colors, while also keeping in mind all the other design principles of balance, unity, repetition, and so forth.

peruviantoad.jpg

On one of my vacation days in December I took myself on an artist's date to our local art gallery and planned on studying such things as use of light, color, line, texture, and other things I could carry into my quilting.

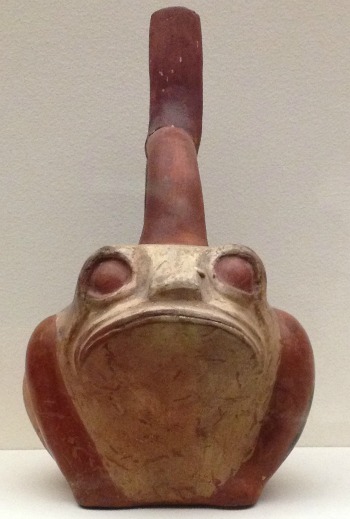
While in the ancient art section, I fell in love with this guy. I just knew he'd end up in a project somewhere.

His face is just too funny.


peruviantoad2.jpg


He's a "Stirrup spout vessel: frog," from the Moche culture of the north coast of Peru, circa 300-450 CE.

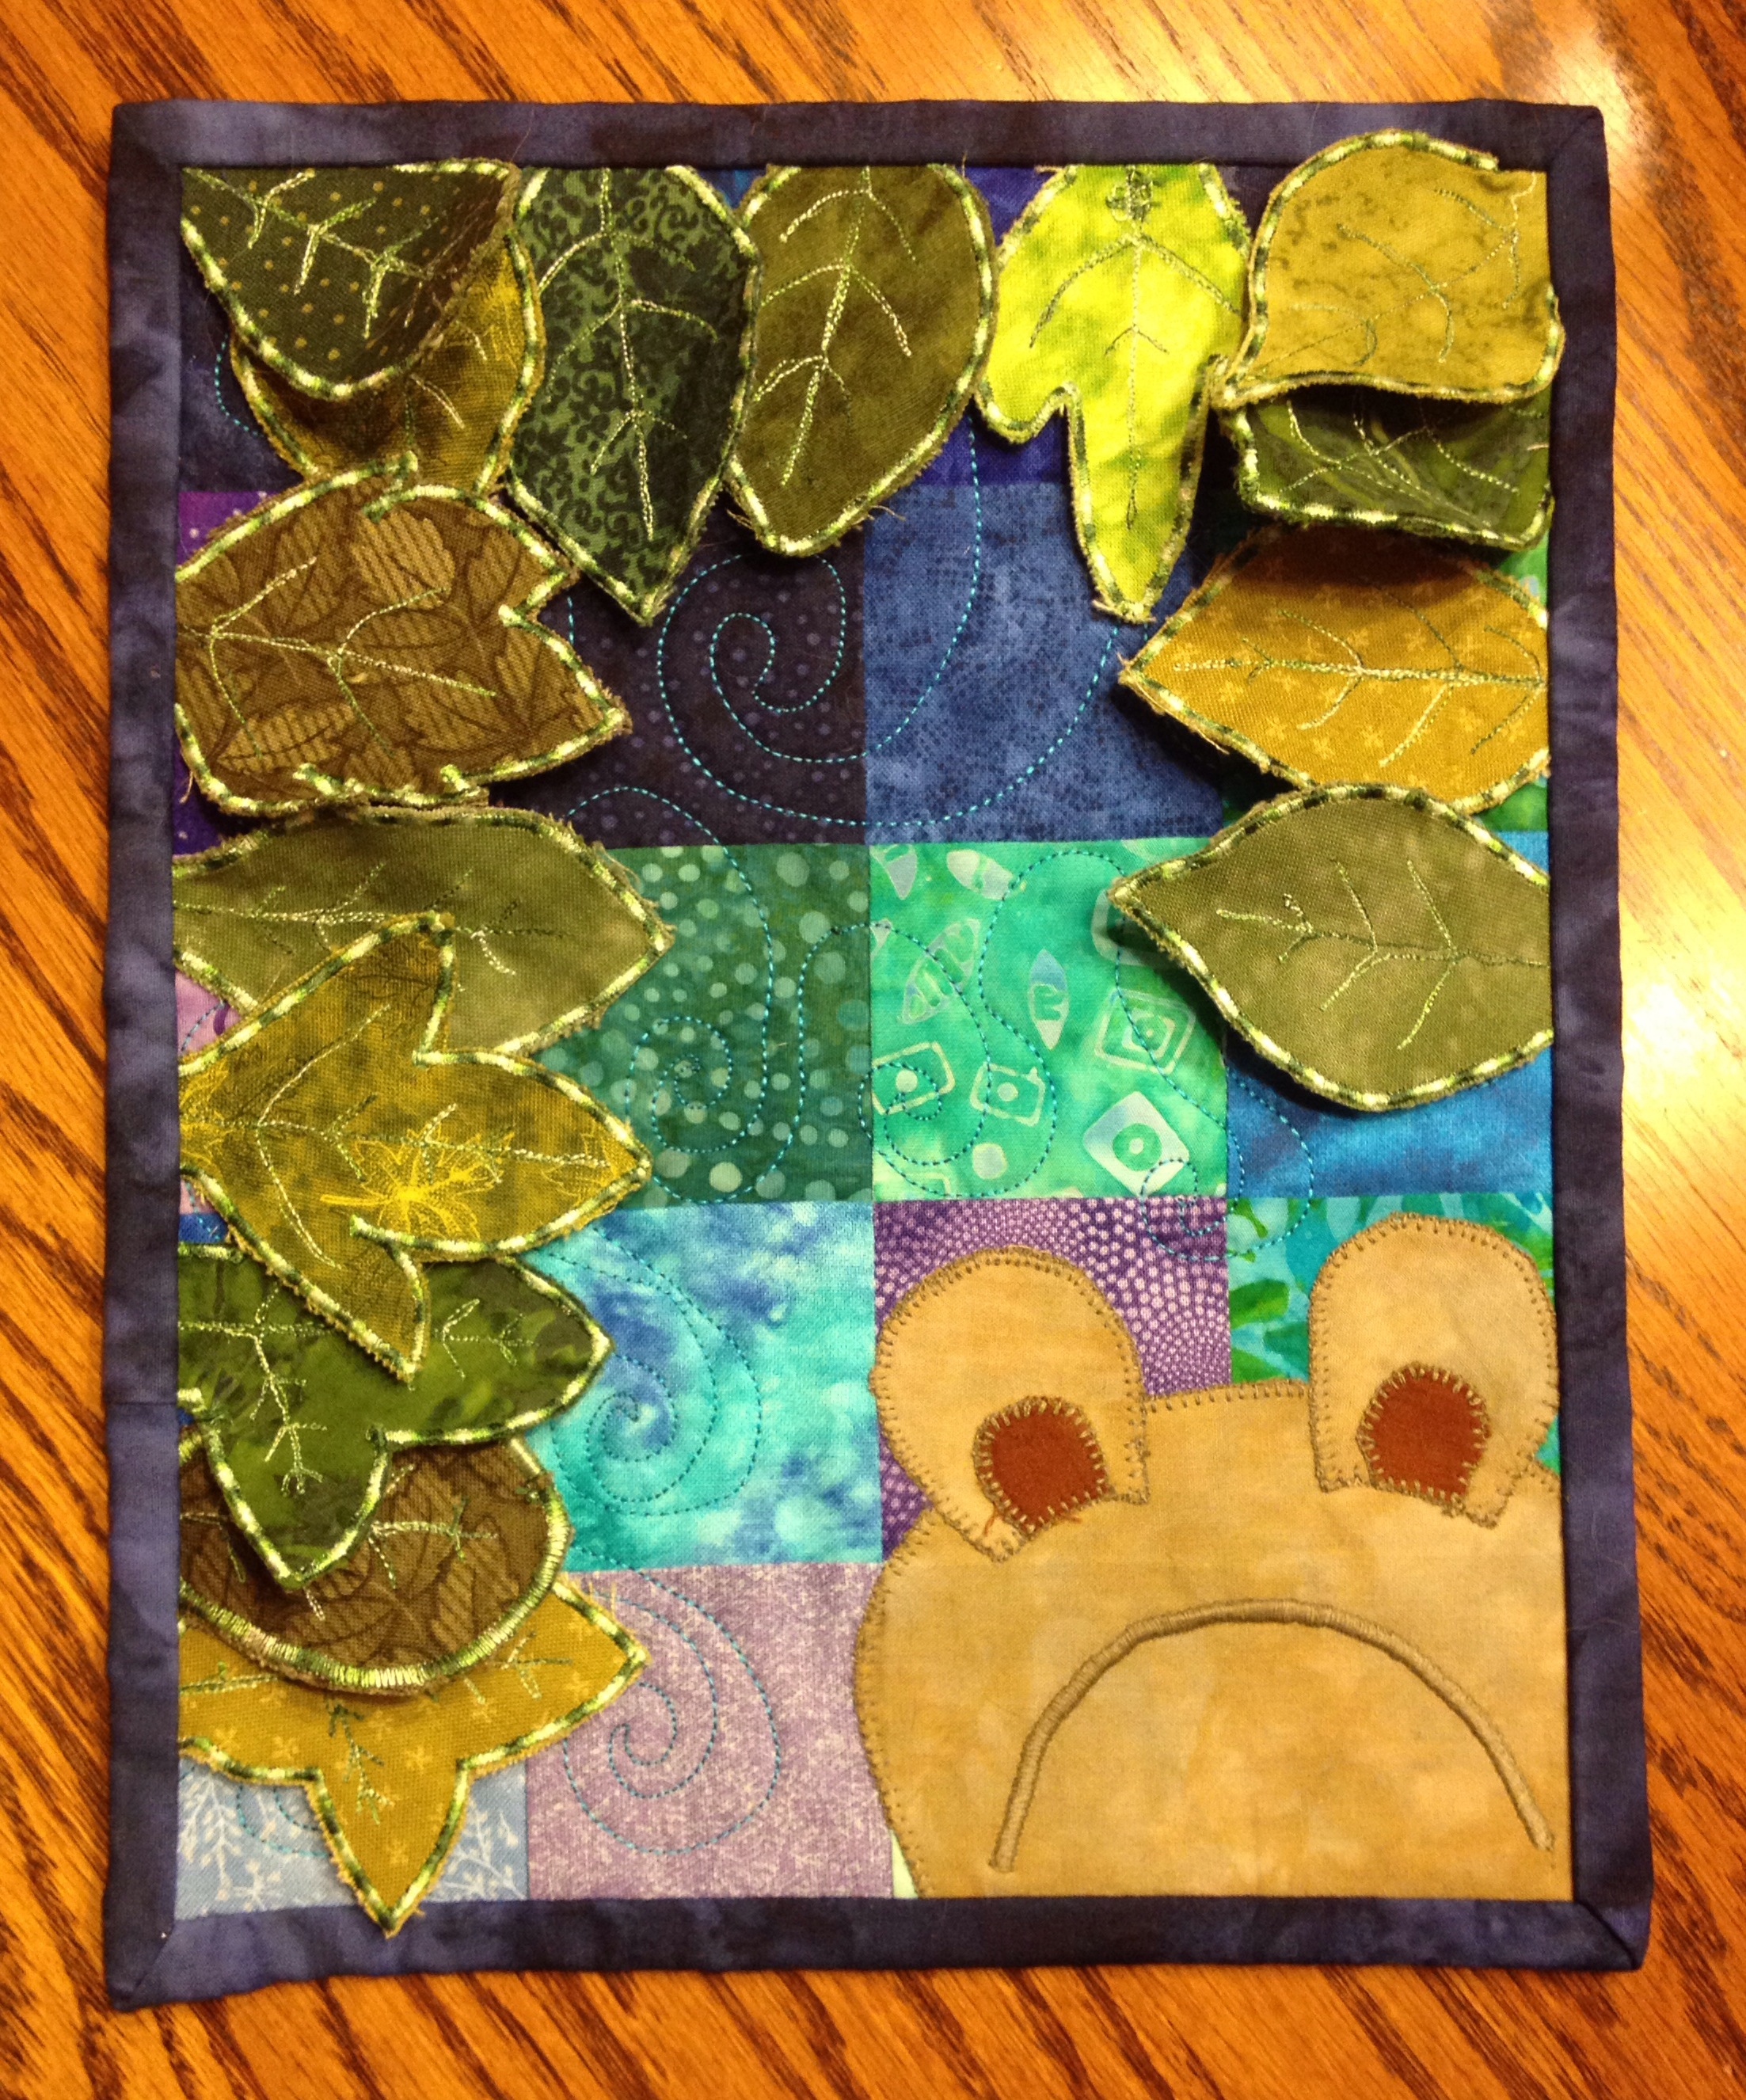
Later, when I was pondering what I might do on analogous colors, I decided to challenge myself to use only 2 1/2" squares already cut in my scrap bin, plus hand-dyes if I chose. Once I made that decision, a design popped into my head.


Yep, Mr. Froggie-Fella was part of the design. Here is the end result.

FrogFellaProject2014.jpg
Photo Jan 27, 8 37 36 PM.jpg

I also had fun figuring out how to make the 3-D leaves. I've seen a lot of techniques for doing it in magazines, in blogs, and in classes; I've done some similar dimensional work before. I tried out a couple of different methods before finding a technique that worked well for this project. Different techniques apply themselves to different circumstances.


Photo Jan 27, 9 20 57 PM.jpg

But you've just gotta love that face, don't you?

(If you're curious, Frog Fella is made out of my hand-dyes and a thread that matched amazingly perfectly.)

Although it doesn't have an official name, I've found myself thinking of this as the Frog Fella Project.


Photo Jan 26, 9 42 57 AM.jpg

By the way, I did also make that chocolate babka from the Artisan Bread class that I'd mentioned. Yum.

No, that's not burnt on the top there. That's all nummy nummy dark chocolate.

Godiva dark chocolate chips.

60% cacao.

Can you tell I'm a fan?


Craftsy Class Review--Molly Stevens' Mastering the Braise

Chicken Thighs with Peppers and Onions

Chicken Thighs with Peppers and Onions

I decided, in the midst of sub-zero temperatures and whistling winds outside my door, that a class on braising was just the ticket. And so, after I'd completed the previous couple of classes in my Craftsy line-up, Molly Steven's The Secret of Slow Cooking: Mastering the Braise was a great excuse for me to cook up some comfort food.

I've braised for years, although for most of that time I didn't know that what I was doing was called "braising." I thought it was just "making pot roast." Silly me. It was only a few years ago that I started seeing the term "braising" turning up regularly in cooking magazines and websites and realized that hey, I knew what that was; hey, I'd done it before; and hey, I could learn to do it a whole lot better. My pot roast could sometimes be a bit hit and miss. It was always decent, but I never made it the same way twice and some versions were quite a bit better than others. I didn't make it often enough to really track what I was doing in different parts of the process that made the most difference to the end result.

Enter Molly Stevens. Her class lessons are set up according to the phases of the braising process. She begins by talking about the elements of a braise: pots and pans, what cuts of meat and what vegetables work best, braising liquids, and finishing touches. Then she uses three recipes--one pork, one beef, and one chicken--to walk through each phase of the braise, from browning to finishing. At the end, she has a lesson on braising vegetables in which she uses three additional recipes to show some more techniques and things to consider.

Note, however, that this isn't a recipe class--it's a technique class. Throughout each phase, she's only using those three recipes as examples of variations that can occur in that part of the process. She talks frequently about other ingredients you could be using, and the class materials have an extremely helpful list of options so you can mix-and-match your own braised dinners or side dishes.

I decided to use one of her recipes as it's written first, to be sure I had the technique down, before doing a mix-and-match of my own. I chose her recipe for Chicken Thighs with Peppers and Onions because, well, frankly, that was the recipe with the shortest braising time and I really wanted to also get some sewing done that afternoon!

I thought it turned out lovely. My husband even liked it and he's not a fan of dark meat. (Yes, you can substitute a chicken breast but white meat doesn't work as well in a braise situation.) And I liked it despite the fact that it calls for crushed red pepper flakes and I'm not a fan of heat. I could've left them out, of course, but since my husband likes heat, I decided to leave them in and just use a light hand to see how the recipe worked as written. It was just enough heat to make it interesting and balance out the sweetness of the peppers and onions, without making it difficult for me to eat my dinner. Perfect.

And while the recipe itself is a keeper, that wasn't even the point of the class for me. I have now figured out where I needed to improve my technique, and I've been given the tools to do so. Rather than turning out "decent" braises, I have all confidence that I'll now be able to consistently turn out something far better and have a lot more fun in the process. I find myself wanting to invite people over for dinner just so I can try out new and different braising combinations.

As usual, here are the basics:

  • 8 lessons in all, ranging from 12-30 minutes.
  • The first lesson talks about talks about the science of braising, pots and pans and other tools. In lesson 2, she talks about why certain cuts of meat braise better than others, plus how to prepare them for braising for the best results.
  • In each lesson following, Molly then uses the three main recipes as illustrations while she goes through each phase of the braising process--browning, adding aromatics, choosing and adding braising liquids, the braising itself, and how to finish.  For example, in lesson 3, she browns the pork, then browns the short ribs, then browns the chicken thighs, and talks about the similarities and differences for each given meat--as well as mentioning others you might use. The last lesson is about braising vegetables.
  • My only slight quibble with the class: She addresses briefly in one of the early lessons how to adjust braising recipes for use in a slow-cooker. However, she doesn't spend a lot of time on it. This is one area that most people (myself included) might not mind having had a full lesson devoted to. For us workin' folk, sometimes a slow cooker is the best option we have for eating a braised-style meal on a week-night. But between what she did say about it, and what I can find on the Internet on my own anyway, I'm not overly bothered by this in the grand scheme of things.

By the way, I also really enjoyed Molly herself. She's a very straight-forward, no-nonsense teacher. She only rarely cracked a smile but still, you could feel her enjoyment and passion for food coming through. Perhaps it was a sense of the smile being in her eyes. She's not a "banter" person--filling up space with words just to entertain. But she felt like someone that I could hang out in a kitchen with for hours and have a great time. Very authentic.

I'm going to consider this class complete even though I plan on keeping the PDF print-out in my kitchen for the next time I go grocery shopping so I can have fun creating my own braise combination. From here on out, it's just a matter of continuing to play with different combinations of ingredients and allowing my Creative Braising Maven to shine through! (Well, until our seasons change and I put away the braising pan in favor of the grill. At the moment, that feels like forever-from-now.)

If you think you'd like to check out Molly Stevens' Mastering the Braise class on Craftsy, here's a link. (Transparency statement: Using that link helps support this blog and podcast.)

Don't worry: If you're not a foodie, I'll be getting back to the textile-related class reviews next time around!

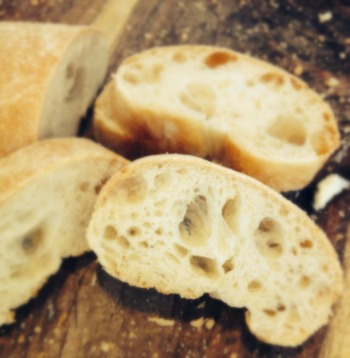
Craftsy Class Review: Artisan Breads with Peter Reinhart

e.jpg

I know, I know. This is "OT" when it comes to quilting. But a quilter's gotta eat, right? And if she's eating, she might as well be eating really, really good bread.

I believe I've mentioned before that I grew up as a child of the Back to Nature Movement. In 1970, my parents moved our family from the city out to a house in the country on seven acres--a house Dad built himself (well, more correctly, "was building" himself as it was little more than a frame when we first moved out there--but that's a story for another blog). Dad lived by the Farmer's Almanac and Mother Earth News. I often joke now that Dad would mow the lawn and we'd get it for dinner: Lamb's Quarters are something vegetarians could eat, if you didn't know. Put enough butter on it....

But more than the canned-just-about-anything, the homemade maple syrup, and definitely more than the homemade wine (a subject for that same other blog), what I appreciated about my growing-up-hippie years was Mom's homemade bread. Every Saturday, 15 loaves. The woman had serious biceps. Kneading, punching down, putting in the oven to rise*, then baking batch after batch well into the dinner hour...it was a weekend ritual. My favorite moments were Saturday nights, when Mom would let us slice into one loaf fresh out of the oven and have a big, thick hot slice slathered with butter (well, those were the margarine years) and strawberry jam (usually also homemade).

As an adult, I rarely had time to bake homemade bread . I did it once or twice, using Mom's techniques and recipe, and the kids loved it. To try to fill the need, I owned a bread machine a couple of different times--until, well, see the rather tragic blog post about the demise of my most recent one.

Now that the kids are grown and my schedule has seriously eased up, I felt the desire to start baking bread again. Enter Craftsy and Peter Reinhart and Artisan Bread Making.

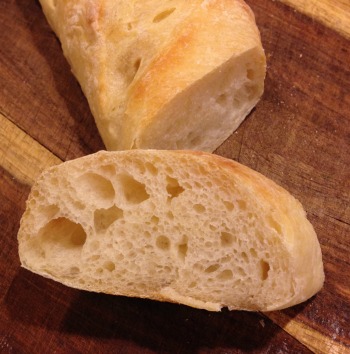
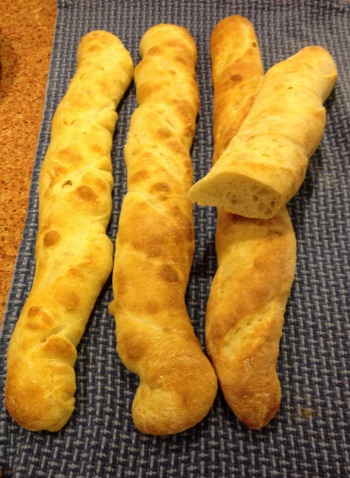
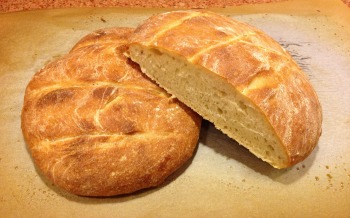
Mom's method was great...but oh, the bread I've been baking! Peter's method is quite different, and produces a very different type of bread. I've been making baguettes, boules, and batards (O My). I plan on making a chocolate babka for an upcoming guild meeting. I'm putting the information about marbled ryes in my back pocket for future reference. Great stuff.

But even beyond the bread recipes which, arguably, you can find on the Internet or in any of Peter's books, there's Peter himself. He's an excellent teacher. His passion for bread-making comes through so clearly that he makes you want to jump up and run into the kitchen as soon as you're done watching a lesson. And his statement that bread is a metaphor of transformation imbues each loaf you shape with your hands with a depth of meaning beyond just, "Hey, this tastes pretty dang good."

And yet, it does taste pretty dang good.

So, the basics:

  • 10 lessons in all, most 30-40 minutes (a couple are shorter, one is 47 mins).
  • The first lesson talks about baker's math and gives a tremendous amount of background information that lays an excellent foundation for everything that follows, the second talks about supplies, definitions, and the 12 steps of bread making.
  • In each lesson following, Peter gives very clear directions on how to measure and mix ingredients, shape, and rise the dough, bake the bread; as well as how to be ready to make adjustments based on your room temperature and relative humidity.
  • The lessons go from straight lean dough, to country variations, rustic breads, enriched breads, marble rye, and that amazing chocolate babka that I'm going to make this weekend.
  • The downloadable materials are excellent reference when you're actually in the kitchen and don't want to get flour or oil on your iPad. Ahem. (Don't ask how I know.)

I had to make a judgment call as to when I'd consider this class completed for the purpose of my tracking. If I had said to myself that I'd have to bake one of every type of bread he teaches before I call the class finished, I'd either be done in 2017 or I'd be the size of a house. I've now baked three batches of bread, using one method twice when the first results weren't what I'd hoped (second results turned out fantastic after I made a few adjustments as per his suggestions to take into account the cold snap we're now living in up in these parts). I'll be baking one more batch in the next couple of weeks--the aforementioned chocolate babka. I've watched all the lessons and made copious notes. Therefore, I've decided to call it done, knowing I'll keep going back and referencing this class for years to come.

I'm putting all the pictures into a gallery--just click on the picture to see the next photo in the gallery. If you're reading this by email, the gallery may not come through. If not, use this link to see it in Flickr.

Haven't tried out Craftsy yet? Use this link to find out more.

Want to check out Peter Reinhart's Artisan Bread Making class? Use this link!

(Full disclosure: Using those Craftsy links helps support this blog and podcast--thanks so much!)

*Backstory: Mom would put the huge batch of dough in a big plastic bucket in the oven to rise. We were all strictly warned never to turn on the oven without looking in it first. When I was somewhere around middle-school aged, one day my sister and I decided to bake a cake. "Flick," went the oven switch to bake, and "Swish" went the temperature control knob. About half an hour later, Mom came running up from the basement where she'd been in her quilt studio. "What's that I smell? What do I smell burning?" She raced into the kitchen and threw open the oven door, to reveal a mass of dough and melting plastic. I don't exactly remember what happened next. I don't, however, recall that my sister and I played any role in helping to clean up. My guess is that, in those moments, Mom didn't particularly want to even lay eyes on us so sending us to our rooms was likely the better option for her. Frankly, I'm surprised I lived to tell about it. To this day, I always open an oven door before I turn it on. Some lessons do stick.


Machine Quilting with Wendy Butler Berns (Craftsy class done!)

I've already reviewed this class in my podcast, but just to make it official for my 2014 Quilty Resolutions, I now consider myself to have completed Machine Quilting with Wendy Butler Berns.

I really enjoyed this class. Well, to be fair, I enjoy Wendy Butler Berns in general, which is a good thing because I own every one of her Craftsy classes. In any case, her style is very laid back, and she gives great tips and demonstrations. The class includes several designs, starting with simpler ones and building up to slightly more complex (although none of them are overly challenging); it also has lessons devoted to information about needles and threads, ideas for whole-cloth quilting, and troubleshooting. You won't get formal designs needing stencils or measuring or math here--it's very free-flowing and organic, the kind of thing you can (once you get the hang of it) just start rockin'-n-rollin' and having a ball.

I'm not new to free motion quilting (FMQ). I've been poking away at it for years--including having watched all the lessons in Wendy's class when I first bought it maybe 18 months ago. The difference is, this time I actually practiced what she was teaching!

WBBsketchbook.jpg

I watched every lesson with a sketchbook in my hand. As she was describing each design, I'd sketch it out several times in pencil, and sometimes play around with different sizes, variations on the design, and how to tweak the designs into smaller filler designs.

When the lesson was complete (or as soon as I could manage to get to my sewing machine), I'd set my phone timer for 15 minutes and spend 15 minutes--or more, if I was really getting into it and had the time--to practice the designs from that lesson. Some designs came relatively easily as they were similar to things I'd done in the past. Some were trickier. Depending on the design, as is common, I often do better going in one direction than the other, and it's never the same direction from one design to the next! I've learned that half the battle is figuring out what direction you most naturally move in order to make the design work best. Sketching it out first does help, although in a limited way--it's a very different motion to move fabric under the needle. Still, every little bit of practice helps, be it with a pencil or fabric.

WBBFMQpractice.jpg

I'm very pleased to see that the back of my FMQ has improved tremendously over the years--nary an eyelash in sight! On the front, my stitches are generally pretty even*. I seem to have the rhythm between needle speed and hand speed mostly down now. I still have some work to do on hand-eye coordination and actually ending up where I'm aiming, but that's something only practice will help. If I were doing these designs right now on a real-live quilt with blending thread, most of them would actually look pretty decent from a galloping horse.

This consistent practice also gave me the chance to compare my open-toed FMQ foot with my closed, specialty FMQ foot and FMQ bobbin case made for my machine (Janome 6600) and sold as a set, I believe. I've owned that bobbin case and foot for a couple of years, purchased based on a recommendation on someone's blog or something along the way. I've discovered I really don't like it. The bobbin was spinning too fast or something and I kept ending up with thread knots on the top--you can sort of see them in the feathers at the bottom of the sample. Once I switched back to my normal bobbin case and open-toed foot, no more thread knots. So that's good knowledge, too.

FMQcolorsketch.jpg

Just for kicks n' giggles, I was also practicing the designs with colored pencil while watching TV at night. Those bubbles are now completely filled in and I'm playing with other filler designs in other parts.


I'm going to consider this class complete although it's a hard class to determine when you've actually "finished," as it has no project involved. But I will continue to practice the designs during my 15-minutes a day, and they're in my toolkit for future reference. I've got a couple of projects in the works in which I could easily imagine doing one of the designs from this class.

I highly recommend this class, especially if you are brand-spanking-new to machine quilting or free motion quilting. It's a great way to introduce yourself to a variety of designs and ideas.

Full disclosure: If you use this link to purchase the class, you will help support this podcast and blog. Still n' all, my review is honest-n-true; I'm not saying good things just to encourage people to use the link. If you're a podcast listener, you'll have heard past reviews of other things about which I'm not quite so positive!

Another "To-Do" Marked "To-Done"

Of a sort, anyway.

DiannesScrapQuilt.jpg

My mom passed away in the spring of 2009. Every Christmas since then, I've intended to put together a photo book of all the photos I have of Mom's quilts and send one to each of my sibs (four in all) as a Christmas gift. And every Christmas it hasn't gotten done. This has been something hanging over me for several years now. I didn't list it as one of my "Quilted Monkeys on My Back" for 2014, but it was definitely there.

As I've been playing around with LifeTopix and setting up my projects for the year, I created one project labeled "Quilt Documentation." One of the tasks in that project was to, once and for all, get that photo book put together. Regardless of it now being mid-January, since I had Monday off as a comp day (to balance being out of town for work last weekend), I sat down to organize those photos of Mom's quilts, put them into a photo book, and send them out to my siblings as a belated Christmas gift.

After monkeying around with it for about an hour and a half, I came to the conclusion that it wouldn't work. Set aside that none of us has a complete collection of photos of Mom's quilts to work with; set aside that Mom herself was really bad at documenting her own quilts (so even those we do have photos of in her albums are often unlabeled so I'm guessing at dates based on color schemes and fabrics)....  The main problem is the quality of the photos is often so poor that if I put them in print in a book, they'd be pretty useless. It just doesn't make sense to spend money having a photo book printed when half the photos would be blurry, pixellated, or discolored.

I finally sent my sibs a link to an online photo album of the photos with an explanation, my apologies, and hopes that they'd enjoy the photos anyway. And I made myself check that task as "done," a quilted monkey off my back, even if it wasn't completed the way I'd have liked it to be.

To be honest, by the time I'd decided it was unlikely to work but still kept poking away at it anyway, I began to get the feeling Mom was standing behind me, tut-tutting and tapping her foot with impatience, saying, "Get over it already, and get back to your own quilting. I can't wait to see how your Rapid Fire Hunter's Star turns out! You know I'd have bought that ruler the minute I saw it, so finish it already, for both of us!"

Lesson learned. The other two tasks on that Quilt Documentation project list are to organize the photos of my own quilts in my digital files, which I've been poking away at regularly over the last couple of weeks, and to create photo books documenting my quilts now, so my kids will already have them in hand when that day comes. Not that I'll tell them that. They get creeped out when I talk about doing things in preparation for when I'm no longer with them. I'll just leave them on a shelf to be found....

Done. Check. Moving on...

Vacation Accomplishments and Ready for 2014

(Caution: Long post ahead!) I talked about this on my podcast, but here are the pictures.

Recall my blog post on spending Friday at my church sewing "Little Dresses"?

I didn't get any made that day, but I'd gotten some pieces cut out and brought them home to finish. And had to re-do it three times because I couldn't figure out how they were supposed to go together. I'd gotten a less-than-five-minute tutorial in the midst of chaos that Friday; now a few days later I was trying to recall what had seemed like a simple process at the time, but I just couldn't get it to make sense in my head. After ripping seams out for the second time (yay for my Havel's seam ripper!), I walked away in frustration and did something else for awhile. Then it came to me: Was it possible I was missing a piece?

littledresses1.jpg

After thinking it through, I decided to make a fourth piece from scrap in my stash. Sure enough, once I made that piece and sewed everything together in a way that seemed to make sense, I had a completed dress that, while not elegantly sewed by any means, is at least wearable and from a distance on a galloping horse, kind of cute.


littledresses2.jpg

I stuffed some scrap fabric in the pocket so you could see that feature better. Basic pockets I've done before, so no seam-ripping required there. The fabric is a Hawaiian "bark cloth" that I got in Hawaii a few years back. It makes a nice sun dress as it's a little lighter weight than traditional quilting cotton, but it frays like nobody's business. Ripping out those seams got harder and harder every time!

I was thrilled to hand that off following our Christmas Eve service at church to the woman in charge of the project. Done and done!

I then moved on to things I feel much more confident in, LOL.

 
Scrapitude 1-3.jpg

I completed Scrapitude Step 1, Step 2, and Step 3. Caught up! Well, okay, still need to trim some dog-ears and square up some units, but I'm considering it done. I'll trim here and there as I'm working on other things.

To set myself up for making serious progress on my 2014 Quilty Resolutions, I bought muslin for and made a boatload of quilt sandwiches for practicing my machine quilting. I think I now have 16 or so, all somewhere around 12-16" square. That should supply me for some time to come, anyway. (No pics since they're just boring white squares!)

Also towards my resolutions, I prepped several new pages so I can finish my Stitch Bible for the Carol Ann Waugh Craftsy class "Stupendous Stitching." I got about halfway through my Stitch Bible last January/February and ran out of pages; that became a stopper. I think I've now got enough pages to finish up the Stitch Bible so that's a priority for the rest of my vacation. (Also no pics yet--I'll wait 'till there's stitching on there.)

huntersstarcenter122013.jpg

I finished the center of the Hunter's Star quilt I'm making using the Deb Tucker Rapid Fire Hunter's Star (petite) ruler I won from AJ at the Quilting Pot podcast.

Ain't it pretty? Points all met perfectly! The fabric is leftover from my grand-niece's baby quilt. I decided on my border fabric yesterday so now that I'm caught up on Scrapitude, this project is back on deck!

For the last couple of days I've been spending most of my time on this: After my husband surprised me by deciding to move his computer to another room (thereby also removing his computer desk), I moved the furniture around in my sewing studio/home office. And then moved some of it again. And a third time. And vacuumed a whole bunch. I think I'm now at an arrangement I really like; I'm going to live with it for a few weeks and then probably build myself that solid-surface cutting table like Tanesha's--boy, have I wanted something like that for a l-o-n-g time!

And then there were all those other extraneous cleaning and organizing things: the spice cupboard, the pantry (yikes!), my Dropbox folders, my photo files on my external hard drive (still in progress), and learning a new calendarizing/organizing mobile app that I believe is the app of my dreams, but with a big learning curve.

Apparently my sunlight lamp is really working--it's unusual for me to have this much energy at this time of year!

One more day off tomorrow, and then it's back to work. I hope everything I've put in place will make it easier to continue to make progress on my goals.

My word for the year in 2013 was "play." I really do feel like I achieved that. In 2014, I'm going to do my best to live out the word "balance." Everything I tackled this week was with both of those words in mind--what I could do that would be fun, and what I could get done that would help me maintain better balance in the coming year.

Have you done yourself any favors towards the future? If not, what's one thing you could do in the next couple of days that might make life a little easier for yourself in the months to come?

Another postcard...

One of our friends at church was sworn in as a U.S. citizen this week. I had a little bit of a plan in my head of a small quilted wallhanging I would make him to celebrate the occasion, and on Friday, while on the Shirley DeMott Memorial Annual Shop-Hop* with a friend, I picked up some appropriately patriotic-themed fabrics.

When my husband and I were out for dinner that night, I mentioned and briefly described what I thought I might make for our friend. My husband said, "Why don't you make another postcard? I like your postcards."

Well, okay then. As I like to give positive reinforcement for any positive reinforcement my husband gives me for my rather expensive creative endeavors, a postcard it is, tee hee. "Plus," I thought, "a postcard is smaller and may go a little quicker than what I'd planned anyway."

flagpostcard12-14-13.jpg

Yeah, well, that never quite works out, does it? I decided to do a design that was quite time-consuming. (Yep, all those red and white stripes are separate little strips of fabric.) Still n' all, it was done in a couple of hours. And of course, I didn't end up using any of the fabrics I'd bought on Friday and just dove into my stash instead.

Sadly, on the very, very last swipe with the iron to make sure all was happily fused down, my iron decided to spit. I hate my iron. And one of the fabrics bled. I hate that fabric.

Here's some irony for you--with all the work I've been doing with my hand-dyes and nothing ever bleeding, this was a commercial fabric. Go figure. My fault--usually when I'm fusing I use a different iron that's never had water in it. But I recently handed that iron over to my son, and didn't bother to take the time to empty the water out of my regular iron before starting to fuse. I hate that water.

I took this picture after I'd gone after the bleed with a dab of Synthrapol, followed by a second attempt with a dampened color catcher. So believe it or not, it does actually look a little better than it did. I'm going to wait to see how it dries, then probably do the ol' paint touch-up. Surely I've got white fabric paint somewhere. I really hate to see all that time--cutting narrow little strips, satin-stitching the hey out of everything--go to waste. But I also hate giving something to someone that's clearly in error. And I don't have time for a Plan B, other than buying him a card at Hallmark. Last I checked, they didn't sell "Happy Citizenship!" cards.

Now, that being said--here's the good news: I've got this whole postcard thing down! I like doing little mini art-quilts. They're fun! (This one is 5x7", btw, rather than the 4x6" I've been doing, as I'm not mailing it so I decided I could go a little larger.)

LATER ADDENDUM:

postcardrepaired12-14-13.jpg

A little white Tsukeniko ink, judiciously applied. One would never know there was a problem.


*Mom and I used to often go on a shop-hop in an Amish area about an hour away on a Friday in December. I'd take a vacation day, and we'd visit three or four shops, then have lunch at an Amish restaurant that had the best dang corn chowder. After Mom passed away, various of my friends have been happy to keep up the tradition with me, and so the Shirley DeMott Memorial Annual Shop-Hop was born. Sadly, the Amish restaurant closed a couple of years ago, but I think this time around we may finally have found a good little pub to replace it. Not Amish, and no corn chowder, but great burgers!

Postcard Swap Reveal

Whoopee! Let me start with a big thanks to Sandi of Quilt Cabana Corner for hosting a postcard swap this year. Those of us who participated had a great time--and pictures have been flying this week as people started receiving their postcards in the mail. My partner and I have both received our postcards so now we can do the Big Reveal! (Cue theme music...)

Here's the postcard I received from Beth:


bethpostcard.jpg

I love the way she did the snowflakes, and the different fabrics in the tree. And did you notice that trunk is thread-sketched? Very cool stuff! Love it, Beth!

And here's the postcard I sent to Beth:


2013postcard.jpg

The square motif is from an old Laurel Burch Christmas fabric. The background fabrics and fused binding are all my own hand-dyed fabrics.

I talked about how I did this in my most recent (as of this writing) podcast episode, Episode 136 In Which We Make Fabric Postcards. For what it's worth, anyway. My technique definitely needs some polishing, but I have fun with it, and that's the main point!

These postcards really do become a permanent part of my Christmas decoration collection. Proof: Sandi's postcard from last year and Beth's postcard from this year have pride of place on my mantel!

postcardsonmantle.jpg