Kimberly Einmo, the Craftsy Giveaway, and a little progress

I just posted my interview with Kimberly Einmo (episode 124). Woo! I really enjoyed the opportunity to meet and talk with Kimberly--very fun. I just wanted to make sure I posted on my blog as well so all-y'all who subscribe to the blog but may not subscribe to the podcast would know that Craftsy is sponsoring a giveaway on the episode--the winner will get a free Kimberly Einmo Craftsy class of their choice!

Check out the podcast!

D9P5813.jpg

Meanwhile, I got the center done of the Disappearing 9-Patch I'm making as a donation quilt. It's wheelchair size (or will be, once I slap some borders on this puppy), and I chose masculine colors for this one. Do you know how hard it is to find charm packs that aren't girly? Fortunately I had enough scraps to beef up the two charm packs I was able to lay my hands on. ​(Terrible, awful picture--that's what I get for doing it at 10:30 at night on my cell phone. Stinky lighting. I'll do better on the next progress shot.)

flowercloseup.jpg

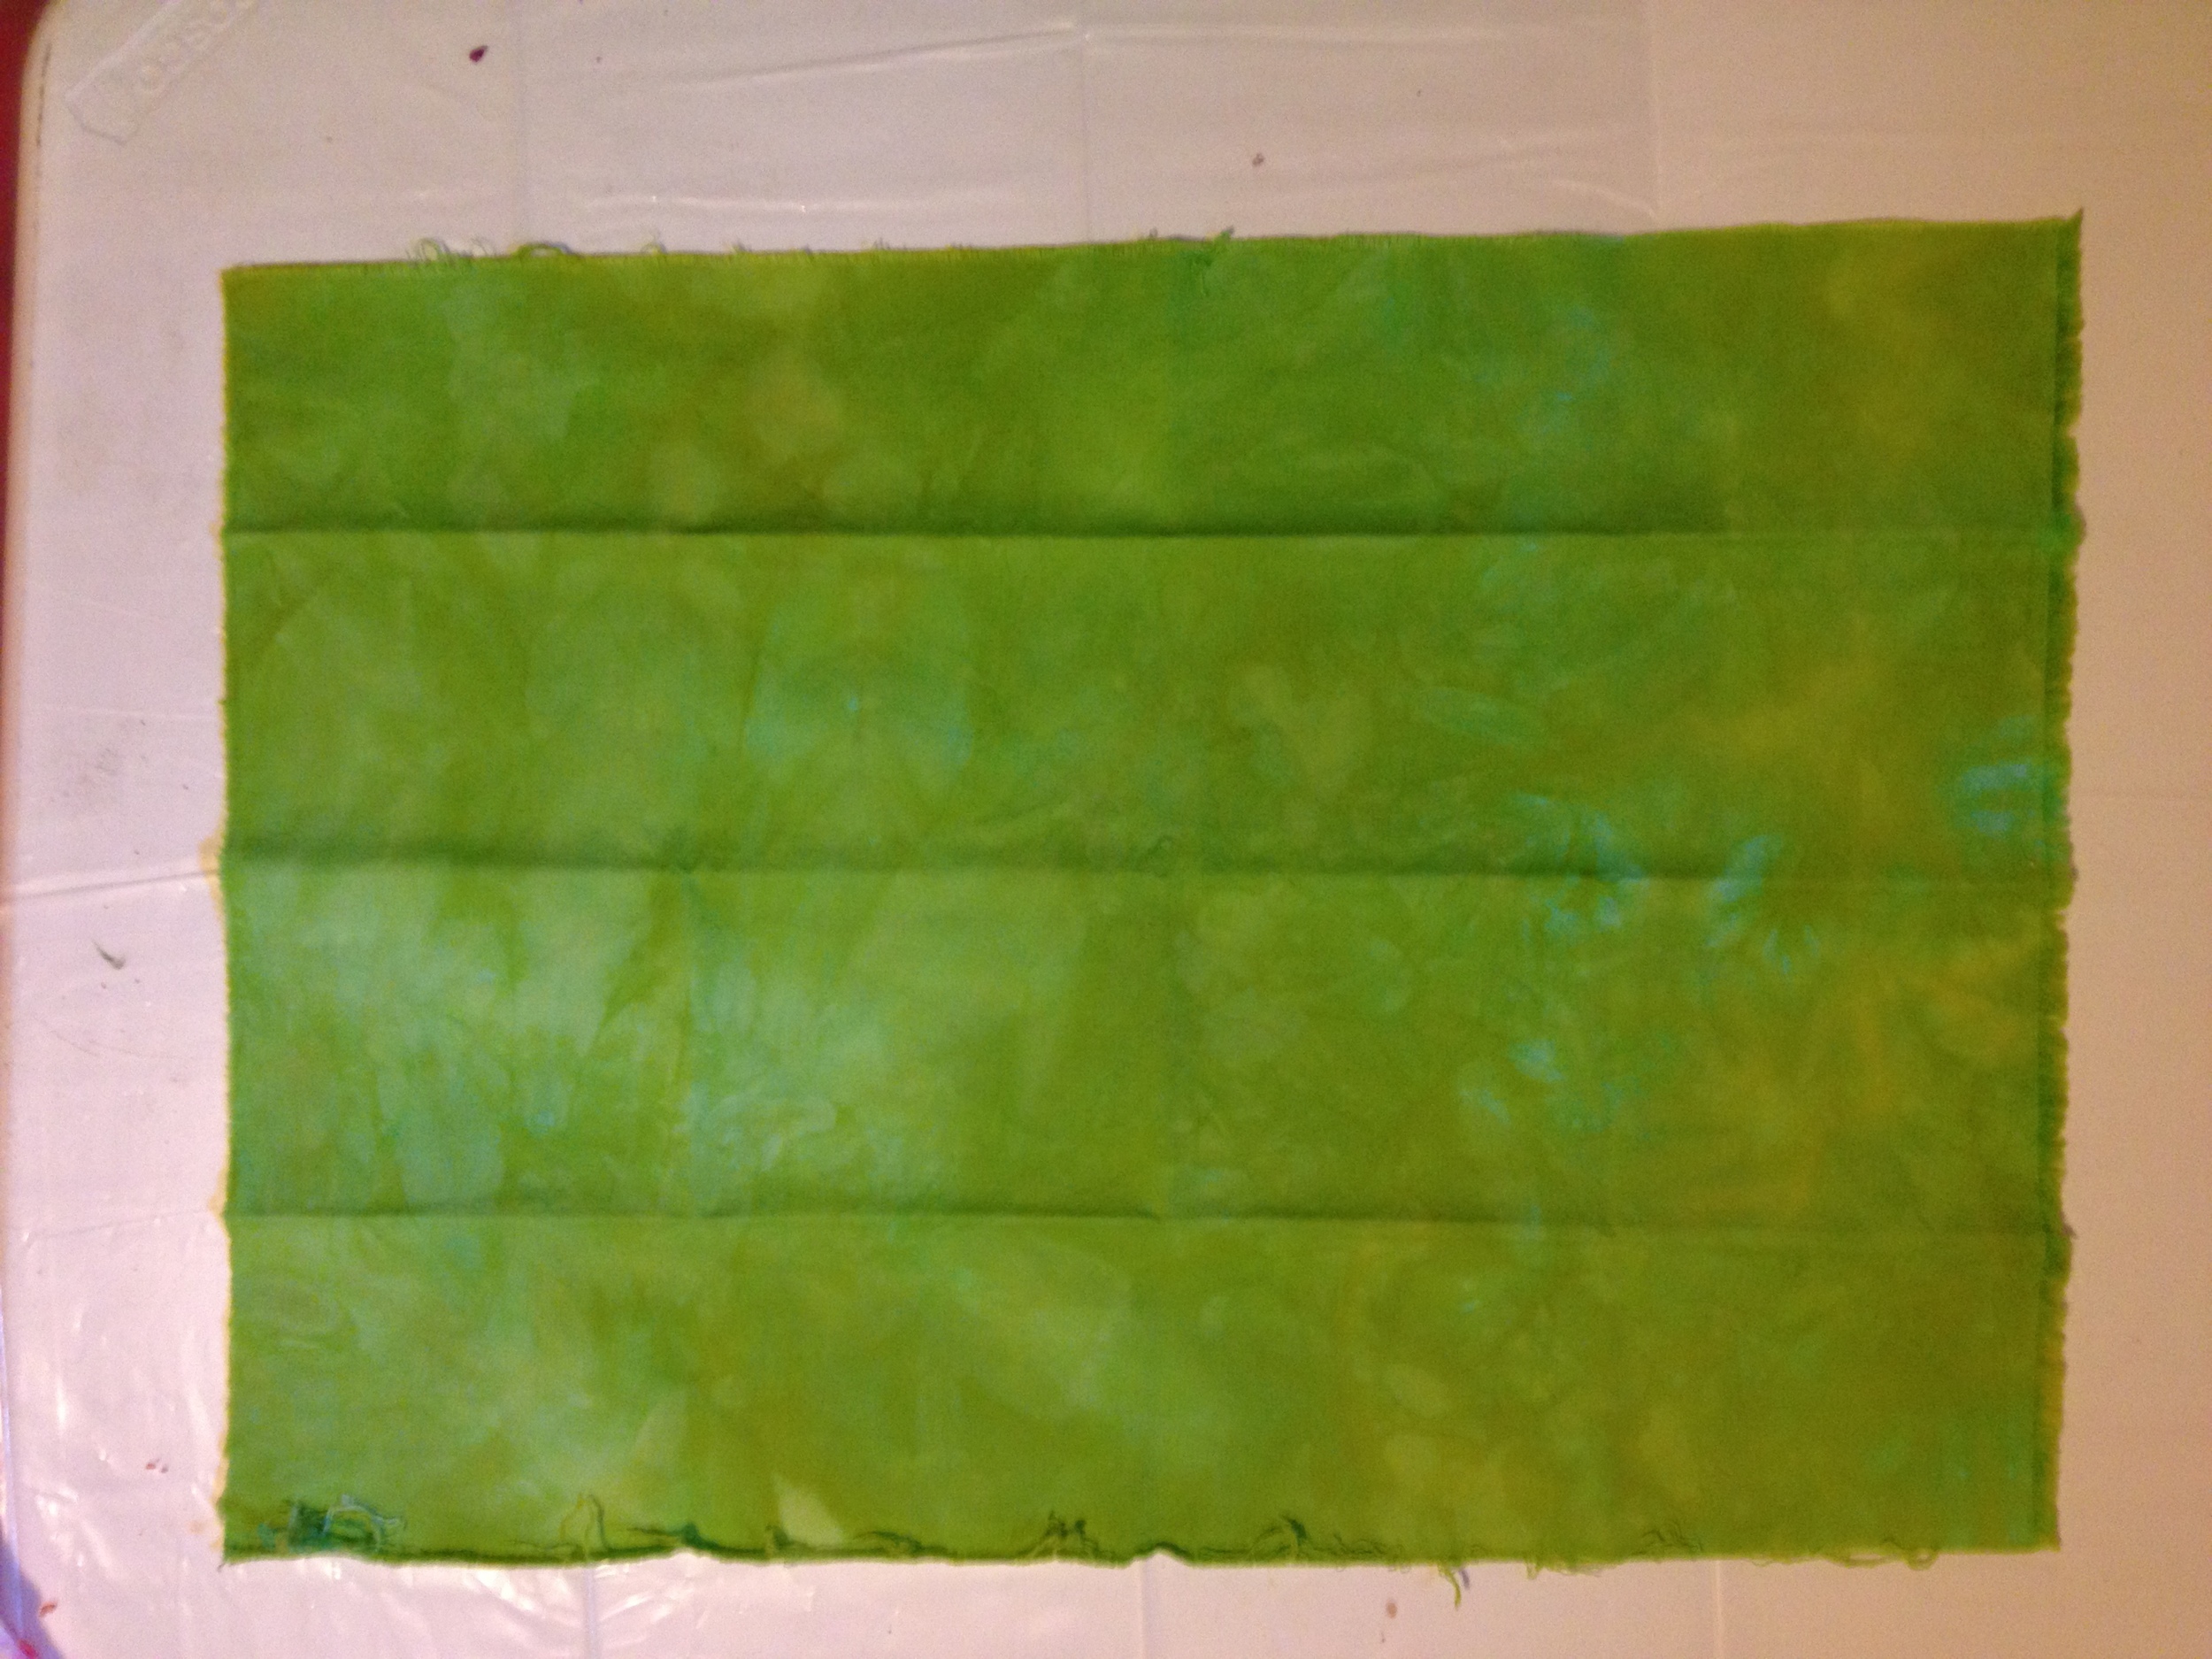
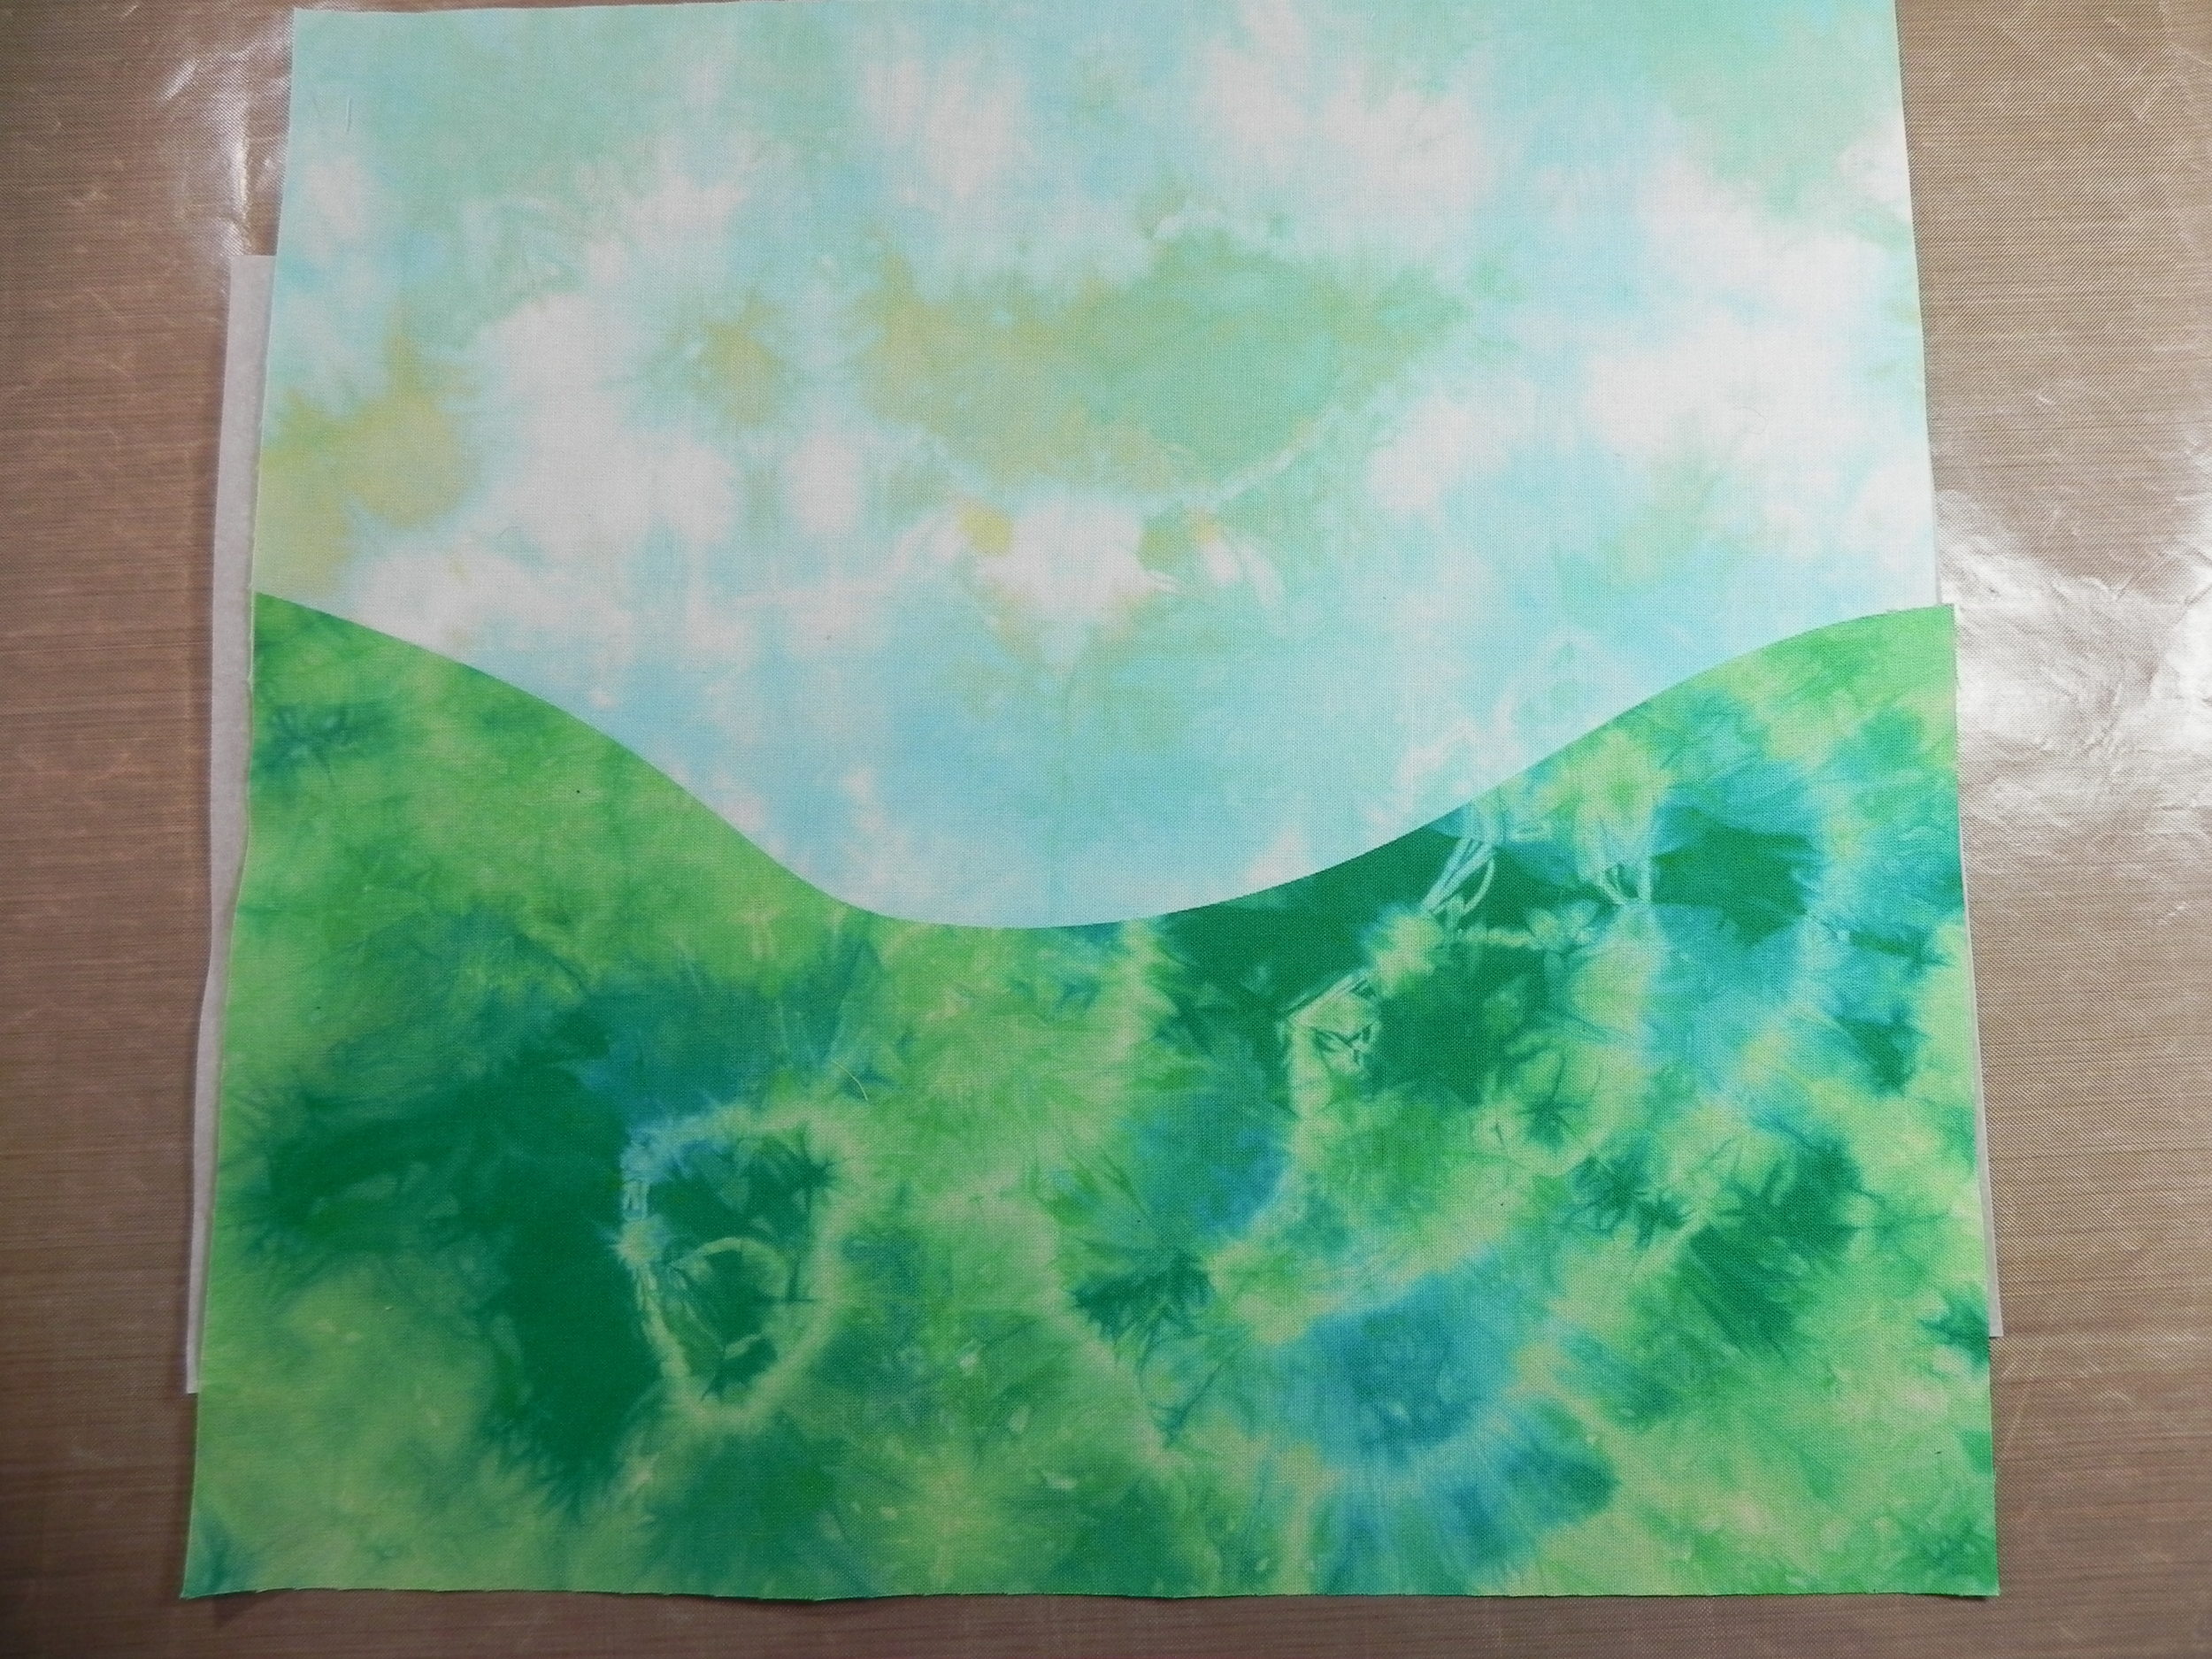
And I made more progress tonight on my House on a Hill Project for Laura Wasilowsky's class on Craftsy, "Hand-stitched Collage Quilts." ​The grass is done. Woot for grass.

See those two wonderful variegated threads? The pink in the flower (not the French knots) and the green in the grass? Those are both Laura's hand-dyed perle cottons, available through www.artfabrik.com. Tasty.​

I promise, better pictures next time. Pinky swear.​

Final Hand-dyeds post for a bit...

...because I need to focus on getting some other quilty projects done!​

​First, the "parfaits."

Experimental Technique #1: "Value Parfait"

In this method, you use a tall, narrow container. Fabric #1 goes in the bottom with the dye of choice for a few minutes. Then you pour on some soda ash water; wait another few minutes, add fabric #2. You don't add anymore dye but, after a few minutes, you do add some more soda ash. Then you add fabric #3--still no more dye, just the soda ash. Let it sit for some number of hours (I let mine go 24 since I had life to live), remove, rinse, and you get dark, medium, and light.

"Value Parfait" using Mixing Red. Or maybe it was Strongest Red. Sorry--I forget now.

"Value Parfait" using Mixing Red. Or maybe it was Strongest Red. Sorry--I forget now.

It worked like a charm--loved this method! Far simpler than measuring out different concentrations like I did last time, although the previous method is great if you want a bunch of fabric all of the same value.

​Experimental Technique #2: "Color Parfait"

This is basically the same concept as above, but for each fabric you add a different color. Fabric #1 and one color goes in the bottom--wait a few minutes, add soda ash. After a few more minutes, Fabric #2 gets added, then second color poured in--wait a few minutes, add soda ash. ​A few more minutes, Fabric #3, dye number #3, soda ash, hang out for at least four hours (again, I did 24).

Color Parfait #1: Fabric #1 (on bottom): Turquoise. Fabric #2 (middle): Fushia. Fabric #3 (on top): Sunny Yellow

Color Parfait #1: Fabric #1 (on bottom): Turquoise. Fabric #2 (middle): Fushia. Fabric #3 (on top): Sunny Yellow

Color Parfait #2: 1 is Red, 2 is Golden Yellow, 3 is Sunny Yellow.​

Color Parfait #2: 1 is Red, 2 is Golden Yellow, 3 is Sunny Yellow.​

Color Parfait #2: 1 is Intense Blue, 2 is Golden Yellow, 3 is Sunny Yellow.

Color Parfait #2: 1 is Intense Blue, 2 is Golden Yellow, 3 is Sunny Yellow.

And then I did more of what I've come to call, my "tapestries." These are longer lengths that I dye flat in a bin. Well, "flat" being a relative term. I scrunch them up and so forth, but there's more surface area available to work with. For the most part, I see myself leaving these as full, long pieces--not cutting into smaller bits. But we'll see-- a couple of these might lend themselves well to being cut, but mostly I love the size of them.​

All of the newer tapestries. (See my last hand-dyed post for my first two.)​

All of the newer tapestries. (See my last hand-dyed post for my first two.)​

Okay, sure--you wanna see those a little closer? I do!​

Tapestry 1 (Fuschia, Lemon Yellow, Red)​

Tapestry 1 (Fuschia, Lemon Yellow, Red)​

Turquoise, Red, Golden Yellow, dyed sideways instead of top-to-bottom.

Turquoise, Red, Golden Yellow, dyed sideways instead of top-to-bottom.

​Tapestry #2, aka "snake skin"--shared the same dye bin as the previous one, but folded and wrapped with rubber bands.

​Tapestry #2, aka "snake skin"--shared the same dye bin as the previous one, but folded and wrapped with rubber bands.

Tapestry #4, aka "Forest Scene." (LOVE this one. Could just walk right into it!) Intense blue, Golden yellow, Sunny Yellow.​

Tapestry #4, aka "Forest Scene." (LOVE this one. Could just walk right into it!) Intense blue, Golden yellow, Sunny Yellow.​

And, of course, the Doofus.​

And, of course, the Doofus.​

More Hand-Dyes--Playing with Toys from Paducah

I'm now testing out methods in different books to see what method, or combo package thereof, gives me the results I'm looking for at any given time. What I'm finding is that, of course, each has its pros and cons. As in most things quilty, being adept at a variety of techniques allows you to pick and choose what works best in ​a particular situation.

But on to the pictures, because I know that's what you're really waiting for. ​(Captions explain what you're looking at.)

Descending to my basement...I prep some dye concentrates. These have ​kept me company all week.

Descending to my basement...I prep some dye concentrates. These have ​kept me company all week.

​New toy from Pro-Chem booth at Paducah: Color Magnet. Stencil or paint it onto fabric, and let dry for 24 hours, then dye.

​New toy from Pro-Chem booth at Paducah: Color Magnet. Stencil or paint it onto fabric, and let dry for 24 hours, then dye.

And the results. Color Magnet draws more dye to the areas where it's painted. (I know--sloppy job with matching up stencil on the top but I was just trying to get 'er done.) Oh...the possibilities!

And the results. Color Magnet draws more dye to the areas where it's painted. (I know--sloppy job with matching up stencil on the top but I was just trying to get 'er done.) Oh...the possibilities!

Bought two new colors: Intense Blue and Fuschia. I tested proportions of dye concentrate to water ​to get different values. Here's the Intense Blue dyebath (with the color magnet dye bath sitting to the right).

Bought two new colors: Intense Blue and Fuschia. I tested proportions of dye concentrate to water ​to get different values. Here's the Intense Blue dyebath (with the color magnet dye bath sitting to the right).

And here are the Intense Blue values. The two in the middle are a little more different from each other when you see the whole piece, but not much. Notes were taken.​

And here are the Intense Blue values. The two in the middle are a little more different from each other when you see the whole piece, but not much. Notes were taken.​

And here's the same set of dilution proportions done in my other new color, Fuschia. ​(Same thing here with the two in the middle, although these are a little more distinct from each other if you look at the whole piece of each.) The black markings …

And here's the same set of dilution proportions done in my other new color, Fuschia. ​(Same thing here with the two in the middle, although these are a little more distinct from each other if you look at the whole piece of each.) The black markings in the corner is my code for tracking which was which.

Looks like very runny lasagna, doesn't it? This is using a method to get a gradated fabric from the book I'm working through first. ​

Looks like very runny lasagna, doesn't it? This is using a method to get a gradated fabric from the book I'm working through first. ​

Dunno what this one looks like. It may look like a mess here, but oh, just you wait.​

Dunno what this one looks like. It may look like a mess here, but oh, just you wait.​

Gradation #1: Sunny Yellow, Golden Yellow, Mixing Red, Fuschia. Seriously yummy!

Gradation #1: Sunny Yellow, Golden Yellow, Mixing Red, Fuschia. Seriously yummy!

And oh, so-freaking-cool! Gradation #2: Sunny Yellow (I think--forgot to write down which yellow on this one), Fuschia, Turquoise.​ Neither of these gradations are getting cut up into anything. I'm letting my imagination wander for a bit. But every …

And oh, so-freaking-cool! Gradation #2: Sunny Yellow (I think--forgot to write down which yellow on this one), Fuschia, Turquoise.​ Neither of these gradations are getting cut up into anything. I'm letting my imagination wander for a bit. But every time I look at them, I grin and do just a little bit of a hop in place. Must. Do. More.

Stay tuned. As you know, I have a boatload more stuff to play with!​

Photo Album from Paducah

And a wonderful time was had by all. For detail, listen to Episode 123 In Which I Went to Paducah, posted on May 1, 2013.​ As I mentioned in my podcast, we're not allowed to post pictures of the quilts/quilt show (or vendor booths) on social networking or blog sites, so sorry about that. Still, I have a few pictures that will give you a feel for the event.

(For those subscribing by email or reading this through a feed-reader, I hope I've been able to fix the problem with pictures not coming through. I'll be checking that after it posts. If not, just visit it on the web; I subscribe to my own feed so I'll see what happens and, if necessary, I'll keep poking away at the problem!)

42313752p.jpg

The drive down (all 14 hours of it) was lovely--beautiful weather. Then, most of the rest of the time it was fairly rainy, except for one very nice day during which we wandered down to the riverfront and I snapped this picture. Nice scenery!

42413900a.jpg

​The shindig officially opened the first morning with a local high school marching band. It was a hoot. I suspect that Ricky Tims and Alex Anderson were somehow involved; a few women began marching behind the band carrying quilts and I recall something on The Quilt Show website (or was it in Quilt Life Magazine?) inviting attendees to bring pictures for a "flash mob" picture with Ricky and Alex. Katie and I were standing too far away to see what was going on once the band entered the building, but we could hear them. Great marching band--especially the drumline.

42413847a.jpg

After whatever-it-was-that-went-on-in-there, they came back out to the parking lot and played for a bit. The Fancy Dress Majorette must have been freezing--it was under 50 degrees that morning, I think, so I'm hoping she had some long underwear on under there. She was cute, though, so there is that.​

424131058a.jpg

Later that first morning, I attended a lecture on The Tentmakers of Cairo, with Jenny Bowker of Australia. It was a special exhibit at the show--truly wonderful, by the way. And Jenny was a fun speaker to listen to--great stories. ​

42613213p.jpg

Two of the tentmakers were working in the exhibit so you could watch how they do it. They're amazingly fast. No, the applique isn't quilt-show-judging-perfect, but you don't care because the finished products are incredibly beautiful. (You can see a snippet of a few of the "tent screens" behind the men.)

42613225p.jpg

If you're interested in more information about the tentmakers, I l linked the Facebook page above, but google "Tentmakers of Cairo" to see various other sites that include photos, videos, and so forth. Really wonderful stuff!

I don't have any pictures from the Lorraine Torrance lecture that Katie and I attended--but it was also a great lecture!​

42613818p.jpg

Friday evening, Katie and I went to "Behind the Seams with Libby Lehman and Alex Anderson." Entertaining. Unfortunately, as Libby explained in class the next day, that's when she first started experiencing some difficulties that were probably the harbringer of the aneurysm she suffered this week. It's a little more difficult to look at these pictures now. (Libby is on the left, Alex on the right.)​

42613253p.jpg

Speaking of that class, Here's Neicey--the woman who had originally registered for "Sheer Ribbon Illusions" with Libby Lehman but later ended up not being able to attend, so she sold me her seat. Thank you so much, Neicey! (And it was fun meeting you--hope we get to meet again sometime!)​

​I got to be Neicey at the class. I felt like I was walking in very fun shoes.

42713927a.jpg

And here's Libby during class on Saturday. She explained that she was feeling under the weather and was wearing a heat therapy patch on her neck during class. It's a testament to her professionalism and skill, however, that she was still a great teacher, making us immediately at ease and having fun in the class. Thank you, Libby. I'm praying for you! (As of this writing, no further information has been posted on The Quilt Show blog.)

427131200p.jpg

​Here's my class project. She suggested that my highlighting was a little heavy-handed (she said it more nicely than that, of course); I studied her samples more carefully and close-up after doing this and saw that she really only lightly highlights hers. Fun technique, though. (And no, I don't plan on finishing this sample--it was just for the purpose of the class. It's a technique I may play with in future quilts, though. I did get to keep the pretty, pretty thread!)

42513300p.jpg

​A highlight of the week was our visit to The National Quilt Museum. Incredible. They had their permanent exhibition (which gets rotated, of course, through the quilts they have in their collection) in the center, as well as a special exhibit of miniature quilts. On the left side was a special exhibit of quilts using the Jacob's Ladder block. Some were antique quilts with the standard, recognizable block; the rest were contemporary quilts that played with the block in a variety of ways. It turned into sort of a game to see if you could figure out where the block was. Very cool. On the other side was a special exhibit featuring two very different contemporary quilt artists: Emiko Toda Loeb and Regina Alexandra. I can't even begin to explain these exhibits, so check out the link here.

427131000a.jpg

​Another highlight of the week was a meet-up with listener Angela and her mom! Woot! Mom took this picture so you don't get to meet her, but say hi to Angela!

And now for the shopping. ​

purchase5.jpg

Books. Mostly on dying and other surface design treatments, but one is a pattern book that I'm using for a baby quilt. (Not for the one you think, Dianne.)

I also got the book/DVD on the Tentmakers of Cairo exhibit, as well as the DVD of pictures from the quilt show itself. ​

purchase1.jpg

Next, fabric. These are for the baby quilt previously mentioned. I got these on the remnant tables at Hancock's of Paducah--$5.98 a yard. I need a lot of fabrics, but not a lot of each fabric, so I'll likely have enough left over to make other things as well. (I'm not posting pictures of other fabric for another baby quilt due to not wanting to give anything away to certain readers of my blog. So there, nyah.)​

purchase4.jpg

​And, of course, Pro-Chemical and Dye...

...stay posted in days to come for more pictures resulting from this pile of fun.

purchase7.jpg

And Tsukineko inks, stencils, and other toys for surface design.​ Had problems deciding what to play with first after I got home! (Haven't even dug into this bunch yet...but plan to this weekend, if the weekend doesn't get away from me.)

purchase8.jpg

Did you notice this guy wheedling his way into several of my pictures? He's not my purchase--he was Katie's. He's an antique...wait for it...tape measure. Yep--he's got a tape measure coming out of his hindquarters. He's adorable, but you've got to know that I gave her no end of ribbing for having a cat with a tape measure coming out of its butt. ​

And with that image  embedded in your mind, we now leave Paducah and return home--weary, broke, and inspired. Let the games begin!

Project Hope Online Quilt Show (Remix)

Due to some things I'm working on with the email version of this blog, the post announcing the Project Hope Online Quilt Show was not able to be sent out via email. Therefore, I'm posting this link to the original post so that those of you who get this post via email will know what's going on! (And how many more times can I use the word "post" in one sentence?)

http://quiltingfortherestofus.com/blog/launching-an-online-quilt-show-project-hope/4/22/2013

Coming up (as soon as I've gotten just a little more sleep): A report on my adventures in AQS QuiltWeek in Paducah, including fabric, classes, and a conversation with a very nice local police officer. I'll cover some in the blog, some in the podcast. Stay tuned.

Launching an Online Quilt Show: Project Hope

Project Hope.jpg

It's been a very, very hard week. My heart bled for everyone involved as I watched the news about Boston; about West, Texas; about ​the devastating earthquake in China...and continuing into this week with avalanches and shootings in Seattle.

It's all too much, sometimes. We can stop watching TV, we can stop listening to the news, and yet events don't stop. We are still a part of this world community in which something that affects someone else's life in such a deep and tragic way cannot help but have an impact on our own life.

There are a variety of ways to respond. I choose hope. I choose to do what I can to bring peace to my little corner of the world and, maybe, if I get the opportunity, to bring peace to a larger corner of the world.

As a quilter, my healing often comes through fabric and thread. While listening to the news late last week, I recalled reading Sandi Colwell's blog post on thankfulness. I shot her a direct message on Twitter: Can we do something quilty in response to this? As I suspected she would be, she was all over it! And so, the Project Hope Online Quilt Show was born. ​

Express your hope. Express your joy and unity and bridge-building and where you can be peace. Join us for the Project Hope Online Quilt Show. (Thanks to Sandi for putting the rest into words so well--I've borrowed this directly from her blog post on the topic.)

Project Hope Online Quilt Show

In keeping with theme of hope, love and peace, create a 12″ x 12″ art quilt that conveys your thoughts and emotions.

The design rules are simple…there are none. Use whatever creative means on this piece of art that you want to…stamps, paint, couching, transfers, crayons, thread, beads, simple piecing, applique, you name it, you can do it!

We ask that you include an artist statement in your Flickr description about your piece and how you felt while you were creating it.

Upload through June 30th, 2013, to the group on Flickr titled Project Hope Online Quilt Show.

If you are feeling moved to take more action while creating this art quilt, we ask that you make a donation of time or money to an organization of your choice that exemplifies the theme of hope, love and peace. One such organization could be The One Fund. This fund is currently collecting money to go to the many victims of the Boston Marathon bombing. Use the link to find out how to donate and for more information.

​So join us, won't you? Join the Sandi/ys in celebrating hope!

Comments on my blog

Yes, I am aware there's a problem. About half of you seem to have no problems leaving comments on my half. The other half aren't quite so fortunate. A few of you have been so gracious as to let me pester you with questions to send along to tech support--I really appreciate the time you took out to test things so you could send me as complete information as possible. That info has all gone to tech support and they're still working on it.

I've been bumped up the food chain now, from the entry level tech support, to the second tier tech support, and yesterday I just got passed up to their engineers. I'm in daily communication with these folks. There's clearly something highly unusual going on here.

I'm also aware that the photos from the last couple of days of posts didn't show up in feeds or the email. I've passed that along to them as well, as it looks like something may have changed that, since it was working fine before.

Here's what we do know:
1. Generally speaking, it seems to work fine from PCs using Firefox or IE (7-9 have all worked).
2. It's about 50/50 on Safari.
3. Chrome has issues.
4. It's about 50/50 on mobile devices.
5. There is a known issue with McAfee that they're working with McAfee folks on. If you use McAfee, leave a comment below. If I see a few of them, I'll post the fix for that.

I'm in last-ditch effort mode on this. Next week I'm in Paducah anyway so wouldn't have any time to make any changes if I wanted to. So tech support has that long to figure out what the problem is.

I did send them the suggestion this morning that it could simply be a sign of the Zombie Apocalypse. So you may want to start stocking up on nonperishable foodstuffs.

Stay posted.

Hand-dyeds Round 2 post 3

It's late and I have a long drive tomorrow for a work trip. Nope, haven't packed yet. Yep, dirty dishes still in the sink that need to be washed before we leave in the morning. So I'm only posting a couple of pics now. I'll try to post more from the road but am not sure I'll be able to pull that one off, so this might have to tide you over until the weekend.

I'm laying out the photos differently this time too, as I'm testing a variety of things again on this website. Won't we all be glad when the dust finally settles?​

​Here was the original "target" that I'd made using a glue stick as resist.

Blue-green Target (glue stick resist) "Before"​

Blue-green Target (glue stick resist) "Before"​

​I decided to overdye it with yellow to see if I could, again, get a nice yellow-green color. I was very much in the mood for some yellow-green. I think it's because I've really got a hankering for spring and we haven't seen much of it here yet.

Blue-green Target "After"​

Blue-green Target "After"​

​Again, not a very exciting result but more interesting than the original. I'm not keen on the target idea so I'll have to do some further surface embellishment with this one.

​Next we come to the one I'll politely call "yellow-green," but I personally think of as "baby poop green." Sorry if I offend.

Yellow-Green Snow Dye "Before"​

Yellow-Green Snow Dye "Before"​

Come on. I know all of you have, at some point in your quilting career, looked at a quilt project you were working on and thought, "You know what this quilt really needs? What would really make it sing? It needs some Baby Poop Green. Yeah. That's the ticket."​

Well, okay, so this is more attractive than what I found in my kid's diapers. But still n' all. It needed help. Overdying to the rescue.

I decided to go straight green on this one to see if I couldn't over come the bodily function aesthetic influence.​ Interestingly, the green overdye somehow brought out more of the blue from the original. I'm scratching my color theory head over that one.

Yellow-Green Snow Dye "After"​

Yellow-Green Snow Dye "After"​

So this next one is pretty nice. ​I had this very nice, unassuming little Golden Yellow piece (that's the name of the Procion MX dye I used straight-up on it) that I'd pleated the first time around.

Yellow Pleated "Before"​

Yellow Pleated "Before"​

I wanted to shoot for a great orange-yellow piece instead, so I overdyed it with red and this time I used rubber bands to make rings.

Yellow Pleated "After"​

Yellow Pleated "After"​

I'm kind of digging this one. Turned out a bit more pink than orange-yellow, but still a very interesting effect.​

Last one for tonight, and then we get into my serious-issue-befores in the next post.​

Here was another experiment with using a glue stick for resist. Remember this one?​

Flowers "Before"​

Flowers "Before"​

I really wanted something with even deeper color, so I overdyed it in blue. It was scrunched the first time and I wanted to still have the flowers visible, so I scrunched again.​ It's even brighter blue in this picture compared to the "before" because the "before" was taken in my basement and the "after" in the shade on my patio. Still, it's very blue now, and the flowers don't stand out as well because the resist isn't there anymore so the lighter drawing also dyed. But that's okay. If I ever use it I can always use the light drawn lines as markings for couching or quilting or paintsticks or some other surface embellishment.

Flowers "After"​

Flowers "After"​

So, did I mention I just got a shipment of Dyn-a-Flo paints and Inktense pencils today? Let the games begin.​

Hand-dyeds Round 2 Post 2

Okay, where did I leave off? ​

The next one started out a fairly uniform hot pink. I believe I'd used my "strongest red" dye the first time. Not quite as deep a red as I'd expected. Very nice, but I wanted to play with it some more. I thought it would be fun to try dying it an even darker red if I could, and use rubber bands to make rings. I was hoping for vibrant pink rings to show up in a deeper red field. Not quite.​ If you squint and look at it sideways, you can almost see the rings. Nice, just not what I was working towards.

Deep Pink "Before"​

Red/Pink "After"​

Here's another I wasn't too jazzed about the first time. It was pleat-folded and dyed orange. This time I dyed it yellow and pleated it in the same direction as the first time.​

Orange Pleat "Before"​

Yellow-Orange Pleat "After"​

Next, I decided to take a blue-green snow-dyed fabric and see if I could do a little sumpin' sumpin' with it. I kept it simple, though--I wanted more yellow-greens in my stash to do some landscape quilts, so I scrunched this one up in a yellow dye bath.

Blue-Green Snow-dye "Before"​

Blue-Green Snow-dye "After"​

Hand-Dyeds Round 2 Post 1

I'm going to do several posts for this one so you can see all the before and after's on the overdying. It would overload with photos if I tried to do it all at once.​

​First, the rust-dyed fabric. I had problems finding stuff that would actually rust, but got a few washers to do the trick when I soaked the whole thing in vinegar.

​I decided to use a blue-green dye bath, going with the idea of complementary colors. And since the original had a clear fold line going through it, I counterbalanced that by just scrunching the second time. It didn't work out quite the way I'd hoped--I wanted a little more muddy effect. I may dye this one a third time to see if I can get something a little more subtle.

Rust-dyed "Before"​

Rust-dyed "After"

​Next, I tackled a single-colored "before." This one was dyed straight up with blue. It's a fairly dark blue and takes well to fabric. Although I liked the blue well enough, I wanted to see if I could make it just a little more interesting so I overdyed it with green. Since the original blue had just been scrunched into the dye bath, I decided to use rubber bands to create rings. I was hoping for a nice dark blue ring peeking out from the green overdye. Can't see the rings, but I still like the finished product quite a bit.

Blue "Before"​ (Apologies for the yellow cast, bad lighting)

Blue-green "After"​

Another single color "before" was a very nice green one. I debated whether I wanted to overdye this one for awhile because it was such a nice green. But hey, I own the dyes. I can always make another! So off to experiment I went. I decided to overdye this one with straight yellow. The first version was just scrunched, so on the second I used rubber bands to make concentric rings hoping to make a more distinct design. ​

Green "Before"​

Yellow-green "After"​

Love that one. The green isn't as faded as it looks in that picture--it's actually a bit ore of a subtle effect between the green and yellow. But I love the yellow rays. Totally unexpected, very cool.​

​Now we turn to one I wasn't keen on at the start and I'm not sure overdying helped it much. It has a little bit more of a coolness factor now, but not quite enough for me. This is one of the tone-on-tones, if you recall those from round 1. The first round was a pleat-fold and dyed in green, so I did a perpendicular pleat-fold in yellow to see if I could get a grid effect.

Green "before" (tone on tone shown)​

Green and yellow grid "after"​

One more set for this post. Here was a long strip of fabric on which I did a triangle (flag) fold the first time and dyed it ​turquoise. It's the perfect shape to try stacking. Stacking is when you "stack" dye colors on top of one another. You crunch the bottom of the fabric into a container with one color, then you stuff a bunch more of the fabric in and add a second color, and stuff more fabric in and add a third, going on for as many colors as you can fit in your container. It works because each section of fabric largely soaks up the dye in that section. There's merging between sections as well, which is where some very funky stuff can happen.

I stacked mine starting with green dye on the bottom, stuffed as much down as I could, then stuffed the rest in and added yellow dye. I don't think I had enough fabric to really soak up the dyes in each section because it all came out a fairly uniform yellow-green. Pretty, but not the effect I was going for.

Turquoise "before"​

Stacked "After"​

Stay tuned...​

Mad Quilt Scientist Strikes Again

This weekend ended up being much busier than I thought it would be. We had family in from out of town which then meant a big family event Saturday night and another one on Sunday. I had a ton of errands to run as well, so my available time for doing anything quilty got shrunk considerably. However, since I'd already decided I wanted to get some dying done this weekend I had a bunch of supplies already in place and had made notes for myself about what I wanted to do, so I was able to hit the ground running.

I focused on overdying my previous hand-dying experiments, but also tried out a few other things. I'm not posting pics here because at the moment, everything is rinsed out and just waiting to go into the washing machine once there's a break in our real laundry (you know, the I-don't-have-anything-else-to-wear-until-that-load-gets-done kind). So hopefully I'll have pics ready to go tomorrow evening. I'll have to post it over several blog posts, I think, so I can do the whole before-and-after thing with a little explanation about process.

I've also got a few new dye baths going--another couple of experiments with resists, and a few bins filled with ice cubes. So more rinsing tomorrow night.

Let me just say, wheee. Still having a ball.

iphone-20130414205649-0.jpg

Yes, I'm a Dog-Person

With thanks to @quiltscapes for sending me this link. Wonderful. And Doofus came over to sit next to me and laid his head on my lap when he heard the video playing. Apparently he wanted me to know that really this video was about him.

On the 8th day, God made a farmer. On the 9th day, He made a dog. With gracious thanks and credit to: Lindsay Kennedy Photography - http://lindsaykennedyphotography.com/ Erin Vey - http://www.erinvey.com FidoJournalism - http://www.fidojournalism.com Photohound Dog Photography - http://www.photohound.biz Marilyn Jeffers Photography - http://www.marilynjeffersphotography.com Evocative Photography - http://evocativedogphoto.com Once around Venus Photography - http://familypetphotographyflorida.com Murphy Dog Studios - http://www.murphydogstudios.com & Unlimited ----- If I used your photo but didn't give you credit, so sorry.

My third podcastaversary giveaway begins!

3rdpodcastaversarybadge.jpg

Be sure to check out episode 121 In Which I Turn Three, and leave your comments on the show notes to that episode in order to be entered for a fantastic giveaway courtesy Aurifil Threads! Thanks so much to Aurifil for sponsoring my third podcastaversary giveaway. Having these threads to giveaway is like having a basket of candy on my cutting table--so yummy to look at and oh so tempting!

Please don't leave your comments here to enter the giveaway--I won't be able to track them. Make sure you leave your comments on the show notes to episode 121 by April 30th to be entered! Thanks--and thanks for listening for the last three years (or however long you've listened....)!

Clearing the Decks, Starting Anew...

I had a sort of "clearing of the decks" this weekend. I had both my mystery quilt tops and backings ready to go to the longarmer for awhile, but I was waiting to get the backing put together for another quilt so I could run all three down at once. I realized Saturday morning after I got home from the grocery store that if I worked quick-like-a-bunny I had a shot at getting that backing complete, and the rest of the paper pulled off the pp'd blocks on the quilt, in time to run it 45 mins south to the LQS before they closed. I just barely made it!

Photo Apr 06, 4 03 34 PM.jpg

So I treated myself to some new fabric as a reward, of course.

​Yum.

It's better for me than buying chocolate. That's my story and I'm sticking to it.​

I posted last week about my progress on the house on the hill project (yet to have it's own name). I'm doing the hand-stitching on that now, which is giving me the chance to do some embroidery. ​

2013-04-03 17.43.08.jpg

​Here's a fairly bad picture of my first attempt at french knots, which, as opposed to the picture, weren't too bad.

The thread I was using was a bit too thick for this particular project, and is very rough to the touch, which means tons of friction trying to pull it through fusible and batting. My fingers ached after the first three, and I believe I did 39 altogether. For the next stitches, I switched to a different thread (an actual perle cotton) and it's been going much more smoothly ever since. More pictures later.​

Once my quilts were at the longarmer, that freed me up to work on other projects. Something I've been wanting to do for awhile, inspired by yet another Craftsy class, Magical Jelly Roll Quilts with Kimberly Einmo, is a scrap quilt using the Jacob's Ladder block. It's a traditional block that I've always liked because you can lay it out in a hundred different ways. Okay, I've never actually counted. A lot of different ways, in any case. Kimberly's directions are all based on a 2 1/2" strip so she's done the math by looking in my stash. Very convenient and kind of her, I thought.

Photo Apr 07, 5 55 51 PM.jpg

I'm doing the larger half square triangles all out of a single red paired with a single white; that will (I hope) create the path for the eye through the quilt. The white looks solid here, but it's tone-on-tone.

I'm trying to once again push myself to make the rest of it as scrappy as possible. I need 390 @ 2 1/2" squares. ​I have a collection of 2 1/2" squares I've been cutting off project scraps for awhile, so I started there.  However, I have a few fabrics that have dozens of squares, and others with only one or two. In order to avoid having blocks dominated by a particular fabric, I separated out my squares by fabric and then started by pulling a consistent number from each pile so the scraps would at least be fairly evenly distributed. Once I got to the point where I had a lot of the same fabrics left, I put those aside and dug into my strip collection.

Photo Apr 07, 5 58 07 PM.jpg

Now I'm going to start cutting more squares from my strips to get even more distribution of fabrics. Strips? I got me plenty o'.

I intentionally chose some strips from my collection that I particularly dislike, under the theory that no fabric is ugly if you cut it small enough.​

I'm pushing my comfort envelope here. I don't do random well. Must. Control. Must. Control. Someone pat me on the back and tell me it's all going to be okay.​

(Not familiar with the Jacob's Ladder block? Check it out here on About.com.​)

Goals for this week:

  • Keep stitching House on the Hill (not sure when I'll decide it's done)​
  • Get squares cut from strips for Jacob's Ladder
  • Fuse more fabrics in preparation for next fused art quilt. Maybe my design, maybe the second one in Laura Wasilowski's class--haven't decided.​
  • Make two pillowcases from sets of scrap fabric I've had sitting on the edge of my cutting table for awhile now and they're just starting to bug me.​


Work in Progress Wednesday--House on a Hill

I've decided to try to join in the fun with Work in Progress Wednesday at freshlypieced.

As I talked about in my most recent podcast episode, I'm taking Laura Wasilowki's "Hand-Stitched Collage Quilts" class in Craftsy. Although I often go haring off into the wild and do my own design, I decided to go easy on myself this time and pretty much stick with hers, although I've made some tweaks here and there as suited my mood.

All of the fabrics less one are my own hand-dyed fabrics. The lime green fabric (grass) is commercial. ​

2013-03-30 14.46.16.jpg

Verily, in the ages of yore, there was a hill.

2013-03-30 14.58.22.jpg

​And on that hill, a house was built.

2013-03-30 15.35.27.jpg

As time passed, as the earth turned and daylight and moonlight did pass, trees and grass flourished.

2013-03-30 18.39.12.jpg

And as the rains did come followed by the brightness of sun, flowers verily bloomed.

And the world was securely fused to batting.​

And there was much rejoicing.

(Stay tuned. I just hit the embellishing stage.​)

Be sure to check out all the other Work in Progress Wednesday posts at freshlypieced!​

Playing with creating our own fabrics

My quilt design study group met last week and I was responsible for leading this week's session (we rotate responsibility, which is the best way to do a group!). We were on the last lesson in Lorraine Torrence's Fearless Design for Every Quilter. 

The lesson had to do with creating your own fabrics using a variety of techniques. I talked about this in my most recent podcast episode (Episode 120 In Which We Get Fused) so I won't go into detail here, but will give some pics of the evening. 

​Turning lines into pictures

​Turning lines into pictures

Using complimentary colors in a rubbing

Using complimentary colors in a rubbing

Working with stencils--analogous colors

Working with stencils--analogous colors

Following the line of the dye design (we thought it looked like a map)​

Following the line of the dye design (we thought it looked like a map)​

Using running stitches to create line on fabric

Using running stitches to create line on fabric

A little color inspiration...a bird in the hand

​(Pardon me while I continue to test out the different methods of placing pictures in my blog. Have to see how well they all work!)

While on vacation in New Orleans a couple of weeks ago, my husband and I spent a morning at the Audobon Aquarium. We got there when it first opened and wasn't at all crowded; by 90 minutes later when we were ready to go, it was pretty full. So fair warning--if you go, go early.​

In any case, my favorite part of the aquarium was, interestingly enough, not the aquatic creatures. It was the parakeet house. I grew up with parakeets--my grandmother had those that came to live with us a few months out of the year when she did. I only really remember one of them. His name was Gentleman Jim, or GJ. We'd let him out of his cage and he'd fly around the room, but he mostly liked to be right where we were. I did a lot of homework at the kitchen table with GJ perched on the end of my pencil or trying to sharpen his beak on it while I was writing. He may or may not have been the same parakeet that liked to dive into the fish tank. That was a little more of an adventure. My sister also had birds as pets most of her growing up years, and still does. Me, not a fan of birds in the house myself. Too much seed tossed around, too noisy. But still, I thoroughly enjoyed playing with the parakeets in the parakeet house.

So I'm including two galleries here--one is just photos from our trip that may entice you to go to New Orleans yourself. The other is strictly for the birds.​

The galleries are on autoplay, but you can speed up or slow down using the control buttons at either side of the gallery, or you can click on the thumbnails below.

First, general scenes around New Orleans, including random parades that spring up all the time, St. Louis Cathedral, the statue about immigrants (didn't get the actual title), various music ensembles we would stumble across (favorite part of the trip), Audobon Aquarium, New Orleans from the ferry to Algiers Point and one great house in Algiers, and the bayou boat tour (see if you can spot all the critters).

And now for the birds...fantastic colors! Definitely could inspire some quilts.​

An update on leaving comments

For those of you who have tried to leave comments on my blog before, it's now been fixed so you're able to leave a comment without having to sign into SquareSpace, Facebook, Twitter, or Google. If you choose not to use one of those accounts, you can leave a comment as "Guest." You will have a short form to fill out--that's just to cut down on spam and bots, you're not signing up for any accounts or anything.​

​I appreciate your patience with new blog set-up issues: Some things are very difficult to test before it goes live!

I hope to get a podcast episode out in the next day or two--I've been spending all my usual podcasting and quilting time on this site lately but we're getting there...​

Paper-pieced Block of the Month

Have I mentioned this one before? My guild is doing it's block of the month challenge in 2013 and this year, we're doing paper-pieced blocks chosen from Carol Doak's 300 Paper-Pieced Blocks. ​Each month, one of our leaders (Kate) chooses a block and we all do it in whatever fabrics, size, or quantity we want. We keep these blocks for ourselves--no exchanges involved.

My challenge to myself is to work completely from scraps. I'm doing four 4" blocks each month. No idea what I'll do with them yet but I'm having a blast!

January's block--starting out simple for those who may not have paper-pieced before.​

January's block--starting out simple for those who may not have paper-pieced before.​

February--let's add some houses to those trees!​

February--let's add some houses to those trees!​

​My faves so far. Had some great fabric to play with here.

​My faves so far. Had some great fabric to play with here.

April blocks. Not as fond of these just 'cause trees were too small to do much with, but they work.​

April blocks. Not as fond of these just 'cause trees were too small to do much with, but they work.

Here's the combo package so far!​

Here's the combo package so far!