A Finish! Craftsy Class Review: Stupendous Stitching

I finally finished another Craftsy class, and this one has been a l-o-n-g time in process. I first started working on this sometime around January 2013, made a little progress, hit a stopper, and subsequently let it languish until sometime around mid-January of this year. That wasn't because it was difficult, or boring, or something I wasn't enjoying; it was pure "Dang, I can't finish this until I..." and then getting distracted before I completed the "until I..." portion.

But I'm done! Woot woot! And so, I can now officially post my review of...

Carol Ann Waugh's "Stupendous Stitching" class on Craftsy

I did have a whole lot of fun with this class!

Well, that is, I had fun once I finished this.

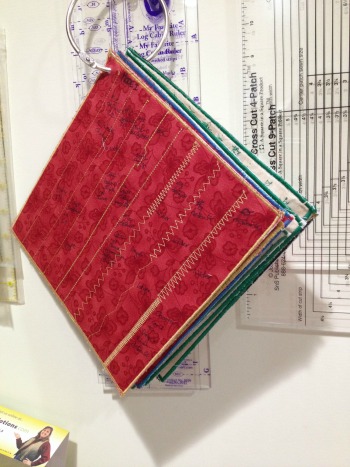
The first part of the class is making a "Stitch Bible." Carol Ann suggests starting out by creating a record of every stitch your machine can make. You start stitching each stitch in the default settings, then you make it wider, then longer. As she points out, some designs actually look like they're completely different stitches once you start monkeying with the settings. This was an extraordinarily helpful project--as she comments in this lesson, we probably have boatloads of stitches available to us on our machines that we've never used. Ahem. Yep. Now I've always got a quick reference. (And yes, they do look quite different stitched out for realsies than they do in the little diagram on my machine, so there's that, as well.) You can tell I didn't worry about having matching pages--I just used scrap fabrics and scrap threads so it's not a very pretty Stitch Bible. But I wasn't going for pretty. I was going for functional...and done.

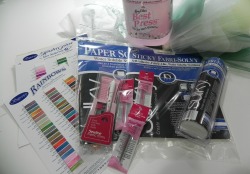
Yes, this was the step that hitched me up and made this class take me over a year to finish. I made the first page or two, ran out of the stiff stabilizer I was using, and took about a year to get back to buying the supplies and creating myself enough pages to finish this. Over Christmas break this year, I got the remaining pages prepped so I could blast through and get the Stitch Bible complete. Boy, was that tedious work! Useful now that it's done, but mind-numbing to complete.

In this detail photo you can see the copious notes I took, ahem. Since I was generally using about the same settings every time, I didn't bother writing them down. It's enough for me to see the difference in stitch.

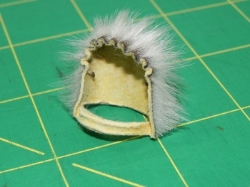
This was before I had an appropriately-sized grommet-maker. So I stabbed a hole in the corners with very sharp, pointy scissors. At that point, stabbing the pages over and over again with a sharp object was a bit therapeutic. This really was a tedious endeavor.

Ah, but once it was done, on to the fun stuff!

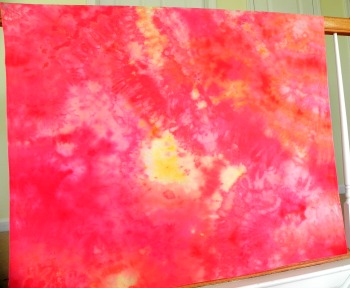
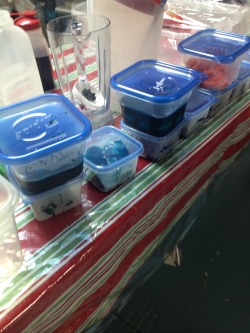
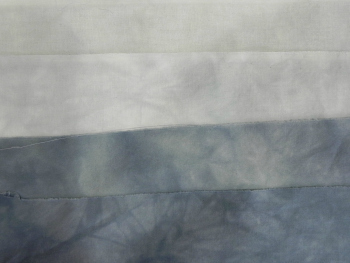
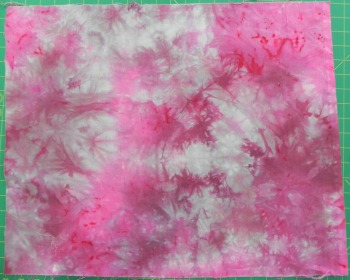
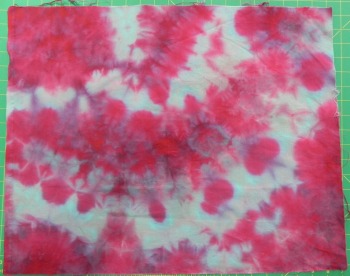
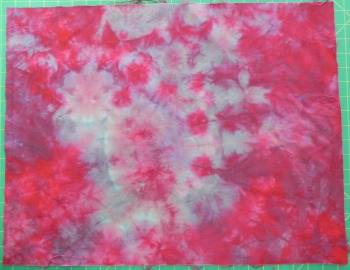
Carol Ann spends an entire lesson on how to choose a background for the Stupendous Stitching project. She does a great job showing choices that would work well and others that wouldn't work so well, and explaining why. It took me some deliberating to settle on which of my hand-dyes would work best for the actual class project. I needed something interesting, but not too busy.

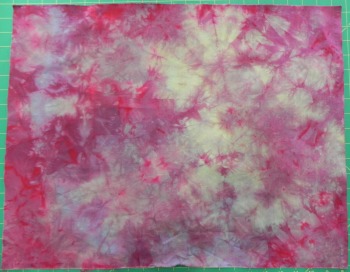
This was the winner. I thought the sort of circular "blasts" of color might give me some design inspiration as I went. (It looks a little more vibrant/busy in this photo than in real life. I think you'll see that better in the finished reveal.)

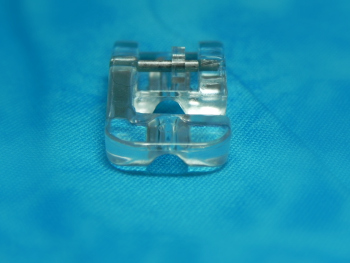
The first step is couching. You couch a few lines on the project that sort of lay the foundation for everything that comes next. I ended up buying a special couching (piping) foot as the foot my machine came with didn't have a deep enough groove for the couching I was doing. This is the "Pearls and Piping" foot--I believe it's the one Carol Ann recommends in the class. I love it. It's a great foot. The one trick is remembering to move the little plastic piece that sits on the bar where it latches onto the shank--that little plastic piece adjusts the placement of the foot in relationship to your needle, which changes where the needle hits in relationship to what you're couching. Got it? This caught me up a couple of times--I'd get started and take a few stitches, then realize I'd not adjusted the little plastic piece. Still n' all, a great foot.

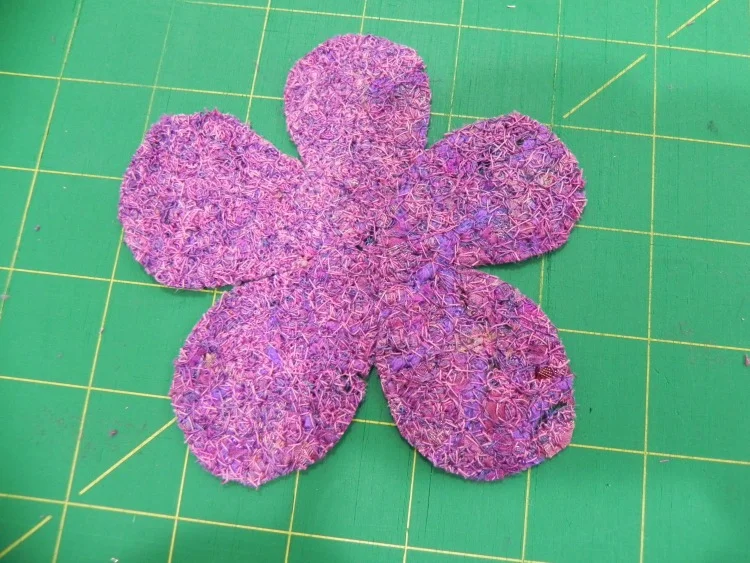
I had a blast using some great sari ribbons and sari yarns--ribbons/yarns created from scraps of old Indian saris. Beautiful stuff, bought a couple of packages of them two or three years ago, never knew how to use them. Wow, did I have fun! Well, except that the sari ribbons had a lot of fraying along the edges that eventually caused a bit of a mangled rats nest under the needle.

I call shenanigans.

Fortunately, nothing broke, and after 10 minutes with a very sharp pair of snips, tweezers, and a quick vacuum with my mini-attachments, we were back in business.

I used three large sari ribbon pieces and one narrower sari yarn. They added great color and texture, but the three ribbon pieces were a bit visually overwhelming. I sent @knittyAJ (AJ of The Quilting Pot podcast and I Knit N Quilt 2 blog) a quick email, since she'd done this class last year at the same time I started, to get her suggestion. She suggested I get over myself. Well, okay, she said it a whole lot nicer than that and it was one of the options I'd said I was considering in the first place, so I agreed. Thanks for the "call a friend" lifeline, AJ! Very helpful. I decided to leave it until much further in the process to see if doing everything else would soften the impact.

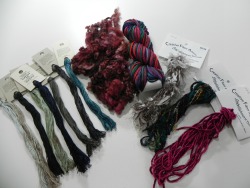
The next step is using your decorative stitches. Here I got to play with a whole lot of gorgeous threads I've collected over the years and, again, never really knew what to do with. (This was just what I started with--I added a lot more later!)

You do more lines with decorative stitches, and then you do some hand-stitching as well.

I had a whole lot of fun trying out some new stitches and getting ideas from the Creative Stitching book by Sue Spargo that I reviewed on a podcast episode awhile back. I got pretty good at French knots and lazy daisies, although my daisies were a bit hodge-podgey in size and petal direction. I choose to call it whimsical and move on.

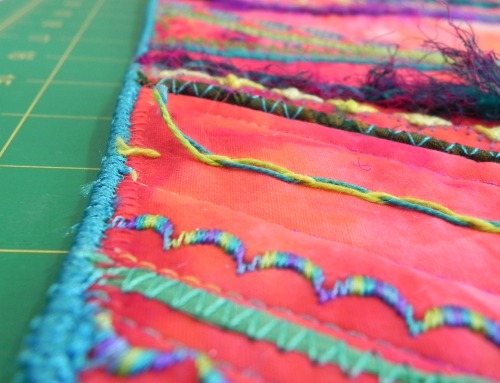
Here's another example of my couching and some hand stitching.

In this one, you can see my ultimate solution for those overwhelming sari ribbons. When I was doing my hand-stitching, I decided I could try hand-couching them down and seeing what happened. I liked it! Nothing had to get ripped out, and now they're all interesting texture without taking over the piece.

(The hand-couched ribbon is on the left. The thicker couching on the right was sari yarn machine-couched. Hand-stitched lazy-daisies, hand-stitched threaded chain on far right.)

And some more detail of decorative stitches, hand-stitching, and couching.

You can see how much fun it is to just cut loose and say, "What can I try to do next??"


By the way, when you take this class (and you know you will!) pay attention when she says to stop the hand stitching a fair amount inside the edge. I didn't. Oops. I cut through some of my knots when I trimmed up the edge and had to go back to hand-tack a couple of my hand-stitching ends back down. Glue may have been involved.

You can also see in this picture the rat-tail binding technique she shows--a new technique for me! I had a little trouble with it here and there because I was using a braided cord that frayed like the dickens when I cut the end, and I also had very thick couching pieces that my zig-zag had to wrestle its way over. I used my Pearls n' Piping foot again for this step and it worked much better than my regular presser foot. Still, I couched over it twice to be sure, and then had to shave off some frayed ends with my snips. It's a nifty technique, though.

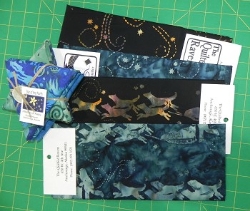
So here's all the fun stuff I played with through this process in one shot.

Pretty threads from a variety of sources, hand-dyed perle cotton from Laura Wasilowski's Artfabrik shop (bought in Houston a few years back), sari ribbons and yarns from Meinke Toy (check out their "toy boxes").

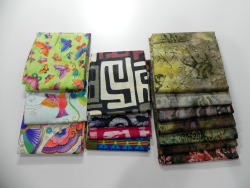
And, of course, my hand-dyes. (Also a hand-dyed on the back but there's a reason that hand-dyed piece ended up as backing. It's not exciting enough for a picture, but it's similar colors to the front.)

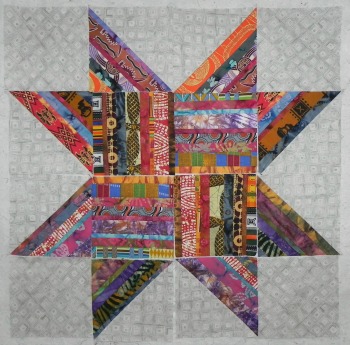
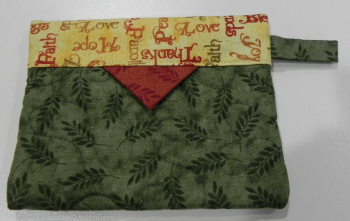
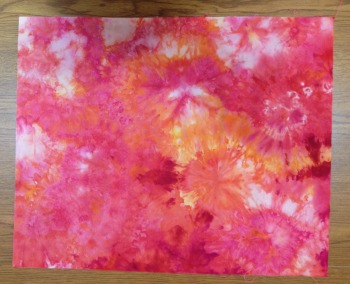
And here's the final reveal:


Sure, there's some things I'd approach differently if I were to do this again. I enjoyed it, though, and I did learn a lot about my machine, using different materials, and hand-embroidery. I can easily see myself using the techniques I learned from this in other projects, or creating "stupendous stitching fabric" for other uses, as Carol Ann Waugh shows in the final lesson (see "Basics" below). And I could imagine doing a few 9" or 12" blocks with this technique, set into a wall quilt with other blocks. That could be cool. I could see adding beadwork, or including needle felting....Lots of possibilities here!

So, if you're in the mood to play, to use a lot of intriguing materials and methods, and just be foot loose and fancy free for awhile (her mantra through the class is "there are no mistakes!"), this is exactly what the quilt doctor ordered. I do recommend this class. Once that dang Stitch Bible was out of the way, it was just a-whole-lotta-rockin' fun!

Again, that's "Stupendous Stitching" by Carol Ann Waugh. You won't be sorry.

The Basics:

  • 11 lessons, ranging from 5 minutes (the last lesson) to about 30 minutes.
  • After the introduction, the first lesson is a very helpful overview of the kinds of materials you could use; then the next lesson talks about the Stitch Bible. The following lessons then take you step by step through the process, with a ton of helpful tips along the way.
  • Last lesson is about five minutes of ideas for other ways you can use Stupendous Stitching techniques--pillows, purses, shoes, tablet covers, and the like.
  • The downloadable materials were great reference, and one, the "No Mistakes Poster," is worth sticking on the wall in your quilt studio!

(Transparency statement: using the Craftsy links on this blog help support this blog and podcast. Thanks!)


Happy Fourth Podcastaversary! And There's Presents! (Giveaway)

(If you've already read this blog, note that the Craftsy class giveaway information has been updated!)

This is the closest I can get to sharing a cake with y'all, but I can give you presents!

Following quickly on the heels of the 2014 Quilty Resolutions First Quarter Check-in Giveaway and Linky Party that just ended at midnight last night (I'll announce the winner on my podcast episode this afternoon), it's time to celebrate my fourth podcastaversary with a HUGE giveaway!

With thanks to sponsors the Fat Quarter Shop and Craftsy, I have two big prizes to give away!

You could win...

... a $30 gift certificate to the Fat Quarter Shop!

Start dreaming now. What wonderful, beautiful, funky, pet-able fabric could you buy from the Fat Quarter Shop for $30? Wheeee!

To enter this giveaway, use this Rafflecopter widget to enter.


But wait...there's more!

You could win...

One Craftsy Class, Winner's Choice, for Free!

(Please note: updated information!) The winner will be able to choose which Craftsy class s/he wins!

To enter this giveaway, just click here.

If you're already registered for Craftsy, you'll just log into your account; if you're not already on Craftsy, you'll be prompted to create a Craftsy account (for free). Once you do so, you'll be entered into the giveaway! Craftsy will choose the winner using Random.org. Craftsy will let me know who the winner is and Craftsy will email the free class link to the winner.

I posted my first episode of Quilting...for the Rest of Us on March 28, 2010. It's been four great years of making new friends, learning a lot of new skills, and (of course) messing up a few times along the way. But I've had fun, and I'm looking forward to the next...however many...years! So come in, have a seat or hang out by the kitchen island like most of my guests do, and join me in my celebration, won't you?

Spring Postcard Swap and A Tutorial

(Looking for the 2014 Quilty Resolutions Check-in Giveaway and Linky Party? It ends at midnight Saturday! Click here. Meanwhile...)

Kati and I both got one another's postcards, so I can now do "the big reveal" blog post!

Kati of Kati's Quilting and Sewing (and one of my #twilter peeps!) and I were partnered up by Sandi of Quilt Cabana Patterns for Sandi's Spring Postcard Swap. I love doing these postcards! It's a great, bite-sized way to try out new techniques, play with design principles or color combinations, and just all around have a good time.

Here's the postcard Kati sent me--a much-needed glimpse of spring while it was still snowing outside (despite the calendar).

It's wonderful! I love the colors she used, the shape of the tulips and the leaves, and the stitching designs. I especially like how the leaves look like they're jumping right up off the postcard. They're so happy!

Thanks so much, Kati! It's still sitting on my desk, reminding me that yes, spring WILL come eventually!

And here's the postcard I sent Kati.

I was double-dipping and used the postcard as homework for my design study group. We were supposed to do something using a triadic color scheme, so I chose purple, orange, and green. I made the "binding" by fusing narrow strips of one of my hand-dyed fabrics down, intentionally cutting it so I'd get the gradation of color along the edges.

I would've been happier if I'd used a brighter white background, I think. The cream color sort of tones everything down more than I'd like. Overall, though, I was pleased with the results. I mailed it in an envelope, though, as I wasn't sure the thread fabric would survive if I didn't!

Here's a detail shot--I was trying to catch the light so you could see the sparkles in the orange center. That's caused by the Angelina fibers I included in the thread fabric.

You can also sort of see that I did a running stitch a little in from the edge of the thread fabrics to tack it down securely but allow for some fringing on the outside all the way around.

I got to play with a couple of techniques on this.

The background and leaves were basically crumb blocks I made using random pieces of fabric--no foundation. I just started stitching stuff together until I made something big enough that I could then use to cut my shapes/background from. It's an age-old method, though I used Victoria Findlay Wolfe's 15 Minutes of Play book for inspiration. I've not done it before, though, so it was fun to mess with!

The petals and center are made from "fabric" I created using thread and water-soluble stabilizer. I did this technique once a year or more ago as a test project. This time, I wanted to see what would happen if I created a larger piece to cut into shapes. It worked great, though you need to use it for something you really want fuzzy edges on.

I've showed this to a couple of people and they wanted to learn how to do it, so I'm including a tutorial here. I didn't make this up myself, but have seen the technique in so many places now I honestly can't remember where I saw it first, and I just do it off the top of my head with no reference to specific instructions anywhere. So don't give me credit for the technique...just for this particular explanation of it!

I didn't remember to take pictures of each step, so I've added the pictures I did remember to take here and there; sometimes they relate to the step, sometimes they're just so you can see a little detail here and there. I'm also posting them slightly higher res than usual so you may be able to click in closer to see the detail of the thread fabric.

Thread Fabric Tutorial

To do this, you need:

  • Water soluble stabilizer. There are several options for this type of stabilizer; yours may not look like mine as mine's quite old at this point (Sulky brand, inherited from Mom, probably at least 5-7 years old or more). You just need a stabilizer that dissolves in water, regardless of brand or appearance.
  • An embroidery hoop that will easily fit within the throat space of your sewing machine, and is narrow enough to be able to fit under the presser foot. (Mine's an 8" diameter plastic cheapo-model; works great for this!)
  • Thread in the color of your choice to use for anchoring everything down (variegated is very nice; type of thread doesn't really matter much--whatever works best for you in free motion quilting);
  • Scraps of yarn, funky thread, cording, tiny scraps of fabric, Angelina fibers, or other textiles to create the fabric. Avoid anything too nubby as it might rip the stabilizer while you're working.
  • A bowl of water or a sink, and a drop or two of fabric softener (optional)

A note about color choice: Use whatever you want--the funkier the better! Make sure you've got at least some color variation for interest, but also keep in mind that the more you stitch, the more the colors of textiles will get blended into your stitching thread. On my orange piece, I went back in with a different variegated thread at the end because it had blended too much and didn't have quite enough color variation for my taste. That's the beauty of this technique, though--you can keep stitching away until you're happy with the results!

The Play-by-Play

1. Cut two pieces of water soluble stabilizer approximately the same size, a few inches larger than you want your finished piece to be.

2. Lay one piece inside one half of your embroidery hoop. (It's easier to do this now than move it into the hoop later when it's covered in scraps!) Make sure enough extends outside the hoop that it holds firm when the hoop is assembled. Press the stabilizer down so it's sitting on the table surface, and squish the sides over the sides of the hoop as much as possible--the less the scraps get shaken around later when you put the hoop together, the better.

3. Randomly spread your scraps of textiles, fibers, and so forth, on the stabilizer within the space of the embroidery hoop. Be sure to leave enough margin around the edge that you'll be able to get your sewing machine presser foot as far to the edges of your scrap pile as possible. You can pile scraps on top of each other, but try to keep the level of the pile fairly even all the way across. The thicker/more evenly spread your pile, the more opaque your thread fabric will be; a looser, more spread out pile will give a lacier effect. You don't have to be exact about it, but it helps in the stitching if things are pretty even. Higher spots can catch the presser foot and cause problems. If you have a longer length of yarn, loop it around on itself a bit to create interesting designs. Adding some Angelina fibers can create fun sparkle. Cut loose and play with what you can throw in there!

4. When you're satisfied with your collection, lay the other piece of stabilizer on top of it and secure it in the embroidery hoop. Note: Have it so that the stabilizer lays flat on the surface when it's in the hoop, not raised from the surface. In other words, it should be the reverse of what you'd normally do if you were embroidering by hand. Does that make sense? (You should be able to see that in the picture here.)

5. Now comes the really fun part! With a great thread in your machine, and your machine set up for free motion quilting, slide that puppy under your needle and go to town! Stipple, loop-de-loop, jiggidy-jaggedy...just make sure you've stitched enough to secure all those little bits and scraps down. As mentioned above in the "piling your thread" section, stitching more densely makes a more opaque thread fabric, stitching more spaced apart makes a lacier effect. Just make sure you stitch enough that the fabric actually holds together when the stabilizer is removed.

What's even better? Tension doesn't matter! If you see skipped stitches or "eyelashes" on the back, who cares? You're creating fabric! Thread nests can be easily disguised simply by stitching over them again--they become part of the texture of the fabric. (Ahem. Ask me how I know.)

The only problem that can occur in this step is if your stabilizer tears apart while you're stitching. (Again. Ahem. I know these things because....) This can happen if your pile is uneven or you have a textile that's too nubby, as mentioned above. Dull needles may also cause it. Small rips--just back up, and stitch over it to make sure the thread fabric is intact. Big rips, carefully dismantle the hoop and lay a third piece of stabilizer over the top, then start stitching again.

6. When you're happy with where you're at, take a deep breath, grin, then pop that sucker out of the embroidery hoop. If you want to avoid too much extra goop having to dissolve, you can trim off any excess stabilizer as I did in the picture here, but it's not necessary. Soak your thread fabric in a bowl of warm water to dissolve the stabilizer, or follow the directions on the package. I found it helpful to soak it for awhile, then rinse it under running water and rub it gently in my fingers, and then soak it again. I think I did this maybe three times over the course of a couple of TV shows that evening. In the last soak, I added a couple of drops of fabric softener--it helps release the last of the stabilizer and make a more pliable thread fabric.

I don't know exactly how long it takes to dry, since it was a full day before I had time to get back to it again, but I'd allow a few hours to be on the safe side. You can always hit it with a blow dryer as well, depending on what fibers you used.

Use good fabric scissors to cut it into shapes if desired. In fact, if you can, try to use really, really good applique scissors--the kind with the little grippy teeth work great to slice right through the variety of textiles without shredding. Again, I just used a straight-stitch about 1/8" in from the edge all around to stitch mine down, but you can attach it by hand, or tacking it in a few places--all depends on the effect you want in the end.

This is a super-super fun technique. I've gotten in the habit of saving all the raveled threads off the edges of my newly-washed hand-dyes for future use as thread fabric!

So, gonna try it? Huh? Huh?


March Update on Craftsy Class Progress

(If you're looking for the 2014 Quilty Resolutions Check-in Giveaway and Linky Party, click here.)

Dang, but I've got too many blog posts all backing up on each other right now! It's apparently either drought or downpour around here in terms of my blogging. Or, perhaps I should say, "blizzard or spring," which is far more apropos of the climate out my window.

In any case, it's pretty much time for the monthly update on my 2014 Quilty Resolutions goal of completing as many of my Craftsy classes as possible. I'm posting this now rather than waiting until the 31st because I have a lot of other stuff to get done this weekend--probably not including a Craftsy class, unfortunately.

I feel like I've had a lot of forward motion this month, but no actual completions. I'm re-ordering how I normally present these lists so that most recent stuff is on top.

By the way, before I get started, you may want to note that Craftsy is currently having a big sale on fabric and yarn right now, through Friday at midnight. Click on the banner on the right  of this page to take you directly to the sale, though you can use any Craftsy link on this page and find the sale info once you're there.

Classes in Progress

Current count: 3

  • Stupendous Stitching with Carol Ann Waugh--so dang close to done! In fact, so close that you might be getting another blog post in a couple of days with a finish. I debated going ahead and counting it as done anyway, but in the name of truly holding myself accountable, I can't quite bring myself to do that.
  • Thread Art with Lola Jenkins--I haven't actually done a whole lot on this yet other than watching all the lessons awhile back and choosing what image I'm going to use, although I've had some further thoughts in the last couple of weeks about things I might do on the project. So, if "thinking about it" counts as progress...
  • Beyond Basic Machine Quilting with Ann Petersen--still waffling between using some of my hand-dyes to make the basic wholecloth quilt project as she describes for this class, versus just pulling her designs and using them on a UFO. Her class designs might work well on my Rapid Fire Hunter's Star that's still waiting to be quilted, but I also think her class project would look great done with my hand-dyes. Waffle...waffle....

Classes added this month

Dang it. 1. I blame @nonnie_p.

  • Design It, Quilt It: Freeform Quilting Techniques with Cindy Needham. Nonnie was tweeting away one afternoon a few weeks back about how much she loved Cindy Needham's classes and how much they'd helped her and gee, wasn't it great that her classes were on sale... "Dang you, Nonnie!" {shaking fist in air over head}

Completed Classes (all topics)

Current count: 20 (+0 from last month, but see comments about a near-completion above!)

Classes To Be Completed

Current count: 17 (will change to 18 when I add my new class to this list...)

(Usual transparency statement: This post contains affiliate links and I will be compensated if you make a purchase after clicking on my links. Thanks for supporting this podcast and blog!)

Hand-dyed Results ('n link to 2014QR giveaway)

If you're looking for the 2014 Quilty Resolutions Check-in Giveaway and Linky Party blog post, click here!

Meanwhile, back at the ranch...Here's what's been going on in my life while y'all have been checking in and linking up!

Despite a flooding stationary tub crisis and dyeing my hand a rather funereal shade of blue (which, actually, was partly related to aforementioned flooding crisis)...

I finally managed to get my most recent set of hand-dyes rinsed, washed, dried, pressed, and photographed!

If you recall my previous blog post, I started out by redoing some of the gradations I'd done in Frieda Anderson's dye class while I was in Lancaster. I wanted to be able to more closely follow the process and take notes on recipes and so forth. Somehow I hadn't managed to bring home the handouts from class, so I was going by the recipes in her book Fabric to Dye For.

The gradation at the top of this photo was the first one done in Frieda's class. The one on the bottom was the one I did at home this weekend. Most look more or less the same, but a couple are slightly different, and others are very different. There are several possible reasons for that--variations in recipes, variations in procedure, variations in water...

In any case, I'm not sweating it. I'm keeping samples of the ones I did here at home as representative for my notes with the recipes I used and all sort of other useful-for-the-future factoids.

And then, just for fun, I'd thrown in...

...some bamboo socks (PFD from Dharma Trading). These were dyed in straight Fuschia, Turquoise, and Lemon Yellow dyes (ProChem names). You can see that, due to aforementioned flooding crisis, I had to fast-track the rinsing process and thereby ended up with some color migration. Minor-league frustrating, but since these socks are for me and I'll only be wearing them under jeans, no one will see that. So shhhh...keep it just between us.

And then...

A pareo (I finally remembered the word!) for myself this summer. A pareo is the cloth you wrap around yourself when you're wearing a bathing suit. I couldn't get the whole thing in one picture, so this is one half of it...

...And then the other half...

I mostly took this second view because you can see more of the tangerine dye in this one (upper right). That was one of the new colors I was experimenting with. It looks very brown in powder form, so I was gratified to see what a beautiful orange it turns into. This was ice-dyed, by the way. It looks a little less mottled because there was a whole lotta fabric and only a little ice, so it doesn't have quite as strong an ice-dyed effect as others.

I may do more of these--they're fun. Anyone want a pareo? Tee hee.

And then--because who can resist?--more baby stuff!

I'm so pleased! These turned out great! And ya gotta love the little caps too! Don't you just want one? Again, it's all bamboo. The one on the left was ice-dyed, purple and teal. Probably my favorite combo to ice-dye because it just gives the most interesting results. Love the shades of gray that appear!

The middle one was rubber-banded and dyed in a teal-ish mixture. Trying to get those rubber bands off in a hurry (did I mention the flooding already?) is what caused the blue fingers. Rubber bands and rubber gloves don't mix, so I finally bagged the gloves. I love the effect of the onesie, when I don't let myself think, "Gee, kinda looks like an old-timey prison uniform or something." 

The orange onesie on the side is upside-down because I used Color Magnet and stenciled my grand-niece's name on the front. It turned out great, but I don't want to broadcast her name without permission. The Color Magnet draws more dye to the spot where you use it, so her name is a darker orange than the rest of the onesie.

Fortunately, no dye migration on any of the baby clothes. I'm really pleased with how they all turned out.

Mr. Plumber showed up bright and early this morning, and we're hoping the flooding issue has been solved. However, he also informed me that the pump is well past it's average life span. Bully. Just another appliance to add to our list of "everything needs to be replaced at the same time."


First Quarter 2014 Quilty Resolutions Check-In

You knew it was coming!

It's time to check in with your progress on your 2014 quilty resolutions!

Did you make a quilt-related resolution for 2014 through my podcast/blog? Did you make one on your own, but not through my January giveaway? Either way, you can still play along now!

I'll be drawing a name at random from the Rafflecopter widget below on Sunday, March 30th. The winner will get these four lovely fat quarters!

For some of you, this will be a two-step process. For others, only one!

First step for everyone: Leave a comment on this blog post with your progress, and then make sure you enter the giveaway via the Rafflecopter widget immediately below. (I'll only see your name through Rafflecopter for the drawing, I won't be trying to count up names in the comments.)

Second step for bloggers: If you've got a blog, write about your progress on your quilty resolutions and link up here! To enter the linky party, click on the link below reading "An InLinkz Link-Up." Follow the directions. (Remember, you still have to enter the Rafflecopter giveaway above. This linky party is just so others know about your blog and can come for a visit!) No fears--participating in the linky party does NOT earn bloggers an additional leg-up than non-bloggers in the giveaway. It's just for kicks n' giggles!

Looking forward to hearing your progress!

Mad Quilt Scientist Finally Back in Action

I woke up feeling like I was in recovery mode, for some reason, and decided I wanted a pajama day today (Saturday). Since I don't worry too much whether I get dye on my pajamas, I headed to the basement as soon as I felt caffeinated enough. As it turns out, I had about a half hour of sorting and organizing to do since things had gotten a bit stacked up, and I had all sorts of new dye-playthings to pet and then put away. While I was sorting, I was pondering what I most wanted to do. Turns out, I really wanted to re-do Frieda Anderson's gradations again at home so that the color mixes would really sink into my brain and I could take better notes. I also chose not to work nearly so fast as we'd sped through them in class (and a whole lot cleaner!), so I only got one set of gradations done in just slightly less than the time it had taken us to do two in class.

gradation1WIP.jpg

You're seeing 12 fat quarters soaking in everything from Sun Yellow to Fuschia to Intense Blue (different names, but same colors that Frieda had us using for the first set of gradations.) After some internal debate, I decided to go Straight Frieda on this one and use her method of mixing colors and soaking in soda ash first, as opposed to Ann Johnston's method (different dye mix, soda ash comes later) which I've been using most often in the last year. This way I can do a more direct comparison with what I came home with from the class last week.

Okay, ummm... so it might just be possible that I used some of the remaining dye concentrate to, just maybe, do some more bamboo baby clothes for my great-niece. Babies do grow, you know. And that bamboo stuff is mighty cool. I wish I could have me some adult-sized hand-dyed bamboo onesies, donchaknow.

On the other hand, yep, I am also dyeing some stuff for myself--mostly experimenting for future dye projects for other people down the road.

So I cleaned out the icemaker in our freezer.

One of these bins contains more baby clothes, but one is something for me.

The one on the left is a dye combination I've used in the past that turned out kind of cool; I'm hoping for similar cool this time. The one on the right is three new-to-me dyes and one that I've had for awhile. Two of the new ones shouldn't be too much of a surprise, but I have no idea what the other one will do. And that's the fun of it! (The white patches you see are a few run-away ice cubes I dumped on the top after I'd already put the dye on.)

But wait, the fun isn't over yet! I've got tomorrow's dye playdate already soaking...

(With apologies for the bad pictures--taking them on my cell phone wearing rubber gloves...not good photography praxis!)

Oh, and one more thing...I've secured two big giveaway items and am working on a third for my fourth podcastaversary coming up--woot! Next week, First Quarter 2014 Quilty Resolutions Check-In Giveaway; The week after, Fourth Podcastaversary Giveaway! Does the fun never end?


Lancaster Report--Part 3 (The Haul)

Friday, Day 3 (with some Saturday, Day 4--homeward bound) thrown in

Friday was my day to see the show and visit the vendors. It was a very nice show, although relatively small. We started when the show opened in the morning and were able to see all the quilts by about lunch time--and that wasn't rushing through. I spent quite a bit of time studying a few that particularly held my interest.

I didn't check into the online posting rules for the show, so I'm not going to risk posting any photos here. Sorry about that. To tell the truth, though, I didn't even take that many pictures. After having seen a few national shows now, I have learned that I rarely actually go back to look at my photos later. I think I took all of about five photos of quilts with details I wanted to remember for my future reference later (you know, the "Hmmm....how did they do that?" photos). Indeed, I'd even handed off my good camera to my friend who'd accidentally left hers back in the hotel, and she was snapping left and right so I knew I'd eventually see the pics anyway.

I did get to see Katie's Corgi Fairytale quilt hanging--it's always a thrill to see a name you recognize!

I really enjoyed the show--the fact that it was small actually made it more manageable for me. I love Houston but I have to break the show up into segments so I don't get over-stim. There was a partial display of the applique quilts from Cairo that I'd seen in Paducah--it was nice seeing some of those again. They're beautiful. There was a nice inclusion of art quilts alongside the traditional, and there was a modern quilt challenge (where Katie's quilt was included). So, for a smaller show, they did a good job--in my opinion, anyway--of keeping it diverse.

And then, of course, the vendors! You've already seen my purchase from ProChemical and Dye in a previous post. Here are pics of everything else that came with me.

Clarification: Most of this was purchased at the show, but we also visited Burkholder's Fabrics on the way home on Saturday based on several listener recommendations, and I included all of my purchases from both places together in the photos.

I've seen this batting sampler at every show I've been to. The first time, I thought, "Why would I want that?" (I was a pretty new quilter at the time.) The second time, I thought, "I could see where that would come in handy, but no." The third time, I thought, "I think I'd like to get that, but I'll wait and see." When I went back to the booth later, they were out. This time, the first time I saw them, I grabbed it and paid. I'm going to use it to practice machine quilting at the same time as I experience the different types of batting.

In the same vein, I'd decided I would pick up a variety of threads at this show--also to use in my FMQ practice so I could easily test them out.

I got some bobbin threads in neutrals, some pretties and variegateds, and a few that were the ends of spools from the manufacturers (think: remnants). The remnant spools were sold three to a bag for something like $5.

Next, I picked up some great fabric scraps from a Thai fabric vendor. If I recall, everything in the bag (the stuff in the pile in the picture) was cotton but the rolled fabrics are nubby silk.

Boy, that was a fun booth. I could've bought a lot more but I restrained myself.

Way back in a dark and very chilly corner was a great vendor who met my needs for small bunches of funky yarn to use as embellishments. And he had a great accent, as he was from Australia. (@ozzypip!) Again, I could've bought a lot more but restrained myself. I picked up everything in the center and right from him. He told me he'd bought that wool right off the sheep. I responded, "Wow! She's a pretty sheep then, all burgundy like that." He looked at me blankly and said, "I dyed the wool after it was off the sheep." Okay, so he didn't get my joke. I'll assume he was just tired at the end of a long week.

The embroidery threads on the left were from a different vendor specializing in felted wool projects. I don't know if you can see it in this picture but the threads I bought from her are all really gorgeous variegated colors. Very subtle, but yummy.

Next up, fat quarters. I only purchased the four African fat quarters in the center--referred to in my previous blog post about my string star quilt. The fat quarters on the left were from BFF/BQF Katie who had gotten them from somewhere but they weren't to her taste, so she offered them to me if I was interested. I'm not sure what I'll do with them, but they'd make a cute donation something-or-other. The batiks on the right were also a gift that all three of us received and divided up between us.

In the "Less Interesting but Useful" category comes my collection of tools n' notions.

A few new stabilizers, another marking pencil and different colored refills, some tulle to use in upcoming projects, thread cards for future reference, and a big ol' jug of my favorite scent of Mary Ellen's Best Press: Cherry Blossom. The only LQS that carries jugs of MEBP up here only carries the unscented, which is fine, but I do love me some cherry blossom. Well timed, too, since I used the last little bit of my previous jug of MEPB pressing the hand-dyeds from Frieda's class.

Oh--speaking of Frieda's class--I found a picture of a couple more fabrics I dyed there that I'd forgotten to include. I did two fat quarters "pot luck" style. IOW, I took some of the leftover dye from a couple of the gradations and dumped it on fabric in a baggie. They're not great on their own, but will make good backgrounds for practicing machine quilting.

Yep, I did get a couple of books. One is on Shibori techniques for hand-dyeing, something I'll be playing with this spring. The other is one that Katie found for me at Burkholders. You all complain about me spending your money--Katie is great at spending mine! Sue Spargo's stitching book is pricey, but fantastic. I'll be talking about it in my next podcast episode as I'm already using it.

Finally, this wasn't at all quilt related but it was something I couldn't resist. I've become a scarf/shawl person. They're great for travelers; when you spend so much of your time on planes and in conference rooms you never know whether you're going to be brutally hot or freezing cold. The secret is dressing in layers and having shawls that you can wrap up in or stuff in your purse. I have a bunch of shawls that I travel with, and I couldn't resist adding this gorgeous one to my collection.

I can't wear most wool, but this one was goat's wool and not at all itchy. I'm in serious love. (And, for once, in this vendor's booth I was able to spend Katie's money as I talked her into buying a different beautiful wrap that she'll be able to wear to the office.)

Friday evening

Friday night, Lori and I attended Ami Simm's "Worst Quilt in the World with a Gong Show Twist" presentation. It was an absolute hoot, and I ended up taking photos for Ami on her iPhone because I was the only one who'd admit to knowing how to use one after she stood there for a few seconds waiting for a volunteer! (Here's hoping the pictures came out!)

It was a great show, as we'd expected. Ami is a hoot. Have I said that before?


Saturday, Heading Home

We'd originally planned to go home on Sunday but by Friday night, the three of us decided we'd done everything we'd wanted to do at the show. None of us had signed up for anything on Saturday. So we decided to leave a day early and take our time getting home. We had breakfast at the Tomato Pie Cafe in Lititz, recommended to us by a Lancaster Visitor's Bureau volunteer at the show. And she did not steer us wrong! It was fantastic! I had a "flipper" (which is their name for an omelette) with goat cheese and roasted beets. A-freaking-mazing. We ate breakfast at 9a and didn't need to stop for lunch until 3!

Lititz is a lovely little town--definitely a place we'd visit again.

But then, there's Burkholders. Despite my GPS lady completely losing us in the countryside, we found our way there and I had the joy of my second meet-up of the week!

Great to meet Torie (@torieQWQ) and Nicole (@1c4quilting)! And Nicole's daughter who was our photographer and shall remain nameless for safety reasons, but was absolutely lovely and I had a good time with her too.

And then we were home again home again, jiggity jig.

I enjoyed Lancaster and will most definitely be going back again in the future!


Lancaster Report--Part 2

And there was night, and there was dawn, and so begins...

Day 2 (Thursday)

Mad Quilt Scientist in her element!

Mad Quilt Scientist in her element!

On the second full day of Quilt Week, Lori and I were both in Frieda Anderson's dye class for the whole day. (Lori has some pictures on her camera--when I get them, I'll post them here.)

Since I'm familiar with Frieda's dye method (I own her book), I wasn't really expecting to learn anything new. I was looking forward to spending the day playing in dye, and I was looking forward to doing it with one of my BFF/BQFs. We were to be paired up in the class, so Lori and I got to work together. Lori has done a little dyeing but not as much as me, so when Frieda suggested that one person of each pair would be the "clean person" and the other the "dirty person" in the morning, and then switch roles in the afternoon, I offered to Lori that she could be Dirty Girl all day. That actually worked quite well for us because we were able to get into quite the effective rhythm once we both got the hang of our roles. And yes, I was thinking ahead. Now I get to call her Dirty Girl next time we're in a guild meeting. FTW.

The only slight hitch was that there was a mistake in the supply list. The list had said to bring one bucket and one dishpan to share per pair; Frieda had actually wanted us to each bring one, so we'd have two per pair. That created a little bit of an issue with keeping our work stations clean because we ended up having a very small container to use as our rinse pan, and a small bowl for smooshing the fabric around in the dye before putting it in its final transport container.

The other small hitch was that Frieda had adjusted her plans for the class and rather than doing two gradations, with a total of 24 fabrics, she decided we'd do four gradations, 48 fabrics total. I had enough fabric with me to do that if I split them into smaller pieces, but Frieda had shipped extra fabric for the class so I bought some off her to be able to do 48 fat quarters rather than having to do some fat-eighths. The only reason it became a hitch was that I'd brought 24 containers with seals for transporting the fabrics home. Fortunately, I'd also thrown a couple of boxes of Zip-locs in the car in case we didn't have enough space for me to use the containers. Lori and I both had all our fabrics in the baggies at the end, which meant two large garbage bags filled with wet fabric in baggies. It could've been a recipe for disaster but it mostly worked out okay.

We labeled all the fabrics 1-12 for each gradation, but as I've talked about in previous hand-dyeing posts in this blog, black sharpie tends to disappear when you're dyeing dark colors. When I washed my fabrics at home, I lost several of the markings. Therefore, in this "Reveal" photo, I made my best guess at where some of the fabrics belong in the gradation. Ultimately it doesn't matter since I'll be breaking up the fabrics to use them anyway. I may do the gradations again sometime at home when I can control the results better, and label them more permanently for my records.

Meanwhile, aren't they pretty?

The first one on the left is"cool" yellow, red, and blue; the second set is that same set of colors diluted for pastels. The third set is a "warm" yellow, red, and blue; the fourth set is those warm colors mixed with black.

No, I didn't really learn anything new in the class, other than confirming for myself that I hate using baggies in dyeing. Give me a nice, hard-sided sealable container any day. But I really enjoyed Frieda Anderson. She's very laid back and funny, a great teacher (there were lots of dyeing newbies in the room and she did very well with them), and had lots of extra supplies for those of us, ahem, who may have had to grab a garbage bag out of the hotel on the way to class to use as a table covering only to find out it wasn't waterproof and was letting dye through onto the table underneath. In any case, I'd look forward to taking a class with her again.

And I just had to do her the favor of buying serious yardage of PFD fabric off her at the end of class, just so she wouldn't have to ship as much home. I'm such a kind person, really. Goodness of my heart n' all that.

By the way...all those raveled threads you have to yank off the edge of the fabric after it's been through the laundry?

Yummy!

Even if you just stash it in a jar and call it "decor," you're going to enjoy it. But oh, the things I can do with a wad of pretty thread!

So now, perhaps, you can understand why I hit a particular vendor at Lancaster before I even got to Lancaster...

(Some of these are simply replacing colors I'm nearly out of, some are new. Plus I bought samplers of acid dyes to use on wool, and a marbeling kit. Play Day!)

None of us had anything on the schedule for Thursday night so we hung out at the pool and actually got a decently-early bedtime. Friday was the first time I was actually going to see the show, so I was jazzed. Stay posted for another update...

Lancaster Report--Part 1

I had so much fun at the AQS Quiltweek in Lancaster that to try to report in on everything in a single blog would be ridiculous. So I'm going to piecemeal it and do several blog posts. For the most part, they'll go through the week chronologically but I may throw some thematic stuff in there as well. So, let's get started with...

Setting the Scene

First off, here's a pic of my BFF/BQFs Lori and Katie standing with me in front of the AQS Quiltweek admission booth. This pic was actually taken later in the week, but it'll help you picture who I'm talking about in all these posts.

We stayed at the Best Western Eden Resort, which is about 10 minutes away from the Lancaster County Convention Center where the show is held. It was a great place. The beds were extremely comfortable and it's been recently renovated so everything was brand-spanking new. The indoor pool was just gorgeous, although strangely it was a mix of salt water and chlorinated water, which I haven't encountered in an indoor pool in the northeast before. The only downside was that with three in the room, I'd requested a rollaway bed. Their definition of rollaway bed is "air mattress." We rotated who got to sleep on it each night.

Day 1 (Wednesday)

I spent the first day in a full-day class with Ami Simms making a String Star quilt. I mostly took it because I really enjoy Ami's sense of humor and thought it would be fun to take a class with her. The project was incidental. Still n' all, I had fun making the project and I surprised myself by being one of maybe two or three people who actually got all the blocks made for the center. I was en fuego! None of us got it completely put together. She didn't really expect us to, it seems; the purpose of the class was to show us the technique and let us get a running head start.

String Star with African fabrics

String Star with African fabrics

I talked about the African fabrics I used in a previous blog post. I wasn't sure I was going to love my background fabric--I was a little worried it would end up looking too busy. I'm glad to say that I'm thrilled. It works beautifully. I couldn't be happier!

I still need to piece all the blocks together. Then I'll be adding a narrow border of more background fabric to float the star a little bit.

Detail of background

Detail of background

For the outside border, at the moment anyway, I plan to do what Ami Simms did on hers: more strip sets of the African fabrics all around the outside, with mitered corners. She'd warned that it takes more strips than you think it will so even though I have a lot left of each fat quarter I've already used for the blocks, I ended up picking up four more African fat quarters--likely from the same vendor I bought all the rest from years before--to give me some wiggle room. I'm going to strip them all up and sew them together to see how much border I might be able to get out of them. If I'm short, I'll add some batiks or hand-dyes. If I'm long, I'll throw the leftover into the backing or something. I just really want to use up all my African fat quarters.

I also made two new buddies during class--woo for new buddies! Ellen and Deb were a hoot to share tables with. Ellen was sitting alone at the table behind me but happened to be placed underneath one of the only actual lights in the room. (It was obnoxiously dark in there!) She kept inviting me to "Come to the light! Come to the light!" So I turned around and put my cutting mat on the empty end of her table behind my sewing space. We were sewing on Bernina machines--don't recall the model number. It took me a few minutes to get used to it but we were doing very basic sewing so it wasn't too bad. The Bernina woman (Mary Alice) was very nice and even figured out how to override some settings on my machine so it would behave more like I'm used to my Janome behaving. After that, I was flying!

And yes, Ami Simms was a great teacher. I picked up some tips for ironing fabric before cutting that will be useful. She had brought examples of string stars she's made to show us what works well and what maybe could be done differently--I really appreciated her showing us something she wasn't as happy with so we could discuss possibilities for backgrounds and such. She also did the lion's share of our pressing for us--at first, so she could check to make sure people weren't getting off track anywhere. Later, I think, just to allow us to be able to keep moving as quickly as possible. She was entertaining but educational at the same time. I'd take a class with her again anytime!

Meet-Up Number 1

Left to right: Julie, Judy, me, Jill, Sarah

Left to right: Julie, Judy, me, Jill, Sarah

After class was out, I had the joy of meeting up with four listeners. Woot for meet-ups and woot for listeners! Judy and I had actually met earlier in a vendor booth when she recognized my voice. (Not surprisingly, it was the ProChem Dye booth. Go figure.) Wednesday afternoon, I met up with Julie, Judy, Jill, and Sarah. Say that three times fast...

I coveted Judy's cardigan and will be checking out the Land's End website soon.

Sarah swears she's going to be using the fabric she just won in my recent giveaway almost immediately!

Julie gave me a lovely gift. It's a little pouch with that snappy-open kind of top that just makes you want to squeeze it and say " 'Salright" like the Parkay containers in those old commercials from my childhood. (And I might just have done that several times. Maybe.) I've had it in my purse ever since, waiting for me to figure out the perfect use for it. Thanks so much, Julie!

Evening Event: Author's Roundtable

Wednesday evening, Lori and I went to the Author's Roundtable which featured eight AQS authors demonstrating a technique or talking about the topic of their latest book. I'm definitely going to be trying out the fun, fast block technique that Billie Lauder demonstrated--it's perfect for a quick baby or wheelchair quilt, especially. I bought some Sulky foundation papers based on the Sulky person's demonstration (more about purchases later). And I enjoyed Edyta Sitar's presentation though I didn't end up purchasing any of her stuff. But I could see myself taking a class from her someday. She's charming. I really enjoyed all the authors' presentations, actually. Not a slow moment.

If you get a chance to do something like that at a show, take it. It's a great way to be introduced to what's new and happening, as well as get short snippets of a variety of potential teachers. I have Mom to thank for keying me into that. The first time I went to Houston was with Mom and she recommended I do whatever roundtables or round robins that I could to be exposed to as many techniques/methods/teachers as possible in a short period of time. I could then see what sparked my interest for following up later. And she was right! I've done it at most shows I've been to and have never been sorry.

After the author's roundtable, we all got back to our hotel room, did the requisite Show n' Tell of what we'd done during the day, and giggled until we couldn't stay awake any more. A true girls' night.

Stay tuned for Day 2...

Lancaster update

I don't have the pics off my camera yet but just posting a fast Lancaster update, while still in Lancaster!

So far, I've made all the blocks for the center of a string star quilt with Ami Simms, dyed 48 pieces of fabric with Frieda Anderson, met and had lunch with two lovely women, saw presentations by eight teachers on their latest techniques (and really want to make that great fast quilt technique that Billie Lauder showed us to make a donation baby quilt!), played for a few minutes on a couple of longarms in vendor booths during the 20 minutes I actually stepped foot in the show hall, and met up with four listeners--Judy, Julie, Jill, and Sarah, and try saying that three times fast.

Have I seen the show yet? Of course not. I've spent both days I've been here so far in class, and the show ends shortly after the afternoon classes release. So today (Friday) is my show day--finally! I may try to tweet some pics as I'm able; depends on how engrossed I get in what I'm looking at. I haven't spent much time with the vendors yet, although I bought a bunch of yardage of PFD fabric off of Frieda after class today. (I really was just trying to do her a favor so she wouldn't have to ship it home. Really.)

Our Saturday schedule is still up in the air--we're all going to see what we feel like at the end of today. I hope to be able to meet up with two more listeners (you know who you are!) sometime on Saturday--I'm staying in touch with them on Twitter to figure out the wheres and whens.

Our hotel is very nice and downtown Lancaster is lovely, so we're having a great time. Well, except our rotating schedule of which one of us gets to sleep on the air mattress. In any case, I'll do a full report after I get home, of course. Just figured I'd give you a quick preview!

As a note, Craftsy is having a sale this weekend--classes up to 50% off. You might want to check it out!

(Transparency: Clicking on Craftsy links or banners on this site help support this blog. Thank you!)

Lancaster Meet-Up

Okay, y'all: I just sent an email to everyone who contacted me with their availability for the meet-up at the AQS Quiltweek in Lancaster this week. So check your email!

If you didn't get an email and are planning on being there (especially on Wednesday, hint hint), be sure to email me or tweet me (@sandyquiltz). If you leave a comment on this blog post, I'll get it that way too, though if I don't have your email address I won't be able to get in touch with you.

At last count, there could be seven of us at the meet-up--Woohoo!!!!

And a very belated thank-you to...

spooldoily.jpg

...Tina (aka @Weezyworks).

Several weeks ago now...well, okay, maybe a couple of months, Tina sent me a very funny Christmas card and this beautiful little spool pin doily she'd crocheted. It's gorgeous. I immediately put it on my spool pin and have been using it ever since!

I apologize, Tina, for the delay in my response but I've been using it and admiring it every time I change my thread!


fromJackieBerdych.jpg

...and to Jackie (aka @SewExcitedQuilts)

I don't think I've already blogged about this one, anyway. Jackie sent me this around the holidays as well, and I've been using it for (ready for this one?) holding my earbuds in my purse. It's great! They don't get all caught up in everything else, and I can easily get hold of them!

 
ScrapitudethankyouDDR.jpg

...and to Diane (aka @ddrquilter)!

Diane sent me this when she sent her thank-you gift for Charlotte. I held off posting the picture until after Charlotte's gift-giving ceremony had been up for a bit.

It's lovely, Diane! You can see from the 3M tabs it's hanging in my sewing room/office...actually, right above my cutting table.

Thanks so much everyone! I'm very touched by your thoughtfulness, and I love that I'm surrounded every day in my office/sewing room (and my purse!) by my listeners! :-)


Boo Yah! Weekend Goals Met! Plus DPW, Scrapitude, and Daisy's Quilt Reveal

This time around, I did great on my weekend plans!

SDHDPWTop3914sm.jpg

Remember that Disappearing Pinwheel extravaganza from way back at the MLK Jr Day Sew-In? I finally got my top completed! I also did a backing for this one, a nice turqouise or aqua blue marbled cotton. It's now in the hands of the longarmer at my LQS. I'm having it pantographed, quilter's choice. Still haven't entirely decided what I'm going to do with this one but I'm thinking it may be a gift for a friend.


And now, the big reveal....

SDHScrapitude3914sm.jpg

My Scrapitude top!

I haven't come up with a spiffy name for this yet.

SDHScrapitudeborderdetail3914.jpg

The narrow inner border was from my stash, so the only purchased fabric for this was the outer border and backing.

I fell in love with this border fabric. Not at all what I'd originally had in mind when I ventured to my LQS to find something. I'd been thinking a large print multicolored floral to balance out all the sharp pointy things going on in the center. I'd seen the bolt of this fabric on the shelf and liked that it had all the colors I was looking for, but since it had the vibe of an Australian aboriginal print design I didn't think it would really fit the feel of the traditional scrappy top. Later in my search, the staffperson pulled it off the shelf and we laid it out next to the quilt. There was a moment of silence, and we both said, "...Oh." And then, "Oh..." again. I loved the way the border motif mimicked the shape of the block, and it spoke to the colors in the quilt. I fell in love with it. Unique and unexpected--even better.

I only debated it for several moments longer because it's a directional print with a distinct motif and I thought I'd hate myself for trying to work with that. Yeah, I probably would, but it was too perfect to pass up.

My original intention was to do all sorts of math to get those motifs to work out as perfectly as possible, by taking little tucks in the border  to pull the motifs together in a shorter repeat as needed. When it came right down to it, though...I was really trying to get the borders done in time to get the quilt to the LQS before it closed on Saturday. Plus, I'd already lost so many points and had so many things not meet up as they should've (you'll need to listen to my rant about a particular ruler for the backstory on that one) that this is nowhere near an heirloom or show-quality quilt anyway. It's going to be on a bed in my house...which bed is yet to be determined. So, in any case, me and my family are the only ones that will see it. My husband really likes it as-is, so I decided not to sweat the border and just get it on there.

Magically, and thankfully, this is the first fabric I've worked with in this way in years that was actually mostly printed on grain! As I cut the fabric lengthwise (so I wouldn't have to piece the border), it was mostly in line with the motif. Amazing. So my priority of at least having the motifs appear relatively straight along the borders worked out pretty dang well. I didn't worry about where the motifs ended or mitering borders to make them match or anything. We were in Get-'Er-Done mode and I was absolutely thrilled to Get-'Er-Done!

This is also now in the hands of my LQS longarmer and it's also going to get a pantograph. As I said to the woman taking my quilt, "If I'm ponying up for custom, it's going to be on a quilt where I can see all my points!"

StringStarPrep3914.jpg

Other projects done this weekend...

Got all my cutting done for my String Star class with Ami Simms at Lancaster AQS quilt week. I'm using various ethnic design fabrics. We're supposed to bring the uncut fabric to class "pressed and ready to cut." The best way I could think to do that was to press it, then lay it out flat one on top of another and carefully roll it all together. Here's hoping it's not a mess if we do get to the point of cutting that.

dyeclassprep.jpg

And I collected all my supplies for the dye class with Frieda Anderson. I already had most of it, but I did take this as an opportunity to pick up more small containers with lids from the Dollar Store--they're a good size for fat quarters and you can even scrunch a half yard down in there if you're going for the scrunchy look, which I normally am. Pack of five for a buck. Can't beat it.

I don't have to bring a ton of supplies because I did buy her kit, so she'll be giving us the dyes, gloves, a face mask, and some fabric. I'm also bringing extra fabric that I cut and folded later after I'd already taken this picture; she invited us to bring whatever else we might want to dye since we may have time to do more in the afternoon. I couldn't bring my dog (What? You can't imagine a Turquoise Retriever?) so I'm sticking with doing more PFD fabrics I can add to my collection.

I got more done on my Spring postcard swap--can't show that yet, though!

DaisysGrace3914.jpg

And, finally, in a last-Hurrah of the weekend, I got the binding on the quilt I won from Daisy in her giveaway a couple of months ago! Woot! If I recall, the name of the design is "State of Grace," so I've named this quilt "Daisy's Grace." My daughter wanted it for her dorm room, so I did a machine binding. She's very happy with it!

DD is holding it up for the photo, and she's standing on the second step up on our staircase. She refers to herself as "fun-sized," so this is the perfect size quilt for her. She'll easily be able to wrap herself up in it while...ahem...studying.

DaisysGracedetail.jpg

Detail of the pantograph design. I almost inevitably leave it up to "Quilter's Choice" on design and thread color--the most I'll usually say is "I want it to blend," or "I don't mind something that stands out on this one" or whatever. They used a nice beige thread that stands out a little, but not so much as to detract from the design. They always do a great job...which is why I usually say "Quilter's Choice!"

I am so thrilled to be able to report that I'm not longer feeling overwhelmed by the number of projects I've got going on! Getting all this done this weekend has  cleared off the top of my cutting table and my sewing table, plus a shelf or two. Things feel organized and in control again.

Breathe.


Souvenirs from Alaska

My husband just got back from being in Anchorage on business. This is his second time in as many years being there. Last year, he texted me said, "Hey, I just walked by a quilt shop!" He very kindly included a picture of the front door with the name of the shop.

You know how mean that is? I gave him cr*p when he got home about not getting me anything, although I didn't give him too much of it because he had brought me a beautiful, small stained-glass plate with native designs that still sits on the mantle of our fireplace.

This year, he texted me a picture of the door again. "Really, you COULD buy me souvenir fabric, you know!" I texted back. His response, "I wouldn't know what to get." "Oh, please," I said. "They'd just think you were the cutest thing coming and would love to help you out!"

Turns out, this time he did brave the quilt shop. He put himself at the mercy of the staff, described the kinds of quilting I normally do, and they made some choices for him. Well done, team!

So, thumbs up to The Quilted Raven in Anchorage!

AK1.jpg

These fat quarters are all done by Alaskan artist Cindy Shake at Cindy Shake Design.

The longer pieces have two each of two designs; one's swirlies and stars, the other is the dog sleds and mushers. (Anchorage is the public starting point of the Iditarod.)

AK3.jpg

I love the many ways fat quarters can be bundled in cute little packages. But I did break open that star collection so you could see those fabrics as well.

Dig those birds!

And what's that little thing down in the lower right?

AK4.jpg

Why, it's a button, of course. It was used in the tie on the packaging. It looks to me like a bone button, but don't quote me on that. Perhaps part of an antler? There was no identifying information.

I won't be putting this on clothes--it'll go in my "random embellishment jar" for safe-keeping.

AK2.jpg

Finally, a traditional seal-skin thimble like those used by the Inuit for generations.

I won't ever use it--it'll sit on a display shelf I have in my sewing room with some sewing-related trinkets he brought me back from a business trip to China, and an antique pincushion  my supervisor gave me for Christmas one year.

AK5.jpg

But before I put it on the shelf, I couldn't resist.

Some Unexciting Hand-Dyeing

Well, I *did* get back into my dye studio this past weekend.

Of sorts.

I finally cleaned up way-old dye concentrate. The last time I'd had a big dyeing session was probably the end of October or early November. Perhaps even before that. I hadn't dumped my dyes because I fully intended to get back down there to use them up. Never happened.

You see, dye concentrates are really only expected to last maybe 2-3 weeks (as long as you've not added soda ash), although I've stretched mine a couple of times as much as 5-6 weeks and there wasn't a noticeable difference. My basement is chill enough, which is probably key.

But. Ahem. Four months was likely seriously pushing it. However, because I'm big into experimentation, I decided to throw a few pieces of fabric into a few Way Old Dyes just to see what happened. The results are unexciting. What happens is that Way Old Dyes lose their chutzpah. The colors aren't as strong and didn't catch as well--it felt like a lot more was washing down the drain than usual.

grays.jpg

I did four fat quarters parfait-style (stacked one on top of another in a tall cylinder), and used up the leftover black dye concentrate, adding water so I'd get graded fabrics, the ones on top being lighter than the ones on bottom. And it worked, but they're all lighter gray than I think they would normally have been.

The one on the top in this photo is the lightest; I'd refer to it as "Ever-So-Slightly-Gray." It's basically a foggy white. The next one down is slightly darker although that's hard to see in this picture. The other two differ from each other mostly in the middles--the one on the bottom is more consistently dark than the one right above it.

I'm keeping them all, of course. I mean, really--who hasn't gone into their stash thinking, "I wish I had a really good foggy white"?

red1.jpg

The next set was also stacked parfait-style, but this time I used four different colors. I knew, with the colors I chose, I could end up with sort of a muddy yellowy-brown thing going on, but I dig muddy yellowy-browns. I think they're interesting.

In this set, the colors clearly came out more dulled than they would usually, And the bright red spots you see here and there are the visible evidence of the fact that the red dye concentrates had gotten distinctly crusty. Chunky, even. A bit of a crystallization thing happening.

red2.jpg

I believe (don't really remember now) that the four colors I used were Mixing Red, Mixing Blue, Golden Yellow, and Fuschia, one on top of the other. There's a couple of ways to do parfaits where you get more distinct separation between the layers of color while still getting some artistic blending. But I was just dumping stuff in to empty out dye bottles. Like I said, I wasn't particularly worrying about results--I just wanted to see how Way Old Dye would change.

red3.jpg

I won't say I'm happy or unhappy with the results. I actually got about what I expected to get: I had assumed Way Old Dye would lose some oomph. I have distinctly less oomph at 48 than I did at 28, so why would dye be any different?

I'm not excited by any of these fat quarters, but they're still usable. In fact, I'm thinking they might be fun to use to practice free motion quilting on. I won't feel like I've got anything to lose and if it turns out looking nice, so much the better!

red4.jpg

I wasn't able to use up all my Way Old Dye in these samples--I did end up dumping the rest down the sink. But now all my bottles are cleaned out and ready to go for when I've got the time to mix up fresh Spry New Dye.

Next week, when I'm at the AQS QuiltWeek in Lancaster, I'll be taking Frieda Anderson's hand-dyeing class. I have her book and have already used her dye techniques, but I haven't done the gradations using the recipes in her book, which is what we do in this class. So I'll have more fun hand-dyeing pictures in a couple of weeks! (And I'll be using Spry New Dye for that!)

What I'm Working On...and 2014 Quilty Resolution Spreadsheet

As I announced on this past weekend's podcast episode, I'll be doing a 2014 Quilty Resolutions First Quarter Check-in at the end of March. A few weeks from now I'll ask you to let everyone know how you're doing so far at keeping your 2014 resolutions and I'll choose a giveaway winner from those who play along. Even if you didn't participate in my resolution challenge, you can report in on your own quilty-related resolutions and how you're doing, and you'll still be eligible for the giveaway drawing.

A few of you, ahem, you know who you are, have admitted to me that you can't remember what you resolved. Perhaps next year's resolution should be, "Improve my memory." So here's a link to a public version of the 2014 Quilty Resolutions spreadsheet. I've removed everyone's email addresses and last names for Internet safety.

I'm looking forward to hearing how you're doing at our first check-in!

How am I doing with my resolutions?

SSinprogress.jpg

Well, as we all know, one of them had to do with Craftsy classes. I've been keeping you updated on that. I'm currently in the finishing stages of Stupendous Stitching with Carol Ann Waugh, and then I really want to get cracking on Thread Art with Lola Jenkins. I already know what artwork I'm going to use and am seriously jazzed!

I'm also going to start working on another machine quilting class (which double-dips in my resolutions) but I'm waffling a bit on which one. I own several, and they've all got benefits. I'm watching all the lessons in two of them now to see which one calls to me more at the moment. Eventually I'll do all of them in my queue, so I could really flip a coin. I honestly don't know why I'm waffling.

I'll do another update when I post the giveaway blog in another few weeks.

What else do I have in progress?

  • I have to do the cutting for my Ami Simms class at Lancaster, and gather all the supplies for my Frieda Anderson class. The first will take a whole lot longer than the second! For the dye class, I already own all the supplies--I just have to pull it together and figure out the simplest way to pack them so they're easy to carry into class.
  • Scrapitude still needs borders (already have the fabric), then I'm taking it to my LQS for longarming--I'll buy backing there. They have a nice selection of wide backing fabrics.
  • My Disappearing Pinwheel quilt still needs borders, and I'm piecing backing for that one (have fabric for both), then I'm also taking it to the same LQS for longarming.
  • My postcard for Sandi's Spring Postcard swap is in progress but I really need to get working on it as technically it's supposed to be in the mail before March 20 and I'm in Lancaster for a chunk of that time!
  • I've got the binding pieces cut for Daisy's Twitter Giveaway quilt top that I won; I just need to get that top bound.

I have no idea how this happened. I rarely, if ever, have so many things going at once. I usually shoot for no more than three projects--one in planning or cutting, one at the sewing machine, and one at handwork (binding) stage. I'm feeling a bit overwhelmed with all of this so I'm just staying organized and focused and reminding myself to just enjoy the process. If it doesn't feel like fun to work on something on a given day, I choose one of the other projects to work on. It's all about having fun, not stressing out!

February Update on Craftsy Class Progress

Here's my February update! A couple of people have mentioned how fast I seem to be whipping through these so far. There's good reason for that. The ones I've decided to focus on first were the ones I was very nearly already done with anyway, those that I thought I could easily accomplish within my current schedule, or those that I knew I'd pretty much just be watching and absorbing information for later use (such as knife skills for cooking). For the most part, however, now I've accomplished most of the classes on my list that fall into those categories. Future classes are going to take much longer so you won't be getting reviews quite so frequently.

Completed Classes (all topics)

Current count: 20 (+3 from last month--yippee!)

Classes in Progress

Current count: 2

Classes To Be Completed

Current count: 17 (-1 since last month, since two of the classes I finished weren't in this list in January's post.)

Classes added this month: None!

Craftsy Class Review: Complete Knife Skills with Brendan McDermott

Another cooking class instead of a quilting class. Hey, a girl's gotta eat.

I've been wanting to do a knife skills class for years. I've picked up plenty from watching cooking shows, checking out YouTube videos, and iPad apps. But it seems that everyone has different techniques and often the demos were poorly done. I do decently well at slicing and dicing, but knew I could use some improvement.

When I saw that Craftsy was offering a class named Complete Knife Skills--and offering it for free, no less!--I spent only a millisecond thinking, "But I already have so many dang classes I need to get through," before I clicked the button and sent it flying into my account.

Photo Feb 27, 4 48 33 PM.jpg

I probably chose a somewhat awkward time to start watching it--I was waiting at my gate in the airport heading home from vacation. I likely gave a few wandering TSA agents pause. "Keep an eye on that woman--she's watching something about knives." They'd have worried even more if they'd seen the grin on my face.

Brendan McDermott, the course instructor, is an absolute hoot. He's a younger guy with tattoos up and down his arms, shaved head, and a very dry sense of humor that just never ceased to entertain me. I texted the link to my 23-year-old son and 27-year-old nephew and told them they both had to take this class--not only because actually learning how to use a knife is one of the best things a beginning cook can do, but because I thought they'd seriously dig the instructor. I confess to getting the giggles when McDermott would pepper his instruction with comments like, "Die, carrot!" and "You can even get into a good-sized watermelon without having to come at it like a Spartan warrior."

As fair warning to those who may be more sensitive to this kind of thing: Once in a great while his language can get ever-so-slightly off-color (he referred to a partially-sliced butternut squash as a "big-a** carrot" which cracked me up, and uses the "d" word once or twice), but it's infrequent and, in my opinion, pretty mild. But we all have different words that push our buttons so you'd need to make your own judgments on that.

Okay, so it was entertaining. But is it informative? Abso-positively! I learned more from this class than I have from years of cooking shows and YouTube. He's very thorough. First and foremost, he's a huge proponent of knife safety, so throughout his demonstrations he's focused on safety as well as efficiency. Although many of the knife skills demos I've seen before have said things like "This is a safer way to do this," Brendan actually explains why it's safer, what the risks are of other methods (interestingly, often other methods I've seen on the cooking shows themselves!), and has just a few guidelines that, if you keep them in mind, will help you figure out how to keep your fingers on every time even if you forget everything else he's demonstrated.

He talks about which knives are essential and what you can do without, tips about cutting boards, and always explains why certain cutting techniques are better than others. The lessons include various types of cuts, and techniques for a variety of foods. He even talks throughout about what remnants left on the cutting board when you're done with your prep work well for stocks and which don't. Each lesson also ends with a "Helpful Hint" (after the close of the lesson, so pay attention--there's more!).

I can't recommend this class highly enough. Unless you're a trained, professional chef, you'll likely learn something. And even if you're a trained, professional chef, the entertainment value is worth it. What do you have to lose? It's free!

The Basics:

  • 5 lessons total, though two of those lessons have a ton of segments so the length of each lesson (not counting the Craftsy promo lesson 1) varies from 8 to 43 minutes.
  • The first lesson is just a brief introduction to Craftsy since this is a free class--it's a promotional tool for them. If you know Craftsy, you can skip lesson 1.
  • Lesson 2 is the introduction--Brendan tells you about himself, and then goes right into choosing knives, the four basic knives you should have in your kitchen, and a few other useful tips.
  • Lesson 3 gets into specifics: how to hold the knife, a variety of cuts, each demonstrated on a particular item and tips about those items as well (what he says about onions was a highlight of the course for me!).
  • Lesson 4 goes into "short cuts" for cutting particular items that can often give people trouble or just ways to go about things more efficiently and effectively (citrus, bell peppers, jalapenos, etc.)
  • Lesson 5 is a shorter lesson on how to sharpen and hone your blade.

I really do encourage you to check it out. This is one of my fave Craftsy classes ever, and you know that's saying a lot! Again, that's Complete Knife Skills with Brendan McDermott. Two thumbs up. Two thumbs that I now feel like I run a far lower risk of slicing off at some point in my future!

(Transparency statement if you haven't seen it before: using the Craftsy links on this blog help support this blog and podcast. Thanks!)