And now, it's time for my review of Building Flavorful Soups with Peter Berley.
As summer winds its way down towards fall, I start thinking of chilly nights with the smells of something tasty cooking on the stove. I've been wanting to focus some energies around learning how to build my own soups for awhile. The fact of the matter is, I only have one soup I make regularly that I use a recipe for (Pumpkin Bisque with Smoked Gouda--amazing); the rest I make up on my own anyway. But I wanted a few more ideas, better techniques, things that could send me off and running in any number of directions.

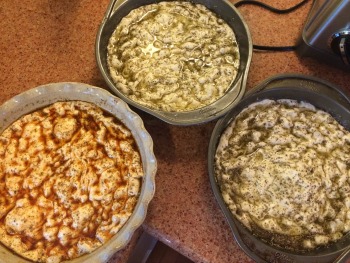
Parmesan broth with toast, a poached egg, shredded Gruyere, and chives.
And so, I bought this class. Peter Berley provides techniques and recipes for several types of broth that can be used as the base for a variety of soups. He starts out pretty simple, with a very basic tomato broth and a Parmesan broth, both of which I was immediately ready to try out myself. It uses Parmesan rinds and since I've gotten in the habit in recent years of buying good Parmesan and grinding it in my food processor, now I know what to do with all those rinds I slice off first!
I made the Parmesan broth and dressed it up exactly the way he suggested in the class--not too bad. I'd never poached an egg before without using my egg cooker--it didn't turn out pretty, but it worked.* And I was surprised that I actually enjoyed a poached egg floating around in a soup! Still n' all, I'll want to do some more doctoring to that one. I can imagine using the Parmesan broth with tortellini, diced tomatoes, and fresh basil, for example, or as a cooking liquid for any sort of pasta or rice. Yum.
I've bought a bunch of tomatoes to try out his method of making tomato broth, but our family plans changed on Sunday so I haven't had a chance to make it yet. I'm hoping to get to that sometime later this week, and turn the broth into tomato rice soup, a family fave.
I'm also looking forward to following his instructions for making chicken broth. It's similar to what I've seen before but has some differences to it, so I'm anxious to try it out. However, that will probably wait until a rainy weekend as it has more kitchen prep time involved.
Peter Berley has a very relaxed delivery. Indeed, sometimes I felt it was a little too relaxed. I've grown accustomed to food instructors who use cooking time as a chance to give more information, some chemistry background to what's happening on the stove or in the oven, suggest substitutions, and so forth. With Peter Berley, there is occasionally "dead air," and it feels a hair awkward at times. Still, he's easy to listen to when he is talking, and I did learn a fair amount more about making broths as bases for soups.
That being said, I do wish there had been something along the lines of the chart that Molly Stevens provides in her Secrets to Slow Cooking: Mastering the Braise class (see my review here), to give me more ideas about how to combine different ingredients within flavor profiles. He mentions variations in passing, but having an actual chart in the class materials would've been very helpful so I wouldn't have to keep running back to the different lessons to remind myself of the possibilities.
However, one soup helps keep away vampires and ghosts. So that's a win.
While this wasn't my favorite of the Craftsy cooking classes, I did still learn a lot from it and will be continuing to play around with his recipes and suggestions. The printed materials will stay in my kitchen recipe binder for reference. If you're a fan of soups, I do think this one is worth adding to your queue.
The Basics:
- 6 lessons, ranging from about 24 minutes to about 37 minutes (absent the first lesson which is his three minute introduction)
- Lessons cover vegetable and herb broths and soups, Japanese Dashi variations and Asian soups, using shellfish, meat, and poultry in broths, soups, and stews, and pureed soups.
- Many of the broths he covers are either vegetarian-friendly or could be easily made so. I was specifically watching for this as my daughter's a vegetarian.
- He briefly touches on refrigerating or freezing the broths, although he doesn't spend a long time on that.
So, for Building Flavorful Soups with Peter Berley, I think I'd give this class one thumbs-up, one thumb in the middle. Again, not my most favoritist of the cooking classes I've taken on Craftsy, but I definitely learned quite a bit and have some good ideas for moving forward. My second thumb would be fully up if there'd been a chart as I'd suggested above, or if Peter Berley had filled some of the dead air with more information about flavor profiles and other ingredients that play well together in soups with certain bases, that kind of thing.
*For instructions on poaching eggs, I did a quick refresh-my-memory check and used Alton Brown's method. Peter Berley doesn't cover that in the class.
(Transparency: Clicking on Craftsy links in this post helps support this podcast and blog. Thanks!)