Thinkin' about It Thursday

(I'm writing this before Thursday as on Thursday I'll be in my car heading across the border for my anniversary weekend trip with my husband. So here's my compilation of thoughts for the week leading up to Thursday.)

This week, I'm thinking...

Niagara on the Lake 2013

Niagara on the Lake 2013

  • How much I love fall. Have I said that before?
  • That I'm really ready for my anniversary weekend trip with my husband this weekend.
  • How we seemed to spend as little time as possible together in the couple of weeks leading up to our weekend trip just to be darn sure we were really ready for our weekend away.
  • How we love it when the timing is such that we end up taking our vacation weekend in Canada the same weekend as Canadian Thanksgiving.
  • That we're sneaky that way, getting two Thanksgiving dinners in a row.
  • That it's good we're going away this weekend because nearly as soon as I get home, I'm gone again for a week-long work-trip.
  • How I'm so glad I got my postcard done for Sandi's postcard swap last weekend so it could be in the mail before I spend a lot of the rest of the month gone.
  • How unusual it is that I'm ahead of a quilting deadline.
  • "Whee!"
Hiking in Balls Falls area 2008

Hiking in Balls Falls area 2008

  • That I'll get a ton of steps in this weekend as we like to go hiking at Ball's Falls and catching the arts and crafts festival they hold every year on their Thanksgiving weekend.
  • That it's been hard keeping my mind on work all week as I've looked forward to my time away.
  • How I am so ready to be gone.
  • That I can't wait to kick through leaves and smell fall everywhere around me all weekend long.
  • Vacation, here I come!

My 3rd Quarter Resolution Check-in & September Craftsy Class Update

Craftsy Logo

I suppose it's only fitting that, since I did the August update in the beginning of September, I should do the September update in the beginning of October. At some point I'll get myself back on track!

We just completed the third quarter check-in on the 2014 Quilty Resolutions. My three "monkeys" were (1) Craftsy classes, (2) using my stash whenever possible, and (3) machine quilting. I've done great on #2, using my stash--I've bought very little fabric this year except borders, backing, and binding, and half the time I was even able to get that out of my stash as well. (No, I don't count buying PFD fabric since that's a supply for my hand-dyeing--it's in a different mental category for me.) Monkey #3 is related to monkey #1 since many of my Craftsy classes are on machine quilting. So my progress on #1 has a positive impact on achieving #3--and I've been going great guns on #1! I've had a bit of a slow-down in completions this summer but progress is still steady.

New Completions

(+ 3)

Classes in Progress

(2)

Classes added this month

(0--woo!)

Classes To Be Completed

Current count:  16 (-3 from last month)

Completed Classes (all topics)

Current count: 36 (+3)

(Usual transparency statement: This post contains affiliate links and I will be compensated if you make a purchase after clicking on my links. Thanks for supporting this podcast and blog!)

Craftsy Class Review: Designing Modern Quilts with Weeks Ringle

Online Quilting Class

I feel like I'm a little behind in my Craftsy class reporting--I know I missed doing my update at the end of September. I'll catch up with that this week. 

Meanwhile, in the midst of all the cooking classes I've been having a ball with, I have done another quilt class. This one was a theory class rather than a project class, so I mostly watched the lessons and took notes. But more about that below.

Here's my review of Designing Modern Quilts with Weeks Ringle

The main thing to understand with this class is that although the phrase "modern quilts" is in the title, the information in the lessons applies across the board, regardless of the type of quilting you're doing. Weeks does give some definitions of modern quilts and modern design in lesson 2, and there are some design ideas towards the end that are related to modern quilt sensibilities more than traditional. Of course, all the quilts she uses as examples are modern quilts as well. Still n' all, even if you have no interest whatsoever in modern quilting, you'd learn quite a bit from this class and be able to apply it to your traditional or art quilts easily. (Lesson 9 is probably the most "modern-quilt specific" as it deals with deconstructed traditional blocks and moving beyond blocks altogether, which are definitely modern quilt material.)

Exploration on color inspiration from "Old Masters" paintings

Exploration on color inspiration from "Old Masters" paintings

There's no class project but she does include "explorations" in the material--exercises meant to help you practice the ideas from the lesson. Although I chose not to do most of the explorations myself because they were things I was already quite comfortable with or was already practicing in other ways, I enjoyed the fact that she incorporated a review of the explorations in the classes themselves, using other student samples from past classes. It's a helpful way for you to do your own practice and then compare it with what she describes from others' work, to get a feel for what you did well and where you may still need expanding.

I enjoyed Weeks Ringle's presence. I've been familiar with her and her husband Bill's work for years, and I have a slight recollection of having seen a lecture by the two of them some time ago at one of the Houston festivals I attended, but I definitely enjoyed the opportunity to experience her as a teacher. I'd love to be in an in-person class with her--I suspect she'd challenge you gently, if you will. In other words, she'd make you want to reach further than you're comfortable, but you'd feel like she was doing it with kid gloves. 

I can't say I had any earth-shattering insights from this class but I've been studying design pretty intensely for the last couple of years so Weeks was going over familiar ground for me. It does always help to see different types of examples of the same principles, though, just to broaden my vision of how things can play out. It's always worth getting the same information in a variety of ways to  help you understand it more deeply, so although all of this was known territory for me, I still think it was worth my time to go through her lessons to get a different perspective.

As stated above, this isn't a project class and there's really not much in the way of specific class projects even in the explorations. The explorations are meant to be done as tests, not completed quilts. The class materials include one pattern for a quilt if you're looking for something like that.

I'd definitely recommend this class if you're new to studying design principles. It's one of the few true design classes on Craftsy, so take advantage of it! I'd also recommend it even if you've done some studying of design and want to look at it from a different angle. 

And, if nothing else, there's tons of eye candy with her quilts!

The Basics

  • 10 lessons, ranging from 11 to nearly 40 minutes in length.
  • The introduction is a serious introduction. Weeks spends a little time telling you about herself, of course, but most of it is about the importance of studying design and how to lay your groundwork for the rest of the class. It's a 33 minute lesson, so you jump into the learning fast!
  • Lesson 2 is where she talks about what makes modern modern, and what is available to us today that wasn't available in generations past.
  • Lessons 3 and 4 address color theory, and although she covers the basics here (color wheel, color schemes and so forth), she does also talk about the messages that color sends, which is a nice touch.
  • Lesson 5 addresses using prints, which gives good information about benefits and challenges; lesson 6, on the flip side, is all about using solids.
  • Lessons 7 and 8 talk about composition and execution. I enjoyed the lesson on composition (over 40 minutes!) because, again, she talks about some basic information you've likely seen in other places but takes it in slightly different directions; lesson 8 also has a very helpful section on avoiding design pitfalls.
  • Lesson 9, as stated above, is one of the few that's probably more closely related to modern quilting than other lesson topics, because it's all about messing with tradition or going in completely new directions. 
  • Lesson 10 talks about quilting and finishing, but to be clear, you'll get a lot more information about quilting from classes devoted to that part of the process. That being said, in many of her examples throughout the whole class she also talks about the quilting motifs and why certain ones were chosen, so you get a lot of inspiration here.

And so, my final review of Designing Modern Quilts with Weeks RingleI'd give this class two thumbs up!

(Usual transparency statement: Using the Craftsy links in this post helps support this podcast and blog. Thanks!)


Announcing My New CafePress Store

I'm pleased to finally be able to announce that I now have a CafePress store up and running!

Check it out: www.cafepress.com/quiltingfortherestofus.

Sure, I've got some Quilting...for the Rest of Us logo items available if you want to join me in my morning coffee.

Or totebags for shop hops, or dufflebags and pajamas for retreats...

I was creating the logo items so I could order them myself, but if you'd like to have one too, the more the merrier!

But here's where I really had fun: Check out the sections of my store that have items featuring my photography.

In the "Landscapes and Florals" section, I have several great options for greeting cards, journals (notebooks), and other items. Some of the photos are used as straight photography; others have been edited using the Waterlogue app.

Several are seasonal. This image is my Fall Beauty collection, that includes a quotation from Albert Camus.

I also have some for winter, and one that wishes peace for the season. Plus there's just some fun florals and landscape images that would be a bright spot any time of year.

And then there's what I have to confess is my favorite section, the one titled simply: "Dogs."

Yep, you too can have the Doofus come to visit you in a variety of forms.

Right now I'm featuring a series I've entitled "Happy Dog." This photo was taken on one of this summer's canal walks. This watercolor version of the photo makes a great greeting card, notecard cover, or padfolio, or you can even get him as a dog tag. Your pet and Sammy can take walks together every day! (It also works great on a keychain, which is where I've got mine.)

I'll be periodically adding new images and new products, but there's plenty enough to check out right now!

Visit www.cafepress.com/quiltingfortherestofus to see what I've got available, and bookmark it so you can keep an eye on what's new!

By the way, while you're on CafePress, be sure to also check out our friend Jaye of www.artquiltmaker.com. She's got a Cafepress store too: www.cafepress.com/artquiltmaker. You can include items from both our stores in a single checkout process.


Fight the Funk Friday

Oops. I've missed what...one week? Two weeks?...of posting for Fitness Friday. That is not entirely indicative of my level of activity the last couple of weeks, but it's probably not too far off. I've had some great days step-wise, and I've had a couple of days where I got other kinds of exercise that didn't rack up the steps (snorkeling, anyone?). But still, with travel and being knocked for a loop by that darn root canal last week, things weren't good overall. This week I've been trying to get back into some healthier routines again, although it's been tricky because this has been the Week of Conference Calls. My organization is hosting a special online week-long educational experience with conference calls every night at 9p that I facilitate, with guest speakers n' all. Plus I've had a boatload of conference calls during the day for other matters, which means I'm behind on other deadlines, which means working late, which means not having enough time between end of work and beginning of conference call to get to the gym or have my usual canal walks.

Sigh.

I will say, though, that even when I wasn't getting my exercise in, I've been working on other ways to "fight the funk," paying attention to general self-care and healthy practices. Sometimes something like having your jaw lock up on you for several days on end after a dental procedure is a bit of a wake-up call. 

Anyway, I've been trying to get outside every chance I get. Soon enough we'll lose the sun entirely for months on end in my part of the world, and I'll have little choice but to be in the gym several days a week. For now, I'm putting an emphasis of soaking up that Vitamin D, plus helping Sammy get some exercise in before he goes winter-dormant, the big galooph.

The one day I did get out for a walk on the canal, it was beautiful.

The one day I did get out for a walk on the canal, it was beautiful.

Next week Friday I'll be on my anniversary weekend trip, racking up the steps but unable to blog about it. And the week after that I'll be out of town for meetings again, probably not doing much in the way of steps as I'll be on my butt in a conference room chair. So sorry, Ozzypip, I won't be linking up for the next couple of weeks...but I'll come back, I promise!

For today, though, linking up with Philippa's Fitness Friday linky party!


Thinkin' About It Thursday

This week, I'm thinking...

  • how much I love fall.
  • that I haven't done a Thinkin' About It Thursday post in awhile.
  • that it's nice to have a week where I'm home, I'm relatively healthy, and I can be back in a routine.
  • that I need to decide what I'm doing for an appetizer for my IL's clambake on Saturday.
  • that I don't like clams.
  • that I don't like any shellfish.
  • that I'm still willing to take one for the team and make an appetizer involving crab meat that others might like so I can play with a new homemade pasta recipe I've been wanting to try, 'cause lemon pepper pasta just sounds like it's tailor-made for seafood accompaniments.
  • how maybe I'll still make a second appetizer that my husband and I would both want to eat.
  • that my husband is the one who suggested having a clambake just to get the family together, even though he doesn't like shellfish either.
  • how ironic that is.
  • how maybe I'll make a second appetizer that only I'd really like to eat and make him stew in his own clam juices.
  • that I love getting together with family, but I really don't like clams. Or shellfish. 
  • that I'm actually getting time in at my sewing machine this week.
  • that I'm having a ball working on my postcard for Sandi's fall postcard swap. 
  • that it's still nice enough outside that I can get some canal walks in with the Doofus. 
  • how much I love fall.

Craftsy Class Review: Cooking Essentials: All About Chicken, with Marge Perry

Two reviews in one week! Bonus! Actually, I completed both of these classes some time ago and just haven't had the time to post reviews of them until now.

Here's another basic technique class, but this time it's all focused on one particular meat that I use a lot in my house: chicken. I actually like chicken quite a bit and don't get bored with it the way a lot of folks do, but even so, it's always worth picking up a few new recipes and tricks to keep things interesting.

Earlier this summer I picked up Marge Perry's Cooking Essentials: All About Chicken when it was on sale. I watched all the lessons during a period of time when I actually didn't have much time to cook (or quilt, or anything else for that matter). The lessons were a good length to watch on my iPad while I was eating breakfast or lunch, making mental note of things I wanted to try out later once my schedule eased up a bit. 

Roast chicken using Perry's methods--and a variation on her recipe with a mix of lemons, garlic, and fresh rosemary under the skin with salt and pepper on top. Some of the lemons snuck out from under the skin and charred just a bit on the top, but e…

Roast chicken using Perry's methods--and a variation on her recipe with a mix of lemons, garlic, and fresh rosemary under the skin with salt and pepper on top. Some of the lemons snuck out from under the skin and charred just a bit on the top, but everything else was perfect--the skin was crispy and the chicken moist. Yum.

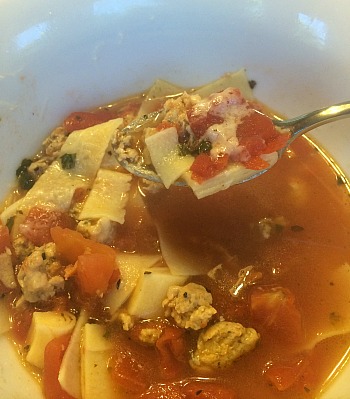
Finally, I had a Saturday free--and it was a cooler day so I was ready to turn my oven on. Roast chicken seemed just the ticket, so I took advantage of the opportunity to put one of Perry's lessons from the class to work.

I've been roasting chicken for pretty much my entire cooking career, since both my husband and I really like it. (He's also an old hand at roasting chicken and will often make one for himself if I'm out of town.) If I recall, one of the very first dinners we made after we got back from our honeymoon was a roast chicken. In more recent years I've been playing around with different seasoning rubs, stuffing various things under the skin, and so forth. I didn't think Marge Perry would have much to teach me about a roast chicken. But oh, I was wrong. One simple change made a world of difference. Thanks, Marge! I'll be doing it like that from now on!

Each lesson focuses on a particular part of the chicken or taking the chicken as a whole. Each lesson also has a recipe it uses for that part and she walks you through many of the steps for that recipe. If you're looking for techniques and recipes, this is a great class. For myself, I would've liked a little more information on what other types of preparations work well for that particular part of the chicken; for example, qualities of that part that make it work better with certain types of preparations than others, or certain flavor profiles than others, that kind of thing. I am at a stage of cooking in which I far prefer to build my own recipes and want more information that will help me do that, rather than how to follow someone else's recipes.

Still, I did pick up a few good tricks on cooking with chicken in general from this class and, now that we've officially entered fall and cooler weather and more kitchen-based-cooking, I'm looking forward to testing out more of her techniques in the weeks to come.

After all, I just can't resist doing something named "spatchcocking." Don't know what that is? There's a whole lesson on it in the class!

Because this is a technique class, they've created it so you can dive in for one lesson and get everything you need to know for that technique without having had to watch any of the others. That means that there's some foundational information that gets repeated every time. After watching two or three of the lessons, I was quoting along with her how to measure the temperature of the chicken for doneness. But, still, that's not a bad thing to have drilled into my head.

On a scale of 1-10, I think I'd rate this class around a 7, maybe a 7 1/2 for me. But that's just because I want more cooking freedom, as it were. From the perspective of someone who's just starting out, or hasn't done much with chicken, or enjoys learning new recipes, this would probably be more like an 8 1/2 or a 9. She is a very good teacher, very polished but accessible, and the recipes do all sound quite tasty to me, even if I'm unlikely to use them as-is myself.

The Basics

  • 9 lessons. The first lesson is about a minute and a half of introduction. Lessons 2 through 9 range from 4 minutes to about 12 1/2 minutes.
  • The lessons cover boneless breasts, bone-in breasts, wings, thighs, drumsticks, spatchcocking, the whole bird, and how to cut up a bird--and that last lesson ends with best practices for hand-washing.
  • Each lesson is built around a particular recipe for that part, so there's a lemon butter sauce, a stuffing recipe, a sauce for wings, and so forth. 
  • The class materials include 7 recipes--all of which are covered in the class, if I recall, though there may be a throw-in that's not in a lesson. 

Cooking Essentials: All about Chicken with Marge Perry: again, somewhere between a 7-8 for me, but likely an 8-9 for others who are looking for more specific direction. In either case, definitely worth checking out!

(Using Craftsy links in this post helps support this blog and podcast--thank you!)

Craftsy Class Review: 20 Essential Cooking Techniques with Brendan McDermott

As I'd mentioned in a blog post awhile back, I had submitted a request to Craftsy some time ago to do some basic cooking technique classes aimed at new cooks--thinking especially of my kids and nieces and nephews who all are a lot more interested in food and cooking than I was at their age. Some of them have done in-person cooking classes with me but because of random work schedules, college, and little bitty babies in their respective lives, they don't always have time to haul themselves to a cooking school. Video lessons are the perfect answer. I was thrilled to get an email from Craftsy saying that my request had now been answered. Enter Brendan McDermott--one of my fave Craftsy teachers to date--and 20 Essential Cooking Techniques with Brendan McDermott. Since I'd helped make it happen, I figured I had to buy it myself.

And I'm glad I did!

Hardboiled eggs done perfectly--not over or under done. These turned into egg salad.

Hardboiled eggs done perfectly--not over or under done. These turned into egg salad.

Even a woman who's been scrambling eggs for [ahem] years can learn a few new tricks.

My recent dental issues meant I was having to restrict myself for days on end to soft, mushy foods. I had plenty of opportunities to use skills I'd learned from the class on homemade pasta I'd taken a few weeks ago, but I needed to keep protein in my diet so I started eating a lot more eggs than usual. This class has two entire lessons on eggs and walks through hard-boiled, poached, fried, scrambled, and omelettes. 've done most of those things...a lot...for a lot of years. The only two I hadn't done successfully were poached and omelettes--my poached ended up stringy and my omelettes ended up scrambled. But I always liked my scrambled eggs.


Poached eggs--yums.

Poached eggs--yums.

Still, boredom with soft foods made me willing to try new techniques just to do something different. And this old dog learned a few new tricks! Following his methods, my hard-boiled egg was perfectly done, my poached egg was beautiful, my scrambled eggs were extra fluffy, and my omelette stayed omelette-y!  

Brendan McDermott is fun to listen to, although his humor isn't quite as evident in this class as it was in his free knife skills class. (See my review of that one here.) His teaching style is relaxed, and he explains the whys behind the hows. I feel like I understand why certain techniques work better now than I did before, even where they were techniques I was already using.

​The lessons are each meant to be stand-alone--in other words, their working assumption in the class is that someone should be able to dip in, watch one lesson, and get all the information they need for that one technique without having missed anything from a previous lesson. This means that if, instead, you watch all or many of the lessons in a row, you will hear certain foundational information over and over. I can pretty much quote Brendan's instructions about heating oil verbatim now. But it's good information, so it's not bad to have it drilled into my head. 

Steak and shredded cheddar omelette, with the steak diced very, very small as I was testing whether I could handle chewables yet.

Steak and shredded cheddar omelette, with the steak diced very, very small as I was testing whether I could handle chewables yet.

I've watched most of the lessons at this point and plan on using his techniques for making clarified butter (something I've never done), and I'll be making fish for dinner tonight based on his lesson on working with fish and shellfish. 

Can you tell that I really enjoy Craftsy's cooking classes--perhaps even more than the quilting ones? I know, that's nearly blasphemy to admit on a quilting blog. But there you go. 

This is not a recipe-oriented class like other technique classes are. He does give some very simple, quick instructions for pan sauces and the like as he's talking through the techniques. The class materials, however, do include 6 recipes, only a few of which I remember him mentioning in the class itself. This truly is a technique class. I didn't miss the recipes at all, though I will be using one of the quick pan sauces he does with my fish tonight--it's a way to make something just a little more special and flavorful without taking any more time or dirtying any other dishes. FTW.

I recommend this class particularly for newbie or less confident cooks, of course. But I also recommend it for anyone who is interested in tweaking their techniques after a lot of years of cooking. There's a lot of good information packed into each lesson. And, again, Brendan McDermott is a really good teacher--easy to listen to, explains everything well, and with a deadpan humor that I enjoy.

The Basics

  • 9 lessons; the first lesson is just an introductory piece about a minute long. The other 8 lessons range from 9 1/2 minutes to nearly 40 minutes.
  • Lesson 2 lays the foundation with "Enhancing Flavors," explaining how to toast various spices and nuts, clarifying butter, and making infused butters. Lessons 3 and 4 are about eggs--hard-boiling, poaching, frying (sunny-side up and over-easy), scrambling, and omelette, plus tips on how to tell if an egg is fresh and so forth. Lesson 5 covers blanching and shocking vegetables, lesson 6 is working with chicken, lesson 7 is making stock, lesson 8 is fish and shellfish, and lesson 9 is pork tenderloin.

So, my final verdict on 20 Essential Cooking Techniques with Brendan McDermott: Two thumbs up!

(Note: Using the Craftsy and Amazon links on this post help support this podcast and blog. Thanks so much!)

2014 Quilty Resolutions Third Quarter Check-In

It's that time again! Check in here with your progress on your 2014 Quilty Resolutions to date!

If you've participated in my quilty resolutions challenge, click here to remind yourself what your resolutions were.

If you didn't participate in my original quilty resolutions challenge, that's fine! Just check in on what your progress has been on your own quilt-related goals for 2014.

I'll be drawing a name at random from the Rafflecopter widget below on Sunday, October 5. The winner will get these four lovely fat quarters!

(Grrrr. We're in an animal mood these days.)


For some of you, this will be a two-step process. For others, only one!

First step for everyone: Leave a comment on this blog post with your progress, and then make sure you enter the giveaway via the Rafflecopter widget immediately below. (I'll only see your name through Rafflecopter for the drawing, I won't be trying to count up names in the comments.)

Use this Rafflecopter widget through Saturday, October 4. I'll draw the winner on Sunday, October 5.

Second step for bloggers: If you've got a blog, write about your progress on your quilty resolutions and link up here! To enter the linky party, click on the froggie-fella below and follow the directions. (Remember, you still have to enter the Rafflecopter giveaway above. This linky party is just so others know about your blog and can come for a visit!) No fears--participating in the linky party does NOT earn bloggers an additional leg-up than non-bloggers in the giveaway. It's just for kicks n' giggles!

For everyone--click on the link to the linky party below to see who-all has linked up, and go read their blogs! It'll be good times!


The giveaway and linky party both close on Saturday night, October 4th, at midnight my time. I'll be doing my drawing on Sunday, October 5th. Again, I'll only draw from names entered in the Rafflecopter widget so be sure, after you've left a comment on this blog, that you go back into that Rafflecopter widget to say that you've left a comment!

I'll be posting my own progress in a separate blog post. Looking forward to seeing yours!

Banned Books Week--My Challenge Project

Home again, home again, jiggity jig--so now it's time to talk about my own Banned Books Week project. Admittedly, it's a bit weird as quilt projects go, and it's not going to be numbered among my favorites, but I had a lot of fun putting it together and got to play with some new stuff. So it's all good.

This year, instead of doing a book I'd already read, a few months ago I looked over the lists of banned and challenged lists to choose one that I'd not read before. I landed on the book The Complete Persepolis by Marjane Satrapi. I chose this book for two reasons: The subject matter of the book is one close to my heart, addressing issues of women's freedoms, education, and oppression; and it also has a fantastic story of the attempted ban of this book in a school district and how the ban was fought by students themselves.

The Complete Persepolis is an autobiography in two volumes done as a graphic novel. Satrapi describes her life in Tehran during and after the revolution in 1979, an event which occurred when Satrapi was nine. Satrapi was the only child of two avant-garde parents who were very committed to the liberal education of their daughter. Prior to the revolution, Satrapi attended a French-Persian bilingual coed school. After the revolution the children were put into gender-exclusive schools with a curriculum subject to the revolutionaries' educational mandates. Satrapi describes the oppression, violence, and fear that she and her friends experienced daily. She's very honest about the impact that kind of setting also had on her and her friends, how they began to pick up on the violence themselves, and how it affected their relationships. The second volume of the book describes her high school years when her parents sent her to Vienna with relatives in fear for her safety, and her return to Tehran for college.

This book was removed by a district directive from all Chicago public schools in 2013 due to concerns about graphic illustrations, language, and student readiness for the subject matter. As word spread about the directive, the students themselves created a multi-media campaign including social media, writing articles for student newspapers, staging protests, checking out all the copies of the book from the school libraries, contacting the author, and appearing on local radio and TV programs. Eventually the directive was reversed and the book remained on reading lists and on the shelves in the school system.

I was taken strongly by the irony that a book about freedom would be banned. And I was taken strongly by the fact that the students who got it reinstated would so excellently show freedom in action. Students of Chicago rock! I'm proud of you!

And so...with all that background...let me now introduce you to...

"Subversion" 

Subversion.jpg

The image that inspired my project is from the second volume that describes Satrapi's experience as a young adult art student in Tehran.

"We confronted the regime as best we could," she says. "In 1990, the era of grand revolutionary ideas and demonstrations was over. Between 1980 and 1983, the government had imprisoned and executed so many high-school and college students that we no longer dared talk politics. Our struggle was more discreet. It hinged on the little details. To our leaders, the smallest thing could be a subject of subversion. Showing your wrist. A loud laugh. Having a Walkman. In short...everything was a pretext to arrest us. I even remember spending an entire day at the committee because of a pair of red socks. The regime had understood that one person leaving her house while asking herself: 'Are my trousers long enough? Can my make-up be seen? Is my veil in place? Are they going to whip me?' No longer asks herself: 'Where is my freedom of thought? Where is my freedom of speech? My life, is it livable? What's going on in political prisons?'....Showing your hair or putting on makeup logically became acts of rebellion."

subversionsockdetail.jpg

I was really struck by the image of red socks as a symbol of protest and subversion.

The socks are composed of a variety of fabrics to represent the freedom of diversity of human expression.

I wanted her feet to be in motion, symbolizing Satrapi's travels, as well as her ability to move forward through life despite obstacles.

I also created "stones" that both depict a street in a realistic way at the same time that they represent obstacles that those under oppression face, stumble over, and need to overcome to survive.

I'd had the image of the socks in my head for several months before I had time to actually sit down and create this project. As images in our heads tend to do, it kept getting more and more complex over time. At first, I was going to just do a basic fused applique of red socks under a fused applique black garment. Then I wanted to add stones. Then I wanted to do a dimensional garment using stiffened fabric. Then I wanted to make the socks out of scraps. Then I wanted all of the pieces to be dimensional. Yep--every one of those pieces is a 3D piece with batting, each its own little unit.That's why I took the pictures outside, so you could see the shadows the pieces cast. (All the fabrics except what's in the socks are my own hand-dyes, although that doesn't symbolize anything except they worked best for the parts I used them on.)

Each step created it's own issues I had to solve--not the least of which was how to attach everything to the quilt! I'll talk about that a little more in my podcast episode (hopefully tonight) because it's probably something better explained verbally than having an even longer blog post than this already is. 

I neglected to spread the word locally about Banned Books Week this year (it was a busy summer, but I feel terrible!) so mine is the only project being displayed in my local public library. I handed it over to my guild-friend-librarian and said, "Have fun figuring out how to hang this thing up." She solved the problem by mounting it on foam board. Brilliant woman!

Don't forget to check out everyone else's Banned Books Week quilts in the Flickr group! You've got through Saturday to enter yours. I'll be doing my drawing on Sunday; Tanesha will be doing hers on Sunday as well--she's got some great stuff in her giveaway too so be sure to check it out!. 

By the way--missed it this year? You can start thinking now about Banned Books Week in September 2015--this seems to have become an annual thing for us!


...Aaaand It's Banned Books Week! Time for a giveaway!

Yep, today officially starts Banned Books Week.

If you recall from this post back in August, Tanesha of CraftyGardenMom podcast and I are co-hosting the Banned Books Week quilt challenge and giveaway!

I'm pre-posting this blog post right before skipping town for a work event, so I'll be keeping it short and announcing my giveaway on this post and then sometime mid-week (after I'm home again) I'll show my own BBW project which will be hanging in my local public library during Banned Books Week.

Anyone who completes a challenge fabric project for Banned Books Week and posts their picture of it in the BBW Flickr group at this link will be eligible to win in either Tanesha or my giveaways. We'll each be drawing from the same pool of entrants so yes, indeed, it is possible to win twice!

I will be giving away (drum roll please...)

Two gift certificates at $15 each for Powells.com.

(That's two winners, each getting $15 a piece.)

The gift certificates will be emailed to you and you can use them at the Powell's website.

What's Powell's? Only one of the world's best bookstores!

The brick n' mortar is in Portland, Oregon. I had the opportunity to visit there years ago while in Portland for work. It's a pretty amazing place.

The website, although not quite as great as being able to walk through shelves of books smelling like...well...books (best smell in the world!), is pretty dang cool too.

And it just seemed fitting to encourage people to buy more books to celebrate Banned Books Week.

So post your photos to Flickr, and if you talk about your project on your blog, leave the link to your blog post in the description of the photo in Flickr. (Be sure to label your photos for 2014 since we're using the same group as last year.)

The drawing will close on Sunday, September 28.

Can't wait to see what you've come up with!

Just a quick reminder...Banned Books Week

Don't forget--Sunday starts Banned Books Week!

I've already got my blog post written and scheduled to go live at one minute past midnight on Sunday, September 21st, announcing my giveaway. Woo!

Sorry that I couldn't quite pull off a podcast episode this week--things got a bit hectic again. I leave town bright and early tomorrow morning for a work trip and by Friday afternoon, I'll be off the grid until I'm traveling home again Monday. I won't be able to see tweets, texts, or emails (o my) while I'm gone, which is sad. But I'll look forward to catching up with everyone when I get home.

Have a great weekend, everyone. There's still time to do a BBW project if you've been waffling about getting involved. Check out the Flickr group for inspiration!


Weekend Progress

Sorry about completely blowing off my Fight the Funk Friday post. I was fighting the funk in many other ways! Thursday through Saturday were a mite busy in these parts and I just wasn't on my computer much. 

I actually touched my sewing machine for awhile on Sunday afternoon. I could've spent more time sewing this weekend but my BBW project is one of those that just needs time. As I'm working on one step, my mind is brewing possibilities for the next step. I'm pleased with where it's at but I needed another brief pause before I make final decisions about the last part I need to do. No pics until final reveal, though--the individual parts don't make much sense without the whole. And the backstory. So wait until next Sunday!

Meanwhile, I made pasta.​

I've been anxious to work on whole wheat pasta. I've tried eating whole wheat pasta a few times (dried, boxed, from a grocery store) and just couldn't get into it. Not so much a flavor thing as a texture thing. Too chewy or something. It just didn't jazz me enough to bother. 

But when I decided I wanted to learn how to make pasta myself, my primary goal was to make whole wheat pasta to see if I liked it any better than the boxed stuff.

And oh, I do.

This was definitely a success. I'll be making a lot more.


And, subsequently...dinner.

Whole wheat pasta with a quick sauce made of diced onions, garlic, diced tomatoes, diced roasted red pepper, Italian seasoning, leftover rosemary garlic chicken (Saturday night's dinner that's going to be a Craftsy class review as soon as I have a few minutes to really pull it together), and fresh shredded Parmesan. 

Very, very tasty. And pretty dang healthy, all in. Absent the Parmesan. (There's not as much pasta on that plate as it looks--I'd spread it out bowl fashion and put the sauce in the middle.)

So, of course, we have to figure out dessert.  

Yes, Virginia, there IS chocolate pasta. 

I know it may sound odd. When I bought the book Artisan Pasta and flipped it open to have my very first peek at the inside, it fell open to the chocolate pasta recipe. "How very weird," I thought, intrigued and a bit horrified at the same time. But it had to be tried. 

Mind you, this chocolate pasta isn't sweetened at all; you just add some unsweetened Dutch Process cocoa and a dash of cinnamon to your pasta flour. It's just about the prettiest pasta I've ever seen.

Look at that, all creamy brown ribbons. Gorgeous.


My first experiment for dessert tonight: I boiled the pasta (then drained and cooled it) and melted some Nutella with a dash of Canola oil to make it a little more of a syrup. Then I sliced up some strawberries into the pasta, drizzled the Nutella over the top, added a spoonful of Cool Whip Lite (had to save calories somewhere!) and sprinkled just a few chopped hazelnuts over the top.

I was shooting for a good balance of bitter, tart, sweet, and crunchy--and I did achieve that, at least--it wasn't too bad, but I don't think it let the chocolate pasta really shine. I'm intrigued by some ideas I saw online for using it Mexican-inspired preparations. After all, cocoa is an ingredient in molé so why not? This begs more experimentation. I've appointed fellow-twilter-foodie @HQSuz as my research assistant on this one.


On a day filled with pasta, it was a darn good thing I still managed to get in my canal walk despite threatening skies. No rain, though. I took my good camera along to play with some new filters I'd bought for it. No really exciting pictures, although you can see things are still pretty lush and green around here. While I walked I was pondering some hand-dyes to capture all those lovely variations on green. I'm starting to see some reds and yellows develop, though--just a couple more weeks and these pictures will look very different!

And, for those of you in his fan club, I'll leave you with a picture of a very happy mid-walk dog.


Thinkin' About It Thursday

This week, I'm thinking...

  • That I didn't appreciate my molars enough while I had 'em.
  • That I probably wouldn't have ever made quite as much homemade pasta several weeks in a row if it hadn't turned out to be one of the few things I can eat comfortably.
  • How every cloud has a silver lining. I guess.
  • That you would think specialists who do root canals would want to get patients in sooner than about 10 days after calling to make the appointment.
  • That once again I'm having major dental work done right before going out of town for a work event.
  • How that's just getting old.
  • How whiny I've gotten lately. So I guess it's time to just suck up and deal.
  • How I'm excited to be moving forward on my Banned Books Week project.
  • How I get to play with something I've owned for at least a couple of years now but haven't tried using before.
  • How the instructions on the bottle are definitely less than sufficient.
  • How, while it's fun to play, it's a little less fun to have to guess how to play.
  • That I'd better spend some serious time in my quilt studio or I'll never get the BBW challenge done by BBW.
  • How that would just be embarrassing.
  • That I went to guild this week, for the first time since June.
  • How much I've missed my guild.
  • How good it is to be back in the routine.
  • How the herd of deer in the back yard should really stop taunting my doggies. (There's about five to seven of them, mostly teenagers like this guy.)
  • That's just mean.
  • How my dogs wouldn't know what to do with them if they caught them anyway.
  • How that really doesn't matter to my dogs.

So I have gotten a couple of things done...

(Quick note: Craftsy is having a sale from Sept 9-15 with some of it's best-selling classes discounted up to 50% off. Here's the link: Save up to 50% off on Sewing, Quilting & Knitting classes. You might want to check it out! From, The Enabler. Using this link helps support this blog and podcast--thank you!)

The big news is...

I'm done making purple scarves! 

Woot woot woot!

75. Count 'em. 75 purple scarves.

I actually probably only need something like 65 to cover this event, but the number tends to keep waffling a bit so I needed a little cushion. And whatever is left over will come to good use for other purposes in our organization.

Meanwhile, I'm not dyeing anything purple again for awhile. Mostly because I ran out of Grape 801 (Prochem). The last few scarves were, ahem, a bit less saturated a purple, shall we say. But hey, that all just adds to the uniqueness of a handmade-with-love item, right?

The other thing I got done was a gift for my friend. My nickname for her is "Crunchy Dirty Gurrl" (long story having mostly to do with the dye class we took together in Lancaster last spring), so I used resist to write her nickname at the top of an apron and ice-dyed it. But when I went to post the picture in this post, I realized--for the very first time as I looked at the picture--I'd misspelled a word. And not the one I'd MEANT to misspell. No, that one I misspelled perfectly correctly, thank you very much. Oi. As I said to her in my apology email, just goes to show the kind of summer I had. 

Dang it. 

ice-dyed apron

ice-dyed apron

I think we'll try to pull out a bleach pen. Or I'll make her version 2. I wasn't keen on the results of the resist anyway, so maybe this isn't such a bad thing.

Here's a bad picture of the bottom of it, offending misspellings cut off. You actually can't see the colors that well as it was taken at night in another friend's living room so it's darker and more yellow than it is in real life. I used fuschia, turquoise, and lemon yellow dye powders so it's a very pretty blend. But still, it proves I did actually finish something, even if I finished it all wrong.

Sadly, that gets me all caught up in finishes. A picture and a half to represent over 6 weeks of productivity. I toss the gauntlet. Beat that, slackers. 


Scrapitude 2015: Scrap-in-a-Box--Cutting Instructions

Charlotte is still working on getting her blog set up, so I'm posting cutting instructions for Scrapitude 2015: Scrap-in-a-Box here. We'll transfer everything over to her blog once it's ready to go!

The Specs

Finished size: 58" to 74" including borders.

Finished block size: 10"

  • Instructions will be given for both “traditional” cutting (using your normal rulers) as well as instructions if you choose to use the Easy Angle ruler for those of you who may own it.
  • You’ll be sewing some diagonals. You may want to check out the Clearly Perfect Angles tool from New Leaf Stitches. I love mine.

Fabric and Cutting Requirements

(Abbreviations: WOF = Width of Fabric or selvedge to selvedge; HST = Half-Square Triangles)

From assorted medium to dark scraps:

Just a few of my scraps that have been put to use.

Just a few of my scraps that have been put to use.

  • (18) 2 1/2" squares
  • (82) 1 1/2" squares
  • (23) 1 7/8" squares
  • (96) 2 7/8" squares, cut on the diagonal. OR (192) 2 1/2" HST using the Easy Angle Ruler
  • (41) 4 7/8" squares, cut on the diagonal. OR (82) 4 1/2" HST using the Easy Angle Ruler
  • (6) different strips at 1 1/2" by WOF
  • (7) 5 1/4" squares
  • (8) 3 1/4" squares

From background fabric:

(Charlotte recommends white, off-white, or very pale color tone-on-tone, preferably all the same fabric but could be scrappy if all the same color. If you're a fan of print backgrounds, just be careful--too busy a background and you'll lose the design on this one.)

I 'm a huge fan of a nice, crisp, white background on a scrap quilt. My white background is scrappy, but all the same white.

I 'm a huge fan of a nice, crisp, white background on a scrap quilt. My white background is scrappy, but all the same white.

  • (96) 2 7/8" squares, cut on the diagonal. OR (192) 2 1/2" HST using with the Easy Angle Ruler
  • (96) 1 7/8" squares, cut on the diagonal. OR (192) 1 1/2" HST using the Easy Angle Ruler
  • (6) strips at 1 1/2" by WOF

Blender Fabric:

(Charlotte recommends medium value blender/tone-on-tone fabric, preferably all the same fabric, but like the background fabric this could be scrappy as long as it's all the same color and intensity. Again, too much variation here and you'll lose the design.)

  • (96) 2 1/2" squares (Approximately six 2 1/2" strips will yield 96 squares.)

Sashing, Borders, and Binding

You'll eventually need approximately 3 yards plus 1/2 yard for contrasting border. However, you may want to hold off choosing this until you see the blocks. Plus, the sashing is kinda special so don't get ahead of yourself here!

Okay--get sorting and cutting! You've got until January 13, 2015, to have everything ready to go.

Sandy’s Notes

I have a freaking boatload of 2 ½” and 5” squares in my stash. So after I’d set aside the 2 ½” squares I needed, I then cut a bunch more down to make my 1 ½” squares. I also got heartless and cut down a bunch of 5” squares for both my 2 7/8” and 4 7/8” squares. I know some of you may think, “Cutting a 5” square down to 2 7/8”? Isn’t that a huge waste of fabric?” Well, sure. But as far as I’m concerned, it was better than (1) taking the time to cut individual scrap pieces into squares, or (2) cutting more strips for the squares and ending up with leftover squares at the end thereby increasing my stash rather than decreasing it. Plus it’s worth the “real estate” those stinkin’ squares are taking up in my scrap bin. The more ways I can use them up and move them out, the better!

It took me awhile to choose a blender fabric. I finally settled on a medium tone-on-tone blue that’s been in my stash for a long, long time. I like the print but I don’t love it, so I thought it was a good one to cut into smaller pieces and spread throughout a scrap quilt.

Remember what they say about ugly fabrics? "You just haven't cut it small enough." Scrap quilts are a great time to use those less-favored fabs up!

Questions for Charlotte


Not familiar with the Easy Angle Ruler? Check out this YouTube video.

(Transparency statement: Amazon links in this post help support this blog and podcast. Thank you!)

Craftsy Class Review: Homemade Italian Pasta with Giuliano Hazan

So you may recall my recent birthday celebration held at the New York Wine and Culinary Institute in the Finger Lakes of New York State. 

And how I learned how to make pasta.

And how I fell in love with making pasta.

And how my husband bought me a pasta machine, and I've been off and running. (Amazingly, even with all this homemade pasta in the house, I've still managed to lose weight the last couple of weeks. Must be all the calories I'm burning cranking the rollers on the machine.)

Well, finally--as promised awhile back--here's my review of the very tasty and very helpful Craftsy class: Homemade Italian Pasta with Giuliano Hazan. 

My first pasta made at home.

My first pasta made at home.

I. Loved. This. Class.

Giuliano Hazan is the son of the woman who has been credited for bringing Italian food into American (and British) home kitchens, Marcella Hazan. I'm not familiar with Marcella's work as I don't own any of her cookbooks. But I can say that Giuliano is a wonderful teacher in his own right. I found his lessons very easy to follow. In fact, the first couple of times I went through the process of making pasta with my new pasta machine, I did it side by side with him, having the videos running while I was doing the steps. Remarkably easy to follow, in fact, as I didn't have to keep jabbing at my iPad screen with pasta-covered fingertips to go forward or back. Smooth sailing.

The very first time you use a new pasta machine you have to make a batch of "waste dough," so to speak, because sending the dough through the rollers cleans any manufacturing or shipping dirt off the rollers and prepares it for service. This gave me the perfect opportunity to make my first batch of dough using his techniques because I had nothing to lose.

First taste--noodles with butter and poppyseeds--the way Mom made then when I was little.

First taste--noodles with butter and poppyseeds--the way Mom made then when I was little.

Admittedly, though, I didn't see much stuff coming off on the pasta as I rolled it through, so I tossed the earlier bits more likely to have invisible gook and still cooked up the later bits so I could see how everything was going. Since I'm still with us to write this blog post, I must not have ingested anything too suspect. 

I've been playing with different flours, which I will say comes more from the Artisan Pasta cookbook I bought than it does from Giuliano's class. He does talk about flours at the beginning and helped me understand why there were so many different ways to approach making pasta (in short: it's a regional thing) as well as a little more about the different types of flours you might use, but Artisan Pasta goes a bit more in-depth on the subject. I've been going back and forth between using an unbleached white flour and a pasta flour (which has semolina and durum in it). I also bought a whole wheat flour but haven't had a chance to test that one yet--that's next week's batch, I think. Giuliano also talks about making "green pasta" (with spinach mixed into the dough) and explains how to adapt it to "red pasta," (with tomato mixed in), but I haven't tried either of those yet either. Artisan Pasta also has a ton of recipes for flavored pasta doughs that I haven't gotten to yet.

So much pasta, so little time.

Ah, but back to the class. 

My most recent batch of pasta.

My most recent batch of pasta.

Giuliano is very easy to listen to, tells little stories here and there through the class so you get a real sense of how pasta and Italian food is such a part of who he is, and does a great job at filling in "dead air time" (while he's kneading or rolling or whatever) with extra information, substitutions, and great tips and tricks. He took all the concern out of trying to use a pasta machine myself, without a partner, by explaining some extremely easy fixes. Doh. Of course. 

He also explains how pasta is rolled out without machines, and gives information for using electric machines such as the type that attaches to a KitchenAid mixer. Because the electric ones are noisier, though, he mostly uses a hand-crank machine in the videos so as not to interfere with the sound.

Again, I really, thoroughly enjoyed taking this class. I'm looking forward to mixing his techniques with recipes from Artisan Pasta, as well as learning how to adapt the techniques to different ingredients. It's a matter of getting a feel for the proportions needed of liquid to flour depending on the density of the flour you're using, as well as how thick a pasta you need for the shape you're making. So far, I've been keeping it simple, but oh, I can see the possibilities.

Noodles in soup

Noodles in soup

Since I'm also one-tooth-short-of-a-full-mouth these days (and no, that's not a euphemism), I've been finding that pasta is a very easy-to-gum meal. So last night I combined a Parmesan broth recipe from Peter Berley's Building Flavorful Soup class (see my review of that one here), with homemade noodles from this class, threw in some diced tomatoes, crumbled chicken sausage (Wegmans Fire Roasted Tomato & Basil--my all time fave), and some fresh basil from my garden, and yum yum. I almost didn't mind having a sore tooth for a few minutes, there.

I highly, highly recommend this class. Everyone should be making their own pasta, in my opinion.

The Basics

  • 7 lessons ranging from 10 to 25 minutes
  • The class begins with a brief introduction to Giuliano but dives almost immediately into making the dough. The first lesson includes the instructions for making spinach pasta with a mention of how to adapt those instructions for making tomato pasta, and concludes with information about how to use and store the dough.
  • The next lesson covers how to roll out and make basic cut pastas. The rolling technique in this class is where he varied most from what I learned from the chef in the culinary center on my birthday--I've been using Giuliano's technique and it works great, so I'm sticking with it. 
  • Lessons 3 through 6 are how to make a variety of shaped and filled pastas, and each includes a recipe for that particular pasta. I liked that he talks about what kinds of dishes each pasta works best in, and sometimes how they're used traditionally in Italy as well as more modern uses. 
  • The final lesson talks about how to cook and sauce pasta. It may seem straightforward, but I found that lesson gave me, if you'll pardon the pun, food for thought. 

Even if you don't plan on learning to make your own pasta (but why wouldn't you?) I think you could still get something out of this class, just in knowing what the shapes of pasta are and how to use them most effectively, plus a lot of great recipes.

I do have to also mention that Hazan has two other Craftsy classes. I don't own either of these yet but I imagine I can see them ending up in my shopping basket in the not-too-distant future:

Classic Italian Pasta Sauces: Meat & Tomato with Giuliano Hazan

Classic Italian Pasta Sauces: Seafood and Vegetable with Giuliano Hazan

Review complete. Two thumbs up!

(Transparency statement: Using the Craftsy and Amazon links in this post help support this blog and podcast. Thank you!)

Announcing...Scrapitude 2015, or "Scrap-in-a-Box"!

ScrapiBonzaTude--my version of Charlotte's first Scrapitude quilt this past year.

ScrapiBonzaTude--my version of Charlotte's first Scrapitude quilt this past year.

Yes, folks, the time is almost upon us! Charlotte's ready to lead another mystery scrap quilt!

The Schedule

Fabric and cutting instructions will be posted this coming week (Tuesday, 9/6). You'll then have a few months to get yourself ready to go.

The first piecing clue will be posted January 13. There are five clues altogether, and we'll be posting them the second Tuesday of every month from January through May, 2015.*

Wanna play along?

The Size

This time, Charlotte has let us know that the completed quilt will be a "snuggly couch size approximately 58" x 74", including borders." She also describes it as being for confident beginners or intermediate quilters. If you are a beginner, you'll just need to go slow and watch some bias edges. But you should be able to do it. Nothing too off-the-wall! And advanced quilters will enjoy it too, of course.

So, what are you waiting for? Join the fun!

On Palettes

Some people love doing controlled palettes. Charlotte prefers doing full-on scrap in her own quilting, so her instructions are set up that way. I suggest you pay attention to the information she gives for value and suggested fabrics. (It's a gorgeous design and you don't want it to get lost!) Controlled palettes can simply be "controlled" along the same value lines.

See below for a little more about controlled palette versus full-on scrap.

Sharing

We'll still use #Scrapitude on Twitter and the same Flickr group. (Didn't do Scrapitude last year? Go ahead and check out the Flickr group to see what-the-what!)

Asking Questions

My travel schedule is nuts this year. So that my absence doesn't slow things down for those of you working on Scrapitude, I've set up a form for you to use to submit your questions about Scrapitude. Charlotte will get the questions herself and be able to respond to you directly. I'll see the questions and responses and if there's something that may be helpful for everyone to know, I'll post it to my blog whenever I land again.

So please use this form to submit your questions. If the form doesn't work for you, email your questions to me and I'll forward them to Charlotte when I see the email. Please do NOT use Twitter to ask questions--they get lost in the stream too easily.


Never Done a Scrap Quilt?

If you want to brush up on your scrappy knowledge, here's the listing I provided last year of past episodes I've done on scrap quilts.

Some Mistakes I've Made Along the Way

A few things I've learned from having done two biggies in a row now (Bonnie Hunter's Easy Street and Charlotte's Scrapitude), with a few smaller scrap projects in between, and having had a few things go awry on me here and there:

1. Unless you're intentionally going for a low-volume or watercolor effect, be sure your background fabric/s have good contrast with your scrap (main) fabrics. Otherwise you lose the design as your block edges fade into the background fabric.

Some of my scraps for the original Scrapitude

Some of my scraps for the original Scrapitude

2. In the same way, when you're choosing your scraps, it's generally a good idea to avoid any large-scale prints with parts of the print that are too close to the color of the background fabric. When you cut those large-scale prints into pieces, you might lose the sharpness of the edge when a big white flower suddenly lands right up against your white background and makes your block look like someone took a chomp out of the edge.

      In a normal non-mystery quilt, large-scale prints can be planned for places where they'd work well. In a mystery quilt, though, you never know how pieces are ultimately going to be used, so large-scale prints can be very tricky unless the mystery quilt designer tells you where it would be okay to use one. If, however, your large-scale print has good contrast with the background overall, these can be great to use in scrap quilts because cutting it into smaller pieces will give you a huge variety of end results--it'll look like you used five different fabrics where it was only one to start.

3. If you have one really dark fabric, balance it out with other really dark fabrics. If you have one really light fabric, balance it out with other really lights. My difficulty on Easy Street was I was trying for a span of values in my controlled palette and ended up with one really dark green mottled-read-as-solid that just sticks out like a sore thumb on the finished quilt. All I can see when I look at it is this dark green visual hole plopped around the quilt. It was my first scrap quilt, and it was a mystery, so I had no way of guessing the end result. Since then, I've done a couple of other scrap projects where I suddenly realized I had one fabric really standing out in an unpleasant way; but rather than removing that one fabric, I balanced it out with others of similar value, and suddenly it all worked beautifully. So while testing the new Scrapitude, I chose a wide variety of scraps and made sure I had a good mix of values (according to Charlotte's directions, which you'll get in another few days). And it's worked really well.

4. Don't be afraid of full-on scrap! I was. I really struggled with Easy Street and the first Scrapitude. In fact, I was pretty sure after Easy Street I didn't want to do another scrap quilt. Ever. (Or another mystery, for that matter.) But when I let myself do full-on scrap, and let Charlotte keep telling me, "It'll be okay! It'll be okay!" every month at guild, I ended up having a ball and completely loving the end product. I had to fight with myself not to control the way those scraps were coming together in the piecing. I confess to a couple of times picking up two pieces and saying, "Yikes! No way am I letting those two colors near each other!" and swapping one out before piecing the unit. But I only did that once or twice before I convinced myself that would be crazy-making and just released myself to the process. When you see the finished quilt, you never see those two fabrics that maybe don't play nice in the sandbox together. Because they're part of a whole, overall wonderful scrappy design.

That's it...although I may have other tips along the way. But for now--start staring at your scrap stash and thinking, "Yay! It's time for Scrapitude again!"

Please note: The original Scrapitude instructions have now been removed from my blog, as Charlotte is in the process of writing it up as a pattern for eventual sale. You will still find my in-progress and completed posts, none of which contained instructions.

*The second Tuesday of every month is my guild meeting. You'll be getting the clues the same day my guild-mates do!


Fight the Funk Friday

This week was a little more hit and miss. I had some great days with steps and others not-so-great. But the difficulty with counting steps is it doesn't take into account how much I'm on my feet versus sitting in a chair, and for us desk jockeys that's actually a big difference. Even though I didn't get a ton of steps in on my days off (see below), I was on my feet most of those days so it was still a drastic improvement. (FitBit does let you input that kind of thing as activities but I've not been doing that lately.)

Friday, Aug 29: 11,261 steps (45 mins elliptical)

Saturday, Aug 30: 9,111 steps (helping DD finish moving in to her dorm room and walking around campus) 

Sunday, Aug 31: 5,030 steps (part of day in car coming home, getting groceries--then spent afternoon in dye studio so while I was on my feet, I wasn't walking around much) 

Monday, Sept 1: 3,835 steps (gym was closed for Labor Day and annual updates, and it was blisteringly hot out so I wasn't in the mood for a walk--but I was on my feet most of the day and cranking a pasta machine so I did burn some calories!)

Tuesday, Sept 2: 3,351 steps (Had an after-work engagement and not enough time for gym or a walk after work, but I was conscientious about trying to move more through the work day) 

sneakerwaterlogue.jpg

Wednesday, Sept 3: 12,678 steps (60 mins elliptical on a higher elevation so fewer steps overall than I may have gotten otherwise, but burned more calories) 

Thursday, Sept 4: 4,113 steps (I took a walk around the store plaza parking lot just to try to get a few more in--added about 1500 steps that way, so it did help.)

The good news is, even though it wasn't a stellar week steps-wise I showed a 4 lb weight loss this week--woot! That's unusual, but I've basically restarted all my healthy habits again so it's like a first-week-loss. The biggest effort I made this week was actually planning and tracking my meals. It does help to pay attention. Next week we'll be back to normal weight loss rates.

I did break my tooth again yesterday (or, more specifically, the repair fell off again) so now we're looking at more extensive repairs and living off smoothies until I have a full tooth in place again. So we'll see how that effects the scale next week, LOL.

Thinking about It Thursday

This week, I'm thinking...

  • That it's already September and I'm not entirely sure how that happened.
  • How I'd better use my patio as much as possible while I still can.
image.jpg
  • How I'm writing this while on my patio with my morning coffee.
  • That the dogs really like it when I drink my coffee on the patio. 
  • That I really wish they'd stop eating my ornamental grasses. ("Sammy! Knock that off!") 
  • About my Susan B Anthony mug and how it reminds me that women are pretty cool. 
  • That those flies are still around and still pesky. 
  • How good it feels to finally have all those scarves done. 
  • How I still need to press the dang things. 
  • How that's going to take for-freaking-ever. 
    • So I'd better get my Zen on. 
  • How broken teeth are really just starting to work my very last nerve.
  • How drinking smoothies for the next little while will help a lot in my weight loss goals, though.
    • So there is that.
    • Still n' all...
  • How it's like turning on a lightbulb when I get a project done that I'm not enjoying as much and immediately my brain finally starts percolating with ideas for my next project. 
  • How I can't wait to get cranking on that next project. 
  • That my quilty mojo might be starting to come back.