For some reason, I found myself buying this Craftsy class on Saturday: Zip It Up: Easy Techniques for Zippered Bags with Joan Hawley of Lazy Girl Designs.
I just get stubborn.

For some reason, I found myself buying this Craftsy class on Saturday: Zip It Up: Easy Techniques for Zippered Bags with Joan Hawley of Lazy Girl Designs.
I just get stubborn.

I didn't burn up the track in Craftsy classes, but I did get one of the biggies done! I'm actually writing this a little over a week before it'll post because I can guaran-dang-tee I won't be finishing any more Craftsy classes before the end of this month. I'm about to head out of town for a work trip and there's no time for watching classes in that circumstance.

Interior shot of my EIIP bag from Annie's class
(+1)
(3)
Current count: (12, down 1 from last month)
Current count: 60 (+1--and I hit a nice round number!0

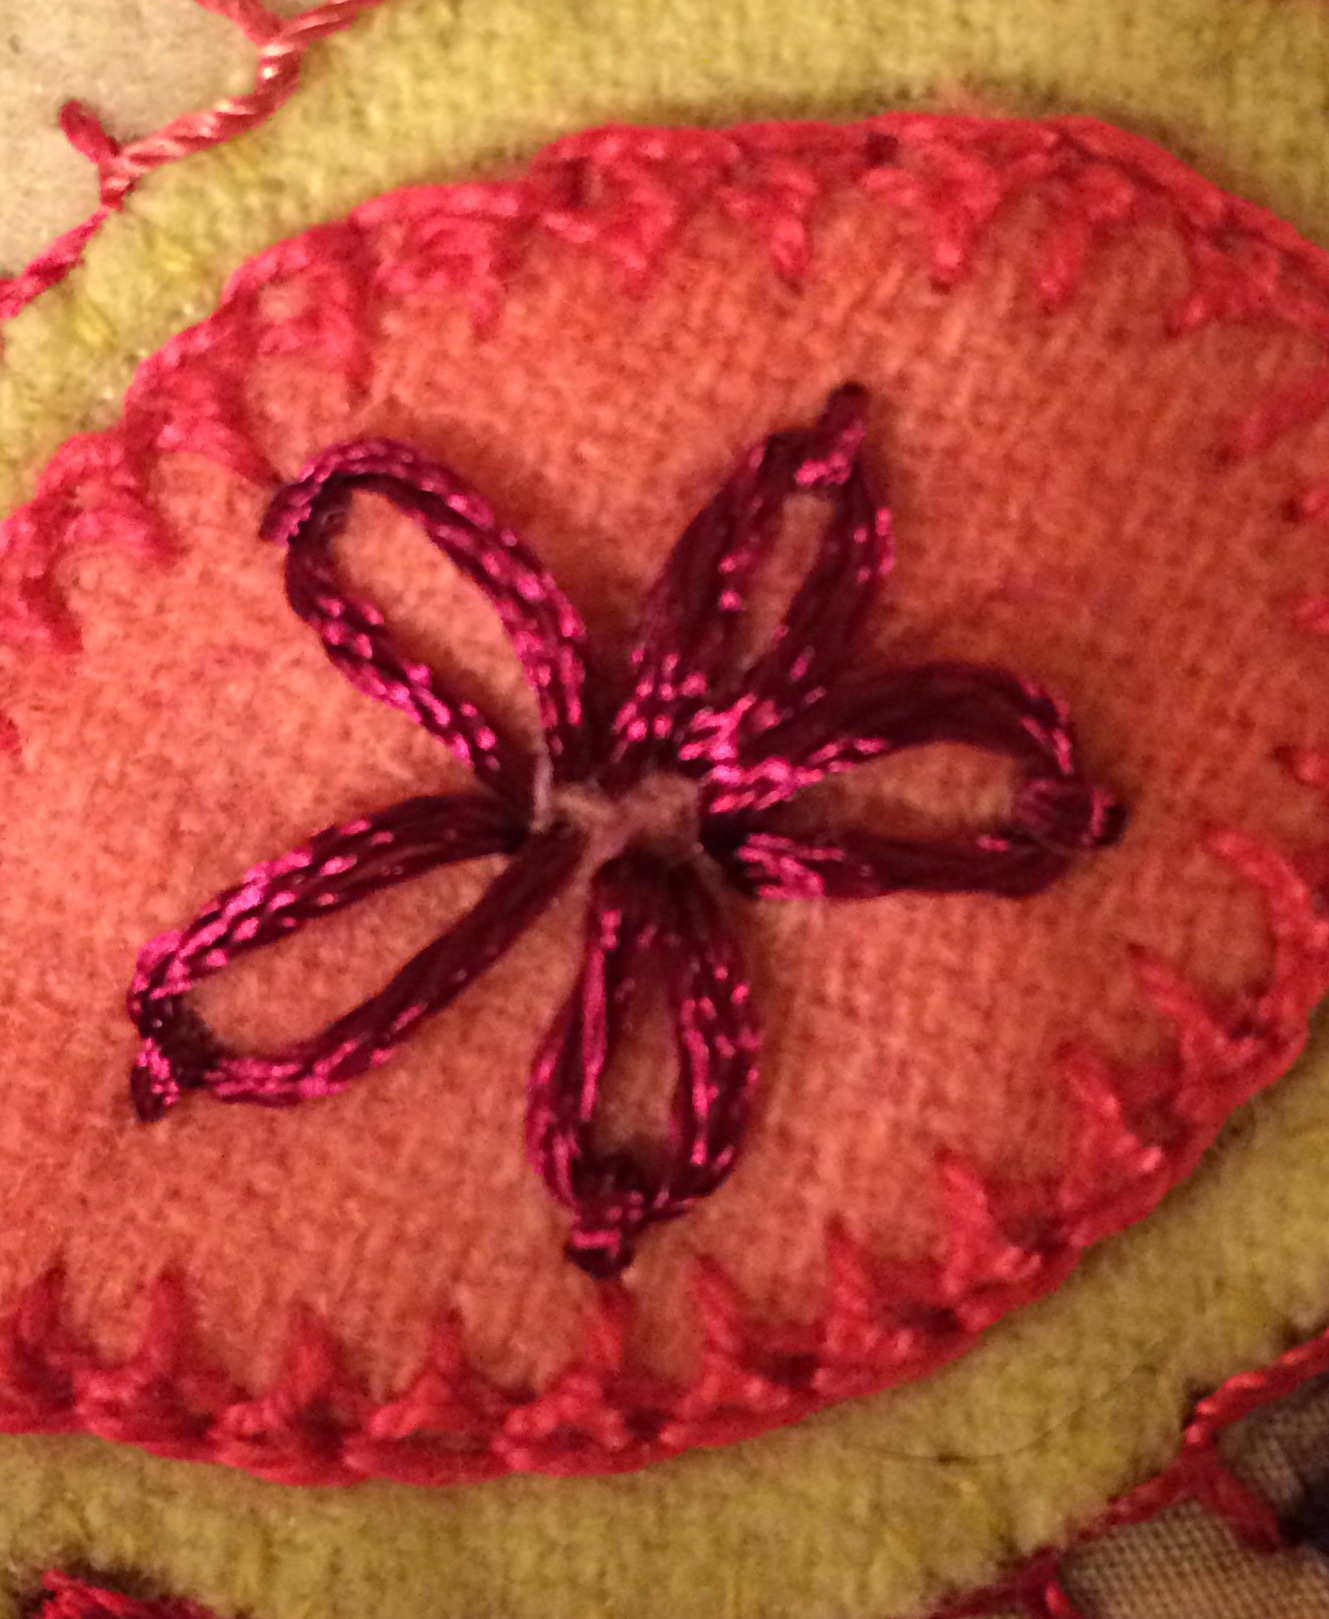
My May journal quilt project was embroidery on one of my hand-painted silks.
I talked about this in this week's podcast episode and all the difficulties I had with it, although I learned a lot in the process; so from a learning value perspective, this was a great project. I learned that silk requires a much different treatment as a background than other fabrics I've been embroidering on. I learned that certain threads don't really play nice with silk. (The spiral center was the Razzle thread and it was just way too slippery to combine with the slippery silk. No end of headaches with that one.)

I learned how to do the "magic chain"--a chain stitch with two threads where you alternate the colors. Cool beans.
You can see I skipped a couple of stitches in this example--that petal was a very-late-night-can't-sleep attempt. I learned I shouldn't embroider after midnight.
I also learned I shouldn't use a chalk pencil for an embroidery design. Couldn't for the life of me see what I was supposed to be doing. Hence, some very whonky flowers.

After I finished this, I started doing some crewel embroidery on a piece of my hand-dyed cotton. Lookie so far! (Okay, I snuck a WIP in here. But one flower is finished, so it counts!)
I love crewel. I'm a crewel girl.
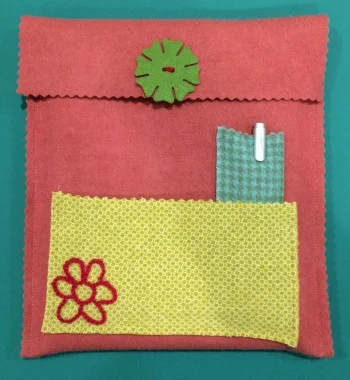
And...on the spur of the moment...I decided I wanted an iPad case with a couple of pockets to hold my stylus and the little (very easily lose-able) packet of extra stylus tips during all my travels this summer. I talked about this on my podcast episode too--but the short story is that I decided felted wool would be the quickest approach, and I have a fair amount of wool.
I actually took out my 3-in-1 color tool when I was choosing which wools to use; everything but the green flower button cover actually fall into a particular color scheme. Can you figure it out? (The green button cover is close, but I'm not super-keen on it. May change it later.)
I just took the "quick and dirty" approach in sewing these pieces together. The beauty of felted wool is that it doesn't really fray, so you can just stitch that puppy together. Depending on the type of wool, though, it can be a little stretchy. You can see where the chartreuse pocket got a little polygram-esque rather than rectangular as I stitched it on. It's a looser weave so had more stretch to it. Still, it works. I just need to figure out how I want to close the two pockets on the front so they're more secure. There's a patch of Velcro on the top under the little flower button cover. I may add Velcro to the larger pocket; would need to do more of a flap thing on the stylus pocket. Pondering. But, to all intents and purposes, it's done.
These may be my last finishes for awhile...
Recently I read an article from Quilting Arts Magazine when I was in a bit of a weak spot, I suppose, and I immediately bit and ordered the foot it spoke of, without reading any reviews of the foot first. Fortunately, I wasn't overly disappointed--I think I've probably used enough of these tools now to know none of them is perfect. The product in question is a free motion couching foot for Janome machines*. Couching is when you hold one larger cord or yarn down on fabric by crossing back and forth over it with a smaller thread--you can do it by hand, of course, or you can do it with a sewing machine by using a zig-zag stitch. I've done it by machine a handful of times; it works okay, but it's hard to do tight or really smooth curves by the standard methods. I thought this FMQ couching foot may be the answer.
It is, partly. I give it maybe a 6 out of 10--possibly a 7 if I have more practice with it.
I talked about this foot on my podcast episode this week, so here are the photos that may help illustrate some of the drawbacks I talked about.

It comes with two sizes of feet in the package; one with a slightly larger hole and one slightly smaller. It would probably take some trial and error to figure out which foot you need for the yarn/cording you're trying to use.
Here's how you thread it--it was a little tricky to get the yarn up and over from the back of the foot. It involved lots of bending over and squinting, but I persevered.
You have to pay attention to the settings the package tells you to use for your needle. I broke my first needle. Oops. There's a very tight little hole for that needle to zig-zag over the couched thread so you've got to make sure the zig-zag settings are correct.

The package suggests to allow the cording/yarn that you're couching to "pool" behind the foot. Believe them. It really needs a lot of slack to work right--every time it used up the pool and started feeding right off the little ball of yarn I had, it would start skipping stitches and missing the yarn altogether. This might be tricky if you were couching on a larger project that would limit the amount of space you have for pooling the yarn; I was just doing a small test piece so I didn't have any problem.

As long as you move slowly and work with the limitations, it does actually work. Here's some of what I was able to do. This is all free-hand; I didn't sketch anything out ahead so I was truly, truly free-motioning.
Normally I'd probably use an invisible or matching thread so the thread wouldn't be visible; I used a beige thread because that's what happened to be in my machine at the time, and this was just a test. Plus, I thought it might be helpful to be able to see the stitches. (The metallic thread you see sticking out is actually part of the yarn.)
The stitch tended to shred this particular yarn--it would work better with a tighter ply, or a cording. Still, this sort of "foamy" look could be cool if that's what you're going for. Just test any cording you're planning to couch with this foot first to make sure you're getting the results you expect.

The foot works remarkably well, really, given that the concept of couching and the concept of free motion quilting are sort of counter to one another. The only consistent time I had problems (other than when the yarn wasn't pooled loosely enough behind the foot) was when I moved left to right. It missed the yarn just about every time. That's where I'd have to do more experimenting to see if I could figure out a way to counterbalance that.
Anyway, using the free motion couching foot worked better than doing the same thing with a regular foot. It still has weaknesses, but with what I'm doing, they probably aren't huge weaknesses. The long and short of it is, I'm glad I got this foot; I think it'll be fun to play with in the future.
*There are also FMQ couching feet for other brands of machines. Just Google!

Once again, I'm doing the class review before I've finished all the projects from the class. I'm doing that in this case because it took me nearly 6 months to get the first of the two projects done for this class. Given my current schedule, it's likely to be another 6 months before I get the second project done. So, here's my review of Annie Unrein's Sew Sturdy Travel Organizers class.
If you're a blog follower, you've already seen my reveal of the first project, an organizing bag she calls the "Everything In It's Place Bag," or as I abbreviated it, the EIIP bag. If you follow me on Twitter or listen to my podcast, you've heard me whine. A lot. With great passion and commitment to my whining.
This isn't a particularly easy project, especially for those of us quilters who didn't come at quilting out of garment sewing. I've only had limited experience doing bags or any type of accessories, and much of that experience hasn't been particularly positive. I'm not a fan, as I have pointed out on many an occasion, of fiddly bits.

And boy, did this bag have more than it's fair share of fiddly bits. Namely, vinyl. More about that later.
It also had zippers which were a bit tricky at first. I've done a small handful of zippers in the past, but this was the first time I'd used zippers-by-the-yard, which raises the quotient of fiddly-bit in the zipper equation. I'll say, though, that by the end of doing this bag which had a grand total of 12 zippers and 16 zipper pulls, zippers no longer give me pause. I can also see the beauty of using the zippers-by-the-yard that Annie sells on her website; I'll advise, however, that you wait to watch where she talks about using those zippers before making your first zipper, which actually comes in the lesson before.
That's on my one knock on this class. It's not Annie's fault that I don't enjoy making bags. And it's not Annie's fault that I still don't enjoy making bags after taking her class. She helped me become more comfortable with certain things, but becoming more comfortable with something doesn't necessarily mean I'll start loving to do it. In any case, the one thing I will knock the class on is that once in awhile things are a hair out of order. You make the first zipper in one lesson, and then in the next lesson she explains how to work with the zippers. I was watching and working my way through the lessons so when I got to the one making the first zipper and didn't know how to put a zipper pull on a zipper, I spent 20 minutes on YouTube trying to figure it out. Then I get to the next lesson, and there she is, talking about how to put on a zipper pull. There are a couple of places like that, so just do what I didn't do:
Watch all the lessons all the way through, before starting the first step in the first lesson.

The only thing that I really struggled with was the vinyl. That was brutal. I spent a lot of time reading through the class discussions to see if others were having some of the same problems I was having and what the suggested remedies were; I found some helpful things there, so be sure to read the class discussions as well. (I talk about that in the previous blog post about this project.) Mostly, I was being stubborn and refusing to buy a Teflon foot when I wasn't committed to the idea of ever using vinyl again. That Teflon foot probably would've been helpful. I used Scotch Tape instead. It was okay.
Annie is clearly very experienced at teaching. I had no complaints about her style. Her instructions are very thorough as well. I kept the class material print-outs in front of me while watching the related steps on video--the two pair well. Her website is great--she has great bag designs and very helpful kits for making many of them, plus she sells all the bag-making supplies separately. More helpful, though, are her YouTube tutorials (also on her website). So if you're into making bags, she's the one to get to know: www.byannie.com. I do really like her supplies--I like how the finished bag feels, using her stabilizer and such. So if I am inclined to make bags in the future, I'll definitely be going back to her site.
So, to try to objectify this and review the class as a class, my personal feelings about bag-making aside, I'd say two thumbs up. She really takes you through a complicated process by breaking it down into very small, pretty manageable tasks. She explains and demonstrates pretty much everything; there are a couple of steps that she talked about but didn't demonstrate, and it would've been helpful to have those on video as well, but they weren't deal-breakers. I do feel pretty confident that I'd be successful at the cosmetics bag as well, whenever my schedule allows me to work on that again. And that's more than I'd have said when I started the first step of the first bag, so that's a mark in the plus column.
Annie's bag designs in Annie Unrein's Sew Sturdy Travel Organizers class are great. Can't beat the functionality. So here's to my perseverance sticking with me to get the second of the two bags done sometime before I retire.
(Using Craftsy links in this post helps support my podcast and blog. Thanks!)
Drum roll please...

Here's the whole story in Steller.
Craftsy class review coming next...
This week, I'm thinking...
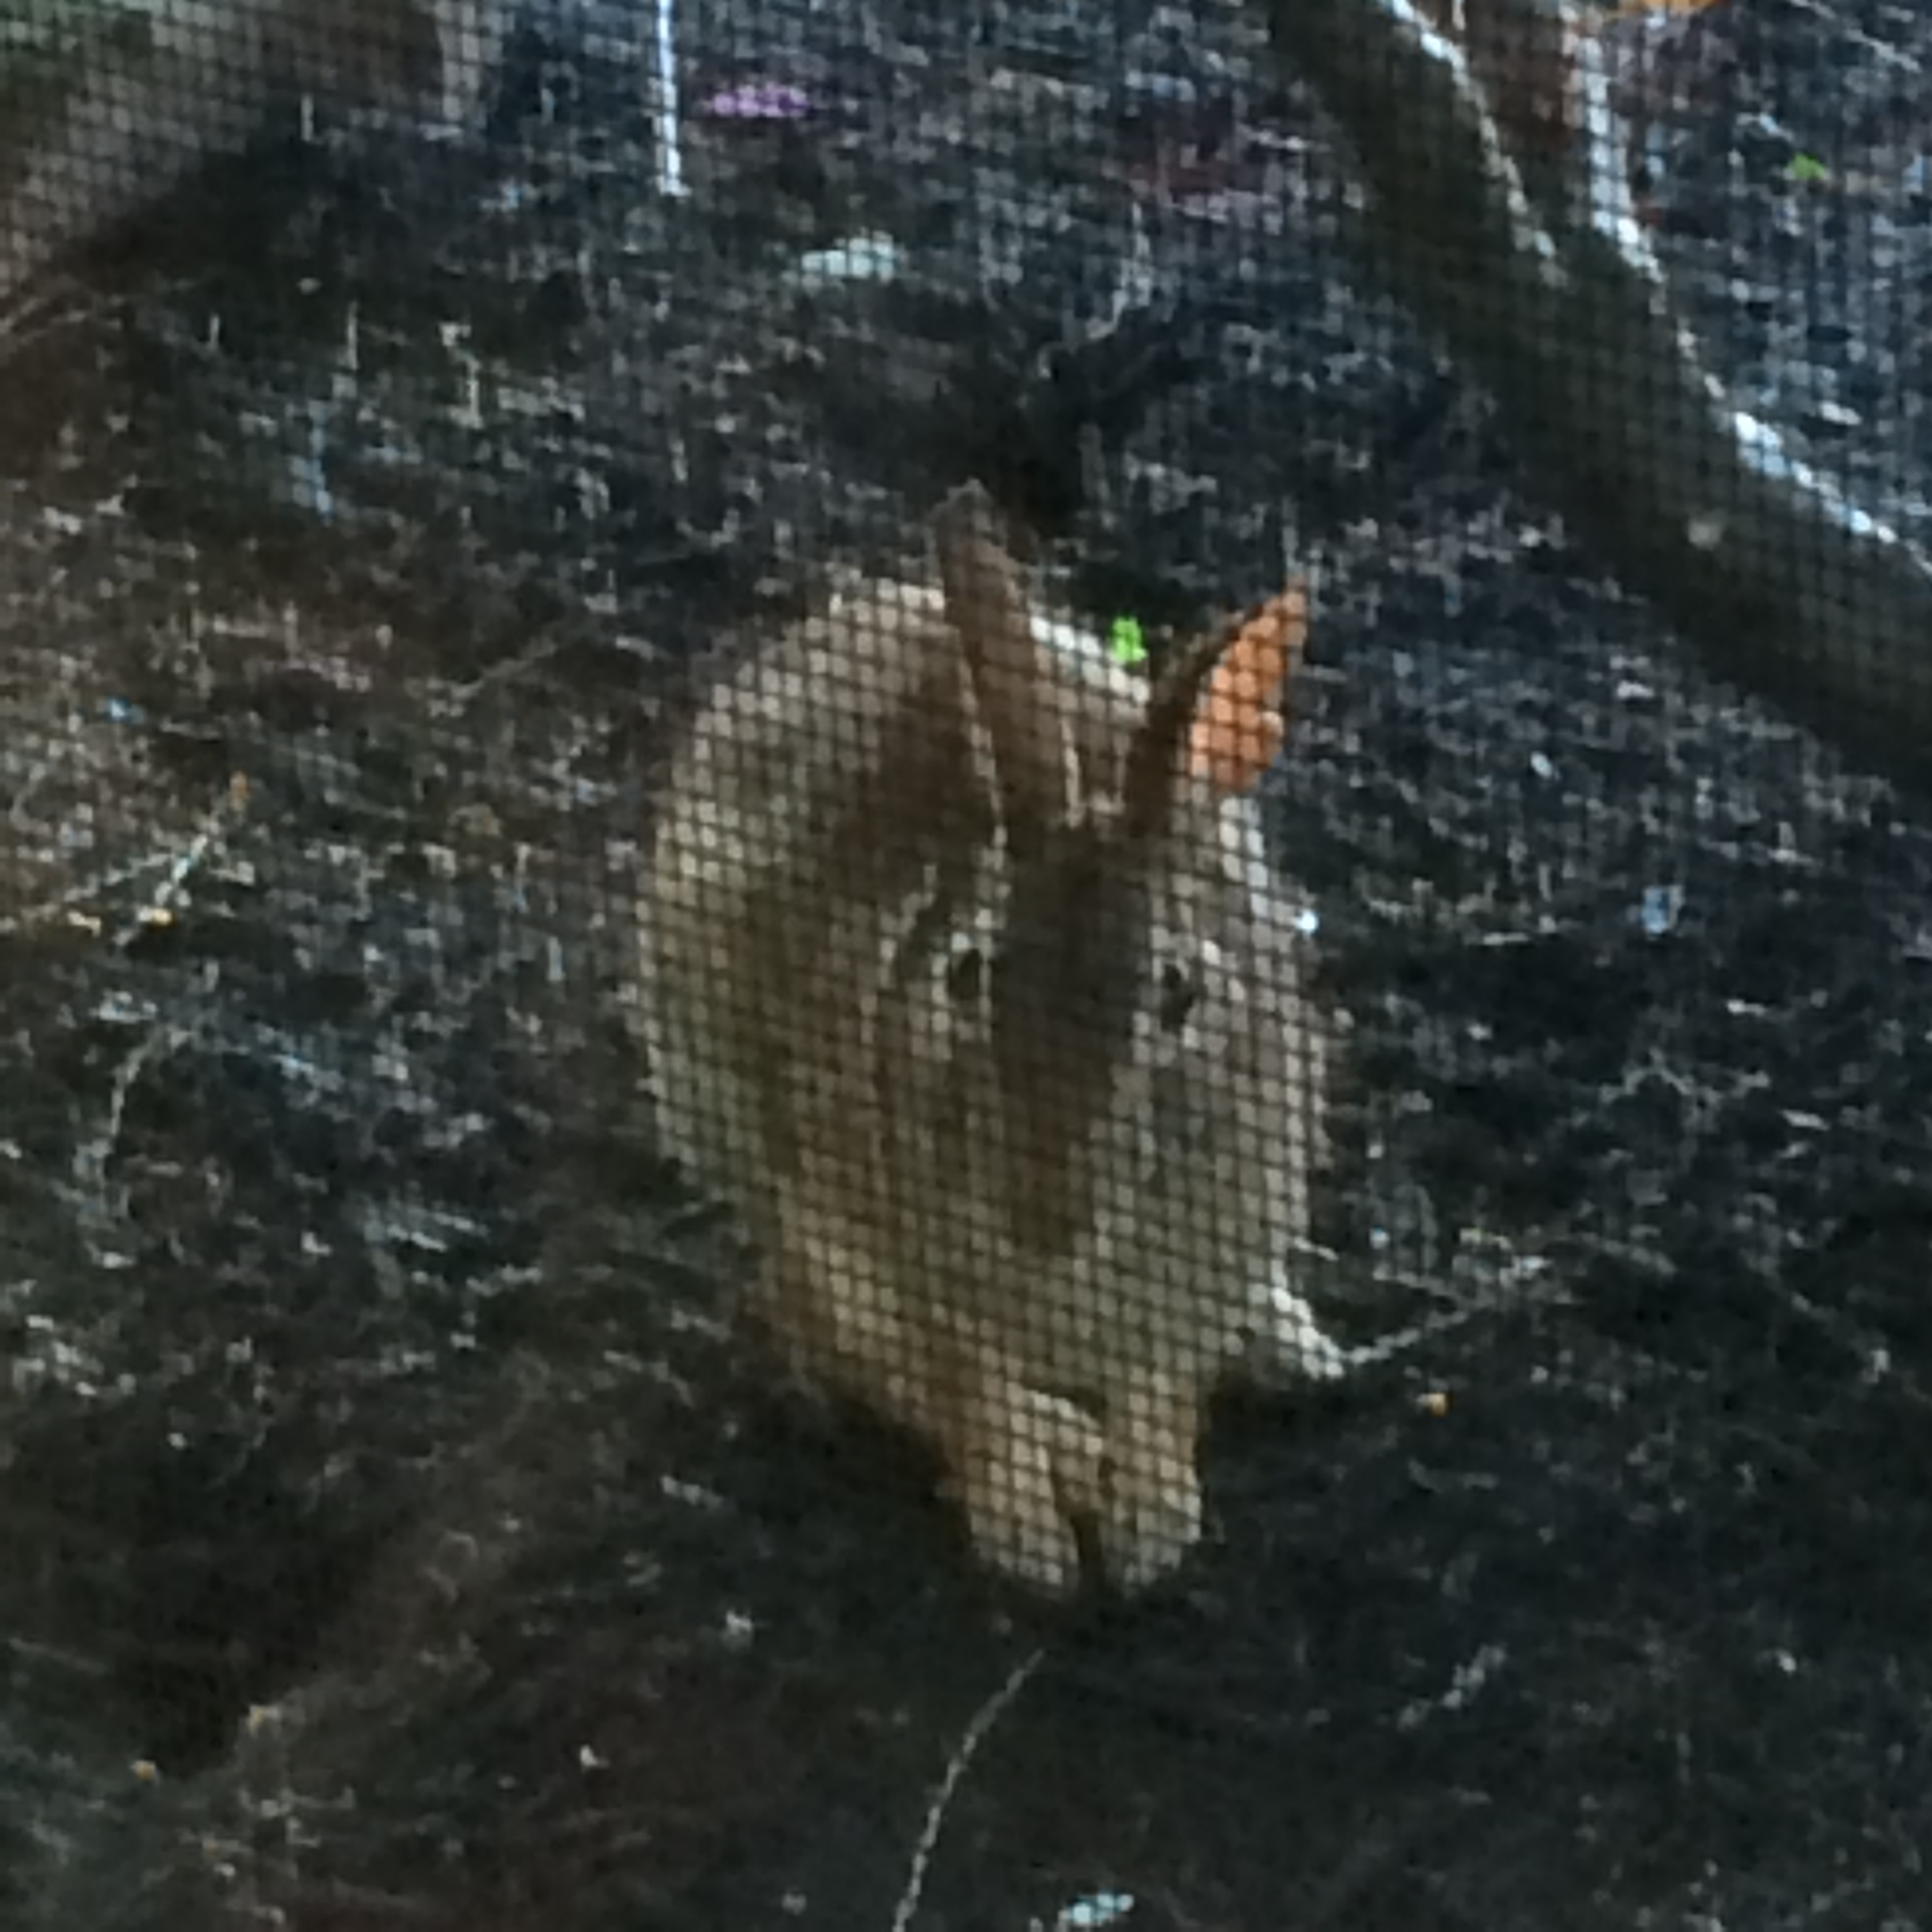
This little critter has been joining me for morning coffee every morning this week. (Taken through my living room window. The dogs have, so far, remained oblivious.)
Remember how I said it seemed like an awful lot of food for our first week compared to other CSAs? Yep, it was. Turns out there was a mix-up at our pick-up location around half-shares compared to full-shares and some of us half-share folks (like myself) ended up with a full-share, meaning, sadly, some of the full-share people got short-changed. I'm sure the CSA made it up to them somehow. That's the risk of a CSA dropping food off at a location and not having someone from the CSA physically present to manage the pick-ups. On the flip side, live and learn--I suspect they'll send out more information ahead of time to avoid that happen again. And, I'm happy to say, this week's delivery feels far more manageable for me!
So, what happened with last week's (full-share) delivery?

Roasted kohlrabi
Out of the 4 kohlrabi, I've used two so far. They keep well, so I'll be able to use the second two sometime in the next couple of days and be fine. I peeled and diced the kohlrabi, then tossed them in a flavored olive oil I have named "Tuscan Garden," with some salt and pepper, and roasted them in a 400 (or was it 425?) oven for about 25 minutes.
They were quite good. It's somewhere between a potato and a turnip, I'd say--most of the flavor comes from the seasonings. I'm thinking I'll roast the other two, but then maybe puree them into a soup. On the other hand, what you see in the picture is both kohlrabi, so I'm not quite sure it's enough for a soup--or, at least, not enough to bother with the extra work soup would involve. (That's a turkey burger with goat cheese and roasted red pepper on the right--nummy.) I will say, however, the whole peeling process is a bit tricky as it's a thick skin with pokey things so, forasmuch as I enjoyed the kohlrabi, I'm not sure I'll be out buying them at farmers markets every wek or anything.
I missed the window of opportunity on using the kohlrabi leaves; I'd have had to use them in the first couple of days and just couldn't pull it together to do that. So I can't report on them.

My daughter used some of the snap peas and garlic scapes in a very tasty fried rice. She also added some red bell pepper we had kicking around. I hadn't added any soy sauce yet when I took this picture--I thought the colors were too pretty to ruin yet. I did, however, add it later; glad my daughter learned how to make fried rice, although I was eating it for a week. (She has the same problem I do of not really knowing how to scale certain dishes for any less than an army.)
The rhubarb is still sitting in my refrigerator. I'm hoping it's still good; it's just been a lot busier lately than I thought it would be.
We also still have a lot of snap peas and garlic scapes left, but they're also lasting well. We gave about a third of the snap peas to my mother-in-law, and about half of our apples. I'm still eating apples too. Makes me glad that I'd decided to only pay for the half share this year; if we got that amount of produce every week, we'd be turning green!
Week 2 Delivery

Week 2 delivery
This week, we got (our half-share) delivery that includes:
1 red leaf lettuce
1 green leaf lettuce
1 bunch radishes
2 zucchini (and so it begins)
More snap peas
1 basil plant (in a pot)
2 celtuces
Right. That's not a typo. Celtuces. Never heard of them before. Even the CSA folks said they were new to them too. Apparently they're big in Asia, though (they're also known as "Chinese lettuce"), which means it's quite possible I ate them somewhere along the way and just didn't know it. Here's a link to a description. Apparently you don't eat the leaves so much as the stem. When I looked at them, my first thought was, "I wonder if I could shave this lengthwise and cook it up as shavings?" Sure enough, check out this article from Huffington Post. I really am getting the hang of this cooking thing--woo! So that'll be fun to play with.
The radishes are going straight to my MIL as none of us are radish fans; the basil plant is also going to my MIL because I just put four basils in the ground about three weeks ago here, so I'll be awash in basil in no time. Everything else is going to be used up quite easily, though. Love me some red and green leaf lettuce, and you already know how we feel about snap peas. Although, frankly, we'll probably be glad to see the last of them with all the snap peas we've gotten the last couple of week.

Actually, I'm not really sure I have anything more to say on this subject. Well, maybe just a little.
First, to recap: Whenever you find yourself thinking of something as a UFO, first make sure it fits your definition of a UFO. Then make sure it's something you really need to finish. Then list out the exact steps, especially the very next action of what you need to do to make progress on completing it. Finally, motivate yourself however you need to motivate yourself to finish it. Does that summarize the last several weeks of posts well enough?
Now, here's the thing: I've done every step of these posts with the exception of deciding which UFO I'm going to tackle next. You see, I just got the first syllabus for my coursework today and, yep, I'm pretty much not going to have time for much else than reading and writing for the next, well, several years. And I'm okay with that. That's simply where my life is at the moment and I choose to accept it gracefully, knowing that I have other focii right now. Could I do the 10-minutes-a-day thing just to get something done? Probably, but do I want to add one more obligatory task to my list just to achieve some sort of fictional finish-count? Nope. I'll be quilty-creative when I need to be for therapy, and I'll finish the couple of giftie things I've mentally committed myself to, but I'm not going to worry about achieving some sort of quantity goal at all.

So, in my long-standing tradition of giving my readers the advice I most need to hear: My last post on the topic of UFOs will be, cut yourself some slack.
Who says you need to finish all those UFOs in a given time frame? In general, whether we're talking UFOs or new projects or whatever, just cut yourself slack. I too often hear quilters apologize for little they're getting done quilty-wise. What? Apologizing? They look at super-productive quilters and somehow think we're all supposed to measure up. Yes, I've even been guilty of that myself--more than a few times. But here's what I've also had to remind myself: It's not about quantity. You're getting done what you're able to get done or what you want to get done. If you're not getting more done, who cares? There's no Great Big Tally Board in the Sky that you'll be measured against after you're gone.
If, however, you're feeling sad that you've not gotten enough of a quilty fix in your life, now THAT you need to listen to. Look at your schedule and see if there's a little sliver of time in there somewhere. Or see if there's some other way to be creative that you can more easily fit into your current realities of life (like me and embroidery--it works better for me right now than quilt projects do, so it's what I'm focusing on).
I'm sure, at several junctures in the next few years of my new phase of life, I'm going to be feeling sad that I don't have the time to get my quilty on. But I'm not going to feel guilty about a lack of productivity. And I want you to hold me to that statement. If you hear me starting to apologize for not getting quilty stuff done, I give you permission to give me the metaphorical cuff upside the head. Just like I'll do for you. Say it with me: I'm cutting myself some slack. Again, louder: I'm cutting myself some slack. One more time, with gusto: I'm cutting myself some slack!
As a side note, cutting myself slack may well mean I'm posting far fewer blog posts in the foreseeable future--well, after this week, anyway; I've got a couple I need to get out given a big finish I just had this weekend! But I'll still be around and likely still as active as ever on Twitter, so keep talking to me!
Last Sunday was my daughter's graduation party and although I kept saying I was keeping it casual, somehow I still ended up on my feet all day. So, no progress and goals post. However, I also have to confess that I hadn't made much progress and I hadn't really achieved many goals, so it's probably not a bad thing I ended up with an extra week to report.
*and following, apparently

This may actually be my last progress and goals post for a few weeks; next week is Father's Day, the week after I'm out of town for work, and the week after I'm out of town again for vacation. So the goals for this week are probably the goals for the better part of the next month!
Woot! It's the first week of our CSA (Community Supported Agriculture) season. This always feels a bit like Christmas every week--I never know what I'm going to get until I go to pick it up.
This week, we received:
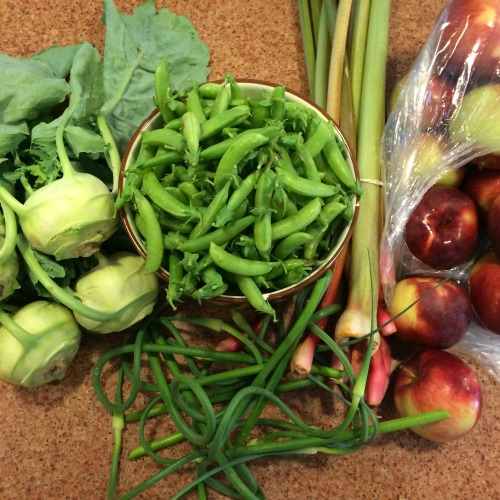
I was a bit surprised by how much there was in the box: This is only a half share or, as they suggested, enough for 2-3 people. The three of us in our house will be sharing it with a couple of other people as well, I think--I'm sending my daughter over to her grandparents' house tomorrow to share a bit of the bounty. Since I don't have time to can and my freezer's pretty small to start with, it's hard for us to prep things for long-term storage. I have yet to buy the vacuum sealer I keep talking about getting. Maybe this weekend I'll finally get out to take care of that.
I know: apples aren't exactly in season in these parts; I believe they're from the farm's cold storage. I already ate one--very yummy. Not sure what type they are--not an Empire or Macintosh, but somewhere in between, sweetness-wise. My daughter and I also dove into the snap peas pretty fast--we both love to eat them raw.
What I'm thinking I may do:
Stay tuned to see what actually happens!
If you're curious, here are the cookbooks I got a few years ago when I first started down the CSA road:
(Using these Amazon links does help support this blog, so thanks if you do!)

So you've made your list and checked it twice, right?
I know at least some of you have--I've been hearing the reports! Love getting the feedback. I've also gone through my own list and, although I was prepared for this week's post (I do have a bit of an "in" with the blog writer), I still haven't done a bang-up job of attending to this week's assignment in my own life. So we're all in this one together for sure!
Now that you know what your UFOs are, and now that you know which ones you're actually going to commit to finishing (you did knock one or two, if not more, off the list, right?), now it's time to make a plan for finishing!
Rather than just starting at the top of the list and working your way down, I'd suggest you figure out which one you want to finish next using the following criteria:

1. Look for UFOs with built-in deadlines. For example, were you working on a wedding quilt that got set aside, but now the wedding is only a couple of months (or weeks--yikes!) away? This first sub-category--imminent first-run deadlines--is pretty easy to figure out and calendarize, so go there first. The second sub-category is "deadlines that have already been blown." But a deadline can always be reworked in a meaningful way: For example, is that baby who you were working on that baby quilt for about to have their own baby, so maybe that UFO can be repurposed for the next generation? Or could the unfinished high school graduation quilt now perhaps be a wedding or a housewarming gift? I'm not always an advocate of going with deadline-driven UFOs first (see the following categories) but let's face it--some of us work best to a deadline, so if you're that kind of person, give yourself a deadline or two!

2. Look for "Easy Wins." This is actually my favorite category, but it only goes so far. In this category, you find those UFOs that would take you so little work to finish it's actually pretty ridiculous it's still sitting on that dang shelf. Ahem. Sorry--I just let you in on a personal between-me-and-my-UFOs conversation. In any case, if you don't have any seriously imminent deadlines from category 1, this would always be the first place I'd suggest starting. An Easy Win makes you feel great and gets the buzz going. Once you knock out a fast UFO finish, you're gung-ho for the next one. You may not want to knock out all your Easy Wins in a row, though, as you'll then be left with the ones you have to slog through a little more and you'll just stop dead again. Depending on how many EW's you have, maybe you want to knock out one or two, then a longer one, then an other EW, then a longer one...rewarding yourself, as it were. Pretty soon, however, it's likely you'll run out of Easy Wins and you'll only have longer finishes facing you. Which leads me to the next category...
3. Look for the most interesting. Which UFOs still interest or intrigue you in some way? Is there a UFO you really did enjoy working on, but it was just taking longer than you thought so it got set aside, or it got sidelined by other projects that fall under #1 above and just fell off your radar? We're always more motivated to work on projects that keep our interest, so these UFOs are more likely to get finished, even if they're going to take us a little longer.

4. Look at what's left: The frustrating projects or those that we've just lost interest in. Once again, I'd say that the first step here is to really be sure you actually have to finish these UFOs (see my last blog post). But if they're still on your list for whatever reason, and they don't fit into any of the other three categories above, you may have to really get creative with your own personal mind-games to get yourself to finish UFOS in this category.
So, using these categories, your challenge this week is to choose which UFO you're going to work on next. (If you're already working on a UFO, great! Decide which one you're going to tackle after this one.)
The problem I've been having lately is that I've been bouncing around a bit in terms of which UFOs I want to finish next. I've probably had three or four rotate on and off my design wall as I'm pondering one or the other. I think doing the Annie Unrein bag is scattering my brain in other places. Fortunately, this week and the coming weekend are fairly clear so I have hopes of once again making some progress...
Anyway...talk to me!

Sorry, I missed Thinkin' about It Thursday again. When I've got stuff happening on Wednesday evening I'm in trouble. Sorry about that!
Meanwhile, not a whole lot to post about today on the fitness front. I'm still doing PT and, in fact, we had a bit of a set-back this week. We think we may have figured out what happened, but suffice it to say that my knee had felt pretty good going into PT and then we did something during my appointment that angered it. Oops.

My PT decided to use this ultrasound thingie on my knee to try to keep it from swelling up or something (still not entirely sure what it was doing, but it felt good, so okay), and then a honkin' big mother-of-an-ice pack for the last 10 minutes of the appointment.
My knee was pretty stiff the rest of the day. I iced it two more times.
That was yesterday. Today it's feeling much better though I'm still being a little careful. I'm about to leave for a canal walk with the Doofus; I'll reserve judgment on whether I want to just stick to a walk or do my Zombies 5K training. I'm still only on week 1 so it's pretty low-key. It also depends on what it feels like when I leave the house. We had thunderstorms move through earlier and, although it's now bright and sunny, I suspect it'll be a steam bath out there. Blech.
I'm not upset about having triggered my knee at PT. In fact, if you're going to trigger it, that's the place to do it. Since I've had what felt like random flare-ups periodically over the last few months, we're now starting to narrow in what causes those flare-ups, which will help me either avoid the position/motion that triggers it or we'll be able to fine-tune my strengthening exercises, or both. I've now got about a half-hour of PT exercises to do every day. Who needs the gym?
Another "good for me move" was that I went to my WW meeting this week even though I'd done so little in the past week to warrant even bothering to get on the scale. Stayed the same, which was only indicative that I truly am in eating habits, even if not the healthiest ones. It's a new week, though--already planned out as many of my meals as I can (I have a couple of unpredictable random events going on this week). Tonight DD and I are hauling out the refrigerator and pantry--partly to make room for stuff for her grad party we're throwing on Sunday, and partly because they're both driving me nuts. I had them organized once. Then other people got involved. Sigh. Once it's cleaned out, I'm planning on setting it up for the best health success possible. (To whit: DD asked me to buy her bagels this week--I got her ones I dislike so I won't be tempted. She likes all those weird flavors, go figure.)
By the way, DD's Oreos are now gone. Best not to talk about it.
On a happy note: My CSA starts next week! Woot! First pick-up is Tuesday. I'll have to figure out how I'm going to do the CSA posts this year now that "Food Friday" has been replaced with "Fight the Funk Friday." Maybe Harvest Wednesday? Any ideas, folks?

Sorry, couldn't resist tossing a little gimmicky rhyme in there.
Okay, some of you have been whining...I mean...commenting about the fact that I made you face up to your UFOs this past week. It's rarely fun to make the list, right? Sometimes we're in for some unpleasant surprises when we really pull all those bins off our shelves or turn the light on in the corner closet. But still--really!--it's a liberating moment. The first step to solving the problem is admitting you have one, right? Tee hee.
But I kept reassuring y'all--just wait until Monday. Today we make it all better. Or, at least, we start making it more sane.
This week, we're going to look at our UFO lists, I mean really look at them, and make some judgment calls. This post is a little on the long side because we have to deal with some real baggage here. So, let's just start by saying...

You know, it is permissible not to finish a UFO.
I know, I know--trust me. I've heard it. "But that's a waste of time and fabric!" "But I spent so much on the supplies for that!" "But I just don't feel right if I have a loose end!"
I'm a loose-end kinda gal, myself. I like things to be completed, I like to get to the end of the story. However, there are a couple of things I've had to teach myself the last few years:
1. Is this my story, or someone else's story?
2. What is the story that needs to be finished?
3. Who needs to finish the story?
4. And what about the trash can?
I'm talking here about obligation quilt projects. We probably all know what these are: the quilts someone has asked us to make--that someone having no idea whatsoever what it actually takes to make a quilt. They have no concept of the amount of work or expense that goes into them. This does not make them bad or inconsiderate people. It just makes them non-quilters. (We create this atmosphere ourselves, by the way, when we pass off a compliment on a quilt with, "Oh, it's nothing special," or "just something I whipped together." We're better off saying, "yeah, that puppy just about killed me but I persevered!" Don't be afraid of letting people know how much work goes into these things!)
There are also the obligation quilt projects we put on ourselves. We intend to make a baby quilt for our co-worker's son and his wife--we've never met them, but we really like our co-worker, so we want to do something nice for the new grandma. We start the quilt, and now said baby is starting kindergarten and the quilt is still half-done on our shelves. Or we start a quilt for a donation project and lose steam, or for a fundraiser, or for whatever.
One of the last projects I did for someone else on request: It was fun, but boy did it stress me out!
I have more difficulty with the second category than the first, only for the reason that I rarely agree to make a quilt for anyone at their request anymore. I did it a few times in my earlier years. I enjoyed doing those projects at some level, but I also stressed out about them far more than any other quilts I'd made for my own enjoyment. I felt perpetually guilty about how long it was taking me because of my work/travel schedule; those projects hung over my head like anvils until I could finally get them done. Fortunately in my case, all the recipients seemed to really appreciate their projects (I know one is still hanging in her living room since I see it every time I go over there). I know for a lot of quilters, however, that's not always the case--there are definitely some horror stories out there of what's happened when a quilter has gifted something to someone and it's not received in the way we'd all hope. In any case, I'm currently working under different guidelines--it may make me sound like Bad Quilter Lady, but I no longer offer/agree to make anything for anyone, unless it's contributing a block to a group project; and even then, I take a careful look at my schedule before saying yes. I just have to face reality--I just don't have the time right now.
An example of one of my "mental obligation" UFOs
My difficulty tends to be more when I mentally connect a project with a particular person--they don't know I've done so, they've not asked for it, they have no idea I'm working on anything for them--it's just me in my head, thinking, "Oh, this would be great for so and so." That makes it almost as binding a commitment to me as if I had told them I was making it, or they'd asked me for it. This is the type of story I need to learn to release. If they have no idea it's coming, and if I get to the point where it's just unreasonable for me to feel like I can finish it, what's the harm in letting it go? I just need to get over myself.
So--the question to ask ourselves here is, "is this my story" (in other words, something I really want to do myself), or "is this someone else's story" (in other words, something someone else has asked me to do). If the answer is the first, the corollary question is, "do I still want to be part of this story or am I ready to move on?" If the answer is the second, the corollary question is, "if I didn't finish this, what would be the worst that would happen?" My guess is, if someone has asked you to make a quilt and you go back to them and say, "You know, my schedule/responsibilities are different now than when I agreed to do this, and I just don't think I can finish it," they may be a little disappointed, of course, but they're not going to open a can of whup-*ss on you. In fact, they may completely understand and actually feel a little badly if they knew it was causing you so much angst in the first place and be happy to release you from the obligation.
Yes, most of the quilts in this category you may still choose to finish, and that's absolutely fine. I'm not saying not to! I'm just saying, as in all things, assess the need carefully.
Several of my UFOs fall into the category of class projects or homework projects I worked on in my design study group; some are simply things I started on my own. They were projects I undertook to learn something new, to experiment with a concept, or to push my own envelope. They were incomplete because (1) I learned what I wanted to learn, (2) my experiment didn't turn out the way I'd hoped, or (3) my envelope, duly pushed, now sent me in other directions and other projects.
These are not projects I really need to finish. Their "story" was to teach me something, and I learned that something. There's no additional learning to be gained from finishing these projects. I may keep them around as reference, but I don't need to keep them around as UFOs. I can now mentally re-categorize them and move on.
Do you have projects kicking around from that class you took five years ago that you've never finished? Ask yourself: Do you really need to? Do you really want to? Or are you feeling like you should finish it just because we're supposed to finish things?
So you have a UFO that needs to be finished--who says you're the one that has to finish it? There are some people who get a big kick out of finishing other people's UFOs. By passing one of your UFOs along, you may well be providing someone else with hours of entertainment. You may be providing someone else with something they can practice their own techniques on: For example, maybe they want a "low commitment" project to practice their free motion quilting skills; if they haven't put all the time into making the quilt top, they're likely to feel more free to mess up the quilting. Or, maybe they want to play around with over-dyeing and surface design techniques and turn it all sorts of interesting colors.
Of course, that means you need to give up all control about how it's finished. That queen-sized UFO may end up being several totebags and placemats by the end. But at least it's no longer on your list and someone else has had a great time playing with it.

One of Mom's UFOs I did finish
When my mother passed away, I went through all her UFOs to decide which I was actually going to take on myself; I was pretty careful, but I still ended up with a sizable number. (I did get those all done!) I let her friends go through the rest, and they each took a couple. I then took the remainder into my guild and put them up for grabs--I didn't go home with anything left in my bag.* My guild buddies were pleased to have this new opportunity for fun and games! As for my own UFOs, I'm fortunate that I do have a couple of friends who enjoy completing UFOs, so I recently handed off a couple. I pulled them out of my totebag with an apologetic look and mumbled words of, "If you don't want it, that's fine, I'll figure something else out." Their eyes lit up and they practically grabbed them out of my hands. "Ooh--this'll be fun!" So next time I know to be less apologetic about it.
Look at your UFOs--are there some that you may be willing to release to the wild? Maybe you could even make a game of it: Put each one in a brown paper bag and challenge your guild friends to each take a bag and convert the UFO into something different--if it was originally a wallhanging, turn it into a totebag; if it was originally a totebag, repurpose it into a tea cozy...etc. Set a deadline and let the fun begin!
Some of you just shuddered, I can feel it from my house. There's a rule in the quilt world that it's Terribly Wasteful to Throw Out Fabric. I might as well be thrown in quilt jail for even suggesting such a thing.
All I can say is, there are some projects I've tossed and then danced a happy dance around the trash can. There's something completely liberating about demolishing a UFO. I reserve this for those projects that caused me unwarranted frustration and angst, that I'd be embarrassed to have anyone else be witness to, or that just cause my stomach to twist whenever I look at them. I just have to purge them from my life.
It's cleansing. Try it.
So, this week, I want you to assess each one of your UFOs and honestly--completely and totally honestly--determine if you actually (1) want or (2) need to finish it. If it's a project for someone else, why isn't it done yet? Could you talk to that person about the consequences of not finishing it? If it's a project for you, does it really need to be finished or, at least, does it need to be finished by you?
I'd actually already gone through my list a couple of months ago and found two projects to give away to others, and trashed a couple of other ones. I still plan on going through the list again to see if there are others I could "off." So I'm with you in this!
See if you can't decrease your list by at least one UFO--maybe more!

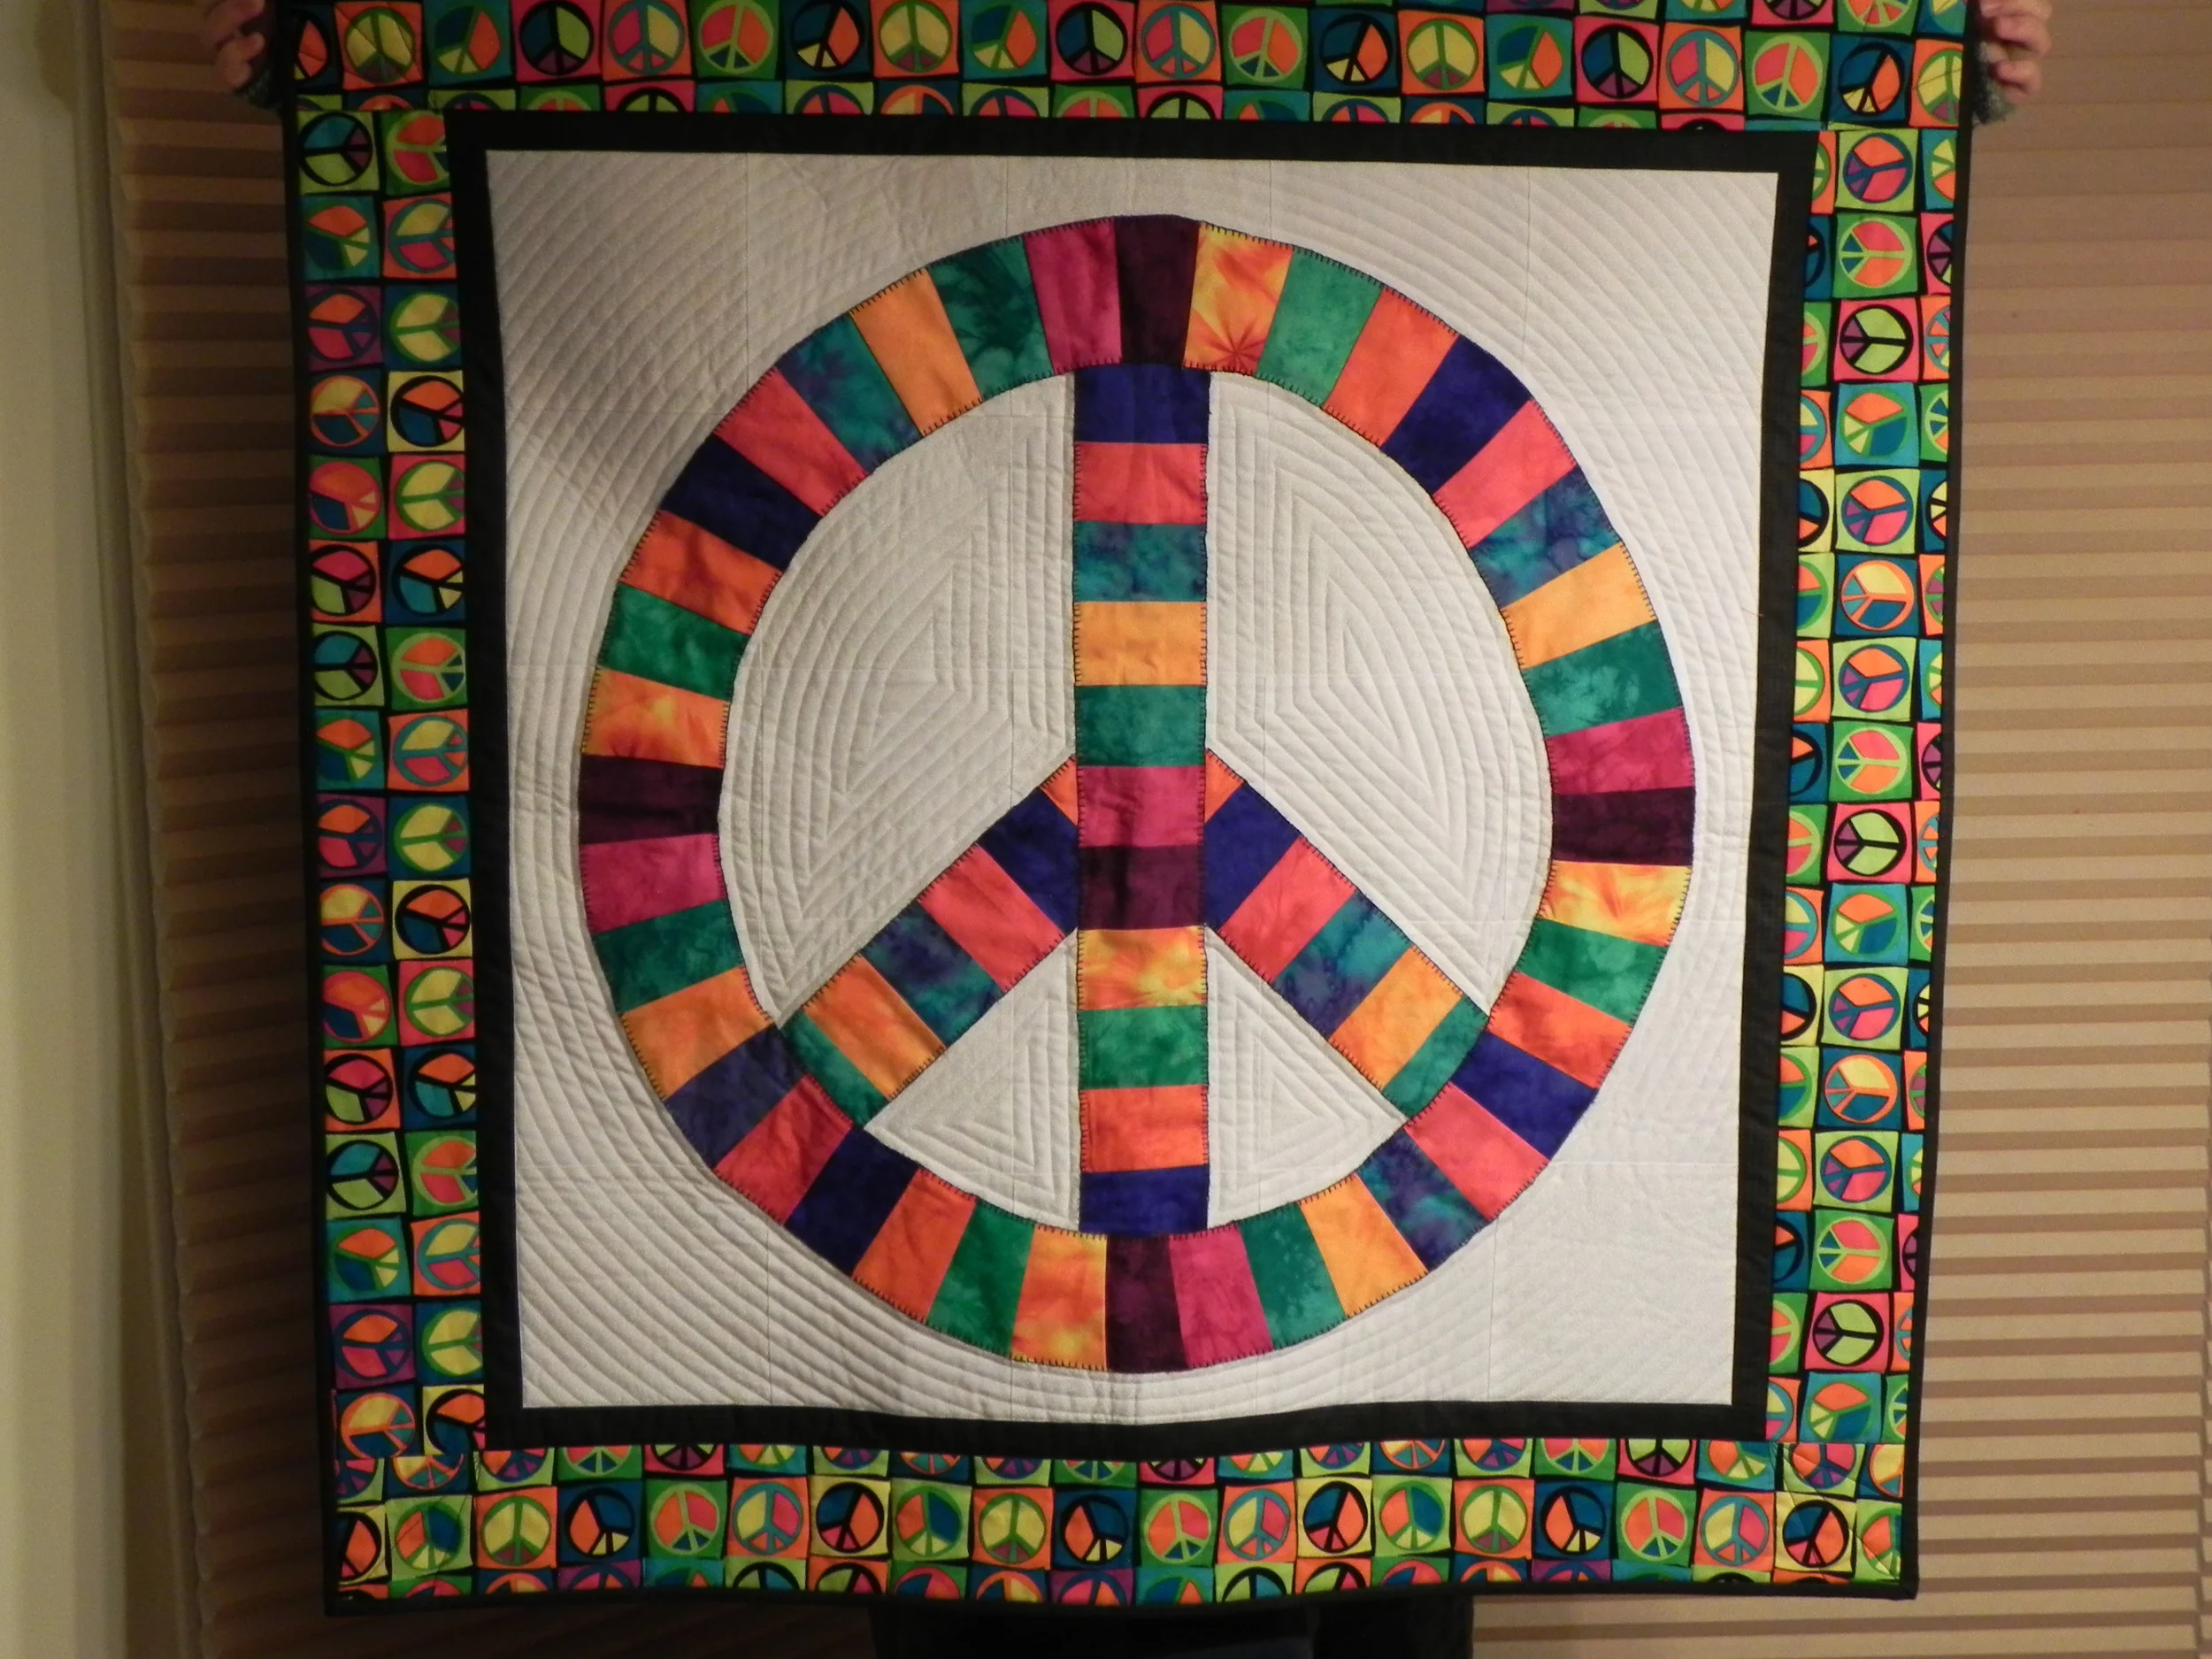
*One of Mom's UFOs did come back home to live with me. One of my BFF/BQFs, Lori, finished it and gave it back to me as a gift a couple of years after I'd done the UFO-giveaway. Mom's original UFO was actually round--or hexagonal or whatever. I think she intended to complete it as a table cover. Lori finished it as a wallhanging and gifted it to me; it now hangs over the bed in my guest room. So, see? There is a happy ending for UFOs sent off to live in other people's houses!

Can you see all the cotton from the trees on the surface of the canal? What doesn't show in this picture is the massive amounts of it also floating in the air like snow. We've officially entered one of my two worst allergy seasons of the year (the other one is the end of August). Getting in two solid canal walks on Friday and Saturday felled me today. Consequently, the super-productive weekend I was looking forward to was only half as productive as I'd hoped. Still n' all, I did get some stuff done.

It's the vinyl that's gettin' me down...
Mountmellick Stitch (outline) and Lazy Daisy.
I had a pretty good month in my Life with Craftsy. I finished four, but I did pick up a couple of new ones as well. Still, I finished more than I added, so I'm ahead!
(+4)
(4)

(+2)
Current count: (13, down 2 from last month)
Current count: 59 (+4)


Surprise, another embroidery class! This time I'm reviewing Design It, Stitch It: Hand Embroidery with Jessica Marquez. Yet another very good, very enjoyable class on embroidery! And yes, even though this is the third embroidery class I've taken in a row from Craftsy, I did still learn a few things.
Of the three, this is the most straight-up embroidery class. Jessica teaches traditional embroidery using traditional methods and traditional types of design. She's working on linen with "normal" embroidery floss; therefore, she doesn't spend a ton of time on talking about supplies: No information about types of needles or types of threads. She just mentions the type of needle she likes (not by name, but by description), and shows the one type of floss (read: DMC embroidery floss). She talks about using different quantities of strands of floss, and demonstrates the best way to separate those strands and then thread your needle. She talks a little bit about hoops, (although not as much information as I got from other classes, but different types of embroidery have slightly different needs), and how to load your fabric into the hoop.

Based on this class, I picked up a handful of new supplies--some linen for testing and a few different types of image transfer pens/pencils.
I think, having now done a couple of other classes, the portion of her introductory lesson that was most useful to me was her talking about transferring designs. I picked up information about iron-on transfer pens and water-soluble pens from this lesson.
The next several lessons go through the different families of stitches, much the same way the other classes did. However, as I said in my review of the crewel embroidery class, every one of these classes had slightly different variations or even a couple of new stitches altogether--so I continually increased my repertoire of stitches with each class.
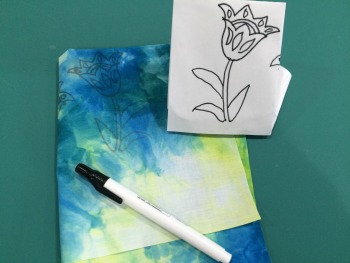
My test of Sulky's iron-on transfer pen for my next embroidery project--worked beautifully, though a bit of a thick line.
There is a class project if you want something that gives you an easy opportunity to practice all the stitches. It would be extremely easy to put together. However, as per my usual...butterflies on this end. Someday I'll be done with butterflies, and I'll never want to see another one again.
At the end of most of the lessons, she shows examples of how she's used many of the stitches in her own projects. It was good inspiration, thought her style is more traditional than mine. I enjoyed seeing stitches at work in various ways and was generating ideas for where I may use some stitches in my own work.
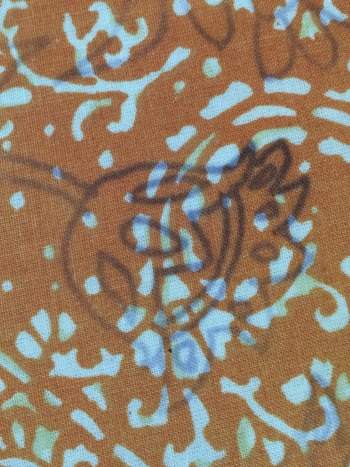
Caution: the iron-on transfer ink did bleed through my embroidery background fabric onto my ironing board. Oops--didn't see that warning in the instructions until too late. Apparently I was supposed to have protective layer underneath. Unfortunately, the instructions offer no guidance as to whether this can be fixed!
The final lesson gives some great information about how to create your own patterns from photos or children's artwork or, really, anywhere else you get inspiration. I would have liked to have seen a finished project based on a pattern she did from a photo, though. She does show a finished product based on children's artwork that was pretty cute. That would make a great gift for a mom or grandmom!
Jessica is very easy to listen to. The first lesson felt a bit stiff until she got into the stitching, and then you could almost visibly see her relax and get into a groove. The rest of the lessons were very easy to watch. She clearly loves her embroidery--it's her happy place. I found myself enjoying watching her be so relaxed and happy with it.
So, here's the thing: Now that I've taken three of the four classes on hand embroidery in Craftsy (the fourth I'm working on now is on bead embroidery so that's a slightly different category), if I did it again, would I do them in a different order? That all depends on your goal, I guess. If you think you want to do traditional embroidery and want to learn the basics, I think this class, Design It, Stitch It with Jessica Marquez, would be the best place to start. However, me being me, I'm not entirely sure I'd have been as grabbed by embroidery if I'd started here. My design preferences are definitely closer to Sue Spargo's Embroidering Texture & Dimension by Hand than the more traditional style of this class. I think I needed to see the possibilities of Spargo's designs in order for the excitement of embroidery to take hold. I also think I'm more jazzed by the styles depicted in Stitch it with Wool: Crewel Embroidery with Kristin Nicholas. So, for me personally, I think I did the classes in the order I needed to do them in: Be grabbed by design possibilities, then backtrack to build up the technique. If you're more of a technique person, you may want to do the classes in the reverse.
I will admit, however, had I started with Design It, Stitch It with Jessica Marquez, I might have sped up the pace of becoming confident in embroidery in general, only because I would have seriously reduced the variables. Learning stitches with a single type of thread and needle makes it much easier to focus on the stitch technique. In Sue Spargo's Embroidering Texture & Dimension by Hand, with every new stitch I tried, I was using a different type of thread and needle--so I had a whole lot to get used to and figure out all at once. Nothing like diving into the deep end. Again, just know yourself and what jazzes you and/or makes you most comfortable.
By the way, I did make a run to the needle arts store across town yesterday and picked up a bunch of crewel wool thread, so that class lives on as well. I've got ideas...
(Using Craftsy links in this post and on this site helps support my podcast and blog. Thank you!)

Time for another food class review: Love Your Vegetables with Anna Bullett. It's been awhile since I've done a foodie post. However, for this one, I don't have any photos of dishes I've made from the class since I'm holding off trying the recipes until my CSA begins in another couple of weeks. So you'll be hearing more about the recipes themselves later.
I decided to do this class because of the aforementioned CSA, or Community Supported Agriculture. If you're new to my blog, just a short backstory: I've subscribed this summer to a CSA, and deliveries start the second week of June. I've done CSAs two other years but skipped last year because I travel a lot during the summer and was having problems juggling the schedule. This year, I found a CSA much closer to me so doing the weekly pick-up will be a lot easier, and I think I'm getting a smaller share, so it should be easier to keep up with the produce. I don't have time for canning and I have limited freezer space so I really do need to be able to use the produce up the week I get it, as much as possible. That means collecting a ton of vegetable-focused recipes. This class seemed just the ticket.

One of my 2013 CSA pick-ups
Anna Bullett reminds me a bit of Rachel Ray in terms of perkiness. If you love Rachel Ray, you'll probably really enjoy Anna Bullett.
As a learning experience, it was a good one. Each lesson focused on a particular family of vegetables and, through the recipe or recipes covered in the lesson, Anna gives rationale behind different types of preparations for the vegetable in question. She also gives all sorts of good tips for washing, slicing, and storage. There are several recipes that I'm looking forward to trying when my produce starts rolling in.

Another ghost of CSAs past
Additionally, every lesson except the last includes a "Chef's Tip," or a brief tidbit of additional information about something else you can do with that family of vegetables. These were nice little additions--one of them helped me understand why my attempt at Kale chips a couple of years ago failed miserably. I think I'll be better prepared for the inevitable influx of Kale from the CSA this year.
If you're looking to expand your repertoire for vegetable dishes--either as a side or a main--I do recommend this class. Just be prepared for the perky.
Two thumbs up. Basically, Love Your Vegetables with Anna Bullett is just increasing my yearning for Tuesday, June 9, when I get to do my first CSA pick-up of the season. I can't wait to dig in!
(Using Craftsy links on this website helps support my podcast and blog. Thank you!)
Once again, I loved doing an embroidery class! After doing Sue Spargo's class and still having a boatload of butterflies to finish, I figured the next best bet was Kristin Nicholas' Stitch It with Wool: Crewel Embroidery. I assumed it would be pretty easy to incorporate any new stitches I might encounter into the butterflies.
I wasn't positive what "crewel embroidery" was and how it differed from regular embroidery before I took this class. As I've now learned, the only real difference is the thread. With crewel embroidery, you're embroidering with yarn. There is actual crewel embroidery yarn, but you can also use regular yarn as long as it's a smooth yarn that will glide easily through your fabric. I have a couple of thicker perle cottons that I decided fit the ticket, so I was able to practice one or two of the stitches even though I don't have actual crewel yarn. It's now on my shopping list, though.
Most people likely associate crewel embroidery with Jacobean design, as crewel was hugely popular in that era. Click here for a great Pinterest collection of Jacobean design in fabrics. However, it doesn't have to be Jacobean to be crewel (which sounds like a song title): You can do any ol' embroidery you want with yarn. Mary Corbet has a nice description of crewel on her website. The thickness of the yarn may dictate a bit what stitches you're able to do, but for the most part, it's the same thing.
I dig Jacobean design, so that was part of what attracted me to this class--if you do the actual class project, it's got a bit of a Jacobean flair to it. Or maybe it just reads that way to me because they're done in wool. Whatever: they are cute projects, but I chose not to do any of them at this stage: I just wanted to focus on finishing those dang butterflies. I have a couple of books on Jacobean applique that I inherited from my Mom and have never used--I'm now imagining them as embroidery patterns instead of applique patterns. I suspect I may be using those books any time now!

Satin stitch worked in perle cotton
Many of the stitches were the same in this class as in Sue Spargo's, which one would expect; there are certain foundational stitches to embroidery that will show up in any class. It's how those stitches get built upon and layered that can make the difference. That means, of course, that Kirstin Nicholas has few new variations and stitches in this class, even if they were the same stitch "families." Plus, every teacher will have slight variations on technique which are helpful to learn--it gives me more options when trying to figure out which technique I wear most comfortably. Additionally, she gives some tricks to making stitches work as well with wool as with floss, or in terms of helping you learn how to choose the best stitches for success with wool, and so forth.
I enjoyed Kristin Nicholas' teaching style. She's very straightforward and clearly demonstrates each stitch. She also has an excellent lesson at the end about how to keep your skeins of stitching yarn from becoming a tangled mess (something I had to learn the hard way, unfortunately), as well as how to block and steam an embroidery project when it's completed. This wasn't covered at all in Sue Spargo's class, but the difference in materials makes it less necessary for a Spargo-style embroidery project than the Nicholas-style.
I've only got the one project picture above for this class as now I'm in sort of a free-style mode on the butterflies--just picking and choosing what stitches I want to use from all of the Craftsy classes I've done (another review coming today!), plus a couple of books I've picked up. But the next embroidery project I'm designing in my head is heavily influenced by this class, and I may well end up picking up some crewel wool so I can get a feel for how it works. Unfortunately, most of the yarn scraps I've collected from friends are "weird yarns," or the type that need to be couched rather than used in embroidery.
So, in summary, I did enjoy this class and I feel like it added to my general repertoire and comfort level with embroidery. I don't recommend either Sue Spargo's class or this one higher than another--they have both been great for me!
So, my review of Kristin Nicholas' Stitch it with Wool: Crewel Embroidery is definitely two thumbs up. I may actually make a trip this weekend to one of the two places near-ish me that sell crewel wool so I can really go to town!
(Using Craftsy links in this post and on this site help support my podcast and blog: Thank you!)

I'm just barely getting this post done while it's still Friday. It's not like I was waiting to see if I actually got any activity in this week before writing it, exactly, but... well, I did just get back from the canal. So I do have something to write about. Nice how that worked out.
PT is still going well. Since she sounds like she's about to "graduate" me from the work on my knee (we're still going to be addressing the vertigo later), I talked with my PT during my appointment yesterday about whether I could start doing a 5K training program again. She suggested I bring my running sneakers to my appointment next week and we'd jog around the parking lot a bit to see how it went. Well, it was a gorgeous day out today and I decided, true to form, why wait? So I packed up Sammy and my running sneakers, and off we went.

I'm using the Zombies Run 5K training program; got Week 1, Day 1 done. Oh, I've missed my zombies. It was fun to be hearing the actors' voices that had been such a part of my life (on and off) over the last few years. I was a bit surprised by my playlist, however. I'd forgotten that I'd had to reset my iPhone a few weeks ago and thereby lost my playlists. I haven't taken the time to get them all set back up again, so the only songs on my workout playlist were 8 or 9 new ones that I'd added by phone over the last few weeks. It was a nice surprise in that all the music was new to the playlist, so I wasn't listening to the same old tunes that have kept me company on the elliptical the last several years. I periodically add a couple of new tunes here and there, but a lot of that music has gotten pretty tired. It's time to give the list an overhaul. In any case, tonight's playlist was an eclectic bunch: A little ELO, a little Mark Ronson, a little Tina Turner, a little Iggy Azalea...fun group to keep me and the Sam-ster going. I admit to a little audible singing along and a few jiggy steps when I was in a deserted section of the canal path. (Can you listen to "Son of a Preacher Man" and not do a little bopping?)

My knee did great during the canal extravaganza. However, I could feel it started to stiffen up a bit afterwards (and while I was doing some of my PT exercises when I got home) so I popped some Advil and I'm writing this on my iPad, ensconced on my couch with my leg up and and ice pack applied. That's more of a precautionary thing--it doesn't actually hurt, but I can feel it reacting. We'll see how it is in the morning.
No 5k training tomorrow--you're supposed to do one day on, one day off, anyway; If my knee is normal tomorrow, I'll just do a regular canal walk.

Sam would've danced along to Uptown Funk if he had any sense of rhythm whatsoever.
I'd be doing fine on the eating front if my daughter hadn't moved home and brought Oreos with her. Dang it all. I'm powerless in the face of an Oreo.