Black Friday Sew-In

Yep--I'll be doing it this year! Join me for our annual (or almost-annual for me) Black Friday Sew-In! For those of us who detest crowds and avoid shopping like the plague on this day, what better way to stage our sit-in protest than by sitting-in in front of our sewing machines? 

We'll be live-tweeting, live-instragramming, and even live-facebooking (or slightly less than live since it's a little trickier to do a by-the-moment update there) the event.  

Ready to have some fun and get some stuff done? 

Finally--a Finish! Butterflies are Free to Fly

Finally, it's done!

This is my completed project from Sue Spargo's Craftsy class Embroidering Texture and Dimension by Hand. Click here for my review of the class and a couple of pictures of the project in progress.

I'm not loving the final product but that has nothing to do with Sue's design or class--I love her work and the class was great fun. 

No, the issues are all "user error." So--if you take her class or use one of her patterns or books, follow her directions! She knows what of she speaks. I didn't, and it bought me all sorts of trouble.  (I went into more detail on that on my last podcast episode, so check it out if you want to avoid the same difficulties.)

Still n' all, I had a lot of fun for most of the process. I question a couple of my design choices but I did achieve my overall goals, which were (1) learning embroidery, and (2) using as many different types of threads as possible. I even threw some beads on there.

Mostly--yay, it's done!

Meanwhile, you can tell I've been bitten by the embroidery bug hard--here's a picture of more pretty mail I got this week.

Check out www.colourcomplements.com. Hand-dyed embroidery threads tastiness. She's also got a great blog to follow. She ships from Canada, by the way, but it came fast!


 I love these threads. So much so that I couldn't wait to put them to work so I added a bullion rose to my free-form sampler piece I've got working. 

Not too shabby for my first attempt at one of those roses. But that thread-gorgeousness makes anything look good. Yums.

Craftsy Class Review: Mobile Photography with Jack Davis

I finally completed another Craftsy class! Mind you, this one was a bit of a gimme but I can use some of those about now.

Last year, after I'd done a few other Craftsy photography classes that used my "real" camera, I sent Craftsy an email. "Love these classes," I said, "but the reality is most of the time I only want to bring my cell phone, not lug my big camera and several lenses. Is there a chance that Craftsy would do a class on photography using your cell phone camera?" (Or words to that effect.) They promptly replied that they were working on one.

And so was born Mobile Photography with Jack Davis. I'm so happy.

I plowed through the lessons pretty quick, watching them over breakfast and with my cell phone in hand. He addresses composition a little bit, but the class really focuses on how to use all the settings and features in your phone camera. Davis shows both iOS and Android features, so either user will benefit from this class. 

Forasmuch as I've done tons of photography with my phone over the last few years, I learned about some great gadgets in the first lesson (and have added several to my Christmas wish list), and picked up several tips in the second lesson that addresses basic settings and such. So I was feeling the benefit of the class almost immediately! The rest of the lessons walk through all the settings available natively in your iPhone or Android phone, as well as highlighting a lot of his favorite apps for taking photos and video and editing them afterwards. The final lesson includes information about backing up your photos to online services, sharing, and other things you can do with your photos once you're done messing with them.

He demonstrates a lot of "creative photoediting" apps, such as my usual favorite, Waterlogue. However, he introduced me to loads of new ones so I've been going to town. Check out this photogallery of what I produced just using the most basic settings in AutoPainter, AutoPainter 2, and AutoPainter 3. I included the original photo I took at the Butterfly Garden in a local children's museum recently for comparison.

So.

Much.

Fun.

(The image gallery is on a timer to auto-forward but you can also use the forward and back arrows on the side to control the speed.) (Second parenthetical statement: Waterlogue and AutoPainter apps seem to only be available for iOS. If you're Droid-based, I found this thread that has some suggestions. Feel free to leave other suggestions for your fellow non-iOS friends in the comments to this post.)

Overall, Jack Davis is a good teacher. He has a very relaxed approach and takes you step-by-step through things so you can better understand how to do it yourself. I really enjoyed this class and plan to do a lot of practicing over the holidays so I'll probably be tweeting a lot of random photos for the next couple of months. 

One important note: This is a pretty time-constrained class, I think. Given the quick advance of technology, if you wait too long to take this class apps will have either disappeared or will have been updated and changed. So although with Craftsy classes you can buy it and own it forever and watch it years from now if you choose, this is a class I'd highly recommend purchasing and watching sooner rather than later. In fact, buy it and start watching it today. You never know when the next big system update for your phone or favorite apps will occur. 

The Basics

CleverPainter app--this one you can control where you're painting, level of detail, etc. Oh, the possibilities!

CleverPainter app--this one you can control where you're painting, level of detail, etc. Oh, the possibilities!

  • 7 lessons, ranging from about 21 to 28 minutes in length each.
  • Lesson 1 covers technology and gear--additional gadgets you might want to consider if you really want to leverage your phone's camera ability.
  • Lesson 2 addresses essentials--what are the basic native settings in your cell camera (both iOS and Android), a discussion of the HDR setting, and doing panoramas using your native app as well as a few other apps you might want to try.
  • Lesson 3 is "advanced shooting," and I picked up some excellent tips here about burst mode, motion blur, and video settings.
  • Lesson 4 addresses basic photoediting of color, contrast, sharpening, and so forth, using both native capabilities and other apps.
  • Lesson 5 is retouching and blending photos, again using native capabilities as well as other apps.
  • Lesson 6 gets super-fun with all sorts of creative stuff you can do either using your camera's native capabilities or a bunch of other apps you will likely want to play with. (I downloaded several apps while watching this lesson!)
  • Lesson 7 is syncing, sharing, and output--in other words, what to do with all that fun stuff once it's sitting in your camera memory.

Mobile Photography with Jack Davis: Two thumbs up. Well, my thumbs would be up if I could get them off my phone playing with all these great new apps!

(Usual disclaimer: As a Craftsy affiliate, using Craftsy links in this post helps support my podcast and blog, so thank you very much. And by the way, at this writing Craftsy is having a big sale so you'll definitely want to check it out! )

Progress and Goals--Week of 11-7-15

My goals this week were to:​

  • ​Finish the pudgy birds garland.
  • Finish getting the Jacob's Ladder blocks set up and ready for sewing.​

And I'm able to report...​

...progress on neither. ​

image.jpg

To finish the garland, I need to cut out a bunch of birds and leaves, then mark the embroidery designs again. This has proved to be a bit of a stopper for me. Instead of spending time doing that, I returned my attention to my Sue Spargo butterflies project. It was a lot easier to pick something up that only needs stitching, not all that prep work. I think it's quite possible I could get the butterflies done tonight or, at least, all the embroidery done. I still need to decide how I'm finishing it, e.g., whether I'm doing a backing and binding of some sort, or just finishing the edges off somehow. But to be honest, it'll feel so good getting that project done that I can't especially regret not working on the pudgy birds at the moment.

I didn't touch the JL blocks, for no good reason other than I just didn't.​

I also didn't get as much class reading done as I wanted to. I think I just went on a mental vacation this week. However, it's a new week....so off we go!

Progress and Goals--Week of November 1

I'd hoped to get this post written and a podcast out this past weekend but I ended up with a busier weekend than I thought I would have. I still plan on getting a podcast episode out early this week, though--it's a nice, normal week!

That normalcy means I may actually touch fabric and thread again. That's exciting.

I decided to go back to my last progress and goals post, which was roundabouts the middle of July. Yep, that fits. That's about when I stopped making much progress on anything. Here's where I left off:

  •  Accessories: Small, fast project TBD. I didn't get this finished, but I did get myself organized for it, have all my supplies, and started cutting. I decided to do a new Craftsy class...

Oooh--I did finish that one! Yay, me! That was the Zip It Up class that resulted in two of these three nifty little bags that I've put to good use, (The third bag was from a previous class; there was a third bag in Zip It Up not pictured here but shown on my blog here.)

  • Quilt Project: Get pieces sub-cut for Jacob's Ladder. 

Jacob's ladder units are now all pieced and trimmed to size. I'm starting to organize the blocks. Yes, it's supposed to be random scrappy, but I have some pieces that would create a visual "hole" in the quilt if they end up banged up against each other, so I do have to exert a little control over where things are ending up.

The goals I then set for the following week were:

  • Accessories: Get the first class project done (small purse).
  • Quilt Project: Get 4-patches completed. Get half-square triangles sub-cut, if not completed. 
  • Embroidery: Go back to working on my crewel embroidery project that I'd started back in early June, now that the other project is completed. I had to give my neck a few days of rest but it's feeling better now. I still feel like I should whip off the heatable neck wrap pattern I've had saved in Pocket for months--that was my original thought for my fast accessory project last week. 

I got the entire class done, I've already reported on the Jacob's Ladder progress. As for embroidery, I haven't done much more on the crewel project. I did get another embroidery project set up and nearly done, though. More about that in a minute.

Now that we're all caught up, let us move on:

Goals for This Week

  • Embroidery Project: Finish pudgy bird garland. This is a project I got out of a book on Swedish Embroidery from the library (and no, the project is not named "pudgy bird," but you know that's my thing). I prepped at the end of the summer with the intent of working on it while on all my fall travels. I don't think it ever got pulled out of the case. Once I got home and my dust had started settling, though, I buckled down and had it all embroidered in just a couple of nights. I figured I'd have it done by the weekend. And then, dang. I looked at the picture in the book again and realized I was supposed to have done half the birdies facing the opposite direction. Rather than ripping out perfectly good embroidery, I decided to use it as a reason to enact my original plan of making two garlands at the same time so I could keep one and give one as a gift. This week, I need to make an entirely new set of birdies and leaves, but face all the birds in the opposite direction. Then I'll combine half from each set and end up with two complete, correct garlands. (Yes, I considered just making the garland with them all lined up like soldiers but it really does look better with pairs of birds facing each other. I'm okay with this decision!)
  • Quilt Project: Jacob's Ladder--Finish setting up blocks for sewing. I don't think I'll actually get to sewing them, but I'd like to get the blocks all laid out. There's a Block A and a Block B--I'm stacking As on top of each other and will do the same with B, then sew one block together at a time so I don't inadvertently get two of those "black hole" fabrics abutting. 

If I can get both of those things done by next Sunday, I'll consider it a major success!

October Craftsy Class Update

Craftsy

It's looking like the last Craftsy class update I was able to post was back in (ahem) June. Yikes. No surprise, though, since I've had some other classes taking my attention! For at least the next few weeks, though, I should be able to make some progress on non-school-life. 

New Completions

(+2)

  • Easy Techniques for Zippered Bags with Joan Hawley (see my review here). This was an in-and-out class, so it didn't have a chance to show up in the "to be completed" list before it hit the "completed" list.
  • Bead Embroidery with Myra Wood. I haven't had the time to post a review yet, but I've left myself a sticky note on my computer monitor to get that done. I didn't do the class project but will be using this class as reference when I add beadwork to embroidery projects. 
(See? I did get some things done!)

(See? I did get some things done!)

Classes in Progress

(4)

Classes added this month

(+4--there was a sale, I was weak...)

  • Mobile Photography: Perfect Photos in Your Pocket with Jack Davis. I'd asked Craftsy for a class like this awhile back and they told me they were working on it. It's now available: A girl's dreams can come true! I love photography--I've owned SLRs in the past, and my current digital camera is one step removed from a DSLR. The reality is, however, that I hate hauling that thing with me when I travel whereas my cell phone is always right at hand. This is especially critical when I'm staffing events for work--I need to be able to grab that great shot the second I see it, rather than scrambling to get my big ol' camera set up. Plus, the way smart phone cameras are developing, they're already better than early digital cameras were and improving with every update. And there are nifty attachments now to make them even better! So when I saw (1) this class was available and (2) it was on sale, who could resist? I've only gotten through the first couple of lessons so far but have already picked up several tips. (He discusses iOS and Droid platforms in the class.)
  • Moving Between Lightroom & Photoshop with Lesa Snider. This is the perfect trifecta class with the two I already own on Lightroom and Photoshop respectively. I've only owned the Lightroom program for a few months and have really only started using it a few weeks ago (again, for work), and love what I've figured out so far. I can't wait to take the classes and really know what I'm doing!
  • The New Chicken Dinner with Ian Knauer. The night after I got home from my last trip of the Insane Fall, I looked up what new cooking classes were available. I'm nesting, clearly. But I love cooking classes and didn't have any left on my list, so in the name of trying to start cooking at home again (after weeks of sandwiches, delivery, and restaurants), it seemed like a good investment.
  • Cook Smarter: Solutions for Weeknight Dinners with Sara Moulton. My husband and I used to watch Sara's first show in the way back, "Cooking Live," and really liked it. We weren't as keen on her next show (slightly different format) so I sort of lost track of her. I was thrilled to see her on Craftsy, and that's made me look up her current show--Sara's Weeknight Meals on PBS. I'll need to set it up to record, I guess. In any case, I've watched the first couple of lessons in this class, remembered why I liked her so much, and am planning on making some of the recipes next week--it feels good to have time to think about cooking again!

Classes To Be Completed

Current count: (15, +3 from last report) 

Completed Classes

Current count: 62 (+3)

(Note: Using any Craftsy links helps support my podcast and blog. Thank you!)

An Easy Win

I'm a bit behind in my class reading this week but I decided I didn't care--I really needed me some fabric therapy. Let's just say, it's been so long since I sat at my sewing machine that it took me a few minutes to figure out I had the foot pedal positioned wrong. Note to self: Foot pedals don't work as well sideways. 

In any case, I knew I'd only have a couple of hours this afternoon/evening so I decided to give myself an easy win and finish up a UFO that's been on my shelf since last spring. 

This is the second project I've made out of this little booklet that came as a freebie in a Fons and Porter magazine years n' years ago. The first, made about 8 or 9 years ago, was a super-easy tote bag (my first tote bag ever, in fact) that went together pretty quickly even though I really didn't know what I was doing. The only hitch I ran into was when it said "box the corners" and I had no idea how to do that, so I skipped it. No biggie--I still use the bag frequently.  (I've since learned to box corners, by the way. I do occasionally have some forward progress in my skill set!)

Ever since I made that first bag I've intended to do a duffle bag pattern in the same booklet. I bought some pre-quilted fabric while on a shop hop a long time ago--2009 comes to mind--with the intention of making that duffle. The fabric sat on my shelves...and sat...and sat...

Finally, last spring, after I'd done a couple of Craftsy classes on bags and zippers and such, I decided doing that duffle bag would probably not be that big a deal. I pulled out the fabric and got it about half done. And then it sat...and sat...and sat...

Today, when I got as much classwork done as I could stand for the day, I pulled the duffle-in-progress off my shelves to assess where I was at. As it turned out, it apparently had ended up on the shelf because I had some unsewing to do. Once I got myself oriented to where I was in the pattern again, and ripped out some stitches that were clearly not in the right place, it only took maybe another hour and a half total to finish. I'd taken a couple of breaks in there to get myself dinner and such so I'm not entirely sure, but it didn't feel onerous.

And so... Ta da!

A duffle is born.

I stuffed it with a lap quilt to try to give it some shape for the photo, but it is a pretty mushy duffle. The prequilted fabric only gives it so much heft. But that's fine--all the more stuffable.

The prequilted fabric is reversible, so the print is one side and the blue mottle the other. It's really simple to use, although I wasn't keen on the quality of this fabric. The stitches in the quilting left a little to be desired but I think it'll hold up okay to the light use I'll give it.

I had to restitch the handles on about three different times because the blue pocket pieces kept popping out of the seams. It was really hard to keep all those layers of fabric together. I couldn't use my Wonder Clips for that part so I had pins that were hanging on for dear life. Things were a little shifty.

I was, however, loving my Jumbo Wonder Clips for this part. (I have the smaller ones too--if you don't have these, you need them!)


There are two end pockets as well. (The blue horizontal strip is the binding on the top of the pocket.) None of the outside pockets have closures--this is a pretty strip-down duffle bag design. But for the way I'll be using this I won't really mind not having zipper or velcro closures on the outside. 

By the way: There are supposed to be zipper tabs. I made the zipper tabs. They're still sitting on my cutting table. Oops. 

So, yay! A UFO knocked off the list, a finish, and another usable bag, all in one fell swoop!


Speaking of usable bags: I put all my little zipper pouches to good use on my work trip last week. I finally found the perfect use for that Bendy Bag--it's exactly the right size for pads of sticky notes! I use those for group brainstorming so I always carry a bunch with me. Now I can keep them from flying all over the insides of my larger bags.

So, another yay! Forasmuch as I'm still not keen on the process of making these bags, it is nice to be able to use them. 


A Little Birdie...

My husband and I just had a very nice weekend away as a pre-anniversary celebration. It was a very relaxing weekend at the beautiful Niagara on the Lake and the Shaw Festival.  Our anniversary isn't until later this month but I'll be away for work so we went a little early. The benefit to going early is that we were in Canada for their Thanksgiving weekend, which means two turkey dinners for us! Woo! We've gone to NOTL for our anniversary for years now. We usually see a play or two; this year we saw Pygmalion on one afternoon and Sweet Charity the next. Both were excellent, though I particularly enjoyed Sweet Charity. I had the soundtrack in college and knew all the songs well before I ever rented the movie version with Shirley McLaine to see what it was all about. To tell the truth, I was never a fan of the movie. This stage production, though? Fantastic. I did manage to restrain myself from singing along, however, though it was a Herculean effort. 

image.jpg

In any case, I just wanted to do a quick post to let you know I still exist since I'm heading back out of town for work in two days so it'll be another couple whiles (as my kidlings used to say) before I can get a podcast out. I even spent about half an hour this afternoon doing a little embroidery--that's pretty major these days! I've started a new project from a book on Scandinavian-style embroidery designs I'd borrowed from the library awhile back. Felted wool, embroidery, and pudgy birds--can you get any more in my wheelhouse? 

It's a very simple project--each little birdie has a small embroidery motif, and then you just glue another felt bird shape to the back to finish it off. It'll eventually become part of a garland. Maybe a gift, maybe not--depends on how well it turns out!

Besides the school-related usual accomplishments, I also swapped out seasonal clothing the morning I was packing to leave for our mini-vacation, and took the opportunity to do a major hauling out. I now have several large bags ready to go to the Good Will. I'm usually good at doing that about once a year but hadn't done it in awhile, so I was a bit behind. (And now I know where my wardrobe is a bit short, too--there's a reason I struggled to find outfits to put together on occasion.) When I got home today, I decided to finish the closet-cleaning trend and after all my other stuff was squared away, I pulled all of my jewelry out and sorted it while watching TV. I'm donating probably close to half of my accessories accumulated over the last 15 years or so. I realized I hadn't worn jewelry much this summer because the tie rack I use to hold it all had gotten so overloaded it was too much of a pain to find just the right necklace and pull it off without taking half the rest of the necklaces with it. Between the clothes and jewelry, I feel so much lighter! It's so nice to go into my closet and actually be able to see everything again, and to know what goes with what and how to accessorize it. 

So I'm feeling very accomplished at the moment. My next big organizing plan is to tackle the pantry, but at this point I'm not going to deal with that until my daughter is packing to move out (she's working on a Nov 1 plan)--she'll be taking a lot of the pantry with her so it'll be easier to deal with once her stuff is gone. And then my Organizer Self will be able to rest easy again. 

Banned Books Week Apologies and Pretty Mail

Yes, I dropped off the face of the earth. I suppose it was wildly optimistic of me to think I'd get a blog posted during my most busy weeks of 2015. Still, I was with BBW in spirit!  

For those of you who did participate and post photos in the Flickr group, I will be awarding prizes as promised! I'm about to head out of town again but will take care of contacting y'all as soon as my life returns to my (new) normal after October 20th.

Meanwhile, the closest I've gotten to anything fiber-related the last few weeks is the delivery of my MassDrop score of a collection of Aurifil embroidery floss. Pretty mail--FTW. 

image.jpg

image.jpg

I also got some Karen Kay Buckley Perfect Pins from another MassDrop. But they're not as exciting to photograph. Just picture them. Shiny. Skinny. Pointy.  

A little end of summer pretty

I just picked the last bouquet of hydrangeas for the season.

Hydrangeas have become my favorite flower. They're gorgeous in every step of their life cycle.

These won't be staying in my house--they're for the mother of the groom (my MIL). I'm glad to be able to share the last bounty of beauty with her on this momentous occasion--her baby boy is getting married tomorrow!

Stash Report Week of September 22 2015

What went out of my studio/office this week:

  • 400 pages of reading
  • two papers
  • one wedding outline (for my BIL and SIL-to-be whose wedding I officiate Friday)

What came into my studio/office:

  • Two new ink cartridges
  • Two reams of printer paper
  • Binder clips
  • A multi-pocket folder
  • My favorite new stapler in the world

Oh stapler, faithful stapler,

How you have served me for lo these 25 years or more

Stapling two, nay, even four pages together at one time.

I could forgive you the occasional jam.

How do Stapler Years compare to People Years?

25 years old in stapler time equals 75 in human time? 145 years? 

I would jam too.

It's not your fault--not really--that you just were no longer up to the task.

You couldn't wrap your little stapler jaw around 30 pages at once. 

You're too delicate. Too dainty. You only want to chew small bites at the dinner table. So polite.

Happy retirement, O Stapler.

Welcome, O New Friend Stapler--open your jaw wide! 

The office is a No-Etiquette Zone.

30 pages? Bring it on! 40? Chomp it all down!

May we have many happy years of stapling doctoral reading print-outs together!


One of my DMin cohorts posted this picture in our cohort GroupMe today.  968 days...if we stay on schedule. Just keep taking it one day at a time...one day...at...a...time...

It's not much, but I have gotten a little done...

image.jpg

This is a few weeks old now but I didn't have much of a chance to post pics until now. I wanted to make a quick mug rug as a gift for a friend so I decided to use some of my bright felted wool that I bought at the AQS in Syracuse. My blanket stitch around the outside edge isn't as even as I usually get because I was working in such a hurry, but overall, I was fairly pleased with the results.  

It's a little hard to tell from the photo but the scattered leaves around the flower in the center are a metallic green thread so it has just  little sparkle to it.  

Not my most impressive work, but fun to do.

Sadly, that's about all I've gotten accomplished recently, at least in terms of textiles. I've pulled out my embroidery supplies all of about twice in the last three weeks. Another couple of weeks of mayhem and then, hopefully, things will settle into more of a routine. Still busy, but more predictable. I'll take it!

Thinkin' About It Thursday

This week, I'm thinking about...

2015-09-02 17.02.21.jpg
  • my daughter looking at my newest school-related purchase: "What is this, some kind of an iPad stand?"

Umm, no, sweetheart. Remember those things called "books?" 

Goin' old school for school.

Craftsy Class Review: Zip It Up: Easy Techniques for Zippered Bags with Joan Hawley

It feels odd for me to be saying I just took a sewing class, but there it is. In my attempts to conquer my dislike of fiddly bits, I've just completed another bag-making class on Craftsy.

If I'd been able to go straight through this class in one fell swoop, it probably would've only taken a weekend. It only took me as long to finish the class as it did because I'm deep into coursework now, so I only take random chunks of time to sew when my brain fritzes out from all the reading. Consequently, the sewing I do needs to be as close to mindless as possible (as I have few functioning brain cells left by the time I put down the books).

Enter Zip It Up: Easy Techniques for Zippered Bags with Joan Hawley. I've been a fan of Joan Hawley's Lazy Girl Designs for awhile; I own a couple of her bag patterns although I've never actually gotten them made. The three bags featured in the class were cute as well as seemingly functional. When it comes to physical things like this, I'm a much better visual learner so when I can watch someone do something rather than trying to read a pattern, I'm happier. Joan's step-by-step instructions on the video as well as the written materials that come with the class were very easy to follow. 

First, there's the "Runaround Bag." I finished this one a few weeks ago and blogged about it here. I think the bag took me less than two hours to make, and that was only because I was closely consulting the video lessons all the way through to make sure I didn't go horribly awry. Plus, I did a little fussy-cutting, which always takes a little longer.

I was able to use the bag immediately after I made it, which was a plus in my book.


The second bag in the class is the Nikita Bag. This is a basic boxy pouch--there are a boatload of patterns for doing boxy pouches out there and I'm sure they're all probably fairly similar when it comes down to it. But once again I found Joan's way of putting it together very easy to follow. I got this one done in about an hour and a half, all in. Again, that was with a lot of referring back to the video. It would go a lot faster next time.

I absolutely loved the fact that I was finally able to use some of my Marcia Derse fabrics. I bought a couple of panels and several coordinating fat quarters years ago at the show in Houston--If I recall, it may have even been the first year her fabrics were introduced. (She had her own booth and I paid her in person for my fabrics, which always makes you feel a little more connected to those fabrics, doesn't it?) I'd never found the right project for them. It works really well for this.

This if my favorite bag of the three. I really like the design of this pouch and could see me making more, although at the moment I don't know exactly what I'll be using this one for. Wait until my next trip when I'm looking for all the best containers for the tchotchke that always has to come with me.

The third class project is the Bendy Bag. I'm not such a fan of this design--I'm finding it a bit hard to work the zipper once it's all put together. I know that part of that is user error--I needed a slightly wider space between the zipper teeth and my seam. I used the same needle position I had on the other bags, but in this particular design I could've used a little more breathing room. Still, that bend doesn't help.

I used a half-yard of fabric I'd bought while in Hawaii in 2008. I've got a couple of other half-yards of the same print in different colors. I'd had half a thought of using all three fabrics in a fast lap quilt as a souvenir of my trip, but the quilt never got made and I've got plenty of lap quilts now, so this is just as good a way to use it. It's the same fabric outside and lining.

So--all in, I had no difficulty whatsoever making any of these bags. I would have no concerns about deciding I wanted to make any one of them again, maybe two or three times even. (I have a lot of fat quarters I'd love to use up!) The one least likely to get made again is the Bendy Bag, but if it proves itself to be the perfect travel bag for cords or adapters or any of the other multitude of electronic gadgets that travel with me, I'd even be willing to give that one another go.

Joan Hawley is easy to follow and now that I've done her class and several of her bags, I'd be willing to revisit the thought of making one of her patterns that I own. On the flip side, having now done two and a half bag-making classes--and yes, I do plan on finishing Annie Unrein's!--I've also gotten more comfortable with the idea of branching out and making other bags. 

Mind you, I still don't enjoy doing it the way I enjoy doing art quilting, hand-dyeing, or embroidery. But I can do it, and that's all I was shooting for. I do still avoid patterns with too many fiddly bits, though. Still not a fan.

The Basics

  • 7 lessons, ranging from 18 to 30 minutes.
  • Lesson 1 reviews the three bags in the class, gives some advice on choosing zippers and fleece, then talks about presser feet and needle positions. (Do pay attention to the needle position thing, and write it on a post-it note. You reference those needle positions frequently throughout making the bags.)
  • Lessons 2 and 3 are the Runaround Bag; Lessons 4 and 5, the Nikita; and Lessons 6 and 7 are the Bendy Bag.
  • Each lesson not only gives instructions for the bag itself, but also offers some nice take-away tips that would be useful in other places. 
  • Class materials are full step-by-step instructions with plenty of photos for making the bags.

If you're a beginning sewist or a beginning bagmaker, I definitely recommend Zip It Up: Easy Techniques for Zippered Bags with Joan Hawley. Great entry-level stuff. If you're more experienced, you may still enjoy her tips and tricks, plus the bag designs. 

(Note: Using Craftsy links in this post helps support my podcast and blog. Thanks!)


A Finish! Zippered Tote

I have very little time to spend in my sewing room these days so fast finishes are of appeal. Plus, as I've said before, I have a sickness: I keep buying bag and tote patterns even though I really don't enjoy making the things. I am in a constant search for the perfect travel bag and I really want to use up some fabrics from my stash that I love and want to keep around, but don't want to commit to turning into a quilt. So bags are sort of the perfect solution, if I can get around my dislike of the process. Since I knew I'd have a few hours as fabric therapy at my disposal this weekend, I decided to make myself something useful given the travel I'll be doing over the next couple of months. To whit: A travel carry-on for flights that would also be fine for normal running about and trips to libraries and coffee shops for school work.

I've posted the pic of a couple of the bag patterns I bought from a vendor at AQS Quiltweek in Syracuse. As soon as I got home, I started digging through my stash to see if I had fabrics that would work well with either of the patterns. I found a winner: I'd bought three fabrics from a collection a few years back, then found another fabric that worked beautifully with them. Then they sat on my shelves. And sat. And sat. They were enough for this bag pattern plus enough leftover to make a coordinating wallet or some such should I decide to do that later on.

Final results! This is the "Laura's Zippered Tote" pattern from The Creative Thimble. It really is pretty straightforward. I took my time with it and still had it done in something like 4 or 5 hours all-in. As a still-not-confident bag maker, I didn't run across anything that gave me the heebie jeebies.


Here's the inside. The pattern calls for pockets on only one side of the interior; I added another set of pockets on the other side as well. The more pockets, the better. 

I measured the divisions to fit my Kindle, phone, and some pens, etc., on the one side. 

The other side of pockets were less specifically measured but divided slightly differently to give myself more options. I also  added some little velcro dots to two of the pockets. Why dots? That's all I happened to have on hand. So I used three dots attached to each other to make it about as long as a regular rectangle of velcro would be. I didn't bother changing thread to white to attach the velcro because at that point I was tired of changing thread colors and I figured that, other than this blog post, I'd be the only one ever seeing it. So yes, the velcro is attached with burgundy thread. I can deal with that. 

There are two things I'm not thrilled with about this design. The first, and main thing, is that there's a raw edge seam at the bottom of the interior. You can see it in the above photo. The instructions have you zig-zag the edge and I used Fray Check as well, but still n' all, I'd prefer a hidden seam. I'd have had to completely re-do the pattern to get rid of that seam and that's just not my thing. So I'm living with it. 

The second thing is that it uses Pellon Decor Bond (809) as the stabilizer. It does give it good structure, but I didn't really like working with it. Plus, the fabric puckered a little when I was fusing it to the Decor Bond. Were I to make this pattern again, I think I'd probably use Annie Unrein's Soft and Stable. I really like the way that one felt when I was using it for the EIIP bag; I don't think using it on this design would make a noticeable different to the process of making the bag.

I did skip one part of the pattern--when you box the corners, the instructions have you folding those corners back into the inside of the bag and gluing them down to give the bottom more structure and stability. I don't have any glue on hand that would work and, again, I wasn't keen on a bunch of stuff hanging out in the bottom of the bag that loose coins and such could get stuck under, so I just cut those off as you normally would. 

And one other note: The numbering of steps is incorrect in one part of the pattern. I had to read it a few times to figure out why I couldn't quite figure out how she'd gotten from point A to point B, but it didn't take too long to see where the mistake was and just move on from there. She doesn't have that error posted in the corrections on her website so I need to remember to email it to her. Other than that, the pattern was pretty easy to follow, even for a noob like me. 

By the way, those are outside pockets as well--six in all. And the straps are the perfect length to carry it comfortably over my shoulder. Finally--a good carry-on bag for airline travel that zips on top so I don't have to worry about stuff dumping all over under the seats!

And I just love that I could finally use these fabrics--they've been on my shelves for a couple of years and now I get to keep looking at them in a far more useful form.

Overall, I'm pleased with the results and am giving myself grace on those parts that are less than perfect. 


AQS QuiltWeek Syracuse

I got this half written before skipping town for Boston, but wasn't quite able to pull off getting it posted. I took some photos of the quilts but not too many; my friend Lori took a lot more. If you're interested in seeing some of them, here's a link to her blog post about the Wicked exhibit, and about the rest of the quilts.  Meanwhile, here's my belated post about my purchases at AQS QuiltWeek in Syracuse.

image.jpg

First--the fat quarters I needed to fill out the current project I'm working on. You wouldn't believe how hard it was to find (1) any fat quarters at all and (2) "standard" (more traditional) ones. Few vendors had fabric, most was on bolts, and the fat quarters that were available were largely batiks or brights that wouldn't work in this quilt at all. This small pile represents three different vendor booths. Weird. 

 
image.jpg

Some Valdani perle cotton from the Primitive Gatherings booth. I think I visit their booth at every show! I'd thought I was getting all size 8, but when I got home I realized some of this is size 12. I didn't have any 12 at all before this triip--now I've got lots! (More in a bit.) No particular project in mind--just colors I don't have and really liked. The lower right is a deep teal--it looks black in this photo. 

 
image.jpg

Some more new embroidery threads. It's like candy. In fact, these were so gorgeous I did joke with my friends that I just wanted to eat them. These are from the Akoyne Kena booth--all their products are Fair Trade. So I have gorgeous threads and I supported artisans at the same time. Wait--let me buy more!

These are Perle 12's, one small collection, and then the other is a larger collection named "Summer." I also bought a collection of Perle 8s named "Spring"--they were more pastels. 

 
image.jpg

And embellishments! Yummy yummy beads, some ribbon lace, and an applique that will work on my butterfly project (no, I haven't forgotten about that one!). Plus a couple of new sets of needles. 


I did succumb to a demo of this funky ruler. I think it was probably first made for woodworkers, then perhaps made it's way through the scrapbooking world, before now hitting the quilt market. The guy doing the demo referenced both woodworking and scrapbooking, and since I've been to a lot of vendors over the years and have never seen this ruler, and the instructions have a copyright date of 1991, I suspect it's only "new" to us quilters. It'll be pretty handy for drafting quilt designs and such. 


I also picked up some pretty, pretty bright felted wools. No idea what I'll use these for, but they were too fun to miss. The vendor had a ton of colors--I just went for a selection of the brightest ones I could find.


And a couple of patterns for totes I couldn't resist. Remember? It's a sickness. I may not enjoy making these things, but I'm constantly in search for the perfect travel bag so I keep buying patterns. That being said, you'll see another blog post with a continuing story about one of these...


And finally, I found a Mama Bear. The Everything in Its Place bag that I made in Annie Unrein's class is great for embroidery supplies. However, it's really too big for airplane travel. It would take up too much room. Before my June trips, I picked up a cosmetics bag from Target that works well for travel, but it's pretty small. It's perfect for holding a small handful of embroidery flosses, a small hooped project, and a few supplies. But I quickly realized that for some trips, I needed something in between. I started thinking of the EIIP bag as "Papa Bear," the cosmetics bag as "Baby Bear," and I needed to a Mama Bear bag. Lo and behold, as BFF/BQF Katie was talking to a vendor about magnified natural lights on stands, I looked behind them and there was a notions display wall that had some supply cases hanging on it. Sure 'buff, there was my Mama Bear!

Similar to my EIIP bag, it has pocket pages inside--I can purchase more pages as needed, but too many more and it would be too big for travel. So at the moment, I think I'm sticking with the pages that are in it now. 


Banned Books Week Challenge 2015

It's that time of year again!

Banned Books Week is September 27-October 3, 2015.

Tanesha of CraftyGardenMom Podcast/Blog and I are once again hosting our annual...

Banned Books Week Challenge! 

You may find information on the issue of censorship, lists of what books have been banned or challenged, and other resources on www.bannedbooksweek.org or the American Library Association website at www.ala.org. You can find lists of Banned or Challenged Classics here, and the Top 100 Banned/Challenged Books: 2000-2009 here, and the Top 100 Banned/Challenged Books 1990-1999 here.(Those dates, by the way, are when those books were banned/challenged, not when they were published.)

My 2014 challenge quilt "Subversion," based on the graphic novel Persepolis by Marjane Satrapi

My 2014 challenge quilt "Subversion," based on the graphic novel Persepolis by Marjane Satrapi

You are challenged to create a small wall quilt that somehow represents a book from the banned/challenged book list that you have read and particularly loved, found meaningful, or otherwise want to celebrate. How you choose to represent the book is up to you—it could be a scene from the book, words from the book, or just represents the book in some way.

            Please be aware that book cover images and illustrations in books are copyrighted art. You would need permission from the publisher/artist to depict those images exactly. You may, of course, use them as inspiration for your own artwork!

The Deets

  • Create a small wall quilt based on a book on a banned/challenged book list that you read and enjoyed. Really, the quilt can be any size, but thinking under 16" keeps it manageable. You can do a mug rug if you want! No specific sizes required. (See "Here's another idea" below, however.)
  • Use any type of quilt techniques you enjoy, any type of surface embellishment you choose--whatever flips your switch! 
  • Post pictures of your completed quilt(s) in the Flickr group for this challenge. We're using the same Flickr group as in years past, so please clearly label your post with "2015" in the title so we know what the new ones are!
  • Include your artist's statement in the description of your photo in the Flickr group. (Or, should you be a blogger, just include a link to your blog post about the quilt in the description.) The artist's statement should include the title and author of the book, why you chose that book, and anything else you want us to know about your mini-quilt.
  • If you finish your project before the week of September 27 and really can't wait to post it to the Flickr group, feel free. 

During Banned Books Week, Tanesha and I will be blogging/podcasting about the entries and there will be...yes!...prizes!  

Here's another idea: For the last several years that we've been doing this challenge, I've arranged for my local public library to display during Banned Books Week quilts from our any local artisans who participate. It's always wonderful to see how the library does the display. Why don't you ask your local library if you can display your finished project there? If so, you'll also want to check with them on a suggested maximum size to make the quilt easier to display in their space. Spread the word--get your local quilty friends to join in!

Tanesha and I are looking forward to seeing your work!

If you want to get some inspiration from previous challenges, here's the Flickr group link again. Beautiful work displayed!

A finish--woo!

Okay, so this completion isn't such a big deal as it only took me about 90 minutes start to finish; and it only took that long because I wanted to fussy cut a motif and had to keep checking back on the instructions to make sure I had it facing the right direction. 

Also--normally I wait to do a reveal on a class project until I do a review of the class. But since it may be awhile since I have another finish, I couldn't wait to crow just a little bit. 

I finished something! Woo woo woo woo! 


image.jpg

This is the Runaround Bag by Joan Hawley of Lazy Girl Designs, as appears in her Craftsy class Zip It Up: Easy Techniques for Zippered Bags.  (The pattern is available elsewhere as well; you don't have to take the class to make this bag.) She calls her zipper technique "ziptastic" and I have to say--it was stinking easy, at least in this design. 

It gave me a nice way to use a couple of fat quarters from my stash--which was my main purpose for forcing myself to get more comfortable with purse-making in the first place.  

I misjudged the front fussy cutting just by a couple of inches; the print on the fabric was a little tricky in terms of isolating the motif easily. I had a sense I should adjust it a little bit but I wasn't totally convinced I knew where it was going to end up. Having done it once now, of course, I'd know better next time.

image.jpg

I did a lot better fussy cutting the back pocket.  

If I do this design again, I would probably put a little bit of velcro or something on that back pocket. It's a good place for a cell phone but I'd want it a little more secure if I used this regularly.  

image.jpg

By the way, the lining is the same fabric as the top accent (see last photo). I used an invisible zipper because that's what happened to be sitting in my drawer that was the right color and size for this project. I've decided I don't like working with invisible zippers. It was okay to sew, though I had to do a lot more by feel than sight, but mostly it was very difficult to unzip after the sewing was done in order to pull everything through right-side out. For some reason, that zipper was very stubborn--I finally resorted to pulling everything through a half-open pocket. Once it was right-side out, the zipper worked fine again. 

You can't really tell from these photos but it has fusible fleece on the back to give it just a little bit of structure.  

I do like this bag; I used it immediately last night going out for dinner with my husband. It's nice to do a simple design that's actually functional. It's a good little bag for times when you don't want to carry a lot around. 

Of course, the first thing I thought as I was putting my stuff in my bag to go out to dinner was, "I think I need to find a wallet design now." My usual wallet is too big and heavy to work in this bag well. So if you've got any favorite simple wallet designs that make a smaller, lightweight, but functional finished product, lay it on me! (Tip: I don't want to have to fold my money in half to put it in the wallet, so I've already nixed several possible patterns.) 

There are two more bags in the class, so stay tuned... 

(BTW, there's a Craftsy link in this post that will help support this podcast and blog if you use it--so thanks in advance if you do!) 

Progress and Goals--Week of July 18

One point of progress I made this week was finally finding a small armchair to fit in the corner of my office. Woo! $40 at Good Will. Double woo!  I buried my nose in the upholstery while in the store to make sure there weren't any lingering odors that would drive me nuts (just a bit of Attic Musty), and I inspected it carefully. Plus I hit it with a dose of Lysol when I got home to be sure, and to get rid of the Attic Musty. 

Yes, there are a couple of rips in the upholstery on the back, but as it's only in my office (read: I'm the only one who will really see it/use it) and the back is towards the wall most times, until I spin around to use my windowsill as a footrest, I'm good with that. If I ever decide I love this chair enough to make it have more aesthetic presence, I can get it reupholstered and it would likely still be less than buying a new armchair. It's now my official school-reading chair, as well as a place to take a short break when my back or shoulders start complaining about spending too much time at my sewing machine or cutting table. Not that "too much time sewing" will be an issue for the next few years, I suspect. 

In any case, back to the topic at hand:

Goals for Last Week

  •  Accessories: Small, fast project TBD. I didn't get this finished, but I did get myself organized for it, have all my supplies, and started cutting. I decided to do a new Craftsy class and, after doing the first half of Annie Unrein's class*, this one should feel like a breeze. By the end of the class, I'll have one small "run around" purse and two zippered bags. Good way to use up some more fat quarters from my stash, not to mention the random collection of zippers I own, based on going through a spate of doing Humbug Bags about 15 years ago. There: I do actually have bagmaking in my past. I made a bunch of those one year as Christmas gifts for my daughter and assorted nieces when they were all early elementary-school age. It's a great pattern, pretty easy to follow, and I don't recall having any difficulty with the zippers. Unfortunately, my next couple of forays into the whole bag-making adventure were dismal, horribly frustrating failures and set me off the genre for years. 

Shake it off...move on...

  • Quilt Project: Get pieces sub-cut for Jacob's Ladder. I made good progress on this yesterday, and hope to get the (420 of them, yikes) 4-patches done today. I guess I sort of mentally shifted this goal a little bit; Rather than subcutting all the pieces (4Ps and HSTs), I'm getting all the 4Ps done first, then I'll tackle the HSTs.

This is a nicely quiet week for me (fingers crossed it stays that way). No evening conference calls, no need to be anywhere other than at home. I'll have some more reading and writing assignments to work on as our online classroom is supposed to get set up sometime this week in preparation for our on-campus study session starting August 4. Hence, I'm still keeping my goals fairly small, but I should be able to manage this much this week...

Goals for This Week

  • Accessories: Get the first class project done (small purse).
  • Quilt Project: Get 4-patches completed. Get half-square triangles sub-cut, if not completed. 
  • Embroidery: Go back to working on my crewel embroidery project that I'd started back in early June, now that the other project is completed. I had to give my neck a few days of rest but it's feeling better now. I still feel like I should whip off the heatable neck wrap pattern I've had saved in Pocket for months--that was my original thought for my fast accessory project last week. 

*I do have plans to finish Annie's class, which means making the cosmetics bag. I just need to attended to more time-constrained projects first.

(As always, using Craftsy links here helps support my podcast and blog. Thanks!)

Progress and Goals--Week of July 13

I warned you it would be a few weeks! I got home from my second trip on Friday and took the weekend regrouping, restocking the refrigerator, and finishing up a time-constrained project. Today I'm finally able to start looking at the next few weeks and figure out what I might be able to get done. 

Goals for This Week (from June 14)

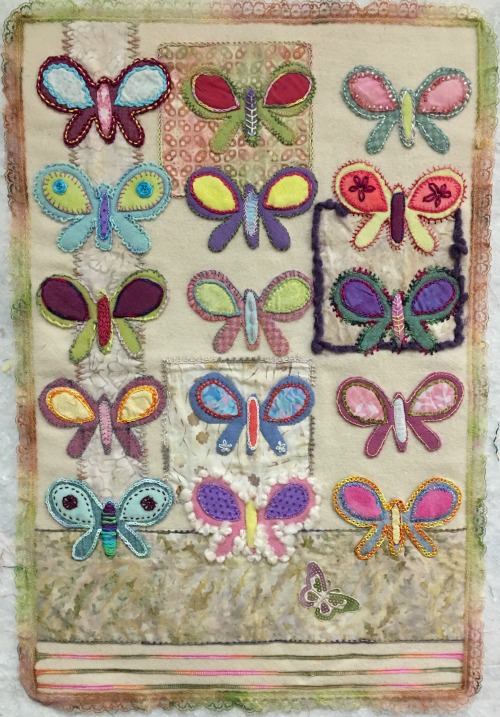
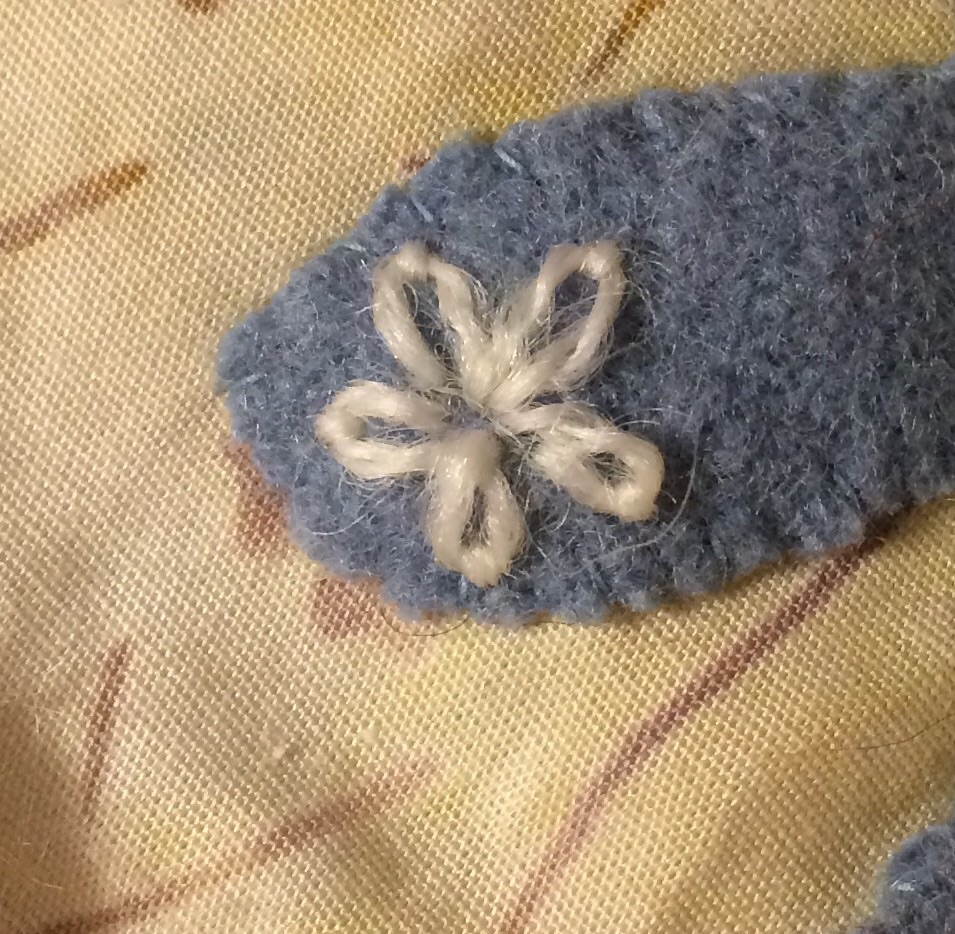
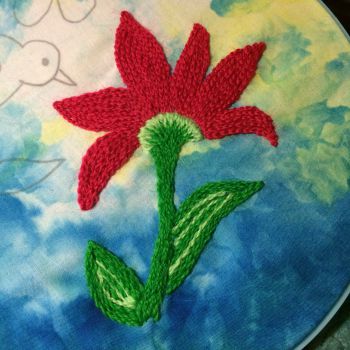
  • Embroidery: Three butterflies. 

Okay, so my goals were minimal. I was apparently being very (and unusually) attuned to my schedule limitations.

So, that being said, I'm not even sure at this point if I got three butterflies done. I think I did my usual 1 1/2 before I left, but I honestly can't remember now. My primary focus was the gift project. And now, having spent the whole weekend polishing that off, I'm setting aside embroidery for at least a couple of days until my neck loosens up after being frozen in position staring at the hoop in my hands (and staring at the book and highlighter in my hands).

Strangely, that gift project didn't even make it onto the goals list, even though I knew that's what I'd have to be focusing on. So although I'm not sure I got my stated goal done, I did get another biggie goal completed. So there's that. 

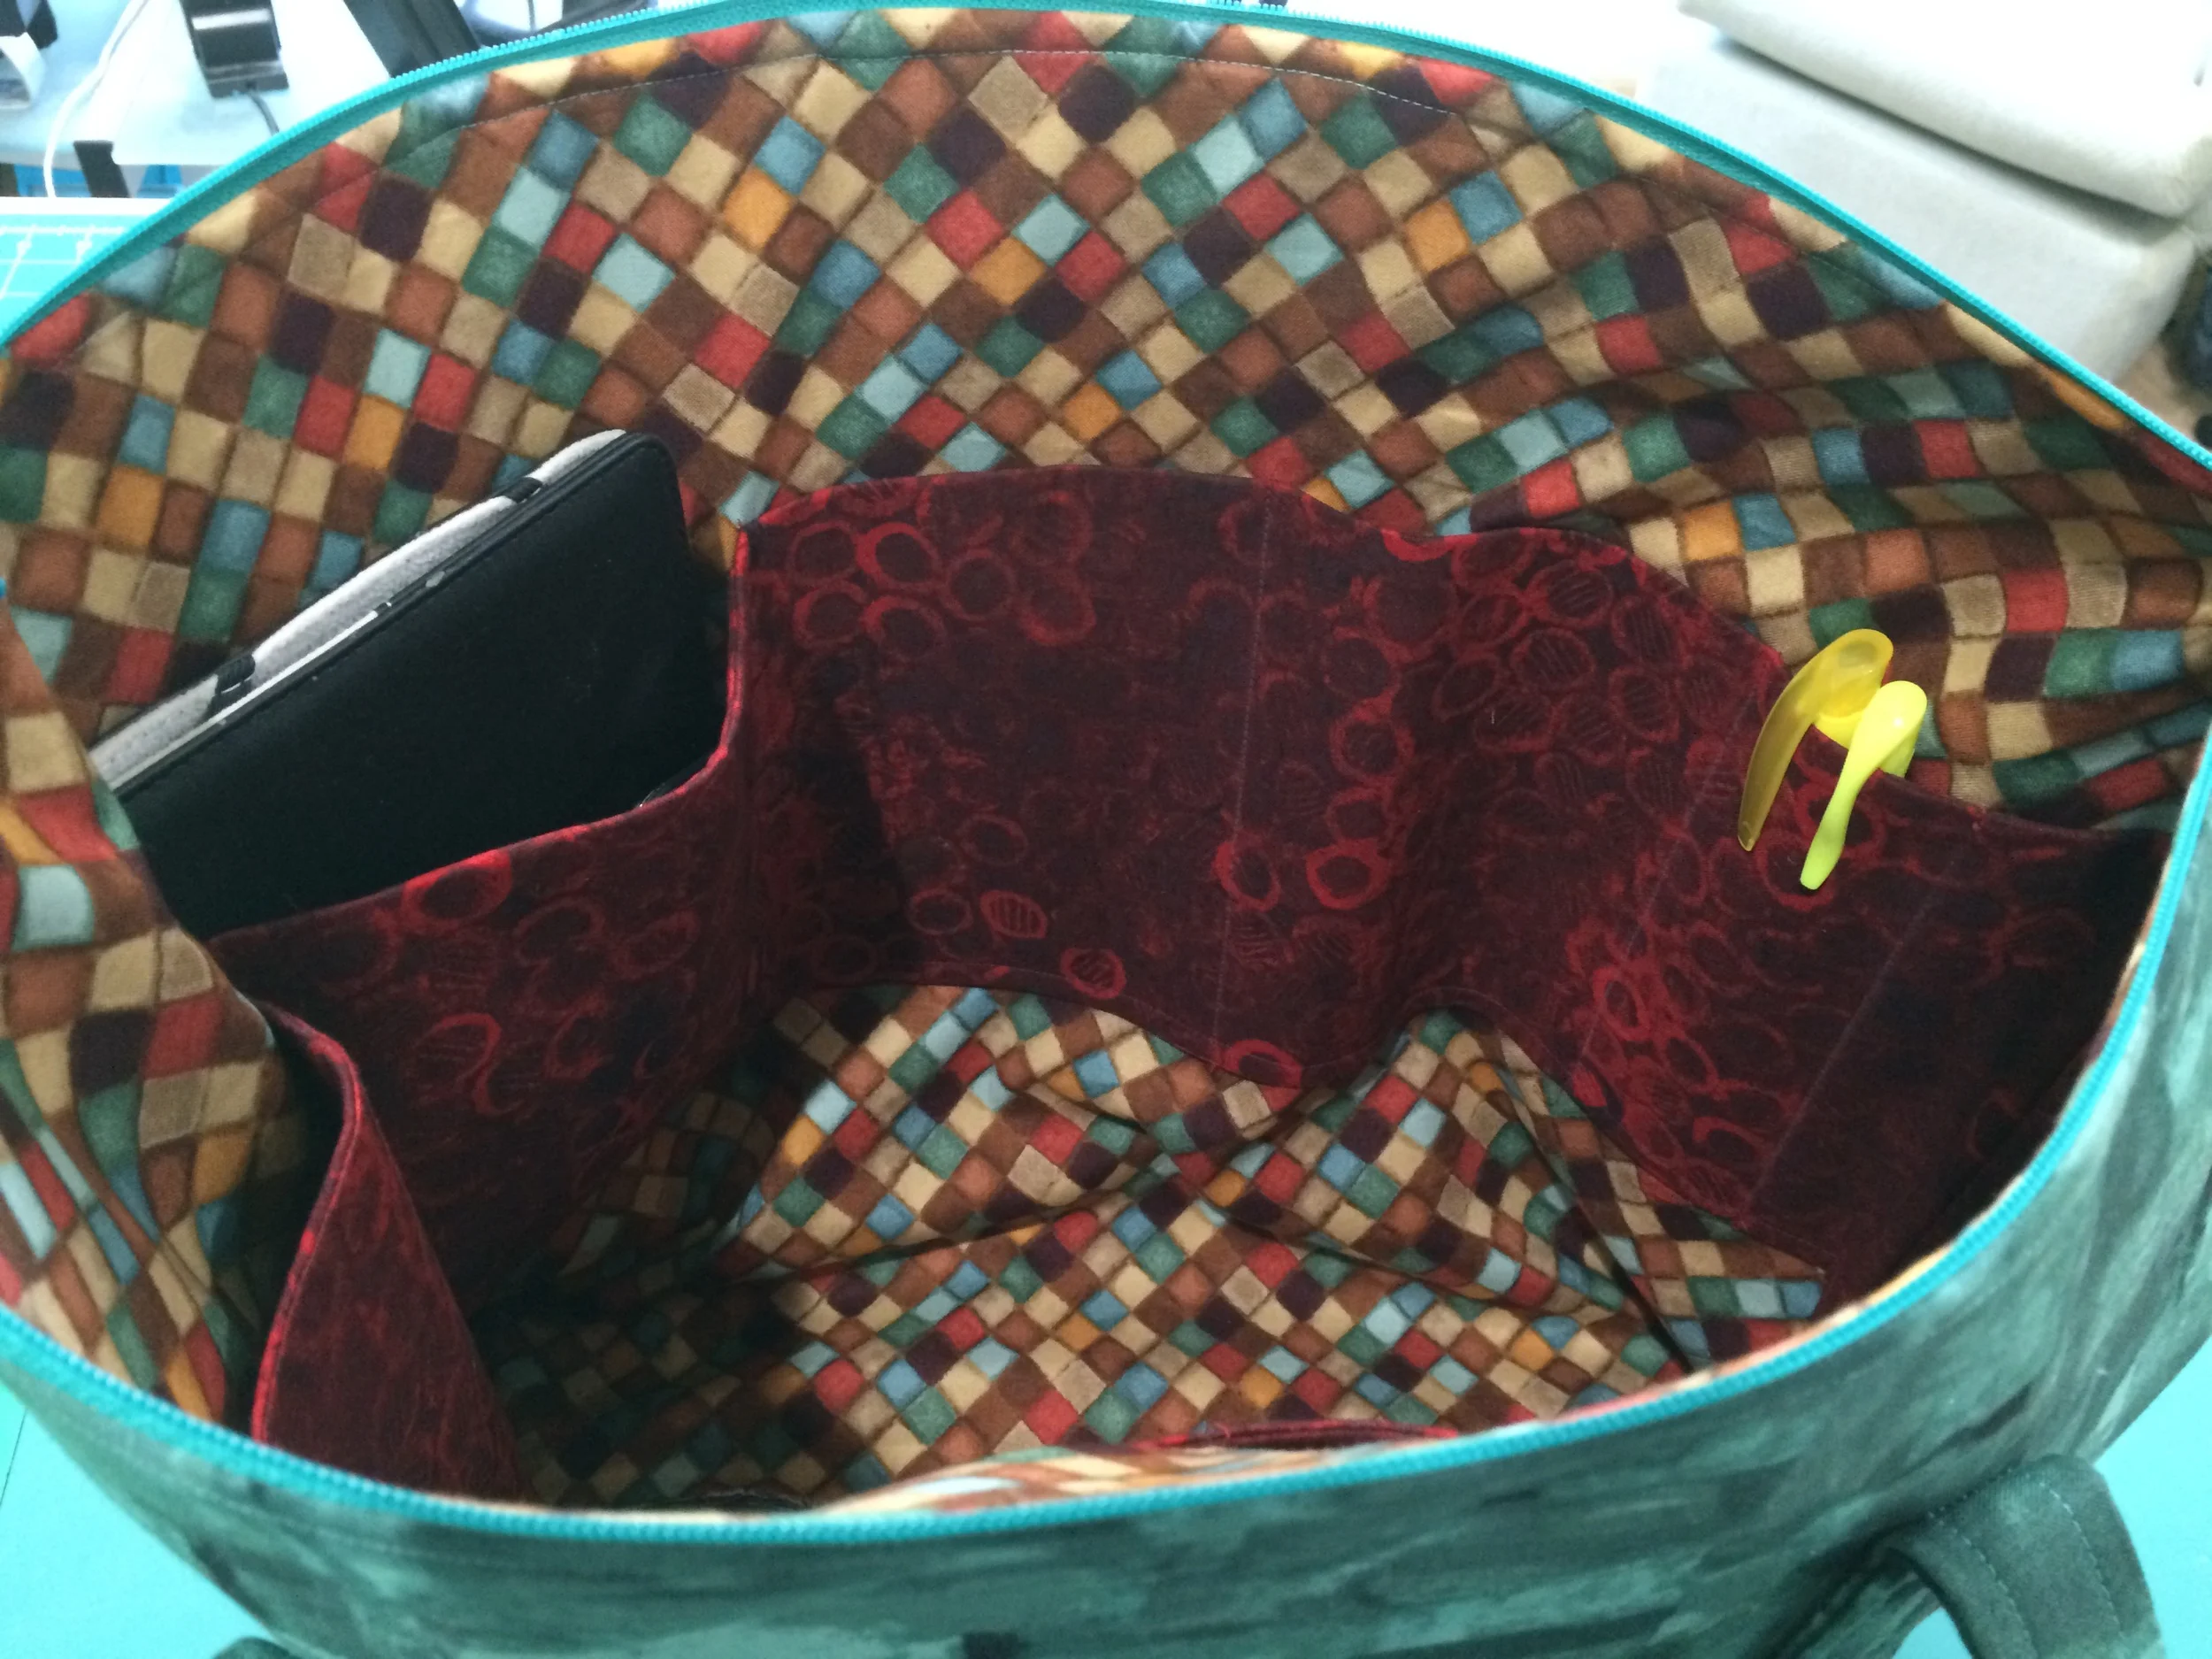
I can't post pics of the completed project at this stage. Waiting until it's been duly gifted. I'm pretty sure none of the parties concerned read this blog or I wouldn't even be talking about gift projects but just to be on the safe side, my lips (and camera lens) are sealed. 

I'm in the mood to give myself a little change of pace and doing some sort of fast project. But my class reading has kicked up a notch and I'm still trying to figure out how to get exercise back into my schedule, so my goals will stay pretty, shall we say, realistic.

Goals for This Week

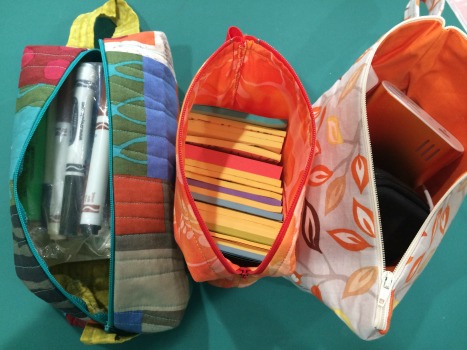
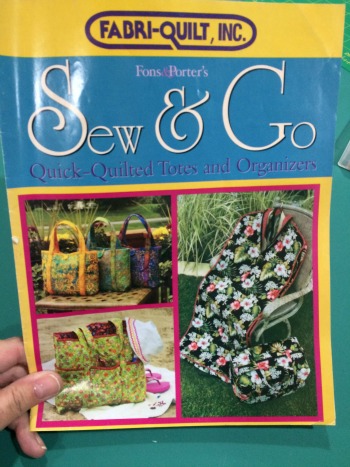
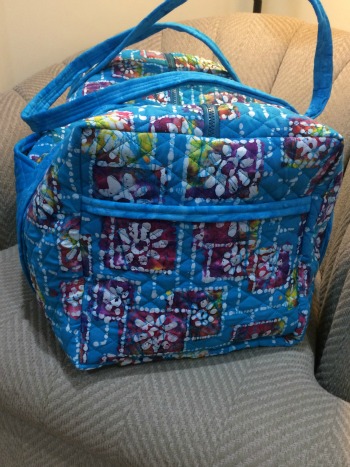
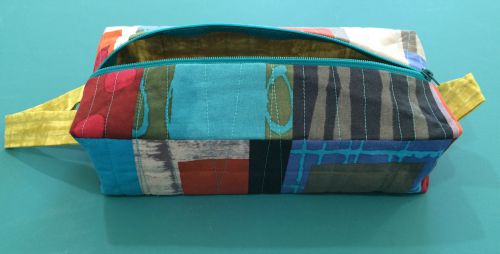
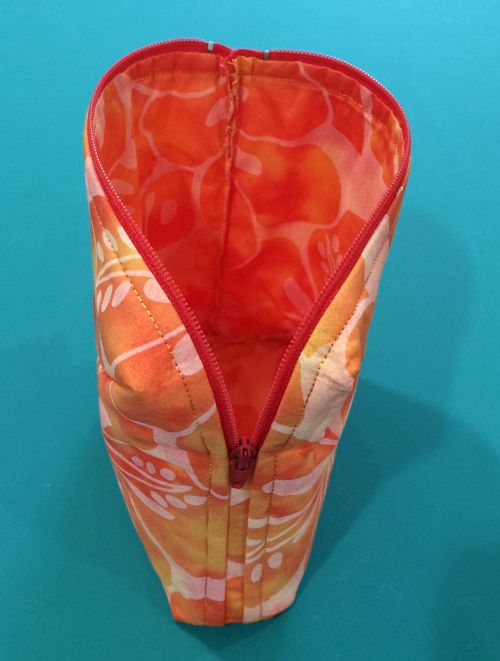
  •  Accessories: Small, fast project TBD. Maybe a microwaveable neck pillow, maybe a zipper pouch, maybe a tool holder...haven't settled yet. I won't get to my sewing machine for another couple of days anyway so I've got a little time to ponder. I'm looking for something I might reasonably get done in just two or three hours (one or two nights). I just want some instant gratification, and maybe a little minor stash-busting, before diving into my next more intense project.
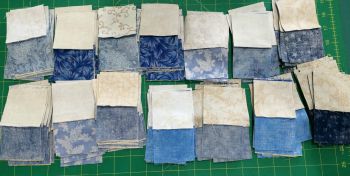
  • Quilt Project: Get pieces sub-cut for Jacob's Ladder. I just realized that, when I did my initial list of categories for a short list, I left out any possibilities of ever doing straight-up new "standard" quilt projects. Hmmm. Shows you where my head has been at. Hence, a new category: generic "Quilt Project." I really need to get started on my Jacob's Ladder project. I don't have anything going on this weekend, so it's a good weekend to get a running headstart. I've already cut all the strips I need--my next step is doing some serious subcutting.  Using techniques from Debbie Caffrey's Craftsy class, Cut to It: Strategies for Smarter Quilting, I should be able to knock it out a little more quickly than usual. I'm also considering going to my guild sew-day on Saturday--what better way to deal with a fairly tedious task than to do it in the company of my peeps?

And that's it. Here's hoping I can get at least that much done!