Post-4SI Weekend Accomplishments

On the spur of the moment, we U.S. #Twilters declared this past weekend #4SI--in other words, the 4th of July Sew In. Most people were out and about with friends and family for the weekend so there wasn't a ton of activity online, but it was still, as always, fun to keep up with one another. 

So here's what I got done with some mammoth (for me) sewing sessions on Saturday and Sunday:

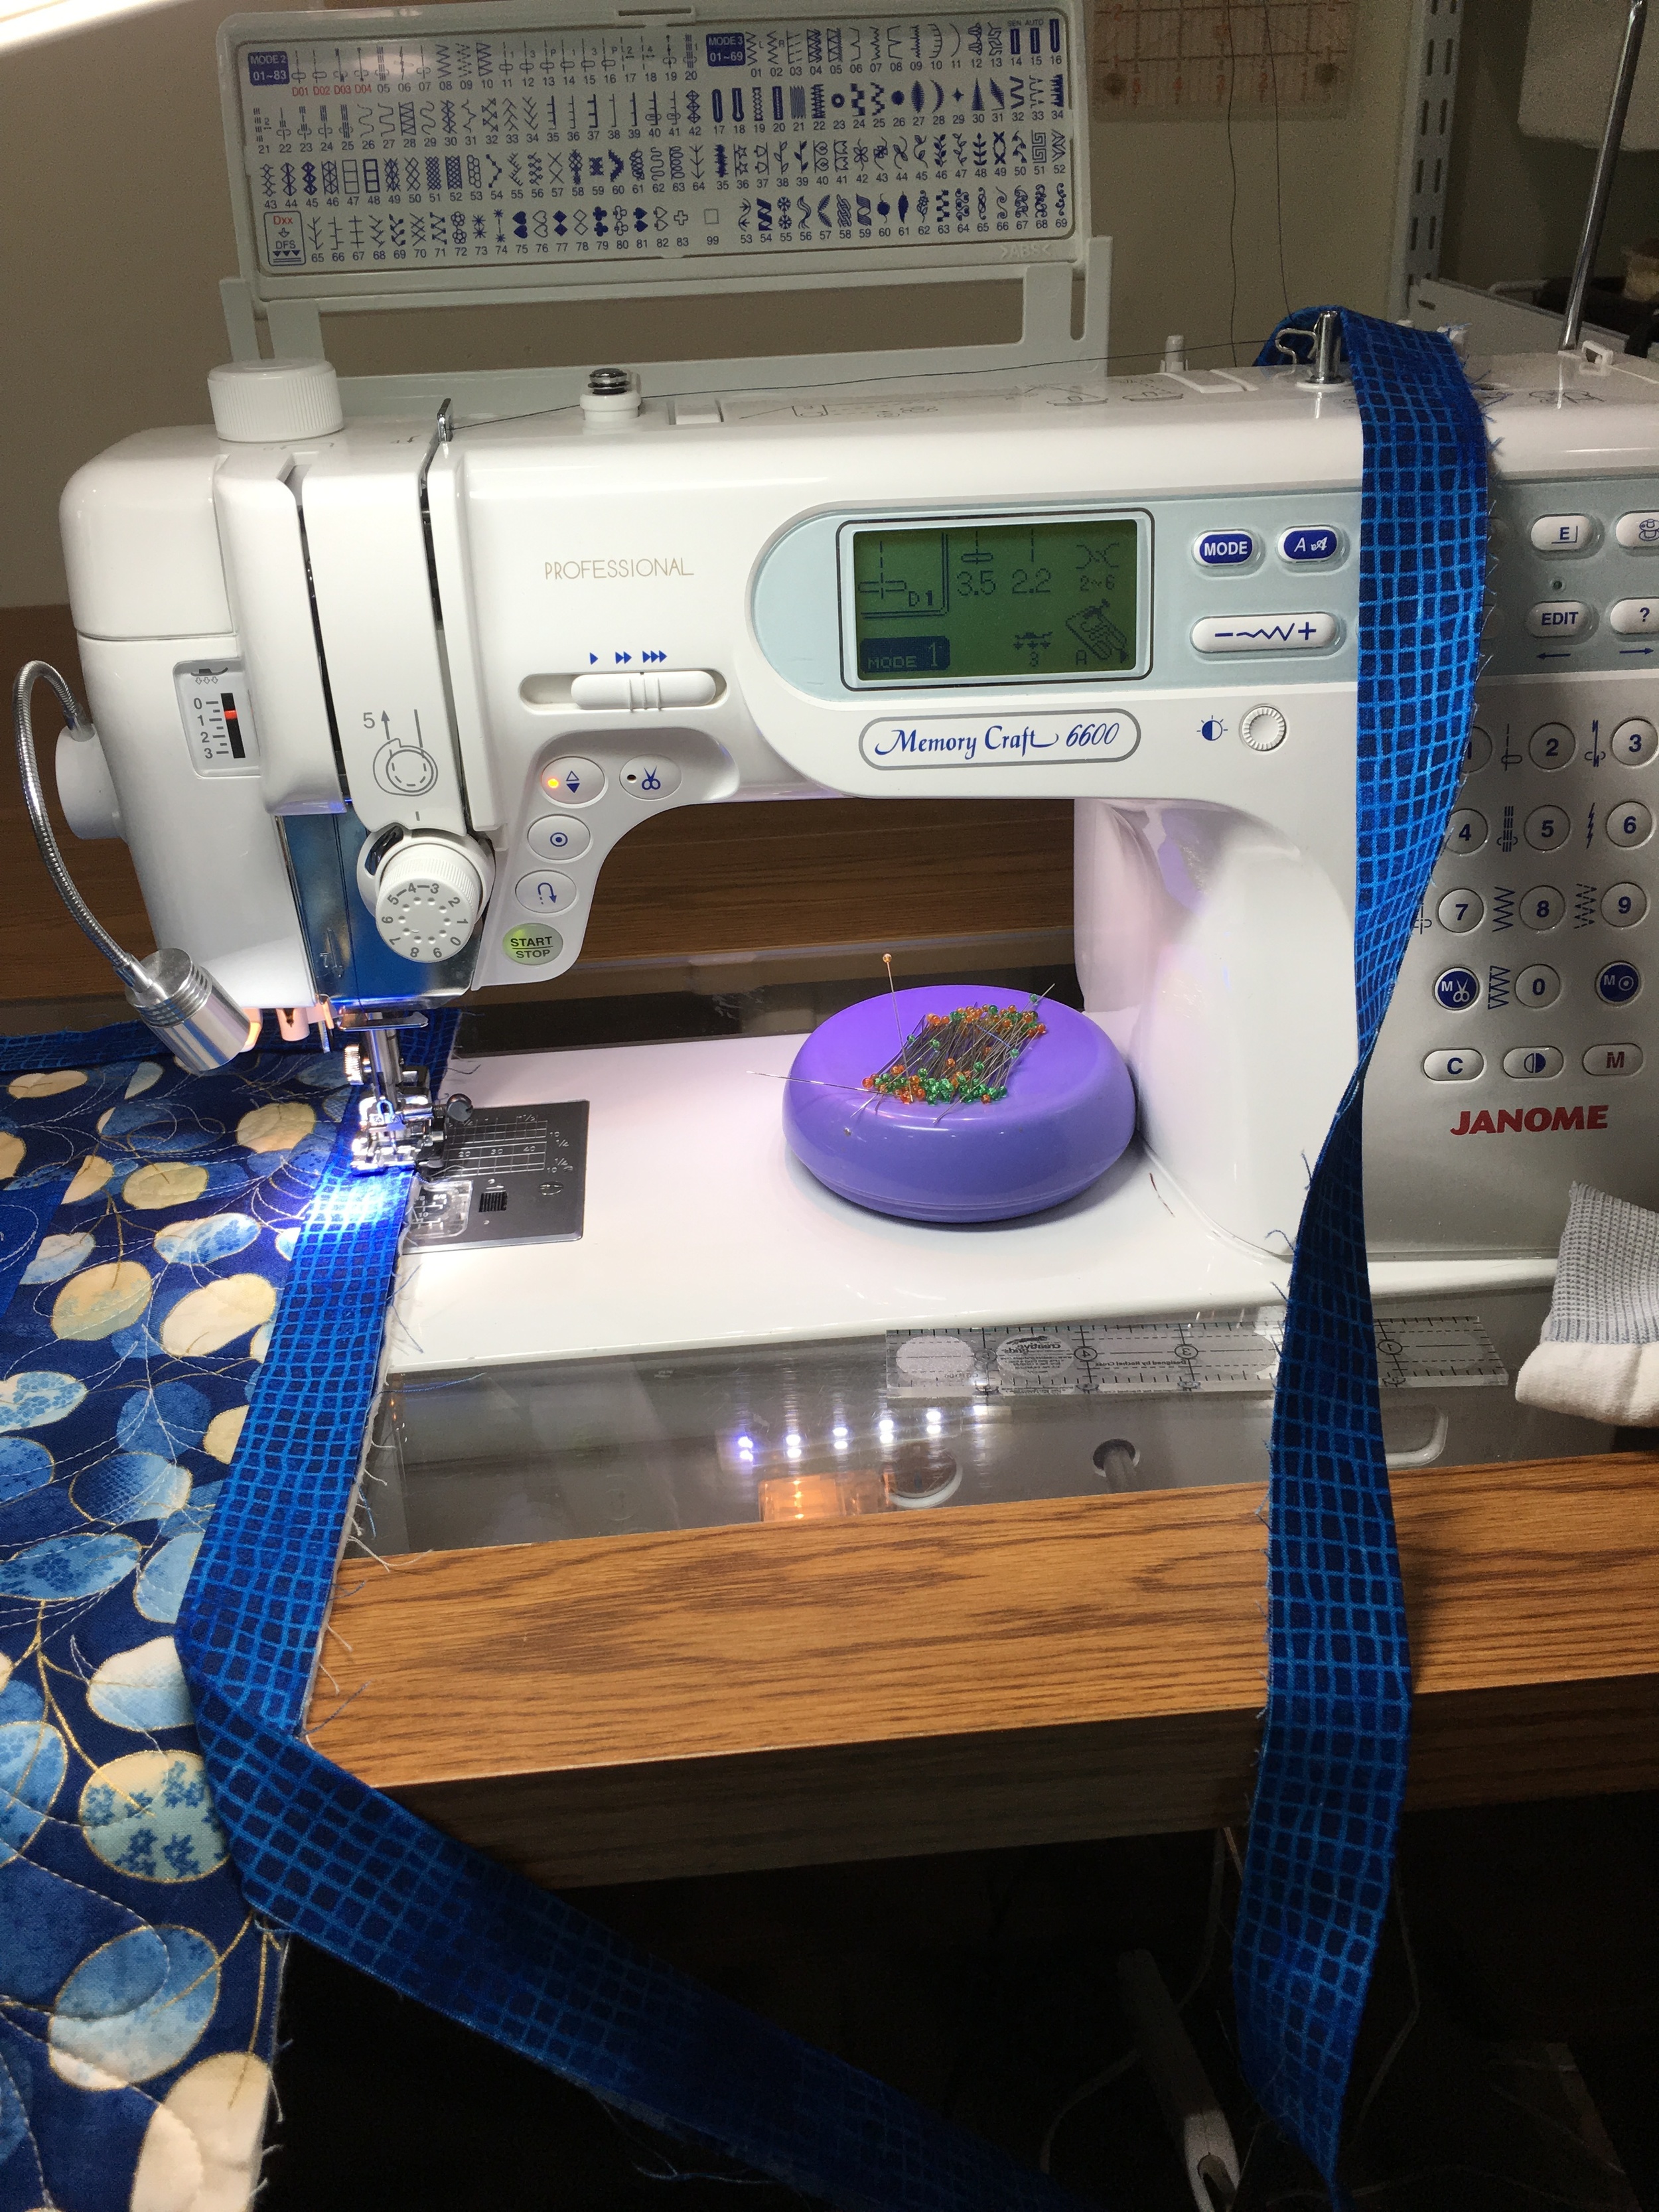
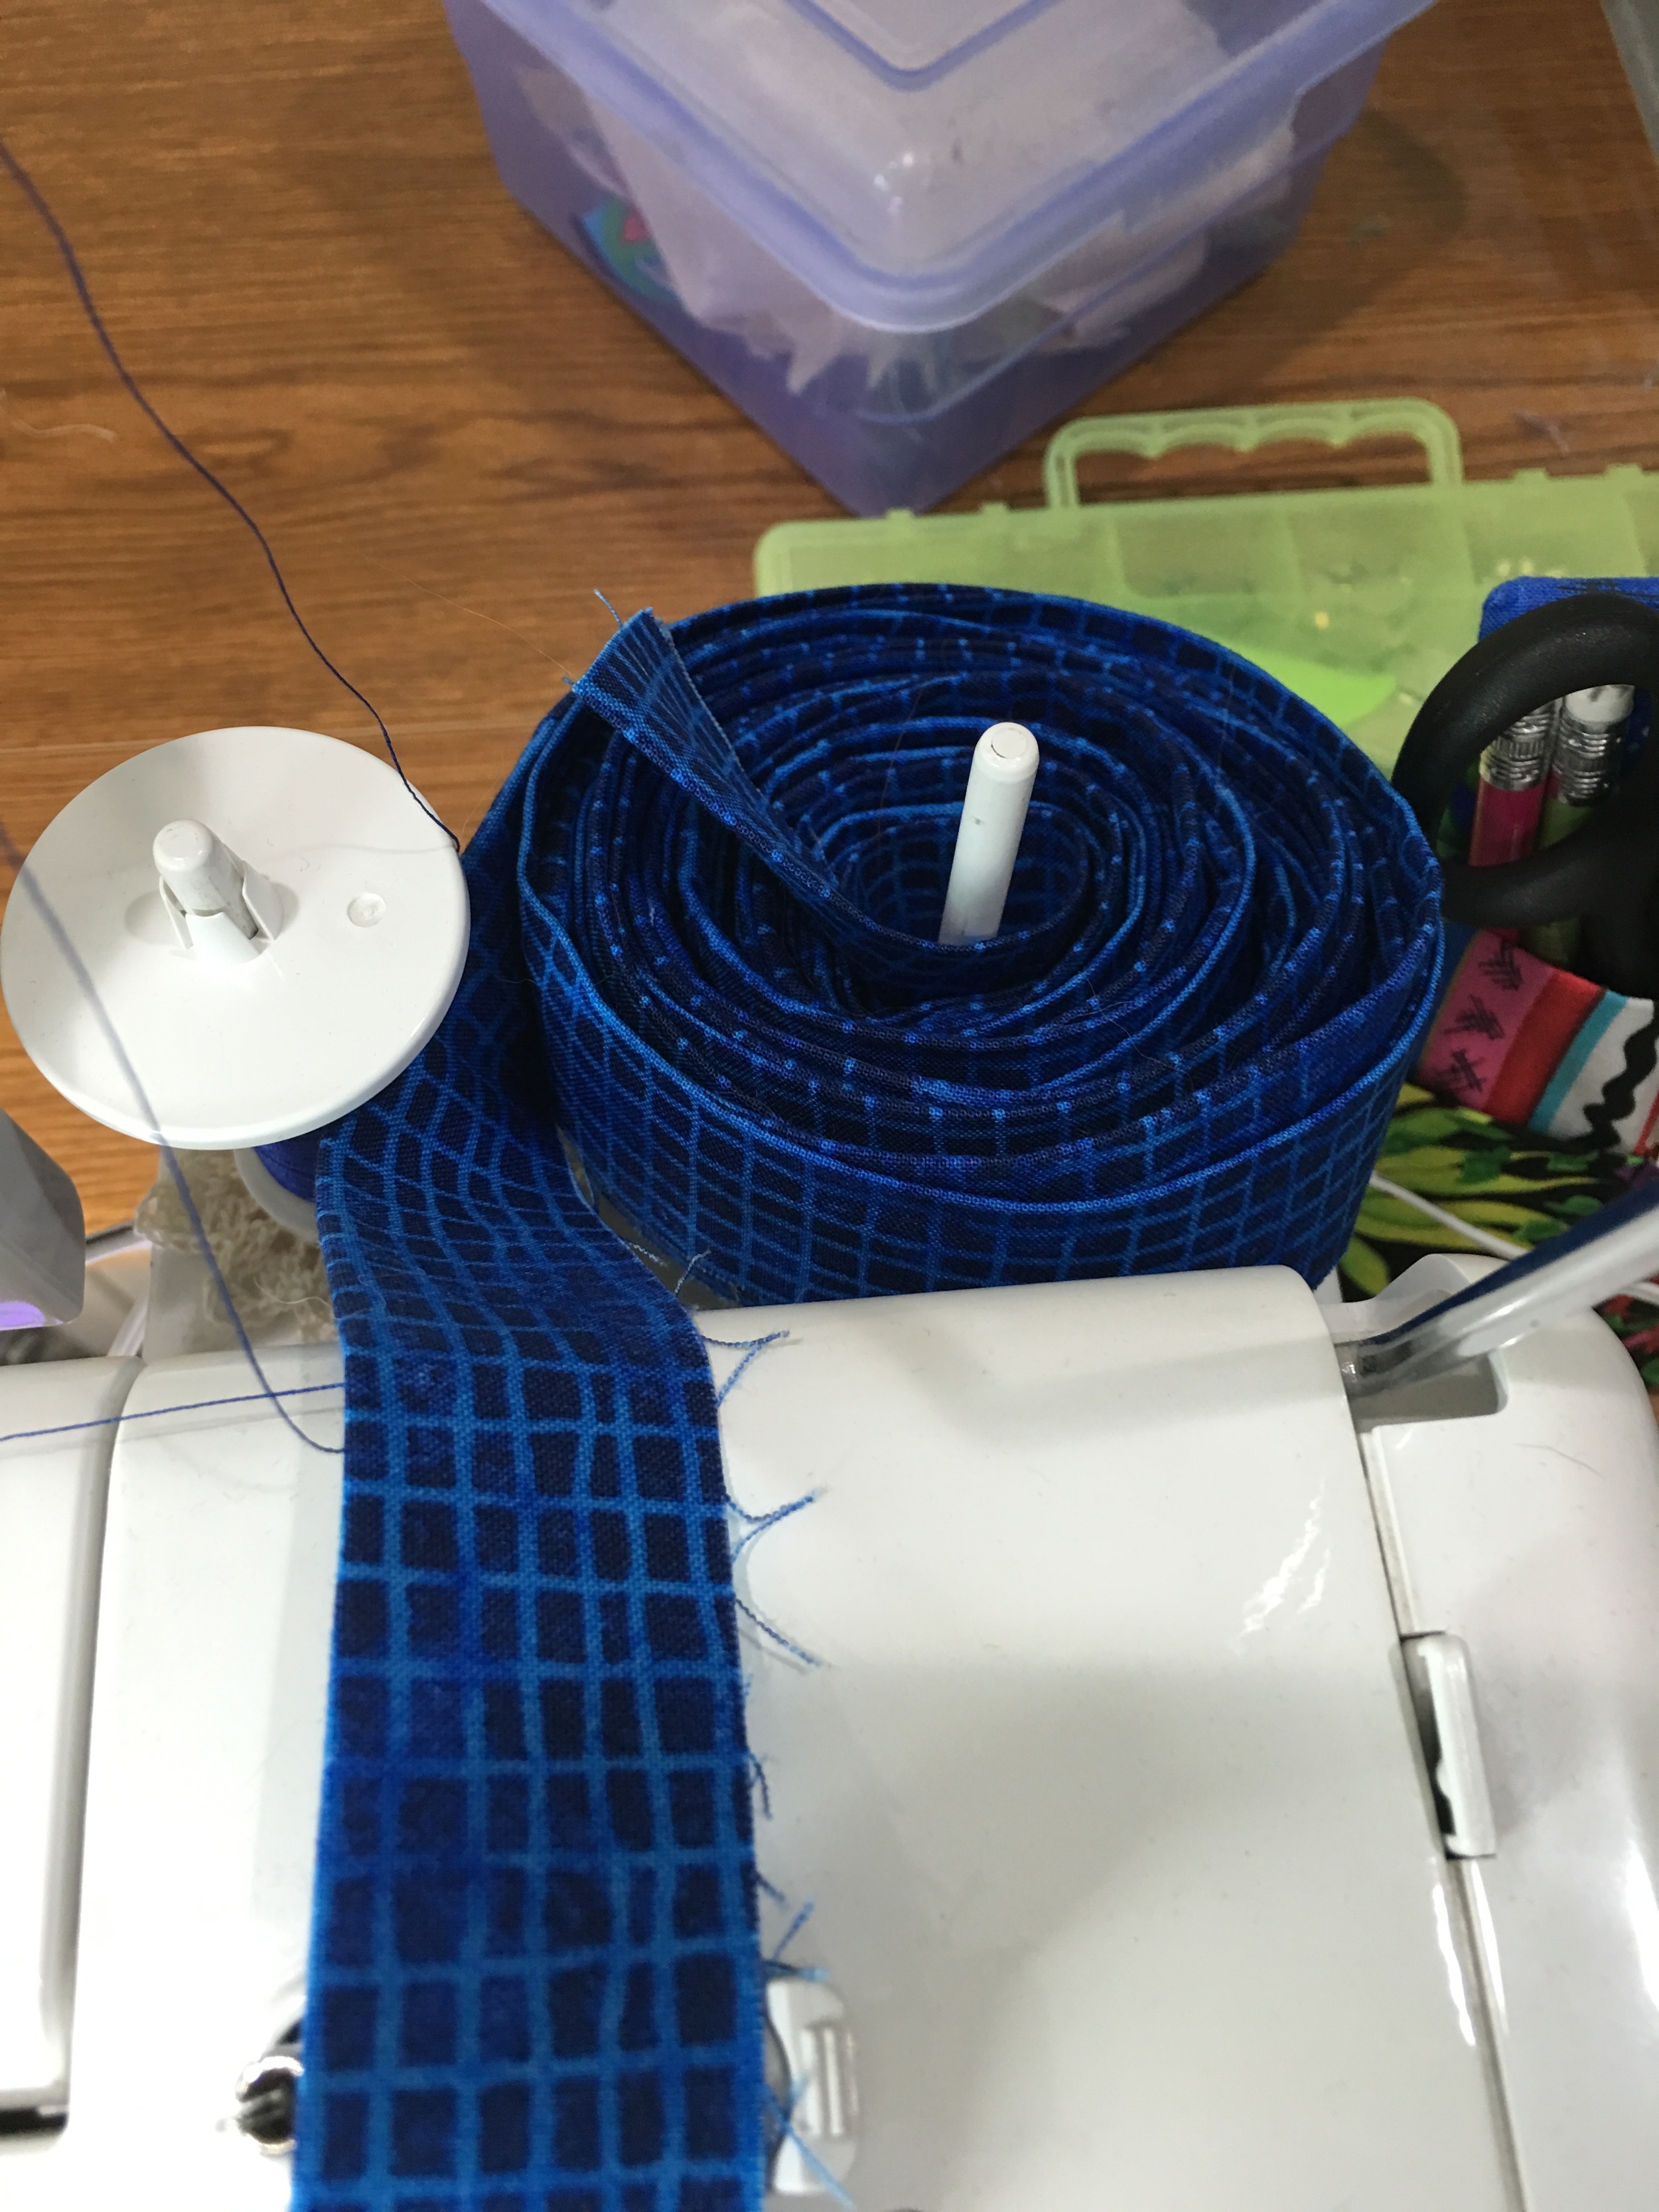
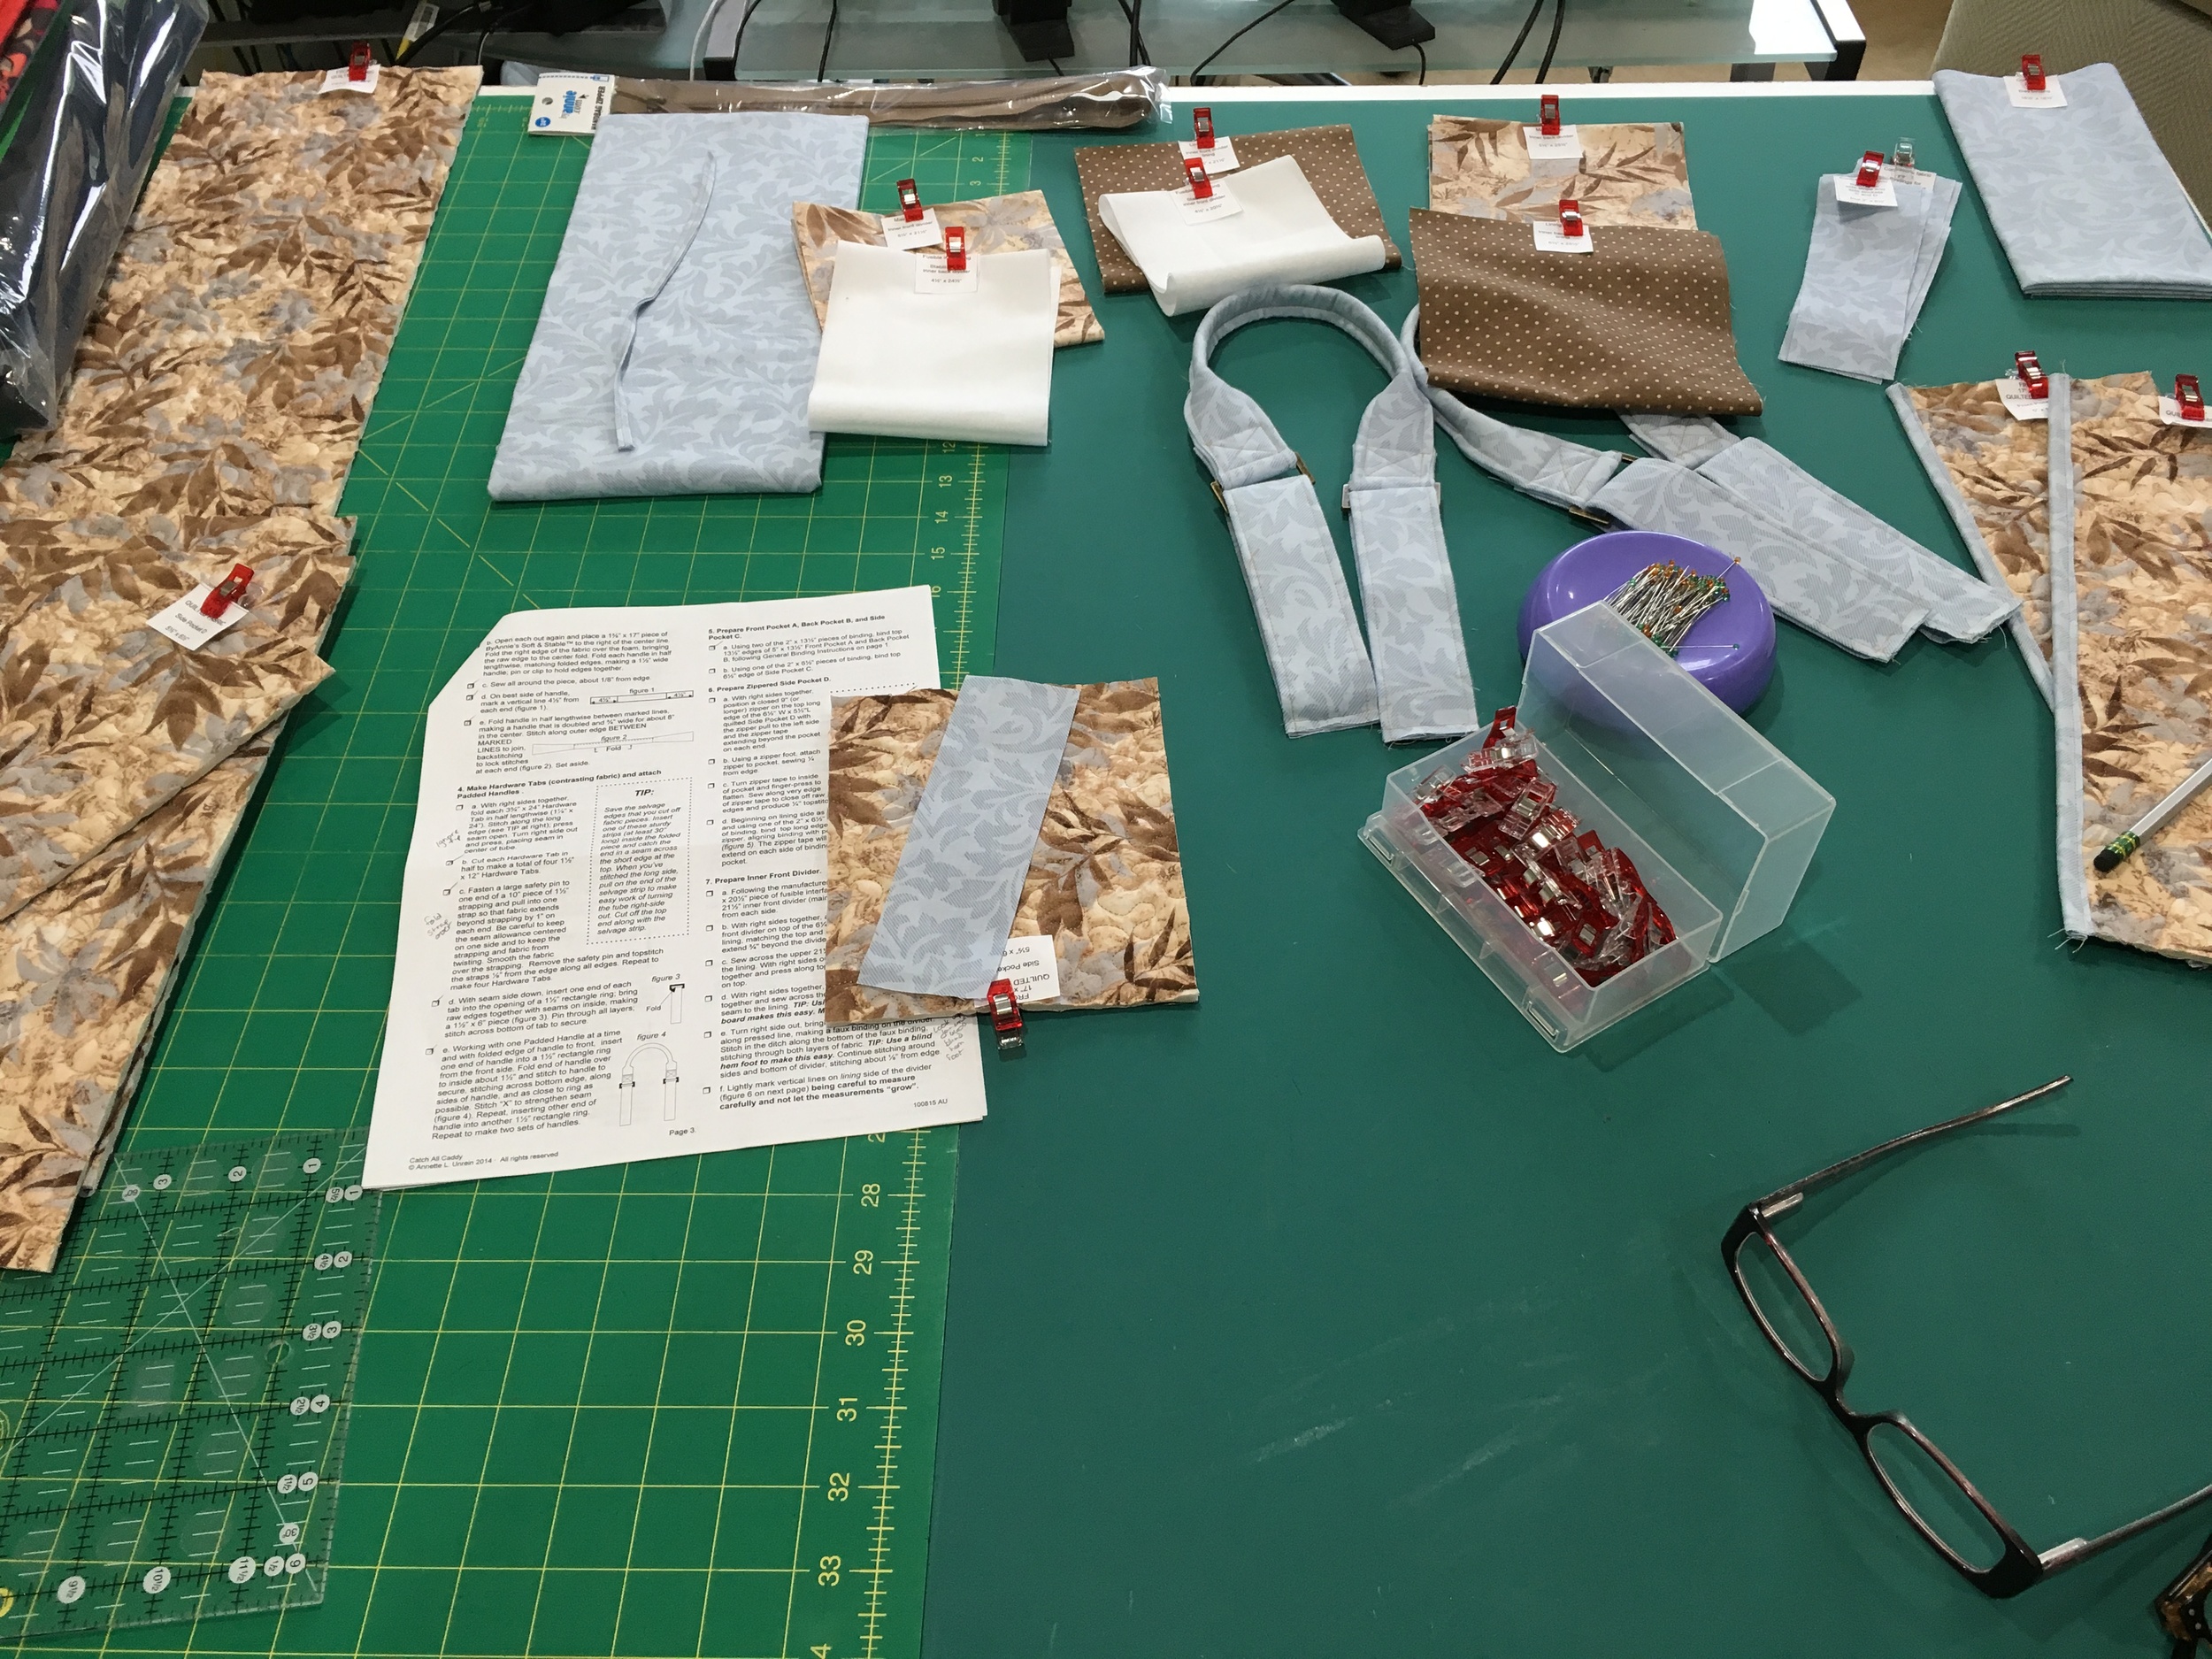
Catch-All Caddy--done! I'll post a separate blog entry about this one. It was a thing. Although it wasn't as much a thing as the Everything in Its Place Bag or the Cosmetics Bag. But still. A thing.


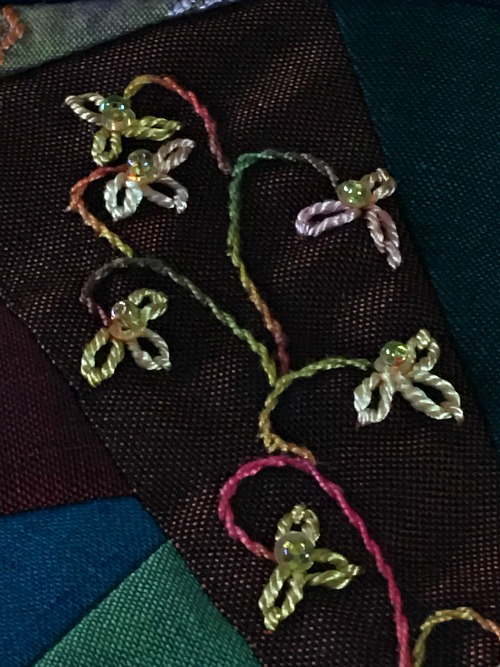
Designs stabilized and traced for Postcard Cuties Halloween embroidery BOM for months one and two--done! Just in time, too, as we got the email today that month three is on its way. (Yeah, I know, you can't see much in the pictures, but really--they're all done!)


Design traced for Nouveau Witch--partly done. I've got the linen background cut, pressed (which took some doing--it is linen, after all), and stabilized. I haven't gotten the tracing done yet. See above. By the time I got all that done my neck needed a break from looking down so I put off tracing the witch for another day. No pics yet since it's just, well, a piece of linen. 

And gravy: I did get the second snowman embroidered. Just need to get him fitted with his hat, sewn together, and stuffed. I'll post a pic of him when he's totally done. Not that he looks much different from the other guy.

Binding on Jacob's Ladder--not done yet. By the time I got done working on that caddy every day my shoulders, neck, and hands were whining at me so I didn't push it. I'm working on it this week, though. Although I got the BOM embroidery designs traced I'm not letting myself start embroidering them until I get that binding finished, dang it.

Basically--woo for me--I got everything done I wanted to get done! 

I don't have much going on this coming weekend, either, so I am already starting to think through what I might focus on accomplishing. I think I'm hearing Annie Unrein call my name again...

(Craftsy links help support my podcast and blog--thank you!)

Post-weekend progress and errata

I got a lot done this weekend, but I also realized I had two designers confused when I wrote a blog post and spoke on my podcast episode (posted yesterday).

The Christmas ornament embroidery I'm working on is Lynette Anderson Designs. She's from Australia.

The Postcard Cuties for Halloween Block of the Month I'm doing is Bunny Hill Designs. She's not from Australia. She's from the U.S. 

I've fixed the BOM blog post to note the error. I can't fix the podcast episode in which I think I said both projects were Lynette Anderson. Apparently I had too relaxing a weekend and my brain just stopped working altogether. Sorry about that!

Meanwhile, I did make progress!

1. I got the label affixed and the binding put on the front of the Jacob's Ladder quilt. I then got about 36" of the binding hand-stitched to the back while watching Stargate Atlantis (our current summer viewing fun). I haven't done the math to figure out how many inches I have left to go on that hand-stitching. Too depressing. I'm just enjoying the zen.

By the way, tried a new method for keeping the binding organized while sewing it on--I've seen this as a tip in a few places, and it really works! 

If you've got two thread spindles on your machine, roll up the binding and put it on one of them. I was concerned it would get tangled with the thread but it never did--I just kept a bit of an eye on it to make sure. 


2. I made progress on the Catch-all Caddy.

Trust me--that's a lot of progress. 


3. I got the first of the two Christmas ornaments completely done. The second is now on hold until I get that binding done.

He's kinda cute. His button hat is a little off in this picture (you shouldn't see the end of the stitching on the one side) but I just twitch it with my finger and it goes back into place. 

A point of slight interest on the stuffing: I bought myself a meditation cushion a few weeks ago as none of the cushions in my house were the right height/firmness. That puppy was rock hard when I got it, so I kept pulling out more and more stuffing until it got to a comfortable firmness I could handle for meditation sessions. The stuffing is 100% cotton fiber--beautifully smooth and soft, actually. I kept all the stuffing I was pulling out in a bag and stashed it in my sewing room. Came in handy for this! I've still got plenty left--can stuff more little fun things like this, of course, but some may also eventually make it down to my dye studio. I think it would be fun to play with. Way to re-purpose!

So--all of this progress, plus time poolside, a Saturday afternoon nap, and lunch with a friend, adds up to a really wonderful weekend. Ready for the week ahead!

Craftsy Class Review: Bead Embroidery with Myra Wood

I'm digging this one out of memory a bit because I actually finished this class several months ago. However, it goes to show the value of Craftsy classes that I was able to review material in it again this past week when I was doing some beadwork on my crazy quilt block!

For those of you doing our crazy quilt slow stitch-a-long, you will definitely want to pay attention to this review. For the rest of you--it's still really good stuff, even if you're not playing in our sandbox right now!

Bead Embroidery with Myra Wood is an excellent class for learning how to add some bling to your projects. I'm not interested (at least, at this stage) in doing a bead-encrusted-something-or-other, but I do like a little subtle shine here and there on the right projects. I'd bought and watched Bead Embroidery last summer when I was plowing through every hand embroidery class Craftsy had going at the time, even though I didn't really know at that moment what I might throw beads onto. But when I was doing my first bit of embroidery on my first crazy quilt block last week, I realized that a touch of beadwork was exactly what was called for. 

"I know how to do that!" I exclaimed in my head. Or it might have been out loud. I'll never tell.

It's really hard to get a decent picture of bling but trust me, there's a little sparkle going on here!

It's really hard to get a decent picture of bling but trust me, there's a little sparkle going on here!

I'm now going back and referencing the class more fully again--I could easily recall the basics that I used in this particular instance, but I have plans for more complex beadwork coming up and have been reviewing Wood's tips and techniques. I also bought more sequins. Because everyone needs more sequins in their lives, apparently. (Although I've now learned that sequins are a lot like working with glitter--they end up everywhere. The Doofus was looking quite festive as he slept on the floor next to the table where I was working.)

I got so much out of this class that when her sequel class went on sale, Bead Embroidery: Beyond the Basics, I bought that too, though I've not started watching it yet. I want to be able to work my way through more of the techniques in the first class before I get ahead of myself!

Anyway, back to the first one...

There is a project for this class that was tempting, but I decided to stick to using the techniques on my own projects. I will say that it's definitely worth taking a cruise through the photo gallery of class projects because there is some beautiful work represented! I found Myra Wood's presentation style very comfortable--straightforward but not stilted. This class is the one that convinced me to buy a new style of embroidery hoop that I love. Although I use other hoops and (gasp) even go hoopless at times, the combo hoop is definitely good for beading.

The class materials, while predominantly geared at the class project, do include useful information about supplies in general. In terms of the class project, the materials include the design to trace as well as a stitch guide if you want to follow the design exactly--it's all very clear to follow.

So...I'm off and running! Just watch my future crazy quilt posts to see the benefits of this class!

The Basics

  • 8 lessons, ranging from 13 to 25 minutes, although the vast majority of them are over 20 minutes long.
  • The first lesson is some introductory material and information about needles, hoops, threads, and beads.
  • Lessons two through six are a wide variety of stitches and designs. The classes are organized as categories, but each class has several types of stitches and/or variations on the basic stitch. If you're doing the class project, she'll show where each stitch shows up in the project. (Even if you do the project, there's a high level of variability in the project design so you can still very much make it yours.)
  • Lesson 7 covers ways to add that perfect finishing touch to your bead design--assessing gaps and adding just a little extra something. It also includes a gallery of inspiration.
  • Lesson 8 gives the final information about putting together the class project. If you're not doing the project, you'll still want to watch this lesson as she addresses some issues common to most embroidery/bead projects such as pressing out hoop marks in the fabric and such.

I can't wait to dig my needle into more beadwork, so to speak. I highly recommend Bead Embroidery with Myra Wood. Keep an eye out--although it'll be awhile--for my review of her sequel class as well!

(Transparency statement: As a Craftsy and Amazon affiliate, using the Craftsy and Amazon links in this post help support my podcast and blog. Thank you!)


Crazy Quilt Slow Stitch-A-Long: My first crazy quilt block done!

I poked away at this a little bit off and on all weekend in between working on my paper. (Makes a nice change of pace.) The only thing that actually took any time was choosing my fabrics as I was trying to pay attention to which ones looked good next to each other, balancing color and design across the block, etc. Once I got everything cut and ready to go, the piecing was super-fast.

The picture doesn't do justice to the fabrics, of course. You really oughta see it in person. The cool thing to me is that this is a very international block:

  • The solids are, for the most part, cross-wovens from Indonesia that I bought from a vendor in Houston a few years back.  
  • The one with the diamonds in the lower right is a cross-woven scrap that the tailor in Myanmar had given me--it's green and purple cross-woven. It's gorgeous in person.
  • The textured in the upper right is also from Myanmar.
  • The dark bronze solid towards the upper left is a scrap from fabric I bought in Thailand. (The camera made it go all moire-like but it's really another crosswoven of brown and gold.)

The piece of lace is not the antique lace I've been talking about in my podcast. I wanted to use something I didn't care as much about for my first try, so this is a scrap of a hand-dyed lace whose origin I don't remember--it's either lace I bought at a sewing guild rummage sale and tossed into a dye bath just to see what would happen, or it's a dyed lace from a scrap bag I got a year or so ago from an art quilter who was destashing some of her experiments. In any case...I thought the mottled color was interesting with the rest of the fabrics in this block, so I spray basted it to a background silk that I'd stabilized with lightweight woven fusible interfacing (as per Allie Aller's method). It's pretty solidly basted down but I'll still be embroidering it down to be sure. BTdubs, I have a lot of that lace, so it may well be showing up again.

The four long pieces around the outside are insurance. The block came a bit short of 8 1/2" square even though I thought my printed pattern matched Allie Aller's measurements. But that's the wonderful thing about crazy blocks--just slap some more fabric on there and call it a day! Most of those strips will be buried in the seams (it's an 8" finished block), but even if part of them shows it just becomes part of the overall design.

Can't wait to dig my embroidery needle into this puppy!

Are you doing the Crazy Quilt Slow Stitch-A-Long with me?

My first block deadline is this coming Saturday (forasmuch as we're even sticking to deadlines). I got mine done a bit early. Yay for me. Don't forget to join QFTRUcrazyquilts group on Flickr and post a pic of whatever block you're working on!

Join me, why don't you? Crazy Quilt Blocks

It struck me this morning, as I was thinking about the crazy quilt block I need to make for my stitching group, that I should invite y'all to join me on this adventure! This would be a very simple, very s-l-o-w stitch-a-long.  

If you've listened to my most recent episode, you already know the backstory to this. In a nutshell, I've started meeting with a couple of quilty friends who are also embroidery enthusiasts and we've decided to start working on crazy quilt blocks. We're not swapping or putting them all together into a single quilt or anything; we're each just making our own blocks and then bringing them to our coffee shop meet-ups to work on the embroidery while we're together. We are, however, swapping some fabrics and threads with one another to help augment our stashes.  

I'm also using it as an opportunity to finally do Allie Aller's Crazy Quilt class on Craftsy;* I've owned the class for a long time and have watched it before, but never made the time to actually do a crazy quilt. So my first few blocks will be based on her techniques in the class.

Our blocks are supposed to be 8" finished which, handily enough, turned out to be the same size as the ones in Allie's class. Convenient, that. I'm using my collection of cross-woven cottons (aka "shot cottons")  from Indonesia as my base fabrics though I'll be throwing a lot of scraps into the mix. 

So, if you'd like to play along, we're aiming to have our first block done (just made, not fully embroidered) by Saturday, December 12. Leave a comment here if you're interested in joining in a crazy-quilt stitch-along--if there's a few of us, I'll set up a Flickr group for us to share our pics-in-progress! Maybe I'll throw a give-away in there somewhere along the way. Can you tell I haven't really thought this through in any formal way yet? I just wanted to invite y'all in on the fun!

I've got some crazy quilt resources to recommend, too, if you're interested.

Books:

Blogs on embroidery or crazy quilts

And I now have a Crazy Quilt board on Pinterest that one of my stitchy friends and I collaborate on. 


(*As a Craftsy affiliate, using this link helps support my podcast and blog. Thank you!)

Finally--a Finish! Butterflies are Free to Fly

Finally, it's done!

This is my completed project from Sue Spargo's Craftsy class Embroidering Texture and Dimension by Hand. Click here for my review of the class and a couple of pictures of the project in progress.

I'm not loving the final product but that has nothing to do with Sue's design or class--I love her work and the class was great fun. 

No, the issues are all "user error." So--if you take her class or use one of her patterns or books, follow her directions! She knows what of she speaks. I didn't, and it bought me all sorts of trouble.  (I went into more detail on that on my last podcast episode, so check it out if you want to avoid the same difficulties.)

Still n' all, I had a lot of fun for most of the process. I question a couple of my design choices but I did achieve my overall goals, which were (1) learning embroidery, and (2) using as many different types of threads as possible. I even threw some beads on there.

Mostly--yay, it's done!

Meanwhile, you can tell I've been bitten by the embroidery bug hard--here's a picture of more pretty mail I got this week.

Check out www.colourcomplements.com. Hand-dyed embroidery threads tastiness. She's also got a great blog to follow. She ships from Canada, by the way, but it came fast!


 I love these threads. So much so that I couldn't wait to put them to work so I added a bullion rose to my free-form sampler piece I've got working. 

Not too shabby for my first attempt at one of those roses. But that thread-gorgeousness makes anything look good. Yums.

Craftsy Class Review: Stitch It with Wool with Kristin Nicholas

Once again, I loved doing an embroidery class! After doing Sue Spargo's class and still having a boatload of butterflies to finish, I figured the next best bet was Kristin Nicholas' Stitch It with Wool: Crewel Embroidery. I assumed it would be pretty easy to incorporate any new stitches I might encounter into the butterflies.

I wasn't positive what "crewel embroidery" was and how it differed from regular embroidery before I took this class. As I've now learned, the only real difference is the thread. With crewel embroidery, you're embroidering with yarn. There is actual crewel embroidery yarn, but you can also use regular yarn as long as it's a smooth yarn that will glide easily through your fabric. I have a couple of thicker perle cottons that I decided fit the ticket, so I was able to practice one or two of the stitches even though I don't have actual crewel yarn. It's now on my shopping list, though. 

Most people likely associate crewel embroidery with Jacobean design, as crewel was hugely popular in that era. Click here for a great Pinterest collection of Jacobean design in fabrics. However, it doesn't have to be Jacobean to be crewel (which sounds like a song title): You can do any ol' embroidery you want with yarn. Mary Corbet has a nice description of crewel on her website. The thickness of the yarn may dictate a bit what stitches you're able to do, but for the most part, it's the same thing. 

I dig Jacobean design, so that was part of what attracted me to this class--if you do the actual class project, it's got a bit of a Jacobean flair to it. Or maybe it just reads that way to me because they're done in wool. Whatever: they are cute projects, but I chose not to do any of them at this stage: I just wanted to focus on finishing those dang butterflies. I have a couple of books on Jacobean applique that I inherited from my Mom and have never used--I'm now imagining them as embroidery patterns instead of applique patterns. I suspect I may be using those books any time now!

Satin stitch worked in perle cotton

Satin stitch worked in perle cotton

Many of the stitches were the same in this class as in Sue Spargo's, which one would expect; there are certain foundational stitches to embroidery that will show up in any class. It's how those stitches get built upon and layered that can make the difference. That means, of course, that Kirstin Nicholas has few new variations and stitches in this class, even if they were the same stitch "families." Plus, every teacher will have slight variations on technique which are helpful to learn--it gives me more options when trying to figure out which technique I wear most comfortably. Additionally, she gives some tricks to making stitches work as well with wool as with floss, or in terms of helping you learn how to choose the best stitches for success with wool, and so forth.

I enjoyed Kristin Nicholas' teaching style. She's very straightforward and clearly demonstrates each stitch. She also has an excellent lesson at the end about how to keep your skeins of stitching yarn from becoming a tangled mess (something I had to learn the hard way, unfortunately), as well as how to block and steam an embroidery project when it's completed. This wasn't covered at all in Sue Spargo's class, but the difference in materials makes it less necessary for a Spargo-style embroidery project than the Nicholas-style. 

I've only got the one project picture above for this class as now I'm in sort of a free-style mode on the butterflies--just picking and choosing what stitches I want to use from all of the Craftsy classes I've done (another review coming today!), plus a couple of books I've picked up. But the next embroidery project I'm designing in my head is heavily influenced by this class, and I may well end up picking up some crewel wool so I can get a feel for how it works. Unfortunately, most of the yarn scraps I've collected from friends are "weird yarns," or the type that need to be couched rather than used in embroidery.

So, in summary, I did enjoy this class and I feel like it added to my general repertoire and comfort level with embroidery. I don't recommend either Sue Spargo's class or this one higher than another--they have both been great for me!

The Basics

  • 7 classes, ranging from 24 to 34 minutes in length. 
  • The first class discusses supplies, how to begin and end a stitch, how to deal with a mistake (helpful to start right out with that!), some ideas for finishing, and how to transfer a design onto fabric.
  • Lesson 2 is basic stitches and lesson 3 is how to embellish those same stitches to add layers of interest. 
  • Lesson 4 addresses what she calls "fancy stitches," which are largely stitches that involve knots of some kind, such as pistils and bullions.
  • Lesson 5 are fill stitches--I got some good ideas here, although on my butterfly project I don't need much in the way of fill stitches. But they'll likely play into whatever my next project is.
  • Lesson 6 is sculpted stitches, such as Turkey Work and the Spiderweb stitch.
  • Lesson 7 is finishing and inspiration--she has a nice gallery of work, although her examples are all pillows and relatively simple designs. She discusses her focus on beginners which is why I think she only had those examples--they're an "easy bite" of embroidery, so to speak. However, I always like to see what we could aim for as our expertise grows: I'd have enjoyed seeing more complex pieces as well. 

So, my review of Kristin Nicholas' Stitch it with Wool: Crewel Embroidery is definitely two thumbs up. I may actually make a trip this weekend to one of the two places near-ish me that sell crewel wool so I can really go to town!

(Using Craftsy links in this post and on this site help support my podcast and blog: Thank you!)


Progress and Goals--Week of May 3

My goals for this week were to:

  • Make progress on the Annie Unrein bag
  • Complete mug rug for swap
  • Complete three butterflies on Sue Spargo project
  • Make block for friend's quilt

Progress:

Satin stitch with heavier thread--based on new Craftsy embroidery class I'll write about later

Satin stitch with heavier thread--based on new Craftsy embroidery class I'll write about later

  • Annie Unrein bag: This got completely back-burnered this week as I have two time-constrained projects on the docket so I focused completely on those.  
  • Complete mug rug for swap: I haven't completed it yet (sorry, Kerry!) but I've made progress! Unfortunately, what I chose to do is somewhat time-intensive. But I think it'll be fun when it's finished.
  • Complete three butterflies on Sue Spargo project: I'm now using stitches from a different Craftsy class (more on that in a future post), but haven't completed three butterflies yet. Again, those time-constrained projects made everything else take a back seat this week. I'll be bringing this with me on my work trip.
  • Make block for friend's quilt: I'm doing some embroidery on it so it's a long process. I'm writing this post on Saturday and scheduling it to post on Sunday, as I'll be driving most of the day Sunday (see afore-mentioned reference to a work trip). I'm actually hoping to get this block done before I leave; if not, it'll be coming on my trip with me.

Goals for This Week:

This is tricky this week as, when I get back into town from my trip, I'm immediately out two nights in a row, then having family over for dinner the following night. So I really only have next Saturday for any sort of quilting projects, I think. Therefore, my goals for this week revolve primarily around portable projects that I can easily poke away at with 10 minutes here and there. (Read: No Annie Unrein bags on this week's plan!)

  • Get my friend's block done.
  • Make progress on the mug rug. This will be my primary focus on Saturday if I haven't managed to get to it before that. I really want to get it done, Kerry!
  • Complete two butterflies on butterfly project. I knocked it down a butterfly due to my lack of time this week. Still, I think this could be within reach.
  • Complete two Craftsy classes. One is the second embroidery class I mentioned above--a few more stitches and I'll have completed the class, if not the butterfly project; the other class is one I'm just watching to get a feel for techniques, no class project involved. I've only got a couple of lessons left to watch and I'm planning on doing that while I'm in my hotel. I can be embroidering at the same time--way to do the two-birds-one-stone thing!

Craftsy Class Review: Embroidering Texture and Dimension by Hand--with Sue Spargo

Oops. I wanted to get this review done in April. When did it suddenly become May? I think when part of April suddenly became winter again it threw my whole sense of the calendar off. 

If you've been listening to my podcast or following my blog at all in the last few weeks, you'll know that I've just completed a Craftsy class that probably had just as much impact upon me as Jane Dunnewold's The Art of Cloth Dyeing did a couple of years ago. This time it was Embroidering Texture and Dimension by Hand with Sue Spargo. I am off and running with this embroidering thing now! Woo--just watch me go!

I have been a fan of Sue Spargo's designs for years, starting back when I went through my first felted wool stage probably a decade ago or so. I enjoy Spargo's slightly more bright and fun primitive style. She can do the Americana/country thing (popular in the felted wool world), but she also does straight-up funky, which I love. I had bought her Creative Stitching book a year or two ago; it's pricey, but especially after doing this class* it's also become my go-to. Love that book. I'd tried teaching myself some embroidery from books before but there's absolutely no substitute for watching someone do it, so when I saw she had a class on Craftsy, I bit.

I decided to, for once, do the class project. It's been awhile since I've done that, as I usually use techniques on things I've already got going or had already planned to do. But as I looked at her design, I realized it would be a great way to use some of my stash of felted wool that was languishing. Plus, her "project" is more a lot of design suggestions that you can put together any way you want--which suits my "independent cuss" nature. When I started working with her suggestions for building a layered background, I ended up with something I really kind of dig. I went an entirely different colorway than she has (she used brights), based on the wool I already had in my collection. It took me so long to pull fabrics for this that I took some short-cuts on building the background--I fused, rather than needle-turn applique like she does, and later I learned why a standard applique technique would've been far preferable. But that's why we take classes, isn't it? Now I know.

She suggests 15 butterflies for the project, so 15 butterflies I did. I ended up ordering just a little more felted wool for the butterflies because I didn't have quite enough in a color range that really worked together. As a point of interest here, I bought my wool fabrics from Erin Rissberger of Quilting Acres on Etsy. She'd sent me some samples years ago when I interviewed her for the podcast (Episode 45)  and I just love her colors, so I was thrilled to be able to use them in this project.

The butterflies took a long time to put together too, as you layer those as well. I'd approach how I did all that layering very differently next time, so I really should've payed better attention to Sue's advice in the class (and in class discussion). Here's a tip: watch and read before doing! Another note--I also ended up buying her book Creative Texturing to help me make some decisions here. This book walks through the process of fabric selection and layering to create more visual interest on your projects. I'll be referencing that book a lot more in the future too.

Finally, I got to the embroidery. This class walks through several stitches, generally in order of complexity, which often means in order of difficulty. However, I did find stitches in later episodes that were actually easier for me to manage than ones in earlier episodes, so it's not entirely a progressive thing. 

Some stitches I took to like a duck to water. Others took a little more trial-and-error. One was my Waterloo--just couldn't quite get that Rosette Chain stitch down. I'll go back to it again after I've got more experience to see if I can't conquer that darn thing. (She does say it's the hardest one she teaches in the class, so there is that.)

 
And this ain't the half of it...

And this ain't the half of it...

Mostly, I had a ball taking Spargo's advice to heart--play with as many threads as possible! There is so much more to the world of embroidery than DMC embroidery floss and a #8 perle cotton, for as much as both of those are quite nice. Still a fan of the perle cotton, especially hand-dyed types. Yums.

I've used a huge variety of threads in this project so far, and still have more to try. Fair warning: It easily becomes a new addiction. It does also make learning embroidery slightly more complex because threads behave differently and require different needles, so every new stitch I tried was a test of trial-and-error before I finally found the right combination for what I wanted to do. But that's also just practice and experience--after just a few weeks of this I already have a better eye for what types of threads are likely going to give me more immediate (read: stress-free) success for certain stitches. 


I also got into adding beads to my embroidery based on one of her lessons. Another dangerous addiction.

So, can you tell I loved this class? It's definitely two thumbs up! If you're brand new to embroidery (like I was, for the most part), I advise making liberal use of the "30-second repeat" button and changing the speed of the video to go more slowly for certain stitches. (I had to watch the cast-on stitch technique a few times since I'm not a knitter.)

Sue Spargo is an excellent teacher, by the way. I really feel like this class gave me a very firm foundation in embroidery, even if I never took another class again. That being said, I'm now working on my second Craftsy embroidery class, already bought a third, and the fourth is sitting in my wishlist for later. I haven't finished the butterflies yet, so I'm currently using it as the project for these additional embroidery classes--meanwhile, I'm already mentally designing my next embroidery project.

The Basics

  • 7 lessons ranging from about 17 minutes to 30 minutes.
  • The first lesson is about creating the project you'll later be embroidering. I could've done with a little more information here, I think. I suspect the issue is that she's not giving directions for a specific pattern but, rather, making suggestions for things you may want to do; I think, since it was a new technique for me, I'd have preferred seeing her walk through a specific project first, and then talking about how to launch off from that to whatever you wanted to do yourself. In any case, I did figure it out and, of course, you don't have to do a specific class project at all, if you don't want to.
  • The second lesson talks about tools--needles and threads. I found this very helpful the first time, but even more helpful when I went back later after I'd done a lot of embroidery and watched it again. That time I had a better frame of reference for what she was talking about. The second lesson also gives the first couple of stitches--the Pekinese stitch (one of my faves!), and couching.
  • Lesson three is decorative edging stitches, including the fly stitch--which quickly became one of my go-to stitches, crested chain--another great one, and the aforementioned Waterloo stitch, the Rosette chain.
  • Lesson four is dimensional stitches and I had great fun here--bullion knots, drizzle stitches, bullion cast-on stitch, and double cast-on stitch (which I skipped because by then it had taken me so long to circumnavigate a butterfly with bullion knots I wasn't inclined to take on the even-longer-term double cast-on).
  • Lesson five is woven stitches--loved doing the circle with a gorgeous thread on this one.
  • Lesson six is beaded stitches. "Danger, Will Robinson, Danger!" I now have a storage container specifically for the beads that somehow magically appeared in my house after doing this lesson.
  • Lesson 7 is finishing touches, with another couple of slight more extensive stitches, plus a lot of really cool ideas for using embroidery in bindings. Can't wait to get my butterfly project finished so I can revisit this lesson.
  • The class materials are so-so; 6 pages, three of which are templates for the suggested project. There's an extensive supply list that felt overwhelming at first--and you don't actually need all of it to do the project, but you're likely to want all of it and more if you really get into this! The second page gives some hints and tips, which were partially useful.

A long review, I know. But I. Loved. This. Class. Remember, embroidery doesn't need to just be for embroidery projects and crazy quilts. It's easily done as an accent on any quilt or quilted project. I'll definitely be using a lot more of it in my art quilts. If you think you may even vaguely be thinking about adding embroidery to your quilting repertoire, you really need Embroidering Texture and Dimension by Hand with Sue Spargo.

*You don't need the book to do the class, but it was quite helpful to have on hand when I was practicing the stitches she demonstrated.

(Using Craftsy links and banners on this page helps support my podcast and blog. Thank you!)

Thinkin' about It Thursday

This week, I'm thinking... 

  • That I really am loving me some embroidery. 
  • That all those wonderful, funky threads are like candy. 
    • I can't resist. 
    • Give me more. 
  • That adding some beads is a dangerous thing. 
    • Addictive. 
    • Another collection. 
  • How getting fiber art books out of the library can seem like a penny-wise move. 
    • Until I realize I really want to own the book. 
    • Ahem.
  • How nice it was to be able to start playing fetch with Doofus in the backyard this week. 
  • That he and I both need to get into better fetch shape.  
    • Winter was rough on both of us.
  • How I'm sorta looking forward to my work trip next week because I know I can take my embroidery with me. 
    • It's a sickness. 

2015 Quilty Resolutions: April Journal Quilt

Okay, Sandy here, once again cutting myself some slack.

I realized that the prayer flag I've been working on is all one big experiment, so I'm now counting it as April's journal quilt, even though it's not 8"x10" or even, arguably, a quilt. It has two layers, not three, and it's embroidered but not quilted.

Work with me, here.

I present to you my April Journal Quilt project: a prayer flag.

The front is a piece of cotton batting I had experimented on in my dye studio--it was originally a normal cotton batting-cream color; I dyed it black. You can see how mottled it came out. Kinda cool.

I then did some needle felting on it with some dyed wool rovings I'd had in my stash for about a year (not dyed by me). I had fun blending the colors. I've done a little needle-felting here and there but nothing really terribly extensive, so I'm still getting the knack of it. Not hard at all, of course, but now I probably should start actually reading up on it and really figure out what I'm doing.

I also wanted to play around with beading, and I'd picked up some really wonderful beads at a bead shop recently. Dropped a bundle in that bead shop, so you'll be seeing a lot of beads on future projects. That bird (which is likely a swallow given the tail feathers but I'm choosing to call it a peace dove) is one of my faves.

I started working on this prayer flag shortly after I'd received word that I'd been accepted into the D.Min. program (listen to episode 180 if you'd like to hear more about that). At the time I started working on this project, I hadn't really decided what my prayer flag would be about--but then I ran across this great quote from William Shakespeare and it just seemed to completely fit where I am in my life right now: "To unpathed waters, undreamed shores...." Now, to be clear, the quotation is from A Winter's Tale which is one of the few Shakespeare plays I haven't seen or read so I don't know the storyline; it's actually taken from a speech in which the speaker is advising others NOT to go off in unpathed waters but to stay on a more known course. But I choose to rip it heartlessly out of context and cast it in a much more positive light. I'm rather enjoying, for the moment, being in unpathed waters and heading towards undreamed shores.

So there, nyah. It's my prayer flag. I'll do what I want.

I finished it off with a little embroidery accent in the swirls (yummy variegated Razzle thread from Sue Spargo's website), and then put a black felt backing on it and did a blanket stitch around the outside. The stitching isn't nearly as visible in person as it is in this picture; it's largely buried in the felted sections--you really almost can't see it. This picture does demonstrate the great lighting I have in my sewing room, I guess. 

My April Journal Quilt/Prayer Flag is now hanging near my office desk to help me remember this positive attitude when the blood, sweat, and tears start.


Progress and Goals--Week of April 26, 2015

My goals for this week were to:

  • Learn two more stitches for Sue Spargo class project
  • Finish prayer flag
  • Finish Anne Unrein's Everything in Its Place bag from Craftsy class
  • Make a solid list of my UFOs

Progress:

Wing Bling

Wing Bling

  • Stitching: Wheee! Boy, did I have fun this week. I did some woven circles, which (once I got the hang of it) were a beautiful way to showcase some particularly yummy threads. I also got into some wing bling (thanks to @Scooquilt, aka Valerie, for the phraseology). The photo at left is my first beading attempt. Here I was using a fly stitch and attaching the bead to the "leg" of the fly, keeping my stitches pretty small so all you'd see was the bead. I chose that stitch because it also helped hold the edge of the appliqued fabric down, which was showing an alarming tendency to pull away from the machine applique stitches I'd originally used on it. A few extra hand stitches, some beads to distract your eye from the fraying edges of the fabric, and bingo-bango, a finished look. Can you tell I was enjoying myself? I've got more plans for beads--Sue Spargo shows several in the final lesson of the class that I can't wait to try out. 
  • Finish prayer flag: Pret' near done. I've completed the design: I just need to figure out how I'm backing it and such. I'm going to take a few minutes on it as soon as I'm done with this post so my plan is that it'll be done before the end of the afternoon.
Vinyl pockets for bag. 'Nuff said.

Vinyl pockets for bag. 'Nuff said.

  • Anne Unrein class project bag: Well, I did make some progress. So there is that. 
  • Solid list of UFOs: Done. Note that on the top of this blog page (if you're on my website), there's a link for another page that used to be pictures of my WIPs. I never kept it updated so I repurposed the page--it now has a complete list of all my WIPs, UFOs, and projects I've decided to "disappear" in one way or the other. I'll do my best to keep this updated. I know y'all will be far less interested in reading it than I am, but maybe knowing it's out there for all the world to see will keep me on track!

Goals for This Week:

  • Do I even say I want to finish the Annie Unrein bag, or should I be more realistic and just say "Make progress on....?"
  • Complete mug rug for swap. (I'm starting that this afternoon too--not sure how long it'll take me as the design keeps getting more complex in my head every time I think about it, LOL.)
  • Complete three butterflies on Sue Spargo project. I'm actually pretty much done with the class. I've watched all the lessons and if I didn't use every single stitch she demonstrates, I used at least one or two from each "group" of stitches. There's one stitch she shows in one of the last lessons that I want to practice, but after that, it's really just a matter of finishing the project. To do that, I'll be re-using a lot of stitches I've already done in other areas; so instead of focusing on numbers of new stitches, now I'll be setting goals towards completion of the project. I've got 15 butterflies in total, plus background. I've done bits and pieces of several of the butterflies as I was choosing where I wanted to practice each stitch, so now I'm going back and looking at each butterfly as a unit to determine what it needs to be finished. I'd like to finish off at least three butterflies this week.
  • Make block. I'm doing a block for a quilt for a friend, so I need to get my block done this week. 

(I'm not including finishing the prayer flag on this list as in my head, it's really already done.)

Kimberly Einmo, the Craftsy Giveaway, and a little progress

I just posted my interview with Kimberly Einmo (episode 124). Woo! I really enjoyed the opportunity to meet and talk with Kimberly--very fun. I just wanted to make sure I posted on my blog as well so all-y'all who subscribe to the blog but may not subscribe to the podcast would know that Craftsy is sponsoring a giveaway on the episode--the winner will get a free Kimberly Einmo Craftsy class of their choice!

Check out the podcast!

D9P5813.jpg

Meanwhile, I got the center done of the Disappearing 9-Patch I'm making as a donation quilt. It's wheelchair size (or will be, once I slap some borders on this puppy), and I chose masculine colors for this one. Do you know how hard it is to find charm packs that aren't girly? Fortunately I had enough scraps to beef up the two charm packs I was able to lay my hands on. ​(Terrible, awful picture--that's what I get for doing it at 10:30 at night on my cell phone. Stinky lighting. I'll do better on the next progress shot.)

flowercloseup.jpg

And I made more progress tonight on my House on a Hill Project for Laura Wasilowsky's class on Craftsy, "Hand-stitched Collage Quilts." ​The grass is done. Woot for grass.

See those two wonderful variegated threads? The pink in the flower (not the French knots) and the green in the grass? Those are both Laura's hand-dyed perle cottons, available through www.artfabrik.com. Tasty.​

I promise, better pictures next time. Pinky swear.​