#BFSI Report--Baby Quilts Finally Done and Delivered!

The two baby quilts are finally both done and delivered--woot!

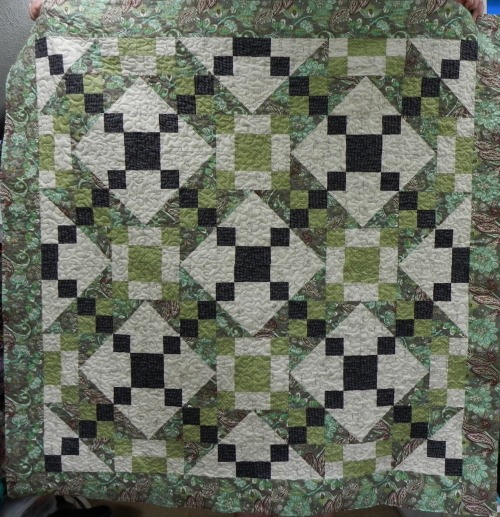
Baby Quilt #1 started out as a Jacob's Ladder quilt.

notmeanttobe.jpg

As per episode 133 "In Which I Have a Story of Heartbreak and a Rotary Cutter", it had some issues. (You can't see the issues in this picture. So let's all imagine it was beautiful and now has a happy home being a quilt somewhere.)

Baby Quilt #1 became Baby Quilt Remix. And although (as per episode 134 "In Which It's Just Snakebit") it also had some issues, a little judicious hand-stitching dealt with the problem and it was duly mailed off a couple of days before Thanksgiving.

babyquiltremix.jpg

It's a Disappearing 9-Patch, arranged randomly, made from the scraps of Baby Quilt #1, with a few more added in since I didn't have quite enough of all of BQ1 fabrics left. (If you want to know about the colors, etc., you'll need to listen to the episode--don't want to take up space on that here again.)

I did a very light quilting in the ditch along the block lines and inner/outer border.

Hopefully it will provide many days of warmth and comfort to my little step-great-nephew. Or great-step-nephew. Or great-nephew-step, which is a dance craze soon to cross the nation. (Let's just call him my new little GSN and move on.)

And so I moved on to Baby Quilt #2 for my newly born great-niece. This one started out in my head as a completely different quilt. However, after all the grief of Baby Quilt #1, I seriously scaled down my plans and reminded myself with some vehemence, "It's a baby quilt! It's going to have all sorts of bodily fluids on it within a short period of time! Make it quick, simple, and highly washable!"

admitone.jpg

Thus, another Disappearing 9-Patch, named "Admit One." I chose to do this one in red, white, and black, which is good for babies as those are reputedly some of the first colors a baby can see. I can't swear to that. My babies couldn't tell me these things at that age.

I quilted straight lines diagonally across the quilt, varying the widths between lines. I don't know that I'd do this again on a baby quilt. 1) It's amazingly hard to quilt in a straight line diagonally across the quilt, and 2) it made for a slightly stiffer quilt. I didn't think I was doing enough quilting to really change the drape of the quilt, but it's definitely not quite as soft as the first baby quilt. I'm not sweating it--it just would've been easier to stick with ditch quilting, so I'll do that next time.

(You might want to pause here for a moment and compare the two quilts. Both Disappearing 9-Patches, looking completely different with different fabrics and a different layout. This design is just too much fun to play with!)

admitoneback.jpg

Oh, the "Admit One" thing? Here's the backing fabric. Mom is in theater, so it just had to be done. As my BFF/BQF Kate said when I found this fabric, "And now you can name the quilt, 'Admit One to the Family!'" Perfect! Hadn't even thought of that!


theoneadmitted.jpg

Here's the one who got admitted to the family. Looks like she likes her new quilt.

Hand-Dyeing Results

As you're reading this, I'm driving far, far away... 

I'm heading a bit south for a packed week of back-to-back meetings, starting as soon as I get out of my car at my destination on Wednesday afternoon. I get home next Tuesday, so I'm making this quick post to tide us all over until I'm home and might actually be able to accomplish something again. (Well, accomplish something other than getting some sleep.) 

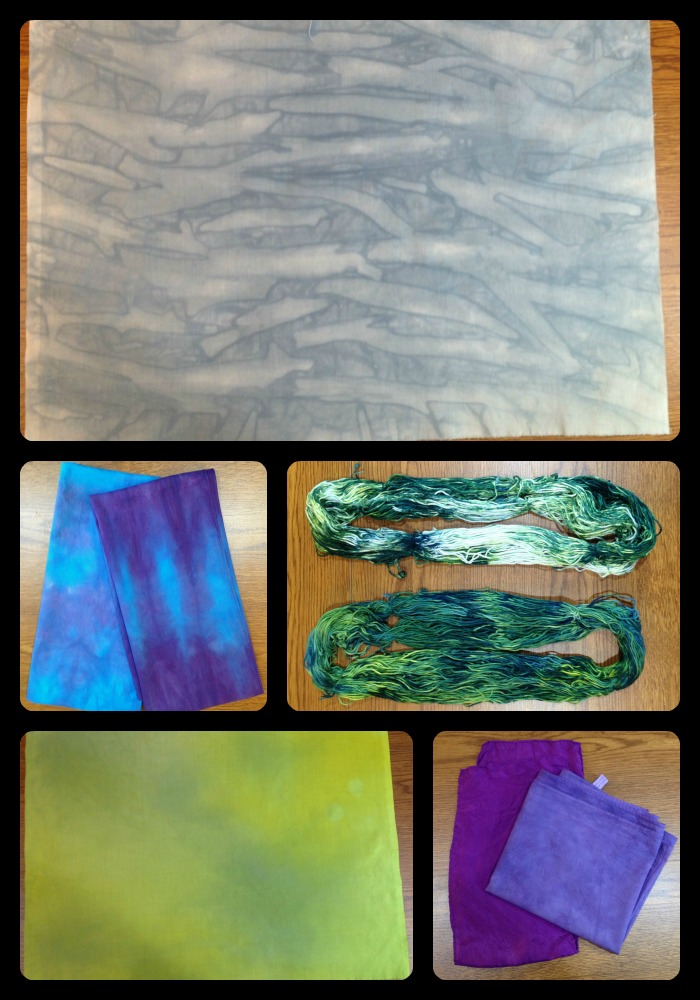
You may recall that I did some more dye experiments on Sunday afternoon. The results are in!

102013DyeCollage.jpg

 Top and bottom left: I was testing out a new technique picked up from Ann Johnston's DVD. I soaked the fabric in soda ash, then laid it out on a table (one of my newly-recovered-with-vinyl tables!), and then slowly poured a little dye on at a time and rubbed it in with my hands. Top picture is using gray dye and very intentionally creating folds and pleats in such a way to create some directionality. The bottom left looked a lot better wet--it's actually a mix of three colors (gray, yellow, and yellow green). It would make a nice background if one were looking for that particular, slightly odd shade of yellow-green-gray, but it's also a good candidate for over-dyeing or some other surface treatment. It simply wasn't what I was picturing would happen. And that's why I love dyeing so much. I so rarely get what I was thinking I'd get--it keeps me on my toes!

Bottom right: two purple scarves I did as testers for someone to look at during my meetings this weekend. I'm probably going to be dyeing about 50 scarves in all, by next September, for us to give out as gifts at one of our events. The one on the left is silk, the one on the right is cotton, both the same dye and dye strength. Just gives you a sense of how different fabrics react to the same dye.

Center left: Just playing with a couple of other cotton scarves I had on hand. Not overly keen on the way either of these turned out--the colors aren't as vibrant as I'd have expected. I'll have to look up what type/weight of cotton this is because it definitely takes the dye color differently than my usual fabric does. 

Center right: 100% cotton yarn, done in an ice dye parfait. Interestingly the one on the bottom is the one that ended up with a lot of white left. I must not have loosened it up as much as I thought when I put it in the container. No biggie--I'm thinking I'll overdye it with yellow.  The yarn is slightly thicker than 8 perle cotton, I think. I'll be interested to work with it and see what it feels like.

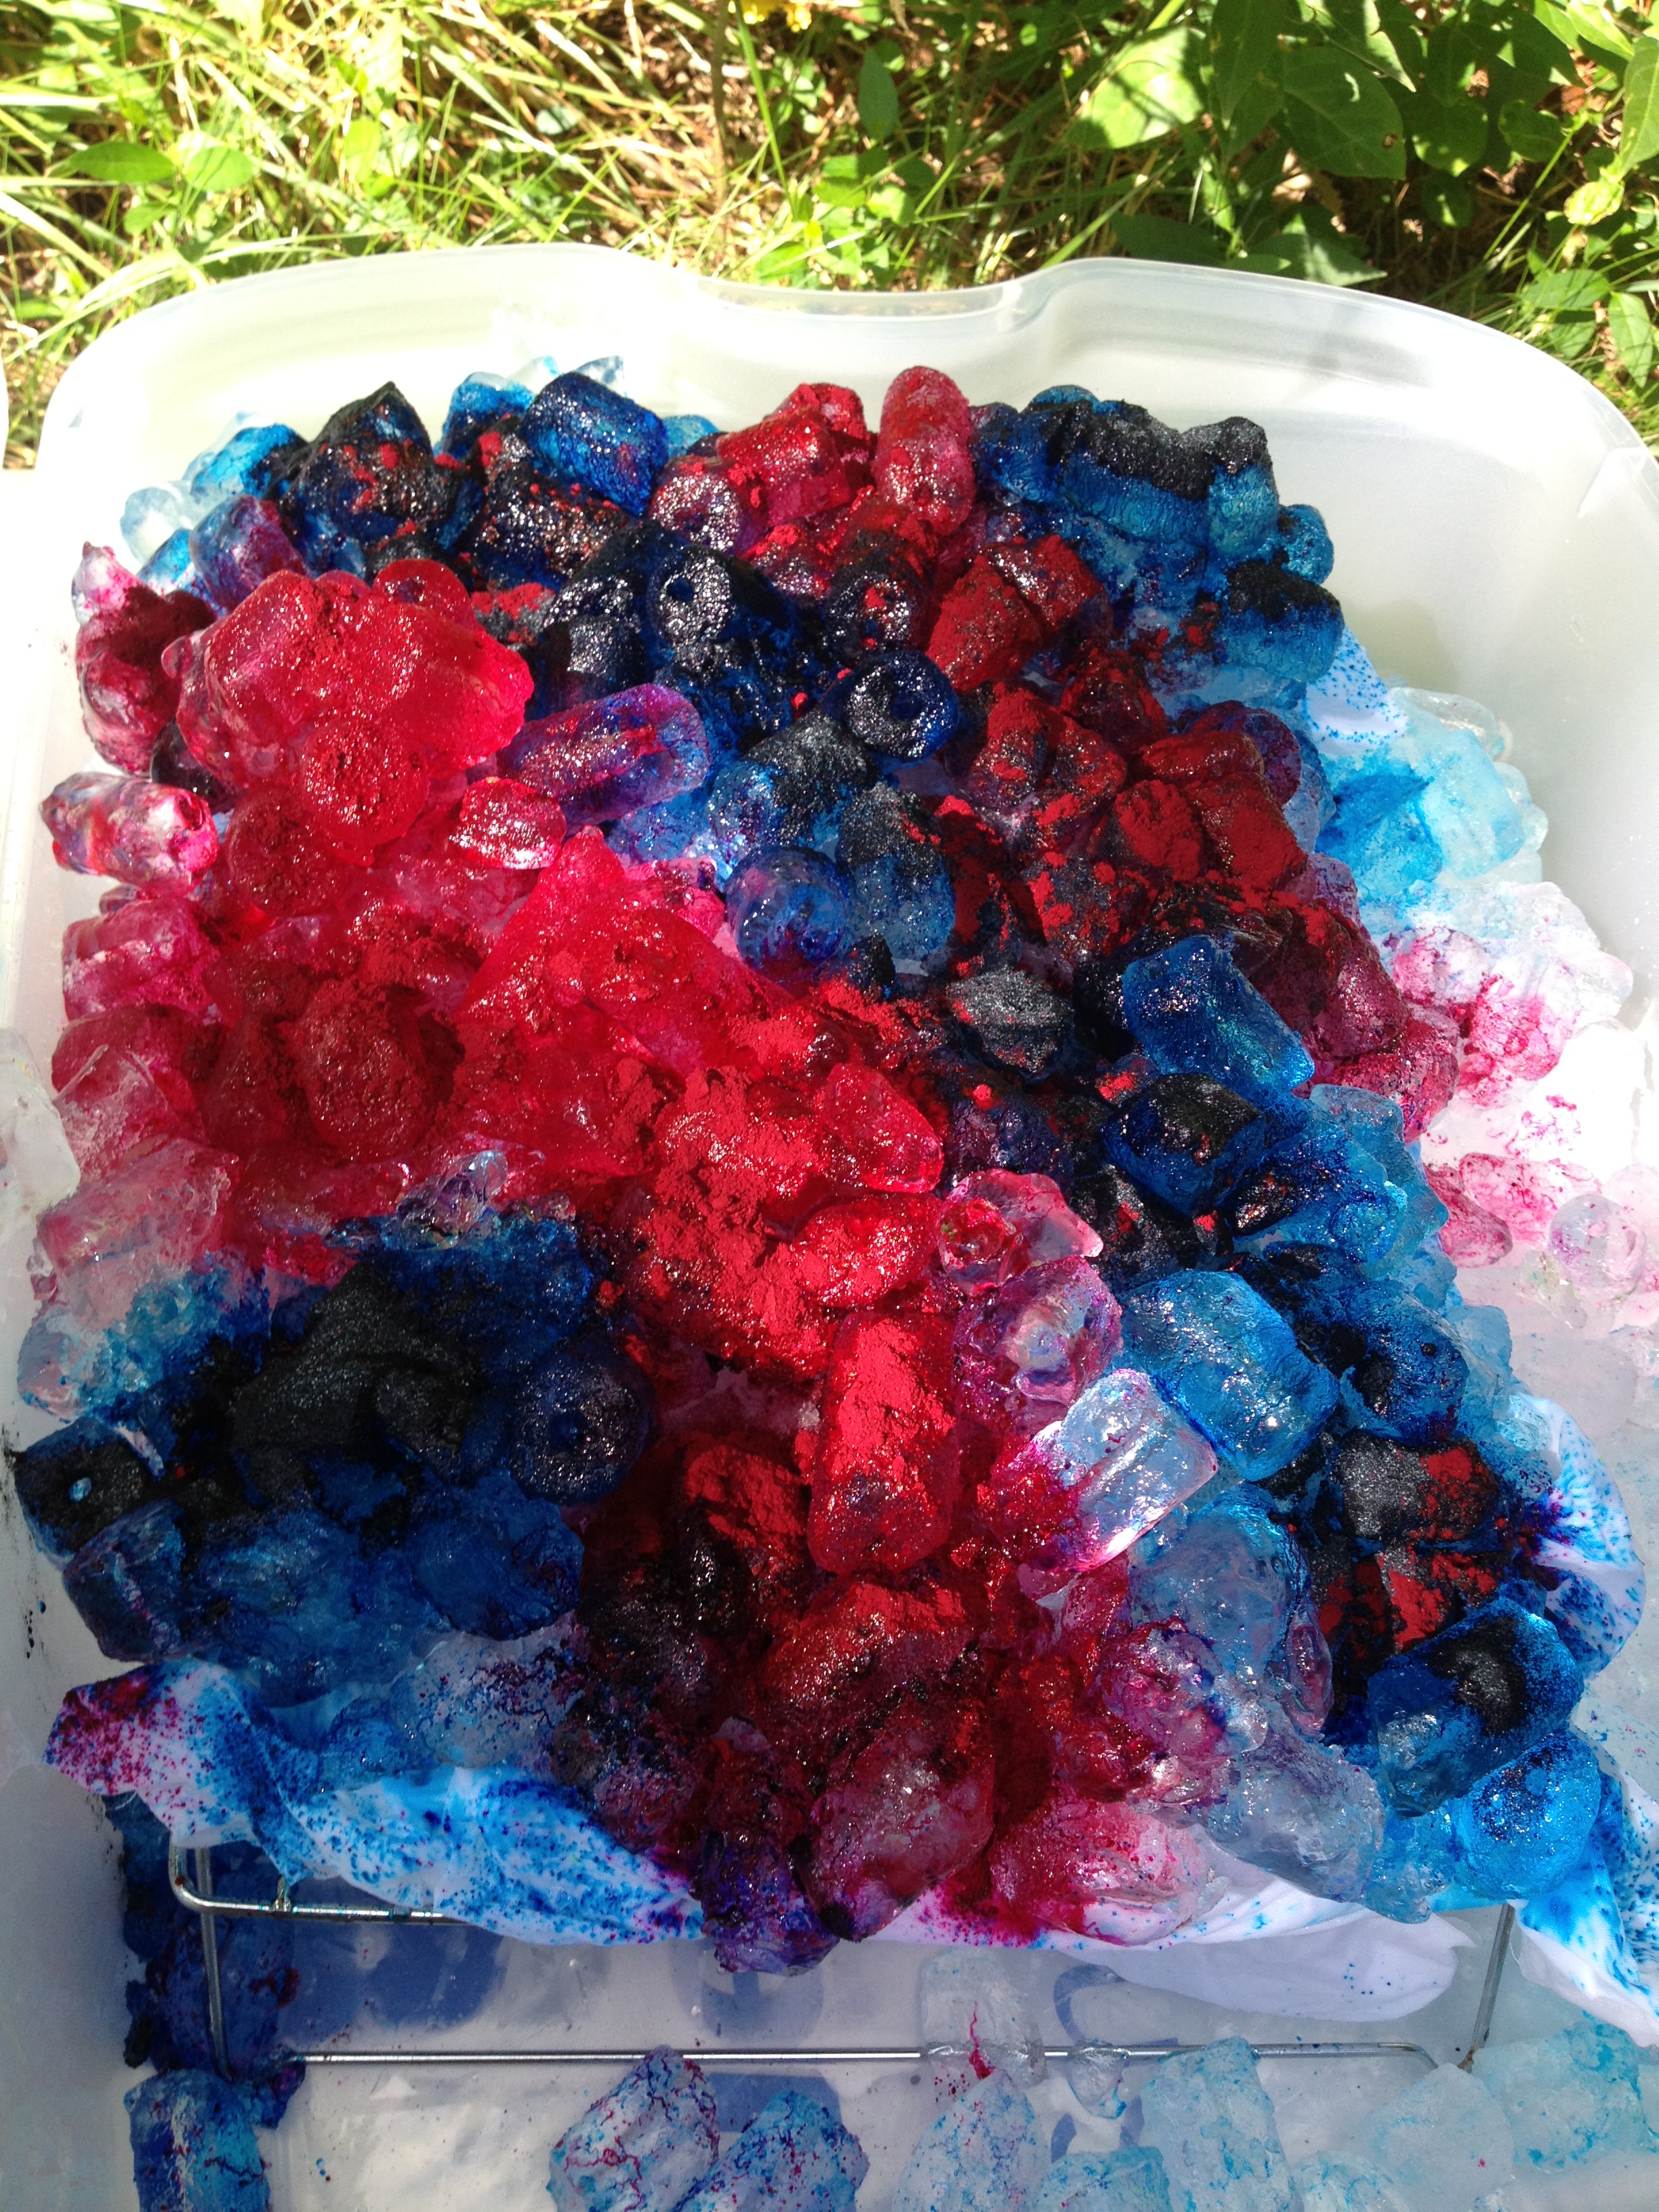
And now for the really impressive ones. I did another ice dye parfait because I wanted to "break" my black and teal dyes to see what component colors would come out. Ice dyeing is one of the best ways I've found to break a dye. And what a fantastic way to see what colors go into making black and teal! 

This one was the bottom layer.

blacktealicedyebottom.png

This one was on the top. 

blacktealicedyetop.png

All I can say is, wowzer. I'll be breaking a lot more of that teal dye!  

Oh, and I did get all my print scraps cut for #Scrapitude, finally, and started plugging away at the background. I plan on doing a marathon session of cutting when I get home next week. And then I'm home for a few weekends so I have hopes of catching up!

A Bit More about My Banned Books Week Quilt

The completed project

The completed project

I've had a couple of folks ask how I put together "If You Walk By." Fortunately I'd taken pictures during the process, half-thinking I might do a photo-journal of it, but that idea got put by the wayside this past week while I was completely immersed in work. (It was an "event" week that tied me up day and evening, even though I was home.)

So here it is, such as it is. I would definitely do a few things differently next time but I do want to use the basic process again. 

Rather than having a solid background, I wanted there to be distinct changes in the texture to give it a little more interest. This meant either piecing or fusing. I choose fusing whenever possible, especially when I'm under a deadline. So I decided to create freezer paper "templates," cut everything out, fuse it back together, and then satin-stitch over the "seams" to create line and definition. 

I also had the purple and yellow thing in my head from the get-go, and later realized I could also use this for one of my assignments in my Quilt Design Study Group. We're working our way through this book and the assignment was on complementary colors. Bingo. Since I'm a bit of a purist on my homework assignments, I needed to also use purple or yellow thread for the surface design. Fortunately, I had a great variegated yellow in my thread collection.

The rest of this photo-journal will be in the captions to the photos. 

Free-hand sketch of design directly onto freezer paper (matte side). The way I was going to be fusing this, I didn't have to worry about reversing anything so I just drew out the design the way I wanted it to end up. I also didn't worry too much abo…

Free-hand sketch of design directly onto freezer paper (matte side). The way I was going to be fusing this, I didn't have to worry about reversing anything so I just drew out the design the way I wanted it to end up. I also didn't worry too much about exactness--whatever I cut was going to fit back together so at this stage I worried more about making sure the general design was what I wanted.

This little 18mm rotary cutter is just the ticket for free-hand cutting of smaller pieces. 

This little 18mm rotary cutter is just the ticket for free-hand cutting of smaller pieces. 

I put fusing on my fabric. I'd have put it on the wrong side if there were a wrong side--these are my hand-dyes so it didn't matter which side it went on.  This is Pellon 805 if you're interested.

I put fusing on my fabric. I'd have put it on the wrong side if there were a wrong side--these are my hand-dyes so it didn't matter which side it went on.  This is Pellon 805 if you're interested.

I then cut out my freezer paper templates. I remembered to label them after I had the first couple cut out. If this were a more complex project, I'd have created myself a second drawing to use as a "map," but didn't feel the need on this. I also did…

I then cut out my freezer paper templates. I remembered to label them after I had the first couple cut out. If this were a more complex project, I'd have created myself a second drawing to use as a "map," but didn't feel the need on this. I also didn't leave any seam allowances because I didn't need them for this technique. 

I then pressed the freezer paper templates onto my fabric, where the fusing was on the back. This way, when I cut them out, they'd be ready to fuse in the direction I wanted them to appear. Again, I didn't have to worry about reversing anything in t…

I then pressed the freezer paper templates onto my fabric, where the fusing was on the back. This way, when I cut them out, they'd be ready to fuse in the direction I wanted them to appear. Again, I didn't have to worry about reversing anything in this technique. Very straightforward. 

And here I've reassembled the pieces in order. I'm fusing them onto a very thin piece of batting. I wasn't planning on doing much quilting and didn't want the "quilted" look, so I found a scrap of the thinnest batting I had. If I recall, it might ha…

And here I've reassembled the pieces in order. I'm fusing them onto a very thin piece of batting. I wasn't planning on doing much quilting and didn't want the "quilted" look, so I found a scrap of the thinnest batting I had. If I recall, it might have been a little leftover "Fusiboo," which is a fusible bamboo batting. I did overlap just by a hair a couple of the purples and yellows, because I thought that might give me more of a pieced look. In retrospect, I wouldn't do that again. It was unnecessary and there's a little shadowing in the finished project.

I press-tacked it all down (which is just tapping the fused fabric with the iron long enough to hold it in place but not be permanent) then carefully removed the freezer paper template pieces. When they were gone and I was satisfied with the placeme…

I press-tacked it all down (which is just tapping the fused fabric with the iron long enough to hold it in place but not be permanent) then carefully removed the freezer paper template pieces. When they were gone and I was satisfied with the placement, I pressed it to permanently fuse the layers. You'll see here I now also have a background fabric on the other side of the fusible batting, so everything got fused together at once. 

By the way, you'll note in the fused piece above that alot of the joins between colors aren't clean. The beauty of the satin stitch was that I knew most of that would be covered up. I did use my thread snips to clean up some of the edges, but not much.

I did a couple of tester stitches on my practice quilt sandwich I keep by my sewing machine for just this purpose--I wanted to make sure I had the width of the satin stitch where I wanted it. I then used the satin stitch on all the "seams". I haven't done a lot of satin stitching to date so I was pretty happy with the way that part of it turned out. Again, in retrospect, I'd have worked out the center a little differently--the way the stitching came together in the middle of the flower is a bit awkward. However, I will say that satin-stitching is fairly forgiving. I was able to go back in and stitch over a few places with new seams to clean it up some.

I don't have a picture of the original binding. I tried a new-to-me technique of cutting the backing enough bigger to fold it and bring it to the front, and then machine stitch it down so it's self-binding. I used the satin stitch there too. Hated the results. The stitching skipped over bulkier areas and I couldn't get the corners to look like clean miters. I set the project aside for a day because the binding really ruined the whole project and I wasn't sure how to fix it at the moment. In the interim, I finished a project I'd been working on for Laura Wasilowsky's Craftsy class and did her fused binding method. Bingo! I went back to this project and just fused a binding over the top of the original satin-stitched binding. Completely covered it up and looked a zillion times better. A little decorative stitch with that same yellow variegated thread, and I was suddenly happy with the project again.

So now I'm adding to my repertoire of "how to fix errors quickly" (a repertoire which includes Sharpies and rotary cutters), fused bindings. Very handy. 

Again, there are a few things I'll do differently the next time I do this, but I am planning on using this method again. I like having the look of a pieced background without having to figure out how to do the piecing. 'Cause I'm just kinda lazy that way.

And now, back to working on #scrapitude. 

My Banned Books Week Mini-Quilt

If you missed the original post with the information about this week's Banned Books Week mini-quilt challenge and giveaways co-hosted by Tanesha of CraftyGardenMom podcast and myself, click here.

I wanted to try to embed a gallery of the Flickr group with everyone's entries so far but the Interwebs are not cooperating with me today. Here's a link to the Flickr group. Be sure to check it out!

My Banned Books Week Challenge is "If You Walk By."  I used a few new-to-me techniques on it so there's a couple of rough patches but I'm mostly very pleased with the way it turned out. And, yep, my own hand-dyes.

"If You Walk By" by Sandy Hasenauer, Banned Books Week 2013

"If You Walk By" by Sandy Hasenauer, Banned Books Week 2013

Listen, God love everything you love? and a mess of stuff you don't. But more than anything else, God love admiration.

You saying God vain? I ast.

Naw, she say. Not vain, just wanting to share a good thing. I think it pisses God off if you walk by the color purple in a field somewhere and don't notice it.

What it do when it pissed off? I ast.

Oh, it make something else. People think pleasing God is all God care about. But any fool living in the world can see it always trying to please us back.

Yeah? I say.

Yeah, she say. It always making little surprises and springing them on us when us least expect.

You mean it want to be loved, just like the bible say.

Yes, Celie, she say. Everything want to be loved. Us sing and dance, make faces and give flower bouquets, trying to be loved. You ever notice that trees do everything to git attention we do, except walk?

(From The Color Purple, by Alice Walker) 

I must have read and written papers on The Color Purple about five times through my college career, and somehow I never minded that it kept showing up on the syllabi of my English Lit classes. Every time, I read it over again. Every time, I got a little something different out of it. When the film version came out late in my college years, I pretty much had the book memorized and was pleased to see that the film stayed fairly true to the novel. In fact, I'm reading the book again this week in recognition of Banned Books Week. I might even watch the movie again.

The Color Purple is a book about finding one's voice, finding one's power, learning to write one's own story. It's about racism, sexism, and abuse, but it's also about deep friendships that help one grow into more than one would be alone; it's about love, it's about healing and reconciliation. It's about strength. It's about faith.

Oh, and by the way, there's a quilt in it.  

 'Nuff said. 


T-shirt Pillows--Done!

When my daughter cleaned out her room in preparation for going away to college, she had two tshirts she no longer wore but wanted to keep; one for sentimental reasons, one because she just thought it was cool.

I offered blithely, "Would you like me to turn those into pillows?" Her eyes brightened. "Yes, please!"  

And then, dang if those shirts didn't sit on the shelves in my sewing room for two years.  

Finally, last weekend for #LDSI, I took the 90 minutes or so that the whole project required and got them done. One went together very quickly, the other was a bit trickier.  So I'm going to share my steps with you briefly, but this is not a complete tutorial.

Never having done anything with t-shirts before, I decided to do a quick google and found this tutorial that had a helpful tip I used about how to make the slip case if you're using a pillow form. 

pillow1pieces.jpg

The first pillow was quite straightforward. I had measured the size of the images on front and back and had bought a 14" square pillow form to fit.

Note that the back is cut into 2 pieces to make the flap; the bottom piece was cut along the hem so the edge flap was already hemmed. I wasn't able to do the same with the part that had the writing on the back, so I did have to hem the flap edge of that side.  The larger piece is about 2/3rds the total size of the front, the smaller piece was cut to overlap the larger piece by a couple of inches.

twohems.jpg

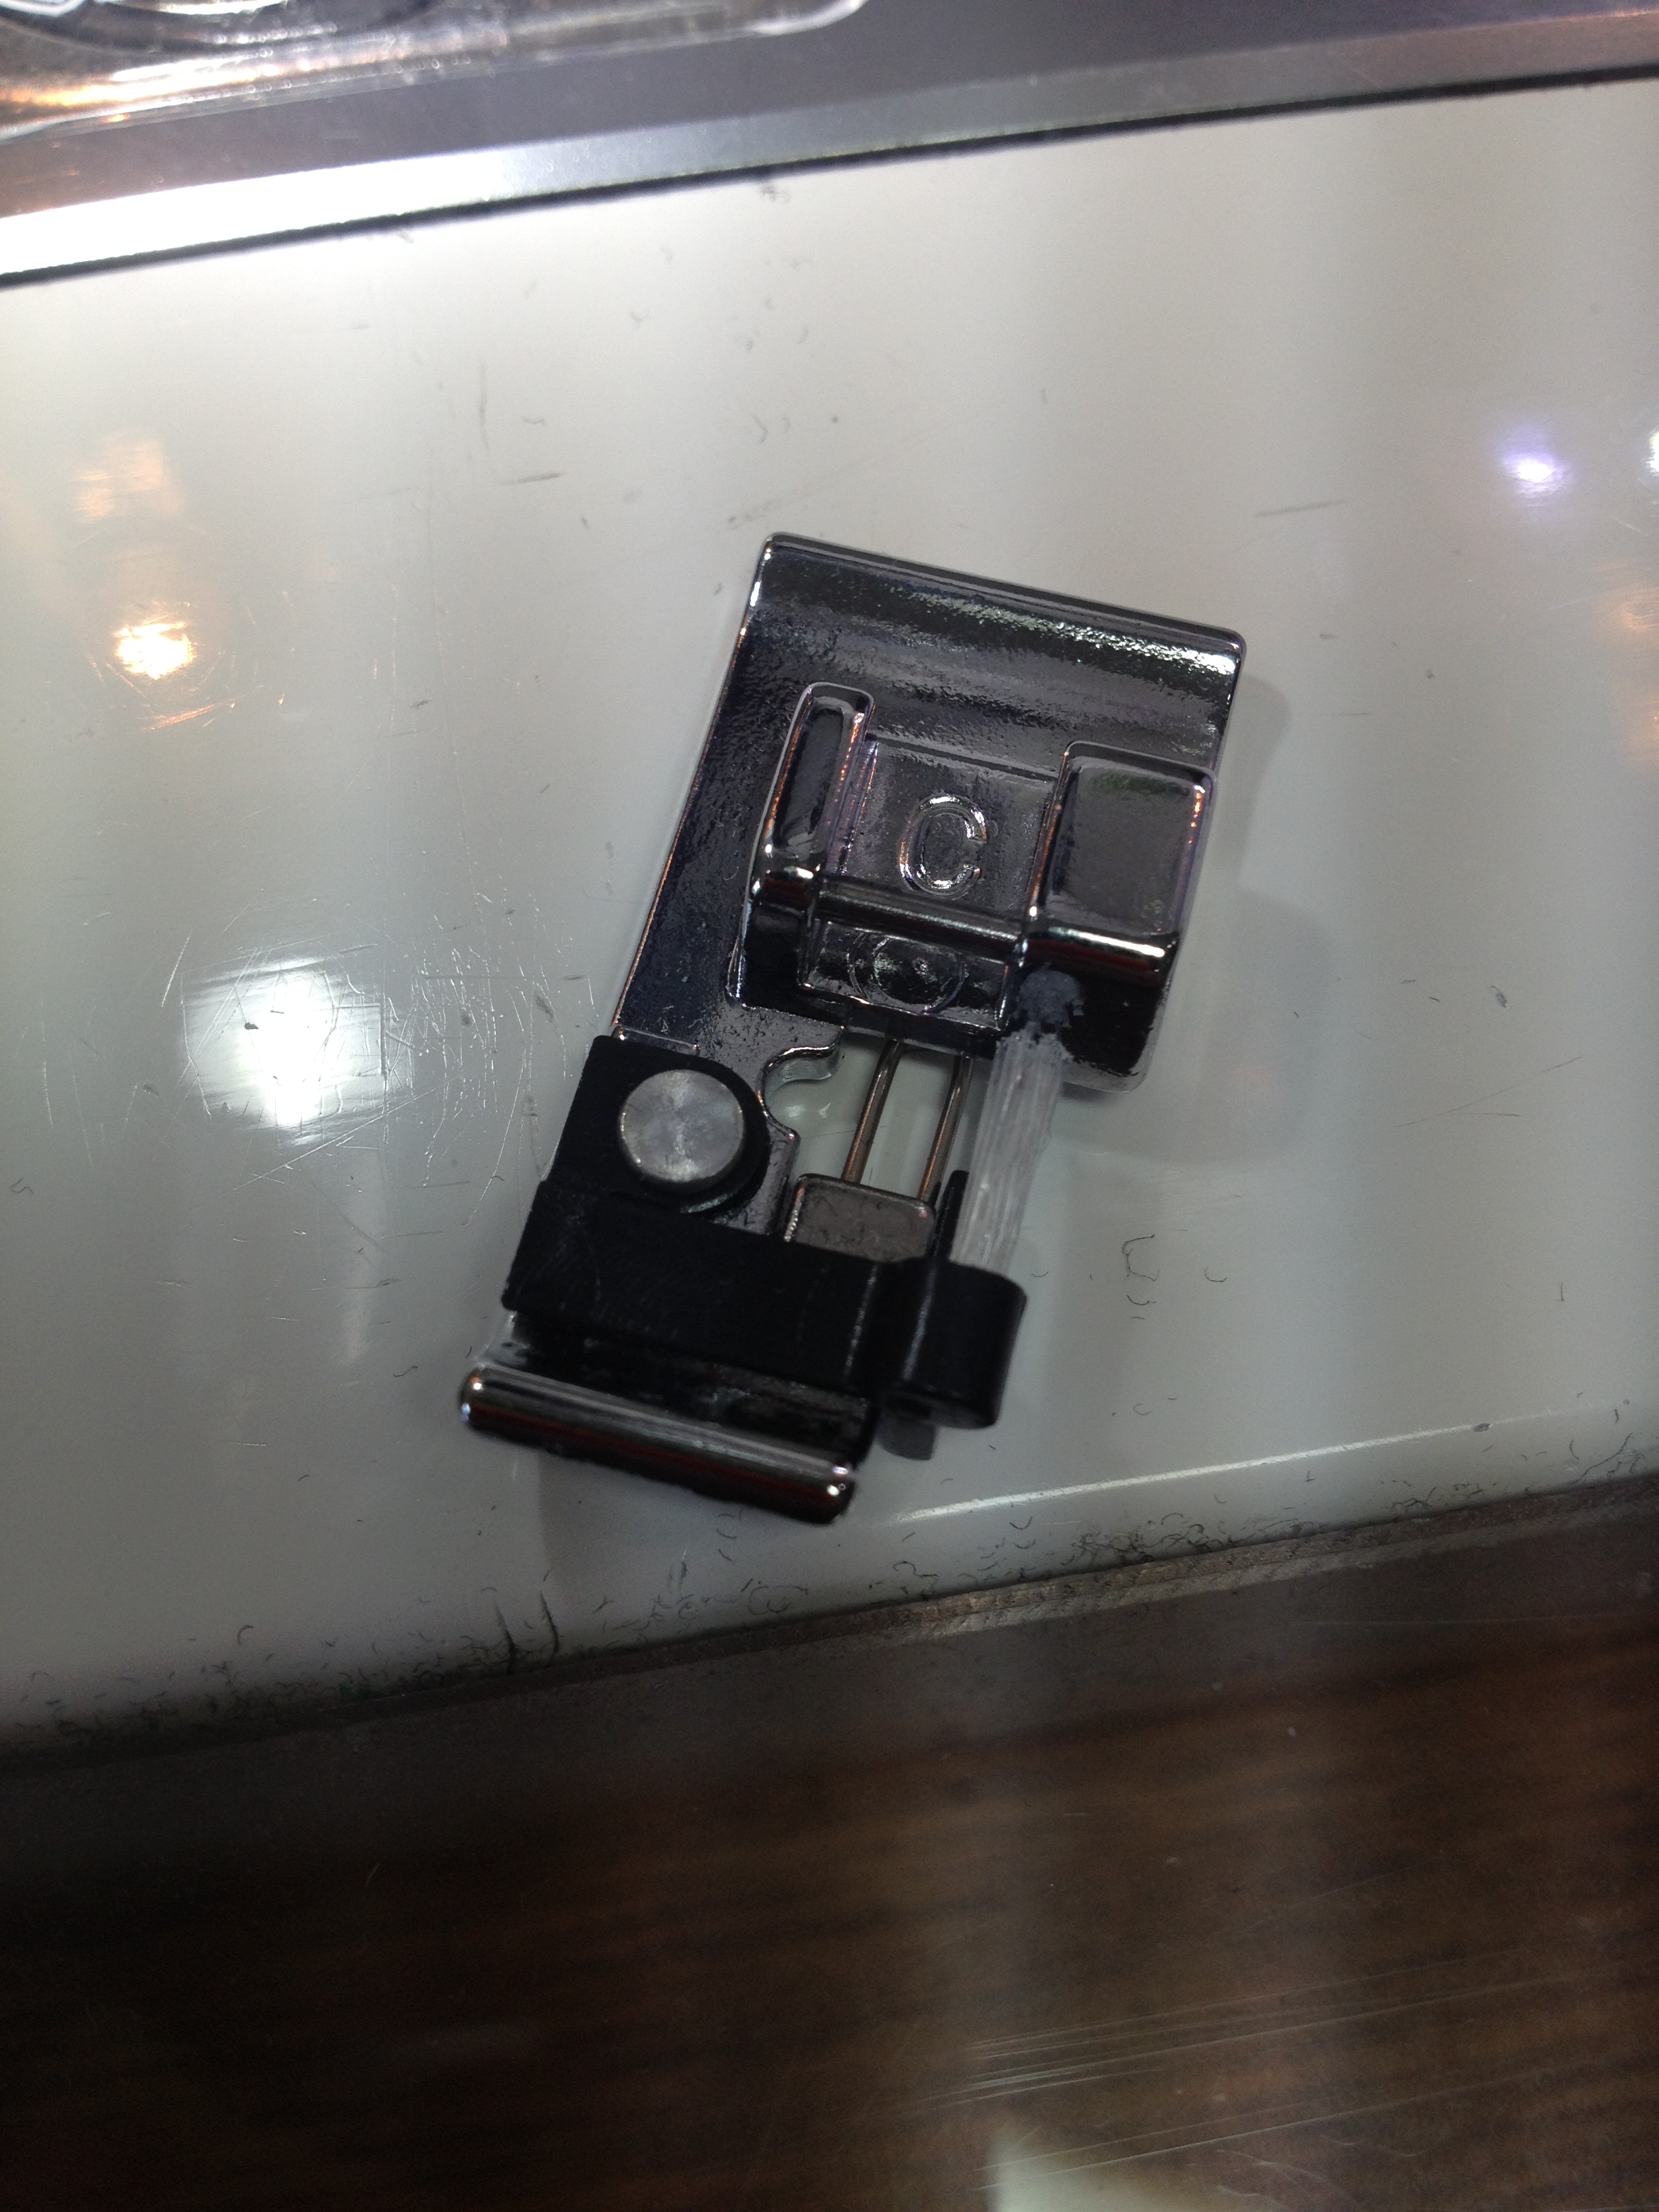
Note the two hems--one from the shirt (lower) the other I sewed (upper). I'm not a garment-sewer so I don't know what stitches one should use, but I picked one that looked the most like an overlock (Is that what you call it, the stitch that sergers use?). I thought it had everything it needed to keep the edge secure and not overly stretchy.

janomefoot.jpg

This is the foot my Janome told me to use with the stitch. No idea what it's called. I call it "C." And so, "C" it shall be.

First time I've ever used it.  Nice to have it when you need it!


pillow1done.jpg

A boatload of pins and a few fast seams later, and there you've got it. Voila. A pillow.

No way was this puppy going to be centered unless I took the time to add some sort of borders around it or something and frankly, this is a pillow she's likely to have for the next couple of years and then get rid of it when she actually cares about decor. She'll love it as-is; I didn't feel the need to get all fancy-dancy with it. 

I started with the easy one to get into the swing of things. The second pillow, not quite so easy.

You see, it's an electric pillow. The logo on the front (used to) have noise-activated lights. The logo lights up and then the lights dance up and down the logo depending on how much noise there is the room. I say "used to" because it's been in her room awhile and I suspect the battery is dead. But that's going to be her problem!

batterypack.jpg

For the most part, it's the same pillow technique. However, I had the added issue of working around a battery cord while I was sewing, and I had to figure out how to get a pocket to hold the battery pack in there once it was complete.  

I had to keep flipping this dang thing (and it's heavy!) out of my way while I was sewing lest I break the battery cord and my sewing machine by going right over it. Quelle pill.

fusibletape.jpg

Here's your notion recommendation of the tute: Get yourself Pellon's Lite EZ-Steam II. It comes in 1/2" and 1/4" widths: I have the 1/4". I used this double-sided fusible tape to hold down the edges of the pocket (and the hem on the white shirt) while I sewed it. Very simple to apply, held everything easily in place while sewing, and it helped me know where the 1/4" was! I think I'm a convert.

fusedhemjpg

I mean, look at this. How pretty.


True confessions. Since I was in a bit of a hurry to finish this project up and get on to things I knew I'd enjoy more, I forgot to flip the front of the tshirt over and pin it right-sides together with the back; when I finished sewing and turned everything right-side out, I was looking at the inside of the front of the t-shirt. Oops. But here's the nice thing about working with stretchy t-shirt material. When I subsequently realized there was no way in Hades I was going to be able to rip those darn seams out, I just sliced them all off and sewed new seams. It actually fits the pillow form even better now, having to stretch just a little bit to get over it. 

bothpillowsdone.jpg

And so, here are the finished products. 

(I have a sneaking suspicion I'm supposed to blur out the logos for fear of copyright infringement or something. Oh well--if this picture disappears eventually, you'll know why!) 


backpocket.jpg

And that tricky back pocket for the battery pack? 

Done and done. 

(Yes, could've made it a more finished edge on the right but refer back to the comments above about shelf-life and future decor.) 

I finished up a lot of UFOs this past weekend, but these I'm particularly glad to get off my shelf. They've been whining at me. It'll be nice to have some peace and quiet again.

LDSI Recap, Project Hope Finish, and More!

What a great weekend! What a productive weekend! 

Of course, I didn't even approach getting everything done that I'd thought I'd get done over my extended Labor Day weekend, but then, I always tend to do that. Free time? Let's fill it up with a completely unachievable list of goals! 

Still n' all, it were fun. And what a great time we had on Twitter. I enjoyed Very Lazy Daisy's twitter giveaways and was glad that Pam of Hip to Be a Square and Katie of Katie's Quilting Corner hosted a Google Hangout, though I got so involved in one of my projects I completely and totally lost track of time and didn't realize it was time for the hangout until probably two hours later. Oops. Sounds like they had fun, though.  

And let me also say, thanks to all who played along with my giveaway. And I'm so pleased to give a great, congratulatory shout-out to Ethel, the winner! Woo hoo! (Everyone join in the happy dance for Ethel!) 

Now, what all did I get done? Lots!

I finally got the pillows done! Woo! And you'll hear more about those in a blog post later this week since I decided to describe the process I used in case you find it helpful. I also cut a few scraps, although not nearly as many as I actually need. Still poking away at that. I also finished cutting all the pieces for one of my two pregnant nieces' baby quilts; now it's sitting by my sewing machine waiting for blocks to be pieced. 

onesies.jpg

I got some baby gifts for the other of my two pregnant nieces done (the one whose mom does *not* read this blog).  

These two onesies were hand-dyed; I used Color Magnet and stencils to create the design. Note to self: Color Magnet works better in a lighter dye bath--there's more definition of design. These are okay, but I'd have liked the designs to be more prominent.  I have a third onesie in the works but that one I've dyed and will be using other techniques on. Pictures later.

maternityshirtcollage.jpg

This maternity shirt was ice-dyed (you're seeing the front and the back). Not sure I'm a huge fan of the results so I'll offer it to my niece with every assurance that my feelings won't be hurt if she doesn't like it either.  

pillowcase.jpg

I got a pillowcase made, when I went to cut a fabric into scraps and decided it would make a very cute pillowcase cuff. Boom. Pillowcase for donation. 

I got my project done for the Banned Books Week Challenge (see above). In fact, I actually finished it twice, when I decided I really hated the way the new-to-me binding method had worked on the first one and did a somewhat-new-to-me binding method instead. But I'm not showing it until BBW commences. So y'all will just have to wait.  (And I'll give more detail about the binding then.)

Sandyshouse.jpg

Second, I finally got the backing and binding done on this puppy.  

For simplicity's sake, I just named this one "Sandy's House." Not creative, but this was a class project and not something that felt like it sprang from my soul or anything. 

Although I did enjoy it! And here's the link to the blog post where I talk about the class and how this came together.  

I really like her fused binding method--in fact, it worked well enough on this one that I used it on my next finish.... Yes, drum roll please, I finally completed my Project Hope Online Quilt Show project, which has been languishing since last June.  

Somewhere.jpg

 This one is named "Somewhere." You can probably figure out the reference. 

I had a completely different idea in my head--an art quilt that may still someday get made. Meanwhile, I led a creativity challenge at my guild's May retreat in which we randomly drew words related to a beach party theme out of a bag and had to add something to an ongoing project somehow related to that word. This is done entirely with my own hand-dyes, btw. The first word drawn on Friday night was "Bucket and Shovel."  When I woke up Saturday morning, a pot of gold at the end of the rainbow was the image stuck in my head. "Sure, the pot is a bucket of sorts," I thought. The next word drawn was beach ball, so I added the gold coins (round like a ball) coming out of the pot (bucket).

duckie.jpg

The third thing I had people draw randomly out of a bag was a little rubber duckie.

Great variety packs of rubber duckies from Oriental Trading Company, by the way. I had a bunch of different ones. This little guy was the one I drew. 

Challenge participants could interpret their duck any way they chose. I decided to use his colors, so I have a purple and blue variegated thread in the words on my project.  

It was right around the rubber duckie that I realized where I was heading with this project and that it also met the theme of the Project Hope Online Quilt Show, and so it became that project. To me, hope doesn't always have to be a solemn matter, and silliness can often have a very deep point (witness Monty Python and Mel Brooks).

Somewheredetail.jpg

I did a lot of hand-stitching (as per Laura Wasilowsky's class), and then machine-quilted some clouds in the sky and used her fused binding method. I wanted to keep things relatively simple. But you'll notice this time I took a page from my Carol Ann Waugh Craftsy Class, "Stupendous Stitching," and ventured into a decorative stitch on my machine I hadn't really known was there before. I love it.  


My artist statement for this piece is: 

Somewhere there is hope. 

Somewhere there is peace. 

Somewhere there is love and joy and unity. 

It is our job and our calling to bring somewhere, here. 

(For more Project Hope Online Quilt Show, visit the Flickr group. Although our main show "ended" back in June, you're always welcome to add more quilts to the group!) 

Thus ends my LDSI recap. Again, be on the lookout for my next blog post all about the Banned Books Week Challenge!

I Know How to Meet a Deadline (Another Finish)

So ignore the fact that I knew this young woman would be graduating from high school a few years before it happened.  

Ignore the fact that I decided to make her a quilt about 10 months before said graduation date.

Ignore watching me pick out fabrics from my stash that I could use in said quilt about six months before said graduation date, choose what kind of quilt I'd make about a week later, and then sort the fabrics into necessary piles about a week after that. 

Don't even look at those fabrics sitting, neatly pressed and still separated into their respective piles...until about two weeks ago. Graduation date done and gone. Graduation party (fortunately) delayed until mid-August. Quilter returns home from summer travels, completely fried, looks at calendar, and immediately thinks, "Cr*p. The party is next Friday."  

I didn't *quite* make the party. I was able to wrap up a completed quilt top (in some circles that's called a "flimsy," which I find highly entertaining and a perfect description) in a gift bag and hand it to her at her party, and them promptly snatched it back away again with promises she'd have a fully finished quilt before she moved away to college.

I made it. Sure, I had to overnight express the darn thing to get to her house the day before she moved, but I made it. 


Graduation quilt complete

Graduation quilt complete

Backing and binding

Backing and binding

Binding by machine--did a pretty darn good job this time!

Binding by machine--did a pretty darn good job this time!

Back of binding--I stayed on the lines! (Well, 95% of the time, anyway. Better than in the past.)

Back of binding--I stayed on the lines! (Well, 95% of the time, anyway. Better than in the past.)

Requisite "Quilts n' Dogs" shot. He's looking quite regal. A bit full of himself because he was recently groomed. (Read: "Defurminated.")

Requisite "Quilts n' Dogs" shot. He's looking quite regal. A bit full of himself because he was recently groomed. (Read: "Defurminated.")

(Yes, my portable quilt hanger was in jammies and a sweatshirt and I dragged her outside early for pictures. I had to get the quilt to the post office, dontchaknow.) 

I heard from the grad today--she got the quilt and loves it; I had to assure her that it really is okay to take it to college and not to worry about stuff getting spilled on it. I made it to be beat up. Velveteen Rabbit and all that.  

And now I get to start on baby quilts... 

Ice-Dyed Results

This.... 

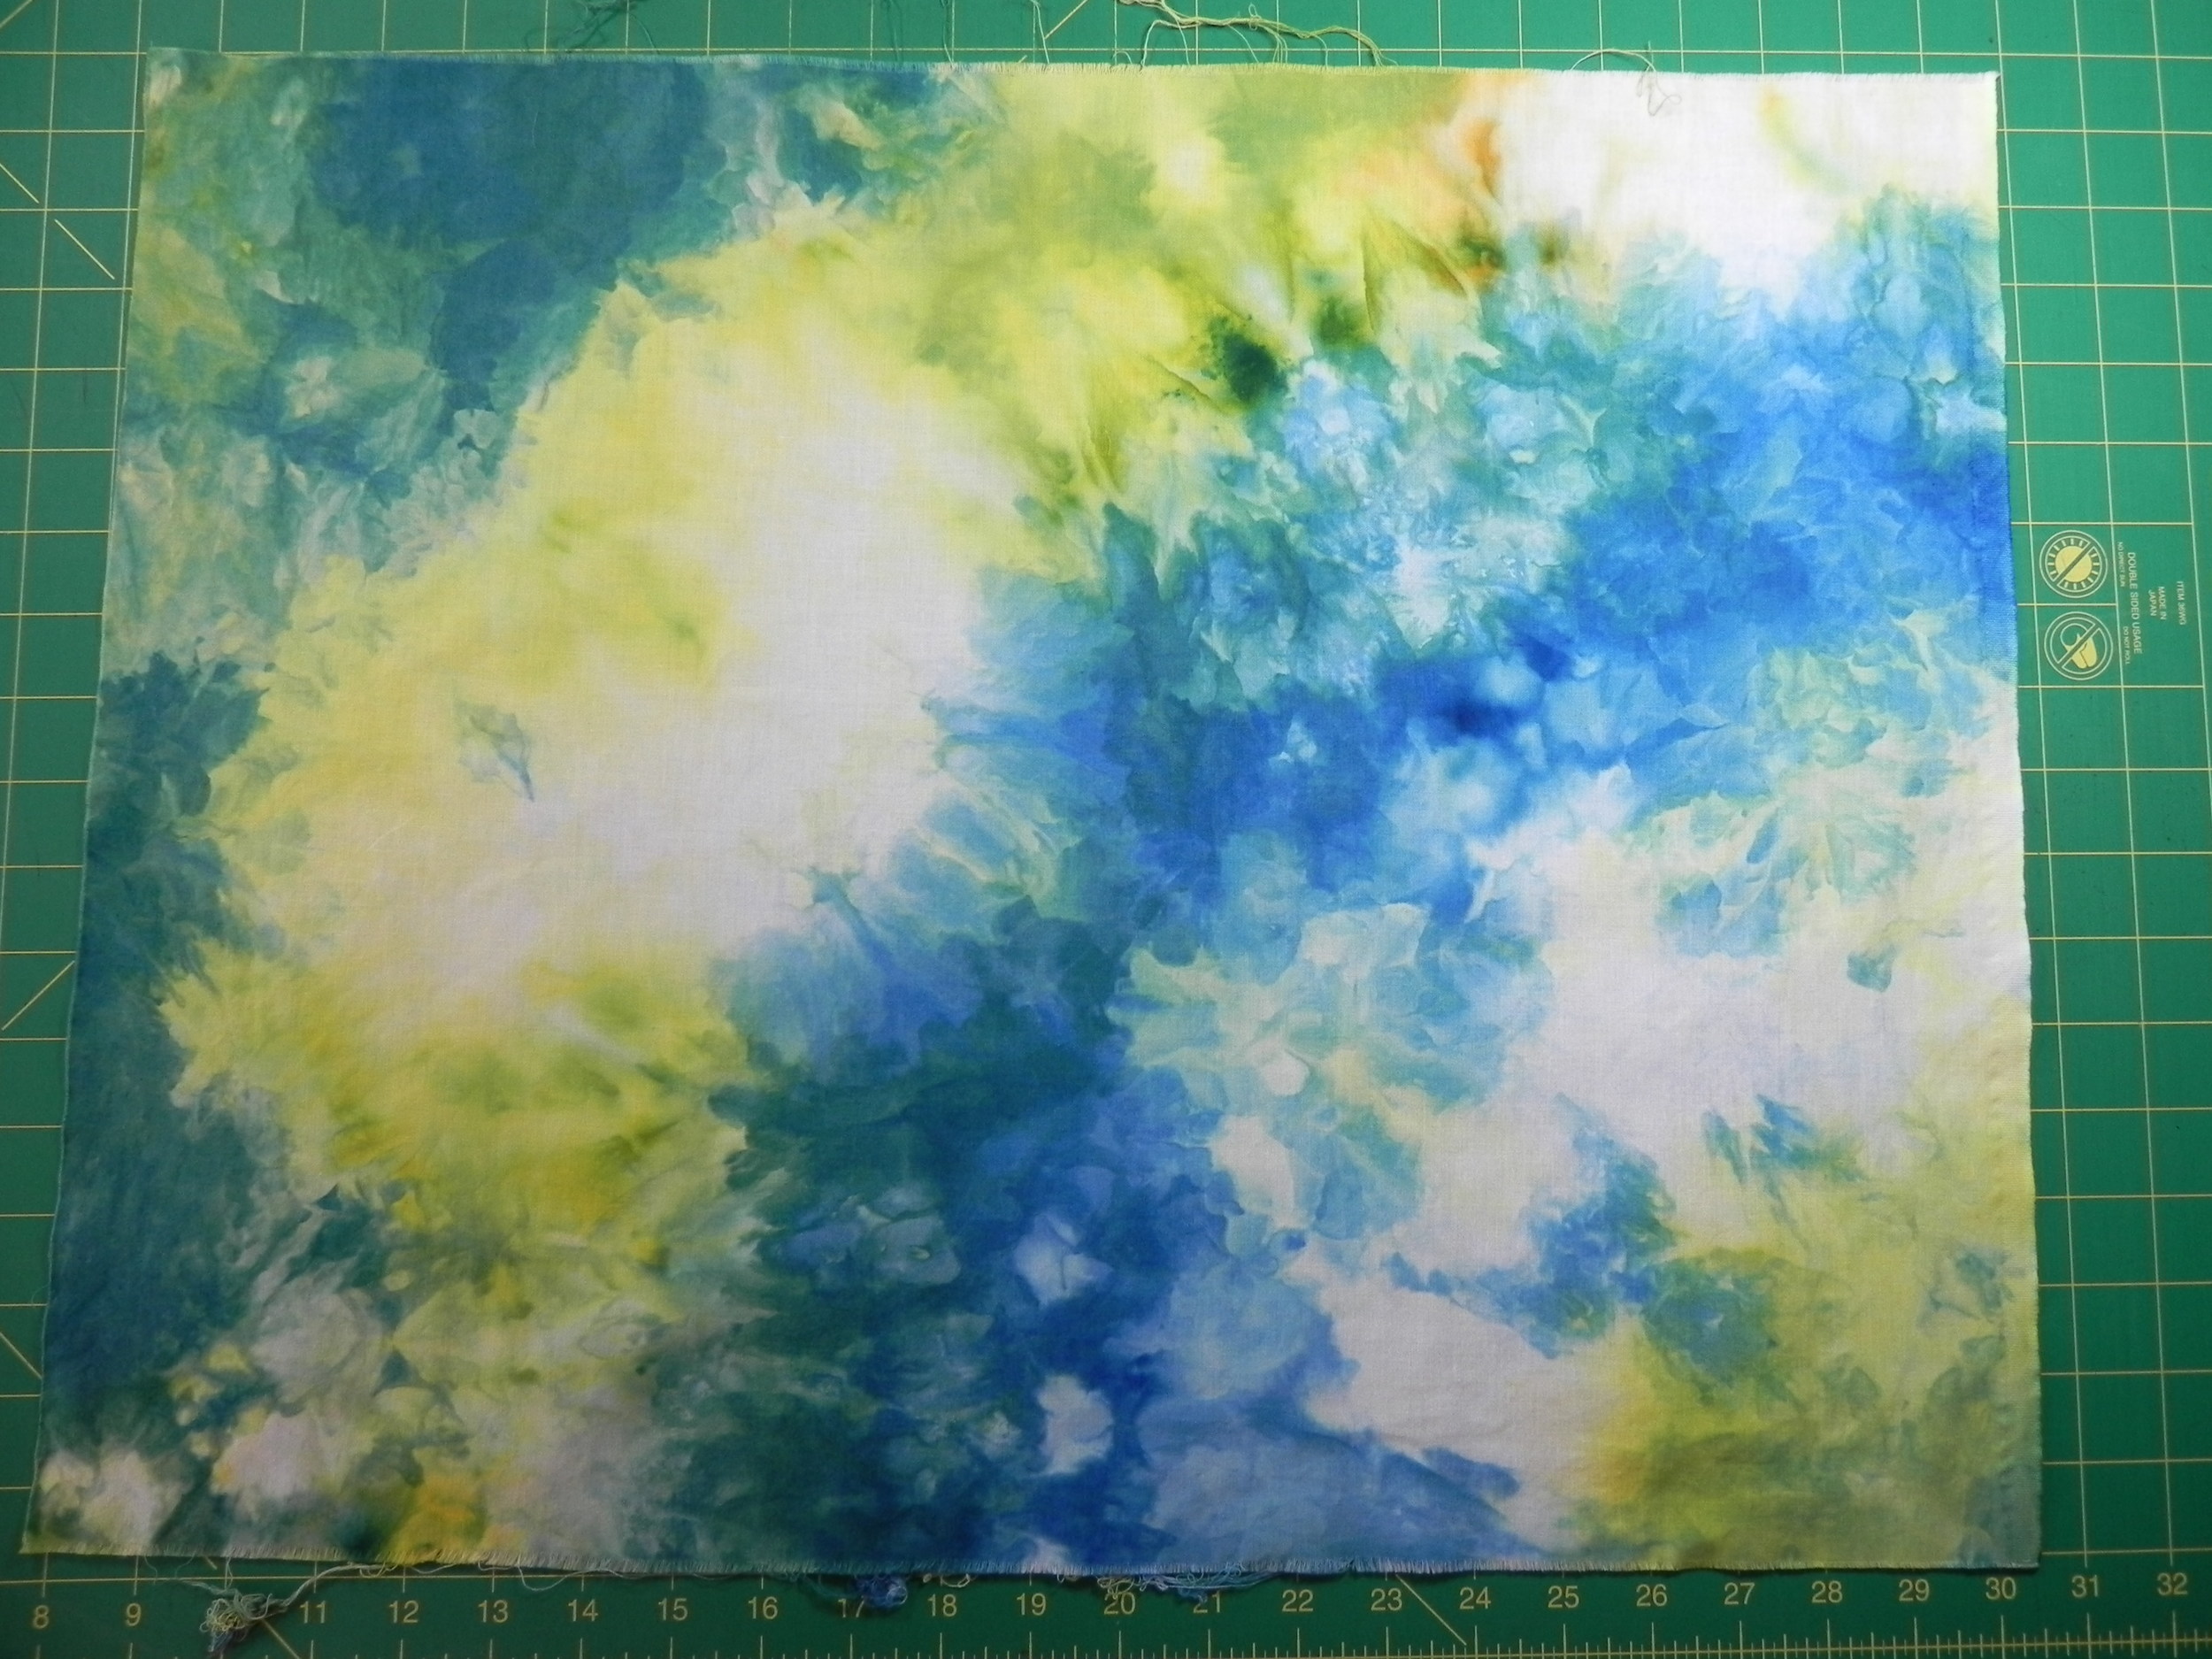
fuschiaturquoiseice

Became these... 

Fabric placed underneath tray to catch run-off

Fabric placed underneath tray to catch run-off

Fabric scrunched on top of tray--note imprint of wire rack in colors. Great texture!

Fabric scrunched on top of tray--note imprint of wire rack in colors. Great texture!

And this... 

blueyellowice.jpg

Became these... 

Folded on top of rack

Folded on top of rack

Wadded up on top of rack. This one got much more "watercolor-y" results. Very cool.

Wadded up on top of rack. This one got much more "watercolor-y" results. Very cool.

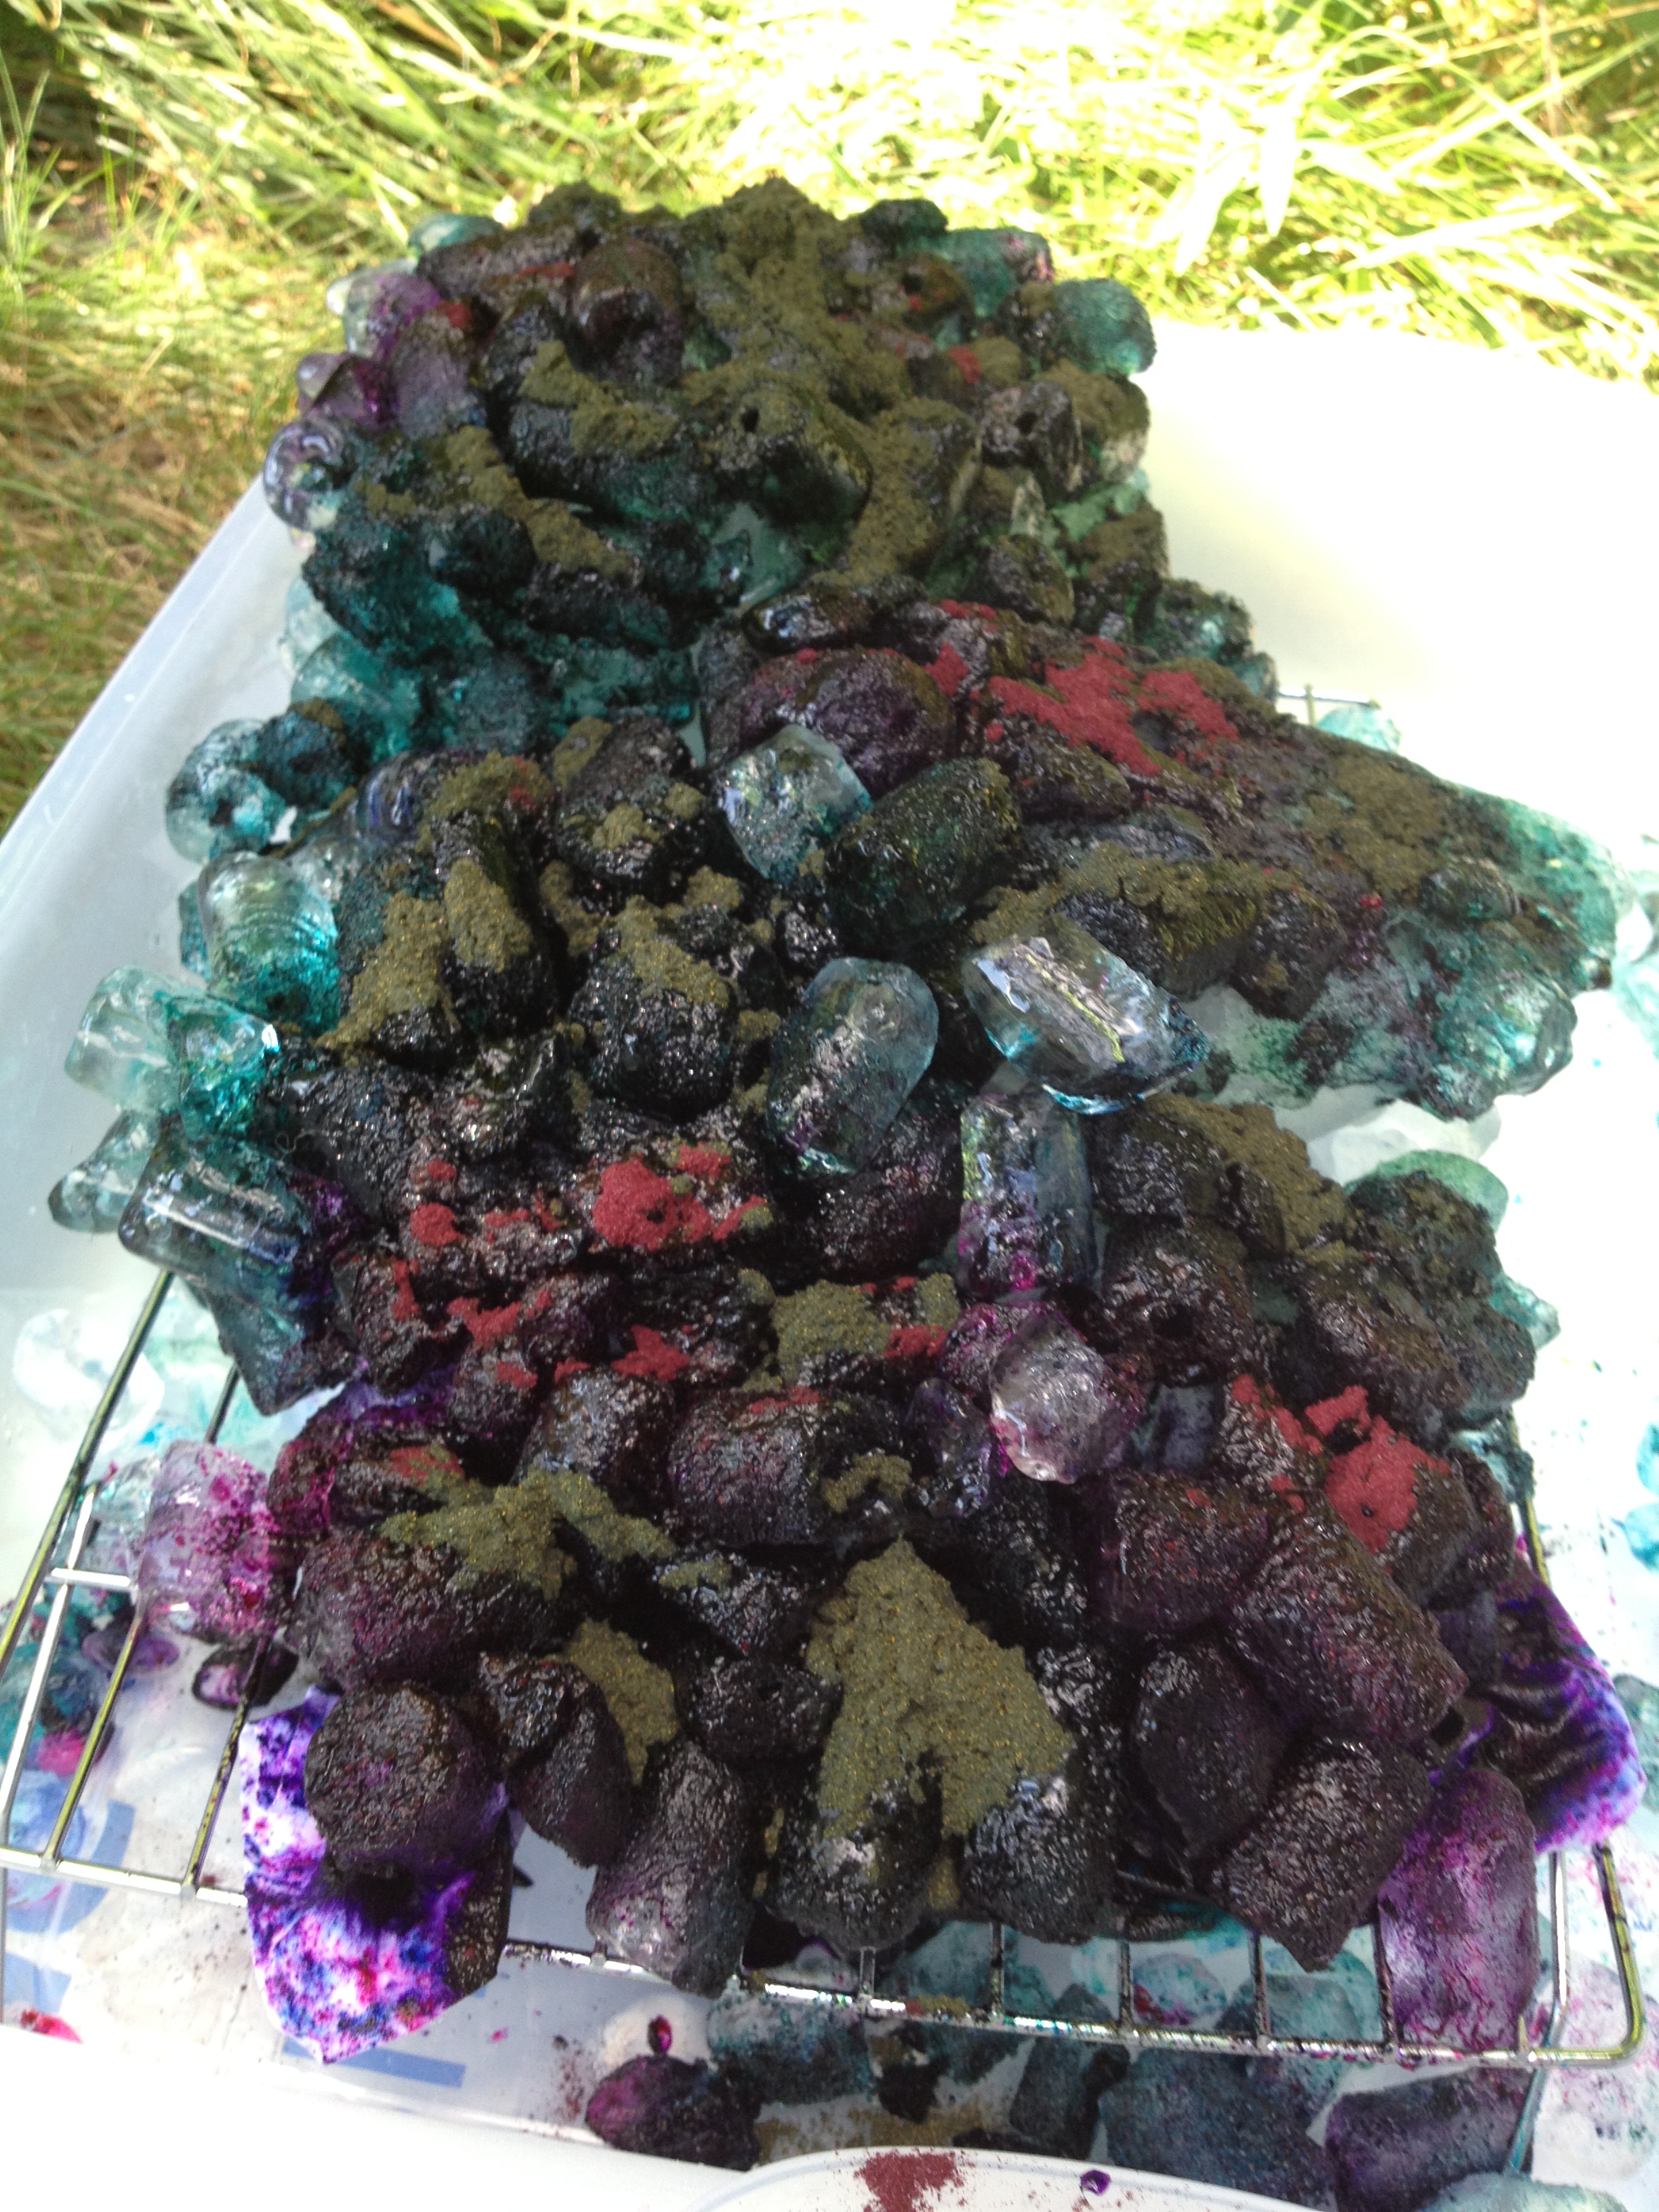
And finally, this rather gruesome-looking mess...

tealpurpleice.jpg

became these... 

Fabric placed under rack to catch run-off. I laughingly called this on "The Hand of God" because the pattern in the middle looks like an open hand to me.

Fabric placed under rack to catch run-off. I laughingly called this on "The Hand of God" because the pattern in the middle looks like an open hand to me.

Scrunched on top of the rack. This one was probably the winner in the "Interesting" contest.

Scrunched on top of the rack. This one was probably the winner in the "Interesting" contest.

The last one was the crowd favorite at my guild meeting last night. Had to watch people to keep them from sneaking it out in their bags! Tee hee. I had them try to guess what two colors I started with and they couldn't. That's the beauty of this process, really: it's unpredictability. The teal dye completely broke into its component colors, and the purple partially broke. I really dig all the grays that turned up.

I don't know that this is a method I'll use often. It does use a lot of extra dye and it's messier and more of a pain to do than standard low-water immersion methods I've been using. However, I'm thinking through ways I might be able to edit the process and do it in my basement dye studio to decrease some of the variables--not to control the results (this method is all about surprise endings!) but to control the mess! 

One happy "mistake"--when doing this method outdoors one of the big issues is dye powder blowing where it shouldn't. In this instance, one of my blue/yellow fabrics ended up with a bit of a stain of a different color dye that blew onto it from one of the other ice baths. You can't really see it well in these pictures, but dang if it didn't turn out to be almost the exact color orange I was shooting for in my Sedona Series. So now I have another possible color combination to play with that hadn't occurred to me before.

That's what I love best about hand-dyeing. I'm learning a TON about color! 

Three Scarves and a Quilt (wasn't that a movie?)

If you're a podcast listener you know I was working on some things to be donated to my organization for our annual fundraiser auction. Pretty much every year I plan on contributing something quilted and in my 11 summers with the organization I've only managed to do that once. I'm very impressed with myself that I actually managed to get done what I wanted to get done this year!  Before I start stuffing things in suitcases, though, I figured you might be interested in seeing the results.

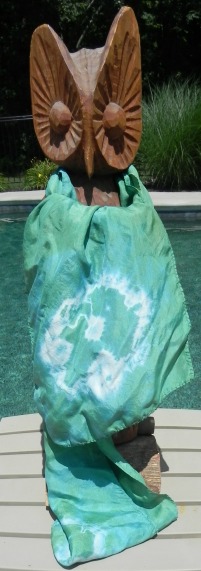
I hand-dyed three silk scarves. I was aiming for our organization's signature colors (purple for the women, teal for the girls). I bought a purple dye specifically for this that's pretty dang close to the purple in our women's logo. As for teal, I figured I could probably come close given the dyes I already had.  

What I learned is that although the dyes I'm using do work with silk, they work differently with silk than with cotton. (Still on that learning curve!) 

Purple scarf with diamonds

Purple scarf with diamonds

This is one of two "standard" scarves. I believe they're something like 11" wide by 60" long...? Don't recall exactly. I used rubber bands on the end of this for the detail and interestingly, the circles all came out more as diamonds. Lesson #1: Since silk handles differently than cotton, the geometry turns out differently--go figure. (Sorry about the tag showing in the picture--kept trying to prevent that but it's a little breezy today so I gave up.)


Purple scarf with diamonds detail

Purple scarf with diamonds detail

Here's a better shot of the diamonds. I did manage to get them roughly evenly spaced on both sides, just eyeballing it. Yay, me.

Purple cowl scarf

Purple cowl scarf

This is a funky scarf--a large circle that you loop around your neck to form a cowl. You can also flip it up over your head if you need to protect your hairstyle. Me, I don't really have a hairstyle to protect. 'Nuff said. 

Love the color again, but I'd hoped this would come out much more mottled so it would have a little more visual interest. However, (lesson #2 learned), silk wicks dye much more readily than cotton does, as it turns out. I had it scrunched pretty tightly and it didn't have a whole lot of liquid in the dye bath--if it had been cotton, it would've been extremely unevenly dyed, which is a really cool effect. This came out almost solid. You can see a little mottling here and there but it almost looks like a mistake rather than intentional. I think it'll still be a popular item. Our women sure do love their "signature color" items to wear to show their support!

Teal scarf

Teal scarf

This one was disappointing to me but my daughter loves it, so I'm getting over myself. The usual dye mix that I use at the moment to approximate teal looks very washed out done in silk.  (Lesson #3) Apparently some of my dye colors just naturally "take" to silk better than others. I had a mix of fabrics in dye baths all at the same time which meant I could do an easy side-by-side comparison. The purple dyed about the same on cotton as on silk. The blue/green quasi-teal is much more vibrant and saturated on the cotton than on the silk. Interesting.

For the detail on this one I used one large rubber band on each end and then stuffed the middle that protruded at the top, once I was done banding it, back down into the center. I do like that effect quite a bit.

Yep, already have plans for next summer's conference and what items I'll be hand-dyeing! 

Baby Quilt

Baby Quilt

There's always a theme for the auction, although generally very loosely interpreted. But this year's theme was a bit of a gimme for a quilter. The theme was "Oh, the Places You'll Go," as sort of a riff off a travel theme but also celebrating the future of the organization and so forth. I joked with the planning team, "Oh, I bet I could find fabric for that!" Certainly.  

I bought the panel and a collection of fat quarters from Fat Quarter Shop. I actually had it in both colorways--the one shown here and one in primaries (clearly meant to be girls and boys, but let's not be so gender-biased about all this!). After I put this one together, though, and started on the primary color version, the panel was giving me fits because it wasn't printed even close to being on square. It was so obnoxious to deal with I finally pitched the panel into the trash, declared with fervor, "No one even remembers I said I'd do one quilt, let alone knowing I'd thought I might make two!", and stalked angrily out of my sewing room.  

(Yes, because I know some of you just gasped in horror, a few days later, calmer heads prevailed and I fished the panel back out of the trash and stuffed it on my "to be given away" shelf. I have a friend who would probably love messing with it. More power to her. I just want it out of my life.)

I designed the quilt myself, in case you're curious. Nothing special, just sashing but playing with color placement. The binding was the remaining strips from the fat quarters that were left over, and the backing is pieced from the four remaining fat quarters that didn't get used anywhere on the front. I had to add narrow strips of a fabric from my stash to get the backing long enough but it was pretty close. And I just stitched in the ditch along all the seams--one, because I wanted it done; two, because I didn't want to have the text disappear behind quilting. But mostly one.

So that's my show n' tell. Here's hoping they do their part to raise much-needed funds for the organization! 

And for your entertainment...another entry in my "Dogs with Quilts" series, although this one should be "Dog with Scarf." He was none too sure about the model.*


Dogs with Quilts

Dogs with Quilts

*No actual owls were harmed in the writing of this blog post. 

The Final MomUFO--Completed

Shirley the Quilter

Shirley the Quilter

If you've followed my blog for awhile, you may recall previous posts about my journey through completing several UFOs that Mom left behind at her passing. (Such as here, and here. And this one talks about the experience a little more deeply--what I learned, how I felt.)

I finished a whole bunch of her UFOs in those first few months after she passed away in April 2009, mostly because I wanted them to go into the general distribution of keepsakes amongst my sibs, and I wanted to finish a few that I knew she had intended as Christmas gifts for that Christmas. (One of the above blog posts talks about those.) A couple took a bit longer, but I finished up the vast majority of them within 18 months. The very last one, however, sat for some time. I kept taking it out, looking at it, puttering a bit, and then putting it back away. It felt somehow overwhelming. It was the only one of her UFOs that I'd kept that was still in pieces, and trying to figure out how to pick up where she'd left off and finish it the way she had planned was beyond my mental capabilities any of those times I pulled it off the shelf to shuffle through it again. 

But last summer, when my daughter and I decided to spend a week together at the cottage (my first full week there in years n' years), I decided it was time to finish Mom's last UFO while I was there, in a place Mom had loved so much and where she'd done a lot of quilting herself.  

Here is what I started with. The project bag contained:

1. A whole ream of print-outs of variants on the design and paper-piecing foundations therein.

2. 24 pieced log-cabin blocks. 

3. 16 paper-pieced flower blocks.

4. One paper-pieced stem/leaf block. 

5. A boatload of fabrics--some she'd already used, most still uncut. She clearly hadn't made all her final decisions yet. 

I had distinct memories of her planning this quilt. She had told me she wanted to make a quilt for our family cottage, where we'd spent every summer as kids. After my Dad had passed away in 2001, my oldest sister had spent several summers rehabbing the cottage, including repainting the inside walls a soft yellow. Mom wanted to make a pretty, summery, blue and yellow quilt to go with my sister's new color scheme. In fact, I had given Mom some fabrics out of my own stash in case she needed them--I recognized some of those fabrics in the project bag. Probably, of all Mom's UFOs, this was the one with the most personal connection for me.

It was also the trickiest to finish. I could write a whole long blog post about how I had to figure out which of all the print-outs of designs was likely her final choice; I could write a blog post about having to figure out how to get log cabin blocks (not on foundations)  to play nicely with paper-pieced flower blocks. As for that, I'll just say, don't take a tape measure to this quilt to measure for square. I went for "good enough for horseshoes."

I could write a blog post about trying to figure out how I was going to re-create seven more leaf blocks to match the one she'd done when she didn't have any of THOSE foundations printed in the project bag. (She had every other paper-pieced pattern for leaves and stems known to quilters, I think, but not that particular one. Go figure.) As for that, suffice it to say that it took me three years to have the sudden realization, "She designed it in EQ. What're the chances it's a block in the EQ Library?" Well, of course it was. But the one she'd already made wasn't the right size--and I could imagine her doing that, realizing it was the wrong size, throwing it down on her sewing table in frustration and walking away, intending to return to it when she was in a better mood, and that's why it was still in pieces in a project bag. Been there, done that. In any case, I made 8 new ones, using her fabrics and fabric placement.

I could also write a blog post about laying it out on my design wall, checking it by her design....and then taking the bold step of moving a couple of things around because I liked it a little better. Sorry, Mom. Hope you don't mind. It's still about 95% her original design.

I got the center pieced at the cottage.  But there was no border fabric in the bag, so I had to wait until I got home and could head to my LQS to by border and backing. Found the perfect border. Got talked into another fabric for the backing that looked better in the store than it did when I actually got it on the quilt months later, but that's okay. It's backing. I'm not sweating it.

I had it custom-quilted at my LQS because trying to figure out how to quilt it adequately was beyond me. At this stage, I just wanted it done. I was able to pick it up from them last week, and got the binding on it yesterday, just in time for my guild's show n' tell.

The last of Mom's UFOs, done. It's the end of an era for me. I introduce to you, "Summers by the Lake with Shirley," Designed by Shirley DeMott, pieced by Shirley DeMott and Sandy Hasenauer, quilted by Debby Kenney at Mt. Pleasant Quilt Company.  

Summersbythelakewithshirleyjuly2013.jpg

Wheee! Finally--a Finish!

Yes, at long last, the Disappearing 9-Patch donation quilt is done. Woot! 

dis9patchjuly2013.jpg

I started with a Moda charm pack (don't recall the line, it was fairly old), added some 5" squares from my scrap stash, and then used stash fabrics for the borders and binding. I did have to buy the backing, but found it on a 50% off rack.  

machine binding--front

machine binding--front

I did the binding completely by machine, something I've done a couple of times before and never been happy with the results. I'm somewhat happier with the results on this one, but I still just don't like the look as well as one that's done the traditional way.  

 (Backing and back of binding)

 (Backing and back of binding)

This is wheelchair quilt size (roughly something like 36" x 45" or so, don't recall the measurements exactly now). I hope whatever elder gentleman receives it loves it and finds it cozy!

And then, because it's tradition... 

Dogs n' Quilts

Dogs n' Quilts

SPOILER ALERT: Kimberly Einmo Mystery Quilt

If you're doing the Kimberly Einmo Mystery Quilt "Chain of Stars" in Craftsy and do not want to see what the end result is, close this blog post now! Quick! Now! Stop reading!​ Step away from the blog post, ma'am, there's nothing to see here.

​* * * * *

Okay, for everyone else, here we go. ​

​I enjoyed doing this--so much so I did it twice at the same time. She offers instructions for four sizes so I chose the wallhanging size, noting that it's actually a decent size for lap quilts.

Here's the version I did all in batiks. I had most of this in my stash but did add two fabrics to give more contrast.

1.jpg

My daughter has claimed that one for her own. Since she's "fun-sized," (as she describes her diminutive height), this one works well for her to use as a lap quilt.​ The backing and binding are a dark purple batik I had in my stash.

​For the second one, I decided to go a completely different direction and use black, white, and red. I had most of it in my stash, but bought a couple of fabrics to round it out a little bit. This one seemed to be floating off into the distance with all the white around the outside of the design, so I added borders to ground it. (The backing is the red/white/black print from the front, and I used the same as binding).

2.jpg

My nephew claimed this one while it was still on my design wall. I texted him this afternoon to let him know it was ready for him to pick it up. His response was, "Omg!!!!! Yay!!!!" Nice to have such an enthusiastic recipient for my quilts.​

​I had them both quilted by the longarmer at Mt. Pleasant Quilting Company. I asked for pantographs with threads that would blend, but left it up to the quilter's choice from there.

Here's a close-up of the quilting on the batik quilt:​

2013-05-19 17.18.04.jpg

 And a close-up of the quilting on the red, white, and black quilt. It's hard to see in this picture but the thread is variegated black-to-gray.

2013-05-19 17.19.53.jpg

Doofus (Sam) is up at the cottage with my daughter for most of the summer, playing in the lake and generally getting messy and having a great ol' Golden time. Princess Doggie (Spencer) stayed home with us because she, well, let's just say she doesn't like change very much.

In any case, to stay with my Dogs and Quilts theme, here's Princess Doggie doing her best to make me happy, which is her general modus operandi.

2013-05-19 17.18.38.jpg

(She's not smiling so much as pleading with me to please love her please please please love her love her please....)​

2013-05-19 17.20.15.jpg

("I submit! I submit! Please love me...please please please love me love me love me...")​

By the way, depending on when you read this, you still have a couple of days left to enter my Kimberly Einmo Craftsy Class Giveaway on my previous podcast episode! You could win this Chain of Stars class, or her other Magical Jelly Rolls class, for free! Enter using the link on the podcast show notes here.​

Hand-Dyeds and A Finish

Remember these?

These were the fabrics created in my snow-dyeing experiments a couple of days ago.

Yesterday I had the day off and since dyeing is a fairly restful activity for a sick day (still coughing!), I decided to review Jane Dunnewold's

"The Art of Cloth Dyeing" class in Craftsy

that I'd purchased and watched some months ago. I'd bought the kit of supplies from Craftsy, figuring that it was simpler and just about as cost-effective to buy the kit Jane had put together with the basic supplies needed than it would be for me to chase all over the Internet finding and ordering them.

I felt a bit like a mad scientist in my basement, with rubber gloves and mask on, hunched over a table mixing chemicals. It was a hoot.

I started out well organized. Look how neat and clean everything is.

 And here are my fabrics, neatly wadded, scrunched, folded, banded, or bundled, waiting patiently....

Soon enough there were drips and puddles and bins of things in wonderful, hopeful color baths.

(By the way, those screw-on lids on Rubbermaid "Twist n' Loc" containers? They seal tight about half the time. Ask me how I know.)

And lookie what happened.

This one was straight turquoise.

This is roughly the same mix of turquoise and yellow that I did with the snow-dyeing above.

The colors are so much more brilliant!

I was shooting for teal on this one, using less yellow proportionately to the turquoise, but I ended up with this wonderful abstract art instead. Love it.

(Scrunched and rubber-banded little "buns" of fabric in a few places.)

This is a white tone-on-tone that I had in my stash and sacrificed to the Cause of Experimentation. In this picture, the side showing is the white tone-on-tone side. The white print acts as a resist for the most part--it's only dyed the lightest green but mostly stayed white. I wasn't too fond of this side.

(Accordion fold, rubber-banded in a couple of places.)

But the reverse? Here's the wrong side of the above fabric. Very, very nice.

It was a fairly dense print on the fabric to start. It would have been more interesting if there were less of the print to resist and more of the background to get dyed.

This was in a mix that was more turquoise than yellow. I was hoping for a teal, but instead I got this really funky mottled effect. Love!

(Scrunched up with rubberbands holding little mini-buns here and there.)

Yummy red. Straight-up red, not mixed with anything.

(Accordion fold with a couple of rubber bands.)

Another section of that white tone-on-tone. I was shooting for orange here. Almost got it. I have to play more with my color recipes.

Again, I wasn't as happy with this side as I was with...

...this side. Wowzer.

(This one was scrunched up tight and then I wrapped the ball with a couple of rubber bands to hold it as tightly closed as possible.)

More of the white tone-on-tone, this time dyed with straight-up yellow. (I think this one was "Sun Yellow.")

The mottling comes out better in this picture than in real life. It mostly just looks like yellow fabric.

And the wrong side of the fabric. Although in this case, I'd use this as the right side.

Hmm. Looks pretty intense here. It's not that bright--just a nice, springy, lemon yellow.

And my favorite result of the day? Here we go, drum roll please.....

BAM!

Now THAT'S what I'm talking about.

I mixed turquoise and red for purple, folded the fabric in a triangle and used a couple of rubber bands on two of the ends.

I

Love

This.

Unfortunately, I've run out of dyeable fabric--at least, what I'm willing to sacrifice from my stash for the time being, so I've got some PFD (prepared for dye) fabric on order now from

Dharma Trading Company

. You don't have to have PFD, by the way. I'm just testing various things to see what I like best. Some of the above fabric was Kona PFD fabric I'd picked up at Joann's awhile back. Some was white/off-white quilter's cotton I'd gotten in the scrap box from Fat Quarter Shop, and some was the aforementioned tone-on-tone. I washed the scraps and tone-in-tone with Synthrapol to prep it for dyeing. It all took the dye beautifully.

Oh, and that other thing...my second finish for 2013...

"Are You Getting Sleepy"

aka The Poppies Quilt

Detail of pantograph quilting by

Mt. Pleasant Quilting Company