Project Hope Online Quilt Show (Remix)

Due to some things I'm working on with the email version of this blog, the post announcing the Project Hope Online Quilt Show was not able to be sent out via email. Therefore, I'm posting this link to the original post so that those of you who get this post via email will know what's going on! (And how many more times can I use the word "post" in one sentence?)

http://quiltingfortherestofus.com/blog/launching-an-online-quilt-show-project-hope/4/22/2013

Coming up (as soon as I've gotten just a little more sleep): A report on my adventures in AQS QuiltWeek in Paducah, including fabric, classes, and a conversation with a very nice local police officer. I'll cover some in the blog, some in the podcast. Stay tuned.

Launching an Online Quilt Show: Project Hope

Project Hope.jpg

It's been a very, very hard week. My heart bled for everyone involved as I watched the news about Boston; about West, Texas; about ​the devastating earthquake in China...and continuing into this week with avalanches and shootings in Seattle.

It's all too much, sometimes. We can stop watching TV, we can stop listening to the news, and yet events don't stop. We are still a part of this world community in which something that affects someone else's life in such a deep and tragic way cannot help but have an impact on our own life.

There are a variety of ways to respond. I choose hope. I choose to do what I can to bring peace to my little corner of the world and, maybe, if I get the opportunity, to bring peace to a larger corner of the world.

As a quilter, my healing often comes through fabric and thread. While listening to the news late last week, I recalled reading Sandi Colwell's blog post on thankfulness. I shot her a direct message on Twitter: Can we do something quilty in response to this? As I suspected she would be, she was all over it! And so, the Project Hope Online Quilt Show was born. ​

Express your hope. Express your joy and unity and bridge-building and where you can be peace. Join us for the Project Hope Online Quilt Show. (Thanks to Sandi for putting the rest into words so well--I've borrowed this directly from her blog post on the topic.)

Project Hope Online Quilt Show

In keeping with theme of hope, love and peace, create a 12″ x 12″ art quilt that conveys your thoughts and emotions.

The design rules are simple…there are none. Use whatever creative means on this piece of art that you want to…stamps, paint, couching, transfers, crayons, thread, beads, simple piecing, applique, you name it, you can do it!

We ask that you include an artist statement in your Flickr description about your piece and how you felt while you were creating it.

Upload through June 30th, 2013, to the group on Flickr titled Project Hope Online Quilt Show.

If you are feeling moved to take more action while creating this art quilt, we ask that you make a donation of time or money to an organization of your choice that exemplifies the theme of hope, love and peace. One such organization could be The One Fund. This fund is currently collecting money to go to the many victims of the Boston Marathon bombing. Use the link to find out how to donate and for more information.

​So join us, won't you? Join the Sandi/ys in celebrating hope!

Comments on my blog

Yes, I am aware there's a problem. About half of you seem to have no problems leaving comments on my half. The other half aren't quite so fortunate. A few of you have been so gracious as to let me pester you with questions to send along to tech support--I really appreciate the time you took out to test things so you could send me as complete information as possible. That info has all gone to tech support and they're still working on it.

I've been bumped up the food chain now, from the entry level tech support, to the second tier tech support, and yesterday I just got passed up to their engineers. I'm in daily communication with these folks. There's clearly something highly unusual going on here.

I'm also aware that the photos from the last couple of days of posts didn't show up in feeds or the email. I've passed that along to them as well, as it looks like something may have changed that, since it was working fine before.

Here's what we do know:
1. Generally speaking, it seems to work fine from PCs using Firefox or IE (7-9 have all worked).
2. It's about 50/50 on Safari.
3. Chrome has issues.
4. It's about 50/50 on mobile devices.
5. There is a known issue with McAfee that they're working with McAfee folks on. If you use McAfee, leave a comment below. If I see a few of them, I'll post the fix for that.

I'm in last-ditch effort mode on this. Next week I'm in Paducah anyway so wouldn't have any time to make any changes if I wanted to. So tech support has that long to figure out what the problem is.

I did send them the suggestion this morning that it could simply be a sign of the Zombie Apocalypse. So you may want to start stocking up on nonperishable foodstuffs.

Stay posted.

Hand-dyeds Round 2 post 3

It's late and I have a long drive tomorrow for a work trip. Nope, haven't packed yet. Yep, dirty dishes still in the sink that need to be washed before we leave in the morning. So I'm only posting a couple of pics now. I'll try to post more from the road but am not sure I'll be able to pull that one off, so this might have to tide you over until the weekend.

I'm laying out the photos differently this time too, as I'm testing a variety of things again on this website. Won't we all be glad when the dust finally settles?​

​Here was the original "target" that I'd made using a glue stick as resist.

Blue-green Target (glue stick resist) "Before"​

Blue-green Target (glue stick resist) "Before"​

​I decided to overdye it with yellow to see if I could, again, get a nice yellow-green color. I was very much in the mood for some yellow-green. I think it's because I've really got a hankering for spring and we haven't seen much of it here yet.

Blue-green Target "After"​

Blue-green Target "After"​

​Again, not a very exciting result but more interesting than the original. I'm not keen on the target idea so I'll have to do some further surface embellishment with this one.

​Next we come to the one I'll politely call "yellow-green," but I personally think of as "baby poop green." Sorry if I offend.

Yellow-Green Snow Dye "Before"​

Yellow-Green Snow Dye "Before"​

Come on. I know all of you have, at some point in your quilting career, looked at a quilt project you were working on and thought, "You know what this quilt really needs? What would really make it sing? It needs some Baby Poop Green. Yeah. That's the ticket."​

Well, okay, so this is more attractive than what I found in my kid's diapers. But still n' all. It needed help. Overdying to the rescue.

I decided to go straight green on this one to see if I couldn't over come the bodily function aesthetic influence.​ Interestingly, the green overdye somehow brought out more of the blue from the original. I'm scratching my color theory head over that one.

Yellow-Green Snow Dye "After"​

Yellow-Green Snow Dye "After"​

So this next one is pretty nice. ​I had this very nice, unassuming little Golden Yellow piece (that's the name of the Procion MX dye I used straight-up on it) that I'd pleated the first time around.

Yellow Pleated "Before"​

Yellow Pleated "Before"​

I wanted to shoot for a great orange-yellow piece instead, so I overdyed it with red and this time I used rubber bands to make rings.

Yellow Pleated "After"​

Yellow Pleated "After"​

I'm kind of digging this one. Turned out a bit more pink than orange-yellow, but still a very interesting effect.​

Last one for tonight, and then we get into my serious-issue-befores in the next post.​

Here was another experiment with using a glue stick for resist. Remember this one?​

Flowers "Before"​

Flowers "Before"​

I really wanted something with even deeper color, so I overdyed it in blue. It was scrunched the first time and I wanted to still have the flowers visible, so I scrunched again.​ It's even brighter blue in this picture compared to the "before" because the "before" was taken in my basement and the "after" in the shade on my patio. Still, it's very blue now, and the flowers don't stand out as well because the resist isn't there anymore so the lighter drawing also dyed. But that's okay. If I ever use it I can always use the light drawn lines as markings for couching or quilting or paintsticks or some other surface embellishment.

Flowers "After"​

Flowers "After"​

So, did I mention I just got a shipment of Dyn-a-Flo paints and Inktense pencils today? Let the games begin.​

Hand-dyeds Round 2 Post 2

Okay, where did I leave off? ​

The next one started out a fairly uniform hot pink. I believe I'd used my "strongest red" dye the first time. Not quite as deep a red as I'd expected. Very nice, but I wanted to play with it some more. I thought it would be fun to try dying it an even darker red if I could, and use rubber bands to make rings. I was hoping for vibrant pink rings to show up in a deeper red field. Not quite.​ If you squint and look at it sideways, you can almost see the rings. Nice, just not what I was working towards.

Deep Pink "Before"​

Red/Pink "After"​

Here's another I wasn't too jazzed about the first time. It was pleat-folded and dyed orange. This time I dyed it yellow and pleated it in the same direction as the first time.​

Orange Pleat "Before"​

Yellow-Orange Pleat "After"​

Next, I decided to take a blue-green snow-dyed fabric and see if I could do a little sumpin' sumpin' with it. I kept it simple, though--I wanted more yellow-greens in my stash to do some landscape quilts, so I scrunched this one up in a yellow dye bath.

Blue-Green Snow-dye "Before"​

Blue-Green Snow-dye "After"​

Hand-Dyeds Round 2 Post 1

I'm going to do several posts for this one so you can see all the before and after's on the overdying. It would overload with photos if I tried to do it all at once.​

​First, the rust-dyed fabric. I had problems finding stuff that would actually rust, but got a few washers to do the trick when I soaked the whole thing in vinegar.

​I decided to use a blue-green dye bath, going with the idea of complementary colors. And since the original had a clear fold line going through it, I counterbalanced that by just scrunching the second time. It didn't work out quite the way I'd hoped--I wanted a little more muddy effect. I may dye this one a third time to see if I can get something a little more subtle.

Rust-dyed "Before"​

Rust-dyed "After"

​Next, I tackled a single-colored "before." This one was dyed straight up with blue. It's a fairly dark blue and takes well to fabric. Although I liked the blue well enough, I wanted to see if I could make it just a little more interesting so I overdyed it with green. Since the original blue had just been scrunched into the dye bath, I decided to use rubber bands to create rings. I was hoping for a nice dark blue ring peeking out from the green overdye. Can't see the rings, but I still like the finished product quite a bit.

Blue "Before"​ (Apologies for the yellow cast, bad lighting)

Blue-green "After"​

Another single color "before" was a very nice green one. I debated whether I wanted to overdye this one for awhile because it was such a nice green. But hey, I own the dyes. I can always make another! So off to experiment I went. I decided to overdye this one with straight yellow. The first version was just scrunched, so on the second I used rubber bands to make concentric rings hoping to make a more distinct design. ​

Green "Before"​

Yellow-green "After"​

Love that one. The green isn't as faded as it looks in that picture--it's actually a bit ore of a subtle effect between the green and yellow. But I love the yellow rays. Totally unexpected, very cool.​

​Now we turn to one I wasn't keen on at the start and I'm not sure overdying helped it much. It has a little bit more of a coolness factor now, but not quite enough for me. This is one of the tone-on-tones, if you recall those from round 1. The first round was a pleat-fold and dyed in green, so I did a perpendicular pleat-fold in yellow to see if I could get a grid effect.

Green "before" (tone on tone shown)​

Green and yellow grid "after"​

One more set for this post. Here was a long strip of fabric on which I did a triangle (flag) fold the first time and dyed it ​turquoise. It's the perfect shape to try stacking. Stacking is when you "stack" dye colors on top of one another. You crunch the bottom of the fabric into a container with one color, then you stuff a bunch more of the fabric in and add a second color, and stuff more fabric in and add a third, going on for as many colors as you can fit in your container. It works because each section of fabric largely soaks up the dye in that section. There's merging between sections as well, which is where some very funky stuff can happen.

I stacked mine starting with green dye on the bottom, stuffed as much down as I could, then stuffed the rest in and added yellow dye. I don't think I had enough fabric to really soak up the dyes in each section because it all came out a fairly uniform yellow-green. Pretty, but not the effect I was going for.

Turquoise "before"​

Stacked "After"​

Stay tuned...​

Mad Quilt Scientist Strikes Again

This weekend ended up being much busier than I thought it would be. We had family in from out of town which then meant a big family event Saturday night and another one on Sunday. I had a ton of errands to run as well, so my available time for doing anything quilty got shrunk considerably. However, since I'd already decided I wanted to get some dying done this weekend I had a bunch of supplies already in place and had made notes for myself about what I wanted to do, so I was able to hit the ground running.

I focused on overdying my previous hand-dying experiments, but also tried out a few other things. I'm not posting pics here because at the moment, everything is rinsed out and just waiting to go into the washing machine once there's a break in our real laundry (you know, the I-don't-have-anything-else-to-wear-until-that-load-gets-done kind). So hopefully I'll have pics ready to go tomorrow evening. I'll have to post it over several blog posts, I think, so I can do the whole before-and-after thing with a little explanation about process.

I've also got a few new dye baths going--another couple of experiments with resists, and a few bins filled with ice cubes. So more rinsing tomorrow night.

Let me just say, wheee. Still having a ball.

iphone-20130414205649-0.jpg

Yes, I'm a Dog-Person

With thanks to @quiltscapes for sending me this link. Wonderful. And Doofus came over to sit next to me and laid his head on my lap when he heard the video playing. Apparently he wanted me to know that really this video was about him.

On the 8th day, God made a farmer. On the 9th day, He made a dog. With gracious thanks and credit to: Lindsay Kennedy Photography - http://lindsaykennedyphotography.com/ Erin Vey - http://www.erinvey.com FidoJournalism - http://www.fidojournalism.com Photohound Dog Photography - http://www.photohound.biz Marilyn Jeffers Photography - http://www.marilynjeffersphotography.com Evocative Photography - http://evocativedogphoto.com Once around Venus Photography - http://familypetphotographyflorida.com Murphy Dog Studios - http://www.murphydogstudios.com & Unlimited ----- If I used your photo but didn't give you credit, so sorry.

My third podcastaversary giveaway begins!

3rdpodcastaversarybadge.jpg

Be sure to check out episode 121 In Which I Turn Three, and leave your comments on the show notes to that episode in order to be entered for a fantastic giveaway courtesy Aurifil Threads! Thanks so much to Aurifil for sponsoring my third podcastaversary giveaway. Having these threads to giveaway is like having a basket of candy on my cutting table--so yummy to look at and oh so tempting!

Please don't leave your comments here to enter the giveaway--I won't be able to track them. Make sure you leave your comments on the show notes to episode 121 by April 30th to be entered! Thanks--and thanks for listening for the last three years (or however long you've listened....)!

Clearing the Decks, Starting Anew...

I had a sort of "clearing of the decks" this weekend. I had both my mystery quilt tops and backings ready to go to the longarmer for awhile, but I was waiting to get the backing put together for another quilt so I could run all three down at once. I realized Saturday morning after I got home from the grocery store that if I worked quick-like-a-bunny I had a shot at getting that backing complete, and the rest of the paper pulled off the pp'd blocks on the quilt, in time to run it 45 mins south to the LQS before they closed. I just barely made it!

Photo Apr 06, 4 03 34 PM.jpg

So I treated myself to some new fabric as a reward, of course.

​Yum.

It's better for me than buying chocolate. That's my story and I'm sticking to it.​

I posted last week about my progress on the house on the hill project (yet to have it's own name). I'm doing the hand-stitching on that now, which is giving me the chance to do some embroidery. ​

2013-04-03 17.43.08.jpg

​Here's a fairly bad picture of my first attempt at french knots, which, as opposed to the picture, weren't too bad.

The thread I was using was a bit too thick for this particular project, and is very rough to the touch, which means tons of friction trying to pull it through fusible and batting. My fingers ached after the first three, and I believe I did 39 altogether. For the next stitches, I switched to a different thread (an actual perle cotton) and it's been going much more smoothly ever since. More pictures later.​

Once my quilts were at the longarmer, that freed me up to work on other projects. Something I've been wanting to do for awhile, inspired by yet another Craftsy class, Magical Jelly Roll Quilts with Kimberly Einmo, is a scrap quilt using the Jacob's Ladder block. It's a traditional block that I've always liked because you can lay it out in a hundred different ways. Okay, I've never actually counted. A lot of different ways, in any case. Kimberly's directions are all based on a 2 1/2" strip so she's done the math by looking in my stash. Very convenient and kind of her, I thought.

Photo Apr 07, 5 55 51 PM.jpg

I'm doing the larger half square triangles all out of a single red paired with a single white; that will (I hope) create the path for the eye through the quilt. The white looks solid here, but it's tone-on-tone.

I'm trying to once again push myself to make the rest of it as scrappy as possible. I need 390 @ 2 1/2" squares. ​I have a collection of 2 1/2" squares I've been cutting off project scraps for awhile, so I started there.  However, I have a few fabrics that have dozens of squares, and others with only one or two. In order to avoid having blocks dominated by a particular fabric, I separated out my squares by fabric and then started by pulling a consistent number from each pile so the scraps would at least be fairly evenly distributed. Once I got to the point where I had a lot of the same fabrics left, I put those aside and dug into my strip collection.

Photo Apr 07, 5 58 07 PM.jpg

Now I'm going to start cutting more squares from my strips to get even more distribution of fabrics. Strips? I got me plenty o'.

I intentionally chose some strips from my collection that I particularly dislike, under the theory that no fabric is ugly if you cut it small enough.​

I'm pushing my comfort envelope here. I don't do random well. Must. Control. Must. Control. Someone pat me on the back and tell me it's all going to be okay.​

(Not familiar with the Jacob's Ladder block? Check it out here on About.com.​)

Goals for this week:

  • Keep stitching House on the Hill (not sure when I'll decide it's done)​
  • Get squares cut from strips for Jacob's Ladder
  • Fuse more fabrics in preparation for next fused art quilt. Maybe my design, maybe the second one in Laura Wasilowski's class--haven't decided.​
  • Make two pillowcases from sets of scrap fabric I've had sitting on the edge of my cutting table for awhile now and they're just starting to bug me.​


Work in Progress Wednesday--House on a Hill

I've decided to try to join in the fun with Work in Progress Wednesday at freshlypieced.

As I talked about in my most recent podcast episode, I'm taking Laura Wasilowki's "Hand-Stitched Collage Quilts" class in Craftsy. Although I often go haring off into the wild and do my own design, I decided to go easy on myself this time and pretty much stick with hers, although I've made some tweaks here and there as suited my mood.

All of the fabrics less one are my own hand-dyed fabrics. The lime green fabric (grass) is commercial. ​

2013-03-30 14.46.16.jpg

Verily, in the ages of yore, there was a hill.

2013-03-30 14.58.22.jpg

​And on that hill, a house was built.

2013-03-30 15.35.27.jpg

As time passed, as the earth turned and daylight and moonlight did pass, trees and grass flourished.

2013-03-30 18.39.12.jpg

And as the rains did come followed by the brightness of sun, flowers verily bloomed.

And the world was securely fused to batting.​

And there was much rejoicing.

(Stay tuned. I just hit the embellishing stage.​)

Be sure to check out all the other Work in Progress Wednesday posts at freshlypieced!​

Playing with creating our own fabrics

My quilt design study group met last week and I was responsible for leading this week's session (we rotate responsibility, which is the best way to do a group!). We were on the last lesson in Lorraine Torrence's Fearless Design for Every Quilter. 

The lesson had to do with creating your own fabrics using a variety of techniques. I talked about this in my most recent podcast episode (Episode 120 In Which We Get Fused) so I won't go into detail here, but will give some pics of the evening. 

​Turning lines into pictures

​Turning lines into pictures

Using complimentary colors in a rubbing

Using complimentary colors in a rubbing

Working with stencils--analogous colors

Working with stencils--analogous colors

Following the line of the dye design (we thought it looked like a map)​

Following the line of the dye design (we thought it looked like a map)​

Using running stitches to create line on fabric

Using running stitches to create line on fabric

A little color inspiration...a bird in the hand

​(Pardon me while I continue to test out the different methods of placing pictures in my blog. Have to see how well they all work!)

While on vacation in New Orleans a couple of weeks ago, my husband and I spent a morning at the Audobon Aquarium. We got there when it first opened and wasn't at all crowded; by 90 minutes later when we were ready to go, it was pretty full. So fair warning--if you go, go early.​

In any case, my favorite part of the aquarium was, interestingly enough, not the aquatic creatures. It was the parakeet house. I grew up with parakeets--my grandmother had those that came to live with us a few months out of the year when she did. I only really remember one of them. His name was Gentleman Jim, or GJ. We'd let him out of his cage and he'd fly around the room, but he mostly liked to be right where we were. I did a lot of homework at the kitchen table with GJ perched on the end of my pencil or trying to sharpen his beak on it while I was writing. He may or may not have been the same parakeet that liked to dive into the fish tank. That was a little more of an adventure. My sister also had birds as pets most of her growing up years, and still does. Me, not a fan of birds in the house myself. Too much seed tossed around, too noisy. But still, I thoroughly enjoyed playing with the parakeets in the parakeet house.

So I'm including two galleries here--one is just photos from our trip that may entice you to go to New Orleans yourself. The other is strictly for the birds.​

The galleries are on autoplay, but you can speed up or slow down using the control buttons at either side of the gallery, or you can click on the thumbnails below.

First, general scenes around New Orleans, including random parades that spring up all the time, St. Louis Cathedral, the statue about immigrants (didn't get the actual title), various music ensembles we would stumble across (favorite part of the trip), Audobon Aquarium, New Orleans from the ferry to Algiers Point and one great house in Algiers, and the bayou boat tour (see if you can spot all the critters).

And now for the birds...fantastic colors! Definitely could inspire some quilts.​

An update on leaving comments

For those of you who have tried to leave comments on my blog before, it's now been fixed so you're able to leave a comment without having to sign into SquareSpace, Facebook, Twitter, or Google. If you choose not to use one of those accounts, you can leave a comment as "Guest." You will have a short form to fill out--that's just to cut down on spam and bots, you're not signing up for any accounts or anything.​

​I appreciate your patience with new blog set-up issues: Some things are very difficult to test before it goes live!

I hope to get a podcast episode out in the next day or two--I've been spending all my usual podcasting and quilting time on this site lately but we're getting there...​

Paper-pieced Block of the Month

Have I mentioned this one before? My guild is doing it's block of the month challenge in 2013 and this year, we're doing paper-pieced blocks chosen from Carol Doak's 300 Paper-Pieced Blocks. ​Each month, one of our leaders (Kate) chooses a block and we all do it in whatever fabrics, size, or quantity we want. We keep these blocks for ourselves--no exchanges involved.

My challenge to myself is to work completely from scraps. I'm doing four 4" blocks each month. No idea what I'll do with them yet but I'm having a blast!

January's block--starting out simple for those who may not have paper-pieced before.​

January's block--starting out simple for those who may not have paper-pieced before.​

February--let's add some houses to those trees!​

February--let's add some houses to those trees!​

​My faves so far. Had some great fabric to play with here.

​My faves so far. Had some great fabric to play with here.

April blocks. Not as fond of these just 'cause trees were too small to do much with, but they work.​

April blocks. Not as fond of these just 'cause trees were too small to do much with, but they work.

Here's the combo package so far!​

Here's the combo package so far!

First post on new blog...and hand-dyeds

So here it is, my first official post on the new website. Like?​

​This will be a short one--mostly pics. I am terribly delayed in getting these photos posted for you. Sorry about that--it's been busy!

Here are the results of my second session of hand-dying experimentation. I had two different types of PFD cotton and one PFD silk (very lightweight, like gossamer!) that I'd gotten from Dharma Trading Company.

I then also had some silk that I'd bought at a local sewing guild's annual rummage sale: a bolt of 30 yards for, wait for it, $15. WOOHOO! It's not as wide--I think it's something like 18" wide or thereabouts. But still, a steal. That silk was more of an ivory color to start than a true white. I only used about a fat quarter size piece of it to dye first, to see how it would work. It took the dye beautifully but I'll have to play with what colors work better on that ivory background.

Finally, I had lots of bits and pieces of some cotton lace and a crocheted doily that I'd bought at that same rummage sale. I had also bought some seersucker--no one there could tell me if it was 100% cotton or not. Apparently not--I only dyed a small corner of a piece and it didn't really take the dye at all. (Other dyes work on poly blends--the dyes I'm using only work on organic fibers.)

I also tried a variety of resists and dying techniques. You'll see examples of two pieces I used some Elmer's water soluble glue stick as a resist--worked better than I thought it would. (Couldn't find actual glue, only glue stick. Go figure.) Two other pieces were folded and secured between a pair of outlet switch plates in one case, and a pair of ethernet cable outlet plates in the other. Some pieces I folded and laid on a tray, then squirted the dye over them--you should be able to figure out which ones those are. That didn't work as well--I'll be overdying those eventually, though, and may end up with some cool results.​

I'm using some of these fabrics already for a Craftsy class I'm taking, but more about that in a future blog post!​

This blog and podcast are moving soon...

...as soon as the domain redirect happens, in any case. Which could be any time in the next 24-48 hours.

qftru logo.jpg

I am moving my blog and podcast show notes all under one roof. This is a change I've been wanting to make for some time, but never had the time to put it all together. However, some changes on one of my hosts ticked me off and made it too difficult for y'all to be part of the conversation. So I finally enacted something I've been poking away at for awhile.

If you subscribe to my podcast through iTunes, no fears. Nothing has changed there.

However, as soon as that redirect goes into action, when you go to www.quiltingfortherestofus.com you'll see my brand new, whiz bang website! (I'm not making the link in that sentence active because at the moment it still goes to the old place.)

There's a page for my blog.

There's a separate page for all the show notes to my podcast episodes, plus you'll be able to stream or download episodes from that page too.

Each of those pages has a separate RSS feed, available through a link on the sidebar, so you can subscribe to either of them however you want. You can subscribe to my blog through Feedly or Bloglovin' or whatever your what-you're-using-now-that-GR-is-no-more-of-choice is. You can use your favorite podcatcher to subscribe to the podcast, if you don't get it through iTunes.

The most important thing to me? You'll be able to leave comments on the show notes to my podcast without having to bow down to the Evil Overlord of Facebook. 

Okay, so I use Facebook. I don't mind Facebook. I absolutely detest being forced to use Facebook as my commenting system on my podcast and I detest having listeners not be able to leave comments unless they have a Facebook account.

But let me not get venting again. 

I'm excited about the new site. It's pretty. It has some very nice features for me from an admin point of view. I hope it's easy and attractive for you to navigate from a user point of view. I'm still poking away at some things--it probably won't be fully set up by the time you're first able to visit it. 

But I hope you'll visit. And I hope you'll help me test it out by leaving all sorts of comments!

I'll post here again when the redirect has happened and I'll leave RSS feeds here and such too. Eventually I'll take the time (when I have it again) to actually post a redirect here. So this is just your heads-up. Keep posted!

30 Questions Thursday--Part 6

Finally--I've had the time to sit down and finish my 30 questions!

25. If you could have dinner with anyone in history, who would it be and what would you eat?

Two people, but that's mostly because they worked as a pair: Susan B. Anthony and Elizabeth Cady Stanton. I wanted to name my daughter Cady Elizabeth, but my husband wouldn't go for it. That's okay--I nixed his Benjamin Franklin for our son. We found happy compromises for both.

In any case, I love the history of the women's suffragette movement and, in fact, it's very close to home since Susan B lived in my hometown and we're the site of the Susan B. Anthony House museum. More recently, however, I've become more aware of how the two women worked together as a team. Although Susan B is the most well-known, she wouldn't have accomplished what she did without Elizabeth as a partner. And Elizabeth was a very impressive person in her own right.

If you're interested in a fun way to learn more about them, by the way, the History Chicks podcast recently did an

episode on Elizabeth Cady Stanton

that was a great look into her life and talked at some length about her relationship with Susan B. Very cool stuff.

What would I eat? I'd probably cook for them because I'd want to just be able to listen to them chat with each other. But from what I've read, I also expect they'd shove me out of the kitchen and want to pitch in. So maybe we'd have to compromise and do a stew in the slow-cooker or order take-out so we could all just hang out and talk.

26. What popular notion do you think the world has most wrong?

That it's okay to be rude. That being mean is funny. That we're past racism, sexism, whatever-ism, and it's okay to say those things because "I don't really mean it, you know." That people who have a different opinion than us are completely wrong and should be shouted down and called names.

Yes, I freely admit it: I am one of those people who longs for a return to civility.

27. What is your favorite part of your body and why?

My brain. I love how much I love to learn; I love playing with ideas; I love those brief moments when I actually feel smart.

And no, this isn't a cop-out. Sure, I have the same body-image issues most women of a certain age and size have. But I also think we tend to forget that our brain is a body part and worthy of respect and love!

28. What is your love language?

I actually had to look this one up because I wasn't clear what was meant by "love language." I took the quiz on

www.5lovelanguages.com

and apparently my love language is evenly split between Quality Time, Acts of Service, and Physical Touch (although that last one is really only true for my intimates--my husband and kids. Everyone else, keep your distance!).

29. What do you think people misunderstand most about you?

I think I covered this in an earlier post. People think I'm much more complex than I really am. I'm really pretty WYSIWYG. I'm not permanently ticked off--my face just tends to look that way. I generally like people even though they think I'm being aloof. Yes, I like to keep my thoughts to myself, but that doesn't mean I'm shy or afraid or anything. Just private. Does that cover it?

30. List 10 things you would hope to be remembered for.

  1. I hope my kids always remember this momism I tried to use through their growing up years: "You can't control what others do; you can only control how you react to it." I try to live by that myself.
  2. I'd like to be remembered by someone as a person who encouraged them to be more than they thought they were capable of. I hope to be remembered by many someones that way, but one would be good enough.
  3. I'd like to be remembered for my writing.
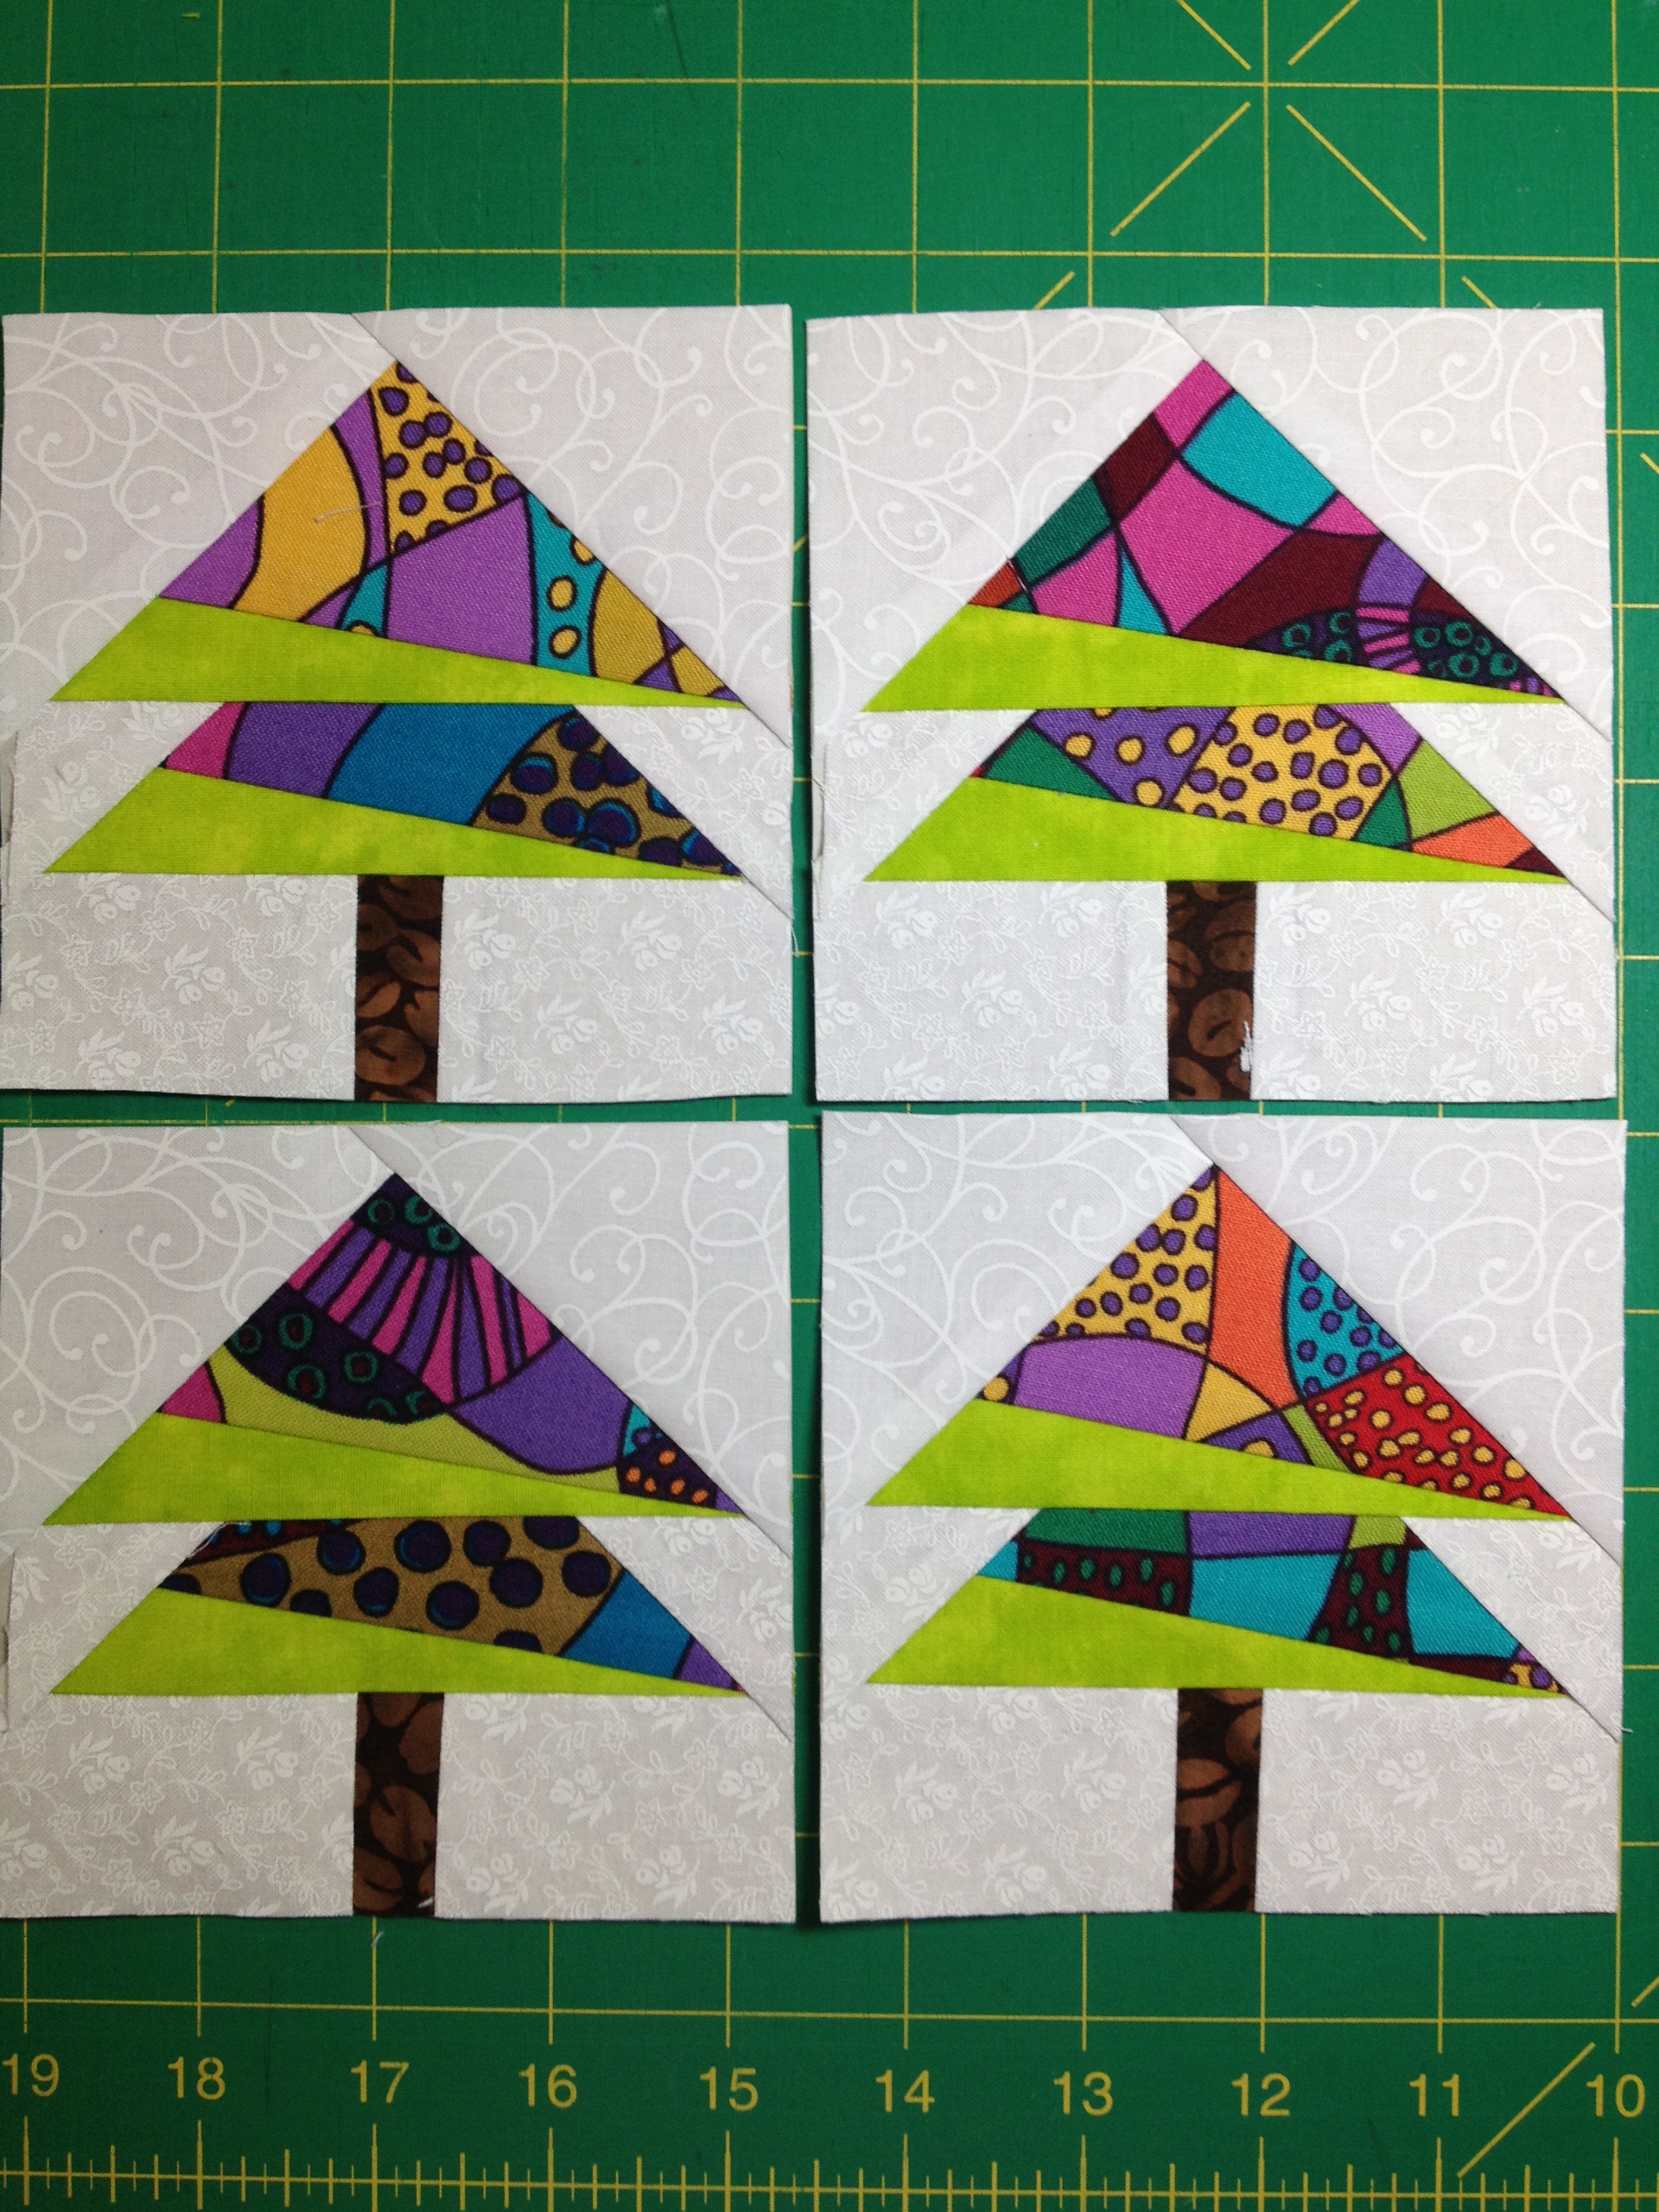
  4. I might like to be remembered for my quilting--but really, only by my family and close friends. I have no dreams of winning big quilt shows or writing quilt books or becoming any sort of quilting celebrity. It's something I love doing for myself and simply hope that it helps my family remember me when I'm gone, like I still have my Mom's quilts surrounding me.
  5. I'd like to think people will remember having a few good laughs with me.
  6. I hope to be remembered as a wonderful grandma--although that would take having some grandkids, which is likely a ways off. Or granddogs. Whatever my kids choose to give me.
  7. I'd love to be remembered for playing some small part in raising awareness about justice issues and maybe changing a few minds along the way.
  8. I hope to be remembered as a deeply connected person--connected spiritually, connected to my family and friends, connected to life.
  9. Sure, I'd like to be remembered as a great cook. Why not? That would be fun.
  10. I absolutely would like to be remembered as a wonderful wife and a great mom. First, foremost, and beyond all the previous 9 items.

Hey--I think that's it! I've finished my 30 questions! What about you?

Are you reading this through Google Reader?

Google just announced it's plans to shut down Google Reader in July. I'm not panicking. That's plenty of time and, given the backlash, they may have been surprised by the number of people actually using Reader and may extend it. Still, it's a good time to explore how you follow blogs and perhaps make some changes.

Just don't change that you're reading this blog. :-)

I've been doing some research for my own use, so I thought I'd pass along some links to articles for you for now--these may help you check out some alternatives. Everyone has different needs and likes/dislikes so what works beautifully for someone else may not work for you. For example, when I first got my iPad, a friend told me I should use FlipBook because she just adored it, best thing since sliced bread, etc. I didn't like it at all. That doesn't mean she's wrong, just means we have different needs and tastes. So, test them out, play around a bit, see which one you like best.

http://lifehacker.com/5990456/google-reader-is-getting-shut-down-here-are-the-best-alternatives

http://www.usatoday.com/story/tech/2013/03/14/google-reader-alternatives/1986865/

http://reviews.cnet.com/8301-19512_7-57574201-233/google-reader-is-dying-but-we-have-five-worthy-alternatives/

http://marketingland.com/12-google-reader-alternatives-36158

(These are just a few articles--more will likely be coming out every day.)

These are simply the articles I've come across today--more will be written in the future so keep checking the web. It does seem like Feedly is coming out strong in terms of top recommendation, but as I'm writing this on vacation I can't test anything out until I'm home this weekend. By the way, as Google continues to tighten it's offerings-belt, I had already started the process of moving this blog from Blogger to Wordpress. Blogger has begun to annoy me, for one, but I'm seeing the writing on the wall. I'll give y'all fair warning when it happens so we can make sure we don't lose any of you! Meanwhile, have fun looking at your other Reader possibilities. Find what works for you.

Posted with Blogsy

Posted with Blogsy

Hand-Dyeds and A Finish

Remember these?

These were the fabrics created in my snow-dyeing experiments a couple of days ago.

Yesterday I had the day off and since dyeing is a fairly restful activity for a sick day (still coughing!), I decided to review Jane Dunnewold's

"The Art of Cloth Dyeing" class in Craftsy

that I'd purchased and watched some months ago. I'd bought the kit of supplies from Craftsy, figuring that it was simpler and just about as cost-effective to buy the kit Jane had put together with the basic supplies needed than it would be for me to chase all over the Internet finding and ordering them.

I felt a bit like a mad scientist in my basement, with rubber gloves and mask on, hunched over a table mixing chemicals. It was a hoot.

I started out well organized. Look how neat and clean everything is.

 And here are my fabrics, neatly wadded, scrunched, folded, banded, or bundled, waiting patiently....

Soon enough there were drips and puddles and bins of things in wonderful, hopeful color baths.

(By the way, those screw-on lids on Rubbermaid "Twist n' Loc" containers? They seal tight about half the time. Ask me how I know.)

And lookie what happened.

This one was straight turquoise.

This is roughly the same mix of turquoise and yellow that I did with the snow-dyeing above.

The colors are so much more brilliant!

I was shooting for teal on this one, using less yellow proportionately to the turquoise, but I ended up with this wonderful abstract art instead. Love it.

(Scrunched and rubber-banded little "buns" of fabric in a few places.)

This is a white tone-on-tone that I had in my stash and sacrificed to the Cause of Experimentation. In this picture, the side showing is the white tone-on-tone side. The white print acts as a resist for the most part--it's only dyed the lightest green but mostly stayed white. I wasn't too fond of this side.

(Accordion fold, rubber-banded in a couple of places.)

But the reverse? Here's the wrong side of the above fabric. Very, very nice.

It was a fairly dense print on the fabric to start. It would have been more interesting if there were less of the print to resist and more of the background to get dyed.

This was in a mix that was more turquoise than yellow. I was hoping for a teal, but instead I got this really funky mottled effect. Love!

(Scrunched up with rubberbands holding little mini-buns here and there.)

Yummy red. Straight-up red, not mixed with anything.

(Accordion fold with a couple of rubber bands.)

Another section of that white tone-on-tone. I was shooting for orange here. Almost got it. I have to play more with my color recipes.

Again, I wasn't as happy with this side as I was with...

...this side. Wowzer.

(This one was scrunched up tight and then I wrapped the ball with a couple of rubber bands to hold it as tightly closed as possible.)

More of the white tone-on-tone, this time dyed with straight-up yellow. (I think this one was "Sun Yellow.")

The mottling comes out better in this picture than in real life. It mostly just looks like yellow fabric.

And the wrong side of the fabric. Although in this case, I'd use this as the right side.

Hmm. Looks pretty intense here. It's not that bright--just a nice, springy, lemon yellow.

And my favorite result of the day? Here we go, drum roll please.....

BAM!

Now THAT'S what I'm talking about.

I mixed turquoise and red for purple, folded the fabric in a triangle and used a couple of rubber bands on two of the ends.

I

Love

This.

Unfortunately, I've run out of dyeable fabric--at least, what I'm willing to sacrifice from my stash for the time being, so I've got some PFD (prepared for dye) fabric on order now from

Dharma Trading Company

. You don't have to have PFD, by the way. I'm just testing various things to see what I like best. Some of the above fabric was Kona PFD fabric I'd picked up at Joann's awhile back. Some was white/off-white quilter's cotton I'd gotten in the scrap box from Fat Quarter Shop, and some was the aforementioned tone-on-tone. I washed the scraps and tone-in-tone with Synthrapol to prep it for dyeing. It all took the dye beautifully.

Oh, and that other thing...my second finish for 2013...

"Are You Getting Sleepy"

aka The Poppies Quilt

Detail of pantograph quilting by

Mt. Pleasant Quilting Company