I'm ready to review my next class! Welcome to Fire up the Fish with David Bonom.
I'm trying to overcome a lifetime aversion to seafood. I grew up eating fresh perch (and sunnies and croppies) out of Lake Ontario, filleted and fried in cornmeal. Other than that, I've really not been a fan of anything coming out of the water. Over the last 10 years I've been trying a lot more varieties of fish, and have begun to nearly like some of them. I'm still not a fan of shellfish of any kind--and believe me, I've tried most of them. Shrimp--well, that's just nasty. (And yes, I've tasted a few preparations. Couldn't get through any of them.) My husband's family is big into clambakes. Can't do it. The only way I'll eat a clam is if it's heavily battered and fried--basically once it's a vehicle for the batter, I can live with it. My theory is that I have a sister who's deathly allergic to shellfish so my DNA has a genetic aversion. That's my story and sticking to it.

So determined to try one of Bonom's recipes, I thumbed my nose at the rain and grilled anyway.
David Bonom, however, made me want to start throwing all sorts of fish on the grill. He still couldn't make shrimp look good to me but to those of you who like shrimp already, you'd probably be into what he does with those. The same goes for his lesson on lobster tails--not my thing, but for those of you who already like lobster, your mouths would probably be watering.
Mind you, this is a technique class, not so much a recipe class. He does give the recipes for every preparation he uses, but he only briefly talks about possible variations or how to create your own recipes, which I'd hoped would be more prevalent. But I got so much inspiration it ultimately doesn't matter.
The class was tremendously inspirational for me. We hadn't ever tried to grill a fish at our house but after watching the lessons all the way through, I was chomping at the bit.

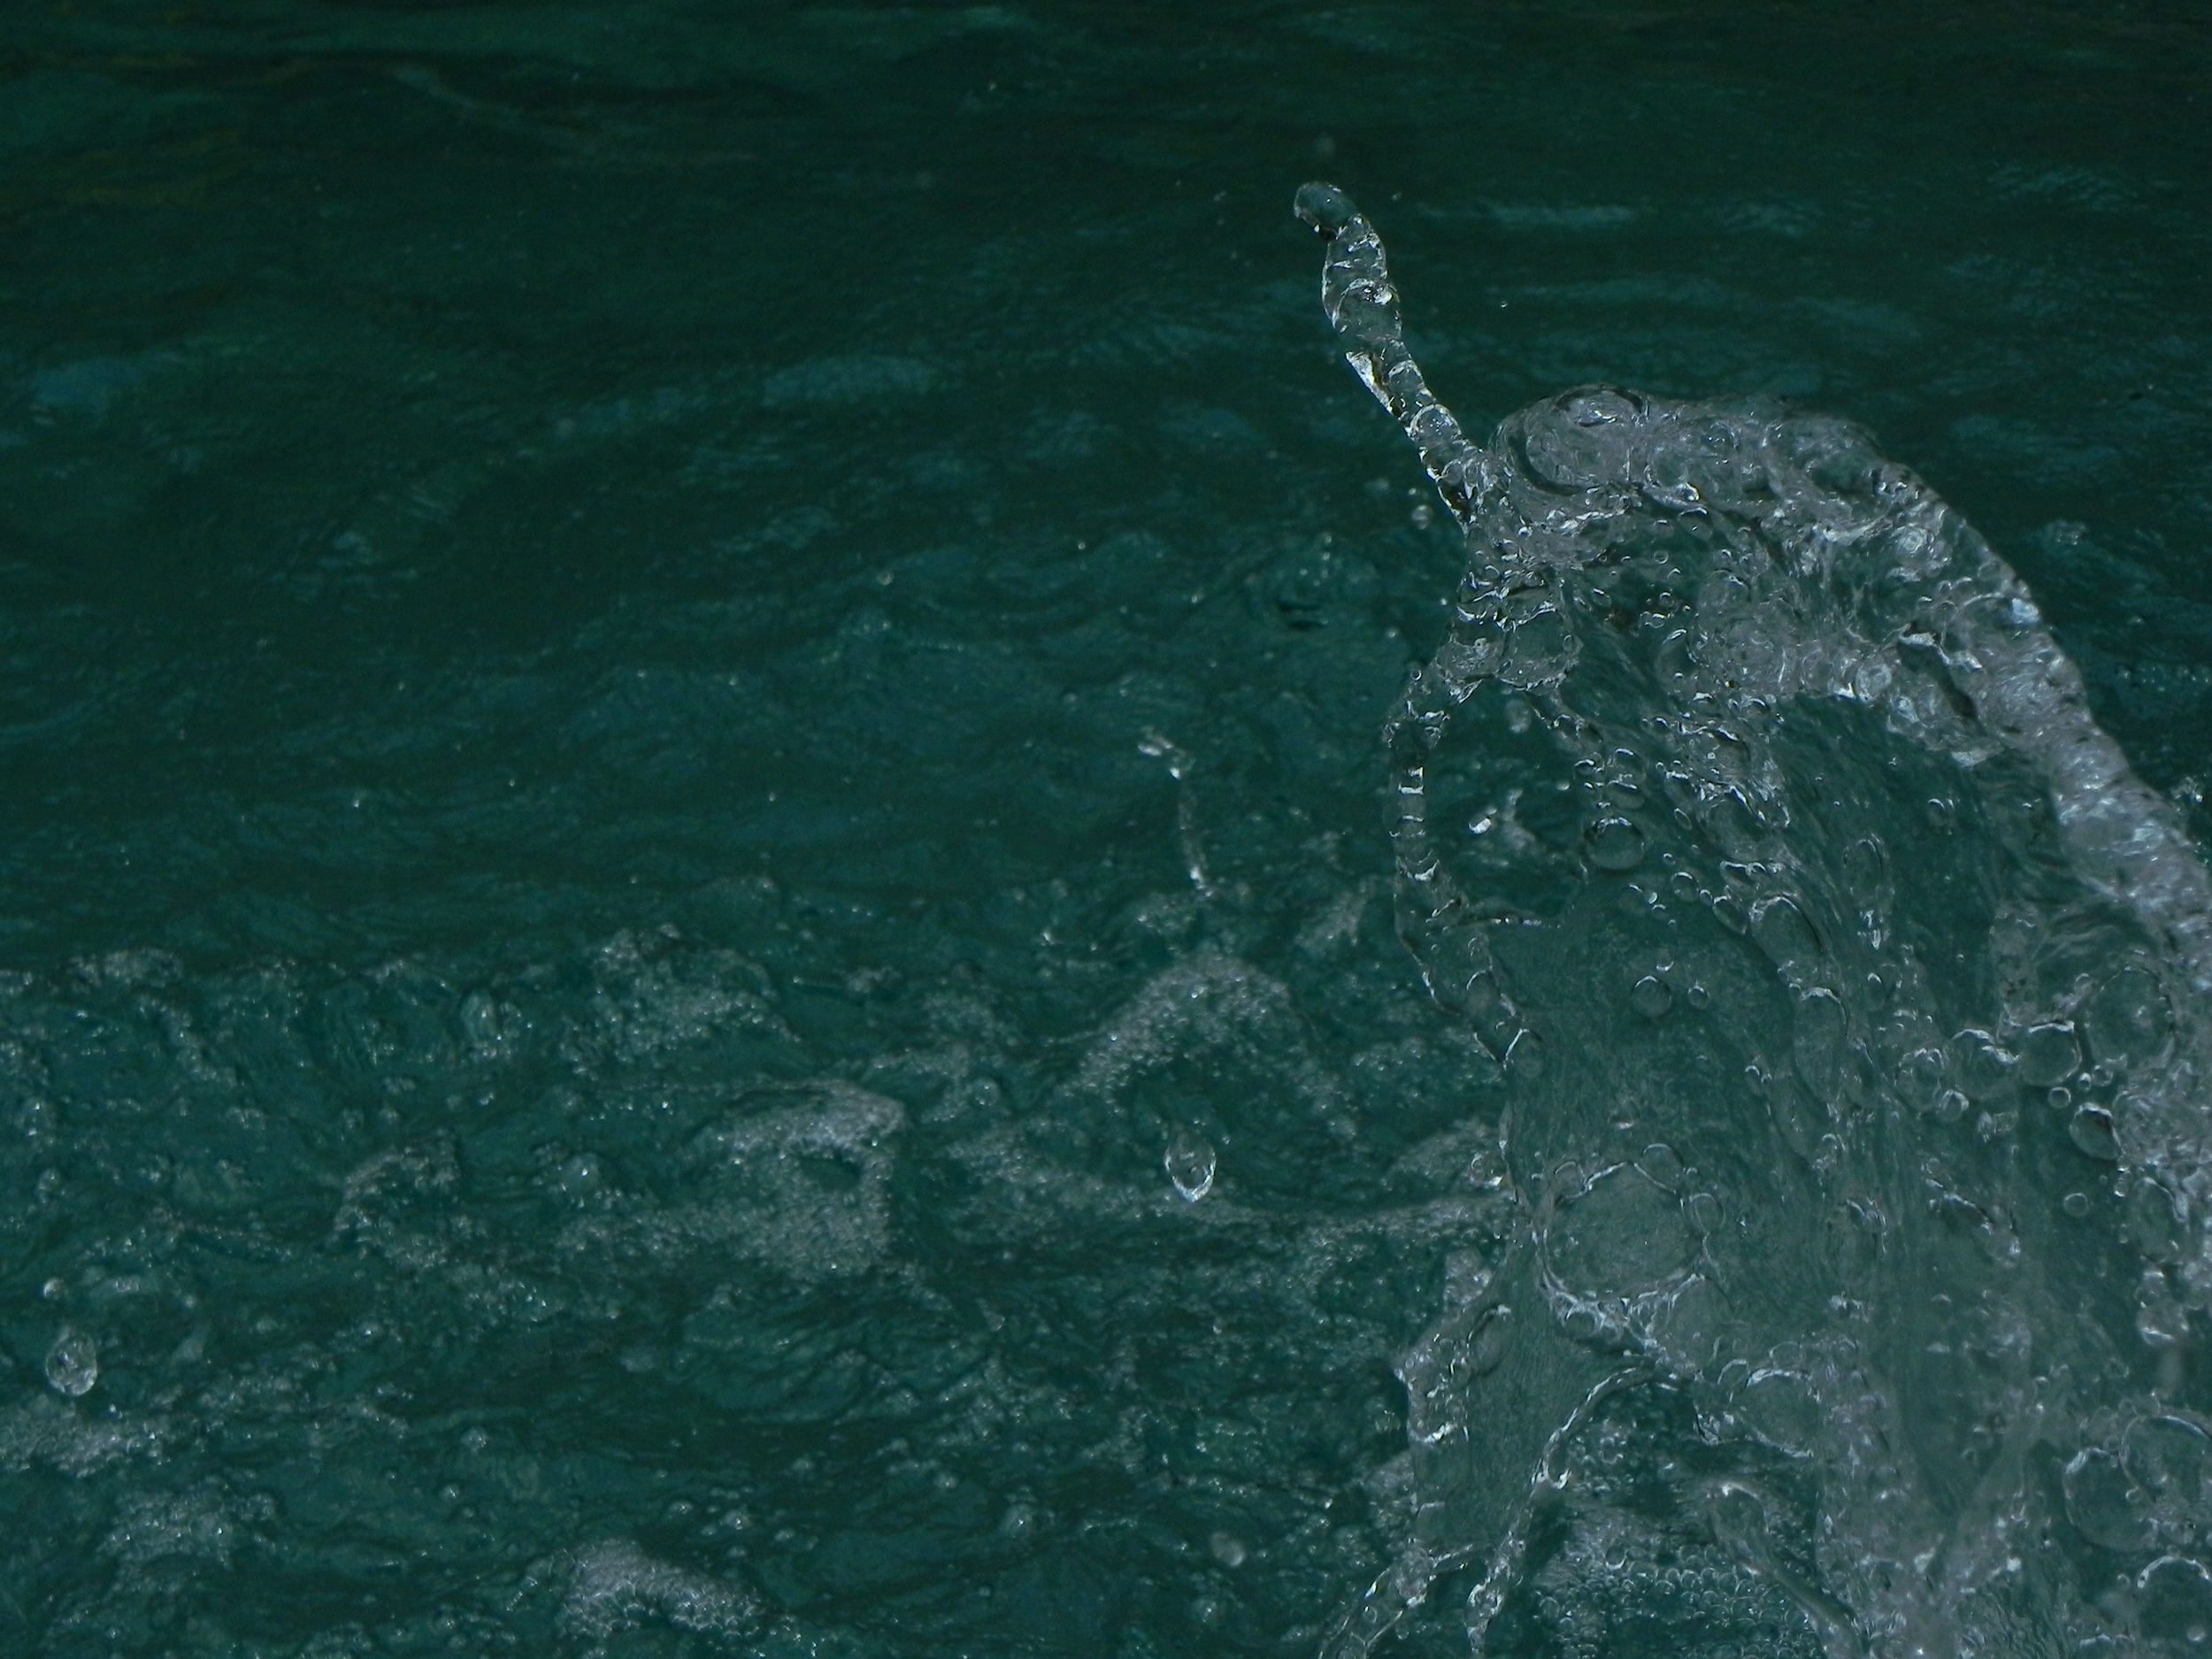
Swordfish on the grill, just starting out.
And, most notably, I was ready to try a fish I'd never been brave enough to order in a restaurant before: swordfish. He made it look so good in the class, I had to give it a go!
Armed with what he'd said to look for in a good, fresh, piece of swordfish, I took a quick jaunt out to my grocery store and found two smaller swordfish fillets that had all the qualities he said to look for and none of the ones he said to avoid.
I also got all fancy on its butt. Although I stuck to his recipe for the dry rub, I decided it called for a little fruit salsa, so I was making up a recipe as I wandered through the produce section. I'll post my recipe at the end--it turned out very tasty.
The fish was really quite simple. I've done enough grilling, and enough dry rubs, to be confident on both counts. I had picked up some useful tips from his classes, though, and had absolutely no problem with my swordfish steaks sticking at all.
I even followed his suggestions for how to get the best grill marks. Mighty pretty, if I do say so myself.
This being my first time out of the gate with (1) grilling fish and (2) working with swordfish, I overcooked it just a hair. I should've pulled it off the grill maybe just one or two minutes sooner. It tasted fine, but it was a little on the dry side. Not too much of a problem, though, since I had my fruit salsa nicely freshening things up. And the end result is that I really, really liked it. I'll definitely be doing this one again.
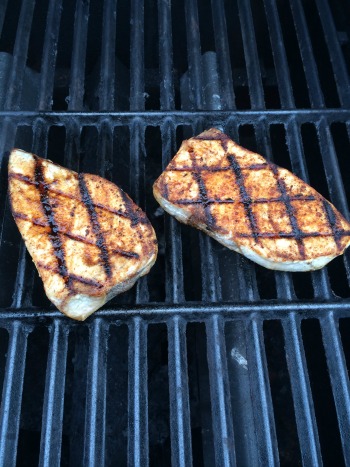
Pretty grill marks! Or, grill hashtags, for you #twilters out there.
Back to the class. David Bonom was very easy to watch. It is important to remember, as I said before, that it's primarily a technique class. Although he does give plenty of recipes and talks a little here and there about possible variations and substitutions, he spends most of his time talking about the actual grilling--starting with a little discussion of the difference between charcoal and gas grills and setting up for the right temperature, he moves into how to prep the fish, how to prep the grill, what to watch for in terms of doneness, different tools and equipment (baskets, foil, etc.), how to check for temperature, and troubleshooting. The class goes from different types of fillets to whole fish to shellfish, and also includes fish cakes.
Not only do I feel a lot more confident about grilling fish, I feel a lot more confident about cooking fish in general and will more easily be able to tackle it in my kitchen when grill season is over.
The Basics:
- 10 lessons. Absent the first that's just a brief intro of about 1 minute, the rest range from about 3 1/2 minutes to 12 1/2 minutes. Short as they are, though, they're packed with good information.
- Lessons include: Setting up the Grill; Fish Steaks & Firm Fillets; Tender Fillets; Whole Sides; Whole Fish; Shellfish without the Shell; Shellfish in the Shell; Fish Cakes; Troubleshooting.
- Included in those lessons are discussions of dry rubs; marinades; stuffing; using baskets, skewers, and foil packets; how to test for doneness; and what to do if your fish cake falls apart on the grill. (!)
I enjoyed this class a whole lot more than I thought I would. Although I'm posting this review after only doing one type of fish, I already have plans for a couple more from the class. I'm ready!
Again, that's Fire up the Fish with David Bonom. Two thumbs way up!

Finished product--grilled swordfish with mango peach salsa (and roasted baby potatoes)
Addendum:
Sandy's Mango Peach Salsa
(Amounts for two or three people)
Ingredients:
- 1 T butter
- Half a Mayan sweet onion (or any sweeter onion), diced
- 1 clove garlic
- Half a mango, peeled and diced
- One peach, peeled and diced
- a few tablespoons of balsamic vinegar--tropical flavor if possible*
- Dash of salt
Directions: Saute the onion in butter until starting to caramelize. Add garlic and saute for about 30 seconds (don't burn the garlic). Add in the mango and peach and saute with other ingredients just to incorporate. Add balsamic vinegar, stir through, then turn heat to low and reduce the vinegar by about half or to taste, stirring occasionally. Add a little salt to taste. Serve over fish. Leftovers could be chilled and used for other things--like maybe over vanilla ice cream for dessert...nummy.
*I used one named Sunny Pineapple Balsamic Vinegar that was quite tasty. If you don't have a flavored vinegar, use a good balsamic--preferably white balsamic so the fruit doesn't look dirty--and then consider squeezing fresh lime or fresh lemon juice into the mix.
Need help knowing how to deal with a mango? Check this video out.