Thinkin' about It Thursday

This week, I'm thinking...

  • That I really, truly, am a machine girl.
  • That hand-piecing and hand applique are just not really my cup of tea.
  • That, however, I do like doing felted wool with a blanket stitch by hand.
    • Just not in several layers with a honkin' big chenille needle that hurts my fingers trying to get it through everything.
  • How I'm finally narrowing in on being able to start my embroidery for the Sue Spargo embroidery class (not the "Sue Spargo Take 6 Weeks to Finish Your Background" class).
  • That I'll find out then whether I'm an embroidery girl.
  • How I have a few too many projects clamoring for my attention at the moment.
  • That, regardless, I'm having too much fun to stop myself. ("Ooh, shiny!")
  • How much I'm looking forward to going to a class on Saturday with a bunch of my peeps.
  • How it's been way, way too long since I've gotten to spend time with my Guildy-Girls. 
  • That, on the other hand, I've gotten to spend time with a few of them in our Design Study Group this week.
  • How much fun Design Study Group is. 
    • Especially when someone brings in a project for a consult.
    • And we can all gather around and discuss design principles and voice opinions.
  • That it'll be fun to see what they do with the art quilt design classes we're all taking the next couple of Saturdays.
  • How that brings me back to looking forward to going to a class with my quilty peeps.
  • How that almost makes it better that there's still piles of snow outside that haven't melted enough yet for us to even see pavement.
  • How the forecast doesn't look good for the next several days.
  • That at least "March 1st" means "Getting closer to spring," so I'll be celebrating that day even if it is supposed to snow.
  • That even the Doofus has an opinion about the weather.

Fight the Funk Friday

I did well in terms of doing my Daily Burn exercise program this week. I think I only missed one day. The series I'm working on did get more challenging this week, so that's good, but it's still largely strength-training without much cardio. I really do need to start getting back to the gym for the cardio--I miss it physically, plus the strength-training emphasis is doing nothing towards weight loss.

In fact, I think the weather is working in the opposite direction. I've been planning and tracking meals this week and did fine in terms of what I was eating (calories in vs calories out), but when I got on my home scales today they hadn't budged. I suspect with the negative wind chills outside, my body is very reluctant to release any of its protective layer at the moment. Still, I will once again step it up a notch. 

Mood-wise, though, I've been solid. I'm doing all my usual habits (sun lamp, aromatherapy, trying to make sure I sit in sunlight coming in through the window even if I can't get outside much), and I do feel more energetic than I usually do this time of year. In fact, normally this is when I get no exercise at all because I just can't bring myself to do it. It's always a vicious circle: I know getting regular exercise really helps with the seasonal depression, but when I'm in the throes of the seasonal depression, I could care less about getting exercise.  This year, I'm keeping up my exercise program in February. Woo! In that regard, having Daily Burn really does help--it's in my house and it's a manageable amount of time so it removes several layers of excuses.

I missed my Weight Watchers meeting yesterday because my husband had taken my car to drive out of town for work--his car stinks in the snow, so I far preferred he be driving mine. But that left me at home with his stinky-in-snow car. That wasn't an issue earlier in the week as I had nowhere to go anyway. But he was supposed to get home in time for me to grab my car keys and shoot out the door for my meeting yesterday...which didn't happen. He did his best, but winter driving just slowed things down. I'll try to get to a meeting Saturday morning instead.

Goals for this week:

  • plan and track, plan and track, plan and track
  • Make it to 5000 steps a day. This may not sound like much but being as house-bound as I've been lately, even with the bits of cardio in my Daily Burn program I've been only barely pushing 4000 steps. I'm starting small. (It's hard to get my head wrapped around doing enough laps in my house to get to 10k...yikes. How boring would that be?)
  • Hit 15 flights of stairs a day. This I can do. I've got stairs in my house, for sure!

Oops...Some Snow Dyes I Never Posted...

I got so caught up in my sewing room I forgot that there was a set of snow-dyes I never revealed here. Plus, I got some regular hand-dyeing done too. These are all from a week or two ago. They're not terribly exciting and I had some issues with a couple of them. But still n' all...

Fuchsia and grape scrunched

Fuchsia and grape scrunched

Fuchsia and grape folded

Fuchsia and grape folded

Fuchsia and grape spiraled

Fuchsia and grape spiraled

Strong orange, mixing red, fuchsia spiraled

Strong orange, mixing red, fuchsia spiraled

Same mix as above, but folded. And clearly there was a little drop of a former dye bath still left on the grate that I hadn't seen when I washed it. Oops. This just shows what havoc one tiny little drop of the wrong color can wreak! Oh well, not one…

Same mix as above, but folded. And clearly there was a little drop of a former dye bath still left on the grate that I hadn't seen when I washed it. Oops. This just shows what havoc one tiny little drop of the wrong color can wreak! Oh well, not one of my faves anyway. Ripe for overdyeing.

A v-neck shirt done in the same color combo as the above. This didn't have nearly as much going on with it as I thought it might, but it's fine as a knock-about summer shirt.

A v-neck shirt done in the same color combo as the above. This didn't have nearly as much going on with it as I thought it might, but it's fine as a knock-about summer shirt.

Lounge pants--woo! These are pretty oversized on me; PFD clothes from Dharma are often on the small size, plus they're 100% cotton so they shrink when washed. These didn't shrink as much as I thought they would, so they're very comfortable but not p…

Lounge pants--woo! These are pretty oversized on me; PFD clothes from Dharma are often on the small size, plus they're 100% cotton so they shrink when washed. These didn't shrink as much as I thought they would, so they're very comfortable but not particularly flattering! Fine for quilt retreats, though! This is teal, intense blue, and turquoise.

Here's a closer-look at the embroidery thread I dyed along with these lounge pants. A little tangled, but I think I could sort it out to use. 

Here's a closer-look at the embroidery thread I dyed along with these lounge pants. A little tangled, but I think I could sort it out to use. 

Some of these other embroidery threads are going to take a little more untangling, though....

Some of these other embroidery threads are going to take a little more untangling, though....

This set is a more prosaic gradation of blacks. The two on the bottom are a blue-black and a purple-black--I wanted different tones. There was something going on, though, as many of these ended up with sort of an orange-y tinge to them. I'm thinking…

This set is a more prosaic gradation of blacks. The two on the bottom are a blue-black and a purple-black--I wanted different tones. There was something going on, though, as many of these ended up with sort of an orange-y tinge to them. I'm thinking I may have left them too long without soda ash (I forgot to put it on until several hours later), so it's possible the belated addition reacted differently with the dyed fabric. Anyone...?

And, just for kicks n' giggles, I dyed some scraps of cotton batting, inspired by some things that @madquiltlady (aka Charlotte) did awhile back. You can see one of the batting scraps was pieced--apparently it had scrim on one side and not on t…

And, just for kicks n' giggles, I dyed some scraps of cotton batting, inspired by some things that @madquiltlady (aka Charlotte) did awhile back. You can see one of the batting scraps was pieced--apparently it had scrim on one side and not on the other. When you flip the piece over, it's the reverse of this side (one half lighter than the other). No idea what I'll do with these but it's fun to know what it looks like!

Snow-dye Challenge Reveal

Sandi of Quilt Cabana Corner and I have both completed our snow-dye challenges early--or, at least, we're both close enough to do reveals this week. Mine's completely done--hers is pretty dang close by all accounts. 

Abundant natural resources...

Abundant natural resources...

If you've listened to either of our more recent podcast episodes you'll know the backstory--we're both happy snow-dyers, but often have difficulty deciding how to use the resulting fabric. So we challenged one another to do something that used at least one snow-dye, if not more. 

When I took the Designing Art Quilts class with Tina Somerset on Feb 7th (which I talked about in this episode), I came home with a notebook full of sketches and stacks of hand-dyes picked out for several of them. It was so much fun, I knew I just had to stay on that roll!

For one of the exercises in the class, Tina had us listen to a few different songs she'd selected, and we sketched as we listened, making notes of what images came to mind. This is actually something I do periodically in my head when my husband and I go to the Philharmonic, but I can't tote a sketchbook into the theater with me and certainly wouldn't be able to see what I was sketching once those theater lights dim. So images dance in my head and disappear as soon as the piece is over. It was fun to do the same thing when I actually had pencil and paper in hand! 

artquilt notebooks.jpg

The sketch that ultimately became my snow-dye challenge project is at the left. The song it's based on is "Grace," by Michael Jones on his album Touch (1996--scroll down to find a sample of the song). If you listen to the sample, you'll hear that it's a pretty spare arrangement--lots of air. I kept seeing long rectangles, muted colors, space. 

And so, that sketch became "Neume."

The background is one of my recent snow-dyes done with Camel, Old Rose, and Smokey Grey. The rectangles are all my own hand-dyes. This project just kept building--I started with the base rectangles as in my sketch, but then decided they needed more dimension so I did a second layer. I fused the rectangles and did a very simple outline quilting around them. After consulting with my daughter, we decided the best quilting design would be straight horizontal lines, which really sealed the image it had come to represent as it developed--notes on a music staff. The rectangles float over the top of the horizontal lines. I did a faced edge so there wouldn't be any visual barriers on the piece.

"Neumes" is the name given to musical notation that developed in the Middle Ages, the precursor to today's written music. (You can still find them today in some chant music.) Neumes were square and mostly represented ascending or descending pitch, but not necessarily specific notes or rhythm until later in their development. The word "neume" comes from the Greek word for breath, "pneuma." I knew about the square notation but I didn't know what it was named until I looked it up after I had the piece done--the fact that it is related to the word for breath really sealed for me what this piece came to represent--a quiet peace. And so, it became the name of the quilt. 

The quilt shop where I took Tina's class is having a quilt show coming up in March--I think I'll be putting this in the show. Now it's time to get to work on some of those other sketches!


Craftsy Class Review: Learn to Sew: Simple Bags with Nicole Vasbinder

Craftsy

So, if you've been listening to my podcast or following my blog for awhile, you'll know my intense dislike for fiddly bits and anything that even vaguely smacks of garment sewing. 

I love seeing other people's completed fabric purses, totebags, and duffle bags. But let's just say that my own brief forays into the field haven't been stellar. I made one totebag years ago that I still use frequently but I can still see the places where seams didn't match up and I didn't quite box the bottom correctly. Still, it's pretty functional and nice fabric so I live with it. I had another attempt at a purse that ended up in the trash. My biggest issue? I'm not a garment-sewer, and a lot of purse/tote/duffle patterns are written with the assumption you are.

Foldover tote completed

Foldover tote completed

While toodling through Craftsy classes a week or so ago to see what was new, I saw Learn to Sew: Simple Bags with Nicole Vasbinder. I thought, maybe that's the ticket. Maybe if I take a step back and put myself in garment-sewing school (just the basics, ma'am), I'd grow more comfortable and wouldn't find these kinds of projects as frustrating. 

I completed the class in one weekend. It wasn't too painful, and I completed both projects in a reasonable length of time and with only a few curse words here and there (all while working on the dang boxed bottom of that pouch when my machine decided to throw a hissy). Enough background. Here's the review:

Demonstrating the pockets on the front (1 pocked subdivided into 3 parts)

Demonstrating the pockets on the front (1 pocked subdivided into 3 parts)

This class would be great for someone who's never touched a machine before. It really does start out with how to sew, as per the name of the class, "Learn to Sew." The first lesson walks through parts of a sewing machine (in brief), how to thread machine and bobbin, and so forth. There are some neat graphics in the first lesson about how the sewing machine works. The second lesson is sewing seams--of course, this class is doing it "garment-style" so seams are generally wider than this quilter is used to. I was proud of myself that I only went to default-mode of 1/4" seams twice--for the most part, I remembered to do those gargantuan 1/2" seams she uses. 

The third lesson had a little information about fabric in general, as well as some suggestions for picking fabric for the totebag. From there, it goes directly into the projects with some "teachable moments" interspersed. 

Showing the interior pocket and lining

Showing the interior pocket and lining

True confessions: I watched most of the lessons on 2x speed, until I got to parts I felt I needed to watch more carefully. I did get frustrated a few times because the video doesn't always completely match the written instructions in the downloadable materials, and the instructions sometimes leave out key information about placement and so forth. I had to keep referencing the video over again to make sure I was doing things correctly. It's not a huge issue in this case, but I would have wished for more accuracy in having the written and verbal instructions match. I made notes on the written instructions just in case I ever go back to use them again and don't want to have to watch the whole lesson over.

Zipper pouch completed

Zipper pouch completed

My suggestion is, if you're new to sewing or new to this kind of sewing, watch each whole lesson first, and then back up and start doing the steps with her. In some things it's confusing until she gets to later steps and finally explains how she's got things laid out or why she's doing something the way she's doing it. 

I can't say this class has made me all gung-ho to run out and start churning out purses and bags. But I think it did increase my comfort level with the differences between garment-sewing and quilting to a degree. The totebag and zippered pouch are cute, but if I were to make either of them again there are several adjustments I'd make to them to have them work better for me. I'm just not committed enough to either design to poke at them like that. I already own a lot of patterns for totes and purses; I guess this is something I can just keep plugging away at when I get in the mood...once in a blue moon.

Interior

Interior

The Basics

  • 7 lessons, ranging from 11 minutes to nearly 30 minutes
  • The first two lessons are introductions to the basics of your sewing machine and sewing in general. Lesson 3 includes some more of that introductory information, but then goes into the cutting of pieces for the tote.
  • Lessons 4 and 5 are the foldover tote, and lessons 6 and 7 are the zippered clutch. 
  • The class materials give some troubleshooting information about sewing on your machine, and then supply lists, instructions, and templates for the two projects. As noted above, I was disappointed that there were some discrepancies between the materials and the video lessons. Just have the materials in front of you while you're watching the lessons so you can make notes to yourself as you go.

This is a tough one for me to rank because it's a topic that I come to having a bit of an attitude already. In the grand scheme of learning how to do garment/accessory sewing rather than quilting, I guess I can give Learn to Sew: Simple Bags with Nicole Vasbinder my usual thumbs up. But I'm still not an enthusiastic garment/accessory sewist. 

Don't forget, Craftsy is having a Valentine's weekend sale--lots of great classes to check out. I'm working on another one I just picked up this weekend that's just chock-full of great information and much more in my wheelhouse...but more on that one in a later post!

(Using Craftsy links in this post helps support my podcast and blog. Thanks so much!)


Craftsy Class Review: Small Changes, Big Variety with Angela Walters

Craftsy

I'm celebrating Valentine's Day weekend by writing up another Craftsy class review!

Yep, another free motion quilting class. At this point I'm just looking for inspiration for designs. And this class was chock-full of that! So, here's my review for Machine Quilting: Small Changes, Big Variety, with Angela Walters.

Do I have to say again that Angela Walters is an enjoyable teacher to watch? I've lost track of how many of her classes I've reviewed on this blog now. And although I've done several of her classes and own several of her books, I have to give her props for not noticeably repeating herself. This class really felt like all new material. Sure, I'd already done spirals before, for example, but getting a few ideas for how to change it up to look like an entirely different design was very helpful.

As always happens with every FMQ class I take, just watching the teacher do the design helps me grasp more easily how to travel from one section to another, how to work my way back out of the corners I almost inevitably end up in, and how to ignore the couple of bobbles here and there and simply drive on. After all, as Angela Walters continually points out, for the most part I'd be using a thread that blends and those little bobbles would be completely unnoticeable. 

I decided to practice some of the designs on a practice quilt sandwich, but to make it interesting for myself I used one of my [less favored] hand-dyes to make the sandwich and then played with a lot of my funkier threads while I was quilting. I intentionally used contrasting thread so I could see what I was doing, so it's clear where my brain and hands periodically refused to play nicely together. But still n' all, I can definitely see the improvement in my FMQ skills after a full year of so many classes and practice. And that's nice. 

In any case, this class is just jam-packed with designs. Packed. I think I counted up something like 32 total designs, and that's just to get you started. Once you see her suggestions for variations it gets your mind running with "What ifs". 

Detail of practice 

Detail of practice 

If you've never free-motion quilted before, you'll need to start somewhere else because she really doesn't spend any time teaching about how to set up your machine, basting, tensions, threads, or any of that. But if you at least know the basics, you'll have no problem doing this class. Each lesson goes from a fairly simple version of the design to increasingly more complex variations. 

The Basics

  • 7 lessons. The 1st is a short introduction; the rest range from 19-27 minutes long.
  • The main designs include pebbles, swirls, ribbon candy, feathers, squares, and clamshells. For each design, she gives between four and six variations, plus ideas for additional variations you can try. 
  • The downloadable class materials are set up like her Free-Motion Quilting Workbook, with a drawing of all of the designs, each with a blank box next to it for you to do your own practice drawing before trying to stitch it on the machine. Although part of me struggled a bit with printing off so much blank space, I have to admit it was useful having the reference drawing directly next to the space I was drawing in rather than on a computer screen or something where I'm bouncing my eyes back and forth.

So, all in all, two thumbs way up for Machine Quilting: Small Changes, Big Variety, with Angela Walters.. I got a lot out of it, I'm still practicing some of the designs, and I'm brewing ideas for some of them on current projects.

By the way, it's on sale this weekend, too! Just click any of the Craftsy links on this blog and it'll take you to the sale.

(Using Craftsy and Amazon links on this post helps support this podcast and blog. Thanks so much!)


Fight the Funk Friday

Have I said recently that I'm cold? 

No, really. It's just a bit nippy up in here.

As a result, I think my body has gone into "store up the fat to make it through winter" mode. Sigh.

I had a gain at my weigh-in this week. I was expecting to be about the same, as I'd been about the same the couple of times I'd gotten on my scales between weigh-ins. However, I did go out on Wednesday evening with the family, and I didn't sleep well Wednesday night so I had a few salty crackers with lunch in my overtired-carbo-load reaction. But I didn't overeat this week and I did get more exercise in than usual, so I'm thinking it may have been a temporary gain due to excess sodium or something. If I'd been just a hair up, I would've bought it. But to be up as much as I was? Completely unexpected.

So that happened.

Still n' all, I'm pleased that I did more exercise and more tracking than I'd done in recent weeks, so the gain just means making some adjustments this week and doubling-down on exercise. 

Some little critter got out walking in this snow--sure wasn't me!

Some little critter got out walking in this snow--sure wasn't me!

Exercise and Steps: My steps haven't been that high but I have been doing my Daily Burn exercise programs just about every day. They're primarily strength and floor work, so they're not adding up to tons of cardio or steps--which I think is also part of the gain. I miss my cardio. I've checked in with my Daily Burn coach (might as well use her as much as possible while I'm still on the free trial) and she says that (1) my current program will get more challenging in the third week--which I start in another couple of days, and (2) she suggested a couple of other programs I might want to add in if I want to up my cardio. So those are both in the plans for this coming week. If the weather lets up at all, I may also try to get to the gym. 

Eating: I'm really focusing on planning out my meals for the day the night before--I always do better when I don't leave meals up to the whim of the moment--and tracking them afterwards as well if I changed anything mid-stride. I've also told my husband I really don't want to ever go out on a Wednesday night again, urgh. It's happened several times that we end up out on a Wednesday and I have that Thursday weigh-in. No matter how healthy a choice I make off the menu, I know it's always higher in salt than what I'd eat at home.

Schedule and Priorities: I did use my sunlight alarm clock a couple of times this week. I do like it! Well, notwithstanding the one time I was trying to turn the light off again to snooze a bit and managed to throw the whole lamp down the back of my nightstand. The whole "snooze" thing doesn't work as easily as the manual says it should. At least I couldn't see the light anymore. I've also used my sunlight lamp and desk humidifier daily. I can feel it when I skip one or the other!

Goals for this week: 

  • Stay warm
  • Plan and track, plan and track, plan and track
  • Do 30 mins exercise daily
  • Get good sleep every night (I've been staying up too late again)

Thinking about It Thursday

This week, I'm thinking...

  • That, for once, I'd just like to be warm.
  • How I don't even need to see negative-double-digits show up on the "RealFeel" temperature listing on my Accuweather app. 
    • Because I can feel it.
    • Even inside.
    • With two space heaters on me.
    • And wearing fuzzy socks, slippers, a hoodie, and fingerless-gloves.
  • That Craftsy classes are apparently like dark chocolate truffles for me (which is a very apt metaphor as we come up on Valentine's Day): I just can't resist them when they're on sale.*
  • That, on the other hand, it's a good way to get over my heebie jeebies about something that smacks of garment sewing. And fiddly bits. 
  • How nice it is to have my daughter home from college for a few days.
  • That I keep forgetting I have Monday off, so woohoo long weekend!
    • Even if it is going to be negative-double-digits on Monday.
    • All the more reason to stay inside and cuddle with my sewing machine.


*Craftsy affiliate link--by using this link you help support my podcast and blog. Thanks so much!

Fight the Funk Friday

Not really an amazing week, but I'm still working on small goals that will eventually all work together for good--one hopes.

Eating: Although I've not been stellar about planning ahead or tracking, I did make it back to my Weight Watchers meeting last night for the first time in three weeks or so, and I was down half a pound. I was expecting to be up, given that I hadn't been paying that much attention. Which means some healthy habits have truly become just that: habits. Yay for me. Goal for this week: plan and track, plan and track, plan and track. Did I say, plan and track?

Schedule/Priorities: I didn't end up using my sunlight alarm all week because my husband complained about the fact that it woke him up too early the couple of mornings I used it last week. Go figure: He's normally up and out of bed well before me. Apparently we need to communicate better as to what mornings he might want to sleep in. I do really like using that alarm--it's a much more gentle way to wake up. So goal for this week: Try to ascertain ahead of time what days my husband will be up early enough for me to use my alarm. I do still need to work on getting up earlier in the morning.

Exercise: Ahem. But there's hope.

After a few more days of "It's way too cold and snowy to make me want to leave the house to get to the gym," I finally subscribed to a 30-day free trial of Daily Burn on Wednesday. I also decided to subscribe to the month's free trial of their personal coaching system. February is really my most critical time in terms of keeping me motivated, so 30 days works for me. By March things are starting to break up around here--although March is our big ice month, but at least we start seeing some sun here and there it makes me think, "spring is almost here!", and I'm much more likely to find the motivation to get to the gym. But until then...

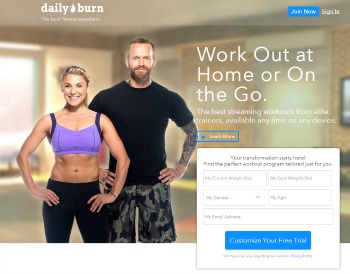
Daily Burn is a collection of exercise videos of a variety of types (strength, cardio, pilates, yoga, etc), rated for fitness level and exercise experience. You can use your mobile devices or stream them to your TV, so they're very portable--good for those of us who travel. When you sign up on Daily Burn, you fill out a short assessment questionnaire and then it gives you a suggested program of which exercise programs to do on each day. If you follow the program exactly, it'll slowly work you through to increased levels of difficulty which, of course, you can also control yourself. If you're not ready to move on, stay where you are. If you think you can skip ahead, skip ahead. I've only been doing it for a couple of days so I can't fully assess it yet, but I can tell you I'm feeling it! 

It has a nutritional component which I'm ignoring as I'm doing Weight Watchers and perfectly comfortable with my knowledge of nutrition; I'm also completely ignoring the supplements section which, in my opinion, is really just them trying to sell stuff. But I do like the way the fitness programs are done so it's okay with me to skip the rest of it.

I've already had a couple of introductory email exchanges with the personal coach I was assigned--Meg. I was impressed in that the second email I got from Meg (after I answered all her general assessment questions in the first email) was relatively personal. I could tell some was copy and paste, but hey, we're just getting started. I'm more skeptical about how useful an email coach will be. It's an extra fee over the top of the monthly cost for Daily Burn so I'd have to be really convinced it was helping to go beyond the free trial. I've had a real-live personal trainer in the past but it's hard to keep up regular meetings with my schedule, so I suppose the one thing an email coach would have going for her is she'd be able to poke at me even when I was traveling. Hmm. We'll see how it goes, anyway.

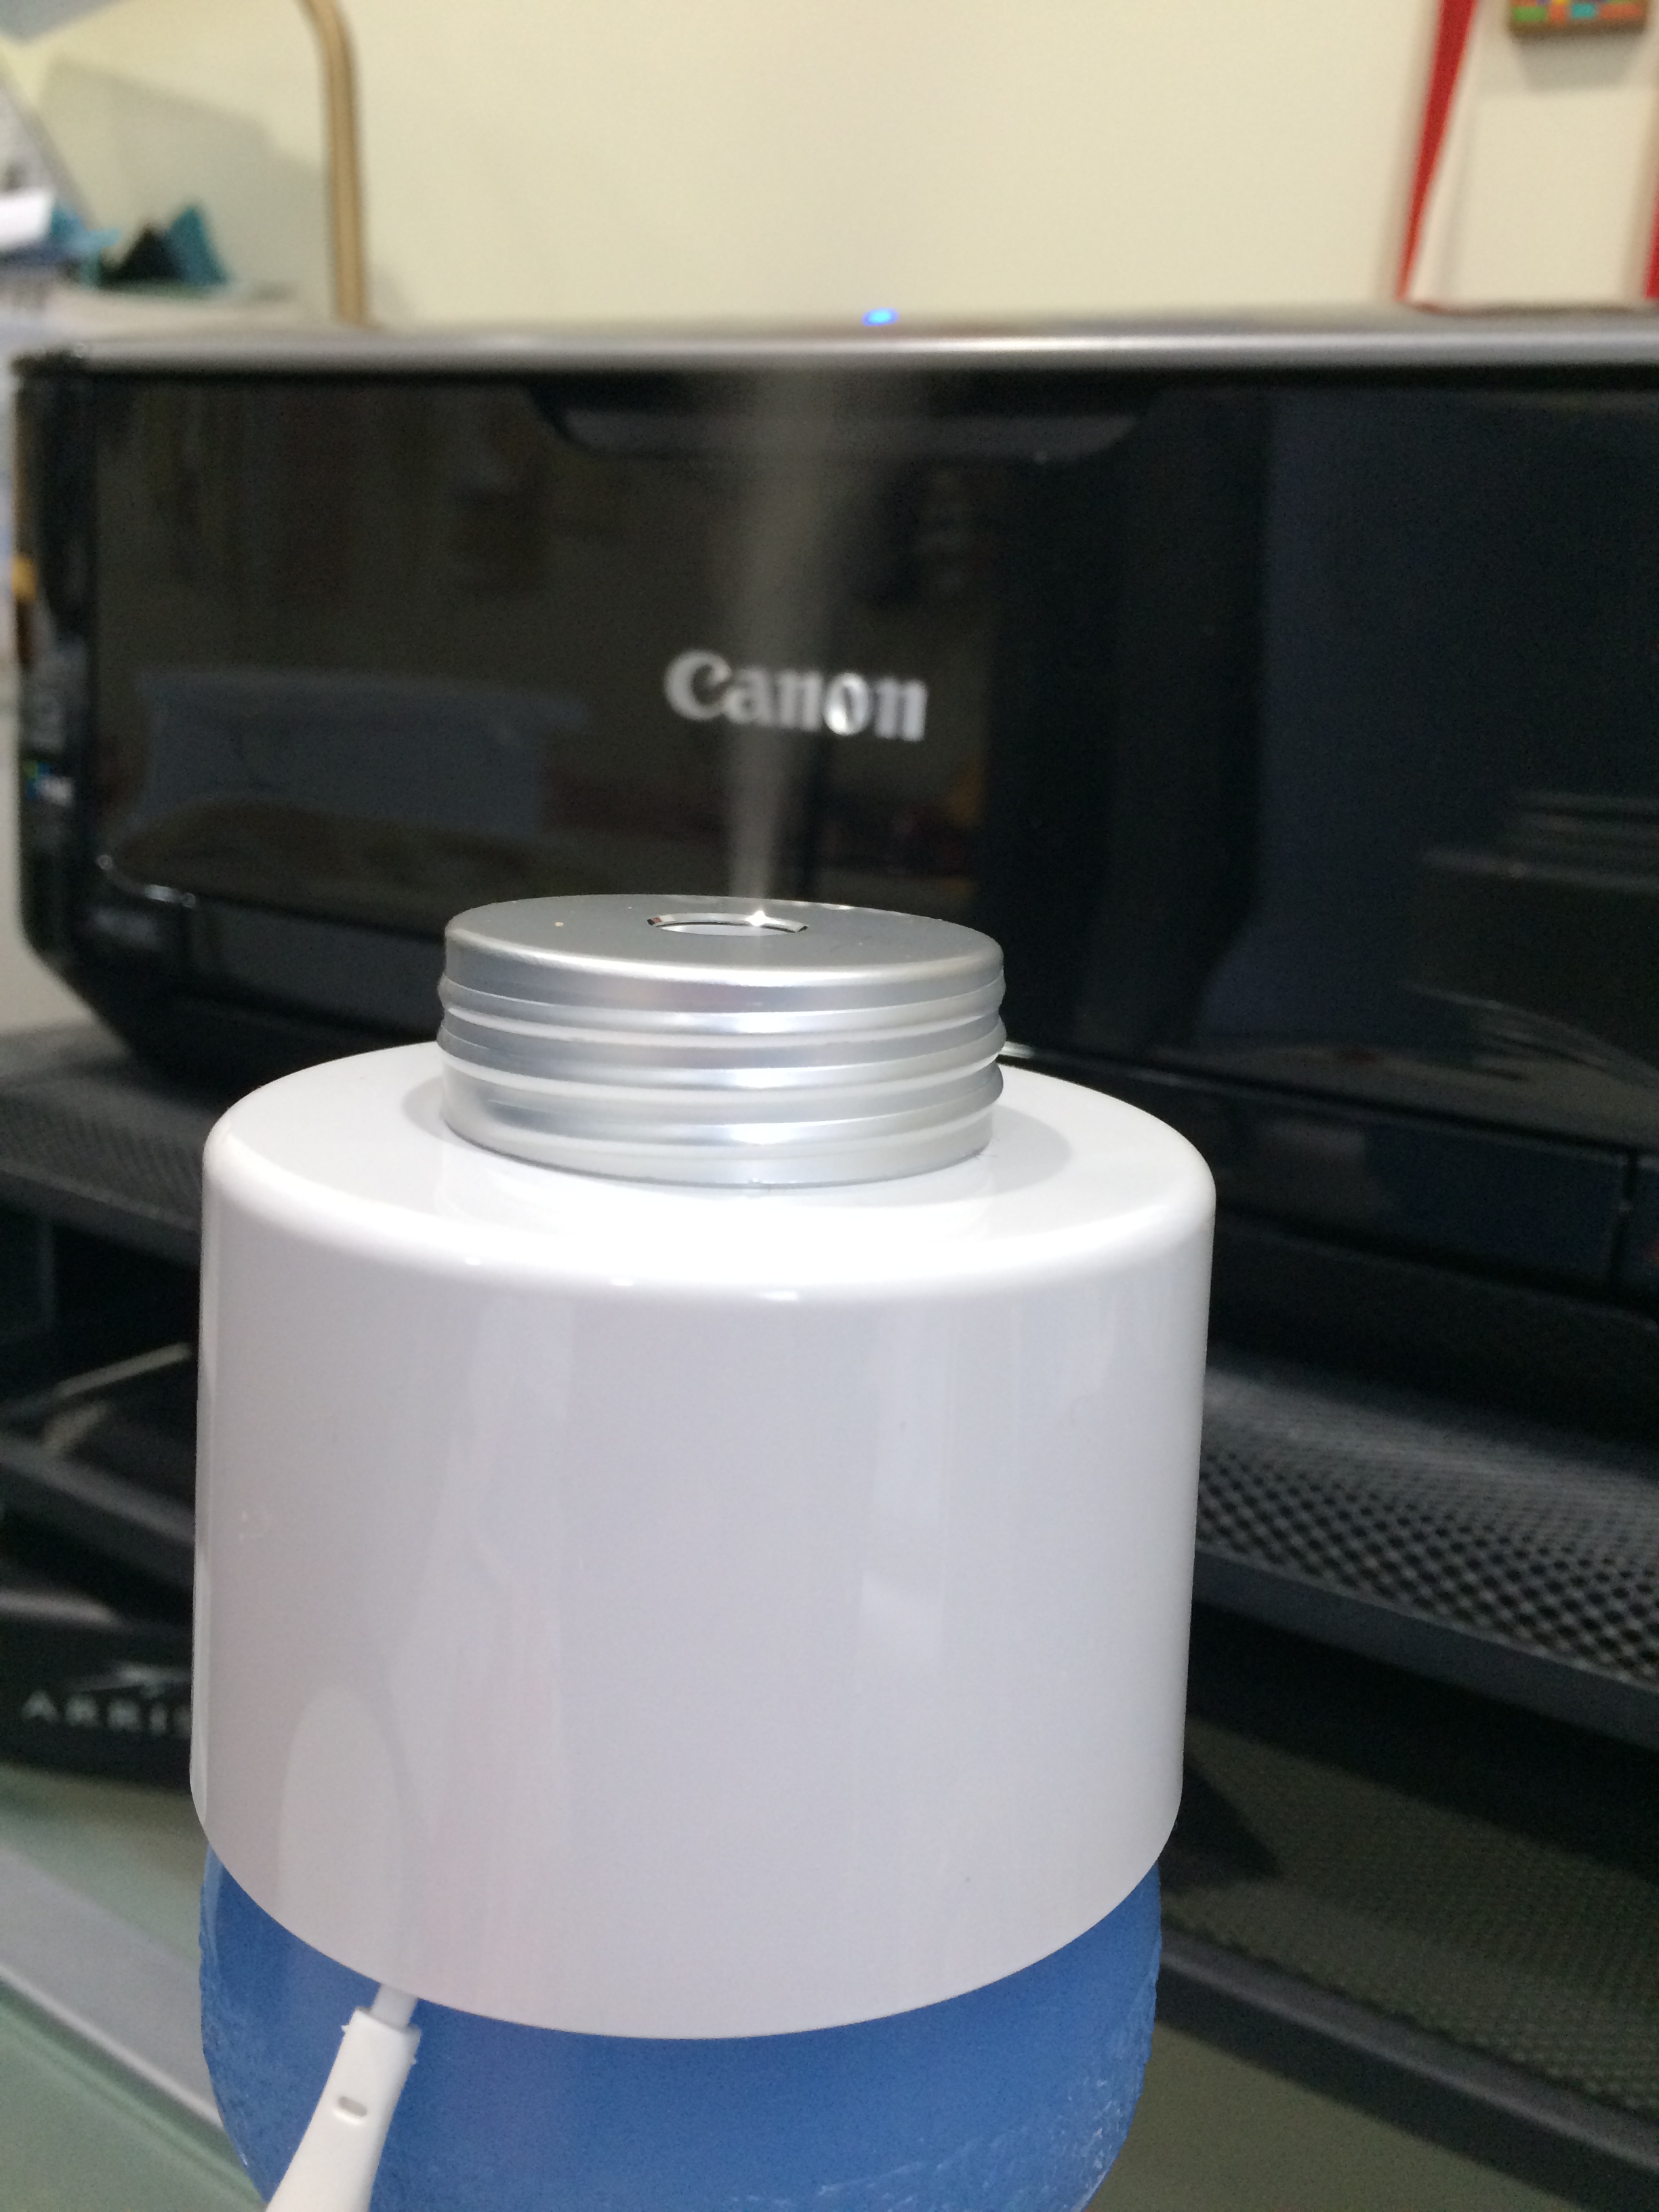
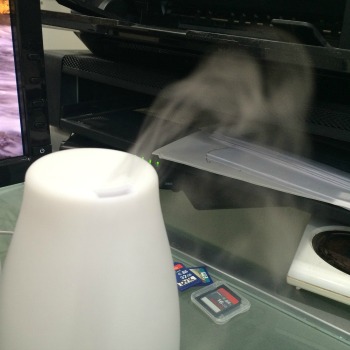
As a follow-up to last week's reference to desktop and portable humidifiers:

The portable humidifier attached to the top of my water bottle, steaming away.

The portable humidifier attached to the top of my water bottle, steaming away.

The good news is, the water bottle humidifier works. The bad news is, it only runs as long as the filter tip that hangs down from the unit can still reach the water level in the bottle, and the water goes down pretty quickly. So I'd say it maybe has 3-4 hours in it, which is only half a night. I suppose half a night is better than none. And I do often (ahem) get up in the middle of the night so I could refill if needed.

The other humidifier, on the other hand, goes all day! I turn it on around 9a and it's still kicking out the steam when I turn it off at 5:30 or 6. Sometimes I'll keep it running longer if I'm working on blogs or whatever. I believe it has an auto shut-off if it runs out of water but I haven't run it long enough yet to find out. And it's fun to decide what mood lighting I might want for any given day--blues and purples have been popular, so far--although I usually just keep the light part turned off. I love that thing!

Thinking about It Thursday

This week, I'm thinking... 

Yet another snowfall...

Yet another snowfall...

  • How good it is to have friends. 
  • That cold and snow is okay, but I could do without the cold.
  • That people really should know to be quiet in study areas in a university library. 
  • That my dogs turned out to be less a distraction than those chatty-cathies and chatty-chucks in the library. 
  • That my dogs were certainly glad to see me come home again to work when I gave up on the library. 
  • How badly I really need to kick my motivation back into gear and get some exercise.
    • No matter how cold and snowy it is outside. 


Snow Dyes Chapter 3

Get ready for some serious cool.

In more ways than one. (Ar ar ar.)

Here are the results of the second batch of snow-dyes I did this weekend, the 3rd batch for the winter (hence, "chapter 3"). I may do another batch tonight since we have about 12" or more of fresh snow out there. Hate to let it go to waste!

For each set, there are two 1/2 yard pieces, and then I took detail shots just so you can really get a feel for the effect that snow-dyeing creates.

First batch: Turquoise and Black.

(Sorry--forgot to write down which black was which. I used 628 for one and 629 for the other--ProChem names.)  Yes, it looks like I threw purple in there, but I didn't! That's the black breaking.

The next batch was one of my favorite combinations to ice dye or snow dye, because it breaks so wonderfully. 

Batch 2: Teal, Grape, and Black.

(Whatever number black the other one wasn't). Teal is a Dharma color, the other two are Pro-Chem.

1st piece

1st piece

1st piece detail 1

1st piece detail 1

1st piece detail 2

1st piece detail 2

1st piece detail 3

1st piece detail 3

2d piece

2d piece

2d piece detail 1

2d piece detail 1

2d piece detail 2

2d piece detail 2

Third batch: Ecru, Old Rose, and Camel.

Now, the final batch heads in a completely different direction. Neutral dyes are just so much fun to break!

Ecru, Old Rose, and Camel 1st piece

Ecru, Old Rose, and Camel 1st piece

1st piece detail

1st piece detail

2d piece

2d piece

2d piece detail

2d piece detail

It all looks so cosmic, doesn't it? Groovy.

If you've listened to my most recent episode (posted 2/1/15), you'll know that Sandi of Quilt Cabana Corner and I have challenged one another to a Snow-Dye Duel. Well, okay, a Snow-Dye Art Quilt Challenge. We've both been snow-dyeing lately (she's in MA, I'm in Western NY, we have a lot of raw material to work with these days) so, in order to be sure we use some of these wonderful new creations we're making, we've challenged one another to make some sort of project using at least one--if not more--of our snow-dyes by March 15. At some point, I'm going to have stop dyeing and figure out what I'm going to make.

But wait...What's that I see? More snow falling outside my window? Heading to the basement...


More Snow Means More Snow Dyes

We got more snow! So, of course, I ran to the back yard, shoveled some into a bucket, and headed for the basement.

I did half yards this time, and in this batch stuck with variations on yellow/orange/red (mostly) so I could play with proportions of each, variations on each (tangerine dye versus orange dye, etc.), and also be able to more easily rinse/wash it all together.


Tangerine and Strongest Red combination. The one in the back has more tangerine and the one in the front more red.


Once the snow has melted--so you can see how I had the fabrics arranged for the dye process.


Tangerine and Strongest Red #1 (the one from the back of the snow picture)


Tangerine and Strongest Red #2 (the one in the front of the snow picture)


Next batch: Golden Yellow, Strong Orange, and Mixing Red


Now with snow melted.... These were both just sort of scrunched up, although I did a few little loose spins in the one on the bottom. I used a lot less red in the one in the back, emphasizing more of the yellow and orange; the one in the front got a lot more of the Mixing Red.


Golden Yellow, Strong Orange, and Mixing Red #1. 


Golden Yellow, Strong Orange, and Mixing Red #2. Although it was quite interesting to me that some of it looks more fuchsia. I'm thinking that must come from the Strong Orange breaking.


Finally, the yellows. In this one I combined Sun Yellow and Antique Gold. I wanted to see how Antique Gold would break.


Here they are dyed. I did a loose pleat on the one in the back. The one in the front is just scrunched, nothing fancy. I believe I used about the same proportions of dye on both, although the one in the back may have gotten a little less of the gold.


Sun Yellow and Antique Gold result #1. The white splotches at the top are likely places where a little bit of fabric hung out over the edge and wasn't getting hit directly by snow and dye. I tried to keep track of that but things can move around when you're stacking the snow up.

The pleat isn't all that pronounced, but I could use this fabric for depicting reflections on water and that kind of thing. (The "Rorschach Test" of hand-dyeing: "What do you see in this fabric?")

And obviously Antique Gold has a lot of green/brown in it. Makes sense, when you think about tarnish and all that.


Sun Yellow and Antique Gold result #2.

You can see a lot more of the green coming through in this one. That's why snow dyeing is so much fun. You never quite know what you're going to get!

Stay tuned for Snow-Dye Batch #3, which is in the rinse/soak cycle as I write this. And we're due for another storm tonight and tomorrow, woo!

Craftsy Class Review--Cooking the Perfect Steak with Bruce Aidells

Hello, World!

I finished all the cooking classes I had bought from Craftsy in 2014. I love taking cooking classes because even with stuff you think you know how to do, you can generally pick up some great new tips. (Brendan McDermott changed forever how I scramble my eggs, and Molly Stevens put a big twist on how I'll be roasting chicken from now on.) So, one weekend in January when I was hanging out in my hotel room trying to turn my brain off from a day of meetings so I could go to sleep, I was tooling around in Craftsy's sale section and landed on Cooking the Perfect Steak with Bruce Aidells. 

Now, mind you, my husband has it down when it comes to using our grill in the summer. No problem there at all. But he was convinced there was no point in having steak in the winter. In his mind, there was no way you could do a steak as well in the kitchen. So I figured this class might offer us some alternative cooking methods that could keep us in steak year-round. 

NY Strip Steaks with two different dry rubs to suit our differing tastes, searing pleasantly in their cast iron skillet.

NY Strip Steaks with two different dry rubs to suit our differing tastes, searing pleasantly in their cast iron skillet.

Bruce Aidells clearly knows his stuff and he's good at explaining everything he does. I still have difficulty remembering which cut of beef is which when I'm facing the butcher case trying to pick out the right cut for the method I want to use it for, but Bruce's explanation of the different types of steaks and their respective levels of tenderness was very helpful and clarified for me some things I've run into over the years.

His class does cover outdoor grilling techniques, and I may have picked up a tip or two there; however, for me, the real benefit of the class was the first couple of lessons that all involve the stove and oven. I bought a couple of strip steaks and used his techniques to make them for dinner one night, fervently hoping I didn't mess something up because those puppies aren't cheap.

Fortunately, I didn't mess anything up. I used a dry rub we already had on hand because I discovered I'm out of a few of my go-to seasonings (when did that happen?). He gives a recipe for a dry rub but it didn't appeal to me--he has other recipes for condiments in the class I can more easily see myself adapting, but I get a kick out of creating those things myself anyway. But this time, I just cut to the chase and opened a jar.  

The steak turned out very well--I was shooting for medium-rare and hit the target. It was an easy enough process, of course, and paying attention to what Bruce Aidells had said to look for at various stages helped me keep on track with getting the level of doneness I wanted. DH and I both liked the results, although he wouldn't quite get to saying it was just as good as the grill in the summer. But hey, it was still good! 

Yum!

Yum!

The Basics: 

  • 7 lessons ranging from 14 to about 24 minutes. The first lesson includes information about what to look for in a good cut of meat, terms, grading, aging, and so forth.
  • Lessons 2-5 each address a different cooking technique--the first two indoor, the second two outdoor. In each, he talks about different cuts of meat that work well for each technique, and gives a recipe (with ideas for variations) for a rub, marinade, or side dishes to go with the steak.
  • Lesson 6 talks about how to measure doneness and gives a very thorough look at different types of thermometers.
  • Lesson 7 addresses knives, carving, and additional condiments.
  • The class materials are 11 pages of recipes, both for the steaks as well as the condiments, side dishes, and so forth.

There was only one "miss" that I noted in the class, and several people had commented on it in the class discussion so he was able to explain. In lesson 6, as he describes each level of doneness (rare, medium rare, etc.), he doesn't show an example of what it looks like. It should have been easy enough to have one steak of each doneness sitting in front of him or flashed on screen as an image. He explained that he expected pictures to be in the class materials but the graphic had gotten inadvertently left out. First of all, there's a reason why you do a PDF: you can fix it and upload a new version easily enough. But even without that, why leave it to the PDF? You're on video, show the examples on the video.

Still n' all, that's my only quibble with the class--and for me, it wasn't a big deal because I know what the degrees of doneness look like. But if I were a new cook, I'd have struggled a bit with that section.

So I give Cooking the Perfect Steak with Bruce Aidells one thumb up, one thumb mostly up but maybe leaning just a hair off-center. Still, if you're a carnivore, this is a good class!

(As usual, using the Craftsy links on this blog post help support my podcast and blog. Thanks so much!)


January 2015 Craftsy Class Update

I had this done before January 31 but was out of the house yesterday and forgot to post it. Oops. 

As I'd said at the end of 2014, although my Craftsy classes are no longer part of my quilty resolutions for 2015, I do want to keep making progress. I've learned so much from them! Therefore, I'm going to keep posting my monthly updates here. I've found, however, that a couple of the classes I'm now working on are definitely long-term classes so you'll be seeing them listed in the "in progress" section for some time to come.

By the way, one of my podcast listeners wrote in with her own Craftsy count, and she's got me seriously beat in terms of quantity! (You know who you are!) So I'm not the only one out there...

New Completions

(+1)

 (Does finishing the January block of the Craftsy BOM count? I could count that as a new completion every month!)

Classes in Progress

(5--ahem. Maybe some more "in progress" than others. But still.)

Classes added this month

(3)

  • 2015 Craftsy Block of the Month with Jinny Beyer (see blog about this here)
  • Cooking the Perfect Steak with Bruce Aidells--I finished all the cooking classes on my list and was really hankering for a new one. I've got a few on my wish list but I figured my husband would prefer me to get this one over Thai or Mediterranean cooking. This one will go fast--I'm sure I'll be using a technique or two quite soon!
  • Crazy Quilts with Allie Aller--this was on my wish list for several months and I knew I'd buy it after finishing an embroidery class or two. When Craftsy had it's big sale over a weekend I was out of town and feeling a bit self-indulgent, I bit. I've watched the first lesson or two and I'm really looking forward to digging in. She's a good teacher and I'm a huge fan of crazy quilts. But a few other projects need to move along further first.

Classes To Be Completed

Current count:  14 (+2--oops, lost some ground there!)

Completed Classes (all topics)

Current count: 46 (+1)

Fight the Funk Friday

Just realized I never scheduled this to post Friday! Oops...

This week (in this case, my week goes Friday to Friday) didn't start out stellar in terms of eating and exercise as I had the weekend away with my husband for his birthday. That meant a weekend of restaurant meals, and as it was pretty dang cold, we didn't do a lot of hiking as we often do. We walked an outlet mall, though, so I got a few extra steps in on Saturday. Sunday I came home with vertigo due to overactive heaters in our room at the inn (my vertigo is triggered by sinus issues), so most of the week was spent getting my balance back. It does look like my weight has stayed the same, though, so I'm doing okay.

That being said, it was a great, relaxing weekend away and we did a lot of reading, so that's fighting the funk in a different way.

Products

Travel humidifier

Travel humidifier

So here's a new thing. When I was mentioning on Twitter about the vertigo, one of the #twilters (@jimtami) mentioned that there were travel humidifiers on Amazon. I'd never even thought about a travel humidifier, so I quickly checked it out. Yep! I'm now the owner of a humidifier thingamabob that fits down into the next of a water bottle so I can run it next to my bed at night when I'm in hotel rooms. Since my worst bouts of vertigo and sinus-induced migraines have always been in hotels, this should do good things. I don't have to travel for awhile, though, so I'll just have to test it out at home.

My current diffuser

My current diffuser

I also finally ponied up for something I've been looking at for awhile--an electric aromatherapy diffuser. I've had an aromatherapy diffuser on my desk for probably 18 months now (largely for eucalyptus and peppermint for said sinus issues) which I really like from a symbolic aspect, but it uses a tea light candle and a bowl of water. I'm limited as to where it can sit and have me still feel the effects, so it's front and center between my two computer monitors. As careful as I am, I can't tell you the number of times I've moved a book or notebook and sent water cascading across my desk. (I haven't, however, ever left the candle burning when I was gone or set anything on fire, so there is that.) So when I ordered the travel humidifier, I finally also got myself an electric aromatherapy diffuser/humidifier for my desk. No more floods, no more risk of going up in flames.

New diffuser--look at that puppy crank out the mist!

New diffuser--look at that puppy crank out the mist!

I guess you could call this "Fight the Funk, Sinus Edition." 

Thinkin' about It Thursday

This week, I'm thinking about...

  • How good routine feels. 
  • That when I have an overwhelming list of projects to accomplish for work, breaking them down into little, concrete subtasks and just plowing through those tasks, checking each one off as "complete" gives me a better sense of control and feels much less overwhelming.
  • That yes, I sometimes put things I've already done on my to-do list just so I can check them off as "complete" to make myself feel better.
    • Because sometimes, we'll do anything we can to feel less overwhelmed.
  • That once in awhile, it's nice to catch sunrise.

2015 Quilty Resolution--January Journal Quilt Done

So the one thing I've always wanted to do that I hadn't done yet--my 2015 Quilty Resolution challenge--is to make one journal quilt per month in 2015. 

Several years ago, there was a national quilt challenge named "Journal Quilts."  I was first introduced to the Journal Quilt project when I went to the International Quilt Festival in Houston with my mother in 2005 (if I can believe the festival pin that's sitting in my sewing cabinet). I fell in love. I spent more time in that exhibit than in any other part of the show. I even bought the book. I highly recommend it--I've spent a lot of time with that book over the years.

I'm using my journal quilts as experimental fun. My personal rules are:

  • Each one will be 8 1/2" x 11" (based on the original Journal Quilt challenge size).
  • Each one will be an opportunity to experiment with something I've not done before or want more experience with.
  • I won't take too much time with them--they'll be spontaneous and fun, even if they ever end up dealing with more serious themes.
  • I won't worry about the product, just the process. If it turns out looking like cr*p but I had fun and learned something, it's all good.

For January's journal quilt, I really wanted to try my hand at using sheers. I've seen it done, I've read about it a lot, I've just never done it myself. Just as I was starting to think about it, I saw an article on sheer collages in Art Quilting Studio magazine Winter 2015 (the same issue that our very own #twilter Carol McDowell is in!) and I was off and running.

For my image inspiration, all I had to do was remember the glorious sunsets I'd seen in Burma, especially in Bagan. It's probably the most famous tourist spot in Burma and I can see why although my personal favorite was somewhere else, but that'll wait for another blog post. We spent one evening on top of Shewsandaw Pagoda--famous for its sunset-viewing opportunities.

Shwesandaw Pagoda--all of the sunset photos are mine; the photo of the steps up the pagoda was taken by one of my friends.

Shwesandaw Pagoda--all of the sunset photos are mine; the photo of the steps up the pagoda was taken by one of my friends.

Rather than lock myself into trying to represent a single image, I didn't even look at the photos before I started working on my journal quilt. I wanted something that would capture the shadowing of the landscape, and also give some sense of the immensity of that pagoda and the insanely steep/high stairs you had to climb to the top. So I mentally compiled all the images in my memory and abstracted a bit from there.

And thus: January's Journal Quilt "Sunset in Bagan" is complete.

In the name of "getting over myself," I didn't sketch anything out ahead of time. First, I fused backing to a piece of batting, and then I put fusible on the front of the batting as well. I free-hand cut most of the fabric pieces although I did loosely sketch the pagoda shape on the cloth, but in cutting it I didn't really follow my own lines so it was still spontaneous. Then I just laid things out as they looked good to me, and did a quick fuse-tack to get it all in place. The fabrics for the background and pagoda are all my own hand-dyes.

I used a piece of nubby silk for the sun and highlights on the sky fabrics. Finally: the sheers. I only ended up using two as I didn't want to entirely lose the fabrics behind. There's a darker burgundy sheer that I layered in a way that reminded me of the mists drifting through the valley--you can see a couple of strips of it in the photo on the left. IT's got a beautiful gold sheen to it that just very barely comes out in the finished product. 

Then I layered a very light gold sheer with a bit of sparkle to it over the whole top, again because it reminded me of the mist on the valley. I used a fusible spray on the burgundy sheer because I was afraid my Misty Fuse would show through. I was a little concerned when I first put the spray on but it did dry entirely invisibly. I didn't fuse the overlay sheer--just pinned it to hold it in place until I quilted it. 

For quilting, once again, I made myself just haul off and start quilting lines. Oh, but I wanted to draw it out first! Still, the name of the game was "experimental fun" so I just did something that represented the stairs and the different levels on the pagoda that you could stand on to view the sunset (we were on the top one). The background just got swirlies and lines to show rolling ground and a slight breeze.

Finally, I did a zig-zag to stabilize the outside edge and then couched yarn as a binding*. One pass of yarn looked kind of skimpy, so I went through a second time with another round of yarn. Bingo! I really like how that turned out.

So when I compared my finished product to the photos, did I get the shape of the pagoda exactly right? Nope. Do the stairs really stand out in my quilting as much as they do in the photo? Nope. 

But do I care? Nope. 

I had a ball. And I got to play with my hand-dyes and with sheers. And I learned a few things in the process. 

So the January Journal Quilt experiment is a success!

*Thanks to Carol Ann Waugh's Stupendous Stitching class on Craftsy--I first learned this technique when I did her class last year. (The link to her class is an affiliate link--thanks for supporting this podcast and blog! The second link is to my review of the class.)

Scrap-in-a-Box (Scrapitude 2015)--Step 1 reporting in

Okay, you may recall me talking about my "secret project" that I was working on last summer, that really wasn't actually all that secret. I was working my way through Charlotte's 2015 Scrapitude mystery quilt "Scrap-in-a-Box" as a pattern tester/mystery tester  last summer so that I'd be prepared to have everything on my blog this year when she was ready to go.

And then she was able to launch her own blog. Woo hoo for yoooo, Charlotte! I was thrilled! And I immediately ceased work on the final stages of Scrap-in-the-box knowing that I'd be able to catch up with everyone once y'all got to play along too. I had a few other pressing-need-projects to refocus on at that point, and I thought it would be more fun to do the last couple of steps in a crowd.

Unfortunately, because I'd originally been taking pictures with the intention of posting steps, I have great photos of individual units under my sewing machine, but not the nice reveal of all the completed units for any one step. And after having worked through the mystery steps with me, Charlotte changed them up a bit so my unit photos don't always match what you're actually going to be doing--at least, in terms of what units get done when. 

So this is all I have to show you for Step 1. One measly unit.

But really, I did get all 82 of those units done; it was just a long time ago and they all got...well...I can't really tell you now, can I? 

Be sure you've subscribed to Charlotte's blog to get the rest of the Scrapitude steps: scrapitudequilts.com.  The next one is released on February 10, 7:00 p.m. Eastern (or thereabouts). You'll also want to check out one of her recent posts on what "random but pleasing" means--great information!


Mad Quilt Scientist Walks Again--Snow Dyeing

When life hands you lemons, you make lemonade.

When life hands you bales of snow...

When I started feeling somewhat better from the Great Sinus Infection of 2015, I decided I could probably handle doing a little dyeing. It's been a long while since I've been in my dye studio in the basement, so after I did a little cleaning up and removing of cobwebs (!) I made good use of the dogs' time outside and filled up three buckets of snow while they were snuffling about. 

This is not the first time I've snow-dyed, but last year when I did it, I followed directions on on a few blogs that all said about the same thing, but I wasn't pleased with the results. Most snow-dye instructions I've found call for creating the dye concentrate with water first, then using the water dye on the snow. Well, what happens when you take a water-based dye and let it melt with snow? Of course--it dilutes. I got very pale pastels. Pastels are all well and good but I like a little more saturation, so this time I did what I do with ice dyeing--I just dumped that dye powder right on top of the snow.

It does, indeed, use up more dye powder that way but hey, I only do this a couple of times a year so I'm okay with that. 

I did three different color combos and three different folds on the fabrics (one yard each). 

The first was fuschia and intense blue, and I folded the fabric in quarters lengthwise and then did a loose pleat.

The second was stormy grey, old rose, and boysenberry, and I spiraled the fabric.

The third was turquoise, lemon yellow, and tangerine, and I just scrunched it up.

So here's what I remembered while I was rinsing the fabric. Turquoise and tangerine are pretty close to being complementary colors, which means that mixing them gives you something in the neighborhood of brown or gray.

I'd been thinking more about the turquoise and yellow, and about the tangerine and yellow, without really thinking through the tangerine and turquoise. So, this isn't the most attractive end result but I already have some ideas for possible overdye designs I might do. (I like a nice neutral but I'd want it a little more intentional and not just muddy like this.)


And here's what I learned: Boysenberry is an aggressive little fella. I used more gray and rose than I did boysenberry--I just barely dotted the boysenberry on there. But it ran amuck.

I was surprised with the amount of light I ended up with in the middle (a very pale gray-purple with one bright random splotch showing). I thought I'd spun it more loosely than that. However, I can play with that, so no worries there. I don't mind this result at all--it's just not what I was picturing it would be. But that's what I like about hand-dyeing. There's always that surprise element involved.


Finally, the fuschia and intense blue combination--this one I knew what I'd get, more or less. There's a lot less variability when you're only working with two colors.

Because of the way it was folded and pleated, one end has more blue than the other. I'd planned on cutting all of these into fat quarters but I'm thinking this one will probably do better has half yard pieces so each piece would have both blue and pink; the spiral one above will stay as a whole piece; and the muddy mess at the top needs more work done on it anyway.

It was fun to be in my dye studio again, but I want to actually have a plan for my next dye session so I've got to do some thinking first. Plus, I think it's time for me to break out the wax resist (batik) supplies...