
I'm going to be doing a podcast episode this week on this:

...in which I'm AWOL...
This week is one of my work events in which I moderate a conference call every evening of the week; because we're a national organization we have to schedule the calls at Past-Our-Bedtime in Eastern time zones in order to hit Barely-Home-From-Work in Western time zones. And it always takes me a couple of hours to "come down" from the calls when they're over--IOW, stop my brain from spinning with everything we talked about on the call so I can finally (and generally with the help of pharmaceuticals) drop off to sleep. The first day or two I'm filled with energy and excitement. By mid-week, I'm dragging. By the end of the week, I don't trust myself with heavy machinery or sharp objects.
So I'm not able to post a podcast this week. Nor blogging. Nor actually touching my sewing machine.
I have, however, made a priority of getting to the gym for as much time as I'm able between work and the conference call. Yay, me.
Friday night is the last call and I have Monday as a comp day, so you should be hearing from me again soon.
Scrapitude Progress and Linky #2
I consider it a significant benchmark that I finally finished cutting all my Scrapitude pieces.
Woohoo, yay me, happy dance, n' like that.
I got home Tuesday afternoon from my week of back-to-back meetings. Wednesday was a comp day, and I was a bit fried. I didn't feel like going out of the house to get batting for Baby Quilt Remix and was a little worried about trying to do any machine quilting, as tired as I was. I decided, therefore, it was a good day to crank up Netflix on my iPad (Midsomer Murders, my second time through the series) and simply knock out the rest of the cutting I had to do for Scrapitude. I do already have a little sewing done on the four-patches from Step 1, but not much.
I'll be putting out a podcast episode this weekend (already started making my notes!). Meanwhile, I decided it might be time to do another Linky Party. I'm going to leave this one open until next Wednesday so you'll have the weekend to make as much progress as you'd like. That also means you may want to check back periodically to see who has linked up!
Are you doing the Scrapitude Mystery Quilt by Charlotte? If so, link up your blog post about your progress so far here!
Everyone else, check out the linkies below to see how everyone is doing! (You'll need to click on the InLinkz widget below to see the links or add your own.)

Memories of Sue
We have lost a shining light in our world.
This past weekend, one of the members of my quilt guild, Sue, passed away quite unexpectedly. She had been on our guild retreat but began to feel unwell; two of her friends had driven her home on Friday night and advised her husband to take her to the hospital where she was admitted for observation and testing. It was quite a shock to receive word that she had passed away late Saturday night. I'm glad my guild friends at retreat had each other for support and comfort in such a difficult time.
I just returned home from the calling hours at the funeral home (the funeral itself will be private). I went with three of my guild friends; when we arrived, the line was out the door and into the parking lot. There were several hundred people that wound their way through the funeral home and into the chapel to greet the family. I remarked to one of my friends that it went a long way to appease my sadness to see such an outpouring of love and the number of people whose lives Sue had touched in one way or another. Most of my guild were there, as well as members of several other quilt groups that Sue had been a part of. We talked about how none of us had even known how many things Sue had been involved in until people were running into each other at the funeral home and sharing stories of how they knew Sue.
Rather than a casket or urn in the funeral chapel, there was simply a display of a couple of her quilts and other handcrafts that Sue had made, with several professionally-done photos of her with her family. There was a small sign on the photos that said those photos had just been done the weekend before. What a treasure for the family to have.
As I'm writing this, I'm still trying to imagine our next guild meeting without Sue there. My head won't wrap around it. Next month's meeting will be hard in some ways, but in others it will give us the chance to have our own memorial, I suspect.

Sue had a wonderfully dry, often sarcastic sense of humor. She led us in the Hokey Pokey and other stretch breaks during retreats, and then would quietly sit at her machine, periodically cussing it out under her breath if it didn't cooperate. (Okay, sometimes not quite so much under her breath.) If I teased her, I could rely on her looking at me with a twinkle in her eye while she said, with feeling, "Bite me." Sue made me laugh.
She also had a tremendous heart. It was Sue who spearheaded our monthly donations to a local women's shelter and often led other charity projects for other sites. Whenever I made a donation quilt, I'd hand it directly over to Sue with confidence that it would go where most needed.
I will miss Sue's laugh, her caustic wit, her willingness to be silly, and her fervent cussing at her machine. And I will miss her drive to make the world a more soft and comfortable place for people during their time of need.
The next donation quilt I make, Sue, will be in your honor. Thanks for all you did for our guild. I count it a privilege that I had the opportunity to know you.
Hand-Dyeing Results
As you're reading this, I'm driving far, far away...
I'm heading a bit south for a packed week of back-to-back meetings, starting as soon as I get out of my car at my destination on Wednesday afternoon. I get home next Tuesday, so I'm making this quick post to tide us all over until I'm home and might actually be able to accomplish something again. (Well, accomplish something other than getting some sleep.)
You may recall that I did some more dye experiments on Sunday afternoon. The results are in!
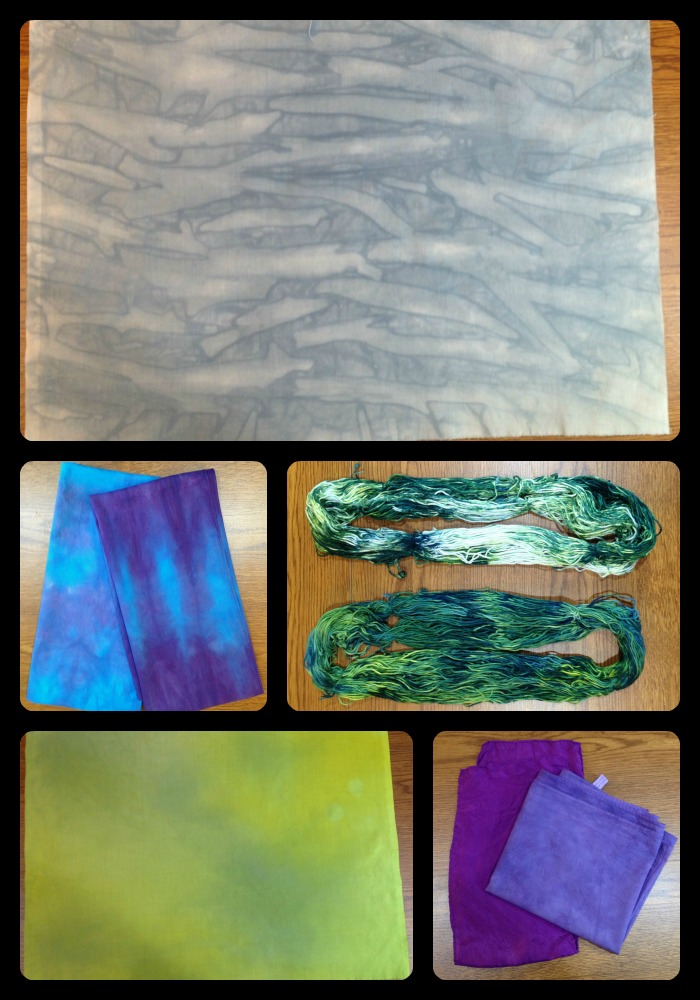
Top and bottom left: I was testing out a new technique picked up from Ann Johnston's DVD. I soaked the fabric in soda ash, then laid it out on a table (one of my newly-recovered-with-vinyl tables!), and then slowly poured a little dye on at a time and rubbed it in with my hands. Top picture is using gray dye and very intentionally creating folds and pleats in such a way to create some directionality. The bottom left looked a lot better wet--it's actually a mix of three colors (gray, yellow, and yellow green). It would make a nice background if one were looking for that particular, slightly odd shade of yellow-green-gray, but it's also a good candidate for over-dyeing or some other surface treatment. It simply wasn't what I was picturing would happen. And that's why I love dyeing so much. I so rarely get what I was thinking I'd get--it keeps me on my toes!
Bottom right: two purple scarves I did as testers for someone to look at during my meetings this weekend. I'm probably going to be dyeing about 50 scarves in all, by next September, for us to give out as gifts at one of our events. The one on the left is silk, the one on the right is cotton, both the same dye and dye strength. Just gives you a sense of how different fabrics react to the same dye.
Center left: Just playing with a couple of other cotton scarves I had on hand. Not overly keen on the way either of these turned out--the colors aren't as vibrant as I'd have expected. I'll have to look up what type/weight of cotton this is because it definitely takes the dye color differently than my usual fabric does.
Center right: 100% cotton yarn, done in an ice dye parfait. Interestingly the one on the bottom is the one that ended up with a lot of white left. I must not have loosened it up as much as I thought when I put it in the container. No biggie--I'm thinking I'll overdye it with yellow. The yarn is slightly thicker than 8 perle cotton, I think. I'll be interested to work with it and see what it feels like.
And now for the really impressive ones. I did another ice dye parfait because I wanted to "break" my black and teal dyes to see what component colors would come out. Ice dyeing is one of the best ways I've found to break a dye. And what a fantastic way to see what colors go into making black and teal!
This one was the bottom layer.

This one was on the top.

All I can say is, wowzer. I'll be breaking a lot more of that teal dye!
Oh, and I did get all my print scraps cut for #Scrapitude, finally, and started plugging away at the background. I plan on doing a marathon session of cutting when I get home next week. And then I'm home for a few weekends so I have hopes of catching up!
A Weekend Away
Just a bit off-topic, then back to our regularly scheduled programming.
It's Sunday afternoon and we're back from our anniversary get-away to Niagara on the Lake, Ontario, Canada. We go every year because, forasmuch as we love to travel and see new places, it's nice to have one place to go you don't have to figure out. We know what restaurants we absolutely need to eat at, we nearly always try to see a play, and we pretty much always hike or walk most of the time we're there. Niagara on the Lake is a gorgeous town right on the point of connection between Niagara River and Lake Ontario, and it has a beautiful walkway along the Niagara Parkway and along the edge of the village. In October, it's beautiful.

We were fortunate in our weather on Friday--a beautiful, crisp fall day. We walked almost all day; however, it started looking cloudy after lunch so on the spur of the moment we drove a half hour back down the road and spent the evening in Niagara Falls. Saturday was pretty cruddy--we got some walking in during the morning but it was wet the rest of the day, so we hung out in our room and read for awhile, then went to see a play and went out to dinner. Soggy, but relaxing.
I didn't take too many pictures, but I did throw them into a Flick album if you want to check them out. I had fun playing with the new panorama feature on iOs7. :-)

When I got home, Mad Quilt Scientist took over and got busy in the basement again.
In addition to some things I just needed to get done, I'm also testing out a couple of new techniques I saw on Ann Johnston's new "Color by Accident" DVD. I've been using her book for the last year but seeing her techniques on video is extremely helpful. I'll keep you posted.
Now, to get back on my sewing machine and finish off some baby quilts. Tomorrow is DS's 23rd birthday (not that I've aged a day) so we're taking him out to dinner tonight. I have just about enough time to finish the top of Baby Quilt Remix and maybe figure out backing...
I know, I know, it's been awhile...
A mixture of being out a lot of evenings, having family events on weekends, trying to fit more exercise into my schedule, and having several days of being just plain' dumb-tired after work have meant that I've been a social-networking slacker of late.
The upside is that I've been getting some quilting done in there too. And I hope to get some dyeing in this weekend. So there is that.
Also in the works: Two new interviews! Look at it this way: I'm not Podfading, I'm Podbrewing. Things are just roiling around in my head until I have both the time and the verbal energy to sit down at my microphone again.
Meanwhile, back at the ranch: I've determined my winners for the 2013 Banned Books Week Challenge. Congratulations
to Dianne, Jackie, Carol, Daisy, and Carole! Yep, I threw in one more
book so all five of you could win something! I love being able to say thank you for playing along. Whee!
I plan on getting a podcast out in the next couple of days even if it's a shortie. Bear with me...
A Bit More about My Banned Books Week Quilt

The completed project
I've had a couple of folks ask how I put together "If You Walk By." Fortunately I'd taken pictures during the process, half-thinking I might do a photo-journal of it, but that idea got put by the wayside this past week while I was completely immersed in work. (It was an "event" week that tied me up day and evening, even though I was home.)
So here it is, such as it is. I would definitely do a few things differently next time but I do want to use the basic process again.
Rather than having a solid background, I wanted there to be distinct changes in the texture to give it a little more interest. This meant either piecing or fusing. I choose fusing whenever possible, especially when I'm under a deadline. So I decided to create freezer paper "templates," cut everything out, fuse it back together, and then satin-stitch over the "seams" to create line and definition.
I also had the purple and yellow thing in my head from the get-go, and later realized I could also use this for one of my assignments in my Quilt Design Study Group. We're working our way through this book and the assignment was on complementary colors. Bingo. Since I'm a bit of a purist on my homework assignments, I needed to also use purple or yellow thread for the surface design. Fortunately, I had a great variegated yellow in my thread collection.
The rest of this photo-journal will be in the captions to the photos.
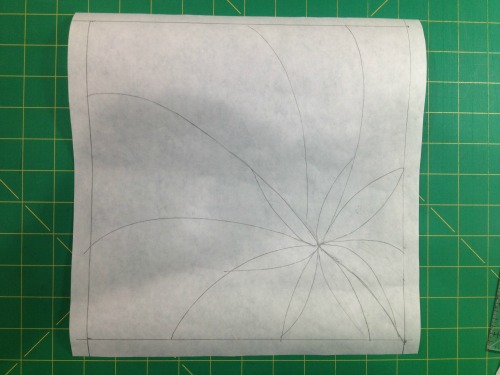
Free-hand sketch of design directly onto freezer paper (matte side). The way I was going to be fusing this, I didn't have to worry about reversing anything so I just drew out the design the way I wanted it to end up. I also didn't worry too much about exactness--whatever I cut was going to fit back together so at this stage I worried more about making sure the general design was what I wanted.

This little 18mm rotary cutter is just the ticket for free-hand cutting of smaller pieces.

I put fusing on my fabric. I'd have put it on the wrong side if there were a wrong side--these are my hand-dyes so it didn't matter which side it went on. This is Pellon 805 if you're interested.

I then cut out my freezer paper templates. I remembered to label them after I had the first couple cut out. If this were a more complex project, I'd have created myself a second drawing to use as a "map," but didn't feel the need on this. I also didn't leave any seam allowances because I didn't need them for this technique.

I then pressed the freezer paper templates onto my fabric, where the fusing was on the back. This way, when I cut them out, they'd be ready to fuse in the direction I wanted them to appear. Again, I didn't have to worry about reversing anything in this technique. Very straightforward.

And here I've reassembled the pieces in order. I'm fusing them onto a very thin piece of batting. I wasn't planning on doing much quilting and didn't want the "quilted" look, so I found a scrap of the thinnest batting I had. If I recall, it might have been a little leftover "Fusiboo," which is a fusible bamboo batting. I did overlap just by a hair a couple of the purples and yellows, because I thought that might give me more of a pieced look. In retrospect, I wouldn't do that again. It was unnecessary and there's a little shadowing in the finished project.

I press-tacked it all down (which is just tapping the fused fabric with the iron long enough to hold it in place but not be permanent) then carefully removed the freezer paper template pieces. When they were gone and I was satisfied with the placement, I pressed it to permanently fuse the layers. You'll see here I now also have a background fabric on the other side of the fusible batting, so everything got fused together at once.
By the way, you'll note in the fused piece above that alot of the joins between colors aren't clean. The beauty of the satin stitch was that I knew most of that would be covered up. I did use my thread snips to clean up some of the edges, but not much.
I did a couple of tester stitches on my practice quilt sandwich I keep by my sewing machine for just this purpose--I wanted to make sure I had the width of the satin stitch where I wanted it. I then used the satin stitch on all the "seams". I haven't done a lot of satin stitching to date so I was pretty happy with the way that part of it turned out. Again, in retrospect, I'd have worked out the center a little differently--the way the stitching came together in the middle of the flower is a bit awkward. However, I will say that satin-stitching is fairly forgiving. I was able to go back in and stitch over a few places with new seams to clean it up some.
I don't have a picture of the original binding. I tried a new-to-me technique of cutting the backing enough bigger to fold it and bring it to the front, and then machine stitch it down so it's self-binding. I used the satin stitch there too. Hated the results. The stitching skipped over bulkier areas and I couldn't get the corners to look like clean miters. I set the project aside for a day because the binding really ruined the whole project and I wasn't sure how to fix it at the moment. In the interim, I finished a project I'd been working on for Laura Wasilowsky's Craftsy class and did her fused binding method. Bingo! I went back to this project and just fused a binding over the top of the original satin-stitched binding. Completely covered it up and looked a zillion times better. A little decorative stitch with that same yellow variegated thread, and I was suddenly happy with the project again.
So now I'm adding to my repertoire of "how to fix errors quickly" (a repertoire which includes Sharpies and rotary cutters), fused bindings. Very handy.
Again, there are a few things I'll do differently the next time I do this, but I am planning on using this method again. I like having the look of a pieced background without having to figure out how to do the piecing. 'Cause I'm just kinda lazy that way.
And now, back to working on #scrapitude.
My Banned Books Week Mini-Quilt
If you missed the original post with the information about this week's Banned Books Week mini-quilt challenge and giveaways co-hosted by Tanesha of CraftyGardenMom podcast and myself, click here.
I wanted to try to embed a gallery of the Flickr group with everyone's entries so far but the Interwebs are not cooperating with me today. Here's a link to the Flickr group. Be sure to check it out!
My Banned Books Week Challenge is "If You Walk By." I used a few new-to-me techniques on it so there's a couple of rough patches but I'm mostly very pleased with the way it turned out. And, yep, my own hand-dyes.

"If You Walk By" by Sandy Hasenauer, Banned Books Week 2013
Listen, God love everything you love? and a mess of stuff you don't. But more than anything else, God love admiration.
You saying God vain? I ast.
Naw, she say. Not vain, just wanting to share a good thing. I think it pisses God off if you walk by the color purple in a field somewhere and don't notice it.
What it do when it pissed off? I ast.
Oh, it make something else. People think pleasing God is all God care about. But any fool living in the world can see it always trying to please us back.
Yeah? I say.
Yeah, she say. It always making little surprises and springing them on us when us least expect.
You mean it want to be loved, just like the bible say.
Yes, Celie, she say. Everything want to be loved. Us sing and dance, make faces and give flower bouquets, trying to be loved. You ever notice that trees do everything to git attention we do, except walk?
(From The Color Purple, by Alice Walker)
I must have read and written papers on The Color Purple about five times through my college career, and somehow I never minded that it kept showing up on the syllabi of my English Lit classes. Every time, I read it over again. Every time, I got a little something different out of it. When the film version came out late in my college years, I pretty much had the book memorized and was pleased to see that the film stayed fairly true to the novel. In fact, I'm reading the book again this week in recognition of Banned Books Week. I might even watch the movie again.
The Color Purple is a book about finding one's voice, finding one's power, learning to write one's own story. It's about racism, sexism, and abuse, but it's also about deep friendships that help one grow into more than one would be alone; it's about love, it's about healing and reconciliation. It's about strength. It's about faith.
Oh, and by the way, there's a quilt in it.
'Nuff said.
Banned Books Week Challenge and Giveaway!
Woohoo! After months of planning, Tanesha at CraftyGardenMom podcast and I are finally able to officially launch the
2013 Banned Books Week Challenge and Giveaway!
Post your Banned Books Week projects in our Flickr group anytime this week (September 22-28). Tanesha and I will be haunting the group and choosing winners at random throughout the week. We've each got a number of great prizes to give away so you really want to get in on the fun! (Need to remember what the challenge is? Click here.)
I'll have four winners myself--Thanks to C&T Publishing/Stash Books and Tanesha, I've got four books to give away! (One per winner, my choice).

Bright & Bold Cozy Modern Quilts, by Kim Schaefer, is her follow-up to her first book, Cozy Modern Quilts. All of the projects in the book are made up of just two shapes: squares and rectangles. They're simply put together but with beautiful results. There are 20 projects in this book: lap quilts (some quite sizeable!), wall quilts, table runners. This book is great for beginners and folks who have been around the quilt block awhile, alike! Great ways to bust your stash, or great excuses to pick up some new fabric.

Modern Mix by Jessica Levitt is 16 sewing projects (quilts, pillows, bags, and more) that combine solids and designer prints in beautiful ways. The book is divided up into sections based on how the solids are used: as background, in strips, as accents, and projects that only use solids. There is also a section with some design tips and, of course, basic sewing techniques. This book will definitely have you looking at your stash a little differently, or maybe planning on some stash enhancement.

A Month of Sundays: Family, Friends, Food & Quilts, by Cheryl Arkison is really an entire lifestyle book. It has 16 projects that are "pre-cut friends," as well as recipes and ideas for ways to relax with your family, friends, or just by yourself. The quilt designs are modern in sensibility, low-volume in color choices (although you could certainly adjust that to your own taste), and fairly simple to piece. There are plenty of other projects, such as little fabric flags, game surfaces, napkins, and other small projects meant for family fun time. This book fits right in with everything I've been saying about the Slow Quilt Movement!
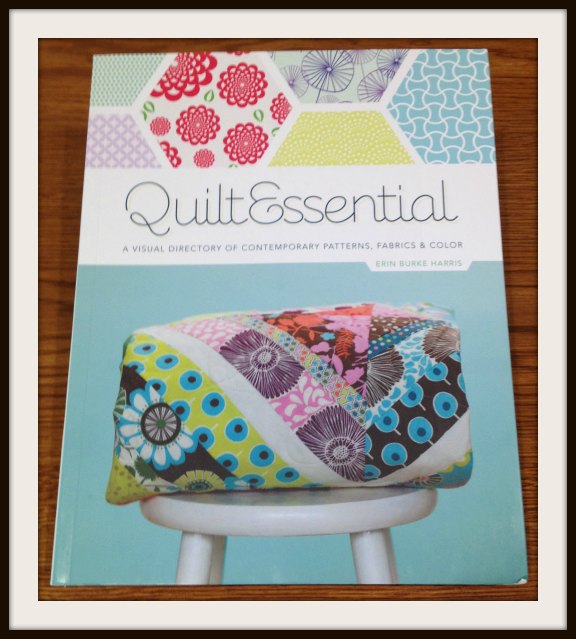
And finally... QuiltEssential: A Visual Directory of Contemporary Patterns, Fabrics and Color, by Erin Burke Harris. I have a ton of quilt reference books on my shelves and still, boy-o, was I tempted to keep this one! Harris has put together a basic reference book with information about quilt math, types of fabrics, design elements, different quilt "genres," and techniques, interspersed with spotlight articles on some current modern quilt artists. The layout is extremely user-friendly, and the photos are both helpful and beautiful at the same time. If you're a beginner, you would definitely want to have this one on your shelf, I think; if you're a not-so-beginner, there may be pieces of information in here missing from your other reference books (like I found!). Great stuff.
So that's it! In order to be eligible for this giveaway, just include photos of your finished Banned Books Week Challenge projects in our Flickr group for the challenge, clearly labeled with "2013" somewhere in the title or description so we can keep them straight from last year's. Don't forget to include your artist's statement or a link to your blog where your artist's statement resides. Tanesha and I will be choosing winners through the week, including Monday, September 29th just to give you that one last Sunday evening to get yours posted. Don't forget to visit Tanesha's blog throughout the week to see her giveaways!
I'll be posting about my own challenge quilt later this week, as well as posting pictures of my local public library that's displaying our guild entries in this challenge during the week as part of their own Banned Books Week publicity. They may even show pictures of your quilts from the Flickr group!
Looking forward to seeing your entries, and good luck on the giveaway!
Scrapitude Progress and Linky Party #1

Here's how far I've gotten on Scrapitude, and I started a whole lot sooner than all y'all!
I still have about 60 scrap squares and nearly all my background to cut.

But wait! I do already have bunches of squares sewn into pairs. Okay, so I cheated a little. I raided a project bin I'd started last spring to do a Jacob's Ladder scrap quilt. Holy Moly, I have enough 2 1/2" squares for probably four Jacob's Ladder quilts after I get Scrapitude done, so all's fair in UFOs and Finishes.

And, since I did that little tutorial on nested seams in four-patches last time, I do have two four-patches done. Yay me.
Are you doing the Scrapitude Mystery Quilt by Charlotte? If so, link up your blog post about your progress so far here!
Everyone else, check out the linkies below and cheer people on. And who knows? You might just catch the bug! (You'll need to click on the InLinkz widget below to see the links or add your own.)

Past Podcast Episodes about Scraps
I'll be talking about scraps again in this week's podcast episode (coming soon!), but meanwhile, I thought it would be worth re-posting some of the past episodes I've done on scrap quilts. Unfortunately, with the move to the new website last spring there's not an easy way for me to do older episodes here. If I repost them into my podcast feed, it'll suddenly confuse the heck of out things to see a bunch of random old episodes appearing out of order. And links just redirect back to this website where the podcast files don't exist. But what I can do is embed players for each of them in this blog post. You can listen from your computer, but you can't download. Sorry! I'm also going to copy the original show notes from each episode above it, so you'll be reminded what was in it.
EPISODE 7: In Which We Get Scrappy (April 7, 2010)
I really want to get better at using my scraps, so I decided to do some research on scraps and scrap quilts. I found so much, though, that I'm having to use two episodes to cover it! So, in this first episode, after doing some catching up with listener comments and contributions, I share with you my experience, my research, and some listener suggestions, as we talk about a glossary of scrap-related terms, a little history of scrap quilting, how to collect scraps, getting yourself used to doing scrap quilts, what the best sizes are to cut your scraps into, and a little bit about storing and organizing scraps. (In episode 8, I'll share ideas for using your scraps!)
EPISODE 8: In Which We Revisit Scraps (May 2, 2010)
Welcome to the second episode on scraps! In this episode, we get right down to business and I talk about specialty rulers for scraps, and share a lot of ideas about how to use scraps, including some books.
EPISODE 51: In Which We Get Scrappy Again (May 30, 2011)
Charlotte Hawkes is our local Queen of Scrap Quilts. A quilter for 10 years, Charlotte's very first quilt was scrappy and she never looked back. In this episode, I interview Charlotte about her system for cutting and saving scraps, choosing quilts, and keeping track of all the projects she's got going on at once. I got a lot of great ideas from her, and I'm sure you will too!
I haven't been able to dig up a picture of the blue and white quilt she made that I referenced in the episode yet, but here is one of Charlotte with one of her more recent scrap projects.
Also in this episode: Sandy Update, Listener Comments, and many, many thanks!
EPISODE 92: In Which We Talk Scraps with Charlotte (May 24, 2012)
Charlotte's back! Woot woot! You may recall meeting Charlotte Hawkes, the scrap quilter from my guild, from episode 51 In Which We Get Scrappy Again. Some of you asked for more detail, so I invited myself over to her house and set up cameras and all sorts of equipment to go step-by-step through her process. As I mention in the episode, the originally-planned video episode didn't quite work out, so after listening to this audio podcast, please go to my blog for pictures of her system and her quilts. Educational, and eye-candy to boot!
Hand-dyeing, and Finally Organized
As I talked about in my most recent podcast episode, I had this past Sunday as a Pajama Day to recover from hosting the weekend's festivities. (More about that in a future post.) As I wasn't entirely sure at the start of the day that I was up to handling sharp objects and having to measure accurately, I decided to spend a couple of hours in the basement doing more hand-dyeing. That just requires a little bit of math, and if I'm off by a splash here and there, there are no tragic consequences.
So this time, I tried one new ice-dyeing technique I'd read about ("Dye Your Own Iced Parfait," by Carol Ludington in Quilting Arts Presents Dye Your Own Fabric, available from the QuiltingDaily.com website). We now have a vase that will likely never hold flowers again.

Ice-Dyeing Parfait--three fabrics each layered with ice and dye. It's in a bucket to catch any possible spill-over as ice melts.
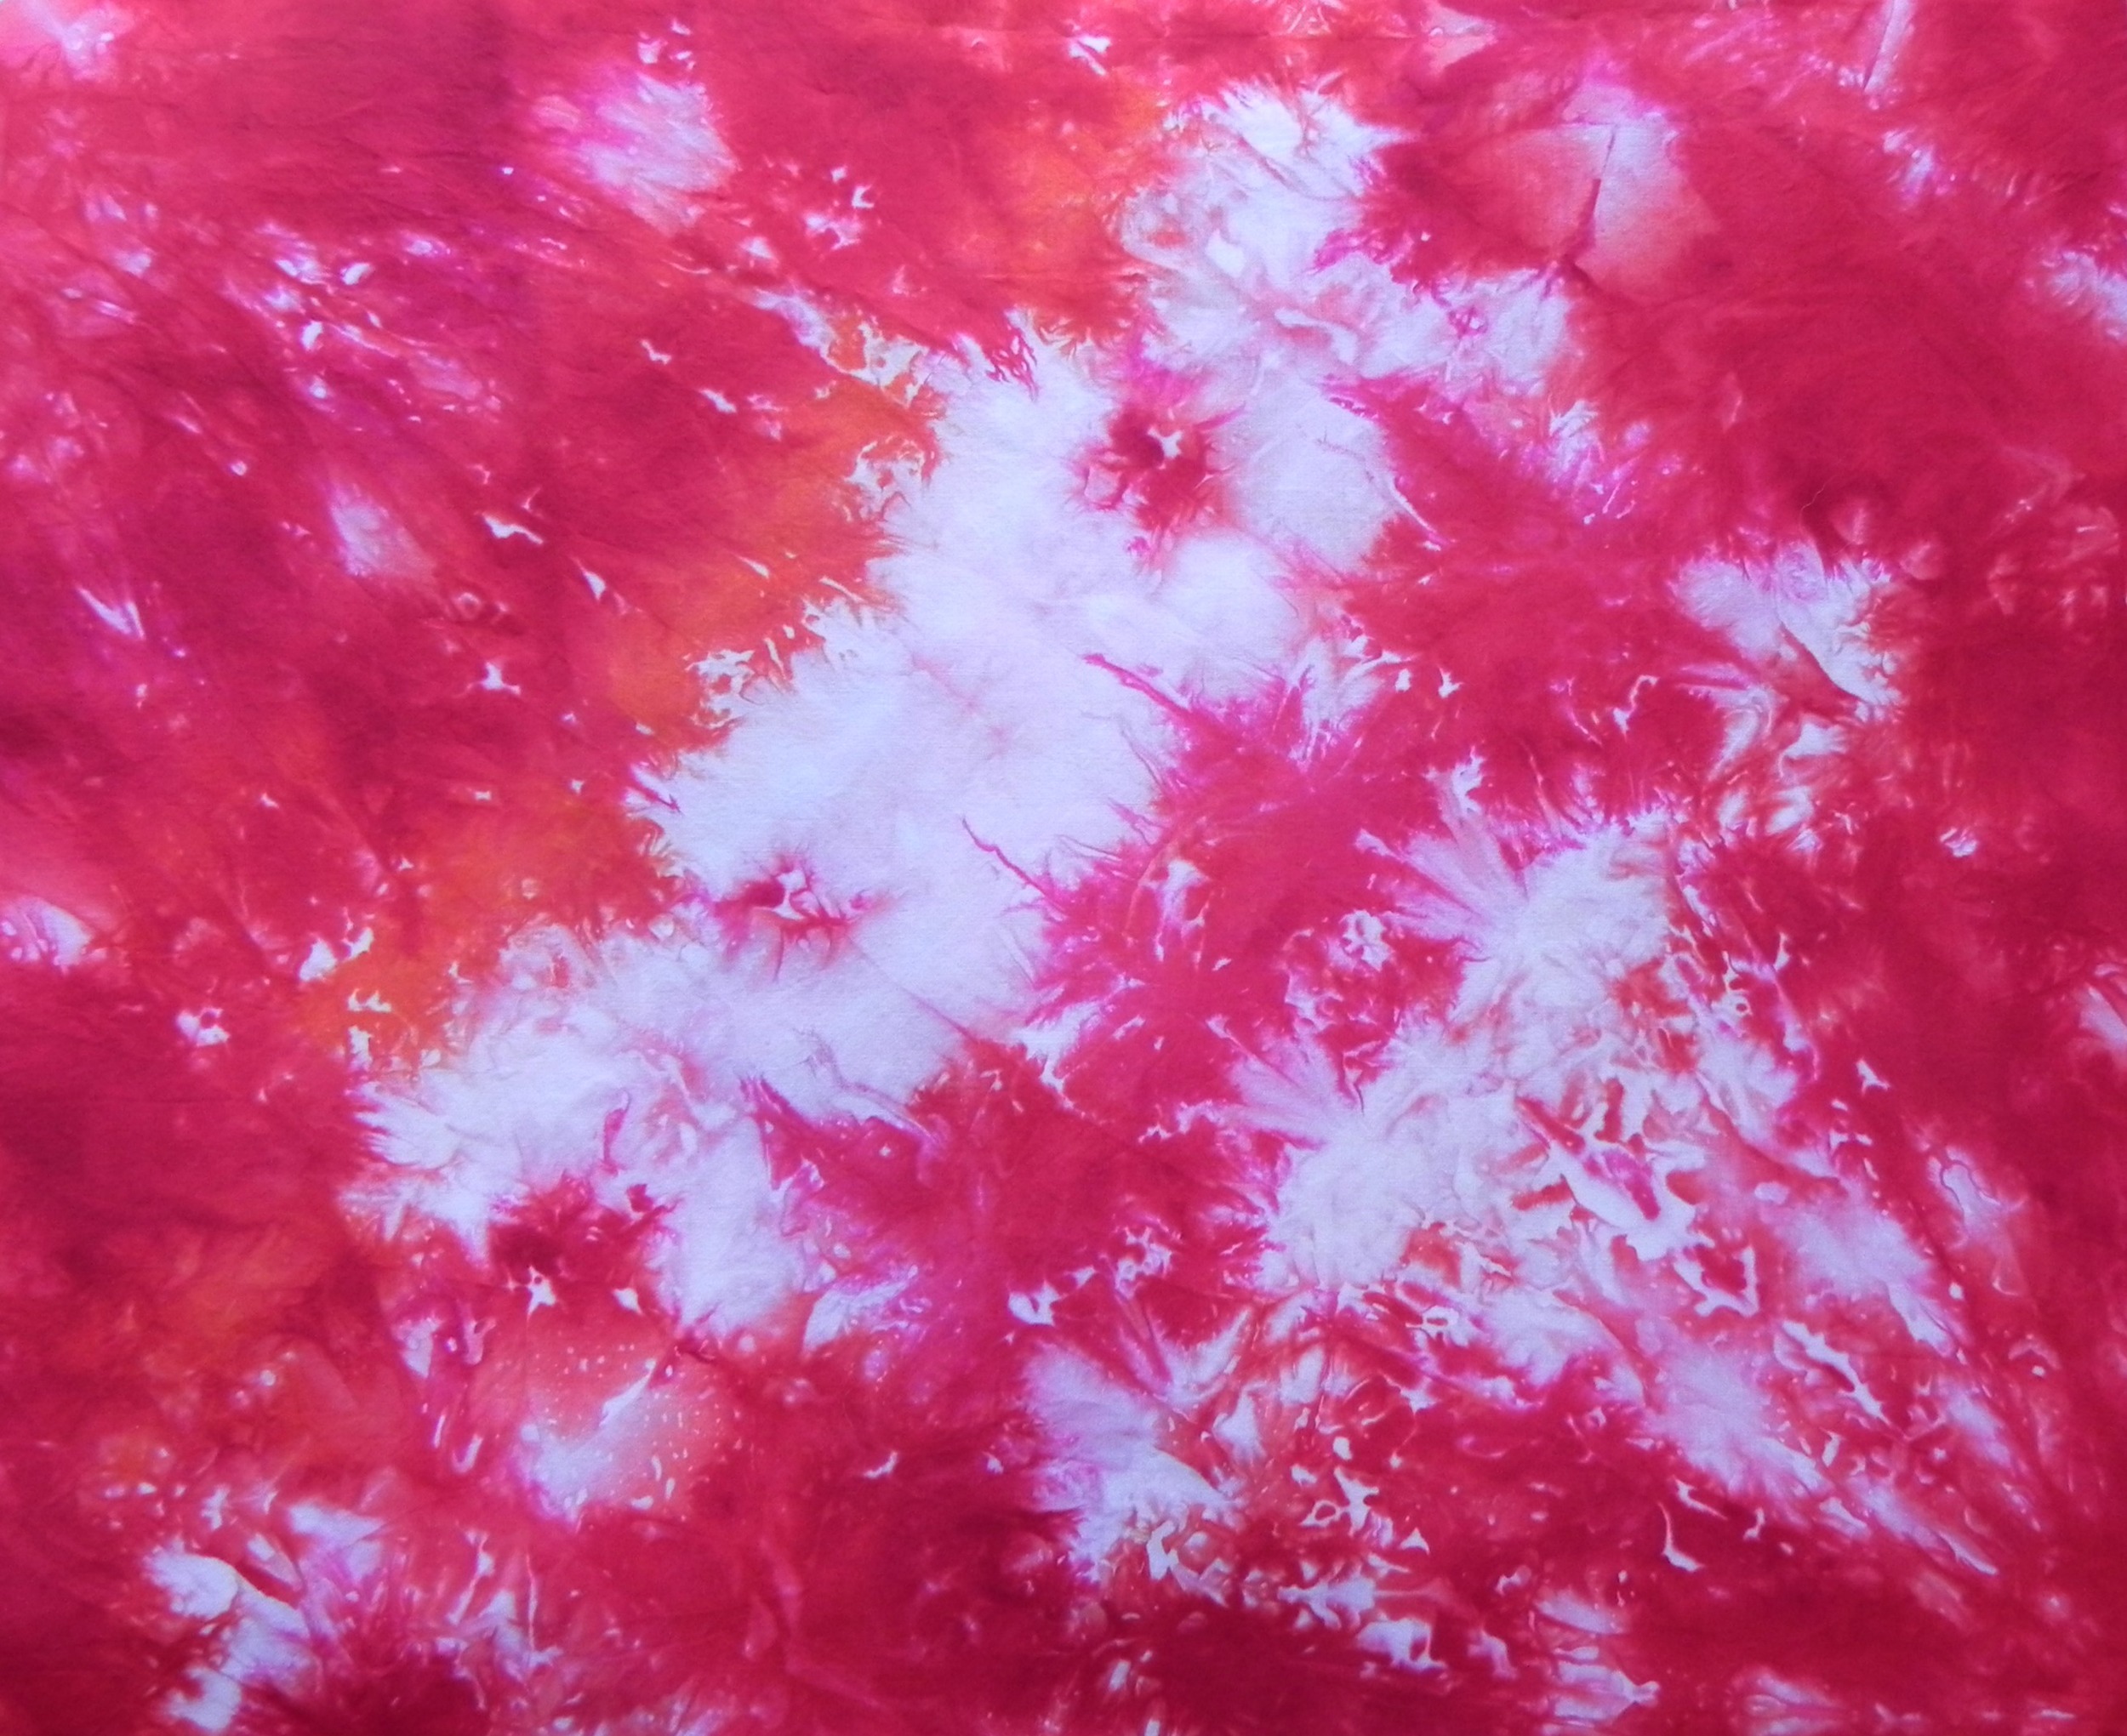
I *think* this was the bottom fabric--I didn't label these. I twisted the fabric and used red and fuchsia dye powders. The orange shows up because this floats in dye water from all layers once the ice melts.

Second layer. This one was pleated and then rolled in a cinnamon-roll fashion; I used fuchsia and golden yellow dye powders on this level. It gets some of the red dye from the first layer, but not as much as the first layer gets.

Top layer. This one looks the most like a recognizable "ice-dye," with the water-patterns in the dye. That's because, since it sits on the top, it's not soaking in a multi-color dyebath after the ice melts--it's floating on top of the other two fabrics. This one had some rubberbands scrunched in but not many; it was then just scrunched under its ice layer. I used golden yellow and red dye powders on this layer.
And then, because I had a prepped fat quarter and some extra ice that wouldn't fit in the vase, I did one more "normal" ice-dye.

Fabric was pleated and folded back on itself lengthwise. Teal and purple dye powders.

Seriously cool. 'Nuff said.
Then I did more work on the Sedona series. I'm very, very pleased with these results. This is definitely the version of orange-brown I was going for. I'll do more with values in the future, but I'll be using this basic recipe. I don't think I'm going to give out the recipe, though, since I just might start selling my fabrics--maybe. In any case, "Trade Secret" and all that. (Those of you who have seen Sedona/Red Rock, what do you think? Is this more or less it? The lightest one reminds me of what the cliffs looked like when the evening sun hit them.)
Because this was just a test, I took one fat quarter and divided it into four pieces, so each piece is quite small. I'd be able to do an itty-bitty art quilt with these, which just might happen!

And I worked on greens. I don't own a green dye powder, intentionally. I wanted to figure out how to get my own greens without having to purchase a pre-fab. I have nothing against green dyes--I'd probably eventually buy one just to have some consistency. But for now, I'm having too much fun doing the art-science myself.

Greens created with various proportions of two different blues, two different yellows, and a little bit of black once in awhile.
And then, rather uninterestingly, I played with ecru. You may recall a few weeks ago I'd dyed a sample fabric with my then-newly-obtained ecru dye and couldn't figure out the result. I decided to test it out again--this time the pure ecru sample turned out much more like I would expect ecru to look. I then did a series of dye baths that were 2/3rds ecru and 1/3rd another color. What I learned? Ecru has no backbone. You can really barely tell on most of them that ecru was even involved--it's an ever-so-slightly muddier version of the color. The only one where I see a significant difference is in the yellow. The red looks pink only because there was so little red dye in proportion to the water, so it's a value thing. So, I know to use ecru if I want to muddy a color up a little bit, but that I should probably use even more in proportion to the color for the difference to be at all noticeable.

Mix colors: yellow (although here it looks more green than it really is; it's actually sort of a mustard yellow); blue; "old rose"; gray; camel; red; black; pure ecru. And another thing I've learned about ecru--virtually impossible to get an accurate picture of it. It's far too dark gray in this picture; it's actually a light off-white, heading towards an extremely light beige.

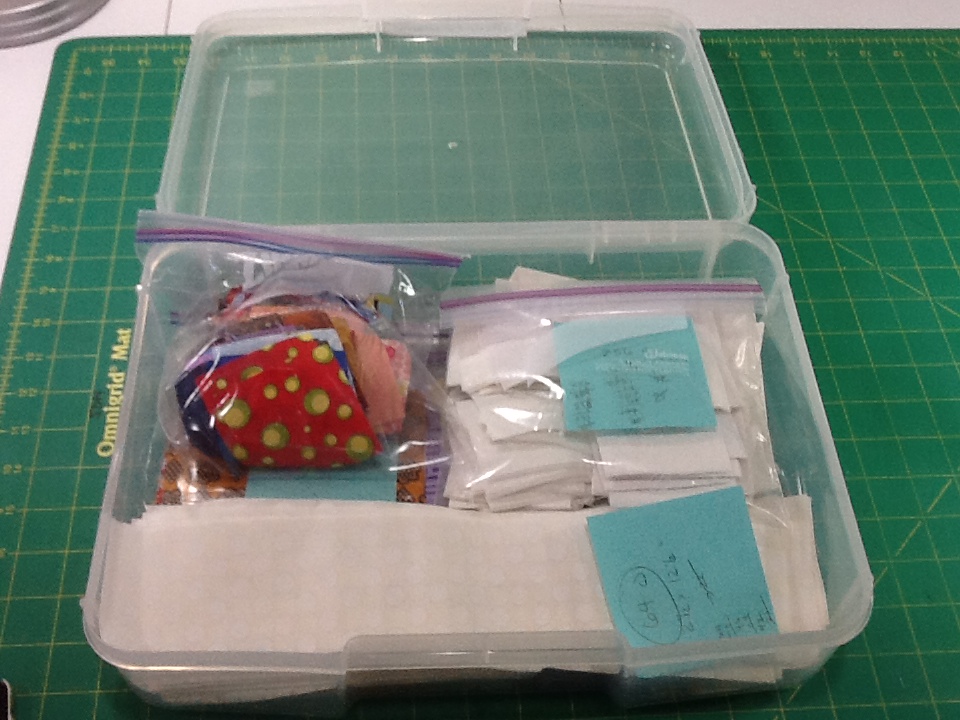
I finally figured out half of the organizational system, by the way. I've settled on a way to track my swatches and recipes. I'm going to use index cards in a box. Back to basics. This will allow me (1) enough space to track info I need, (2) a decent-sized swatch, (3) ability to sort and re-sort color swatches as I keep creating more, (4) ability to flip through them quickly to find the one I want. And it's cheap. Yay for cheap.
I have another thought about how to track fabric samples as I'm dyeing them: I'll keep you posted after I test it out.
And yes, I'm still working on that baby quilt. But no pictures since grandma-to-be reads this blog... (Nyah nyah nyah nyah nyah :-P pbbbbttpbptpbptptpbbt)
T-shirt Pillows--Done!
When my daughter cleaned out her room in preparation for going away to college, she had two tshirts she no longer wore but wanted to keep; one for sentimental reasons, one because she just thought it was cool.
I offered blithely, "Would you like me to turn those into pillows?" Her eyes brightened. "Yes, please!"
And then, dang if those shirts didn't sit on the shelves in my sewing room for two years.
Finally, last weekend for #LDSI, I took the 90 minutes or so that the whole project required and got them done. One went together very quickly, the other was a bit trickier. So I'm going to share my steps with you briefly, but this is not a complete tutorial.
Never having done anything with t-shirts before, I decided to do a quick google and found this tutorial that had a helpful tip I used about how to make the slip case if you're using a pillow form.

The first pillow was quite straightforward. I had measured the size of the images on front and back and had bought a 14" square pillow form to fit.
Note that the back is cut into 2 pieces to make the flap; the bottom piece was cut along the hem so the edge flap was already hemmed. I wasn't able to do the same with the part that had the writing on the back, so I did have to hem the flap edge of that side. The larger piece is about 2/3rds the total size of the front, the smaller piece was cut to overlap the larger piece by a couple of inches.

Note the two hems--one from the shirt (lower) the other I sewed (upper). I'm not a garment-sewer so I don't know what stitches one should use, but I picked one that looked the most like an overlock (Is that what you call it, the stitch that sergers use?). I thought it had everything it needed to keep the edge secure and not overly stretchy.
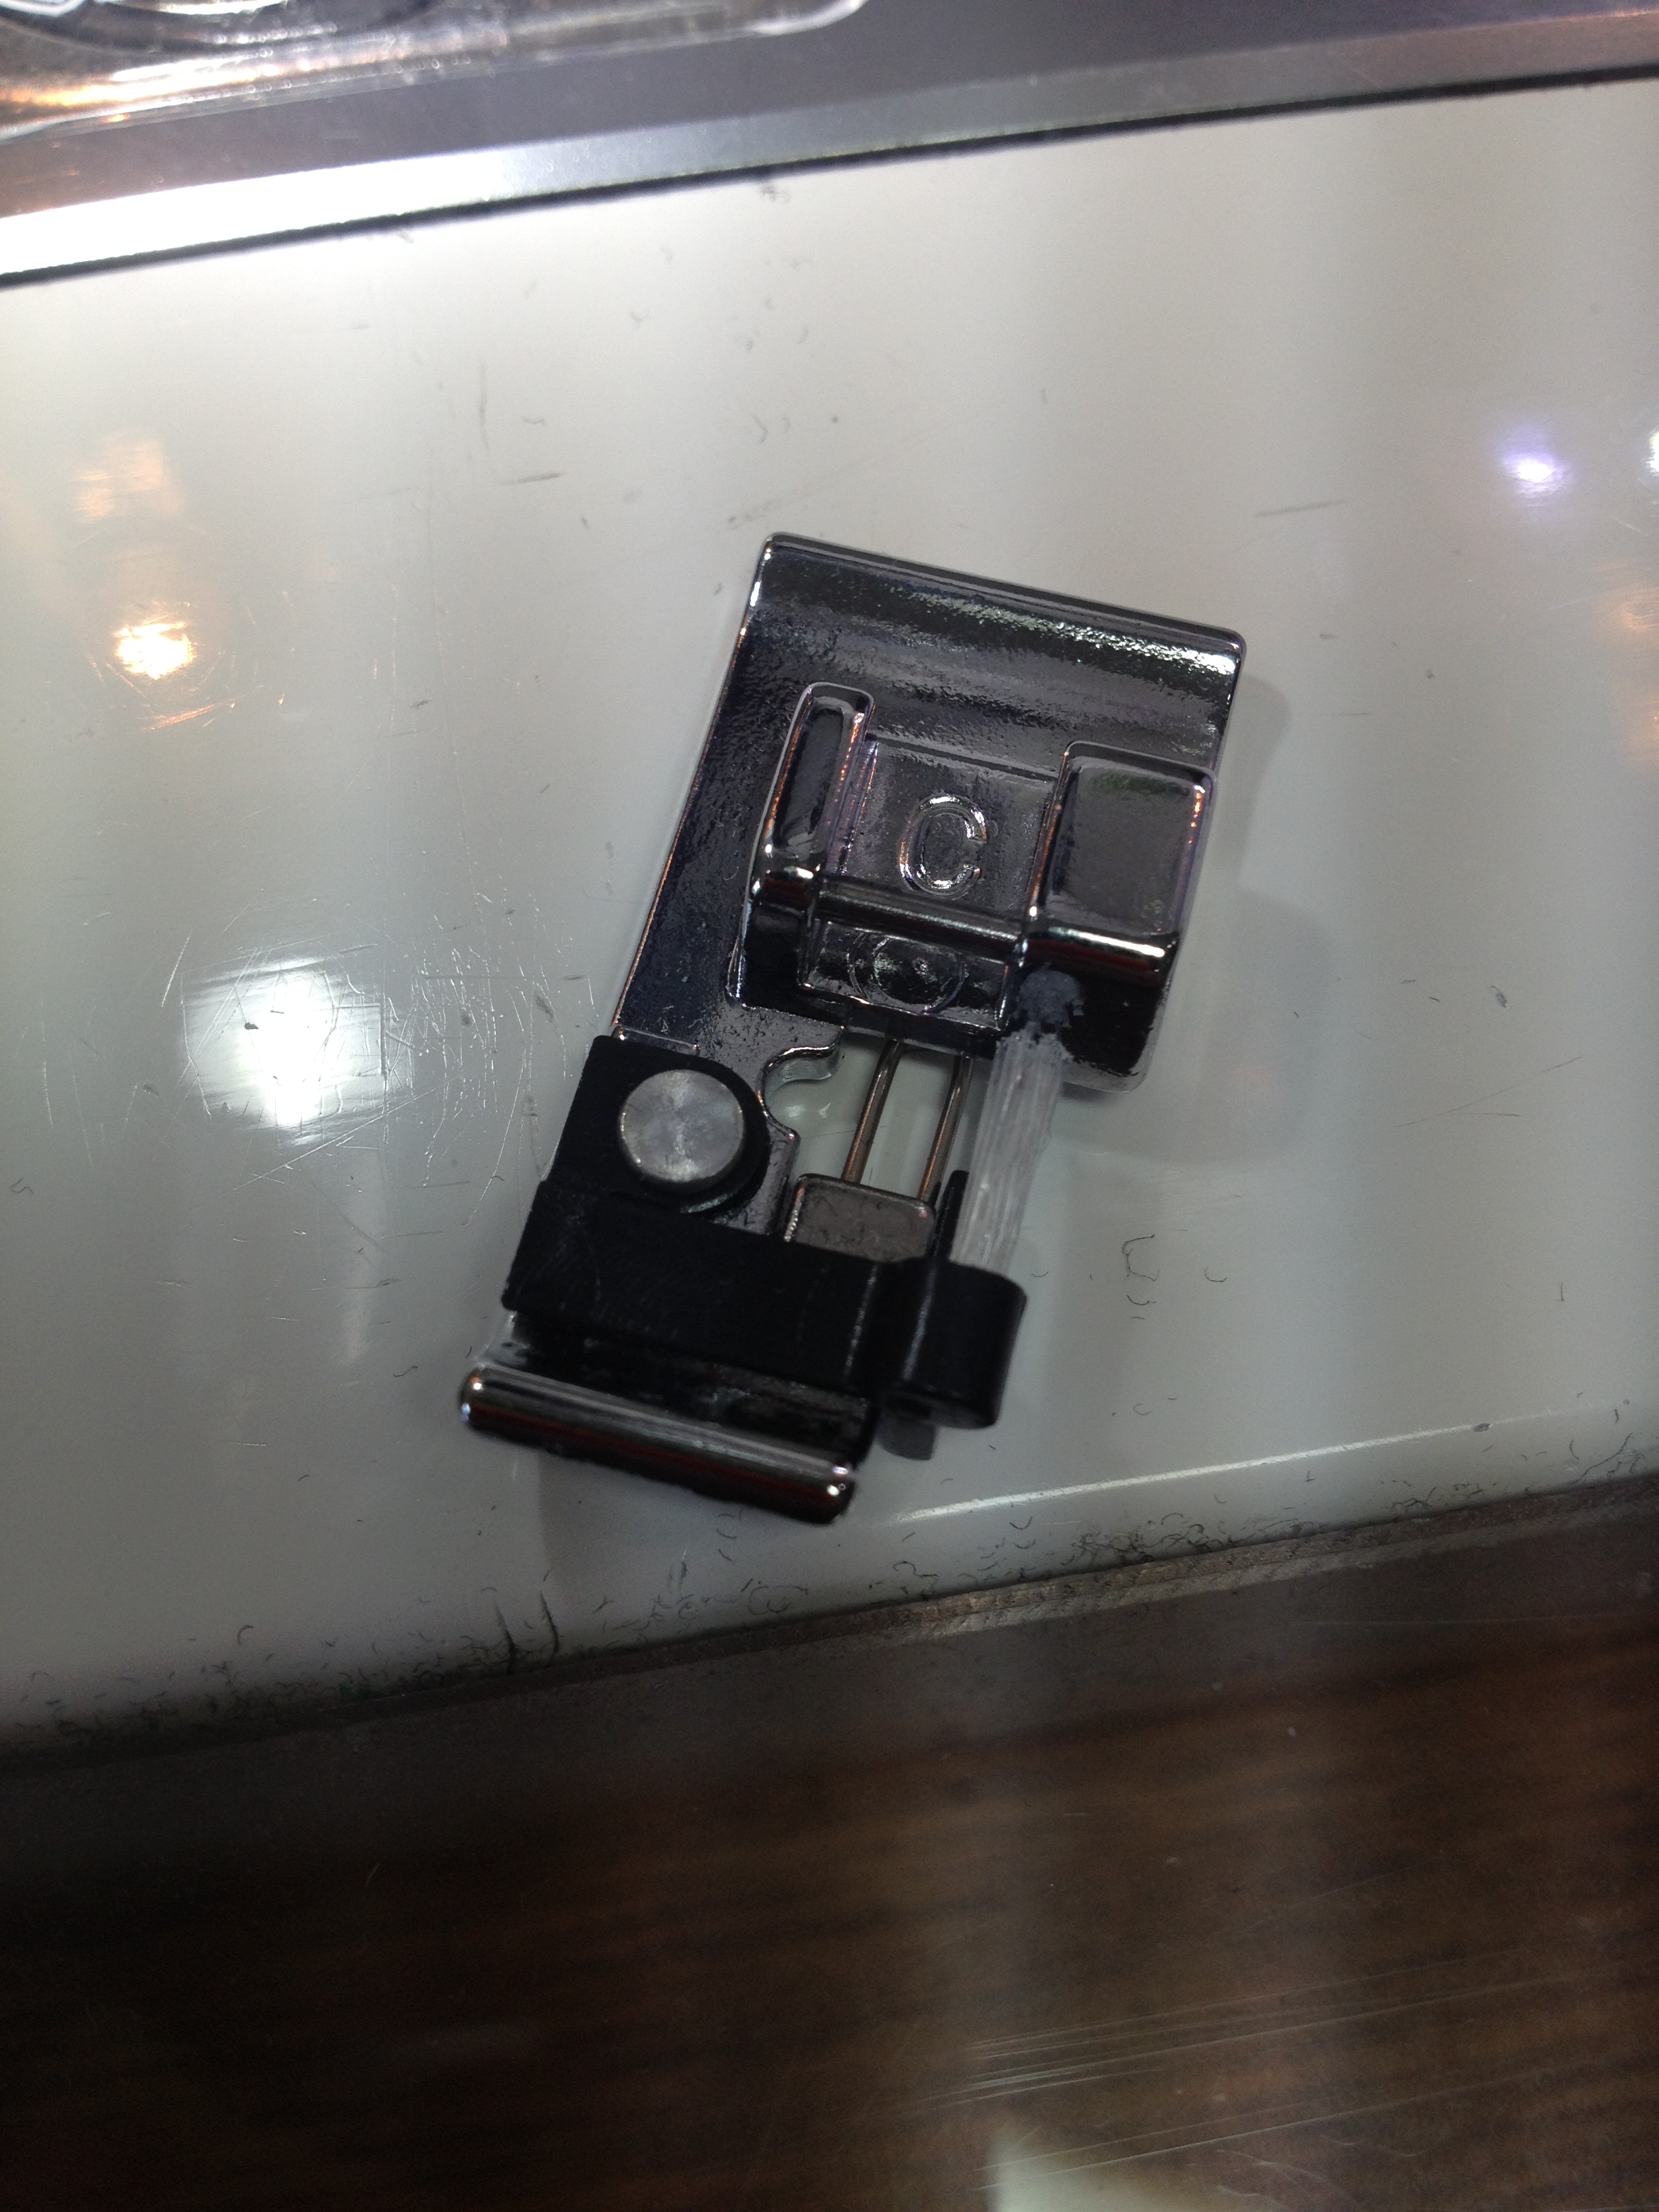
This is the foot my Janome told me to use with the stitch. No idea what it's called. I call it "C." And so, "C" it shall be.
First time I've ever used it. Nice to have it when you need it!

A boatload of pins and a few fast seams later, and there you've got it. Voila. A pillow.
No way was this puppy going to be centered unless I took the time to add some sort of borders around it or something and frankly, this is a pillow she's likely to have for the next couple of years and then get rid of it when she actually cares about decor. She'll love it as-is; I didn't feel the need to get all fancy-dancy with it.
I started with the easy one to get into the swing of things. The second pillow, not quite so easy.
You see, it's an electric pillow. The logo on the front (used to) have noise-activated lights. The logo lights up and then the lights dance up and down the logo depending on how much noise there is the room. I say "used to" because it's been in her room awhile and I suspect the battery is dead. But that's going to be her problem!

For the most part, it's the same pillow technique. However, I had the added issue of working around a battery cord while I was sewing, and I had to figure out how to get a pocket to hold the battery pack in there once it was complete.
I had to keep flipping this dang thing (and it's heavy!) out of my way while I was sewing lest I break the battery cord and my sewing machine by going right over it. Quelle pill.

Here's your notion recommendation of the tute: Get yourself Pellon's Lite EZ-Steam II. It comes in 1/2" and 1/4" widths: I have the 1/4". I used this double-sided fusible tape to hold down the edges of the pocket (and the hem on the white shirt) while I sewed it. Very simple to apply, held everything easily in place while sewing, and it helped me know where the 1/4" was! I think I'm a convert.

I mean, look at this. How pretty.
True confessions. Since I was in a bit of a hurry to finish this project up and get on to things I knew I'd enjoy more, I forgot to flip the front of the tshirt over and pin it right-sides together with the back; when I finished sewing and turned everything right-side out, I was looking at the inside of the front of the t-shirt. Oops. But here's the nice thing about working with stretchy t-shirt material. When I subsequently realized there was no way in Hades I was going to be able to rip those darn seams out, I just sliced them all off and sewed new seams. It actually fits the pillow form even better now, having to stretch just a little bit to get over it.

And so, here are the finished products.
(I have a sneaking suspicion I'm supposed to blur out the logos for fear of copyright infringement or something. Oh well--if this picture disappears eventually, you'll know why!)

And that tricky back pocket for the battery pack?
Done and done.
(Yes, could've made it a more finished edge on the right but refer back to the comments above about shelf-life and future decor.)
I finished up a lot of UFOs this past weekend, but these I'm particularly glad to get off my shelf. They've been whining at me. It'll be nice to have some peace and quiet again.
Banned Books Week Challenge
Finally, the official blog post about the Banned Books Week Challenge! If you've been listening to my most recent podcast episodes, you'll already know all about this. Yay you! If you've been listening to CraftyGardenMom podcast or following Tanesha's blog, you'll also already know all about this. Yay you!
If you've not done either this is hitting you out of the blue. But you're a quick study--you'll be up to speed in no time. Yay you!
Announcing...
The 2013 Banned Books Week Challenge
(and giveaway!)
Once again, Tanesha and I are co-hosting a Banned Books Week mini quilt challenge. Our form of non-violent protest, I guess, of the idea that anyone would want to ban books. Just so not our style.
Banned
Books Week is September 22-28, 2013. You may find information on the issue of
censorship, lists of what books have been banned or challenged, and other
resources on www.bannedbooksweek.org or the American
Library Association website at www.ala.org. You can find lists of Banned or Challenged Classics here, and the Top 100 Banned/Challenged Books: 2000-2009 here, and the Top 100 Banned/Challenged Books 1990-1999 here. (Those dates, by the way, are when those books were banned/challenged, not when they were published.)
You are challenged to create a small wall quilt that somehow represents a book from the banned/challenged book list that you have read and particularly loved, found meaningful, or otherwise want to celebrate. How you choose to represent the book is up to you—it could be a scene from the book, words from the book, or just represents the book in some way.
Please be aware that book cover images and illustrations in books are copyrighted art. You would need permission from the publisher/artist to depict those images exactly. You may, of course, use them as inspiration for your own artwork!
The pert-details:

2012 BBW "Alice's Spider," by me. Based on Go Ask Alice.
- Create a mini-quilt based on a book on a banned/challenged book list that you read and enjoyed. Really, the quilt can be any size, but "mini" keeps it manageable. You can do a mug rug if you want! No specific sizes required.
- Use any type of quilt techniques you enjoy, any type of surface embellishment you choose--whatever flips your switch!
- Post pictures of your completed quilt(s) in the Flickr group for this challenge. We're using the same Flickr group as last year, so please clearly label your post with "2013" in the title so we know what the new ones are!
- Include your artist's statement in the description of your photo in the Flickr group. (Or, should you be a blogger, just include a link to your blog post about the quilt in the description. ) The artist's statement should include the title and author of the book, why you chose that book, and anything else you want us to know about your mini-quilt.
During Banned Books Week, Tanesha and I will be blogging/podcasting about the entries and there will be...yes!...prizes!
Here's another idea: I'm also co-facilitating this same challenge in my quilt guild, with fellow guild member Kate who is a librarian in our local public library. We've arranged for the library to display during Banned Books Week quilts from our guild members who participate. Woo! That meant having a few more guidelines about sizes and deadlines and such, but I'm very excited about it. I'll post pics of the display when it's up and ready. Why don't you ask your local library if you can display your finished project there?
Whatever you do, Tanesha and I are looking forward to seeing it!
For inspiration, here are the pictures from last year.
LDSI Recap, Project Hope Finish, and More!
What a great weekend! What a productive weekend!
Of course, I didn't even approach getting everything done that I'd thought I'd get done over my extended Labor Day weekend, but then, I always tend to do that. Free time? Let's fill it up with a completely unachievable list of goals!
Still n' all, it were fun. And what a great time we had on Twitter. I enjoyed Very Lazy Daisy's twitter giveaways and was glad that Pam of Hip to Be a Square and Katie of Katie's Quilting Corner hosted a Google Hangout, though I got so involved in one of my projects I completely and totally lost track of time and didn't realize it was time for the hangout until probably two hours later. Oops. Sounds like they had fun, though.
And let me also say, thanks to all who played along with my giveaway. And I'm so pleased to give a great, congratulatory shout-out to Ethel, the winner! Woo hoo! (Everyone join in the happy dance for Ethel!)
Now, what all did I get done? Lots!
I finally got the pillows done! Woo! And you'll hear more about those in a blog post later this week since I decided to describe the process I used in case you find it helpful. I also cut a few scraps, although not nearly as many as I actually need. Still poking away at that. I also finished cutting all the pieces for one of my two pregnant nieces' baby quilts; now it's sitting by my sewing machine waiting for blocks to be pieced.

I got some baby gifts for the other of my two pregnant nieces done (the one whose mom does *not* read this blog).
These two onesies were hand-dyed; I used Color Magnet and stencils to create the design. Note to self: Color Magnet works better in a lighter dye bath--there's more definition of design. These are okay, but I'd have liked the designs to be more prominent. I have a third onesie in the works but that one I've dyed and will be using other techniques on. Pictures later.

This maternity shirt was ice-dyed (you're seeing the front and the back). Not sure I'm a huge fan of the results so I'll offer it to my niece with every assurance that my feelings won't be hurt if she doesn't like it either.

I got a pillowcase made, when I went to cut a fabric into scraps and decided it would make a very cute pillowcase cuff. Boom. Pillowcase for donation.
I got my project done for the Banned Books Week Challenge (see above). In fact, I actually finished it twice, when I decided I really hated the way the new-to-me binding method had worked on the first one and did a somewhat-new-to-me binding method instead. But I'm not showing it until BBW commences. So y'all will just have to wait. (And I'll give more detail about the binding then.)

Second, I finally got the backing and binding done on this puppy.
For simplicity's sake, I just named this one "Sandy's House." Not creative, but this was a class project and not something that felt like it sprang from my soul or anything.
Although I did enjoy it! And here's the link to the blog post where I talk about the class and how this came together.
I really like her fused binding method--in fact, it worked well enough on this one that I used it on my next finish.... Yes, drum roll please, I finally completed my Project Hope Online Quilt Show project, which has been languishing since last June.

This one is named "Somewhere." You can probably figure out the reference.
I had a completely different idea in my head--an art quilt that may still someday get made. Meanwhile, I led a creativity challenge at my guild's May retreat in which we randomly drew words related to a beach party theme out of a bag and had to add something to an ongoing project somehow related to that word. This is done entirely with my own hand-dyes, btw. The first word drawn on Friday night was "Bucket and Shovel." When I woke up Saturday morning, a pot of gold at the end of the rainbow was the image stuck in my head. "Sure, the pot is a bucket of sorts," I thought. The next word drawn was beach ball, so I added the gold coins (round like a ball) coming out of the pot (bucket).

The third thing I had people draw randomly out of a bag was a little rubber duckie.
Great variety packs of rubber duckies from Oriental Trading Company, by the way. I had a bunch of different ones. This little guy was the one I drew.
Challenge participants could interpret their duck any way they chose. I decided to use his colors, so I have a purple and blue variegated thread in the words on my project.
It was right around the rubber duckie that I realized where I was heading with this
project and that it also met the theme of the Project Hope Online Quilt
Show, and so it became that project. To me, hope doesn't always have to be a solemn matter, and silliness can often have a very deep point (witness Monty Python and Mel Brooks).

I did a lot of hand-stitching (as per Laura Wasilowsky's class), and then machine-quilted some clouds in the sky and used her fused binding method. I wanted to keep things relatively simple. But you'll notice this time I took a page from my Carol Ann Waugh Craftsy Class, "Stupendous Stitching," and ventured into a decorative stitch on my machine I hadn't really known was there before. I love it.
My artist statement for this piece is:
Somewhere there is hope.
Somewhere there is peace.
Somewhere there is love and joy and unity.
It is our job and our calling to bring somewhere, here.
(For more Project Hope Online Quilt Show, visit the Flickr group. Although our main show "ended" back in June, you're always welcome to add more quilts to the group!)
Thus ends my LDSI recap. Again, be on the lookout for my next blog post all about the Banned Books Week Challenge!
Labor Day Sew-In (Let the Sewing Begin!) #LDSI
It's finally here! Yes, the weekend you've all been waiting for...
The Labor Day Sew-In!
There's actually a couple of opportunities to get together and have a great time while getting stuff done..
Be sure to check out Lazy Daisy Quilts and Daisy's #LDSI giveaway. (She's always a source of fun!)
And I've been hearing rumors of others--if I get word of a new one, I'll update this blog post with a link.
Meanwhile, here's mine.
Now that I'm creating all this wonderful hand-dyed fabric, I need to make space on my shelves. So I'm giving away some of my wonderful, beautiful commercial fabric to someone who may actually be able to put it to good use!

LDSI Giveaway
Four yards.
Count 'em. Four yards.
One yard each of gorgeous, coordinated 100% quilter's cotton fabrics.
The three purples are from the Florentine line of P&B Textiles. One is a border print.
The yellow fabric is one I had in my stash that coordinates beautifully although not from the same line (it's labeled "Chanteclair" on the selvedge with no further information.) I inherited all of these from my mother's stash. They've survived several stash purges of mine but given I still have yet to use them, I decided to let them fly/be free and hopefully show up (in a picture!) soon in someone else's completed project.
(Fair warning: I believe I washed all of these after inheriting them. I live in a smoke-free environment but do have two dogs.)
To enter in this drawing, please use the Rafflecopter widget embedded below and leave a comment there letting everyone know what quilty project you're currently working on--whether you're able to participate in #LDSI or not.
Make sure your email address is visible to me! I need to have an email address to contact the winner. In the past, I've had to skip a potential winner because they hadn't left an email address for me to be in touch! Double-check your settings to make sure your email address appears in your profile, or just leave it in the comment itself.
(Another fair warning: This is the first time I'm using Rafflecopter because I know some people have difficulty on occasion leaving comments on my blog, so I'm trying this way instead. I'll be watching it carefully through the weekend. If it doesn't seem to work well, I'll go back to the old-school "leave a comment on the blog" thing.)
This giveaway will end at midnight (Eastern time) on Monday, September 2, 2013.
I'll announce the winner on Tuesday. Remember to make sure I can see your email address! And check your email on Tuesday!
Reverse Dyeing (better known as: Discharge), and Some Food
I finally got around to doing something I've been wanting to play with for months: discharging dye. This is a process whereby you remove the dye you so painstakingly put in there in the first place.
Remember: mad quilt scientist. It's not supposed to make sense. It's art.
Tee hee.
I don't recall if I posted pics a few months back of the fat quarters I'd dyed using the two blacks available through ProChem. One is supposed to have a warmer cast, and the other a cooler cast. Honestly, I had difficulty seeing the difference when I had my dyed fabrics side-by-side, but that may simply require more experimentation. I also didn't end up with the graded values I'd hoped for using the technique I did. But that's okay, since I still came up with eight great fat quarters ranging from very, very black to mostly black. I can live with that.
Now I'm working on adding texture through pattern. So this time I'm working with discharges and color magnet.

Once upon a time, there was a stencil languishing on a shelf.
Along came some deColourant Mist Spray and some black fabric.

24 hours later, and a hot steam iron, and the stencil was pleased to see that she had helped make this happen.
(I was surprised to see blotches appear, then realized the steam was making them come out more. I decided I dug the effect and steamed the heck out of it from there. A hot, dry iron makes the resist work. A hot, steam iron makes the resist work even more. So there's even a lot of room for playing in the end game.)
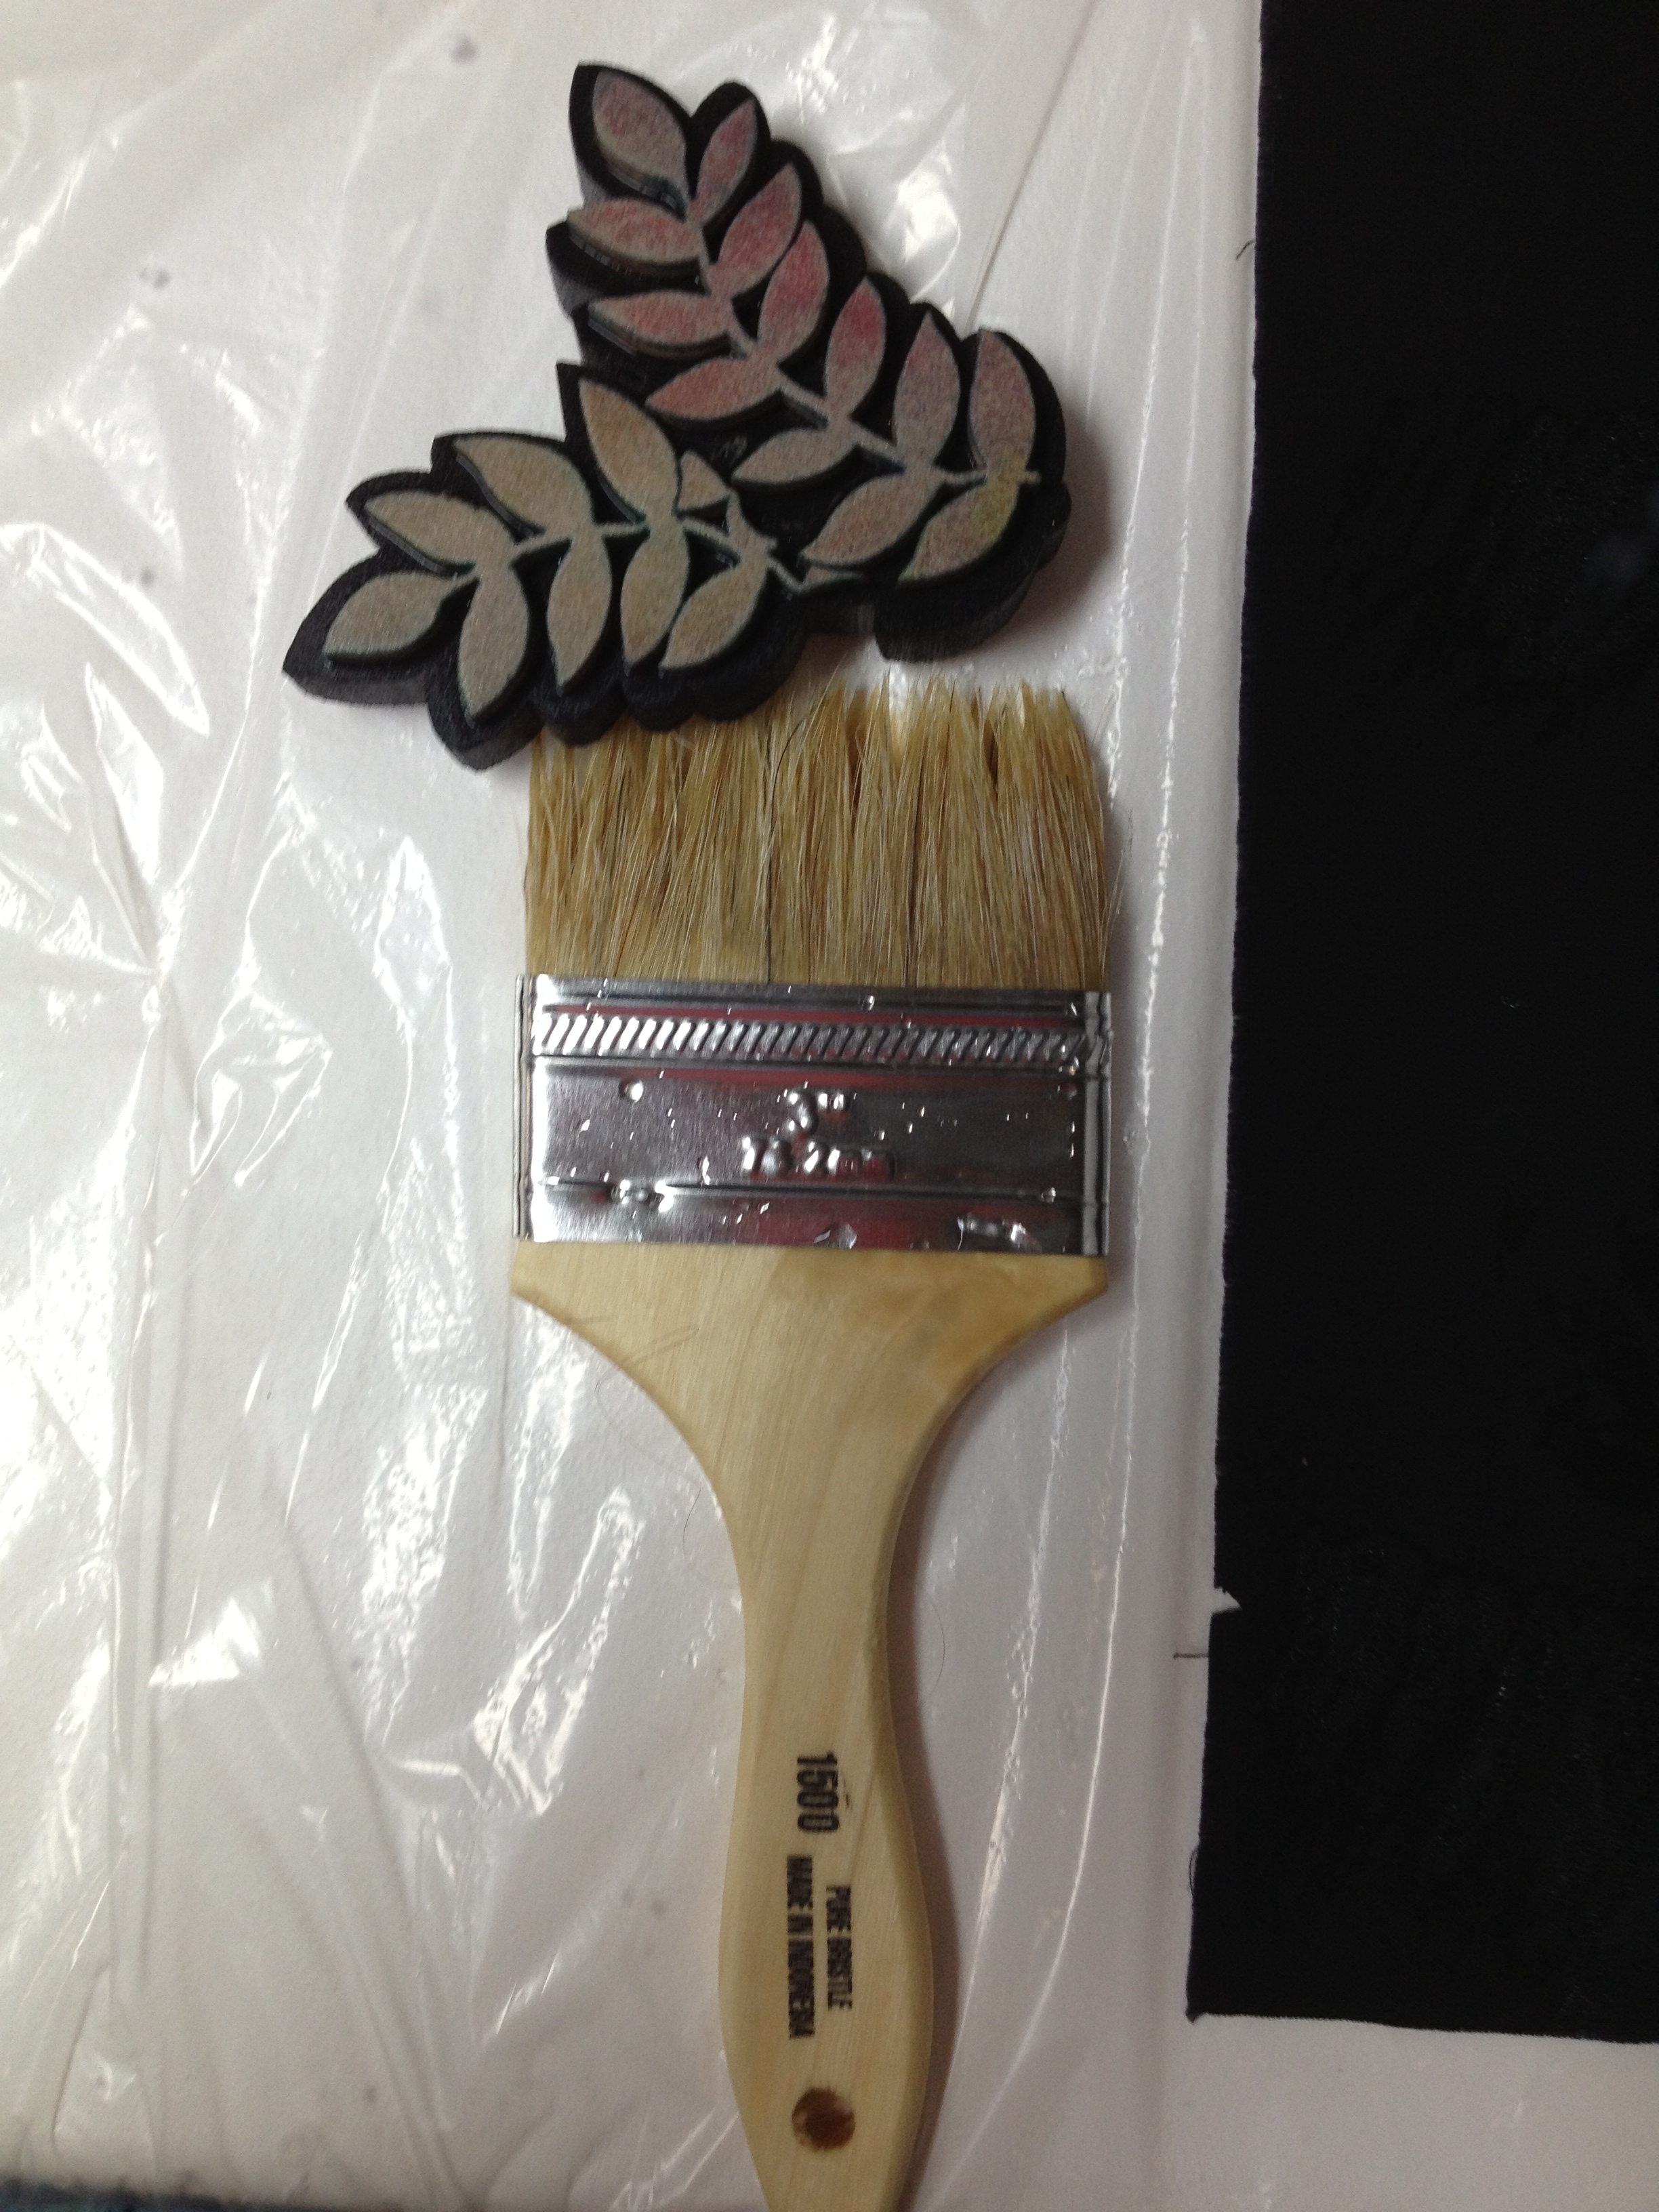
Then the stencil called her friends, Brush and Stamp, to come play too.
This time they invited Jacquard Discharge Paste to the party.
(Unfortunately, Stamp gave her life to this job. She fell apart when being washed afterwards. Apparently Jacquard played a little rough with her. Or she was just old. We don't really know where she came from in the first place so her pedigree is uncertain. And next time we'd prefer to play with Brush's tougher friend with stiffer bristles, if we can find him.)

The nice hot steam iron made magic happen!
(This is a technique I can definitely improve but I love love love love the brush stroke effect.)

I'm thinking this one might even be worth a close-up.
Dig that crazy brush-stroke, man.
I'll save the color magnet results for my next blog post.
Turkey Burgers with Cranberry Herb Mayonnaise
And now, for a quick foodie post. I made my first-ever homemade turkey burger with homemade cranberry herb mayonnaise this week. I was inspired after having yet another very bland, very dry turkey burger at a burger joint earlier this week. "I know it's possible to make a good turkey burger," I whined to my husband. Said husband then promptly skipped town for a few days so I decided it was a good time for some experimentation. What I offer here is inspiration, not an actual recipe, because as usual I didn't measure a darn thing when I was making it.
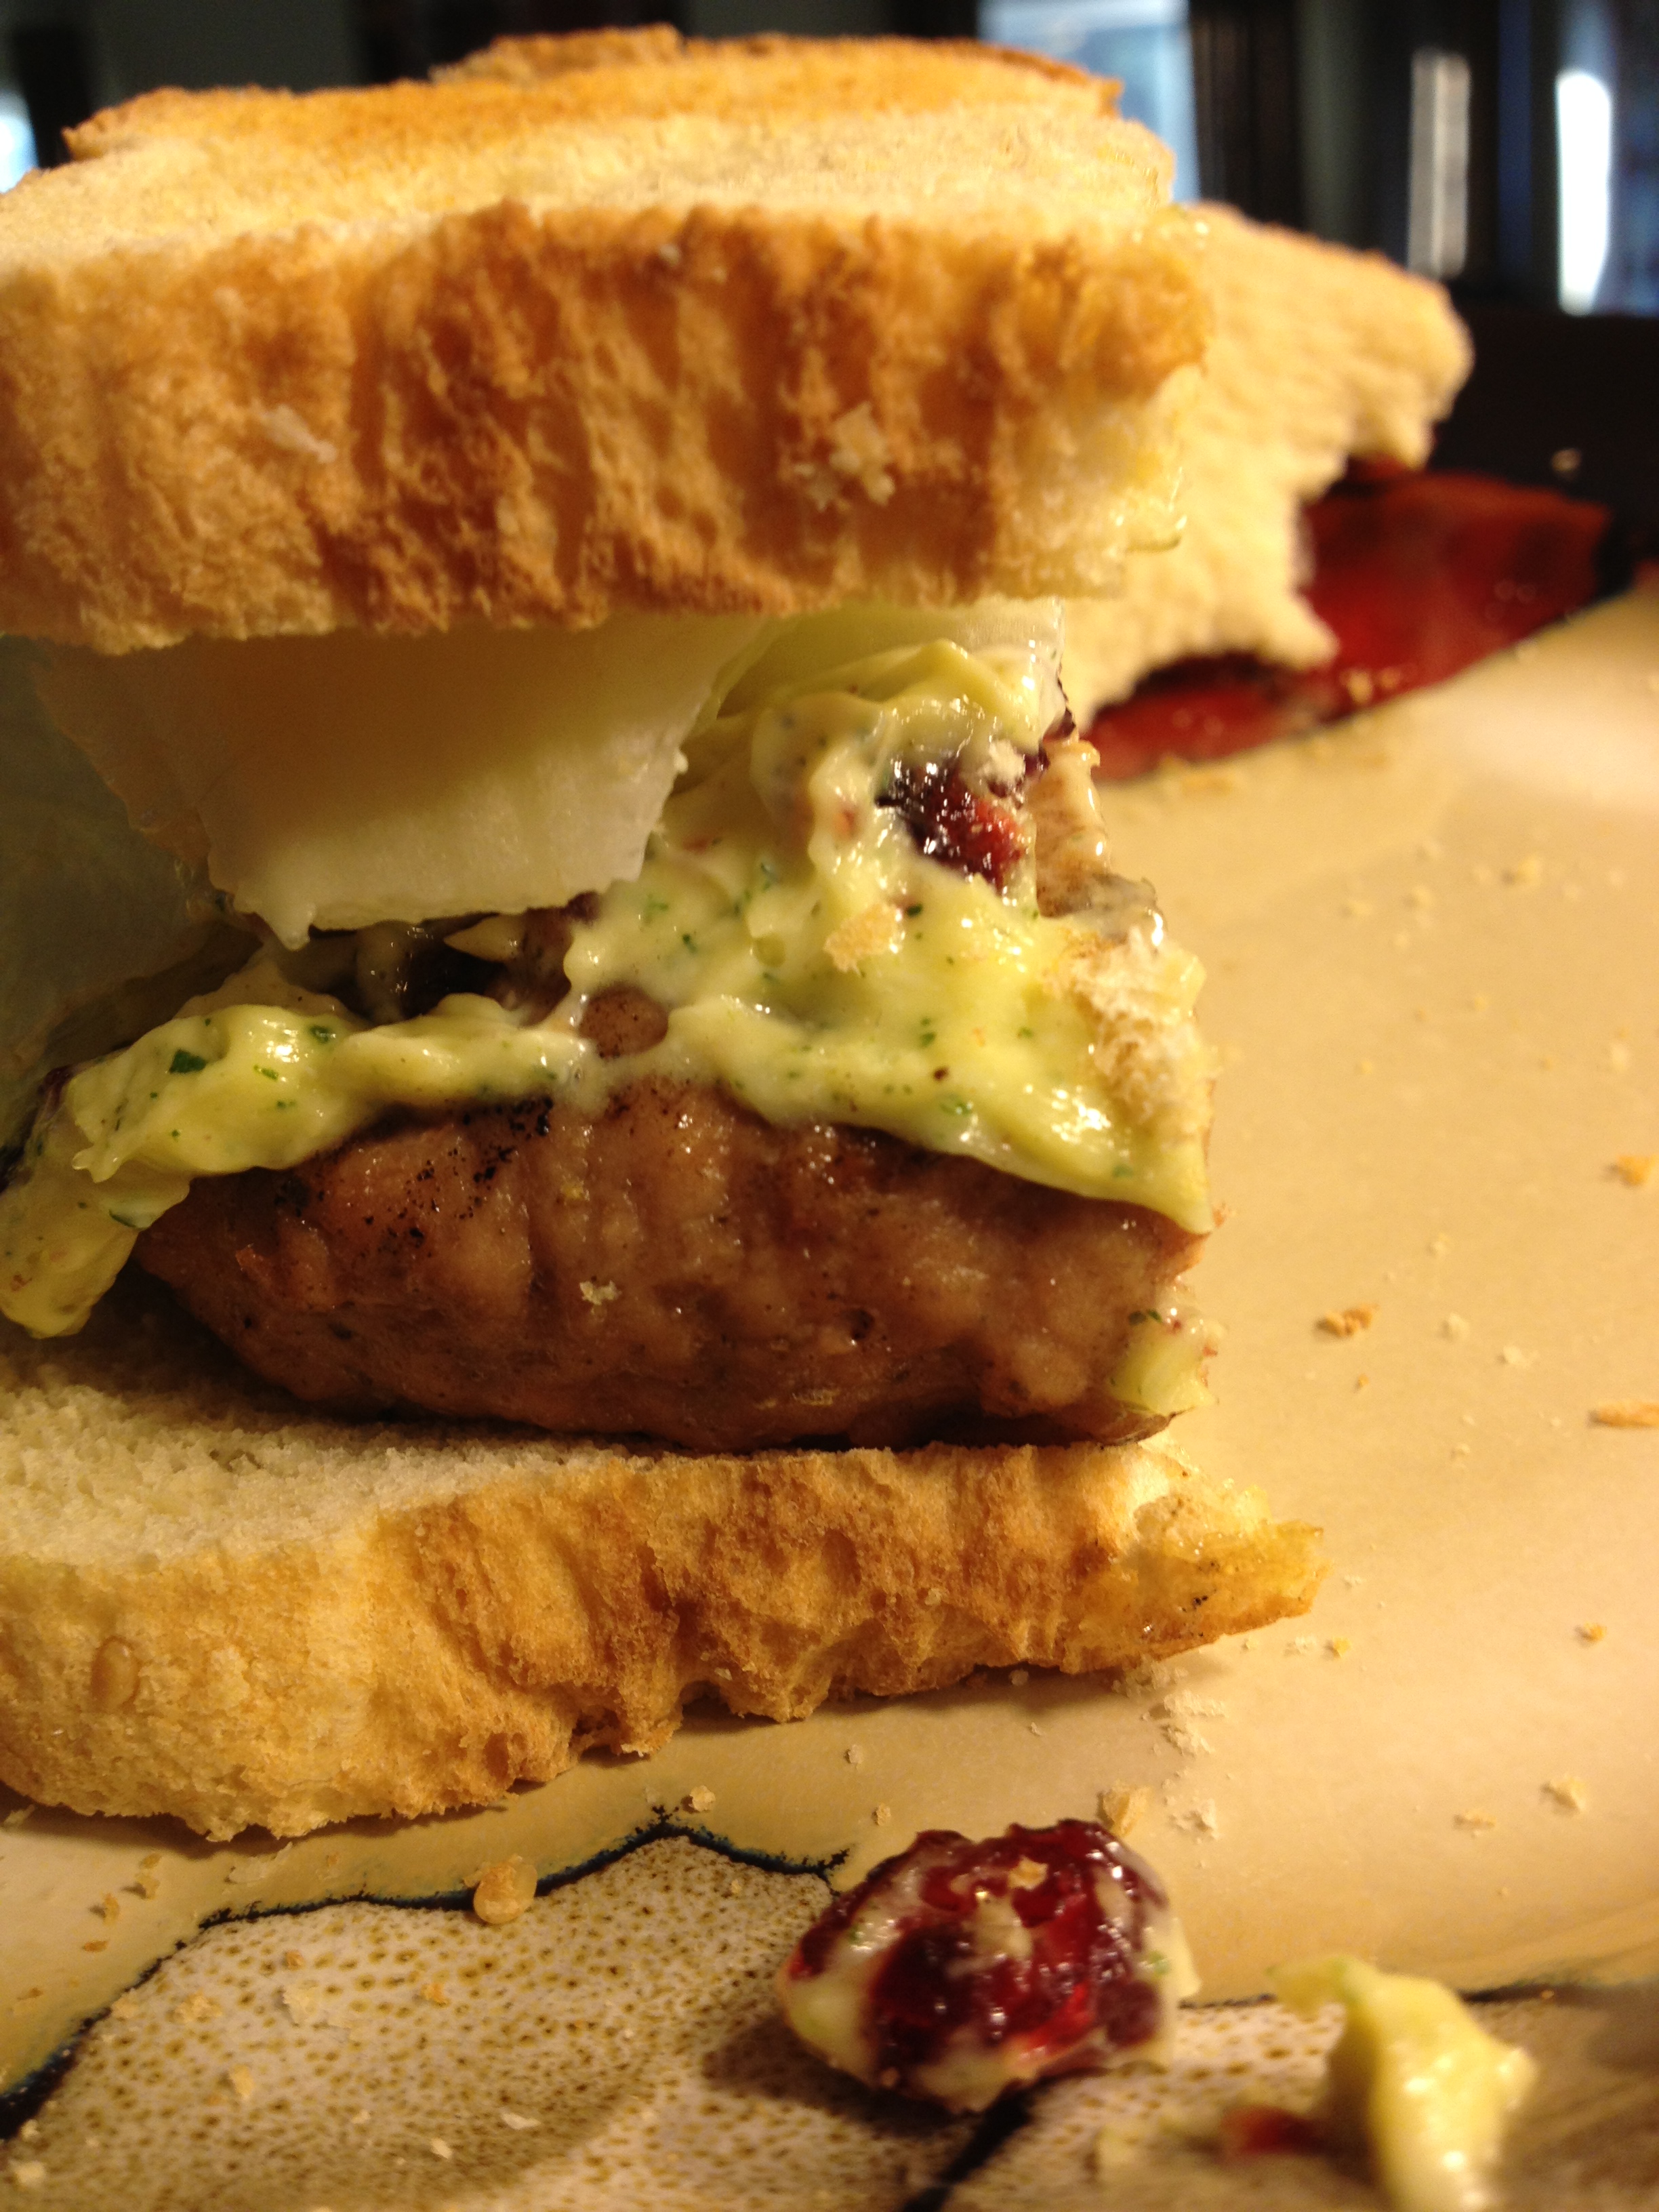
I mixed ground turkey (96% lean) with the same herbs I usually use on my roast turkey: garlic powder, onion powder, ground thyme, ground rosemary, white pepper, kosher salt. Ummm, might have been some sage in there, maybe some celery seed, and perhaps a touch of savory--that last one I don't remember for sure. (I used my usual sniff-test method to decide what I wanted to add in.) I added just a titch of olive oil--maybe about a tsp or less--to make sure it was moist.
For the mayonnaise, I mostly followed the recipe that came with my Cuisinart: egg yolks, Dijon mustard, a little fresh lemon juice, emulsified with olive oil. However, I added fresh rosemary and thyme from my garden, then threw in dried cranberries at the last minute. I also used more lemon juice at the end. It turned out pretty well for a first try, but in the future I want to decrease the Dijon, and increase the lemon juice or use some white vinegar as well, so it's a little lighter in flavor. And having dried rosemary in the burger with fresh rosemary in the mayo really made me want to name this a Seriously Rosemary Turkey Burger. So I'd be a little more light-handed with that next time, though I'm a fan of rosemary.
By the way--the toast was originally because I didn't have burger rolls on hand. But it turned out to be the perfect accompaniment--crunchy, warm, toasty. A regular roll wouldn't have done it. And the lettuce helped with crunch too.
And my son (who was home for dinner and did the grilling--perfectly!--for me) is now a convert to turkey burgers and cranberry herb mayo.
Hey, keep an eye out: I'll be posting more about #LDSI and the Banned Book Challenge tomorrow!
Labor Day Sew-In, Anyone? #LDSI
It's become a Twitter tradition to have sew-ins around major holidays. I was just recently asked if we were going to do one this weekend. See, for those of my readers who aren't U.S.-based, this coming Monday is Labor Day and a lot of folks have the day off. Picnics and barbecues generally ensue.
I don't exactly know what my weekend will entail yet, but it seems like it's shaping up to be pretty low-key, so sure. Let's do a sew-in! We'll start it Friday morning because, gee, that's when I happen to start my long weekend. It'll run through Monday night. Roughly. All depends on time zones and international date lines and all that.
If you're on Twitter, use the hashtag #LDSI as you tweet about what you plan to do, what you are doing, and what you've *actually* managed to get done. Some of us have been known to post pics of other goings-on in the house while we're sewing, and some of us have been known to post pictures of our shoes. And our toenails. And such.
If you're not on Twitter, feel free to still play along! I think, just for kicks n' giggles, I'll do a giveaway on this blog in honor of #LDSI. It'll probably be fabric from my stash. (Having just moved it from sewing room to bedroom and back to make room for the electricians to do their thing, I'm thinking it might be time to downsize a little of it.) So get ready...
Happy Labor Day Sew-In!
Let There Be Light (and Color!)
My sewing room and home office are in one space (as well as my husband's computer, and formerly the kids' computer until they left home and I kicked it out!). It's a nice, big room--the bonus room over the garage--but it's pretty narrow and although it's got a nice big picture window at one end, it faces east so I get great sun for about two hours in the morning and then it gets progressively darker for the rest of the day.
And let's not even talk about November to March, when we're lucky to get even 10 minutes of actual sunlight in a day.
My new lights ended up, just by a happenstance of scheduling, becoming a day-after-birthday gift to me. And what a birthday gift.
Before...

This was taken at 9:00a, when I should be getting the most light of the day. It was a gray, dreary day, so this is actually what I normally dealt with most of the late fall through early spring. (Yes, I blurred out the office side--you can see the sewing side.)
Note the number of floor lamps and table lamps trying desperately to give me working light. I'm standing right next to my design wall--the darkest corner furthest from all lighting available. Also note how yellow everything is. I had an Ott light at my cutting table and would have to pull fabric off the shelves and lay it under the light so I could see what color it really was.
After...

Taken later the same day. It looks brighter outside just because it had stopped raining, but it was still just about as gray as it was in the morning. All the light you see is now electric.
I had them install bulbs that were as natural-daylight-colored as possible. My fabrics look fantastic. The electrician really worked to figure out the best placement and number of lights to minimize shadowing when I'm at my cutting table. They're "cool" lights so they don't heat the room up at all.
And, best thing--there's one right near my design wall.
I can see!!!! Woohoo woohoo woohoo!!! Serious happy dances up in here.
Best thing? I'm getting rid of the table lamp that's been taking up space on my cutting table for years! (I'll still keep the floor lamps around until I experience the room through all times of day and a few more months of seasonal light changes, but I think I'll eventually be able to ditch one or two of those too.)
And, as another happenstance of timing to feel like it's a birthday present to myself, two color wheels I'd ordered from Dharma Trading came today. These are designed especially with fabric dyeing and painting in mind.

This is a "CMYK" wheel. Some dyes/paints apparently work better if you use the CMYK wheel when figuring out dye combinations rather than the traditional wheel. Joen Wolfrom also prefers to use this color wheel in general--her 3-in-1 Tool is based on it.
I like that it has percentages for mixing. If you look below the red where it has the tones, it has percentages written along the sides. In other words, if you create a dye solution that's 90% the pure color (red, in this case), and 10% of it's complement (cyan), you'd get the first color down from the red. If you have an 80/20 proportion, it's the next color lower, 70/30 is the next one down, and 60/40 is the lowest one. See? (Did you know that? Mix a color and it's complement and you work your way towards gray! )

The back of the CMYK wheel has another very helpful tool in determining proportions.
Look under yellow. If you mix 80% of the pure color (yellow) with 20% white, you get the tint--which is the lighter swoop on the left. If, on the other hand, you mix it with 20% black, you get the shade, which is the darker swoop on the right. Next one down is 60/40, next is 40/60, and lowest one is 20/80.
The graphic in the middle also gives you at a glance what the complement, split complement, triad and tetrads are, plus it shows analogous along each side of your chosen color.

The second wheel I got is based on the traditional color wheel, but it has another very useful tool for choosing dye combinations.
Look at red, center top. You spin the wheel to see what color you would get if you added the colors at the top of the inner wheel. In this case, I've spun it to show what would happen if you added blue to red--you get the color in the window (which is violet). It may seem straightforward, but it's particularly useful in the tertiary colors. In other words, what's the difference between adding blue to orange, versus adding blue to yellow-orange? It will allow me to more easily fine-tune my color recipes.

The back has the tints, tones, and shades again, with the graphic in the middle giving a quick-glance visual of complementary, split complementary, triads and tetrads of any chosen color.
So while there are a lot of similarities between these two color wheels, and between these wheels and other ones I'd already owned for quilting, there are some very useful differences for use in my hand-dyeing and fabric painting. I can't wait to get back in my dye studio and play.
And yes, my dye studio is also very well lit. We had them install new lighting in the basement as well and there's a natural-light florescent in the corner where Mad Quilt Scientist lives. All is right in my little fiber arts world!
In fact, you'll have some more hand-dyeing results soon--playing with discharges and resists and magnets (Oh My).