Post-4SI Weekend Accomplishments

On the spur of the moment, we U.S. #Twilters declared this past weekend #4SI--in other words, the 4th of July Sew In. Most people were out and about with friends and family for the weekend so there wasn't a ton of activity online, but it was still, as always, fun to keep up with one another. 

So here's what I got done with some mammoth (for me) sewing sessions on Saturday and Sunday:

Catch-All Caddy--done! I'll post a separate blog entry about this one. It was a thing. Although it wasn't as much a thing as the Everything in Its Place Bag or the Cosmetics Bag. But still. A thing.


Designs stabilized and traced for Postcard Cuties Halloween embroidery BOM for months one and two--done! Just in time, too, as we got the email today that month three is on its way. (Yeah, I know, you can't see much in the pictures, but really--they're all done!)


Design traced for Nouveau Witch--partly done. I've got the linen background cut, pressed (which took some doing--it is linen, after all), and stabilized. I haven't gotten the tracing done yet. See above. By the time I got all that done my neck needed a break from looking down so I put off tracing the witch for another day. No pics yet since it's just, well, a piece of linen. 

And gravy: I did get the second snowman embroidered. Just need to get him fitted with his hat, sewn together, and stuffed. I'll post a pic of him when he's totally done. Not that he looks much different from the other guy.

Binding on Jacob's Ladder--not done yet. By the time I got done working on that caddy every day my shoulders, neck, and hands were whining at me so I didn't push it. I'm working on it this week, though. Although I got the BOM embroidery designs traced I'm not letting myself start embroidering them until I get that binding finished, dang it.

Basically--woo for me--I got everything done I wanted to get done! 

I don't have much going on this coming weekend, either, so I am already starting to think through what I might focus on accomplishing. I think I'm hearing Annie Unrein call my name again...

(Craftsy links help support my podcast and blog--thank you!)

Pre-Long-Weekend Progress and Plans

Ooh. I love alliteration.

I do find it helpful to state boldly--sometimes rashly and foolishly--all those things I seriously think I could actually get done over a weekend. And then at the end of the weekend, I generaly look back and say with some sheepishness, "Well, at least I got this one little thing done. That's something."

Here in the U.S. it's the 4th of July weekend. For many of us, that means we have Monday off. I also had slightly-early-dismissal today (Friday). Even though it was only about 90 minutes early, it still feels like a nice way to get a head-start on the weekend.

We'd originally planned to have people over Monday but as it turns out, we're going to be meeting my son for breakfast and then maybe going to Genesee Country Museum for their festivities (including a swearing in ceremony of new citizens--always a highlight). Since we're not actually having people over and I don't have to prep for a party, that means woo! Sewing time the rest of the weekend!

2016-06-26 19.27.47.jpg

First: I plan on finishing the Catch-All Caddy.

It's been in this state since last weekend. That does actually represent good progress made last weekend, but obviously it wouldn't catch or caddy much in its current state.


Also: I plan on getting the binding done on the Jacob's Ladder. 

Miles. I have miles to go. But our family is in the midst of a Stargate Atlantis binge so I've been to working on this all week while watching the Atlantis crew fight off the Wraith. Here's to hoping we watch enough TV the rest of the weekend that I've got it done by Monday!


Finally: I'd really like to get started on putting together the first blocks of my embroidery BOM. 

I want to finish the little Christmas snowman guy I'm working on before starting the embroidery on this one, and I will get back to him once I get the binding done. (He's a "handwork in front of the TV" project.) But I need sewing room time to get the blocks for the BOM together and prepped for embroidery so I'd like to do that this weekend when I have more hours in the day available to me. 

By the way, I've also started thinking through my other new Halloween embroidery project. So that's a possible other endeavor this weekend, depending on time. 

Thanks to Trisha who turned me onto Urban Threads (see the Quilting for the Rest of Us Facebook page for that conversation), I bought a really wonderful Art Nouveau Witch design. Love Art Nouveau. This Halloween design is seriously classy and SO right up my alley. I've pulled out my tracing paper and colored pencils and am starting to think through thread choices. I printed a picture of an Alfonse Mucha painting to use for color inspiration. (Mucha's a fave.) I might toss into the weekend schedule a trip to an LQS that I recall having some great Art Nouveau/Art Deco/William Morris fabrics to see if I can find some borders I could use on her and blend that with color inspiration from the Mucha painting. I did find some pretty nifty possible border fabric from Fat Quarter Shop but really don't need/want an entire half a yard of it, so I want to see what I can get at an LQS first. Unfortunately, said LQS is about 45 minutes away so it would take a big chunk of sewing time out of Saturday, so we'll see what I feel like when I get up tomorrow morning.

So, let's see what happens this weekend, shall we?

Post-weekend progress and errata

I got a lot done this weekend, but I also realized I had two designers confused when I wrote a blog post and spoke on my podcast episode (posted yesterday).

The Christmas ornament embroidery I'm working on is Lynette Anderson Designs. She's from Australia.

The Postcard Cuties for Halloween Block of the Month I'm doing is Bunny Hill Designs. She's not from Australia. She's from the U.S. 

I've fixed the BOM blog post to note the error. I can't fix the podcast episode in which I think I said both projects were Lynette Anderson. Apparently I had too relaxing a weekend and my brain just stopped working altogether. Sorry about that!

Meanwhile, I did make progress!

1. I got the label affixed and the binding put on the front of the Jacob's Ladder quilt. I then got about 36" of the binding hand-stitched to the back while watching Stargate Atlantis (our current summer viewing fun). I haven't done the math to figure out how many inches I have left to go on that hand-stitching. Too depressing. I'm just enjoying the zen.

By the way, tried a new method for keeping the binding organized while sewing it on--I've seen this as a tip in a few places, and it really works! 

If you've got two thread spindles on your machine, roll up the binding and put it on one of them. I was concerned it would get tangled with the thread but it never did--I just kept a bit of an eye on it to make sure. 


2. I made progress on the Catch-all Caddy.

Trust me--that's a lot of progress. 


3. I got the first of the two Christmas ornaments completely done. The second is now on hold until I get that binding done.

He's kinda cute. His button hat is a little off in this picture (you shouldn't see the end of the stitching on the one side) but I just twitch it with my finger and it goes back into place. 

A point of slight interest on the stuffing: I bought myself a meditation cushion a few weeks ago as none of the cushions in my house were the right height/firmness. That puppy was rock hard when I got it, so I kept pulling out more and more stuffing until it got to a comfortable firmness I could handle for meditation sessions. The stuffing is 100% cotton fiber--beautifully smooth and soft, actually. I kept all the stuffing I was pulling out in a bag and stashed it in my sewing room. Came in handy for this! I've still got plenty left--can stuff more little fun things like this, of course, but some may also eventually make it down to my dye studio. I think it would be fun to play with. Way to re-purpose!

So--all of this progress, plus time poolside, a Saturday afternoon nap, and lunch with a friend, adds up to a really wonderful weekend. Ready for the week ahead!

Pretty Mail (AKA: Like I Really Have Time for This)

BOM bag.jpg

Yesterday I got the first couple of installments of the embroidery Block of the Month (BOM) that I signed up for at The Quilt Block, Inc., when I was in Exton, PA, in April. Woot!

I ended up getting month 1 and 2 at the same time due to some delays around getting my payment info to them, etc., which is part of the fun-tricky part of doing a LQS BOM from a distance. Still, we worked it out, and it's all good. It was a kick getting a box filled with goodies!


The BOM is "Postcard Cuties for Halloween," from Bunny Hill Designs. My package included all sorts of great stuff to get me rolling!

Even candy corn for a mid-project sugar fix!


There's a jelly roll of fabrics to work with--Moda's Spooky Delights by Bunny Hill Designs.

As you can see if you use the link for the whole project above, ultimately this finishes to a 38" x 36" finished wallhanging. To date, I've never made a Halloween quilted decor item of any kind, although I do have a few patterns I've collected over the years. As I told my daughter yesterday when she was admiring my pretty mail with me, this isn't my usual style. But even if I don't love it when it's done, it would only be hanging up for, at most, a couple of weeks a year. (More likely, the way I usually forget to decorate until the last moment, a couple of days a year.) 

I do the cutting for each block as I work on them, and it looks like I can choose which fabric I want to use each time, so that'll be fun too. The only thing I'm a little worried about is whether I'd end up with two fabrics sitting next to each other in the finished wallhanging (which would bug me no end) so I may end up, for simplicity's sake, just following her picture. That's not normally like me, either, but much of the time I'll be working on this I'll be deeply enmeshed in work travel and schoolwork again and won't want to unduly stress myself out for what's supposed to be a fun project.

I know my limits.


The package also included some Tulip embroidery needles. This is a Japanese brand made in Hiroshima. According to the packaging, they're made in such a way as to make them slide more easily through the fabric. I bought some Tulip needles when I was at the shop but I made the mistake of opening the package and dumping them into my usual magnetic needle case with all the rest, so I have no idea now which is which to compare. I'll keep these needles separate with this project to make it easier for me to get a feel for them.


And then there's the embroidery thread--everything I'll need for the project. This is Cosmo embroidery floss, another product from Japan. I noticed that it's also sold on the Bunny Hill Designs website so she must be a fan of this floss; hence, it's use in her project. 

I'm not familiar with Cosmo, but since it's from Japan, and since Bunny Hill Designs is Australian, I'm thinking maybe Cosmo is more common in Australia...? Any of my Australian/New Zealander buddies want to comment on that? I'm looking forward to using it to compare it with DMC and the other threads I'm used to working with. 

EDITOR'S NOTE: Error here--sorry. I had Bunny Hill Designs and Lynette Anderson Designs mixed up in my head. Bunny Hill is not in Australia, Lynnette Anderson is. So Australian/New Zealanders would have no more reason to be familiar with Cosmo thread than I do!


And just to be extra nice, they included a water soluble marking pen. I already use this type and really like it, so I'm glad to have another!


Month 1 will be fun--I get to start out embroidering bats. Woot! I need to make five bat blocks altogether, but it's a really simple design so I don't think it'll take too long. I will have to practice my satin stitch a little more--I've not gotten that one really smooth yet and it's used for the bats' eyes. The bats are scattered throughout the finished wallhanging on that orange dot fabric included with the package. The official first block includes a cat and spider (on the off-white background). It's got a little more going on, especially in the satin stitch department. If I'm not good at that satin stitch now, I will be by the time this puppy is finished!


Month 2 is another cat block with some lettering. That one is simple enough that again, it should go pretty quickly. (I know, I know: "Famous last words.")

Month 3 comes in July, but I do have a few other projects I really ought to get done before starting on this so I may end up with Month 3 arriving before I've managed to get both 1 and 2 done. I'm determined not to fall too far behind, though!

I'm thinking I may have found the ultimate use for the Annie Unrein toiletries bag--I feel like it would be the perfect project bag for this BOM. It would easily hold all the supplies, so it's just a matter of what size hoop I'll need for the blocks. I'll keep you posted...

Just a little embroidery fun

My guild had a sew day today and although I didn't feel like I could be gone an entire day, I put together a quick embroidery project I've wanted to get at for awhile and stopped by for about an hour or so. It was long enough to get my social fix with my quilty peeps and it was good motivation to finally get these little puppies underway.

I have two identical little kits that I picked up at one of my LQS a few months back. It's from Lynette Anderson's Sweet Christmas Ornaments patterns. There are 12 designs in all and you can choose to make a wallhanging out of them or use them individually as ornaments. I think I bought these right after Christmas and they only had a few of this one design displayed. It's possible they'd started out with the whole set but sold out of most of them before Christmas. I didn't mind picking up two of the same: I thought they'd make nice last-minute gifts and/or I'll keep one/give one, or something. Undecided. The kit came with the design, fabric strips and squares to trim to size, and a wooden hat button. I'm using my own floss. 

I got both of them sewn together and traced before heading to the sew day, then I got partway through the embroidery on one of them while I was there. It's been so long since I've touched my embroidery that I had to re-start my stem stitch three times because I totally blanked on how to get myself going. Once I worked that out, though, it was a relaxing hour just hanging out with my friends and doing some simple stitching. 


And so I went on retreat... (I guess this is #SBSI)

I made an impulsive almost-last-minute decision to attend a quilt retreat this weekend sponsored by a sorta-kinda-LQS. I went on her first retreat two years ago--horribly sick, had to go home at night to sleep in my own bed, didn't get a lot done. Couldn't go last year as I'd only recently gotten home from my international jaunt. I'd put my name in for this year but waffled for months over whether I'd be able to go. Finally decided I really needed some friend-time and quilty-time so about 10 days before the retreat I contacted the LQS owner and was able to send in my deposit. I'm so glad I did.

image.jpg

My home away from home... It was a small enough retreat that several of us got rooms to ourselves. That's my "Quilt I Saved from Almost Certain Destruction" on the bed (episode 17 and this blog post). The armchair was convenient for getting some class reading done here and there as well.

 
image.jpg

Our weather. 

Unexpected, but pretty. (Drive 10 minutes in any direction and no snow. For some reason, our retreat center was right in a blizzard pocket.)


image.jpg

The way we ate. All freaking weekend. I don't even want to know how much I gained/ 

 
image.jpg

Oh...and did I mention the desserts? Yikes.


My friend surprised me with a little gift on the table space she'd set aside for me (I arrived a few hours after most others). Adorbs! 


The retreat started Thursday morning but I didn't go down until after work Thursday, which meant I got there right about dinner time. Thursday evening, therefore, after getting my stuff all set up, I decided to just go for a little embroidery Zen. I got one more patch on my crazy quilt block done. 

I wasn't keen on the way the feather turned out (my markings kept disappearing on me, urgh), so I used the Rule of Distraction. Put enough beady-bling on there and you don't notice anything else!

 
image.jpg

By Friday morning, I was ready to rock n' roll. This was a guild BOM from 2008. Got all the blocks finally pieced a couple of years ago. I'd put fabrics for the sashing, inner border and outer border in the bin with the blocks so at least I knew more or less what I'd intended to do back then. Now the top is done--woo!  

This is just for me so I'll probably just do an all-over FMQ on my DM. So we'll see how long it takes me to get it REALLY done.

 
image.jpg

Saturday's job was my second UFO of the weekend. This is a jelly roll quilt from Jelly Roll Sampler Quilts by Pam and Nicky Lintott (a gift from listener Carolyn of the U.K.--thanks!). Started it around 2012-ish. Finished the blocks in maybe 2014. Took it to an LQS Super Bowl Sale this weekend and amazingly found sashing and border fabrics pretty quick despite the crowds. That burgundy stripe between the two borders is a flange--first one I've done, and I love it. Just the right amount of accent for the burgundy in the blocks. I'll probably use that same fabric for the binding. Haven't decided if I'll do it myself, or maybe rent time on a long-arm to do it myself that way, or send it out. I'm giving myself another week or so to think about that. It's going to someone else so there's a little more at stake than with that other one.

 
image.jpg

As a small, fast project for a break between the two UFOs, I fused this kit. It's most likely from an Edyta Sitar BOM quilt* but I bought just this one block at an LQS so I don't actually know for sure: The block kits were in an unmarked basket; there were only three months' worth there; and no picture or information available about the completed quilt. I thought this one would make a great background for some fun embroidery and beadwork. All the pieces were pre-cut and pre-fused, so it was basically just putting together a puzzle. I mostly followed the picture on the package but I moved the bird from sitting on one of the leaves at the top to sitting on the basket--I thought that made him far more prominent and we all know how I feel about pudgy birds.  

*Later edit: I did some googling and yes, it's Edyta Sitar, Seasonal Silhouettes.

I also traced another embroidery design on some linen using a big picture window and the last remaining light of the afternoon, but didn't take a picture of it. Not terribly exciting anyway. 

Finally, I had some time left Saturday night and Sunday morning, so I made another little zipper pouch. This one is the Ditty Bag pattern from www.byannie.com. (The pattern has three sizes; I made the medium-sized one.) Wasn't too hard to do, other than the usual annoying fiddly bit sewing around that curve on either side. Zippers are going pretty easy for me these days. Yay. It's got some nice structure but if I use the pattern again, I won't bother with the binding on the inside--it was a pill and doesn't really add much. Finishing the seam with a zig-zag would be good enough. 

Oh, and I got a decent amount of class reading done. So there's that too.

All in all, a good time. And now, for the rest of #SBSI, now that my week's assignments are done, I'm going to hang out in front of the TV with my man and four-leggeds and do some more embroidery.

(By the way--I realize I didn't draw the name for the Quilty Resolution challenge yet--I'll take care of that manana!)

Monday Musings: UFO Sightings, Part 1--Just What Is a UFO?

So it would seem that some of you appreciated the 5 Ss posts that I've done the last few weeks--maybe some of us are feeling the pinch of being a little less organized than we'd like. So I'm thinking I'd like to keep with that theme for a bit, but explore different facets of it. As usual, stuff I talk about on my podcast and blog are things I'm addressing (or feeling the need to address, anyway) in my own life, so I'm talking to myself as much as to anyone else.  

I've mentioned that I had a sudden alien invasion in my sewing room. What to my wondering eyes did appear but something like 17 UFOs. Really? When did that happen? Leave fabric alone for long enough and it gets up to shenanigans, apparently. 

So, based on that, and on comments some of you have made when I've been talking about my UFOs, I'm going to do a few posts on what I've learned about addressing those alien invasions in your own life. 

Week 1: Define for yourself, "UFO" 

We all know what a UFO is, right? "Unfinished Object," or so they say. But what, exactly, is an unfinished object? Turns out there's as many definitions for what warrants the definition "unfinished" as there are quilters not finishing things. I once read an article or a blog awhile back--don't remember specifics anymore--written by someone who defined her UFOs to include quilts she'd even just  thought about doing. In other words, she may not have even bought fabric or designed it on EQ or sketched it in a notebook, but it was in her head as a quilt, therefore the fact she hadn't made it yet rendered that quilt as unfinished.

Technically, I suppose that would be true. But if I were to be held accountable for every quilty thought that passed through my mind, well...I'd just throw in the towel and call it a day right now.  

Some people include PIGS (or Projects in Grocery Sacks, an acronym which really geolocates it's users to those who live in parts of the country who call grocery bags "grocery sacks," as here in Western NY it would be PIGBs, which is virtually unpronounceable); these projects are those for which you have a pattern or design and you've collected all the fabrics for it--it's all sitting neatly in a bag or a bin awaiting your attention. And waiting. And waiting.

A very old photo of my storage for UFOs. I'm pleased to report all of these UFOs did get completed. They're now replaced with a new stack...

A very old photo of my storage for UFOs. I'm pleased to report all of these UFOs did get completed. They're now replaced with a new stack...

Some quilters include WIPS (or Works in Progress); these are projects you're currently working on. They've not yet started collecting dust on the shelf, but are still at least more or less in current rotation. 

For me, I made some judgment calls a few years back and came up with this working definition for myself: A UFO is any project in which I've already made the first cut, and which has dropped off my mental radar for any number of reasons.

In other words, I don't choose to count PIGS.  My rationale for that is that I can always repurpose the fabric if I lose interest, so just because I've thought about doing a particular design and put together a particular collection of fabric for it, doesn't make it a UFO. I haven't actually cut into that fabric yet, so I've never officially "worked on" the project to make it now be something I haven't worked on in awhile.

I also don't count WIPs because, by definition, those are still "in progress." It has to have been languishing on my shelf for some period of time.

I've never strictly defined how long a period of time it needs to have been out of rotation; it generally has more to do with whether it's fallen off my mental radar or not. If I look at something and think, "Oh, yeah, I really need to finish that," it means it's dropped off my radar, even if it was only waiting for me for about three weeks. That makes it a UFO. 

I don't count quilts I've dreamed up. That's just crazy talk. 

So this week, if you want to play along, work on your personal definition of what you actually, personally, consider a UFO, if you haven't already done it at some point in your quilting career. Don't just take someone else's definition for it--use a definition that works for you. You might even want to write it down, maybe hang it over your cutting table or something, live with it for a bit. Does it feel right to you? When you're ready, share your definition here!

Progress and Goals--Week of May 3

My goals for this week were to:

  • Make progress on the Annie Unrein bag
  • Complete mug rug for swap
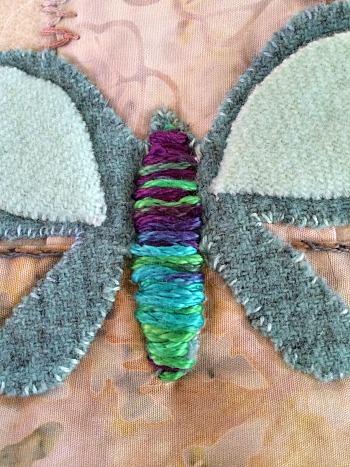
  • Complete three butterflies on Sue Spargo project
  • Make block for friend's quilt

Progress:

Satin stitch with heavier thread--based on new Craftsy embroidery class I'll write about later

Satin stitch with heavier thread--based on new Craftsy embroidery class I'll write about later

  • Annie Unrein bag: This got completely back-burnered this week as I have two time-constrained projects on the docket so I focused completely on those.  
  • Complete mug rug for swap: I haven't completed it yet (sorry, Kerry!) but I've made progress! Unfortunately, what I chose to do is somewhat time-intensive. But I think it'll be fun when it's finished.
  • Complete three butterflies on Sue Spargo project: I'm now using stitches from a different Craftsy class (more on that in a future post), but haven't completed three butterflies yet. Again, those time-constrained projects made everything else take a back seat this week. I'll be bringing this with me on my work trip.
  • Make block for friend's quilt: I'm doing some embroidery on it so it's a long process. I'm writing this post on Saturday and scheduling it to post on Sunday, as I'll be driving most of the day Sunday (see afore-mentioned reference to a work trip). I'm actually hoping to get this block done before I leave; if not, it'll be coming on my trip with me.

Goals for This Week:

This is tricky this week as, when I get back into town from my trip, I'm immediately out two nights in a row, then having family over for dinner the following night. So I really only have next Saturday for any sort of quilting projects, I think. Therefore, my goals for this week revolve primarily around portable projects that I can easily poke away at with 10 minutes here and there. (Read: No Annie Unrein bags on this week's plan!)

  • Get my friend's block done.
  • Make progress on the mug rug. This will be my primary focus on Saturday if I haven't managed to get to it before that. I really want to get it done, Kerry!
  • Complete two butterflies on butterfly project. I knocked it down a butterfly due to my lack of time this week. Still, I think this could be within reach.
  • Complete two Craftsy classes. One is the second embroidery class I mentioned above--a few more stitches and I'll have completed the class, if not the butterfly project; the other class is one I'm just watching to get a feel for techniques, no class project involved. I've only got a couple of lessons left to watch and I'm planning on doing that while I'm in my hotel. I can be embroidering at the same time--way to do the two-birds-one-stone thing!

Thinkin' about It Thursday

This week, I'm thinking... 

  • That I really am loving me some embroidery. 
  • That all those wonderful, funky threads are like candy. 
    • I can't resist. 
    • Give me more. 
  • That adding some beads is a dangerous thing. 
    • Addictive. 
    • Another collection. 
  • How getting fiber art books out of the library can seem like a penny-wise move. 
    • Until I realize I really want to own the book. 
    • Ahem.
  • How nice it was to be able to start playing fetch with Doofus in the backyard this week. 
  • That he and I both need to get into better fetch shape.  
    • Winter was rough on both of us.
  • How I'm sorta looking forward to my work trip next week because I know I can take my embroidery with me. 
    • It's a sickness. 

WIP Wednesday

I think I've done a WIP Wednesday post maybe twice in my blogging life. But here it is. I have something to say this week!

Vinyl pockets with gussets

Vinyl pockets with gussets

I'm pleased to announce I finally conquered the whole "sewing on vinyl" thing with the Anne Unrein Everything in It's Place bag.

(For those of you who haven't been playing along recently, I'm doing Annie's Craftsy class, "Sew Sturdy Travel Organizers,"* in a last-ditch effort to see if I could ever learn to love doing this kind of sewing.)

In my last podcast episode--I think, or maybe it was a recent blog post, can't recall exactly--I was grousing about the trouble I was having with thread breaking when I was trying to sew gussets in strips of vinyl that will eventually become the pockets.

After reading some blogs on the topic, and then a little trial-and-error myself, I finally hit on the combination that worked for me: Leather sewing machine needles and thinner polyester thread. Using a 90/14 Schmetz leather needle with a Superior Threads Bottom Line (bobbin weight) poly thread in my top and bobbin, I finally got all the vinyl pocket gussets sewn with nary another break. I think the bobbin weight thread will be strong enough, but it all gets sewn again anyway when you install the pockets on the pocket pages, and I'll be using a 50-weight thread for that, so it'll be fine.

Zipper-by-the-yard with pulls installed

Zipper-by-the-yard with pulls installed

And then I had to install umpteen-million zipper pulls on a zipper-by-the-yard. This was a struggle I'd already had to conquer back when I had to do the mesh pocket a couple of weeks ago. Now that I know how to get that stinkin' zipper pull on...I can't say it got a whole lot easier. But at least I got it done without throwing a single one across the room. I measure success a little differently these days.

That being said, I really should've watched the lesson all the way through before I hauled off and got started on the zippers this time around--I only saw after the fact her very helpful tip about putting all the zipper pulls on first and then measuring it out, sewing and cutting the zipper lengths needed with the pulls already installed. Probably would've gone a lot faster, as it's easier to put the zipper pull on using the fabric tail of the zipper rather than on the cut end.

Yes, the jury is still out. Her instructions are great, the class is great, the design is great--but I still think I'd happily pay someone else to make this dang thing for me. Still, I soldier on...

(*Using this Craftsy link helps support this podcast and blog. Thank you!)


Progress and Goals--Week of April 19, 2015

My goals for this week were to:

  • Learn two more stitches for Sue Spargo class project
  • Finish prayer flag. (It's quite close to being done.)
  • Finish Anne Unrein's Everything in Its Place bag from Craftsy class--maybe. At least, make significant progress.

Progress:

  • Stitches--ummm...I did watch one lesson. I'll be sitting down with my embroidery tonight for the first time in about 10 days. So tonight I'll have some progress, but nothing to report here.
  • Prayer flag--ummm... see above.
  • Finish EIIP Bag--[insert snort of derision here

Basically, I didn't make much progress this week on quilting projects; I did, however, do a lot to set myself up for better progress in the future. You'll need to listen to tonight's podcast episode to hear why. That being said, while I was listening to my own episode back again prior to posting, I did make some progress on the EIIP bag. Just know (after you listen to that episode) I did finally conquer sewing on vinyl--woot! It took new needles AND a different thread. I finally landed on the right combination that allowed me to get 'er done. It wasn't fast, and it wasn't pretty, but it was done. 

Goals for this week:

  • Second verse, same as the first...
  • Also, develop a really solid list of my UFOs for planning.

Progress and Goals--Week of April 12

Did you notice Craftsy is having a flash sale this weekend? Use the banner in the right sidebar of this blog post to check it out! And thanks for supporting this podcast and blog.

My goals for this week were to:

  • Continue progress on the "Everything in It's Place" bag from Anne Unrein's class.
  • Get the binding on the D4P baby quilt.
  • Learn two more stitches on my Sue Spargo class project.
  • Put beads on the prayer flag

Progress:

  • Got the D4P baby quilt done! It has no name, it has no current destination. But it's done!
 
  • Got the beads put on the prayer flag. And a few other things done on it besides. Now I just have to figure out what finishing touches I want to do--it doesn't need much, though, so it won't take long.
 
Cast-on bullion stitch

Cast-on bullion stitch

  • Learn two more embroidery stitches. I learned three, actually--woo! I finally finished lesson four. Took awhile--lesson four stitches are all pretty time-consuming. I only used one on the project; the other two I practiced but decided I didn't want to actually use them yet.

The cast-on bullion stitch (at left) is pretty but very similar to the bullion stitch I did last time; so, since it takes even longer than the bullion stitch, I wasn't in the mood to do it all again. I did one to see how it looked, then cut it back out of the project. I may do one down the road as I still have a heck of a lot of project to embroider, but right now I wanted to do something different.

By the way, being able to slow the video down to 1/4 speed and put it on 30 second repeat helped a lot when I was trying to coordinate my thumbs for that cast-on stitch. Not being a knitter, that  isn't something I've done much and she whipped hers off pretty quickly. After watching her do it very s-l-o-w-l-y several times over I finally got the hang of it.

 
Drizzle stitch

Drizzle stitch

The drizzle stitch is darn cute (at left) but doesn't really work on this current project so I did one for practice and then cut it all off again. Good to know for the future, though. Yep, it's supposed to look like a wad of knots, basically, though generally it would be neater than this. You can't quite tell in this photo that it's 3-D--the stitches hang off like hair or fibers or some such. Cute in the right place--not right for my project. I cut these off when I was done practicing.

 
Double cast-on stitch

Double cast-on stitch

Finally, the third stitch was a keeper on the project this week. The double cast-on stitch is also very, very time-consuming, but pretty cool, and I was able to use it in a very limited space so I wouldn't be working on it for the next three years. I didn't get mine touching each other the way I'd have liked to--it was a little hard to see where my needle was coming out in comparison to the completed stitch before it. And I still need to work on evenness, but that all comes with practice. It's also a matter of learning how your thread will behave. This one was variegated in such a way that it divided in half color-wise, which was kind of neat, but now I know how to picture that ahead of time as I'm choosing threads in the future. 

She has several examples of how she's used this in various ways (as she does with all her stitches) and this one has great possibilities for other places on my project. You may see more of this one later.

  • As for the Anne Unrein purse project? Well, not so much. I looked at it the evening I finished up the baby quilt but decided the next step is not one I can leave half-done easily, and since I'm about the head out of town, it's better to be left until I'm home. So it's on next week's goals--but this time I hope to get it finished!

And yes, it did help listing my goals like this. Mostly, it got finishing that baby quilt stuck in my head until I finally just sat down to knock it out! 

I'm actually on the road as this posts (waving at you as I drive by). I don't get home until Thursday, but I have Friday as a comp day. Friday evening my husband and I need to clear out of the house for a couple of days as my daughter is turning it into a weekend boarding house for her and some of her buddies attending a Comic-Con in the area. We're just staying in town because we've got some things to do locally, so it's not a terribly exciting weekend away, although we'll make the best of it! In any case, I won't have access to my sewing room for the weekend. For all those reasons, my goals are small, and largely involving embroidery that I can bring with me on the weekend jaunt. 

Goals for the week of April 12

  • Learn two more stitches for Sue Spargo class project
  • Finish prayer flag. (It's quite close to being done.)
  • Finish Anne Unrein's Everything in Its Place bag from Craftsy class--maybe. At least, make significant progress.


Progress and Goals for Week of April 5, 2015

Yeah, I know--I'm entitling this blog post for April 5, which was yesterday, even though I'm writing it today (April 6, Monday). But for some weeks now I've been thinking I should take a page from the books of Jackie at SewExecitedQuilts.com and Philippa from Ozzypipquilts.com and do a post every weekend in which I recap what I've gotten done and set goals for the coming week. That just seems so nicely organized. And I've just become so...well...disorganized. I've been all over the place is my quiltmaking lately and it's time to settle down and move some projects through finishing stages to get them off my cutting table, design wall, or shelves where UFOs go into hibernation. I'm thinking Jackie and Philippa have a good idea--doing a weekly report on my blog may keep me on target. Or, here's hoping, anyway.

I guess I should start with the master list. Oi--this is going to hurt. I won't include this full list every week, though I should probably put it in the sidebar or on it's own page or something; I just always forget to update that kind of thing. Anyway...engines started, here we go:

Things I need to get done in April but haven't started yet:

#JBBOM kit

#JBBOM kit

  • Mug Rug for Sandi at Quilt Cabana Corner's Mug Rug/Potholder Swap--I know what fabric I'm using, and have mentally toyed with several designs. I need to settle on one and execute.
  • April Journal Quilt--no definite thoughts about this one yet, although see art quilt design class-related list of projects below--one will likely become the April journal quilt.
  • April Jinny Beyer Block of the Month (Craftsy)--aka #JBBOM
  • One Feb JBBOM block
  • March JBBOM block--the fact I'm a couple of months behind on this is really stressing me out. I need to devote a couple of days to catching up again.

Works in Progress (things I'm poking away at on an on-going basis)

20150327194201.jpg
  • March Journal Quilt--it's partly done; I probably have another couple of hours of work to do on it.
  • Two bags for Anne Unrein's Craftsy class--first bag is in progress. It's taking a long time. And I had my first temper tantrum over it earlier today. But I'm not giving up!
  • King-sized Jacob's Ladder quilt--first stage of cutting done
  • Sue Spargo Embroidery project
  • Prayer flag--needle-felting and embroidery project that I haven't talked about yet because it was purely spur-of-the-moment; it should only take about an hour of embroidery/finishing.

UFOs (projects that have sat for at least one month or more with no progress being made)

D4P Baby Quilt

D4P Baby Quilt

  • D4P baby quilt--just needs binding. Really? And it's sat for this long?
  • Duffle bag--probably only has about an hour or so left of work to be done. 
  • Color and Curves class project--working on border, then needs quilting/finishing. Probably would only take a few hours to finish, all in.
  • African Star Quilt--the one I did in Ami Simms class in Lancaster last spring. Needs quilting/binding. I want to quilt this one myself.
  • Scrap-in-a-Box--I did most of mine last spring/summer when I was pattern-testing, but didn't finish it once everything moved to Charlotte's blog and I was no longer responsible for the reveal, LOL. I've had breathing room while everyone caught up, but I think next month y'all will be caught up to me, so then the pressure will be on to actually finish it in my lifetime.
  • Color Circles art quilt design class project--needs quilting and finishing
  • "Flames" hand-dyed tapestry project--needs quilting and finishing
  • Art Quilt Map--stalled, went after it with a rotary cutter and completely changed direction, then ended up sort of backing myself into a corner. Need to make a decision about the future of this one.
  • Jelly Roll Sampler--I think all my blocks are made. I just need to decide sashing/no sashing, then get the top pieced and send it out for quilting. This is something that will be a gift for someone who is likely to redecorate before I ever get it done. Need to just get it done!
  • Fibonacci Sequence Quilt--my own very simple design using Fibonacci Sequence. Strips all cut, one block done, another block completely messed up. Need to decide if I'm finishing this or not and if so, figure out what I did wrong.
  • 2008 Guild BOM--blocks all done. Have to decide sashing/no sashing, then get top pieced and send it out for quilting.
  • Katerina Project--this one is an ancient UFO, probably over 10 years old. My own EQ design to use a fabric collection my Mom gave to me for Christmas that year. Some of the finished block sizes were way off, though, so it got set aside. Now I'm no longer in love with the fabric but there's still a lot of sentimental attachment to the project due to its connection with memories of my Mom. Need to decide what I want to do about this one.
  • This one's a little embarrassing, but do y'all remember the Hexie Challenge I did with Pam and Jaye, and I only ever got my Hexies cut out? They're still sitting in that bin. Hmmm.

Projects in Planning Stages but First Cut Hasn't Been Made (so, technically not a UFO in my mind!)

Burma Fabrics

Burma Fabrics

  • Laurel Burch wallhanging--have had fabrics for-freakin-ever; keeping it simple in design. Need to just get 'er done.
  • Art Quilt Design Class project Feather
  • Art Quilt Design Class project Hope out of Darkness
  • Art Quilt Design Class project Monochromatic Trees
  • Art Quilt Design Class project Sunset on the Irawaddy colors
  • Art Quilt Design Class project Finger Lakes Wine Country (FMQ)
  • Art Quilt Design Class project Monochromatic Cave
  • Zipper pouches with fabrics from Burma
  • Hand-dyeing colorways--I want to start working my way through the Ives color wheel and dye sets of fat quarters in every color, several shades/tones/tints of each. That's a long term project but there will be immediate benefit since I'll immediately have new fabrics to put into projects as soon as I get rolling on it!

I'm not yet including in this list the recent UFO I inherited from Vicki (I talked about this an episode or two ago), nor a set of blocks I inherited from Mom years ago that still haven't landed in a project. Those just need to brew for awhile before I worry about getting them on any official list.

UFOs I think I'll be releasing to the wild

Some UFOs just don't jazz me anymore, and I'd be finishing them just to finish them. And there's not enough time in the day for that kind of nonsense. I'm not big into obligation quilting--if I'm going to spend what little, precious time I have in my sewing room on a project, it's one that's really going to jazz me. So there are certain UFOs I think I'm ready to just send on to someone else. I'll ask around at my guild to see if someone wants these.

  • Bow tie blocks--I was playing with a technique I'd learned when I was out on a speaking engagement. I thought it would be a great way to use up 5" squares, which it is. I've got something like 12 or 13 blocks done--just enough for a wheelchair quilt for a guy. It probably wouldn't take all that long to finish, I just have zero interest in putting any more time into it. Someone may love these blocks and enjoy putting it together.
  • Snail-trail top--I believe this one dates back a couple of years to when I was doing creativity challenges on my podcast. I vaguely recall this was my start on the warm color challenge--I did a background with snail trail blocks in black and sort of a taupe-y fabric. The intent was to do applique flowers on the top in oranges/yellows. The background is nice enough but I have no interest in finishing it at this stage.

There may be others I decide to send away to new, loving homes, or ditch altogether if I've learned what I need to learn. These are just the ones I've run across recently that I immediately thought, "Nope, not interested."

Oh, I'm so sure I'm missing something on this master list. But it's enough to make me feel overwhelmed so here's to starting to chunk away at it.

Goals for This Week

I'm home most of the week, though after today I'm back to work. I'm out Tuesday night but I think that's it. I'm gone next week, though, so I'm keeping my goals very limited until after I get back from this next work trip. Then I've got a few weeks of a fairly low-key schedule so I hope to make significant progress then.

This week I plan to:

  • Continue progress on the "Everything in It's Place" bag from Anne Unrein's class. Unlikely to get it finished, but would like to at least feel good about where I'm at.
  • Get the binding on the D4P baby quilt. I mean, really. Can't believe that's still sitting there.
  • Learn two more stitches on my Sue Spargo class project.
  • Put beads on the prayer flag so it's easier to travel with--I'll bring this with me on next week's trip because it's very, very small and easily portable.

Thinkin' about It Thursday

This week, I'm thinking...

  • That I really, truly, am a machine girl.
  • That hand-piecing and hand applique are just not really my cup of tea.
  • That, however, I do like doing felted wool with a blanket stitch by hand.
    • Just not in several layers with a honkin' big chenille needle that hurts my fingers trying to get it through everything.
  • How I'm finally narrowing in on being able to start my embroidery for the Sue Spargo embroidery class (not the "Sue Spargo Take 6 Weeks to Finish Your Background" class).
  • That I'll find out then whether I'm an embroidery girl.
  • How I have a few too many projects clamoring for my attention at the moment.
  • That, regardless, I'm having too much fun to stop myself. ("Ooh, shiny!")
  • How much I'm looking forward to going to a class on Saturday with a bunch of my peeps.
  • How it's been way, way too long since I've gotten to spend time with my Guildy-Girls. 
  • That, on the other hand, I've gotten to spend time with a few of them in our Design Study Group this week.
  • How much fun Design Study Group is. 
    • Especially when someone brings in a project for a consult.
    • And we can all gather around and discuss design principles and voice opinions.
  • That it'll be fun to see what they do with the art quilt design classes we're all taking the next couple of Saturdays.
  • How that brings me back to looking forward to going to a class with my quilty peeps.
  • How that almost makes it better that there's still piles of snow outside that haven't melted enough yet for us to even see pavement.
  • How the forecast doesn't look good for the next several days.
  • That at least "March 1st" means "Getting closer to spring," so I'll be celebrating that day even if it is supposed to snow.
  • That even the Doofus has an opinion about the weather.

January Block for 2015 Craftsy BOM with Jinny Beyer

Yep, it's all hand-pieced. 

Nope, it didn't convert me to hand-piecing. 

Or templates. 

It came out to around 9 1/4" instead of the required 9 1/2", something that a lot of people in the class said in their message boards, so it's a common issue. I had measured my PDF print-out of the templates quite carefully, so that wasn't the problem. I suspect it had to do with the multitude of error possibilities in the template process that I talked about on my podcast, plus when I was hand-piecing I was stitching right on the lines, whereas perhaps I should've been doing scant seam allowances instead. Who knows?

templates and pieces marked

templates and pieces marked

I'm very tempted to rip it all out and re-do it by machine to see if I could get it closer to the required size, but I've decided to wait until after February's blocks--there's two of them--to see what size those measure out to. There are some bias edges involved, and I don't think I've got enough fabric to recut pieces, so it would be almost more of a risk to take everything apart and re-do it. Hence, pushing the pause button and adopting a "wait-and-see" attitude.

I'll be doing February's blocks by machine. Although I did get into a groove and had pretty even stitches after the first couple of pieces, I just didn't find the process Zen enough to warrant taking that long on a single block again. I withheld my final judgment until I saw the finished block--I was willing to decide it would be the way to go if my final block were somehow a better or at least equal product to what I can do by machine. Ahem. Nope.

Yes, it's possible to sew a piece on upside down even when "slow quilting" (snail's pace) by hand. At least it's easier to rip the seams out!

Yes, it's possible to sew a piece on upside down even when "slow quilting" (snail's pace) by hand. At least it's easier to rip the seams out!

I know, I'd get better and more accurate if I kept doing it by hand, I'm sure. But here's the thing--ya gotta wanna. I'm not sure I'm particularly interested in becoming an expert hand-piecer. 

I'm still doing hand-work with the embroidery, so I've got plenty of TV-ready work to do. Meanwhile, I'm a machine-piecing-girl at heart, as it turns out. Not overly a surprise.

Meanwhile, I've got some snow-dyeing happening in the basement. Feels good to be playing with dyes again! 

Quarantine Has a Silver Lining

So this cold that's had me down for the week took an interesting left turn this weekend. I had already cancelled out of a couple of things so I could spend most the weekend resting and recuperating. I had a couple errands to run but otherwise was pacing myself with time in my sewing room alternating with time on the couch. I felt some slight improvement by last night so I had high hopes for today. And then this morning (Sunday) I woke up with what I strongly suspect is pink eye. I've never had it myself, but my kids did when they were little and a quick check of the Internet confirmed my symptoms. Still, I'll be calling my doctor in the morning to be sure. Fortunately, it's not too bad--my eye's a little swollen but it's not really bothering me much in terms of pain or anything. 

image.jpg

The biggest impact is that I consequently had to quarantine myself. My husband got groceries instead of me (love that man), and I carry disinfectant wipes with me everywhere I go to wipe down any surface I touch. I've had a hand towel tossed over my shoulder all day for drying my hands so I wouldn't use any of the bathroom towels. I had DH pick me up a box of latex gloves so I could help put away some of the Christmas decorations and then tonight, when my son and a friend, and my nephew and his girlfriend, showed up to play games, I could participate safely. 

I call it, "practicing safe game." Ahem.

But for the most part, I tried to stay sequestered in my sewing room. It doesn't matter what I touch in there because no one else ever goes in that room.​

image.jpg

I got all the pieces done for the Jinny Beyer BOM. I haven't started hand-piecing it yet. I do think I've already decided I won't be hand-piecing the rest of the quilt. Holy cow. I mean, I'd like to have this done before I'm 95.  

I also want to shout my thanks to the person who invented the rotary cutter and rulers. I'd never have become a quilter if I had to do it this way. More power to all y'all who started quilting in the days of templates and scissors--every one of you is a better person than I am!

It's a fine line between Zen and Tedium. 


image.jpg

I also got one butterfly--count it--one--of fifteen appliqued on my other Craftsy class project-in-process, Sue Spargo's embroidery class. I'll be blogging more about that class some other time. For now, let's just say I was having thread issues. 'Nuff said.  

I'm probably going to be working on this more tonight. I had to tap out of game night when talking more than I'd talked for the last several days all together got my coughing started up again, so my nephew tapped in to finish out my role in Careers, and now they're gathered around the dining room table playing Settlers of Catan. I'm having fun just listening in on their trash talking.

image.jpg

The other big project I wanted to get done this weekend is now complete. I'd bought two hand-woven fabric pieces from a woman in Myanmar---straight off her loom; I needed to cut each piece in two to turn them into four shawls as gifts for colleagues. I had to hem them up, which was more of a challenge than I thought it would be. I'll talk more about this process on my next episode--whenever that is. In any case, I got those finished tonight too. That felt particularly good--now I just need to get two of them in the mail. The other two go to womenn I'll be seeing this coming weekend.

I also knocked out a lot of other things---little niggly things like getting a bunch of printed Craftsy materials organized into a binder, ssome other stuff labeled, a few necklaces fixed, some other Myanmar souvenirs boxed up and rready to get packaged for mailing.

image.jpg

All in all, quarantine allowed me to knock this post-it task list... 


image.jpg

Down to this.  

I guess I can handle being quarantined.  

For now, anyway. 


I caved--2015 Block of the Month with Jinny Beyer

Online Fabric Patterning with Wax Resist Class

I haven't done a block of the month (BOM) in years. The last time I tried to do one, it proved to be a lesson in frustration--I kept running out of the month's allotment of fabrics before getting all the pieces for the block cut. In six months, I think I ended up with three completed blocks. I ended up cancelling the rest of my order and tossing what I'd already received--and never signing up for a mail-order BOM again.

Fast forward to 2015 and the free 2015 Craftsy Block of the Month with Jinny Beyer. Craftsy has done a free BOM class every year for the last few years but none of them have grabbed me, and I had too much other stuff I wanted to get done.

This year, however, it's Jinny Beyer. I've been a Jinny Beyer fan since before I even started quilting. Back when I was still a muggle just thumbing through my Mom's quilting magazines at her house, I was able to pick out a Jinny Beyer quilt in a nanosecond. I always loved her use of color. However, I've never done one of her quilts. I started eyeing the 2015 Craftsy Block of the Month with Jinny Beyer with a "hmmm" in my mind.

Jinny Beyer BOM kit with coffee at the ready

Jinny Beyer BOM kit with coffee at the ready

And then a bunch of the #Twilters started talking about doing it. And I caved. Things are always more fun when you do them with friends.

I'm impartial about the design of the finished quilt. I like basket quilts well enough, but they're nothing I've ever really felt moved to do myself. And, interestingly enough, given that it's Jinny Beyer, I'm also a bit impartial to the colors and fabrics--it's a bit too dark for me, although the blues and purples are beautiful. But I have a few blank spots in my quilt skills toolbox that I really should address, and this BOM will help me address them. Also, I began to find something very appealing about the idea of maybe, just maybe, doing this BOM entirely by hand. After all, Jinny Beyer is a hand-piecer, and she shows her hand-piecing technique in the class. Maybe it's something I should try out.

On the other hand, I do want to get this thing done. So maybe not.

Fabrics sorted and labeled

Fabrics sorted and labeled

I waffled a bit about fabrics. Yes, I could have--and, arguably, should have--just gone into my stash and built my own fabric collection for the project. But, read the above paragraph. I do want to get this thing done. And with everything else I've got going on, I don't want to have to be thinking too hard about this one--or, rather, I want to be able just concentrate on whatever technique is being taught by that month's blocks and not sweating about whether or not my substituted fabrics are really working. So I bought the fabric kit. When I did the math, it's a pretty good deal per yard. I like it well enough, and I for-sure know that once it's done I'm sure someone I know will absolutely fall in love with it so it'll find a good home. I might also find I like the finished product more than I do the picture. I'm game, anyway.

This morning, as I did my sorting and organizing, I was tweeting back and forth with #Twilter friend Gretchen (aka @mafiretones) who also bought the kit and was doing her organizing at the same time as me. Although Craftsy includes a print-out of the fabrics in the kit, we both found ourselves having to consult Jinny Beyer's website to pull up images of each fabric (the print-out includes item #s) to be sure. Some of the fabrics are pretty close to one another and in the print-out it's hard to see the difference. So, there's a helpful tip for any of y'all who also buy the kit.

Gretchen has set up a Flickr group so we can all share our photos of fabric choices (even if you're using the kit!) and monthly progress. We should, of course, also post our project photos in Craftsy. It's just still hard to find people you know on Craftsy--how many times have I submitted a feature request to be able to search for other users?--so we thought the Flickr group would make it a little easier to have a sense of community.

Organized for the year. All my Craftsy quilting class print-outs go in the binder.

Organized for the year. All my Craftsy quilting class print-outs go in the binder.

So feel free to join us! Sign up for the (free) Craftsy class 2015 Craftsy Block of the Month with Jinny Beyer, join the Flickr group, join the conversation on Twitter (#JBBOM).

I'll be working on my January block this weekend. Stay tuned to find out if I do end up doing the block by hand or machine.

(Craftsy links in this post help support this podcast and blog. Thank you!)

A Couple of Finishes and a WIP

scarves.jpg

Yep, got those purple scarves done. The ones on the bottom are those I had leftover from the summer events. And yes, they are darker. I must have used a slightly different concentration for this newest batch. Which tends to happen when you don't write things down. Which is the beauty of handmade--the individual uniqueness. Which I'm going to say is my reason rather than just "I didn't bother to take the time to write the darn proportions down."

These will be gifts to women I meet on my trip. I have 25 altogether--no idea how many women I'll actually be meeting.

I'd also mentioned on somewhere along the way that I made a last-minute decision to make something for a special visit I'm hoping to make. This will be for the man who in the 1990s invited my father to work with him on peace-making. I thought a peace dove would be a suitable recognition of their shared work and token of my great appreciation for him and all he's done. 

It's roughly 9" square. Commercial fabric for the dove, my hand-dye for background, backing, and binding--all the same piece. The dove is fused to the background, and I did a hand blanket-stitch around the outside with a variegated perle cotton (I don't recall where I got it--I think from a vendor at Lancaster). Even though I've done blanket-stitches a whole lot, I had difficulty keeping my stitch even because I'm too used to doing it on felted wool, not fabric, and I was struggling to hold the piece comfortably in my hand. For some reason it was all kinds of awkward. But overall it looks okay.

I then hand-embroidered the olive branch with a variegated hand-dyed perle cotton from Artfabrik. Love those perle cottons--very tasty.

As opposed to the blanket stitch, I'm really pleased with the way the olive branch turned out. First time ever doing a stem stitch, first time ever doing a herringbone stitch for the leaves. It looks a little more pine-y than olive-y but hey, you know what it's supposed to be so it's all good. 

It's possible I should've done the quilting first and then done the olive branch. Oh well.

I really enjoyed doing hand embroidery. I may do more free-form embroidery of my own designs in 2015. And yep, I've already got Craftsy classes on my wish list to help me out with that! BTW, I also talked about this on my last podcast episode and mentioned the book I used as reference. Oh, and yes, I did remember to put a label on the back of this too. Cookin' with gas.

And then, also on a whim but with far less purpose than the dove... Remember that Jenny Doan trunk show I went to? Ever since, I've been jonesing to dig into my pre-cut stash and whip something up. Last weekend, when I'd gotten all my scarves pressed and done as much work on the dove as I felt up to doing that day, I pulled out a charm pack, consulted a Missouri Star Quilt Company tutorial, and started cutting.

Introducing: My Disappearing 4-Patch Work in Progress As-Yet-To-Be-Named

I'm hoping to get the blocks done before I leave; I'll not worry about getting it put together into a top until I'm back. I only had one charm pack of this fabric (Good Morning by Moda, an older collection) so it'll be a baby-sized quilt. At the moment, this quilt has no purpose--no one in mind. I don't think I'll donate it, though. I'm starting to realize it may be helpful for me to have a certain number of finished quilts on hand for those last-minute gifts (illness, shower gifts, etc.). And, if truth be told, every other time I've started a quilt without a designated recipient, it seems the designated recipient appears before the quilt is done anyway. So who knows?

Here's the tutorial!


Craftsy Class Review: Dot-to-Dot Quilting with Angela Walters

Online Quilting Class

So this one had been in my wish list for a few days, and I had no intention of purchasing it until I'd knocked a few other quilting classes out of my queue. And then I realized I had a UFO I really needed to finish before the end of November. And then I realized it was quite possible that this class would have the perfect solution to my "How to quilt this thing" dilemma. And then it went on sale. So I bit.

Here is my review of Dot-to-Dot Quilting with Angela Walters.

 I'll start by saying Angela Walters is an excellent teacher and very easy to watch. Her classes are much like her books (which I have reviewed before)--step-by-step, clear instructions, with good diagrams as well as her demonstrations. 

Using Golden Threads quilting paper to test out my design plan.

Using Golden Threads quilting paper to test out my design plan.

Here's one caveat: If you've never machine quilted before, you should consult other resources or classes first. This is a class about quilt designs: She doesn't talk about making your quilt sandwich, basting, or stabilizing the quilt. She assumes you are already at least that far in your experience. Indeed, I was wondering for several lessons whether she did any stabilizing (stitch-in-the-ditch) at all and finally found reference to it in the discussion threads on the side. As I watched the next lesson, I could finally see some evidence of stabilizing stitching.

Closer view of my quilt design sketch, marking what points I'd be using as my "dots". I then free-handed the actual quilting.

Closer view of my quilt design sketch, marking what points I'd be using as my "dots". I then free-handed the actual quilting.

That being said, once you know how to prep your quilt for quilting and are ready to start doing some designs, this would be a good starting point. These designs are very simple, but have lots of possibilities for making them more complex. They're good no-mark designs, but if you're more comfortable marking, there are some very fast and easy ways to do that. On the other hand, most of the designs she shows in this class involve straight lines, which can be remarkably difficult to do with a free motion foot. (Although you can use a walking foot if you want, that requires a lot of twisting and turning of the quilt so it's far simpler to become competent at doing straight lines free-motion.) 

I was able to immediately put the class techniques to use on a wallhanging/baby quilt I'm trying to finish for my great-niece's first birthday at the end of the month. I made it a long time ago and it's languished from inattention but then, I always work better to a deadline. I'd been waffling on how to quilt it but found the dot-to-dot technique the perfect solution. 

Quilted--you can see the chalk lines and stitching on the black but the thread blends on the white and red.

Quilted--you can see the chalk lines and stitching on the black but the thread blends on the white and red.

The pictures embedded in this post show my testing process as I tried to figure out what design would work well on this top--I sketched it out on Golden Threads quilting paper first (the most sheer paper I had in my cabinet), but I didn't use the paper when I did my quilting. I just wanted to see how my design thoughts would help those black and white background squares feel like a single block. For the first few blocks, I did sketch out in chalk on the black fabric where my lines should be and based on that, was able to then keep track through the whole block of where I was headed. By the end of it, I no longer had to sketch anything out; I'd gotten into a rhythm of knowing where to aim next. (The last picture is quilted--you can see the chalk lines on that block, but you can't really see the thread in the white or red.)

My need to continue practicing free-motioning straight lines aside, this was a great way to figure out a nice quilting design quickly, and execute it almost as quickly. I'm glad I bought this class!

The Basics

  • 9 lessons, ranging from 3 minutes (the intro lesson) to 10 1/2 minutes. Although the lessons are quite short, she gives good information in a very concise manner. I still felt like I'd gotten my money's worth from this class.
  • The lessons include quilting starbursts, starburst variations, diamonds, diamond variations, lattices, lattice variations, and borders. The final lesson is a gallery that shows all of the designs used in a variety of ways. 
  • The class materials include the pattern for a quilt if you'd like to use that to do the class project; it then includes diagrams of all the designs she shows in class, and three examples of how the designs could be used in the class project quilt.

Again, I do recommend Dot-to-Dot Quilting with Angela Walters. It really helped me in figuring out possible quilt designs more easily. And now I've got a UFO nearly complete!

(Using Craftsy links in this post help support this podcast and blog. Thank you!)


Some promised pictures of pretty fibers

How was that for alliteration?

I'd talked in a recent podcast episode about the fibers I'd bought at the Fibre Garden in Jordan Village, Ontario (Canada). I'd said then that I'd post pictures...and then I got distracted by, oh, you know, work and life and such. 

So, belatedly but nonetheless still pretty...

Two bags of pulled sari silk*--one group is called "Paint Box" and the other is "Warm Tones." I can't wait to play with these. I'm not good enough at spinning yet to be able to spin slippery and shorter fibers, so I will be using these as embellishments somehow. (Oops--just realized one of the bags was upside down when I took the picture. Sorry if I'm messing with your perspective, there!)

The long tube of dyed roving is named "Sorbet." I'm not normally a pastelly-kind of girl but this one grabbed me for some reason. I imagine it'll spin beautifully.


I have already started spinning the other tube of dyed roving that I bought. I was anxious to test out the new, slightly heavier top-whorl spindle I bought at the shop. The new spindle does work better with the thickness of yarn I'm able to spin at this stage. The more I practice, the thinner yarn I can manage. For now, though, my yarn is still thick enough that it needs a spindle that'll stand up to it. 

This spindle also has a notch carved into the side of the whorl which has been tremendously helpful in holding the yarn in place as I'm spinning. (I tried to carve a notch into one of my other spindles but couldn't make a dent in the darn thing.) This spindle is also able to be used either as top or bottom whorl, which may come in handy, although I've not tried to use it as a bottom whorl yet so I don't know how well it works that way.

And that's it! Not a big quantity of stuff, but the roving allows for plenty of spinning play time so I'm definitely getting a lot of bang for my buck!

*If you've not heard of it before: "sari silk" is recycled silk fibers from old saris. They're all the rage now in the fiber arts world because they're just so darn yummy! I think this link will take you to some Google images of saris, and this link should take you to images of recycled sari silk fibers.