Food Friday--Report on CSA Week 8 and Pick-up Week 9 (and a brief moment of quilty)

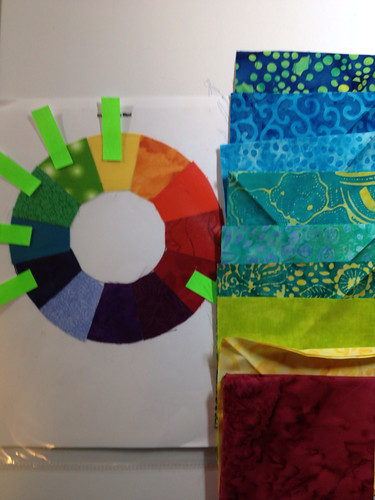
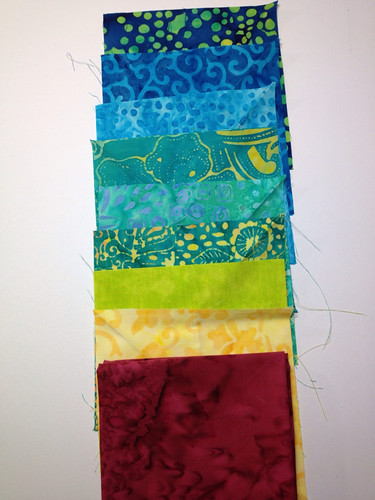
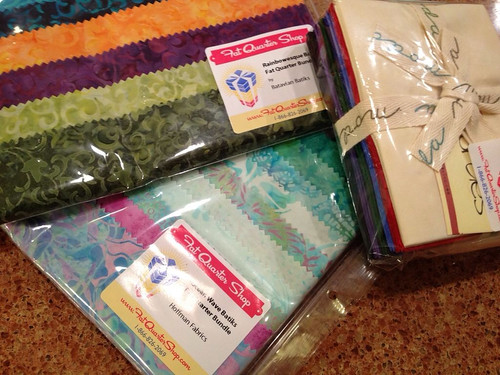
If you're not a foodie and just want some fabric-quilty-stuff, here's a quick pic of one ongoing project I'm working on...

Now, back to food!

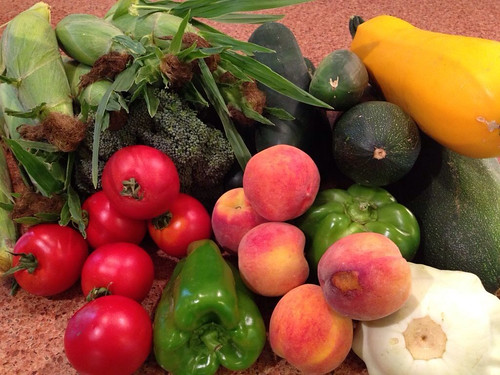
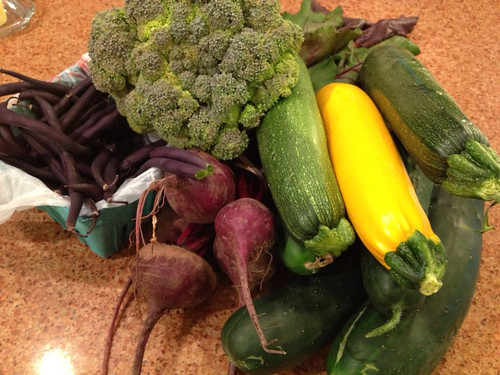
Oh, we have reached the bounty of summer!

Remember last week's haul? I've done pretty well at using it all this week, with the exception of one zucchini that's carrying over into this week's dinner explorations. (I might be resorting to zucchini bread.)

Fortunately, we had family over for dinner on Friday night so I used up quite a bit of the produce right away. We did a marinated flank steak--or three, since we had a couple of young adult males in the mix--and bought a loaf of French bread because I ran out of time to make homemade. Other than that, Dinner Brought to You by McCracken Farms.

Two cucumbers were turned into a cucumber and tomato salad with Italian dressing for starters. I had to use some storebought tomatoes for the salad because I used all my CSA tomatoes on the next dish. Unfortunately, I didn't think to get a picture. (My daughter ate the other two cucumbers--one straight up, the other in some sort of rice curry thing she makes herself. I've never been positive what all is in it, but she likes it, so hey. I won't even ask.)

The huge yellow squash, the honkin' big zucchini, the tomatoes, and the pattypan squash were cut into 1" chunks (more or less), tossed with some olive oil, salt, garlic powder (I was out of fresh garlic), and thyme, and roasted in a 400 oven for about 40 minutes. It probably would've taken a lot less time except the squash and zucchini were (have I mentioned?) freaking huge so the veggie mix took up two jelly roll pans that I rotated between two racks. Again, unfortunately, I didn't get a picture of that one either. Too busy trying to get everything on the table! It was yummy, though.

The corn on the cob was done straight up, and boy, was it amazing! Believe it or not, it was my first sweet corn of the season, and we all were raving about it--it was really, really good.

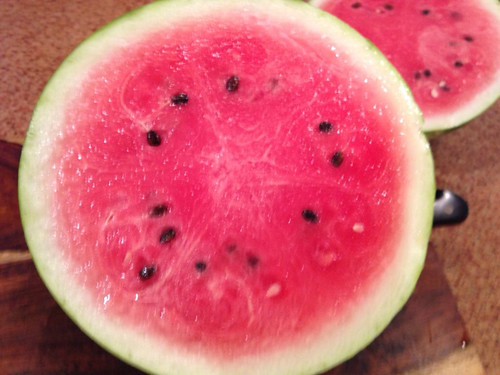
I had forgotten to include the watermelon in the original picture of last week's pick-up, so I snapped a pic as I cut into it a couple of days later. Yes, it is just that sweet and juicy!


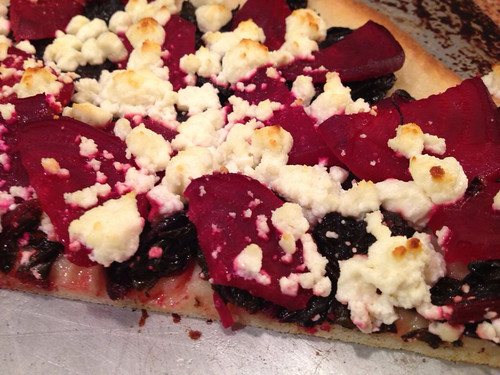
Here it is as a salad before dinner one night--a little feta, a little fresh mint from the garden. (This has more feta on it than I'd normally do--the container got away from me. But that's okay, I like feta and watermelon. Nice combination.)


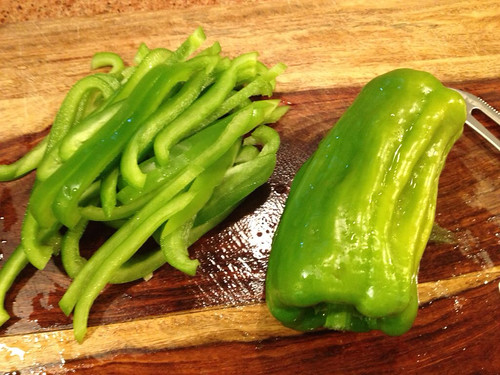
I made Italian sausage and peppers for dinner a night or two later again to use the green peppers. No pictures of that since I just blogged about it awhile back. Looked about the same, although I did better keeping the green pepper actually green. Tasty, tasty, tasty. Next time I'll use chicken sausage, to make the meat match the health factor of the rest of the dish.

The peaches disappeared pretty quickly, just eating out of hand. Very sweet.

The head of broccoli was simply microwaved and used as a side dish with chicken breasts one evening. I'm a bit of a purist where broccoli is concerned--I don't really like it covered in sauces or anything. Just steam it a little bit, add some salt, and I'm good to go.

Sunday morning I was in the mood for a big breakfast and, since I had a lot of those roasted vegetables to use up, I made myself an omelette. Or, at least, what's supposed to be an omelette. I can never get it to flip right. A couple of eggs, the roasted vegetables, a little goat cheese...nummy.


And, the next day, since I still had roasted vegetables left, I picked up some naan from the grocery store, heated it up in the oven for a bit brushed with a wonderful basting oil from Wegmans (love that stuff, use it on a ton of things), then spread some hummus on top, piled the roasted veggies on, shredded some chicken, and topped it with, you guessed it, goat cheese. I drizzled just a touch more basting oil on it, popped it back in the oven for a couple of minutes to heat the veggies back up again, and it was a very tasty lunch.

So that took care of everything, except the watermelon. Somehow I ended up being the only one in the house eating most of that watermelon. It's taking me awhile.

Tonight, I treated myself to a watermelon cocktail.

Don't notice me spitting out the seeds on the patio.


And now, we're up to Week 9! Another bounty!


  • 12 ears of corn this time! Woot!
  • 4 cucumbers
  • 1 zucchini (I dug through the pile to find a smaller one this time)
  • 1 yellow squash (same strategy)
  • 1 patty pan squash (I got a slightly larger one this time because I decided I like it)
  • 2 green peppers
  • tomatoes (maybe 10, still small, but smell amazing)
  • 6 Jersey Mac apples
  • 4 peaches--larger this time, I hope they're still as sweet!
  • 1 red onion
  • 1 yellow onion
  • about 7 or 8 jalapeno peppers
  • 1 eggplant
I've never been a big fan of eggplant. It's a texture thing, really. Eggplant parmesan just makes me gag. Too slippery. But I'm willing to give eggplant in another form a shot. I've seen a recipe for breading and frying slices of it that looks like it might work for me.

I'm not a huge heat person either so I'm going to gift the jalapenos to a family I'll be visiting tomorrow night. They're originally from Burma, so they're all about the hot peppers. They'll love them.

Probably a good thing there's no watermelon this week since I'm still working on last week's. Time for another cocktail.


Photos to go with episode 98

 Here are the photos of fabrics I talked about in episode 98 In Which I'm Alive, posted Saturday, August 4, 2012.

(I already posted the pictures of fabrics from The Fat Quarter Shop here.)


One set of eight 10" squares of South African fabric. 


Second set of eight 10" squares of South African fabric.


Third set of eight 10" squares of South African fabric. 


Fourth set of eight 10" squares of South African fabric.


Fifth set of eight 10" squares of South African fabric. (Which means yes, there are forty squares altogether.)

Notice how the last square is folded--it's distinctly two-sided! Although others in this set could also be used right or wrong side, this is the only one that actually looks like two completely different fabrics. Pretty dang cool.


Thanks to Vickie, my friend that gave me these. They're definitely the best quilty toys ever!


Some wonderful inspiration

A few months back I had the opportunity to visit a friend's church on a Sunday morning. As I walked into the sanctuary, I was struck by several absolutely beautiful quilted wallhangings throughout the worship space.

As we took our seats, I tugged at my friends' sleeve. "I need to meet whoever made those, if that person is here this morning."

My friend pointed a thumb over her shoulder. "She's sitting right behind us."

There was a church luncheon following worship but I immediately tackled the creator of the wallhangings and she took me on a tour of her quilts, telling me the stories behind each one. We barely made it to the luncheon while food was still available.

I asked her permission to share images of the quilts with you. I'm not going to share the stories--too much complex church history and particular individual's stories for the space that a blog allows. I'll let the quilts speak for themselves.


The quilts' creator, Carol Fielding of Austin, Texas.

Food Friday--CSA Pick-up Week 8

I think it's week 8, anyway. I missed two weeks while out of town; I think they'd have been weeks 6 and 7. Let's just call it week 8 and leave it at that.

Bounty!


This week's pick-up includes:
  • 6 small tomatoes that smell heavenly
  • 5 peaches--and since I ate one as soon as I took this picture I can attest that they're wonderful too
  • 2 green peppers
  • 4 cucumbers
  • 2 zucchini (one of which is HUGE)
  • 1 summer or yellow squash (equally HUGE)
  • 1 patty pan squash--my first time for that, but it's supposedly just like summer squash so I'm not concerned
  • 1 head broccoli
  • 8 ears of corn
  • 1 watermelon (that I forget to put in the picture--oops!)

My son is coming home for dinner tonight, so we've also invited my nephew and my in-laws as well, since no one has seen much of the kid this summer. We'll be doing marinated flank steak on the grill, and I'm planning on making homemade bread--either French bread or dinner rolls, haven't decided yet as of this writing. I'll be using up a lot of the CSA produce for the rest of the meal. Definitely corn on the cob, then I may roast up some of the zucchini, patty pan, summer squash, and tomatoes (maybe with some roasted garlic as well, maybe with some onion); I can't decide if I'd rather put the tomatoes in with the roasted veggies or do a cucumber and tomato salad to start. I'll see what strikes me when I start getting everything together.

I may or may not do something with the watermelon as an appetizer. We won't actually have a lot of time for dinner so I don't know that I'll bother with appetizers at all. And my MIL is bringing dessert. So if we don't end up using it tomorrow, we'll eat it Saturday.

The green peppers will go into dinner Saturday night--I've had a hankering for that sausage and peppers dinner I made a few weeks ago. I'll probably use the broccoli with some fish on Sunday night; it'll just be my husband and I home for dinner so it's a good night to go super-light and healthy!

So that's the plan. We'll see what actually happens!


Honey, I'm home!

Got back from my work trip a few days ago and am mostly recovered. Still a little nonverbal. It takes us introverts awhile to recover from having to pretend to be extraverts for a couple of weeks running. So I'm slowly getting myself into the swing of things. I sent out a few tweets this week, now I'm writing a blog post...eventually I'll work my way back up to recording a podcast episode.

Meanwhile, here's the project I'll be working on this month.

Pretty, ain't it?

This is the last of the Momufos. What's a Momufo?

Check here.

And here.

And maybe here too, if you're really into it.

There may have been others, but that's all I am awake enough to dig up in past blog posts. I consider this project the last of the Momufos because it's the last of her work-in-progress projects that I decided I'd finish myself. I have clear memories of talking about this project with her, and I had even given her some fabric out of my own stash to use with it if she wanted--that fabric is still in her project bag with everything else for the quilt. It's one she designed herself in EQ, and I know what she intended to do with it when she was done. So it was the last project of hers that I really felt I needed/wanted to finish on her behalf.

It'll take some doing. Unlike all the other projects of hers that I mostly needed to just bind, or quilt and then bind, this one hasn't been fully pieced yet. It's a combo platter of paper piecing and standard pieced blocks. There are 8 blocks left to finish, and unfortunately, she didn't seem to have gotten to the point of printing off all the paper piecing foundations for those blocks. There's one block from that set done, and one printed paper pieced pattern. Unfortunately, the two aren't the same size. Go figure. I need to do some math to figure out how much to blow up the printed pattern to get it the same size as the one finished block, and then try to print off additional foundations on my own printer and hope the size differential isn't too substantial. (Each printer prints a little differently, so there will always be some variance.)

Then I get to put all the blocks together and hope they all play nice in the sandbox!

It's a design and colorway that I appreciate but wouldn't necessarily do myself at the moment--not my current idiom. Which makes it almost more fun to do, I think. It's a little hard to tell right now, but I think it could be stunning when it's finished. (Beautiful design, Mom. Nice job.) I have a vacation coming up the middle of this month and this will be my primary vacation project--if the whole "resizing the foundation" thing goes well, I should easily be able to get the top pieced by the end of that week. Famous last words, of course.

I do have one other set of random blocks from Mom but that one isn't clearly a UFO to me. It could have easily been a class project that she never intended to finish, but stored the blocks away anyway. Those blocks weren't kept with all her other ongoing projects, so I don't think they were on her own UFO list. I love the blocks, though, so eventually I'll do something with them. They were too cute to toss. Through this process of finishing Mom's UFOs, by the way, I've found that I have a very clear definition of what a UFO is. In my mind, a UFO is a partially-done project that you actually intended to finish. Mull that one over for a bit.

Time for bed. The Olympics have been keeping me up far too late this week.


Ricky Tims Super Seminar Report

I just posted a podcast episode with my reflections on the Ricky Tims Super Seminar that I attended this past weekend, so here are just a few pics to go with. (Sorry about the low quality--I was taking them on my phone from a fair distance in weird lighting!)


Ricky Tims


Alex Anderson


Libby Lehman


Libby Lehman, Ricky Tims, Alex Anderson


Ricky's Kaleidoscope technique sample (on screen)


Ricky Tims concert Friday evening--included music and storytelling


Exhibit of presenters' quilts as well as some made by others that are in Ricky's personal collection


Ricky Tims quilt made using Caveman technique


Libby Lehman "Windfall" quilt


"Windfall" detail


Ricky Tims' new quilt "Heartlines" (I think--didn't write down name of quilt when he mentioned it and couldn't get close enough to label in the show to see it)


"Heartlines" detail


Detail of another Ricky Tims quilt--I took this one because I liked the way the metallic thread (I think it's Razzle Dazzle) was used along edge of applique. Didn't take picture of whole quilt.


Ricky Tims--one of the Rhapsody quilts (quilt is bed-sized--hard to tell size from this picture)


My purchases. Ricky Tims hand-dyed fabrics: 1 yard of multi-colored on far left, half yards of all the others. Another multicolored in brights is on the far right--sorry it got cut off in this picture. Three variegated Superior threads, one water-soluble thread, Ricky Tims Stable Stuff stabilizer, Libby Lehman "A Day of Thread Play" DVD. (The Fat Quarter Shop label you may notice way at the top is the rest of the backing fabric I'd ordered to finish my baby quilt--so that gives you a peek at the backing!)


Food Friday--CSA Week 4 Report and Week 5 Pick-Up

Beet & Goat Cheese Pizza
I used up most of week 3 and 4's CSA beets and beet greens on a Roasted Beet and Goat Cheese Pizza. Although I used the recipe at the link for a little guidance, it's very straightforward. You roast the beets with a little salt and pepper, then peel and slice them. Meanwhile, sauté the beet greens with some onion until they wilt down. Then you simply brush the dough with olive oil, and spread the wilted greens and beets on it. Finally, put the goat cheese on top. Bake it at about 400 or a little higher for about 10-15 minutes, depending on how thick your crust is, and you're good to go.

I used goat cheese crumbles available at my grocery store because I have those on hand for salads. But a really nice goat cheese would work better--the crumbles got a little dry. I made homemade pizza dough (did the breadmaker recipe without a breadmaker) and rolled it out really thin so I'd get a nice, crispy crust. The texture on the dough was a perfect complement to the soft beet topping.

I already love beets and goat cheese. Putting it on a pizza crust is a plus! I did decide, however, that I'm not overly keen on beet greens. If I get beets again next week, I may try the greens again with a different preparation, but I'd have preferred this pizza without the greens. Maybe some orange slices or an orange sauce or something.


Remember the one CSA green pepper? (It's the one on the right--uniquely shaped but still tasty!)


We had some leftover Italian sausages from the 4th of July so I supplemented that one green pepper with a second from the store, a clove of garlic, an onion, a can of diced tomatoes, a couple of tablespoons of tomato paste, and some Italian seasoning. Very tasty sausage and peppers for dinner on Saturday night. Add in some of the dinner rolls I'd made last week and it was a pretty simple, mostly fast dinner. That was the last night for the rolls, though--they were somewhat dried out.

Other than that, this was a pretty light CSA week for me. I've been eating the CSA green beans raw (my fave preparation), and I have to confess the dogs got a couple of the CSA carrots because they looked ever-so-appealingly at me when I opened the vegetable crisper drawer. Plus, either my husband and I were out for dinner or I was home alone and didn't cook. So, admittedly, some produce ended up getting tossed because it turned before I could get to it, for which I feel forever guilty.

I did make some blueberry muffins, however, with fresh blueberries from a U-Pick farm I visited last weekend. Not CSA, but still supporting local agriculture! I used a recipe from my Betty Crocker cookbook. Not my favorite--a little on the bland side despite the crumble topping--so if I get out picking again, I'll be checking out different recipes.

Week 5 Pick-Up

My daughter did me the huge favor of doing our CSA pick-up this week since I was (ahem) otherwise occupied at the Ricky Tims Super Seminar during our pick-up time. (I'll be talking about that experience at a different time!)

Week 5:

1 head broccoli (I think maybe it was supposed to be purple broccoli but ours wasn't very purple)

4 cucumbers

2 zucchini

1 yellow squash

4 beets (yay)

purple beans

I've seen these in magazines but haven't ever had them--they're just green beans of a different color, of course. But how pretty! Check out that closeup!

I may not have time to post much about this week's CSA produce since I'll be leaving town in a few days. I'll be making zucchini bread, that much I can guarantee you. (Still have zucchini left from last week.) And those beets? Roasting 'em. Maybe pizza again. The cucumbers are mostly getting eaten raw--DD and I are both big cucumber fans, although the farm provided a recipe for cucumber soup that's intriguing my daughter so we may end up making that over the weekend. And several of those beans didn't even make it into the fridge since I was gnawing them raw while I was prepping everything else.

The next two weeks I won't be around much, so my daughter has instructions to pick up the CSA deliveries and head them straight over to my mother-in-law's house. Unfortunately, I won't be able to get pictures of what my MIL does with them, so no CSA reports for a few weeks until I'm home again!


Total Color Tuesday Linkies extended

Hey everyone--like I mentioned in last night's podcast, I've gone through and changed the close dates on all the linkies to the Total Color Tuesday blog posts so you can still link to older ones now, if you missed it the first time around. I won't be posting the next couple of weeks so that gives you some time to play with older posts and catch up!

Have fun!

Total Color Tuesday--It's Becoming a Color Party!

For the last couple of weeks of our Total Color Tuesday play times, we've been adding friends here and there. This week, it's a crowd! We're doing two color harmonies again this week, so get ready.

First up, four colors are coming over to play.

Two Colors and Their Opposites

This one is a four-color harmony in which you start with two colors, then hop across the color wheel and pick each of their opposites. Color Magic for Quilters suggests that for this color harmony to work best, you should choose two colors separated by one color.

I decided to go with green and yellow, plus their complements, red and purple.

How in the world do I keep ending up back at yellow, when I have so little yellow in my stash?


This one worked out pretty well. I had a print fabric in my stash that includes both green and purple (not a surprise, since that's one of my fave color combos).

I then added another purple fabric just to emphasize that--and yes, despite the picture turning it blue, the purple is really an identical purple to what's in the print. Go figure.

Then red and yellow to round out the harmony. I could see using this in a quilt. If I were to do so, the yellow would just be a little accent here and there, and I'd throw in a white or some other very light fabric as well. But, not bad.


Then I turned to the Joen Wolfrom 3-in-1 color tool to see what the CMYK wheel would turn up.

I tried to stay with more or less the same color scheme as I'd used with the traditional color wheel, although the CMYK wheel changes it to yellow, yellow-green, violet, and magenta.

Surprisingly, I have a print that's got both violet and magenta in it. It looks more red in this picture but it's really a deep magenta. This could work, although I think I'd try to find a lighter yellow to counter-balance the intensity of the yellow-green in this one.


Now, onto the next color harmony. This time, our friendly four colors get party-crashed by some interlopers.

Three Colors and Their Opposites

Yikes. It's getting crowded in here. Turn down the music before the neighbors call the cops!

This time, you're choosing three side-by-side colors. No skipping. Then you find the complements, or opposites, for all three colors.

Color Magic says, "At first, the thought of working with six colors may seem daunting...."

Well, actually, I've worked with at least that many colors before. But trying to find colors in my stash that are this close together was a challenge. I came up with this set based on the standard color wheel. Same starter fabrics as above, but adding in a green and a purple to round out the harmony. This particular set probably wouldn't do it for me in a quilt, although maybe if I could find a lighter yellow and then just went with the very light and very dark as accents, I could make it work.

However, when it came to the CMYK version of the color wheel, I had a complete fail.

I just don't have a big enough stash to have fabrics that are so close together and yet still distinctly different. This one would require a trip to a quilt shop. Maybe a few.

I wonder if, in using the 24-point CMYK color wheel, I'd be better off doubling the number of colors "skipped?" In other words, where Color Magic, using the 12-point standard color wheel, suggests skipping one color for the best harmony, maybe in using the 24-point color wheel that means I should skip two colors? And if I don't skip any in the 12-point standard wheel, maybe I should skip one in the CMYK? It would provide a more clear differentation.

Not that there are any real rules, here. The six colors I've got fanned out in the photo would make a very pretty quilt. I just can't do it out of my stash.

But just to leave on a high note, aren't these pretty? (Stonehenge 2 1/2" strip package that I broke into to see if I could do the color harmony above. Nope. But I liked petting them, just the same.)


Play time!

Your turn! As usual, link up your blog posts as you play with these color harmonies. And here's hoping you do better at the three-colors -and-their-opposites than I did!


Food Friday--CSA Week 3 Recap and Week 4 Pick-up, and a bit about bananas

This first one has nothing to do with CSA, but it's definitely worth mentioning!

I had some overripe bananas on my hands, so tried out a new recipe from BigOven.com.

Banana Crumb Muffins

Very yummy. However, it was an extremely light, tender muffin--so much so that it crumbled a bit when I spread some very soft butter on it. Probably telling me I really don't need more butter in my life.


Back to CSA Week 3 Report

I pick up my CSA deliveries on Thursday, and my daughter announced she wanted to make pasta that night. We decided on spaghetti. She cooked the pasta and then we both did our own doctoring. I sauteed up a CSA zucchini with a minced clove of garlic in olive oil, threw in some chopped tomatoes, then added the pasta into the skillet with salt and pepper, and cooked the whole thing until the zucchini and tomatoes cooked down just a bit into more of a sauce. Put it in a bowl and added shredded parmesan. Yum.
Got more CSA bok choy, and still had some left from last week. So on Sunday, I made myself bok choy soup with tofu. Didn't use a recipe, and wasn't very precise in what I was doing. It was also my first time cooking with tofu. Basically, here's more or less my process: sauteed onion and garlic, added tofu (cut into about 1" chunks) until it was nicely browned. Splashed some soy sauce and rice vinegar on it, grated a bit of fresh ginger in there for good measure. Put that all into a pot with two 32-oz containers of chicken broth (since my vegetarian daughter had no intention of even trying this one). Added some more soy sauce and rice vinegar, a very little bit of Chinese five spice powder, a very little bit of chili pepper, and just a dab of fish sauce--because a dab is all you need. Trust me on that. Not stellar, but not bad for my first time out of the gate.


Sunday afternoon I made homemade croutons using a loaf of rosemary and olive oil bread I'd picked up at the supermarket. Cut the bread up into 1/2" chunks, toss with some olive oil that had been mixed with garlic powder, salt, and white pepper, baked at 325 for about 30 mins. They were kind of crowded on the pan, so it took longer than usual to crunch them up. Got it to the perfect amount of crunchy. Very tasty.

For dinner Sunday, we used up some CSA Romaine lettuce with a Ceasar salad. My husband and I did a grilled chicken breast on top; my daughter left hers off. Those homemade croutons were the perfect touch!

I made homemade Ceasar dressing, too--store-bought is way too salty for me. I have one of those funky bottles that has the recipes on the side with lines drawn in for the amounts. The Ceasar salad dressing using that recipe is nice. Using fresh lemons makes a big difference, too--bright and fresh, not sour.


I also made homemade dinner rolls that night using my very own biceps, after having tossed my breadmaker due to the Great Jam Tragedy.

I used this recipe for "Soft Dinner Rolls" from BigOven. They were tasty, but spread out a little bit more than I was expecting. I probably could've left them in another couple of minutes to get even more brown on top, but we were hungry, and they were done even if not pretty.

We had DH's fam over for the 4th of July, and I took that opportunity to make Chinese Cabbage Salad using a recipe the CSA farm had provided (using the Chinese Cabbage they'd given us). Yum. Toast a package of Ramen noodles and 10 oz of cashew pieces for about 10 mins in a 350 oven. Shred the cabbage. Thinly cut 1 bunch of green onions and toss the cabbage and onions together in a large bowl. In a separate bowl, prepare the dressing: Whisk together 1/2 c sugar, 1/2 c vegetable oil, 1/4 c cider vinegar, 1 tablespoon soy sauce. Right before serving, toss the noodles and cashews in with the salad, then toss it all with the dressing. The bowl was nearly empty by the end of dinner--people loved it. Next time, I may only use 1/4c sugar--it was a hair sweet for my taste but still good. Could also add in maybe some red cabbage for a little color.

CSA Week 3 report

Used: Chinese cabbage, Romaine, bok choy, 1 zucchini. Remaining: 3 beets, 1 zucchini, 1 yellow squash, beet greens, carrots, bok choy.


CSA Week 4 Pick-up:

2 zucchini
1 yellow squash
1 green pepper
3 beets/beet greens
green beans
snow peas
3 kohlrabi (finally, kohlrabi! I've been looking at recipes since I started this--have a great idea for what I'll be making with these this week.)

I think zucchini bread is in my immediate future.

By the way--I've been playing with some free online photo editors. Many of the photos on this blog were edited with picmonkey. Check out a collage of Food Friday photos!

Total Color Tuesday--Finally Not Analogous!

Finally, we're not working with analogous colors this week! (That ought to make Jackie happy.)

However, we are working with complementary colors which, I believe, Nonnie has said she doesn't like.

Which all goes to show: While some of this is science, a lot of it is art, and most of it is simply personal preference.

But we move on.

Today we're doing two color harmonies because otherwise we'll never get through the dang book.

Opposite Colors

Colors opposite one another on the color wheel are called complementary

When you go opposite, you will always have one cool and one warm color, which automatically creates balance, as well as excitement. Putting two colors side-by-side also intensifies both of those colors. If you want to tone that effect down a bit, you can simply add a neutral (such as white, black, gray, etc.) to settle things. You can also use tints and shades, adding white or adding black to the main hue, to create even more interest but also settle things down a bit. Using each color in its most pure form will have the most dramatic effect.

Color Magic for Quilters has some interesting tips about how to determine the appropriate amount of each that I won't go into here since my goal isn't to render their book unnecessary. I encourage you to get the book for yourself--it's got great information in it!

Play Time--Complementary

I went for purple and yellow. I do like this combination, although if I were to turn this into a quilt, I'd definitely be using some tints and shades to make it a lot more interesting.

By the way, that darker fabric really is purple. Between the lighting and using my phone camera it came out a whole lot more blue. I tried doing some color adjusting to bring it back to its actual color but was only partially successful.


Using the Ives Color Wheel (CMYK) a la Joen Wolfrom, a complementary color scheme is green and magenta.


Here's green and magenta out of my stash. Although the colors work together, I don't like this combination of fabrics so probably wouldn't use it in a quilt, unless there was a whole lot else going on and one or both of these was smaller pieces.


I decided to get into my crosswoven fabric collection to see how that works in terms of the color wheel. I bought these at the Mid-Atlantic Quilt Festival from a wonderful vendor carrying fabrics from all over the world. These are from Indonesia.

If you're not familiar with crosswoven fabric, it's fabric woven from one color thread in the warp and a different color thread in the weft. The finished result is primarily one color, but you can see that other color when you hold it just the right way. Super cool.

Here's green and magenta. (Note that the green is crosswoven with blue, so it depends on the light which color you get more strongly. The magenta is crosswoven with green.)


 Just for kicks-n-giggles, here's complementary blue and yellow-orange in the crosswovens.


Moving on...

Opposite Colors with an Accent 

Our second color harmony for the day is kicking it up a notch: take those two complementary colors and add an accent. Any accent. You have a few colors to choose from when you're deciding on your accent.

Generally, that accent is most effective if it's at least one color removed around the color wheel from one of your two complementary colors. In fact, Color Magic for Quilters refers to this as "the preferred accent." Choose your complementary colors, then move two colors away to either side of one of them for the accent. Note that this technically gives you four different options of colors to use as the accent. However, as in everything, there's no hard-and-fast rule about that. Do what feels good!

Accents give the whole thing just a little more jazz, a little more excitement and interest. Not to say, however, that a straight-up complementary can't be really interesting! But if you're working on a complementary scheme and it's just not flipping your switch, try adding an accent.


Play Time--Complementary with Accent

Going back to my original complementary pair of purple and yellow, one accent I might choose would be green.

I do like this combination, although if I were to make this a quilt I wouldn't use these three fabrics. It needs contrast of print in there to make it really sing. But the purple-yellow-green thing feels like a garden to me.

Back to the crosswovens, just 'cause they're purdy n' I love them.

Yellow-green, red-violet, blue-violet. (I have to stretch the color wheel a bit with the crosswovens since they're not distinctly one color or the other!)


Blue, yellow-orange, purple-ish. I do like this set of three and could see it working. The crosswovens have sort of a funky Amish thing going on.


Back to my original combination of magenta and green using the Ives wheel, I picked up yellow for an accent.

This one would work! The floral in the middle pretty much has that entire color harmony in one fabric--yellow, green, magenta. Wouldn't this make a nice spring quilt?

If only I wanted to make a nice spring quilt right now, and didn't have fifty other projects in my head that I'd like to do first!


Your turn! As usual, link up your own blog posts showing us how you might approach these two color harmonies: opposite and opposite-with-an-accent, aka complementary and complementary-with-an-accent.

RIP Breadmaker--The Great Jam Tragedy of 2012

RIP, O Poor Breadmaker
Thou camest to an untimely, sticky end
Verily the manual
(o most villanous vexing manual)
told not the truth when
it did proclaim
in most beguiling of promise
Jam
Sweet, wonderful 
Jam
May be made herein.

A pox upon thee, thou clod-headed book 

Alas, Poor Breadmaker
Coated thou wast
with thick, sticky shreds of fruit
In crevices where none could reach.
Verily, whilst I scrubbest and washed thee,
a multitude of times,
'til my fingers puckered,
still fruit remained.


RIP, O Poor Breadmaker

Food Friday--CSA Week 3

Sorry folks...last week was busy and I neglected to take pictures of my CSA adventures. Admittedly, I wasn't particularly adventuresome. I got big hunks of lettuce so I was mostly eating salads all week, although I did do roasted beets with goat cheese one night. Nummy. And I still have some green lettuce, and kale left from week 1 (boy, that stuff stores forever!).

CSA Week 3

Beets! More glorious beets! And all for me, since no one else in my family likes them. I'll try to do something marginally more creative with them this week, although I do love them roasted, and with goat cheese.


Also: 

  • 1 yellow squash
  • 2 zucchini
  • 1 head bok choy (will the bok choy never end?)
  • 1 head red lettuce
  • 1 bunch carrots
  • 1 head green lettuce (smaller than last week's, thankfully, since I'm still working off that one)
  • 1 head Chinese cabbage

My daughter is in the process of making dinner while I'm prepping this blog post--I'm writing this on Thursday night so it can go live Friday morning. She's making penne, and will just be eating it plain with a little olive oil, garlic, and parmesan, her favorite preparation. I do believe I'll be adding some zucchini to mine. Maybe a tomato. Saut<&eacute>e it up with a little olive oil, garlic, and toss some shredded parmesan on the top, and you've got something there.

On Friday night's menu is something we do frequently around here, and I've got pictures from the last time I did it, but never ended up posting. I've talked about grilled pizza before. It bears repeating. I'm figuring this will be a good way for me to use up some of this week's CSA.

First of all, for recipes for the dough and sauce, check out my blog post on homemade pizza (with thanks, again, to Susan of The History Quilter podcast for one of the sauce recipes). Here I'm just talking about the process of doing a pizza on the grill. 

Pizza on the Grill

When you've made the dough using your favorite recipe and method, you start out rolling it just like you would to make a regular pizza. However, when I'm grilling, I like to make a thinner crust. It's easier to work with, grills more evenly, and the center will bake before the outside chars. (The dark spots in the dough are herbs. I like a flavorful crust.)

We also usually do personal-sized pizzas when grilling. Not only does that accommodate varying tastes and creativity, but it's easier to handle smaller pieces on the grill than one big pizza crust.

You oil both sides of the dough when you grill pizza, so I like to make an oil concoction with more herbs and a little garlic powder. And yes, I oil both sides before it gets on the grill. You could oil one side and then quickly oil the second while it's on the grill, but often my husband or nephew are doing the grilling part, so I'd just as soon have everything done in advance.

It's crucial to put waxed paper between the pizzas. And make sure the paper completely covers the crust. The dough will stick to itself and you'll have a nasty mess on your hands otherwise.


Hey, whatever it takes to grill. 


You'll put a couple on the grill at a time, directly on the grill. Make sure you've cleaned your grill and oiled the rack with a rag or paper towel and vegetable oil.

It's much like making pancakes. You'll see them start to look dry around the edges and then that dryness moves in towards the center, and bubbles start forming. (I like to poke the bubbles. It's fun.) When you think the bottom is ready, flip it over and do the other side. You want them to get done enough to put toppings on, but not fully done. You'll be cooking them again with the toppings, so don't do the initial grilling past a very light golden brown.


When it's done on both sides, take it off the grill and add whatever toppings flip your switch. You don't want to go too heavy on toppings--again, it won't grill evenly if it's too slushy or piled too high. But you can still be pretty generous.

When you put them back on the grill with the toppings on, do it over indirect heat to give the toppings the best chance of cooking through/melting before the bottom of the pizza burns. (If we're doing these for a crowd, I usually finish them off in the oven so some can be going on the grill while others in the oven. However, this is a tricky menu for more than about eight people.)


And then it's time to eat!

One of my favorite combinations: parmesan sauce (see that previous blog post), spinach, carmelized onions, and goat cheese. 

Tomorrow night I'm going to have to come up with a combination using something from my CSA pile instead. I'm imagining something Asian-inspired, with sauteed bok choy, chicken, onion, maybe a little pineapple, soy sauce...

I texted my nephew earlier this afternoon.

Me: "Grilled pizza tomorrow night. Coming?"
Him: "I'm so there." 

Total Color Tuesday--Fivesies and a Friend

I'm sorry, Jackie. Don't hate me.

We're still working our way through the analogous world. Last week: fivesies.

This week: fivesies with a friend.


Color Magic for Quilters refers to this as five side-by-side colors with an accent. Take five side-by-side colors, and then jump across the color wheel from any of those five and you'll have the accent.

I took it a little easy on myself again this week and turned to a package of Tonga Treats to start. (This is the Island Punch collection.) There I found my blue, blue-green, green, and yellow. I added in a yellow green from some scrap squares I have. I used some variations of some of the colors so there's more than five fabrics in that part, but they still live in the same segment of the color wheel.

I then jumped across the color wheel to find a red, and there it was, sitting in my fat quarter stash.


Here's a better picture of the fabrics.

It could work. If I were making this for realsies, I'd hunt more for a red accent that fit the milieu a little better, but this one could fly in a pinch.


Turning to the Ives (CMYK) color wheel favored by Joen Wolfrom, I pulled out Wolfrom's 3-in-1 Color Tool to see if I could do fivesies and a friend based on that wheel as well.

Unfortunately, since there are more colors on the Wolfrom-preferred color wheel, it's a lot harder to do this one from my stash. I just don't have the selection. But here's one option of what fivesies and a friend would look like if I had just the right fabrics.


Your turn!


Link up here with your own blog posts describing your playtime with fivesies and a friend. If you've already done this (because you were bored with straight analogous, perhaps), try doing a different set of colors just for fun. Looking forward to seeing your posts!


Sneak Peek...

Not to interrupt the Total Color Tuesday playtime, but I know this week's may not garner as many responses. It was a toughie.

Meanwhile, here's a sneak peek at my current work in progress...

Total Color Tuesday--Fivesies

First, a big shout-out to the following who have been my playmates on Tuesdays so far:
Thanks so much for hanging out with me. It's so much fun seeing what y'all come up with! Everyone else, time to join in--it really is a lot of fun and it's a good excuse to pet fabric for awhile. Plus, I'm finding fabric I'd forgotten I had, and I don't even have that big a stash!

This week was a little tougher for me. I didn't come up with any combinations out of my stash that I thought would actually work in a quilt that I'd want to make. This is a color harmony that, if I should choose to use it, would make me take a road trip to my LQS, color wheel in hand.

This is also one in which it really did make a difference which version of the color wheel you're using--the standard 12-point one that we're mostly all used to using (see below), or the Ives/CMYK wheel with 24 points (pictured left): Notice how many more colors the Ives wheel--used here in the Joen Wolfrom 3-in-1 color tool--gives you to work with. More about that below.

This week:  Five side-by-side colors.

Or, analogous on steroids.

Technically, Color Magic for Quilters points out, this would be called an extended analogous color harmony.

I have a mug with an illustration from the original Winnie the Pooh books and the caption, "I am a bear of very little brain and long words bother me."

Fivesies it is.

Color Magic suggests that this color scheme is successful for the same reason that the standard analogous scheme is successful--the five colors all have a common root color with each color to either side, so they flow naturally from one to the next.

Depending on where you start on the wheel, you could have all warm colors, all cool colors, or a mix. However, because it moves step-by-step from warm to cool (or vice versa), it's not quite as shocking a color harmony as those that hop directly across the color wheel for an accent. It would still have a little of that feel to it, but it would be a little more of a peaceful transition.

Play time.


I struggled mightily with this one, like I said above.

I started out using the Ives/CMYK wheel (3-in-1 tool) and worked my way from blue violet to magenta. It goes: blue-violet, violet, red-violet, purple, magenta.

Issue #1: What the 3-in-1 color tool defines as purple sure looks like what I've always thought of as red-purple! Regardless of what it's named, though, I worked with the swatches on the tool itself, holding it up to my stash to find the fabrics that seemed to work best.

Issue #2: Using a 24-point color wheel means that your five colors are much closer together in nature than when you're using a 12-point color wheel. So it's harder to feel like there's much of an accent in there. It's still possible to go cool and warm, but it's going to be less of a transition from color to color.

Believe it or not, every fabric there really does match one of the swatches on each card--lighter or darker in tone/shade. I'd never make that quilt, though--which goes to show (as everyone knows) it's not just a matter of matching swatches. You really have to figure out which ones play nice together.

I bagged the purple thing--don't have enough of those five colors in my stash to find anything that was going to work.


Starting with green, and switching to the other standard 12-point color wheel, I worked my way around to orange. This was more successful, although I wasn't a fan of the dark dark green on the end.

(Technical difficulties--can't get the picture to stay rotated in position when I upload it. Sorry about that, but you can see what you need to see so hopefully the odd perspective doesn't make you woozy.)
I swapped out a couple of the greens and tried again. This one is more successful although, if I were a stickler about it, the one green has blue dots, which aren't part of this color harmony. And I still wouldn't make a quilt out of this combination. (Again, it won't rotate. Blogger is giving me fits today!)

So, your turn. Here's hoping you do a lot better than I did with this one! Can you do five side-by-side colors, or fivesies, from your stash? 


Slow Quilt Monday--and a Few Other Items

I finally broke down and bought some Bobbin Mates so that I could stop guessing at which bobbin in my little bobbin holder actually matched the thread I wanted to use. They mostly work pretty well--and you'll see in a couple of cases you can pop two bobbins onto it if, like me, you realized that for some unknown reason you never finished one bobbin before loading a second.

The only thread I own that they don't fit well is my Aurifil which, as you know, is a significant proportion of my thread stash. But balancing it on one edge and propping it up on my thread holder on the wall just so actually isn't too bad. I haven't had any fall off yet. Workable, anyway. Now my thread stash feels just a little bit more organized.

In terms of works in progress, now that I finished Joy I'm feeling the need to finish the gift for my pregnant friend and get the baby quilt done this week, if possible. So I've started making all the required half-square triangles.

This is the method I'm using: Cut two squares an inch bigger than desired finished unit; draw quarter inch seam lines on either side of the center line; sew down each drawn line; cut in half. Press the triangles open, square up/trim down to necessary size. Easy schmeasy, and you can easily chain piece a bunch of them. (By the way, I cut my squares 1" larger than my desired finished unit because I wanted some wiggle room. The standard formula is 7/8" larger but, really, who is that 1/8" going to kill? I like nice round numbers in my math whenever possible. My brain hurts less that way.)

This method is even easier when you use a tool like the Fons & Porter Quarter Inch Seam Marker. Yes, I could line up a regular ruler to draw the line on one side and flip it to draw the line on the other, but there's always the chance for variation based on exactly where you line the ruler up along that center line each time. As we all know, 1/16" here and there can make a whole big difference when multiplied by lots of blocks. I prefer to use this ruler. It comes in a package of two sizes for the one price.

Where is my slow quilting this week in all my talk about chain piecing and efficiency-building rulers? It's in my head. While I'm going through the rater mundane, rote motions of drawing lines and cutting in half, I'm designing my next quilt in my head. I'm also finding that my Total Color Tuesdays are already influencing what my plans are for that next project. (Be sure to check out the linkies on those posts! Folks are playing along!)

Also, this weekend my husband and I went hiking. How can one not be inspired to quilt?


(Taughannock Falls State Park, near Ithaca, New York.)

Food Friday--Let the CSA Adventures Begin!

I've decided to do a CSA this year for the first time. What's a CSA, you may ask? CSA stands for Community Supported Agriculture. When participating in a CSA, you buy "shares" in a local farm and, in return, get fresh produce each week. The farmer's markets near us are at times that are difficult for us to fit into our schedule, and although I grow my own herbs, we've had terrible luck with tomatoes in the last few years and I travel quite a bit over the summer, leaving the bulk of the responsibility for summer gardening to my husband. He enjoys gardening, but works long hours himself. So our garden attempts the last few years have been pretty sad.

I finally tracked down a CSA near enough for me to make the weekly pick-ups pretty easily. Last night was our first pick-up.

In this week's bag: peas, kale, romaine lettuce, Swiss chard, and bok choy. I was afraid we'd get too much to handle but this feels do-able.


Both my daughter and I are fans of certain raw vegetables, straight off the vine. The raw peas made a very tasty appetizer while I was washing everything and figuring out what I was going to make for dinner.

My husband was out for the evening at a work thing, so it was just my vegetarian daughter and I. We decided to go on a cooking adventure and just make it up as we went. Well, "we" being in the royal sense, as it turned out. Normally my daughter does like to help cook but she had two late nights in a row so she begged off; I stuck her with loading the dishwasher after dinner instead. Not a bad trade-off, in my mind. I got to play with new toys, so to speak, as I messed around with new-to-me-produce, and she did most of the kitchen clean-up.

Here was my resulting dinner! (My daughter skipped the salmon and ate her bok choy with some vegetarian chicken nuggets.)

I wasn't as creative with the salmon as I could've been--just sprinkled some five-spice seasoning on it and baked it. I spent too much mental energy on the bok choy. Bok choy is something I've never cooked before, although I've eaten it plenty of times in Asian foods--usually in soups, I believe, although a lot of the Burmese meals I get to eat with my new arrival friends probably have it as well.

I put together a concept in my head and then checked my ideas by some recipes online. Yep! I was in the right ballpark. And it turned out mighty tasty, if I do say so myself! So, here's my recipe for this week:

Sandy's Sauteed Bok Choy
Ingredients:
2 bunches bok choy, chopped into 1-2" pieces.
1/2 medium onion, diced or sliced thin
1 tsp grated fresh ginger
garlic to taste (garlic powder or fresh garlic)
2-3 tbsp oil
3 tbsp low-sodium soy sauce

Directions:
  • Heat oil, then add onion and ginger and saute for a few minutes until onion begins to turn translucent.
  • Add garlic and saute for another minute.
  • Add bok choy and saute until it cooks down slightly, then add soy sauce.
  • Saute for about 7-8 minutes, or until bok choy stems are crisp-tender.
 Notes:
  • As usual with my own recipes, all amounts are approximate and depend on what you've got on hand, as well as personal taste. I had three or four bunches of bok choy but a couple of them were quite small, so knowing what I typically see available in the grocery story, I'm thinking two larger bunches would be the equivalent. I just used garlic powder this time but fresh garlic would be better, as fresh usually is.
  • I used low-sodium soy sauce and didn't add any other salt. If you use regular soy sauce, you may want to use less. This was just about the right saltiness for me.
  • The bok choy, like any leafy green when you put it in heat, cooks down quite a bit. Using all four bunches that we'd gotten gave me barely enough for my daughter and I, and you can see our servings weren't that big.
Food Friday posts are making a comeback this summer as I go on my CSA adventure! Here are two cookbooks that were highly reviewed on Amazon that I'll be consulting (although I didn't tonight):

The Farmer's Kitchen: The Ultimate Guide to Enjoying Your CSA and Farmer's Market Foods, by Julia Shanks and Brett Grohsqal (CreateSpace, 2012). Looks good, but no pictures with recipes. I miss having pictures. Looking forward to trying the recipes, though.

From Asparagus to Zucchini: A Guide to Cooking Farm-Fresh Seasonal Produce, by Madison Area Community Supported Agriculture Coalition (Jones Books, 2004). Again with the no-pictures-thing. When I'm trying to identify produce, a nice color picture would be extremely helpful.

Both of these books have good tips on storage, as well as a wealth of recipes. I have another book I've requested through my public library that was recommended by a friend--I'll let you know about that one when I get it.

I'll leave you with a moment of quilting inspiration...Swiss chard stems. 
(Match those up to your color wheels, why don't you?)