Fight the Funk Friday (And Some Happy Just Has to Happen)

Welcome to the inaugural "Fight the Funk Friday" post!

I came to a realization this week. It's not actually the first time I've had this epiphany, but every so often it strikes me again and feels like a fresh, new thing.

If I think of exercise and eating right and all that as being about weight, heart health, strength, and all that, it's just not that much fun. I know it's good for me, but what I tend to end up doing is thinking, as I'm working out, "How did I let myself get this out of shape?"  It's not so much that I'm beating up on myself because I learned long ago that's not the way I want to be. But it does tend to lead me more towards comparing where I am now to where I'd rather be. Sure, that can be motivating, but too often it just seems way too far away. So calling a weekly blog post "Fitness Friday" was only partially motivating to me. I couldn't help but mentally add in "Or not-so-fitness..."

The realization I had this week was that, for me, the main benefit of getting serious cardio is this:

Exercise is a mood-altering drug.

I've been in a funk this summer. It's unusual for it to hit me in the summer--my funkiness is usually pretty winter-related. However, it's been a rough summer, I've not gotten outside a whole lot except when I was working, and things just haven't gone the way I'd normally like them to go. Bring on the funk. Cranky. Perpetually imagining the worst-case-scenarios. Insomnia. Hermit-ing.

On Wednesday, I made myself get to the gym, regardless of how little I was in the mood for it. Once I was on the elliptical (for the first time since the beginning of the summer) I felt good that my body was moving again. And then Pherrell Williams' "Happy" came on my playlist, and I was grinning. Suddenly, I was in a completely different mental place than I'd been for the last several weeks. Endorphins abounded. By the time I was in my car driving home, I had the windows wide open and was treating my neighboring cars to a concert of songs from E.L.O. to M.I.A. while doing the "driver's seat boogie." Memories of that feeling got me back to the gym on Thursday even while I was still feeling the stiffness from Wednesday's workout. I wanted that drug again.

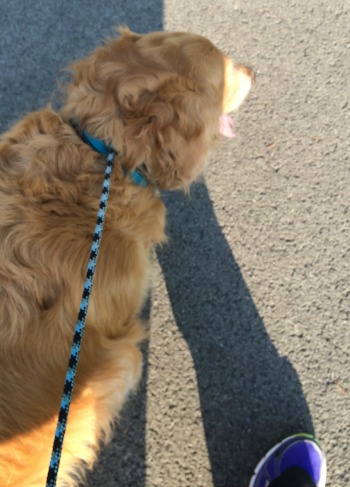
We have a strong strain of what my older sister once referred to as "melancholia" that runs through our family. Various leaves on our family tree have it with more severity than others, but it's definitely a genetic thing in these parts. One thing I've learned about myself over the years is that the best way to control my version of it is by getting really solid cardio sessions in at the gym. I enjoy walking along the canal with Sammy, I enjoy swimming laps in my backyard pool. I know those are good for me too, but they don't quite click my brain into another place the way 45 minutes of serious sweat on the elliptical does.

So from now on, I'll be labeling these posts "Fight the Funk Friday." I made a nifty little logo for myself. And I'll be hashtagging #fightthefunk (a quick search on Twitter didn't turn up anything untoward already using the same hashtag--hopefully that'll stick!). It'll be my way of reminding myself that regardless of how fit or unfit I may feel on any given day, the best way for me to stay in a good mood is to get myself some serious cardio.

I'll be fighting the funk by getting that heart rate up. Join me?

By the way, I may also be fighting the funk in other ways, so other non-gym-related things might occasionally get #fightthefunk 'd. Feel free to fight your own funk however you need to!

I've been inspired to do these posts by Ozzypip and QuiltCabana. Thanks, y'all! (Go give 'em some love, won't you?)

Side note:

The other thing I've been enjoying again this week is my favorite post-workout treat: Thistle Farms shower gel in Tea Tree Mint scent. I seriously love this stuff. It feels and smells great. Be sure you read all about Thistle Farms--great organization. (I've interviewed Becca Stevens for my work podcast,  had a tour of their facilities, and had conversations with some of the women. Great stuff! And no--I'm not an affiliate. I'm just making a suggestion!)

And just to leave you with a smile on your face...My other favorite version of this song on YouTube.


Thinkin' About It Thursday

This week, I'm thinking...

Cooperstown, NY

Cooperstown, NY

  • How nice, and absolutely necessary, it is to get away for a while with my husband, even if just for a couple of days.
  • That I still have to dye 24 scarves for sure, maybe 30 if I want breathing room for last-minute additions to the list.
  • That it'll be a long time before I dye something purple again.
  • That the previous statement is probably not true since I do happen to like purple.
  • That Sam is a fun playmate on a sunny, breezy day.
  • That my daughter is shaping up into a very good cook.
  • That it turned out to be neither invisible nor red thread.
  • That I'm narrowing in on actually finishing a quilt project for the first time in several weeks.
  • That said daughter will soon be going back to college to start her senior year.
  • How time flies.
  • That I'm getting old.
  • That it's nice that my husband and I are getting old together and still have a great time going away for weekends together.
  • That no matter how old I get, I'm still the youngest is my family, and younger than my husband, so I can still rub it in.

Fitness Friday

I've been reading @ozzypip's and @quiltcabana's Fitness Friday posts and have started wondering...if I blog about it, will it come? Perhaps doing a Fitness Friday post will bring fitness back into my life. I know I quilt a lot more because I want to have something to blog about...so knowing I've got a FF post coming up, maybe I'll get my tuckus out of my computer chair and get moving again. (Counterintuitive, I know: get my tuckus into a computer chair to write a blog post about how I should get my tuckus out of my computer chair...)

A very willing workout partner

A very willing workout partner

So today's inaugural Fitness Friday, in a nutshell, is "nuttin'." I am so far off the wagon I no longer even see the dust trail. I've just been sitting by the roadside picking daisies, waiting for the next wagon to come trumbling along. I had been doing great for awhile, but then things got super-busy round-about mid-May and it's been downhill ever since. Now that my big summer events are over, though, I have a few weeks to try to get myself back into some sort of routine before the travel kicks in again.

But first, I have to figure out where my Fitbit ended up when I changed out of sopping wet clothes in the front seat of my car somewhere in the middle of Ohio.  

Tomorrow my husband and I go away for the weekend. We come home Monday afternoon. We're only heading about a 3-hour drive away which is close enough to be easy to get to, but far enough to feel "away." Our habit is to do a ton of walking so I'll probably earn some decent steps without having to really think about it. That'll be a good way to get my body used to real moving again. Then, when I'm back home, it's off to the gym.

If my daughter would stop bringing potato chips and bagels into the house, that would help a whole lot too. Dang kids.

Gee--I've written my first post and I'm feeling fitter already! Time to go search out that Fitbit. 

Thinking About It Thursday

This week, I'm thinking,..

It's like candy! (Dyed roving for spinning)

It's like candy! (Dyed roving for spinning)

  • About whether invisible thread or red thread would work better.
  • How good it feels to sleep without needing a pill.
    • And how fantastic a luxury a hot cup of non-toxic coffee is first thing in the morning*.
    • With fat-free French vanilla creamer, of course.
  • About whether I'm awake enough yet to hold a drop spindle for any length of time.
    • So I can play with all the pretty pretty colors of roving I was just gifted by an online friend. (Thanks, friend!)
    • And how pretty all colors are, really.
  • About whether I feel like messing with invisible thread, in any case.
  • That it's probably time to change my needle before using either invisible or red thread.
  • How I need to iron 20 purple scarves again because I re-purposed some of my hand-dyed scarves as table runners for our work event and they were rather haphazardly folded as we were breaking down and packing on the last night.
  • How I need to count all the scarves again to remind myself of how many I have left to dye in the next few weeks.
  • How red thread would probably look best.
  • That I've got very old dye concentrates sitting in my dye studio that probably just needs to be tossed.
  • About whether or not I can get another batch of purple dye concentrate out of the powder I have left.
  • That I really need to stop clicking on Craftsy sale emails.
  • About whether or not I've got enough scarves left to dye or will have to do one more order.
  • About whether I've got the right shade of red thread.
  • That I should make another batch of soup.
  • That my dogs seem to have finally forgiven me for July.

*To understand this reference, you'll need to listen to this week's podcast episode here.

Announcing the 2014 Banned Books Week Challenge!

Woot woot! It's time to engage in a little nonviolent protest again. And we get to do it with quilts!

Although I fully support everyone's right to determine what they and their children will read, I also support my right to do the same. Banning books from libraries does not protect freedom, it restricts it. Books are open pathways to ideas, meaningful discussions, and growth--even if (even especially if!) one does not agree with what's inside the covers. Besides, I was an English major in my undergrad years. Hence, I support Banned Books Week in celebrating literature!

Tanesha of Crafty Garden Mom podcast and blog and I are once again hosting the Banned Books Week challenge (and giveaway--whee!). And this year we're giving you a little more heads-up than in the past--ain't that just grand?

The 2014 Banned Books Week Challenge

My 2012 BBW challenge, "Alice's Spider," based on Go Ask Alice by Anonymous.

My 2012 BBW challenge, "Alice's Spider," based on Go Ask Alice by Anonymous.

Banned Books Week is September 21-27, 2014. You will find lists of books that have been banned or challenged and other resources on www.bannedbooksweek.org or the American Library Association website at www.ala.org. They also give a lot of ideas about ways to observe Banned Books Week in your area.

For our challenge: Create a small wall quilt that somehow represents a book from the banned/challenged book list that you have read and particularly loved, found meaningful, or otherwise want to celebrate. How you choose to represent the book is up to you—it could be a scene from the book, words from the book, or just represents the book in some way.

Please be aware that book cover images and illustrations in books are copyrighted art. You would need permission from the publisher/artist to depict those images exactly. You may, of course, use them as inspiration for your own artwork!

My 2013 BBW challenge, "If You Walk By," from The Color Purple by Alice Walker

My 2013 BBW challenge, "If You Walk By," from The Color Purple by Alice Walker

The Deets

  • Create a mini-quilt based on a book on a banned/challenged book list that you read and enjoyed. The quilt can be any size, but "mini" keeps it manageable. You can do a mug rug if you want! No specific sizes required.
  • Use any type of quilt techniques you enjoy, any type of surface embellishment you choose--whatever flips your switch! 
  • Starting the week of September 21: Post pictures of your completed quilt(s) in the Flickr group for this challenge. We're using the same Flickr group as previous years, so please clearly label your post with "2014" in the title so we know what the new ones are!
  • Include your artist's statement in the description of your photo in the Flickr group. (Or, should you be a blogger, just include a link to your blog post about the quilt in the description. ) The artist's statement should include the title and author of the book, why you chose that book, and anything else you want us to know about your mini-quilt.

During Banned Books Week, Tanesha and I will be blogging/podcasting about the entries and there will be...yes!...prizes!

I did this last year, and I'm doing it again: I offer this same challenge in my quilt guild, and with the help of Kate, a guild friend who's also a librarian at our town's public library, for the second year in a row we've arranged for the library to display during Banned Books Week quilts from our guild members who participate. Why don't you ask your local library if you can display your finished project there?

BBW quilts on display at my local public library. Unfortunately I didn't write down what each represented--sorry!

BBW quilts on display at my local public library. Unfortunately I didn't write down what each represented--sorry!

Tanesha and I will both be posting about BBW over the next several weeks to help motivate and inspire you, and have some fun to boot. We'll also be posting about our own projects as we're so moved. So stay tuned!

Craftsy Class Review: Fire up the Fish with David Bonom (and a recipe!)

Craftsy Logo

I'm ready to review my next class! Welcome to Fire up the Fish with David Bonom.

I'm trying to overcome a lifetime aversion to seafood. I grew up eating fresh perch (and sunnies and croppies) out of Lake Ontario, filleted and fried in cornmeal. Other than that, I've really not been a fan of anything coming out of the water. Over the last 10 years I've been trying a lot more varieties of fish, and have begun to nearly like some of them. I'm still not a fan of shellfish of any kind--and believe me, I've tried most of them. Shrimp--well, that's just nasty. (And yes, I've tasted a few preparations. Couldn't get through any of them.) My husband's family is big into clambakes. Can't do it. The only way I'll eat a clam is if it's heavily battered and fried--basically once it's a vehicle for the batter, I can live with it. My theory is that I have a sister who's deathly allergic to shellfish so my DNA has a genetic aversion. That's my story and sticking to it.

So determined to try one of Bonom's recipes, I thumbed my nose at the rain and grilled anyway.

So determined to try one of Bonom's recipes, I thumbed my nose at the rain and grilled anyway.

David Bonom, however, made me want to start throwing all sorts of fish on the grill. He still couldn't make shrimp look good to me but to those of you who like shrimp already, you'd probably be into what he does with those. The same goes for his lesson on lobster tails--not my thing, but for those of you who already like lobster, your mouths would probably be watering.

Mind you, this is a technique class, not so much a recipe class. He does give the recipes for every preparation he uses, but he only briefly talks about possible variations or how to create your own recipes, which I'd hoped would be more prevalent. But I got so much inspiration it ultimately doesn't matter.

The class was tremendously inspirational for me. We hadn't ever tried to grill a fish at our house but after watching the lessons all the way through, I was chomping at the bit.

Swordfish on the grill, just starting out.

Swordfish on the grill, just starting out.

And, most notably, I was ready to try a fish I'd never been brave enough to order in a restaurant before: swordfish. He made it look so good in the class, I had to give it a go!

Armed with what he'd said to look for in a good, fresh, piece of swordfish, I took a quick jaunt out to my grocery store and found two smaller swordfish fillets that had all the qualities he said to look for and none of the ones he said to avoid.

I also got all fancy on its butt. Although I stuck to his recipe for the dry rub, I decided it called for a little fruit salsa, so I was making up a recipe as I wandered through the produce section. I'll post my recipe at the end--it turned out very tasty.

The fish was really quite simple. I've done enough grilling, and enough dry rubs, to be confident on both counts. I had picked up some useful tips from his classes, though, and had absolutely no problem with my swordfish steaks sticking at all.

I even followed his suggestions for how to get the best grill marks. Mighty pretty, if I do say so myself.

This being my first time out of the gate with (1) grilling fish and (2) working with swordfish, I overcooked it just a hair. I should've pulled it off the grill maybe just one or two minutes sooner. It tasted fine, but it was a little on the dry side. Not too much of a problem, though, since I had my fruit salsa nicely freshening things up. And the end result is that I really, really liked it. I'll definitely be doing this one again.

Pretty grill marks! Or, grill hashtags, for you #twilters out there.

Pretty grill marks! Or, grill hashtags, for you #twilters out there.

Back to the class. David Bonom was very easy to watch. It is important to remember, as I said before, that it's primarily a technique class. Although he does give plenty of recipes and talks a little here and there about possible variations and substitutions, he spends most of his time talking about the actual grilling--starting with a little discussion of the difference between charcoal and gas grills and setting up for the right temperature, he moves into how to prep the fish, how to prep the grill, what to watch for in terms of doneness, different tools and equipment (baskets, foil, etc.), how to check for temperature, and troubleshooting. The class goes from different types of fillets to whole fish to shellfish, and also includes fish cakes.

Not only do I feel a lot more confident about grilling fish, I feel a lot more confident about cooking fish in general and will more easily be able to tackle it in my kitchen when grill season is over.

The Basics:

  • 10 lessons. Absent the first that's just a brief intro of about 1 minute, the rest range from about 3 1/2 minutes to 12 1/2 minutes. Short as they are, though, they're packed with good information.
  • Lessons include: Setting up the Grill; Fish Steaks & Firm Fillets; Tender Fillets; Whole Sides; Whole Fish; Shellfish without the Shell; Shellfish in the Shell; Fish Cakes; Troubleshooting.
  • Included in those lessons are discussions of dry rubs; marinades; stuffing; using baskets, skewers, and foil packets; how to test for doneness; and what to do if your fish cake falls apart on the grill. (!)

I enjoyed this class a whole lot more than I thought I would. Although I'm posting this review after only doing one type of fish, I already have plans for a couple more from the class. I'm ready!

Again, that's Fire up the Fish with David Bonom. Two thumbs way up!

Finished product--grilled swordfish with mango peach salsa (and roasted baby potatoes)

Finished product--grilled swordfish with mango peach salsa (and roasted baby potatoes)

Addendum:

Sandy's Mango Peach Salsa

(Amounts for two or three people)

Ingredients:

  • 1 T butter
  • Half a Mayan sweet onion (or any sweeter onion), diced
  • 1 clove garlic
  • Half a mango, peeled and diced
  • One peach, peeled and diced
  • a few tablespoons of balsamic vinegar--tropical flavor if possible*
  • Dash of salt

Directions: Saute the onion in butter until starting to caramelize. Add garlic and saute for about 30 seconds (don't burn the garlic). Add in the mango and peach and saute with other ingredients just to incorporate. Add balsamic vinegar, stir through, then turn heat to low and reduce the vinegar by about half or to taste, stirring occasionally. Add a little salt to taste. Serve over fish. Leftovers could be chilled and used for other things--like maybe over vanilla ice cream for dessert...nummy.

*I used one named Sunny Pineapple Balsamic Vinegar that was quite tasty. If you don't have a flavored vinegar, use a good balsamic--preferably white balsamic so the fruit doesn't look dirty--and then consider squeezing fresh lime or fresh lemon juice into the mix.

Need help knowing how to deal with a mango? Check this video out.

Home again, home again, jiggity...well...

Maybe not quite so jiggity jig.

I got home from my work event and board meeting week last night. I was gone eight days in all, including travel time, but it was a long eight days. The trip there was pretty uneventful, fortunately, since I was on a schedule and had to arrive at a certain time that first Saturday in order to get everything set up and ready for the start of the event.

The event went swimmingly with only a few hitches here and there that no one else even knew were hitches...which is how it should be. The board meetings that followed were solid, and I've got some very exciting walking papers for my work life this coming year which is how I like it. If I'm going to be busy, I may as well be busy doing meaningful work.

But it went downhill from there. I made the mistake of getting in my car to head home.

A significant potion of the drive home looked like this.

It took--I kid you not--an hour and a half to go two miles in this particular traffic jam. And it wasn't the only jam I sat in. And several times the rain was so loud I had to turn off my podcasts and drive in (rain-loud) silence because I couldn't hear anything anyway.

The double whammy of construction and horrible rainstorms all along Lake Erie (most of my route went along the south and east sides of Lake Erie) meant that my usual 12-14 hour drive--depending on traffic around Chicago--clocked in at 19 1/2 hours. I was two hours later than I'd wanted to be getting into Shipshewana, IN, on my first leg of my trip home on Friday, and three-and-a-half hours later than I'd expected to be pulling into my driveway yesterday. 5 1/2 extra hours of driving. Bully.

I've made this trip probably 12-15 times over my lifetime, and this one took the cake for Most Annoying.

Sitting in my car in the Cracker Barrel parking lot

Sitting in my car in the Cracker Barrel parking lot

I'll tell the story on my next podcast episode, though won't dwell on it since you all tune in to listen to quilting, not whining, but as a teaser, the excitement includes: a toxic water alert, an insanely badly managed Burger King, bad coffee, a 5-second sprint through the Cracker Barrel parking lot  in a torrential downpour resulting in--well, you'll have to tune in to find out, nearly rear-ending another car when everyone slammed on their brakes unexpectedly when a lake appeared in the middle of the expressway, and being in the bathroom in complete darkness (complete darkness) when the power was knocked out in a roadside rest area.

Fun times.

But here's the bright spot.


My 20 minutes in Lolly's (I got there at 5:40 and they close at 6 on Fridays) resulted in these.

I've never tried Quilter's Dream batting so I picked up a crib-size package to try out.

I've been testing out several marking pencils of late and have heard good things about Roxanne's, so I got a package of those.

My trial-size bottle of Best Press that lives in my retreat tackle box is nearly gone, so I decided to pick up a new scent. (I'll keep the empty old one around and just refill it. Still, fun to try new pretty smelly things!)

And I succumbed to more charm packs, though I really shouldn't. But I'm a fan of William Morris and couldn't resist Morris Modernized. I bought two packs because I've learned most designs call for that many.

Today, Sunday, was pretty much a Pajama Day for me. I watched a couple of episodes of my current Comfort Food TV--Murder She Wrote--while enjoying my Real Coffee Sans Toxins, and then watched several lessons in my current Craftsy class. We spent the afternoon at "Guardians of the Galaxy" (great movie!), and now we're home again and I'm pretty much ready to go back to bed. I'll do my best to make it to a reasonable hour, though.

No sewing today. Hope to get back to it in a day or two to have something to actually talk about when I do get to posting my next podcast episode...

I feel for the people who are continuing to suffer the effects of the toxin alert for water from Lake Erie due to an algea bloom; it affects significant portions of Ohio and some parts of Michigan. I was able to drive out of it, they're not. Prayers for you, folks--hope your water tests okay and it clears up quickly!


Thinkin' About It Thursday

Hey, y'all.

When you read this I'll still be out of town for work, so I'm doing a little future-casting here. It might be more appropriately entitled "What I Think l'll Be Thinkin' About Next Thursday."

  • That I really do love my job.
  • That I've just about had enough of restaurant and cafeteria food by now, and am thinking fondly of the simplicity of my usual lunch salad at home. 
  • That I'm looking forward to sleeping in my own bed again.
  • And playing with my doggies.
  • And, of course, seeing my husband and daughter again--and maybe strongarming my son into stopping by for dinner shortly after I'm home.
  • But that I'll have fun doing a meet-up with a listener/#twilter in Shipshewana tomorrow on my drive home. (I hope. As of this writing, plans have just barely gotten in the works for a meet-up so fingers-crossed it works out!)
  • That by this time next week I'll be in a slower, quieter mode at work for at least a two or three weeks, and I may actually be rested up enough to be getting some quilting done. 
  • And that I'm really ready to be home and welcomed by this face again...

July Craftsy Class Update

I'm writing this early and scheduling it to post since I'll be out of town for the last week of July, when I'd normally be posting this. So it's possible I'm under-reporting my completions, but I doubt it. My last couple of weeks in town before my travel are jam-packed so progress on Craftsy stuff will be limited.

Just as a note: This month I found myself consulting the Peter Reinhart classes (Artisan Breadmaking and Perfect Pizza at Home) several times for reference. The focaccia I've made for a couple of events, based on the recipe and techniques he covers in both of those classes has become an oft-requested item in my husband's family! But it just proved to me how much I love the fact that there's no time limit on these classes. Once you've got 'em, you've got 'em!

New Completions

(+3)

Classes in Progress

(2)

My thread art class project in progress

My thread art class project in progress

  • Thread Art with Lola Jenkins. Very close to done--and having an absolute ball with it! Can't wait to get home and have the time to finish this project.
  • Building Flavorful Soups with Peter Berley (see "Classes added..." below).

Classes added this month

(+4--with only a little twinge of guilt because most of them were on big sale, and I've already finished one and am working on the other.)

It's been in my wish list for a long time, and came on sale at the same time as I was feeling pretty good about having finished so many classes...and so, now I own

  • Building Flavorful Soups with Peter Berley. I've started watching this one but may not get around to trying any of the techniques or recipes until later in August when I'm looking forward to the crisper evenings of fall and pots of soup simmering on the stove. I do, however, have some Parmesan rinds set aside for a very tasty-sounding broth he covers early on in the class.

Another that's been on my wish list for awhile and came on sale mid-month at 50% off (so how could I resist?):

Okay, so this one was brand new to me, but I've been talking with my husband that I feel like we should be including more fish in our diets and that I'd like to take a class in cooking fish just to see if I couldn't expand my repertoire a bit. When this class came on sale--and I was feeling particularly over-tired and self-indulgent--I bit. (Pun intended, ar ar ar.)

  • Fire up the Fish with David Bonom. We'll see if he can convince me I like more types of fish than I think I do. This is definitely a summer class for me, though, since it's about grilling. Our grill season is pretty limited here in Western NY. I'm sure I'll be able to adapt some of the concepts to my its-too-dang-snowy-to-fire-up-the-grill rest of the year indoor cooking.

And another photography class and another 50% off sale. This class doesn't depend on having a DSLR--it's all about composition and telling stories. Since I was two days away from leaving for a work event at which I knew I'd be primarily responsible for taking photos we'd use in future publicity, I went ahead and bought it, started watching the lessons the same day, and finished it before I left. Again, here's the link for my full review.

Classes To Be Completed

Current count:  17 (+1. This month was tough to keep track of because I had a couple that were sort of "in and out" classes.)

Completed Classes (all topics)

Current count: 29 (+3) (And I've alphabetized them!)

(Usual transparency statement: This post contains affiliate links and I will be compensated if you make a purchase after clicking on my links. Thanks for supporting this podcast and blog!

Craftsy Class Review: Creative Photography with George Lange

Welcome to Creative Photography: Capture Life Differently, with George Lange.

This one was a quick finish for me--I allowed myself to simply watch all the lessons to absorb what tips and tricks I could before heading out to my summer work events this weekend--events at which I tend to end up being the de facto "official photographer."

I had to think through how I was going to review this class. For me, I didn't actually get a whole lot of new information out of it. Most of it turned out to be things I already knew--which I suppose makes me feel better about what I apparently already do pretty well. I've been working on my composition and ability to tell a story through photos for a long time, and taking this class really just confirmed for me that I've learned a lot over the years!

But for someone who is just getting into photography or who would like to step it up in terms of composition and telling stories with photos, this would be an excellent class.

One of my all-time fave pics I took of DD when she was about 8. This photo exemplifies things Lange talks about in the class.

One of my all-time fave pics I took of DD when she was about 8. This photo exemplifies things Lange talks about in the class.

First off: This is a composition class, not a settings class. In other words, the techniques you learn are related to how to set up a shot, how to use ambient (natural) lighting, how to create a scene, how to capture a moment/mood/feeling, and so forth. It's not about which f-stop or shutter speed to use. In fact, he really only loosely references settings in a backhand way once in awhile. (For that kind of information, check out my review of Basics of Digital Photography with Rick Allred.) The point of this class is all about capturing the subject matter most effectively, and conveying a mood.

The good news is, that means you can get a lot out of this class even if you're taking pictures on your cell phone. The principles are the same regardless of how you're capturing your shot. (He even starts right out in the first lesson saying that!)

The second thing I appreciated about this class is that he discusses in one lesson issues around sharing photos on social media. He makes some very good points that I think it would behoove all of us to pay attention to. I've not seen that covered in other photography classes yet, and I liked the fact that he addressed it.

He does also have good examples of lighting and action shots, and talks about "between moments" (in other words, take lots of pictures without worrying yet about which one is the "hero shot," as he calls it). I'll probably be using my "sports" setting a lot more at my events next week, which makes my camera take several quick photos in succession when I click the shutter. What you think might be the best shot when you're taking them may change when you see all your pictures later.

DS when he was 3.  Another photo that exemplifies things Lange discusses in the Craftsy class. (Can you see the Easter egg?)

DS when he was 3.  Another photo that exemplifies things Lange discusses in the Craftsy class. (Can you see the Easter egg?)

I think what I found lacking in terms of my needs and what I was hoping to get out of this class was that most of his examples seemed to be based on things he could control: He set up shots, he put people in positions where the lighting would be best, he asked them to get into certain poses or do certain kinds of actions, and so forth. For me, I'm shooting completely candid shots in the middle of events where lighting is often quite iffy (I hate hotel conference centers!), I have no control over where people are sitting or standing, and I'm trying to be as unobtrusive (invisible) as possible. I was hoping he might address how to work in those situations a little more. Still, I have some new ideas about angles I might use or situations I might take better advantage of, and certainly many of his set-up shots are meant to mimic candids so I had some take-aways from that as well.

Again, I clearly walked into this class with a pretty solid foundation on composition, so there were only moments of newness for me. But for someone who hasn't spent as much time working on her photography as I have, there may well be a lot of new and useful information here.

Lange clearly loves his work and finds creative ways to make his points--certain phrases will definitely stick in my head. And I did love seeing his photos--great stuff. If you would like to see your photos more creatively composed, I do recommend this class.

The Basics:

  • 7 lessons, ranging from six minutes (intro lesson) to 25 minutes. Most are in the 10-15 minute range.
  • Lessons include "Do the Unexpected," "Create a Stage," "Be in the Moment," "Beyond Good Enough," "Capture All of Life," and "Social Sensitivity."
  • You do not need any particularly kind of camera to take this class. Again, it's all about composition, not settings or lenses or anything technical.
  • He spends a fair amount of time on photos of children, so those of you with kids, take heed!

Again, that's Creative Photography: Capture Life Differently with George Lange. (As of this posting, it's still 50% off!)

(Usual transparency statement: clicking on Craftsy links in this post helps support this blog and podcast. Thanks!)

Thinkin' About It Thursday

Well, some of you remarked how much you enjoyed this post and would like to see it as a series. So I'll do my best!

What I'm thinking about this Thursday:

  • How, even if the colors haven't been changed, freshly painted walls are still quite nice to look at.
  • That hosting a party for 70-plus people the same week as I have painters underfoot and my busiest, most stressful workweek is crazy talk.
  • That Rescue Remedy actually [sort of] works.
  • But that watching a clan of family and friends--some of whom haven't been in the same place for decades--having fun together and reconnecting is worth the sleepless nights.
  • But that next time I'll hire a dish washer.
  • That I have a great group of my own kids and my nieces and nephews, and that they've got a great group of friends. 
  • Who, even when they've crashed on my floor and gotten about four hours of sleep, are still willing workers on clean-up duty the next day. (They may have been walking like zombies, but they were cleaning zombies so I'm good with that!)
sam.jpg
  • That although it's not his favorite place to be, Sam is Sam and will make five days at the kennel work for him. (He made friends.)
 
spencer.jpg
  • That Spencer will take awhile to forgive me for that same five days at the kennel. (Hint: That's no smile on her face. That's pure hysteria.)
 
  • That pretty new thread can be almost as recuperative as chocolates.
 
  • And that this is a wonderful way to recover. 

(Tune in to this channel in a couple of weeks for a return to quilty talk.)

What Has Come to Live in My House

As I mentioned in my most recent podcast episode, I had fun with the "TRYME" special sale on the Superior Threads website. (The sale goes through the end of July, by the way.) Their Try-Me specials are always a little less expensive than buying the spools straight-up, and now they're on sale so you save even more. The only hitch is that you can't choose the colors. But doesn't that make it like a fun surprise party when you open the box?

In any case, because they were on special, I bought more than I normally would. Here's the list, from left to right in the picture above:

  • Fantastico #40 Poly, variegated yellow/orange/red
  • Magnifico #40 Poly, green
  • Art Studio Colors (Ricky Tims) #40 Poly, gray
  • King Tut #40 Cotton, variegated purples
  • Halo variegated purple/red/blue with metallic gold
  • Glitter (holographic) purple base with red/green/blue colors
  • Nature Colors (Hollis Chatelain) #40 Trilobal, cream/vanilla color
  • Masterpiece (Alex Anderson) #50 Cotton, green
  • Bottom Line (Libby Lehman) #60 Poly, navy
  • Nitelite Extra Glow, #40 Poly, pink

The only one I'm a hair bummed about is the pink Nitelite. I hadn't really noticed that Nitelite came in colors--I guess I was thinking it would be similar to monofilaments where there isn't really a color to the thread itself. My bad. I'd planned on using it in a project for Halloween with all black, grey, and orange fabrics. Pink just won't look right. I'll likely find some other project to try the pink on and see how it works, and maybe order a color that works better with the project later.

I'm watching the DVD as I write this. So far, I'm realizing that I knew more about thread than I thought I did. Still n' all, there is some helpful information (how they make metallic thread is really interesting!) and I'm only four chapters in so I'm sure it'll be good overall. Besides, I got the DVD free with my order. Can't go wrong!

Yes, I've gotten to the point where seeing a funky-cool thread immediately starts making me dream up projects I can use it on!

Thinkin' about It Thursday

I don't know if this will be a series or not--might be kind of fun to do. But here's what I find myself thinking about this week.

  • How much I'm beginning to loathe the smell of paint.
  • That Princess Doggie is going to give herself a cataclysmic health event of some kind. She's really got to learn some mellow from Doofus.
  • Whether or not I could challenge myself for a month to create something small and experimental from fabric each day.
  • That spinning yarn is very meditative.
  • That coloring is also meditative.
  • That 14 hours alone in a car can sound like the perfect couple of days, given the right circumstances.
  • That clouds are really a very pretty thing.
  •  

WIP Wednesday--String Star

I think I've only managed to connect to Freshly Pieced's WIP Wednesday once, but I've finally managed to time it right this time!

Last weekend I finally got the borders on my string star quilt, started in a class with Ami Simms at the AQS quilt show in Lancaster, PA, back in April. I took the class mostly because I've always wanted to take a class with Ami Simms--she's a hoot. (I have an interview with her on my podcast too--great fun!)  I used a collection of African fabric fat quarters I'd been gathering over the years--I'd never figured out the best way to use them and decided this class was as good an experiment as any. I was very unsure how everything would turn out, but I'm quite pleased!

The background fabric is from my LQS--I like the cross-hatch design on it (sort of "thatch-y"), and the light gray sets off the fabrics really well without being the more jarring contrast of a plain white.

The biggest challenge on this was the African fabrics themselves. There was a lot of variation in thread count and weave. Some were very stiff, others were really stretchy. That border caused me some grief. Besides, mitering string pieced borders isn't fun--seams ending up in all sorts of wrong places. But it worked out better than I worried it would, so it's all good.

As of this writing I'm still pondering quilt designs. I think I'll have awhile to do that--I'm unlikely to get back to this until August when my work travel is over for a few weeks.

This has already been designated for a recipient, but I've really fallen in love with it. I do have enough of the fabrics and even enough cut borders left to do a second quilt for myself. I haven't decided if I'm up for that yet--I'm not a huge fan of doing the same thing twice. We'll see.

Here's my traditional "Dog with Quilt" shot. He was apparently quite pleased to be included. Smiley guy. But he kept his tennis ball nearby just in case I put the camera down.

And yes, I dragged my portable quilt hanger out of the pool for the photo op. Because I'm just that kind of Mom.

Be sure to check out all the other WIP Wednesday bloggers at Freshly Pieced!

Craftsy Class Review: Finishing School--Edges and Bindings with Mimi Dietrich

Craftsy Logo

Here's another class review with no pictures...I really hate doing that. But once again, this is a class for techniques with no specific project. I picked up information for techniques I've been wanting to try, but don't yet have a project at the finishing stage where I can put any of this into practice in order get pretty pictures for you!

Now reviewing...Mimi Dietrich's Finishing School: Edges and Bindings. I watched this class over one weekend because it was clearly going to be reference material for me--things to keep in mind later in the summer when I get projects to finishing stages. (Nothing being finished this week, that's for sure!)

The first lesson in the class is pretty much how to make a (straight-grain) binding. I sped through this because I've done enough bindings in enough ways over the years that there didn't happen to be new information for me in this particular lesson. However, if you're a new quilter, or have only ever made bindings in one way, it would definitely be worth watching. If I hadn't had my Mom at my side teaching me how to do bindings, this class would've been a great way to learn!

Lessons 3, 4, and 5 demonstrate several fancier borders--adding corded piping, flat piping, rick-rack, round corners and scalloped edges (and shows how to make bias binding), Prairie Points, and ruffles. I've marked each of these for future reference when I decide to use any  of these techniques. I've especially been wanting to do something with piping or using one of my funky ribbons in a binding for awhile, so I'll definitely come back to this class when I find the right project. By the way, for those of you who are fans of Prairie Points, she demonstrates three different types of them--so it's a pretty thorough treatment of this technique.

Lesson 6 goes back to the basics: different types of sleeves and making a label.

The one downside to this class is that class materials are patterns for quilts, not information about supplies or instructions for any of the steps. If you take good notes during the class and read all the questions, you get the information about the supplies. However, she tends to keep referring people to her book, which is unusual for Craftsy teachers. She references in one response to someone's complaint about the lack of materials that it would've been hard for her to create materials for this class without infringing the copyright of the book itself. (The book was originally published in the late 80s but it's been redone in 2013--available on Amazon in paperback or Kindle.) So that's a bit of a lack--but the class is still great for talking you through what it looks like to do all of these things.

In terms of her teaching style, I kept feeling like she sounded like one of my elementary school teachers--and sure enough, she used to be an early education teacher. That does make her teaching style very easy to follow!

The Basics:

  • 6 lessons, ranging from 26 minutes to 53 minutes
  • She starts with the basics, goes into some fun variations, and goes back to basics again.

This class would be great for beginners and for people who haven't ventured into the world of binding variations and fancy furbelows before!

Again, that's Mimi Dietrich's Finishing School--Edges and Bindings.

(Wait for it.....Usual transparency statement: Clicking on links in this blog post help support this podcast and blog. Thanks!)

Sundry Catch-up Items

A few things I never really talked much about in recent podcasts or blogs...

I bought a couple of new 3M containers for my quilt studio/home office. Really. It's an addiction.

glassesholder.jpg

I have drugstore readers all over the house at this point. This pair was designated for my cutting table/sewing machine area. As you may guess, they often end up under piles of fabric scraps, buried under the quilt project at the machine, on the floor....

When I saw this little container, the perfect solution hit me. Now my readers live on the wall within easy reach of my cutting table. I'm pretty good about putting them back in there when I'm done with them, too!

Another problem that has arisen for me of late is spools of thread. I have good storage for thread that's not in use, but when I'm switching back and forth between projects, or switching threads mid-project and thinking I might go back to a previous one, the spools in circulation get in my way. I don't want to put them back on the rack or in the drawer because I don't want to lose track of which I'm using, but I get tired of moving them around or having them roll off surfaces while I'm working.

Bingo.

This container is for toiletries or some such--I think it had nail polish in it in the display. But it's exactly the right size to hold a few spools of thread and bobbins that are in a holding pattern. Immediately to my right, I can quickly drop a spool in or pull one back out. It's been extremely useful!


So those are my organizational tips for the month. I love these things.

The other catch-up item is my hand-spinning. I mentioned in my podcast that I had a two-part class this month: The first week we worked with drop spindles, and the second on a spinning wheel. I won't go into detail here since I did talk about it on my podcast. But here are some before-and-after-and-during pics.

First, here's a progression of my spindling. The ones at the top are earlier attempts, the ones at the bottom are more recent. I tossed a couple of very early ones because they got all tangled when I pulled them off the spindle. Still n' all, you can see my improvement in evenness and thinness in these samples. They don't all have to be thin, and they don't all have to be strictly even, but I'd like to learn the control so I can be thin and even when I want to be!

This picture is a two-ply yarn spun and plied completely on my drop spindle the first week of class. I believe it's alpaca, but don't quote me on that. It was called "cookies and cream" because the roving had brown and white together. Delicious. I'll buy more of this when I go to the fiber festival again in a couple of months. I'd like to treat it the way it deserves to be treated.


This picture is the two single yarns (another two-tone roving on the right--so much fun!) and then the ply of them together done on the spinning wheel the second week of class.

I struggled with the plying on that one because there was no lazy kate so the yarn balls were just flying around at my feet. Hard to get into a rhythm. But it was fun to try.


And last, here's what's on my spindle now. Still need to get a little more even but this is a different fiber and I'm just getting used to it. I think it's Louen wool...does that sound right?

Anyway...just some sundry stuff keeping my hands busy and out of trouble!


Craftsy Class Review: Basics of Digital Photography with Rick Allred

We're heading off down a different Craftsy path today. I've reviewed a whole lotta quilting classes and a few foodie classes, but only one photography class so far. 

But, oh, I've been hankering to do more photography classes on Craftsy. They have a lot of really good ones, but (1) they tend to be more expensive than the quilting classes and (2) I don't have a digital SLR (DSLR) camera, which is listed as required equipment for most classes. I do, however, have a camera that's basically only one step below the DSLR. I can't change out my lenses, but I can do most other things that DSLRs can do. So when Craftsy introduced a new photography class that lays the foundation, I bit: Basics of Digital Photography, with Rick Allred. (There was only one lesson specific to DSLRs, really, and that was a discussion of lenses. Otherwise I could do everything in all the lessons with my camera.)

Lesson on lighting--working with backlighting here

Lesson on lighting--working with backlighting here

I wanted to brush up on what I'd learned in my high school photography class (using a darkroom n' all). I used to have an SLR camera in college and a few years beyond, and knew all that about f-stops and shutter speeds and the whole kettle of fish, but in the years since, when it got faster and easier to just whip out a point-and-shoot, and then (who'd have imagined?) my cell phone, I got lazy about it. With a big trip overseas on the horizon, it was time to re-learn what it means to do real photography. 

Practicing shutter speed and aperture together

Practicing shutter speed and aperture together

He starts out talking about your settings. Yes, it's necessary to have your users manual open at your side, unless you really know all those ins-and-outs of your camera. I've owned mine for a couple of years and have spent time with my manual, and still learned a ton about what my camera could do during that first lesson. 

The next several lessons address the "exposure triangle"--ISO, aperture (f-stop), and shutter speed. His explanations are very easy to understand, and he has plenty of photographic examples to help you see the difference between settings. He gives homework suggestions in each lesson to give you some guidance about how to practice the techniques. 

Working on panning. They were moving faster than I could, but this is an entertaining "mistake" picture. 

Working on panning. They were moving faster than I could, but this is an entertaining "mistake" picture. 

After a lesson specific to lenses and filters (which I watched, even though it doesn't have immediate application--I hope to get a DSLR in the near future!), there are a couple of additional lessons, one on composition/creativity, that included some more settings to play with, and a final lesson on "putting it all together" which includes how to organize your photos, backing up, memory cards, comparing shots, and so forth. 

I really enjoyed this class. Rick Allred is a good teacher--he uses great metaphors to explain fairly technical things. Again, I knew most of this back in the day but it's been (ahem) awhile, so though I wasn't quite coming at it cold, it was pretty chilly. I'm back to feeling like I actually know photography again!

Lesson on aperture and depth of field

Lesson on aperture and depth of field

This class wouldn't be particularly useful if you have no ability to change settings on your camera. Although he does talk about composition, most of the lessons do require the ability to have manual control to a degree. However, you may want to pull out your camera manual--you may have more control than you think you do! If you're able to set your aperture (f-stops) and shutter speeds at all, you'd get something out of this class. If you have a camera with more settings, you'd definitely learn a lot, and if you have a DSLR and are still figuring it out, I'd highly recommend this class. 

Working with exposure compensation settings. And check out those quilts!

Working with exposure compensation settings. And check out those quilts!

The Basics:

  • 9 lessons, ranging from about 9 minutes to about 20 minutes
  • Lessons include: "Get to Know Your Camera," Light and exposure, shutter speed, aperature, ISO, shooting modes, lenses, composition and creativity, and the final lesson named "putting it all together." 
  • Downloadable materials provide very helpful quick-reference materials. I've checked them a few times when it wasn't convenient to boot up the Craftsy class again. 

Again, that's Basics of Digital Photography, with Rick Allred. Recommended!

(Transparency statement: Using the Craftsy links on this blog help support this blog and podcast. Thanks!)

Gift Project Complete

A friend commissioned me to make a gift for her daughter who graduated from high school a few weeks ago. Yes, "graduate-d." I missed the deadline a bit. But still, she hasn't started college yet so it's still good. Isn't that in the etiquette books somewhere?

In any case, it took me a long time to decide what to do. When I'd asked my friend whether she wanted me to hand-dye something or quilt something, she said, "Whatever you want to do!" So, as it turned out, I did both. This projects is done on my hand-dyed fabrics, and its quilted. To within an inch of its life, actually.

I decided to do a word quilt. I chose a Scripture that felt to me like it fit her daughter, who is a tremendous vocalist, planning on continuing music in college, and whose faith is very central to her life. Since I didn't have it in me to do a lot of words, I just cited the verse. I thought it might be a little intuitive, anyway, since it'll make people have to go look it up. I'm a teacher at heart, I guess. That's my story and I'm sticking to it.

I started out by using a new product: Sticky Fabri-Solvy.

I. Love. This. Stuff.

This photo is from my test sample--I kicked up the contrast in the photo so you could see it well enough. You can run Sticky Fabri-Solvy right through your printer. So after I designed my lettering in some software or another, I just printed it right off on the stabilizer. I didn't have to reverse it or anything, because it has a paper backing that I peeled off and it adhered to the right side of my fabric. I then stitched around the design, and soaked  the stabilizer off the fabric. Easy Peasy.

I decided to do it that way after my chalk-stencil method was a big fat fail (the chalk wouldn't stay in place long enough for serious stitching); and this was just so much faster. And, to be honest, I wanted to play with the stabilizer to see how it worked. The test sample worked beautifully, so I went right to work on the real thing. After I soaked the stabilizer off, I put my quilt sandwich together and then just outline-stitched the lettering again. That also gave the letters two thicknesses of thread/outline, which helped set it off even more.

I did have a bit of a glitch at that point.

I'd practiced on a test sandwich to set my tension and everything--it was all working beautifully.

I started stitching away on the real thing and it all felt like it was going swimmingly. I'd flipped up the back and checked after the first half inch of stitches or so, and it looked fine.

I should've paid more attention to how the bobbin was sounding. Something got unhooked somewhere and chaos was breaking loose on the back. I didn't see it until I came to the end of the word. Out came my new electric seam ripper. And then the Havel. And then my traditional seam ripper. Eventually, between the three of them, I did get it all undone. (Each seam ripper has its special gifts!)

That being said, that was really the only major snafu in the whole project. Everything else went pretty well, given how many new-to-me techniques I was throwing in this thing.

Free-motion feathers, using techniques I learned from Ann Petersen.

Background quilting circles and straight lines--the straight lines particularly being a design thought I got from Cindy Needham.

Shiva Paint stick highlights--it's been awhile since I got to play with my paint sticks and I haven't used them on a quilt like this ever.

Metallic thread--which I haven't used in probably over 10 years.

And bling. I've never blinged before. What a hoot.

And so...the end result. (Drum roll please.....)

Psalm 98 quilt complete. Approx 14'x16".

Psalm 98 quilt complete. Approx 14'x16".

And, because it's hard to see the sparkle in that lighting...

(Actually, the picture above is also the result of what I've been learning in my Craftsy photography class. To try to get the sparkle to show, I worked with some settings I recently learned that I have on this camera. But more about that class in a different blog post.)

Can you see the metallic thread outlining the feathers in this picture?

It's subtle, but it's there.

I'll probably talk more about this in my podcast episode this week (which, as of this writing, hasn't been recorded yet). I'll talk about using that metallic thread, especially, and some other slight hiccups along the way, and what I did about them.

So, there it is. Of course, as I look at it, I see all the things I'd have liked to have done better. But it's done, and it's not bad, and I think both the mom and daughter will enjoy it. And I had fun doing new stuff. Though, admittedly, it'll be awhile before I'm ready to sit down and stitch little bitty circles and very-close-together lines again.


My 2014 Quilty Resolutions Second Quarter Check-In

If you're looking for the original resolutions check-in blog post with the Rafflecopter giveaway and Linky party, click here.

As promised, here's my own second quarter check-in!

My three quilted "monkeys on my back" were:

  1. Craftsy classes--My goal is to complete as many of the Craftsy classes I own as possible, without adding more than I'm finishing. I don't have specific numbers attached to this, but I want to end 2014 with far fewer classes in total than when 2014 began. A single-digit list would be nice.
  2. Stash--My plan was to stay focused on using stash whenever possible. I didn't set specific goals about yardage amounts--I just wanted to stay conscious of it. As with the Craftsy classes, I basically just wanted to end 2014 with less total yardage on my shelves than I began--more out than in.
  3. Machine quilting--I wanted to be more confident and competent in machine quilting in general by the end of 2014, as well as being more on the ball about sending stuff out to longarmers if (1) it was just too big for me want to tackle it on a domestic or (2) I just needed to get 'er done.

So, how have I done?

Carol Ann Waugh's Stupendous Stitching class

Carol Ann Waugh's Stupendous Stitching class

1. Craftsy classes--Woohoo! I'm going great guns on this one! Since January I've completed 13 classes altogether. I've only added three, but one of those I also immediately finished. So, in all, I'm seriously ahead of the game! And I'm not just blasting through watching the videos without paying attention, either. I've been taking video notes, intentionally asking a question or posting a comment in every class just to make sure I'm staying engaged, and usually doing the class project or practicing the techniques each lesson teaches. I feel really good about where I'm at with this, and looking forward to what I'll be learning next.

 
Building a stash of my hand-dyeds...

Building a stash of my hand-dyeds...

2. Stash--Without tracking on a spreadsheet I can't give exact figures. But I'm pretty confident that from one perspective I'm ahead on this one too. I've bought very little new commercial fabric--if any--since January, except for what I needed for borders, backing, or binding; even those I was able to often take straight from stash. The only fabric I've added to my stash other than that is all my own hand-dyes, which I don't entirely count because it's a whole different category, isn't it? I prefer to think so, anyway. I'm not buying a fabric I don't immediately need just because it's pretty anymore--I'm creating pretty fabric instead! Anyway, that's my story and I'm sticking to it.

3. Machine quilting--See #1. Due to having now done several of my Craftsy classes on machine quilting, I'm feeling a whole lot more confident, if still not exactly competent. My quilting is still...ummm..whimsical, but I more easily sit down at the machine to try. I panic less about "ruining" my project with my quilting and am far more able to just get over myself and get on with it. And there are some designs I've gotten better at. It's just a matter of practicing even more. Given the number of machine quilting classes I still have left in my Craftsy account, I'll be getting plenty more practice!

So, there it is--my second quarter (halfway point!) check-in on my 2014 quilty resolutions. Be sure you check in with your own to enter my giveaway and linky party!

June Craftsy Class Update

If you're looking for the 2014 Quilty Resolutions Second Quarter Giveaway, click here.

Meanwhile...back to our regularly scheduled programming...

Craftsy Logo

I finally have a completion...or more...to report! Sheesh. It's been awhile.


New Completions

(+4--woo!)

(I actually finished a fifth class this month, but I'm holding off on doing the review of it for a little bit so I'll list it as a July finish instead...)

Classes in Progress

Current count: 2

  • Thread Art with Lola Jenkins. I may move this one back a couple of months--it'll be hard for me to focus on completing a project until sometime in August, I think. But I'm keeping it on this list because it really will be my next major class to work on.
  • Finishing School: Edges and Bindings with Mimi Dietrich--the one I'll be reviewing next month.

Classes added this month

Well, ahem {shuffling feet}.... (+1) But there were good reasons!

I've been looking at the photography classes for awhile thinking that I really needed to brush up on my skills. (Took photography in HS, used to be pretty good when I had a film SLR in college, have gotten lazy with digital point-and-shoots ever since.) Since I've got some pretty significant travel coming up, and since Craftsy had a great sale at the beginning of the month, I bit. I now own:

Classes To Be Completed

Current count: 16 (-4, even though I added a class. I'm finishing more than I'm adding--Woo!)

Completed Classes (all topics)

Current count: 26 (+4 from last month. Again with the woo!)

(Usual transparency statement: This post contains affiliate links and I will be compensated if you make a purchase after clicking on my links. Thanks for supporting this podcast and blog!