Fight the Funk Friday--A New Year

Well, technically last Friday would've been the first FtFF post if I'd been on top of things. Oh wells...

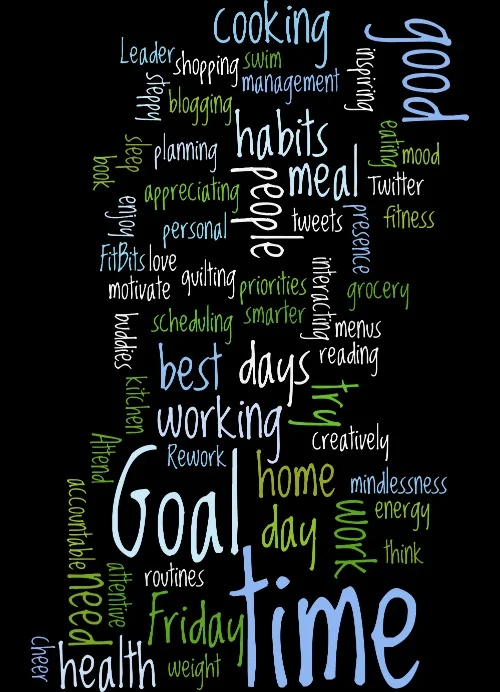
I'm logging more aspects of my Fight the Funk now based on my 2015 personal goals: addressing my health, reworking my schedule, and doing more cooking. This week's is sort of long, but it'll get more concise as things fall into routine.

Exercise

Gym attendance: Zilch. Steps: Near nada. Just when I was starting to build up a head of steam for getting back in routines, I built up a head of gunk instead. (Achoo.)


Slow-cooker apple cinnamon oatmeal getting ready for me to enjoy in the morning!

Slow-cooker apple cinnamon oatmeal getting ready for me to enjoy in the morning!

Eating/Cooking 

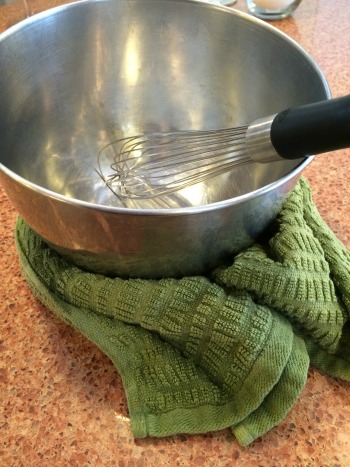
I started out the week with a big vat of beef barley soup on Sunday night--and leftovers! I worked off that most of the week--all sorts of healthies in there. I also made myself slow-cooker steel-cut oatmeal for Tuesday morning which means leftovers for a second breakfast. I began the week strong but as the days wore on and I wore down, I started comfort-eating again. Not a good week all-in. But I made myself track everything, so at least I was staying in some decent habits. And I'm now officially throwing out any remaining candy or cookies left in the house from the holidays. Yikes. 

Weight Watchers: I dragged my sorry, coughing and sniffling butt to my WW meeting last night (Thursday evening) for the first time since before Thanksgiving.(Don't worry--I sat way far away from everyone else and didn't shake anyone's hand!) I'd lost 7 lbs in Burma due to the malaria med kerflaffle, and was pleased to note during my weigh-in that I'd only gained 3 of that back; IOW, I'm down 4 lbs since my last official weigh-in. I'm fine with that. Whenever I lose weight due to illness, I know I'm going to regain some of it when my body recovers. I just didn't want to work my way all the way back up--which is why I dragged my sorry butt to the meeting in the first place.

Chicken and brown rice soup--perfect for a sniffly Sandy

Chicken and brown rice soup--perfect for a sniffly Sandy

Our meetings are right next to a grocery store--which may seem uncool but on the contrary, it's very cool. Every Thursday evening after meeting I go next door to restock on fresh produce to get me through until my regular shopping trips on the weekend. This week, since I was still coughing and sniffling, I picked up fixings for a fast homemade chicken noodle soup--a plain rotisserie chicken and pre-diced mirepoix because I knew I didn't have much energy for standing and chopping. I had homemade turkey stock still left in the freezer. When I got home, I dug through the pantry for the noodles I thought I had, only to turn up zilch. So I substituted brown rice, making it even healthier than I'd originally planned. And now I've got leftovers for the next couple of days, so I'm sitting pretty.

Priorities and Schedule

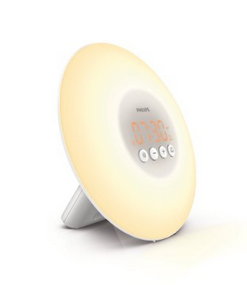
I finally bought something this week I've looked at for a long time--a sunlight alarm clock. Rather than being awaken with some sort of intrusive noise and the related shot of adrenaline, I do better with a slow, gentle wake-up. I had tested an app on my phone for awhile that measured my sleep patterns and then woke me with a vibration at whatever time it figured I was in the right part of my sleep cycle around when I needed to be up, which worked pretty well. But the phone had to be on the corner of my bed fairly near my head. You can see the potential problems. I gave up. Now that I'm trying to rework my schedule, I just have to get up earlier in the morning. Enter the sunlight alarm clock. Have you seen these things? My sister uses one and really likes it. Rather than an annoying, heart-attack-inducing buzz or music blaring, it starts 30 minutes before your alarm time with a gently-increasing light. When it gets to your alarm time, it's a full-spectrum light, and then a quiet beep goes off just in case you haven't gotten the idea yet. I know I'll start waking up early in the light cycle--it'll be a much more gentle way for me to come to in the morning. 

I was supposed to get it Wednesday morning but it got held up in shipping due to weather (go figure) so I didn't get it until Thursday. I'll let you know how it goes in next week's post.

Mood 

My mood was so-so all week, mostly due to being under the weather. Ahem. Pun intended, I guess. A head cold inside when it's below-zero-cold outside--poetic. I've been using my light box in the morning consistently so at least that much is okay; I've also been using my aromatherapy oils at my desk--mostly to keep my breathing passages clear (love that eucalyptus!) but hey, I throw some peppermint and other energy-related oils in there too. I don't know if they do anything, but they smell better than Dog so it's all good. 

Here's to a healthier week all around next week!

Thinkin' About It Thursday

(If you're looking for the 2015 Quilty Resolution Challenge, click here.)

This week, I am thinking...

  • that six weeks away from work is a very long time. 
  • how proud I am of how well I'd organized myself before I left so re-entry wouldn't be too horribly painful. 
  • that the stressful fall was worth it since I'm not behind the 8-ball now.
  • how being back in a routine isn't altogether a bad thing. 
  • that colds stink. 
  • how I may have had a bad reaction to the malaria meds but at least I didn't get off the airplane with bronchitis the way I did when I went to Thailand; but before I pat myself on the back, wait a minute....No, I had to go and catch a cold from some dang family member or another over the holidays.
  • that they say most accidents happen within two miles of home. Like family members gifting you with germs.
    • Put a bow on that package, why doncha.
      • Ratzifratzit.
  • how Ricola doesn't mix well with peppermint tea and honey. 
  • how I'd just gotten my quilty mojo back when I started sneezing.
  • how the great quilty progress I'd made over the weekend has now come screeching to a halt. 
  • that I'm a whiner. 
  • that I promise you--once my throat stops hurting I'll do that second Burma episode like I've promised. Promise.
    • Ratzifratzit.

Craftsy Class Review: Free Motion Quilting A Sampler with Leah Day

(If you're looking for the 2015 Quilty Resolution Challenge, click here.)

Craftsy

True Confessions: I started "working" on this class a long, long time ago. At that stage, working on it meant watching the lessons and not much more. But when it came up in my queue again, I decided this time around I really needed to make some decisions about how I was going to approach Leah Day's Free Motion Quilting a Sampler class. 

I'd already decided I didn't want to make the sampler, nor did I want to purchase the pre-printed sampler panel available through Spoonflower for this class. Kudos to Leah, though, for making that an option! I did consider it, as it would've been an easy way for me to really practice all her designs in the way she guides them during the class. So I give her two thumbs up for having made that available. Woo! Options!

Ultimately, I decided I'd just watch through all the lessons again, choose a few designs I particularly liked to practice, and then put one or more into action on a current project. The main thing I can definitely say for this class: There is a boatload of quilting designs here!

For those of you who are already familiar withLeah Day, this won't come as a surprise: This is probably the most content-rich class I've taken from Craftsy to date. You'll see in The Basics (below) the sheer volume based on number and length of lessons. In fact, that's part of why it took me so long to get through the class--it felt a little overwhelming when I was over my head in life this past fall. Some lessons took me two or three tries to get through, and that was just watching the lessons, not even doing the project! After I got back from my trip and had some time over the holidays, though, I was finally able to finish watching all the lessons and do some practicing on quilt sandwiches. I still haven't used a design in a project, but that's just because I'm dithering between two or three of the designs from the class for the project I'm working on. When I finally beat this cold that's laid me out this week, I'll make myself decide on a design and just knock it out. 

Practicing designs from Leah's class (one feather is from previous practice--the rest are based on her class)

Practicing designs from Leah's class (one feather is from previous practice--the rest are based on her class)

This class is excellent for beginners who have never done any machine quilting before. She starts from the very beginning (as the song goes), and talks about prepping your quilt for quilting--starching, pressing, backing, batting, basting...41 minutes' worth of how to get your quilt ready. 

If you've been quilting for awhile, it's still definitely worth watching this lesson. Her method for basting (especially for securing the quilt to the surface while you're basting it) is very different from other methods I've seen. You might pick up some good ideas for your own setting.

Then she spends over half an hour in the next lesson talking about supplies, FMQ feet, how to modify a foot if you need to, machine settings, and the basics of the quilting process itself. 

The next 8 lessons are all different types of designs, from stitching in the ditch, to all-over designs and fillers, to motifs. Tons and tons and tons of designs. And tons. Each lesson has several designs within it. Did I say it? Tons. And the class materials include drawings of each design with little arrows to help you remember the best way to execute the design (and leaving yourself an escape route). 

More practice on the back of a previously-used quilt sandwich--green thread showing is from the other side of old practice. All designs in white are new from Leah's class.

More practice on the back of a previously-used quilt sandwich--green thread showing is from the other side of old practice. All designs in white are new from Leah's class.

The last two lessons are borders and binding, with the addition of how to do a sampler as a "quilt as you go" quilt, quilting one block at a time and then attaching them together at the end. 

She has a unique element in this class: In one of the early lessons, she brings in Sadie, who has never free motion quilted before. While Sadie is doing some stitching, Leah is talking about how hard we all are on ourselves. She then examines Sadie's results and talks about how normal they are, first of all, but then gives her some tips about how to improve. If I'd seen this back when I was first starting to FMQ, I'd have found it very empowering. It took me a long time to realize that I was actually doing not-half-bad.

This is a really, really full class. You definitely get your money's worth here, no matter what price you end up paying for it. Leah Day as a teacher is very easy to watch--she's very good at explaining what she's doing, she includes information about what to do when things go wrong, and she doesn't have any particular mannerisms that start wearing on you after watching her for several hours on end. Which is good, because this class is several hours! I still enjoy Leah just as much after finishing this class as I did when I was watching her 365 project on YouTube (the designs are now available in a book). 

The Basics

  • 13 lessons, ranging from 10 minutes (the introduction) to 92 minutes--yes, that's right, one lesson is an hour and a half long. Most fall in the 45 minute-ish range. 
  • Lesson 1 is the introduction to Leah Day and the Craftsy platform. Lesson 2 is all about basting (see above). Lesson 3 is Basics and Supplies--I picked up some good tips here. Lesson 4 talks about stitching in the ditch--which she's an advocate of doing before you do anything else. She does address in later lessons how you may be able to sometimes incorporate the ditching at the same time as you're doing other designs, but for the most part, she does it first, and then does whatever else she's going to do.
  • Lessons 5-11 are all the different designs and, again, a ton of them. There are plenty of options here. 
  • Lesson 12 is finishing (borders)--including another design thrown in here for kicks n' giggles, plus trimming and squaring up.
  • Lesson 13 is binding, using a quilt-as-you-go method or traditional. However, she mostly addresses the quilt-as-you-go method here. 

I give Leah Day's Free Motion Quilting a Sampler two thumbs up although, as I said at the beginning, there were times it felt overwhelming. I'd almost have preferred two shorter classes from her. To a degree, it felt like she wanted to cram everything she could into the one class she thought she'd ever do on Craftsy. But, either way, I was able to practice several designs I'd not practiced before, and I've got some good ideas for projects I need to finish. So, yay!

(As usual: Using Craftsy links in this post helps support this podcast and blog. Thank you so much!)


2015 Personal Resolutions

(If you're looking for the 2015 Quilty Resolution Challenge, click here.)

Since I did so well on my 2014 quilty resolutions by blogging about them, thereby holding myself accountable, I figure putting some of my personal goals down here and tracking them through the year may be helpful.

Goal 1: Attend to personal health.

This has to do with fitness and weight, of course, but it also has to do with setting up better sleep patterns and paying attention to my mood, especially during these dreary winter months. I'm already blogging about this with my Fight the Funk Friday posts--thanks to @Ozzypip and @QuiltCabana for the inspiration (Philipa and Sandi respectively, although I do tend to automatically think of people by their Twitter handles these days). I've also been appreciating @Butterflysews, aka Sue, who just recently became a Weight Watchers Leader and has been inspiring me with her tweets. Too bad it would be a heck of a long swim for me to attend her meetings, as she's one of our UK buddies. As always, SherriD aka Walker Lady continues to motivate me, as do all our QuiltCast Fitbitters crew--those of us with FitBits who cheer one another on, even when our steps are (ahem) not very steppy; for example, today when I forget to even put my FitBit on.

Goal 2: Rework my daily schedule.

This has mostly to do with Goal #1. My best time for working out is late afternoon after work--my body feels best then. However, as you have probably experienced yourself, stuff tends to come up so on a busy week I may only make it to the gym once. I try working out at home but I don't enjoy it, nor are my workouts as good. Plus, since I work at home it's just really good for me to actually get OUT of the house on a regular basis and be in the presence of other people, even if we're not actually interacting with one another.

That being said, it also has to do with quilting, reading, cooking, and other stuff I like to try to do on a regular basis. So I need to look at how I'm using my time every day and possibly set some different priorities. However, I also know I need a time for mindlessness and un-productivity, so I'm not going to book every hour of the day in the name of "time management." I work my calendar by blocks of energy, not time, these days. 

This is a trickier one to figure out how to hold myself accountable. Maybe I'll add in a piece to my Fight the Funk Friday posts about how well I did on scheduling during the past week.

Goal 3: More cooking.

This one is just a matter of getting back into good habits I used to have. As you know, I do love to cook and do a lot of my own cooking...some of the time. This fall, things completely fell apart. Other than my weekend homemade pasta-making habits, I was doing very little other meal prep. It was a very stressful fall and generally I was too burned by the end of the workday to do much creatively in the kitchen. I don't travel a whole lot over the next few months so I'm planning on buckling down and getting back into my routines of drafting menus for the week for smarter grocery shopping, and more attentive meal prep and eating for my health efforts. 

So, those are my personal goals. They're not particularly measurable--I don't have numbers or timelines attached. Just general intentions. I know that doesn't fit the "SMART" goal rubric, but hey, this is how I prefer to treat myself at the moment. Taking it one day at a time...

2015 Quilty Resolution Challenge and Giveaway

It's that time of year!

You'll need to listen to Episode 171 In Which We Talk 2015 Quilty Resolutions (posted 12-31-14) to hear the set-up for this year's quilty resolution challenge. 

Once you've done that, use this form to submit your 2015 Quilty Resolution and optional word-to-live-by.

If the form doesn't appear above, or doesn't work for you, here's a direct link: https://docs.google.com/forms/d/1pGxo2nkilwznjJfMfoIuvYyQaSt1KU_Bx9zMXJw1ITI/viewform

What am I giving away? 

Anyone who enters their resolution in the form above will be entered in my giveaway! I'll be choosing three (count 'em--three!) winners. Each winner will win one set of fat quarters--I'll be choosing.

Maybe this set of soft, mostly taupe-y, somewhat William Morris-y, fat quarters will come home to live with you!

Maybe this set of soft, mostly taupe-y, somewhat William Morris-y, fat quarters will come home to live with you!

Or maybe you'll get this set of Stonehenge fat quarters, looking a bit like stained-glass windows.

Or maybe you'll get this set of Stonehenge fat quarters, looking a bit like stained-glass windows.

Or, perhaps, this fun set of brights will be yours to play with!

Or, perhaps, this fun set of brights will be yours to play with!

How do you enter for the giveaway?

First, use the form above to enter your 2015 Quilty Resolution (and optional word-to-live-by). 

Second, use the Rafflecopter widget below to register your entry in the giveaway. (I'll be using the Rafflecopter list to choose winners for the giveaway.)

Hey, if you want to leave a comment below too, that doesn't hurt--but I'm not including comments in the giveaway. That's just for people who take up my challenge for 2015!

How long do you have to enter?

This giveaway closes at midnight Eastern Time (where I live) on January 31st. So you've got a little time to think...but don't forget to enter!

I'm looking forward to reading your resolution!

December Craftsy Class Update (Final for 2014)

Craftsy Logo

Well, dang. I had a November Craftsy Class Update all written and intended to schedule it to post while I was gone. Apparently I never did, because I just found it still sitting in my drafts folder. So this month I'm catching both my November completions and December completions--not that I've gotten a lot done in December because...well, you know. Something about travel, about only being home one week of the month. Still n' all, I managed to complete two classes this month to add to the four last month, so that's not bad!

Check out the very end of this post for my grand summary of my progress on my 2014 Quilty Resolution regarding the completion of Craftsy classes.

New Completions

(+6)

Classes in Progress

(3)

Proof I've already started working on the Sue Spargo class...

Proof I've already started working on the Sue Spargo class...

Classes added this month

(+2)

I succumbed to the Craftsy end-of-year sale and got two more classes at $19.99 each. I can't be very sorry about that, especially since I immediately finished one and got started on the other.

Classes To Be Completed

Current count:  12 (-4 from last month as I added 1)

Completed Classes (all topics)

Current count: 45 (+5)

2014 Quilty Resolution Summary

A few of my Craftsy class pics from 2014

A few of my Craftsy class pics from 2014

So, how did I do, in total, on my 2014 quilty resolution regarding completing Craftsy classes? I never set a specific number to be completed, nor did I have the real intention of wiping the slate clean by the end of the year. I was far too realistic for that. Plus, as you know, I bought new classes through the year in addition to working on ones I'd already owned. For the most part, the new classes got finished pretty quickly. New is always more interesting, to be honest. So I'd say about half of the classes I didn't get finished have been in my queue for a long time; the other half were purchased in 2014. I suppose that's not a bad balance.

When I started in January 2014, I had:

  • 14 completed Craftsy classes.
  • 21 to-be-completed classes (those I already owned but hadn't finished or, in many cases, even started yet).

At the end of December 2014, I now have:

  • 45 completed Craftsy classes (+31 from 2013)
  • 12 to-be-completed, 3 of which are currently in progress (-9 from 2013, but the math doesn't show the true picture because...)

...this means I purchased 22 classes during 2014, most of which I then completed.

It certainly would be understandable if you were thinking, "Yeah, but did you really learn anything? Is it possible to take that many classes and absorb the material?" The answer is, yes. Sure, there are some classes I went through and decided, "Nope, not for me, not right now, anyway." But they're in my memory banks (and on my computer) for future reference. Some are classes with techniques that I continue to work on--such as spindling, dyeing, and free motion quilting. I can indeed say that I picked up hints or tips from just about every class, even if most of the class turned out to be not my bag or stuff I already knew. That being said, there are several things I do now that I didn't do before--making homemade pasta being a major stand-out, and spinning, and being far more brave and confident in my machine quilting. So yes, those 45 completed classes (or 31 completed in 2014, anyway) were all worth the time, and have helped me improve. 

I can also say, however, that though I'll continue to do my monthly updates in 2015 (it keeps me plugging along and I really do want to finish the 12 remaining on my list) and will most likely continue to buy new Craftsy classes on occasion, in general I'll be doing a lot fewer this coming year as I have other things on my horizon that'll be taking up some time. So no, Craftsy classes aren't continuing as part of my 2015 Quilty Resolutions. I have another plan for that. Stay tuned.

(Usual transparency statement: This post contains affiliate links and I will be compensated if you make a purchase after clicking on my links. Thanks for supporting this podcast and blog!)

Craftsy Class Review: Simple Soups from Scratch with Kathy Gunst

Despite the fact that I came home from 90 degrees in Myanmar/Burma looking forward to a white Christmas, and got off the plane instead to mid-spring weather here in Western NY (50 degrees and rainy), I still declare it to be Soup Season. Every year for the last several years I've stated that "This will be the Year of the Soup!" And most years I miss that mark, only making soup once or twice, at best. My husband only likes one or two soups so, since it's hard to make soup in any less quantity than "Vat," I don't end up making it much. However, this year Dear Husband has a fair amount of travel coming up in the next couple of months so I'll be on my own, and happy enough to cook up said Vat of Soup over the weekend and live off it during the week. All the more time to spend in my sewing room, donchaknow.

So I've taken two soup classes on Craftsy now. You might recall reading my review of Building Flavorful Soups with Peter Berley awhile back. This time, I spent my jet-lag recovery time last week watching Simple Soups from Scratch with Kathy Gunst. I'm far more likely to make recipes from this second class than from the first, mostly because they are, as the title states, simple. (True confessions, though: I skipped the lesson on seafood soups. Not my bag.) 

Pureed Leek and Potato Soup--not a great picture as I took it on the fly as I was prepping for a party and it steamed up my cell phone camera lens.

Pureed Leek and Potato Soup--not a great picture as I took it on the fly as I was prepping for a party and it steamed up my cell phone camera lens.

Kathy Gunst is easy to watch and does a nice job explaining what she's doing, giving extra information while she's waiting for whatever is on the stove, and offering suggestions for substitutions or variations on the recipe she's demonstrating. I really enjoyed her rather high-energy engagement with the studio broiler in Lesson 6--she handled a tricky situation with good humor and was still able to teach while having to keep an eagle eye on what was under the flame. Finally--a Craftsy class with an edge. "Will she burn it? Will she save it? I'm on the edge of my seat!"

The class, like most of this type, is structured around certain types of soups, and each lesson has one recipe she demonstrates while showing how it can be adapted for other ingredients. I knew immediately I wanted to try several of her soups, so I made the Pureed Leek and Potato soup of lesson 3 for my side of the family's Christmas gathering on December 28 (aka Second Christmas). It's very basic, and very tasty. Leeks, potatoes, vegetable broth, seasonings, and some shredded white cheddar at the end. No cream, so other than the cheese it's pretty dang healthy, and very filling. I had some leftover soup the next day for lunch and didn't need anything else.

My one-year-old great niece was a particular fan of the soup. That was her dinner!

My one-year-old great niece was a particular fan of the soup. That was her dinner!

I included her suggested garnish of Cheddar Chive Walnut Swirl, which was also a big hit. It adds just the right Something to the soup.

On tonight's menu is her Lemon Orzo Chicken Soup, although my version will be Lemon Rice Turkey Soup. I roasted a turkey to make sandwiches for Second Christmas. The store only had one HUGE turkey or lots of very small ones, so I got the behemoth. Lots of leftovers to make the soup, and a great big carcass for making broth, also one of her lessons in the class. (I made the turkey broth yesterday using her recipe--it seems successful. I'll know when I pull it out to use it for tonight's dinner soup.) 

The other one I really want to play with is her roasted vegetable soup, only I'm going to do it with parsnips and apples. I had a parsnip apple soup at a restaurant the other night and found myself thinking, "I'm sure I could do this better!" The restaurant soup just didn't have enough flavor for me, so I'm looking forward to using Gunst's techniques and playing around with ingredients.

As you can tell, this class was a big success for me. The class materials are extensive: 10 pages of recipes from the class, including the many garnishes. The only thing I really wish--as I've mentioned in my other reviews of cooking classes--is that she include a helpful list of types of soups and ingredient combinations to help you learn (or become more creative about) how to mix-and-match your own. That was probably the most helpful, and my favorite part, of Molly Stevens' Secrets of Slow Cooking: Mastering the Braise class. I would love to have a chart of different types of soups and sort of a "pick one from this category, three from this category," type of thing. I know--that's asking a lot. I'm just sayin'. It would be helpful. That's all.

The Basics

  • 6 lessons, ranging in length from about 18 to 28 minutes.
  • The introduction uses the Lemon Orzo Chicken Soup recipe to demonstrate "modern chicken soup," including adding egg and using lemon to brighten flavors.
  • Lesson 2 is roasted vegetable soup, in which she also discusses choosing which vegetables will work best, how to prepare them for roasting, and deglazing the pan.
  • Lesson 3 is Pureed Leek & Potato Soup, in which she also discusses helpful tips when adding dairy, although the recipe she demonstrates doesn't use it.
  • Lesson 4 is a seafood chowder. Can't speak to this one as I skipped it. Not a seafood soup fan--but given the other lessons, I'm sure she does it well!
  • Lesson 5 talks about meat and vegetable stocks, as well as very useful information about how to store your stock. She also discusses how to enhance store-bought stock if you're short on time.
  • Lesson 6 is all about the garnishes--a couple of pestos, croutons, and other ways to add flavor and texture to your soups. 

As you can tell from my sudden uptick in soup-making at my house, Simple Soups from Scratch with Kathy Gunst. was a big hit. Two thumbs up. Even without the useful chart of my dreams.

(Using Craftsy links in this post helps support this podcast and blog. Thank you!)

Craftsy Class Review: Free-Motion Quilting with Feathers with Angela Walters

Yes, it's another FMQ class. It could be argued that I need to stop taking classes and just practice practice practice, but there is a method to my over-indulgence in learning. First of all, that's just who I am. I recall doing an Enneagram test back in my early 30s that identified weaknesses based on the 7 Deadly Sins (it also identified strengths, but I don't recall what gimmick it used for that). My primary weakness was "gluttony," and was identified with my personality type as gluttony for knowledge. It described in frighteningly exact detail my overloaded bookshelves and desire to be involved in academia the rest of my life. Ahem. I resemble that remark.

In any case, the flip side to "maybe you should stop taking classes and practice" is that every teacher shows a slightly different way to do the same thing. In this case, I've now been exposed to several different ways to machine quilt a feather. I'm learning which ones feel more comfortable for me and therefore have a higher chance at making me successful.

3 methods for feathers--top two from Angela Walter's class, bottom from Ann Petersen's class. All while still recovering from jet-lag and malaria med side effects. Not too shabby.

3 methods for feathers--top two from Angela Walter's class, bottom from Ann Petersen's class. All while still recovering from jet-lag and malaria med side effects. Not too shabby.

So, my experience with Free-Motion Quilting with Feathers, taught by Angela Walters, is a great example of this truism. I enjoy Angela Walters as a teacher. One of her methods for doing a feather is fairly similar to others I've used in the past, so I used this class as an opportunity for more practice. However, her other feather technique (she calls it "custom feather," although I can't figure out what's custom about it) feels very awkward to me. I was able to do it, and practiced it several times over, but it just didn't make logical sense to me and the way I think/quilt. I don't think it flowed any more smoothly or made for a better looking feather, even after I got pretty good at doing it. I far prefer other methods I've learned in the past, such as the feathers I did in Ann Petersen's Beyond Basic Machine Quilting, or the ones I did in Wendy Butler Berns' Machine Quilting class. That is not at all a knock on Angela Walters--I love her work. It just shows that not every technique will be the right technique for you...which is why I want to learn every possible variation out there and I refuse to think of that as a deadly sin, LOL.

That being said, what I got most out of Free-Motion Quilting with Feathers was not so much the feather technique itself as her suggestions for how to use feathers in a variety of settings. The first half of the class is on doing feathers and feather variations; the second half of the class is using feathers in different types of blocks, borders, as meanders, as motifs, and then feathers with "a modern twist." The second half of the class is where I got the most inspiration and ideas--in fact, so much so that I now feel armed to tackle a UFO that's been languishing, draped over my UFO holding bar. It's crying out for some of Angela Walter's spiral feathers and other variations.

So I definitely view this class as a success for me. I can't wait to clear some other little things off my docket so I can put that UFO back up on my design wall and start sketching out some ideas for myself based on what I've learned from this class.

The Basics

  • 10 lessons. Absent the 2 minute introduction of Angela Walters, the rest of the lessons range from 8 to 18 minutes. In each lesson, she first talks about the method or shape, then draws it out, then goes to the machine to demonstrate stitching it. She goes back and forth between domestic and long-arm machines from lesson to lesson, showing you that each design can be done equally well on either machine.
  • Lessons 2-5 demonstrate her techniques for the basic feather and variations, and the "custom" feather and variations. Lessons 6 through 10 show how to adapt feathers to different shapes, use them as meanders and fillers, turn them into a variety of motifs, and use them as creative background elements.

One more time, the class is  Free-Motion Quilting with Feathers, taught by Angela WaltersDespite my comments about her one feather technique, I still definitely give this class two thumbs up. If you love feathers, you'll love this class; and you may really vibe with her custom feather technique--every person is different. Even if you turn up your nose at feathers as being too traditional or fussy, I'd highly recommend this class anyway--I think you'll get a new view of how feathers can enhance any quilt!

(Using Craftsy links in this post helps support this podcast and blog. Thank you!)

Farewell Friday (In lieu of Fight the Funk Friday)

I haven't been to the gym this week so "Fight the Funk Friday" would have a whole lot more with what I didn't do than what I did do. However, this is likely the last opportunity I'll have to write a blog for a few weeks so I didn't want to walk away from it completely. Fortunately, "Farewell" has nice alliterative magic as well.

Tomorrow I get on a plane. For a very long time. (30 hours travel time, all in, if everything stays on schedule.) I've got me some podcasts. I've got me some Great Courses lectures. I've got me some Craftsy classes. Since I'll be on Dramamine, though, I'm likely to be dozing quite a bit and probably won't get through everything I've downloaded to keep me entertained.  

I'm not bringing any handwork. First of all: airplane. Very cramped. Secondly, packing space. Very cramped. Thirdly, once I'm there I won't have a lot of downtime--at least, not other than when I'm on planes or buses or in vans and, again, cramped.  

I'm hoping to have halfway decent access to WiFi at least often enough to occasionally tweet or post on Facebook a pretty picture and short update. The hotels we're staying in all have WiFi, but quality and endurance of the connection are always questionable, so we'll see. 

We've got a couple of markets on our schedule and I'm quite familiar with textiles from that area, so I'm looking forward to that. I'm also hoping to visit some local artisans, especially spinners. It'll be interesting to see the techniques and tools they use. I'm familiar with the weaving as I've worked with groups of weavers originally from Burma here in the U.S., but I haven't met any spinners yet, so that'll be fun.

Meanwhile, as of 4:30 p.m. this afternoon I'm as packed as I can be until I'm done getting dressed and ready tomorrow morning. The clothes only take up about 1/3rd of the suitcase. The rest is pharmaceutical supplies (for any eventuality!) and gifts for people I'll be meeting. 

Fortunately, our flight is very late morning tomorrow so although we need to get to the airport a couple of hours earlier, it's still a very reasonable time, so I won't be rushed in the morning--always a nice way to start a long travel day. The weather looks clear. But I won't say any more about the flights in case I jinx something.

So that's it! Until sometime in very late December...

Sing it, everyone! "So long, farewell, auf weidersehen, good bye... I flit, I float, I fleetly flee, I fly..."


#BFSI Craftsy Class Review: A Modern Take on the Mother Sauces with James Peterson

Craftsy

Yes, it's Black Friday, and once again I'm refusing to shop. However, I'm also not really hosting my usual #BFSI (Black Friday Sew-in) because I dropped my machines off for cleaning/tune-ups already--since I'll be gone three weeks, I figured this was the best time to do without. Unfortunately, I ended up with more time on my hands today than I thought I would and I'm really missing those machines!

However, it did give me time to finish up a Craftsy class, and I figured I'd quick post the review today since Craftsy is having a big Black Friday sale with all classes $19.99 or less. So grab the ones you've been looking at now!

This morning, sans machine, I took the time to finish A Modern Take on the Mother Sauces with James Peterson. To a certain degree I've been working on this class for awhile, watching lessons here and there, waiting until I had the time to try out one of the techniques. This one was a little trickier to decide what to try than the other sauce class I took awhile back, Homestyle Pan Sauces with Martha Holmberg (see my review here). Homestyle Pan Sauces is geared more at simple and relatively quick sauces you can make even on a weeknight when time is short. Mother Sauces take more investment of time, and willingness to wash a few more pots and pans afterwards. To tell the truth, some of what I learned from this class is, "Unlikely to make that one at home!" But that's part of the learning process--discovering what your limits are. None of the sauces are difficult, really; it's just a matter of time and, again, being willing to wash a bunch of pans. 

Holding steady...

Holding steady...

However--one of his lessons that I was willing to take on: I made myself a cranberry rosemary mayonnaise this morning to use on my leftover turkey sandwich for lunch, it being the day after Thanksgiving and all. I've made homemade mayo before, but I wanted to try his technique. I've used my food processor for this before; this time, I did it by hand. I picked up a nifty technique from him for keeping the bowl in one place on the counter while you're whisking--wrap a damp cloth around the base. My bowl was so lightweight it still bounced around a little unless I held onto it but it did make it wander a lot less than usual. He made some great suggestions for mayonnaise variations and how he serves them at barbecues that I may need to call on sometime over the summer when we've got a crowd over--they sound tasty!

I may do his aioli technique at some point--it's in the same lesson, and takes the same time and number of bowls (one) that the mayo takes. I could see myself doing a Hollandaise sometime, on a weekend or for a brunch. I thought all of the other sauces looked quite wonderful, really, but they're mostly going to have to wait until I have a stay-cation or retire.

I enjoyed James Peterson's teaching style quite a bit. He's very laid-back and can come out with some very funny expressions here and there--he referenced stealing the soul of a particular ingredient, for example, which tickled me. I did find that some of the lessons I was able to watch on 1.5x speed because he speaks relatively slowly, so if I was just wanting an overview of the technique to determine if it was something I'd do again, speeding it up a little was great. Besides, it's fun to watch someone whisk that quickly. Once I decided I wanted to use a technique, I went back and watched it again at regular speed to make sure I hadn't missed anything. Plus, of course, I took lots of notes--one of my favorite parts of the Craftsy platform.

Cranberry Rosemary mayo--tasted far better than it looks.

Cranberry Rosemary mayo--tasted far better than it looks.

The lessons are very comprehensive--in addition to teaching how to make the basic sauce, he gives several variations (sometimes demonstrating them, sometimes simply talking about them), and in most of them he also gives one quick recipe or demonstration of how you'd use the sauce--a cauliflower gratin, for example, or poached fish, and so forth. 

If you're a foodie and are willing to invest some time in getting great results, this would be an excellent class for you. Even if you're not into cooking, I actually found it very interesting to learn what goes into sauces I like to order at restaurants--now I finally know what they're made from and what makes them special, even if I don't ever tackle making them at home. 

The Basics

  • 8 lessons; the intro is 3 minutes, but the remaining 7 lessons range from 20-30 minutes long.
  • Lesson 1, the introduction, does the usual teacher introduction, but then explains what a "Mother Sauce" is and why they're good to learn how to make.
  • Lesson 2 is Béchamel Sauce; Lesson 3 is Beurre Blanc (another one I'm likely to try at some point); Lesson 4 is tomato sauces, although not necessarily "your grandma's Italian pasta sauce cooking on the stove all day," but other types of sauces using tomatoes; Lesson 5 is Brown Sauce, Demi-Glace, Glace de Viande, and Bordelaise; Lesson 6 is Velouté (this was a new one on me!); Lesson 7 is Mayonnaise and Aioli--inclduing a brief discussion of why much of what you see called aioli in restaurants isn't actually aioli; and Lesson 8 is Hollandaise and Béarnaise sauces.
  • The class materials are also very comprehensive. Not only do they include the recipes he demonstrates in class but a ton of variants on a lot of the sauces, and a glossary of terms at the end. 

Even though, the day after Thanksgiving, I'm watching this class and saying, "Nope, not gonna wash that many pots again," the likelihood is that once I'm a few weeks removed from kitchen chaos I'll decide on some relaxed weekend that spending a few hours making a really wonderful, fancy French sauce for dinner sounds like a lot of fun. I would definitely take other classes from James Peterson. Two thumbs up.

Again, that's A Modern Take on the Mother Sauces with James Peterson. And yes, it's on sale today!


Thinkin' About It Thursday

This week, I'm thinking...

Happy Thanksgiving!!!

And I'm thinking...

  • That family and friends are good things to have.
  • That Thanksgiving is a wonderful holiday.
  • That I never keep quite enough leftovers at home after I host.
  • That I like being generous, but I wouldn't mind a few more days of leftover turkey, either.
  • That my husband and I sometimes end up roasting a turkey breast within a day or so of Thanksgiving so we can manufacture ourselves more leftovers.
  • That I hope I'm well-enough packed that I can actually relax some on Friday rather than running around in a frenzy attending to details for the trip.
  • That come hell or high water,  I'll be on a plane on Saturday and whatever hasn't happened by then won't happen and it'll probably all be fine anyway.
  • That this going-without-coffee thing really does stink.
  • That it's not a caffeine issue--I haven't had any withdrawals to speak of--but just a flavor thing.
  • That I really, really miss my morning coffee (and probably most especially will tomorrow morning as I'm in recovery from a big day of cooking and eating).
  • That December 21st will bring the biggest honkin' mug of coffee and fat-free French Vanilla creamer my way: merry early Christmas, Sandy.
  • That dropping off my sewing machines for their time at the spa while I'm gone was nearly as difficult as saying goodbye to my dogs for a few weeks.
    • Nearly.
  • That I can't wait to put brand-spanking-newly-cleaned-and-tuned-up machines to use once I get home.
  • That family and friends, and being fortunate enough to have a table laden with food, really is a blessing.

Happy Thanksgiving to everyone in the U.S. To those elsewhere, have some turkey or squash on us!

*This will be the last Thinkin' About It Thursday post until after my return. I can't even begin to predict what I'll be thinkin' the next three Thursdays!

A Couple of Finishes and a WIP

scarves.jpg

Yep, got those purple scarves done. The ones on the bottom are those I had leftover from the summer events. And yes, they are darker. I must have used a slightly different concentration for this newest batch. Which tends to happen when you don't write things down. Which is the beauty of handmade--the individual uniqueness. Which I'm going to say is my reason rather than just "I didn't bother to take the time to write the darn proportions down."

These will be gifts to women I meet on my trip. I have 25 altogether--no idea how many women I'll actually be meeting.

I'd also mentioned on somewhere along the way that I made a last-minute decision to make something for a special visit I'm hoping to make. This will be for the man who in the 1990s invited my father to work with him on peace-making. I thought a peace dove would be a suitable recognition of their shared work and token of my great appreciation for him and all he's done. 

It's roughly 9" square. Commercial fabric for the dove, my hand-dye for background, backing, and binding--all the same piece. The dove is fused to the background, and I did a hand blanket-stitch around the outside with a variegated perle cotton (I don't recall where I got it--I think from a vendor at Lancaster). Even though I've done blanket-stitches a whole lot, I had difficulty keeping my stitch even because I'm too used to doing it on felted wool, not fabric, and I was struggling to hold the piece comfortably in my hand. For some reason it was all kinds of awkward. But overall it looks okay.

I then hand-embroidered the olive branch with a variegated hand-dyed perle cotton from Artfabrik. Love those perle cottons--very tasty.

As opposed to the blanket stitch, I'm really pleased with the way the olive branch turned out. First time ever doing a stem stitch, first time ever doing a herringbone stitch for the leaves. It looks a little more pine-y than olive-y but hey, you know what it's supposed to be so it's all good. 

It's possible I should've done the quilting first and then done the olive branch. Oh well.

I really enjoyed doing hand embroidery. I may do more free-form embroidery of my own designs in 2015. And yep, I've already got Craftsy classes on my wish list to help me out with that! BTW, I also talked about this on my last podcast episode and mentioned the book I used as reference. Oh, and yes, I did remember to put a label on the back of this too. Cookin' with gas.

And then, also on a whim but with far less purpose than the dove... Remember that Jenny Doan trunk show I went to? Ever since, I've been jonesing to dig into my pre-cut stash and whip something up. Last weekend, when I'd gotten all my scarves pressed and done as much work on the dove as I felt up to doing that day, I pulled out a charm pack, consulted a Missouri Star Quilt Company tutorial, and started cutting.

Introducing: My Disappearing 4-Patch Work in Progress As-Yet-To-Be-Named

I'm hoping to get the blocks done before I leave; I'll not worry about getting it put together into a top until I'm back. I only had one charm pack of this fabric (Good Morning by Moda, an older collection) so it'll be a baby-sized quilt. At the moment, this quilt has no purpose--no one in mind. I don't think I'll donate it, though. I'm starting to realize it may be helpful for me to have a certain number of finished quilts on hand for those last-minute gifts (illness, shower gifts, etc.). And, if truth be told, every other time I've started a quilt without a designated recipient, it seems the designated recipient appears before the quilt is done anyway. So who knows?

Here's the tutorial!


Thinkin' About It Thursday

This week, I'm thinking...

"And it ain't a fit night out for man nor beast!" (With thanks to W.C. Fields.)

"And it ain't a fit night out for man nor beast!" (With thanks to W.C. Fields.)

  • About whether I have everything I need for my trip, since I'm at the point-of-no-return for ordering things online.
  • How much computers work my very last nerve at times.
  • That I'm glad I don't live in Buffalo--and thinking of all who do!
  • That the normal snow we've gotten this week of 4-6" feels like enough. Seasonal, even.
  • How I'm ready for the snow, but not quite ready for the below-zero wind-chills.
  • That even the dogs weren't too keen on the cold.
  • How good it's felt to be back at my sewing machine for a little bit.
  • That I need to get my head wrapped around a menu for Thanksgiving.
  • That I also need to, once and for all, sort out the various seasonal wardrobes in my closet and get some things in storage and other things packed.
  • That we really should have gotten the carpets cleaned before Thanksgiving but I couldn't squeeze one more thing in.
  • That I should have gotten it done over the summer when I first started thinking about it.
  • How procrastination is rarely useful.
  • That a sunlight lamp is a wonderful thing, especially when one is weaning oneself off coffee at the same time as the days are getting darker and shorter.

Craftsy Class Review: Strip Your Stash with Nancy Smith

I've owned this class for awhile. A l-o-n-g while. I waffled frequently about whether or not I was going to use it to actually make a quilt. I've ultimately decided that this kind of quilt is a fantastic retreat project, and since I'm not likely going on retreat anytime soon due to scheduling issues, I may as well go ahead and review it in concept, because I know it's a concept that works. (I've done similar in the past.) So, unfortunately, no photos of my own work based on the class!

Strip Your Stash with Nancy Smith shows how to cut your stash fabrics into strips of varying sizes, sew them back together to make a new "fabric," then cut different types of shapes out of that fabric to create some really fun quilts. It's more or less string quilting, although with bigger and, in her examples, more color-coordinated "strings."

Why would it make a great retreat project? Because part of the process is extremely repetitive--cut, cut, cut, cut...sew, sew, sew, sew. Once you've got your new fabric made, of course, then it gets really interesting again. So I need the kind of setting in which I can have all sorts of other things going on to entertain me while I'm cutting, cutting, cutting, and sewing, sewing, sewing. 

In the class, Nancy walks you through how to choose effective color combinations, and then walks you through the cutting, sewing, and pressing of the strips. This is the lesson you'll really want to pay attention to as she gives good advice for how to keep those strips from going all whacked when you're sewing them together. (Never sewn a bunch of long strips together side-to-side? It's not as easy as it feels like it should be!)

After the fabric is created, the remainder of the lessons go through several possible block variations cut from this stripped yardage, including very helpful tips relevant to each one. And let me tell you, the quilts are all just so much fun. I do really like the designs and could easily see myself designating one of them as a retreat project in the future.

The last lesson, entitled "Good to the Last Scrap,' gives several examples of how to use up the progressively-smaller pieces of scrap stripped-fabric you'll have left from doing any of the previous quilts. There are some cute ideas here!

Want to see some pictures of projects based on the class? Check out the class project page here. (You may have to be a member of Craftsy for that link to work--apologies if that's true!)

The Basics

  • 8 lessons, ranging from 8 to 35 minutes, though most are in the 20 minute range.
  • Lesson 1 is Nancy's introduction, as well as a really good discussion of color choices.
  • Lesson 2 is making the stripped yardage. She really takes her time with this and offers a lot of tips along the way, so it's worth paying attention to even if you already know the concept.
  • Lesson 3 starts the block designs with Carnival Squares in two variations--I love this block; Lesson 4 is Candy Strips; lesson 4 is Paint Box--another of my favorites; lesson 5 is Kaleidoscope with some great information about putting the rows together; and lesson 7 is Curved Play, which introduces curved piecing. '
  • Finally, as mentioned above, Lesson 8 gives several great ideas for using up the scraps. 

I did enjoy watching Nancy Martin and I really do like several of the block designs. As I said above, I could see myself doing this sometime in the future--just not right now. So, with apologies for a photo-free-post, I'm giving Strip Your Stash with Nancy Smith two thumbs up.

Craftsy Class Review: Travel Photography: The Essential Guide with Jad Davenport

Gee, have you heard? I'm about to take a trip. A *Big* Trip. Therefore, I've been brushing up on my photography skills, and Jad Davenport's Travel Photography: The Essential Guide seemed just the ticket. 

His main theme of the class is to take your time. Get to know the area. Get to know the lighting. Think through themes you want to convey in your photos of the trip. He states at the outset: You're not just taking photos, you're making pictures. 

As I was watching these lessons, I realized that, for the most part, I have been working on everything in this class for many years. Not only do I enjoy photography myself, but as I do most of the marketing and all of the resources for my organization, I'm also consistently trying to improve my photography so we can use my photos rather than having to pay for stock--as well as the fact that when I take photos at an event to use in publicity for future events, I know exactly what photos I want to have. I did pick up a couple of tips and the conversation with the teacher available on the Craftsy platform is quite helpful. 

Boy behind wire fence at refugee camp in Thailand

Boy behind wire fence at refugee camp in Thailand

I've always known that I want to take pictures that "tell a story." Jad's discussions of making pictures with intention (lesson 2) are exactly that. Think through what story you want to tell--what theme you want to explore with your photos. He discusses the theme "edges" that he often uses--where are the edges between things? As I was listening to him talk about that I immediately recalled one of my favorite photos I took during my 2008 trip to Thailand, of a man carrying a basket on his back walking down the side of a road with a motorcycle going by (included in this post). I took it because it represented to me the strange blend of ancient and modern I saw all around me in Thailand. I also have several photos of people standing behind the fences on the edge of the refugee camp, representing their lack of freedom. Apparently I also explore the theme "edges" without realizing it!

Juxtaposition of ancient and modern in Thailand

Juxtaposition of ancient and modern in Thailand

That being said, with apologies to Jad and his emphasis on taking your time to find the best photos, usually when I'm traveling I'm not able to just wander about at will, going back to places at different times of day, waiting in one location for half an hour to get the perfect shot, asking people to pose for a series of 25 shots to make sure I get one good one. Few of us have the luxury of time; rather, we generally have to grab photos on the fly. This means training our eyes to know immediately what will likely make a good photo; being willing to get into a different position to capture just a particular angle; knowing ahead of time what story we want to tell. And, of course, taking thousands of pictures so we'll get a handful of good ones. Thank you, digital technology.

This class will help you train your eye. Jad discusses issues of composition, getting unique perspectives, using available light, and the importance of "moments." For someone new to photography or someone who is trying to improve upon the shots she normally takes, I would recommend this class. For me, while I enjoyed Jad as a teacher and loved seeing his photos as examples (beautiful stuff!), I didn't learn as much from this class as I'd have liked; but then, I've been working on these concepts already. Sometimes I just don't give myself enough credit for what I already know. However, it did put some ideas back in the forefront of my mind for when I'm traveling. And I picked up a great tip for a portable tripod-hack that he learned from the Navy Seals. I have to get myself to Home Depot this week to pick up the parts to make it for myself! 

"Joy"--of girls playing on the beach in Oregon when we finally let them out of meetings.

"Joy"--of girls playing on the beach in Oregon when we finally let them out of meetings.

The Basics

  • 7 lessons, ranging from 17 to 32 minutes in length.
  • Lesson 1 includes the usual teacher introduction (and he's got some serious street cred), but also addresses planning ahead, travel gear, and basic camera techniques to set yourself up for success.
  • Lesson 2 lays the foundation, including how to assess the location for possibilities, four elements of a good photo, and "building" a photograph.
  • Lessons 3-6 then each explicate one of those four elements of a good photo in more detail. There are some great tips here in things to be paying attention to as you line up for a shot. Even if you don't have a lot of time or if you have a point-and-shoot with no manual controls, you can still usually take just a minute or two to think through where to stand, where to aim, how close to be, how to compose the best possible photograph.
  • Lesson 7 talks about putting together an "artful presentation," rather than just showing people pictures willy-nilly. How do you put your photos together to tell a story or create a mood?

For me, I gave Jad Davenport's Travel Photography: The Essential Guide one thumb up. (Although that might go to two thumbs if this tripod hack thing works for me!) For anyone who is newer or less confident in their photography, it's two-thumbs up. Great guidance, helpful tips, and it's almost worth it just to see his photos!

Craftsy Class Review: Continuous Line Quilting with Ann Petersen

Online Quilting Class

This class has been in my queue for some time now, but I moved it up to the top of the pack this month because I have several UFOs all in the same stage: They need to be quilted. I've been working my way through all my free-motion quilting (FMQ) classes most, to be honest, to get inspiration for designs. I feel like at this stage I know how to do FMQ--it's just a matter of a lot more practice and better thoughts about design patterns. 

And this class immediately paid off.

And so, my review of Continuous Line Quilting with Ann Petersen

I'd already taken another of her Craftsy classes--check out my review of Beyond Basic Machine Quilting. I liked her then, and I still like her now. I won't take time here to talk about her teaching style and such as I've already covered that in my previous review.

Just for a quick definition, if this is an unfamiliar term for you: "Continuous line quilting" is doing a quilt design in a single pass, without cutting thread and restarting somewhere else. It's the best way to make FMQ fast and simpler, rather than having to keep stopping at the end of one line, locking the stitch in some way, breaking thread, moving to another section, and starting all over again. 

practicing

practicing

This class is very helpful (1) if you're looking for more quilt design ideas (most in this class were not ones I've already found in other classes, or she brings a new twist to the design); or (2) if you've been trying to figure out how to use some of the standard (traditional) quilt designs in a continuous-line way. For me, with all the studying-up I've been doing on FMQ for the last couple of years, I found that aspect of the class (especially lesson 8) the most useful for what I needed; that's where she walks you through the process of how to take a standard traditional quilt design--often those developed with hand-quilting in mind--and make it work better for FMQ by figuring out where the continuous lines could be. Now-a-days, more and more designs made with FMQ in mind are being published and produced as stencils. However, there are still a lot of great quilt designs out there that need some slight adjustments to make them easier to do FMQ-style, and this class is really helpful in teaching you how to look at designs differently, break them into component parts, and think through your quilting plan.

Signature as seen from the front

Signature as seen from the front

I chose not to do the class project and, rather, look at how I might use any of the designs on current projects I need to finish. As it turned out, it was the very last few moments of the very last lesson in the class that inspired me. I'd just finished the baby quilt for my great-niece earlier this week but was realizing, over my morning coffee today, that I hadn't put a label on it. Since it is for her first birthday, a very momentous occasion in any person's life, I felt badly that I hadn't put something on there marking that.

And then I watched the last class while I was eating breakfast. And there, at the very end, Ann FMQ'd her name onto the corner of the quilt as her label. Well, of course! I've done words on quilts once or twice before but it rarely comes to mind as a first option. I was pleased to be reminded. 

Signature from the back

Signature from the back

From the pictures on this blog you can see the results. I practiced with a sharpie on paper first because, face it, it's been awhile since I've written in cursive--or, at least, a cursive that would work in FMQ. Then I practiced on a quilt sandwich to make sure I had the tension right--it took a few passes. But then I was ready to do it on the quilt.

It's a secret message, to be sure--I intentionally chose thread that would blend on both sides. It says, "To [name] for her first birthday" in one border, then "Love Great Aunt Sandy"; no comma because it wouldn't have been visible anyway, but it has the nice grammatical effect of commanding her to love her great-aunt so I'm okay with that. Then the other two borders include words that come from the meaning of her name, almost as sort of a blessing. I was very pleased with the way it turned out. So, thanks for the idea, Ann!

The Basics

  • 8 Lessons, ranging from 36 1/2 minutes to 8 minutes, although the 8 minute one is an outlier--they're mostly 20-30 minutes long, so you really get your bang for your buck in this class.
  • The introduction talks about fabrics and tools, tracing the stitch path, transferring the design, and some basics about FMQ and troubleshooting.
  • Lessons 2 and 3 present several motifs and variations on them
  • Lessons 4 and 5 address ways to travel from one part of the design to another, some of which help make simple designs appear even more complex
  • Lesson 7 walks through the process of breaking a design down into component parts to make it easier to quilt in a continuous line
  • Lesson 8, as mentioned above, addressed converting a non-continuous line design into continuous line. As always, she gives several options here for you to consider.

When I'm back in the saddle after the holidays, I plan on practicing some of the designs from her class a little bit to get myself back in the habit of FMQ after a bit of an absence from my sewing machine. But mostly I'm looking over my UFOs to see if any of the motifs or suggestions from her class will inspire me to finish one or two of them!

Once again, that's Continuous Line Quilting with Ann PetersenTwo thumbs up!

(Usual transparency statement: Using Craftsy links or banners on this post help supports this podcast and blog. Thanks!)

A (Belated) Postcard Reveal

Once again, I participated in a postcard swap hosted by Sandi of Quilt Cabana Corner podcast. This time our theme was "fall," and the deadline was Halloween, if I recall. I don't remember for sure because (ahem) I actually had mine done a few weeks early. Cookin' with gas.

My partner this time was Glenna, aka @gfcsailor (and here's her website).  I love the postcard she sent me! 

She says it started life as a pumpkin, so I call it "Funky Punkin'." It's hanging in my postcard gallery, one of the favorite spots in my office. I really love the abstract and jazzy nature of it. Very fun.

And here's the one I sent her. I don't really have a name for it. "Leaves" seems a bit prosaic. 

I have a package of die-cut leaves of various shapes I inherited out of Mom's stash. I've been using a leaf here, a leaf there, and still have a lot left. I decided to play a little with the dimensionality thing again, so I used two leaves wrong sides together with a lightweight stabilizer in between, then FMQd the veins on and did a loose satin-stitch around the outside with one of the variegated threads I've picked up from Superior along the way. I then tacked the leaves onto the background (already fused to the heavyweight Pellon I use in postcards), hiding the tacking stitches in the veins. I fused the backing on last to cover all the tacking stitches. It's possible I ended up using two layers of fabric on the back because the tacking stitches were in black thread; I don't really remember now, but that's sort of ringing a bell. Then I fused on a binding to cover up all those raw edges. The mitered edges were just trimmed before fusing to look mitered. Shhh. Don't tell Glenna. 

I couldn't mail it by itself because it was all hanging off all over the place, so I used an envelope. 

If I do the die-cut/satin-stitch combination again, I may try hitting the edge with some Fray-Check first. I was gritting my teeth over the fuzz that was going on.  

I really enjoyed doing these postcard swaps this year--it was a great way to play around with different techniques. I'm glad all my swap partners were game to get my experiments! I've heard rumor that Sandi will be doing swaps again in 2015 but may change the format--mug rugs, perhaps, or something else small and fun. Make sure you're watching her blog or following her on Twitter to find out what she decides to do! 


A Finish!

And finally I'm able to officially present the completed Rapid Fire Hunter's Star project, which I have named after its recipient so I can't share the actual name here. In any case, for those of you who may have just arrived at the party...

Let's get into our Wayback machines to the day I won the Deb Tucker Rapid Fire Hunter's Star (Petite) ruler from AJ of The Quilting Pot podcast. "Woohoo," I thought. "That's the one I wanted to win!" She had a couple of things it was possible to win and I actually got the one I was hoping for--I rarely win in the first place, and to win the one I wanted, well...gravy! 

image.jpg

I was so jazzed that I set right to putting a top together, using scraps from the baby quilt I'd made for this same recipient. I have to say, the ruler is a beaut. It really was fast. It really was pretty straightforward. It really was pretty dang accurate. I'd have been pleased had I spent money on it. But to get it for free and still be that happy for it? Join me in a jig, will you?

It only took me a weekend to get the top together, as I recall--and that was with a whole lotta breaks to do other things. But then it sat, and sat, and sat. The recipient chose it for herself when it was hanging on my design wall (she was a wee little baby at the time and its colors attracted her--I've told the story on my podcast a couple of times, I think, so I won't go into it again here). 

Finally, a few weeks ago the date for the recipient's first birthday party was chosen and I had a deadline. I always work better to a deadline. I used Angela Walter's "Dot to Dot Quilting" class on Craftsy for quilt design inspiration, and you can read that story here. It took me awhile to have enough energy to finish getting the binding on, but it was done and through the wash earlier this week. With a whole week plus to spare before the deadline. Aren't I good?

I'm glad it's done, and I hope the recipient is still as into the colors now that she's a Big Girl One-Year-Old as she did back before she knew how to crawl. 

Fight the Funk (Fitness) Friday

Unfortunately, I don't have a lot to report on the fitness side of things. I was way busy over the weekend and through Tuesday--and then I completely crashed. Plus I forgot to wear my FitBit on occasion.

So, this week, I thought I'd give you this. My Fight the Funk efforts from May through October. Enjoy.


Thinkin' About It Thursday

This week, I'm thinking...

  • What a relief it is to have my travel visa in hand.
  • That Jenny Doan is one fun chick.
  • How, on the other hand, she's now added several quilts to my "wish-to-make" list.
  • That if I do get around to making even a couple of those quilts, though, it'll make a nice dent in my pre-cut stash.
  • How that would make me feel good, using those dang pre-cuts that have been hanging around for years.
  • That sleep is just such a good thing.
  • That my "Fitness Friday" post this week won't be any great shakes.
  • How I need just a few more super-productive, heads-down days in my office with no distractions to actually have a hope of getting everything done that I need to get done to be out of the office in December.
Empty lot next door

Empty lot next door

  • How sad I am to see the empty lot next door rock-hounded, and how I'm wondering if that means it has actually, really truly sold this time.
  • That we're going to need to fence in our back yard now because the doggies have gotten way too used to nearly ten years of wandering as they will.
  • How I doubt new neighbors will appreciate that.
  • That new neighbors may move in with dogs of their own, and I'm praying they're not bark-y ones like the one on the street next to us that you can hear for miles...
  • How I'm building up all sorts of ideas for quilt projects I want to get rolling on when I get back home.
  • That it may take awhile before I'm awake enough to trust myself near my sewing machine or rotary cutter.
  • That, if it weren't for being in Burma the month of December, I'd already have my lightbox out and running as we've truly entered Dark Gray Season around here.
  • How being in Burma might buy me some wiggle room on my usual S.A.D. schedule as I'll be in full sun while I'm there.
  • How I've got to dig my sunscreen out of storage and make sure it gets packed.
  • That November is just flying by...